
When I first got this camera, I initially thought it was from somewhere in Europe, possibly Germany or Eastern Europe, due to its design and feel placement and shutter release, which resembles the Karma-Flex camera from Germany.
After doing some research on the camera, I found out that it was made in Japan. It was the first medium-format single-lens reflex (SLR) camera with a leaf shutter.
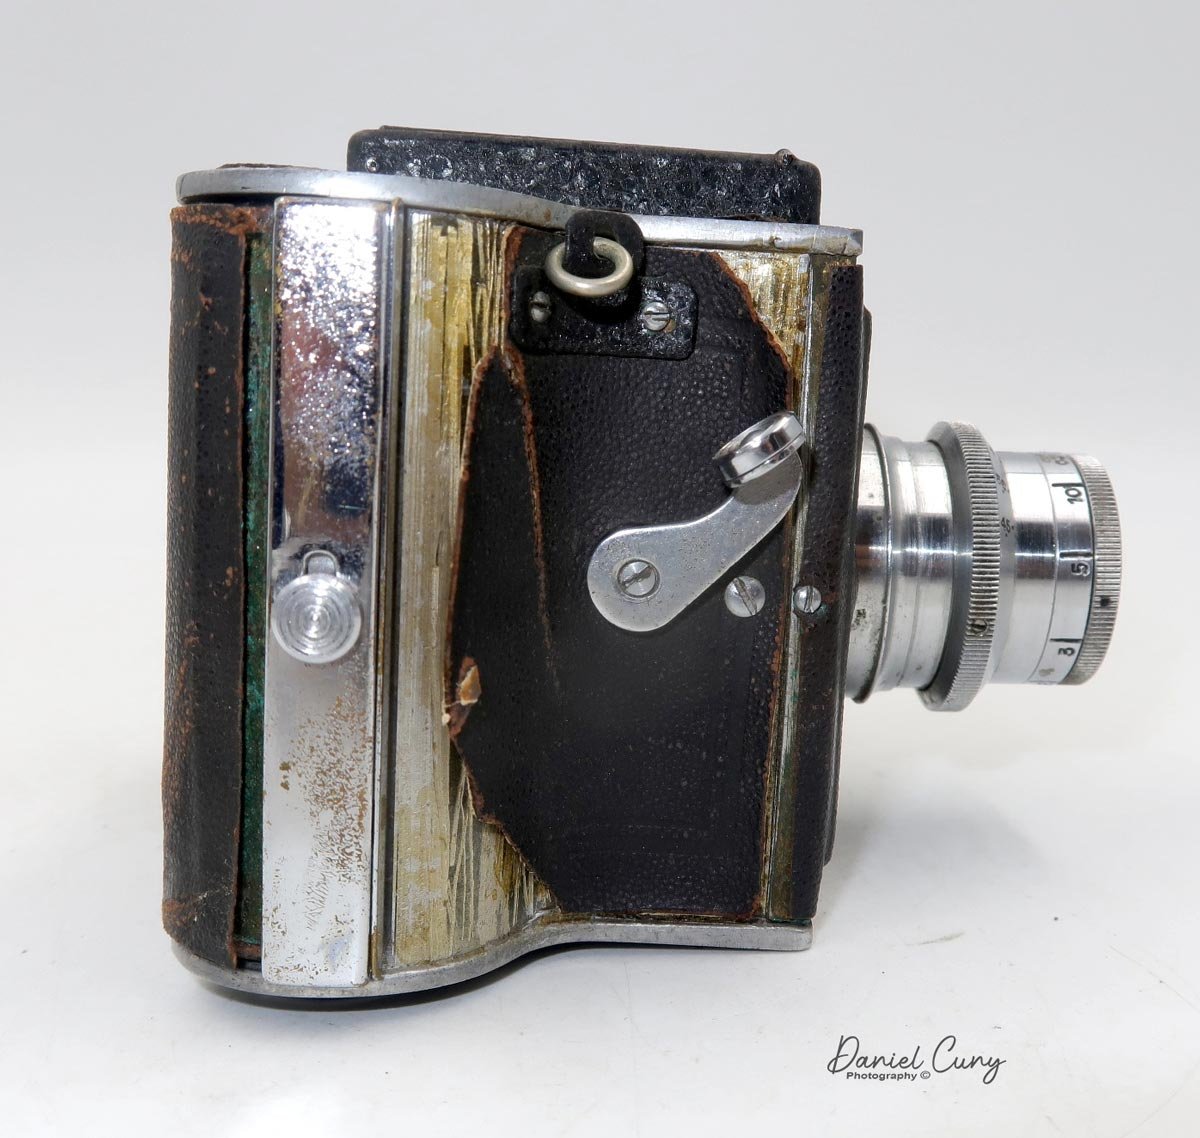
The Super Flex II camera is odd and relatively small, too. When I took the camera out of the case, my hands are average size, but the camera seemed lost, and it was only a minute before I held it. It's not a miniature camera, but everything seems much smaller than I'm used to. The light tube or waist level finder, the lens and focus control, and even the winding knob appear to be smaller than what I'm used to. In the back of my mind, this will be a fun camera to test and write a blog post on.
History:

Umemoto Seisakusho manufactured the Super Flex camera between 1938 and 1942. It was started by Umemoto Kinzaburō, who started a small manufacturing plant in Yokokawa in 1931. In 1932, he was asked to open a new camera manufacturing plant in Toyko, which was completed in 1935. Their first cameras were the Super Makinet Six in 1936 and Neure Six in 1937, both 6x6 strut-folding cameras.
As mentioned above, they took inspiration from the Karma-Flex camera in 1938. They developed the first Japanese medium-format, single-reflex camera, the Super Flex camera, built around the popular 127 film 4x4cm format camera.
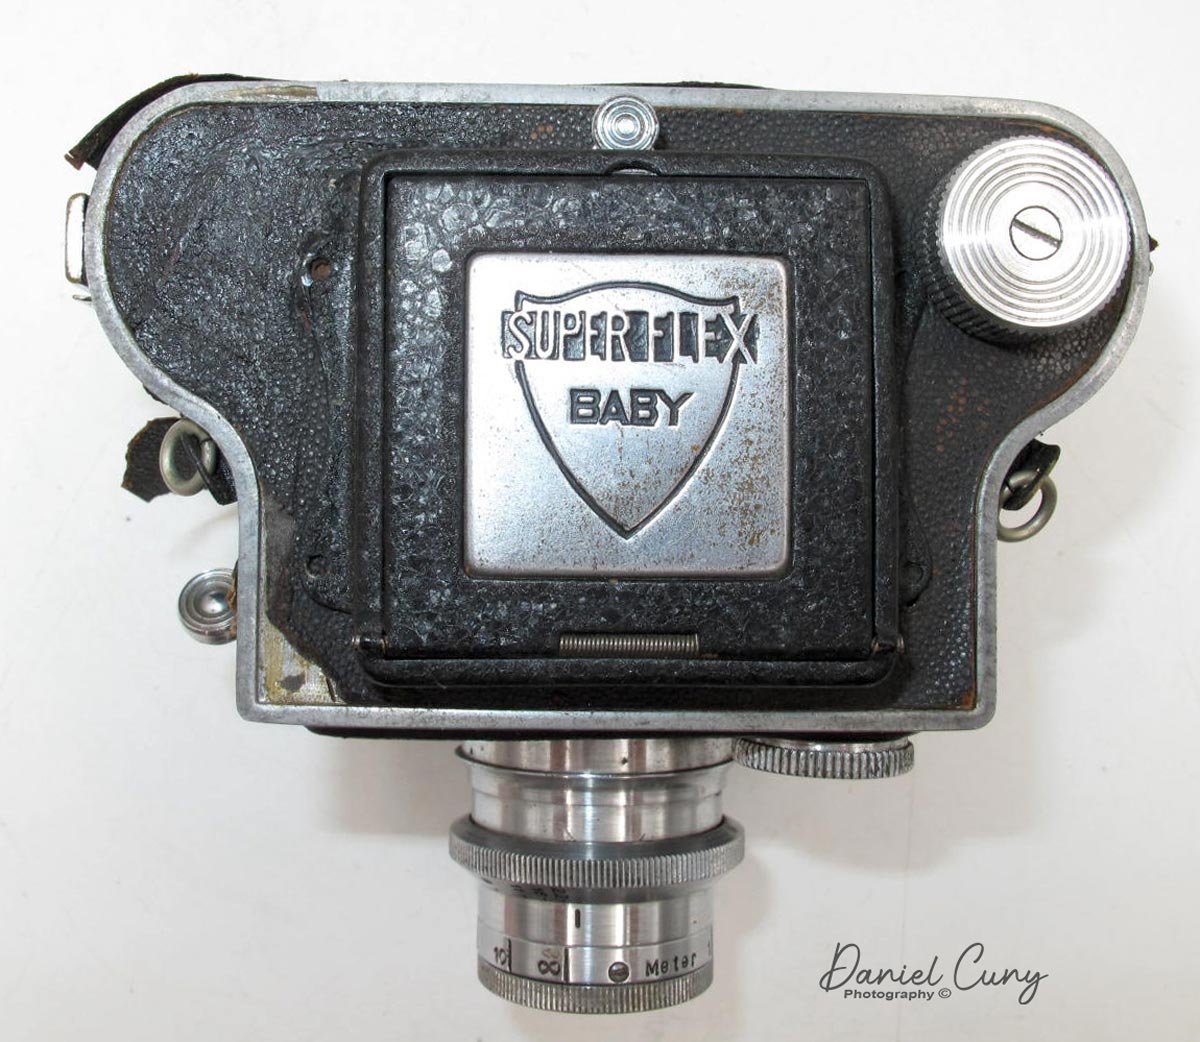
In 1939, they modified the camera's design to what's known as the Super Flex Baby II. The modifications included a fully chrome shutter speed dial as opposed to the chrome and black of the original design. They also came out with a new lens with a full chrome barrel and a focal length of 70mm instead of 7cm on the original lens. They also lost the black and chrome on the viewfinder logo and went all chrome, like the shutter speed dial and lens.

Advertisement of the Super Flex Baby camera from 1942.
During the tumultuous years of WWII, the company shifted its focus from camera manufacturing to supporting the war effort. Despite the challenges, they produced the Semi-Makinet camera, a 6x4.5 folding camera, between 1941 and 1943. The factory was tragically destroyed during the Allied bombing of Tokyo in 1945. However, the company's spirit remained unbroken. They relocated the plant to Yamagata in 1945 and rebuilt the plant in Tokyo in 1948, which was a remarkable display of resilience.
After the war, the company briefly took the name Umemoto Kōki Seisakusho and produced the Rocky Semi in 1953. This camera didn't do well, and in 1962, it became Y.K. Umemoto Seisakusho, which still produces photo-related parts for Kenko today.
Here is a wonderful Japanese website with a lot of insight on the company Umemoto . I used Google Translate so I hope it comes through properly.
My Camera:
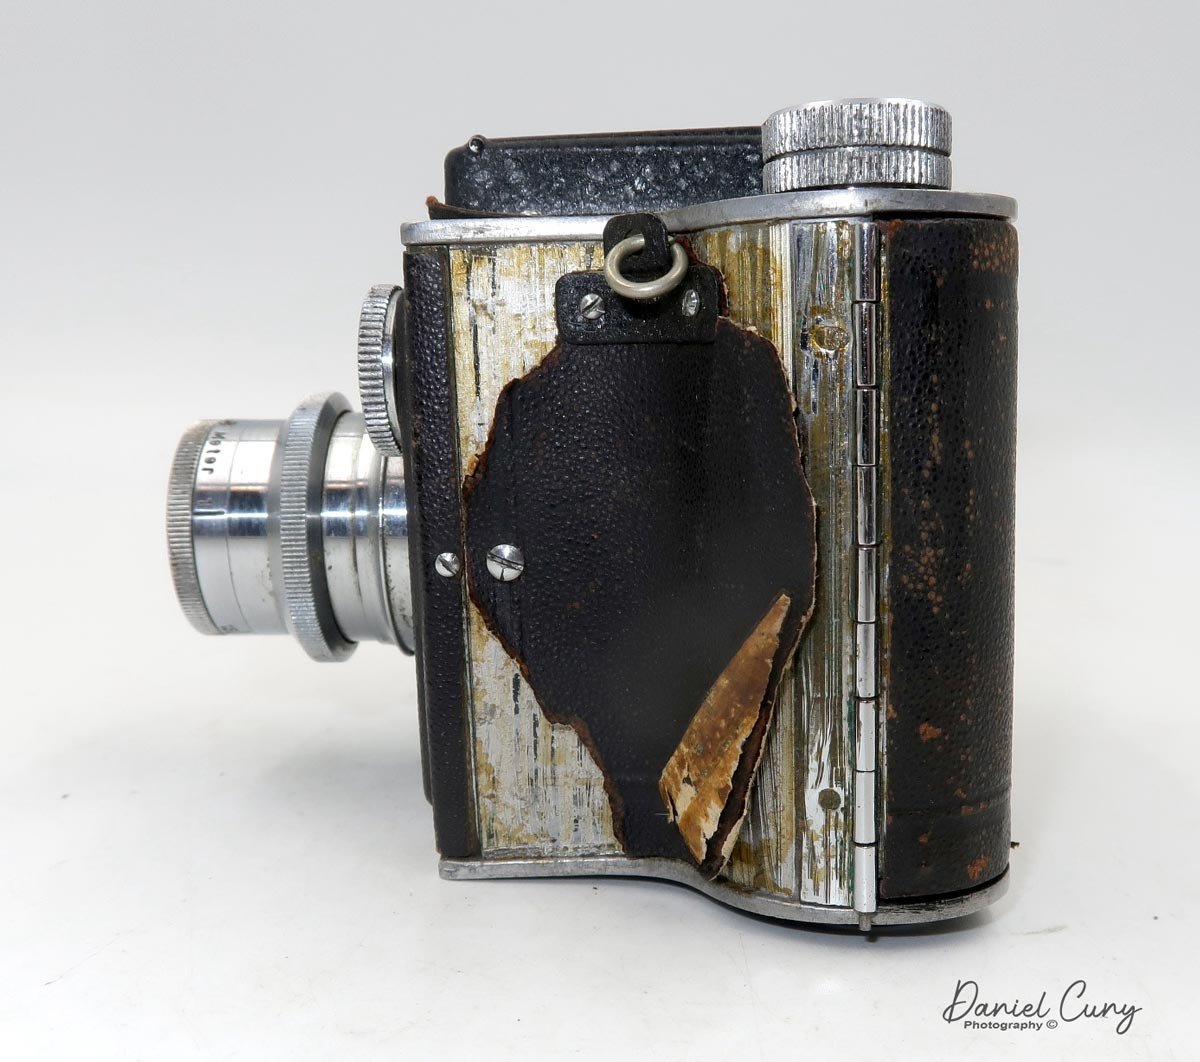
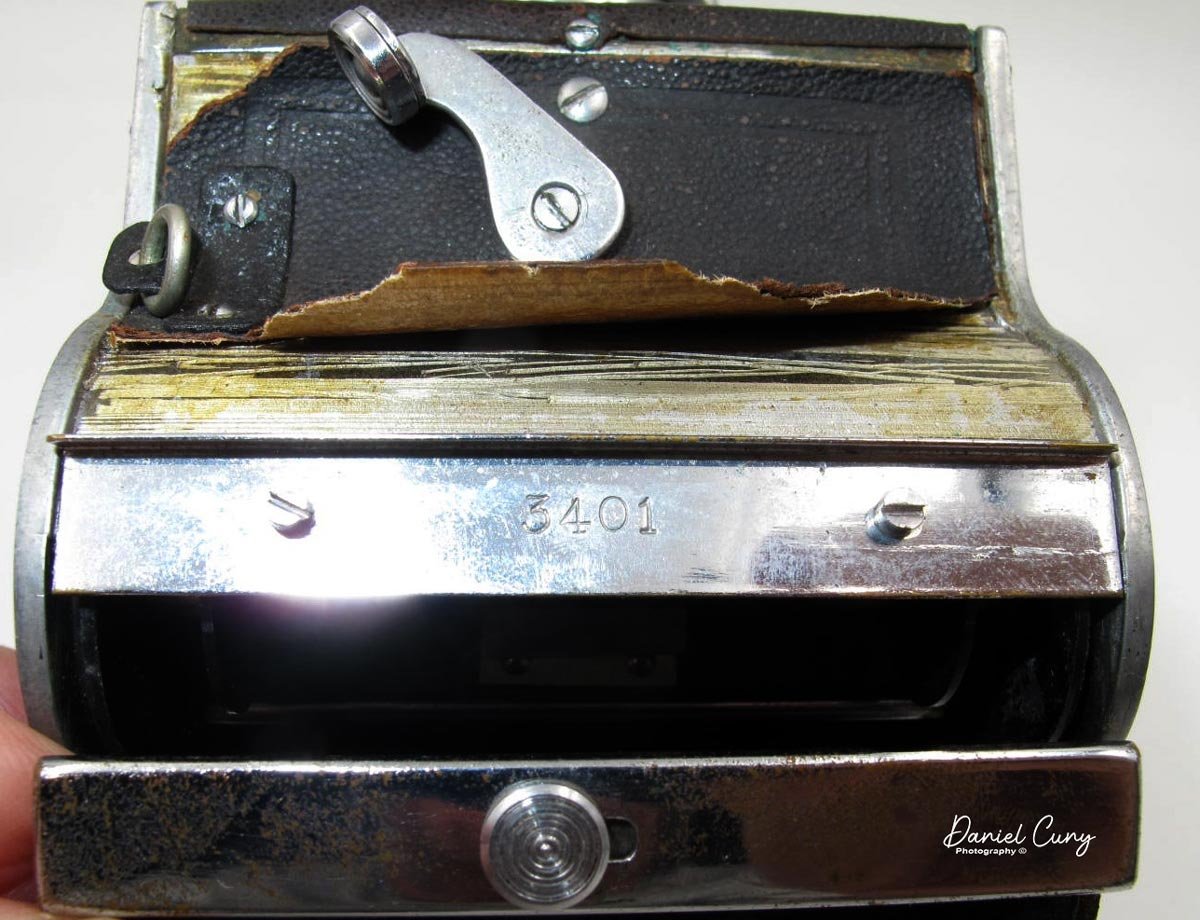
My camera, with its serial number 3401, is a fascinating blend of the original Super Flex Baby and the model II version. It features the original chrome and black viewfinder, a Model II shutter speed dial and lens, both in chrome, and a lens measured in 'mm' rather than 'cm.' This unique combination, a result of the transition period, added an element of surprise and excitement to my discovery of the camera.
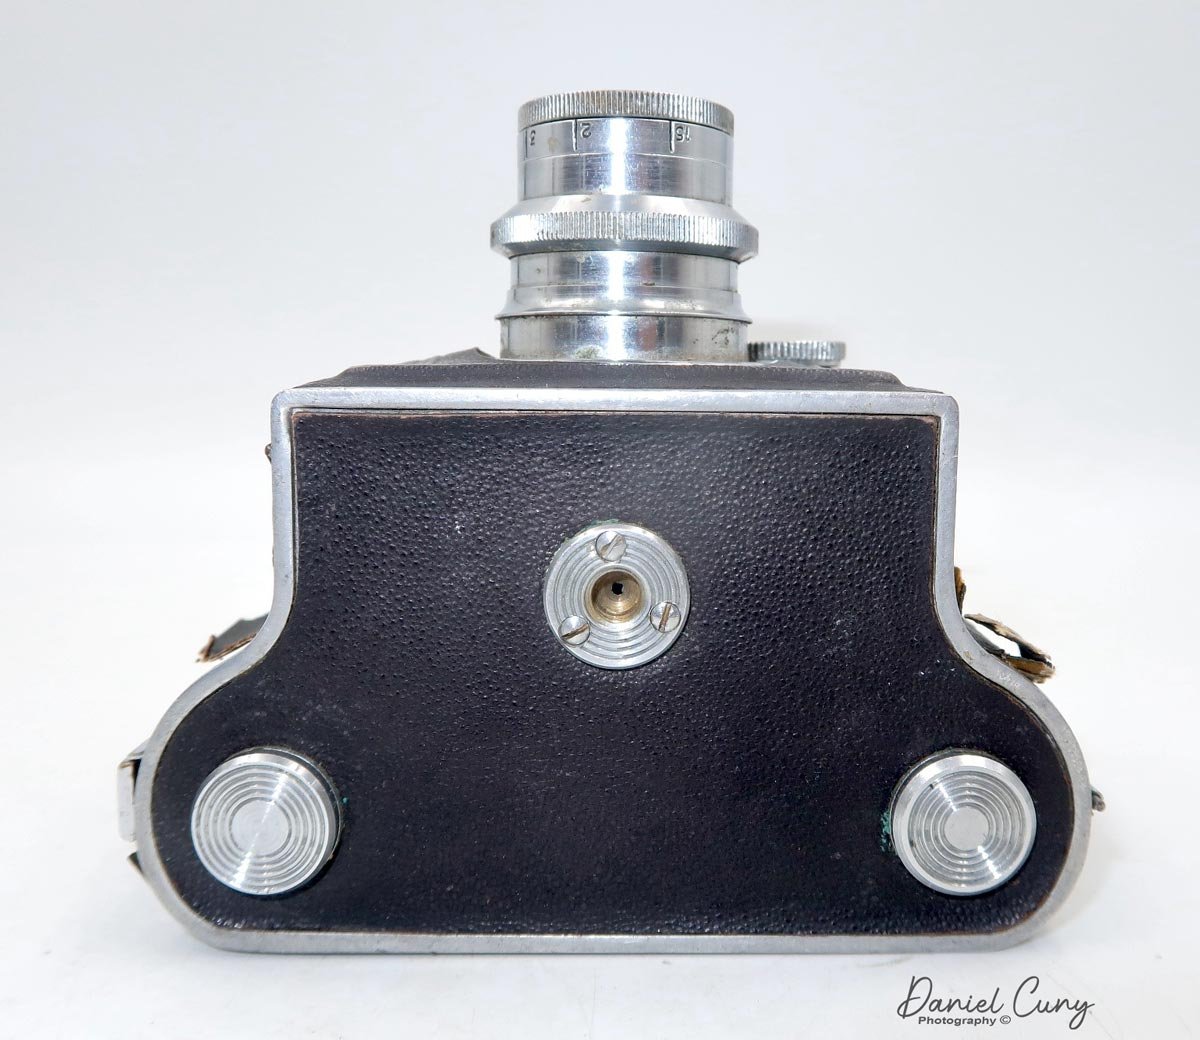
The serial number on my camera is 3401, which you can find on the inside of the latch that holds the back of the camera. My camera measures 4" from the back to the front of the lens and 2.75" from the back to the lens mount on the camera. It measures 4.25" wide and 3.25" tall if the viewfinder is closed and 4.75" tall with the light hood opened. My camera weighs 1 lb. 3.2oz without the case.
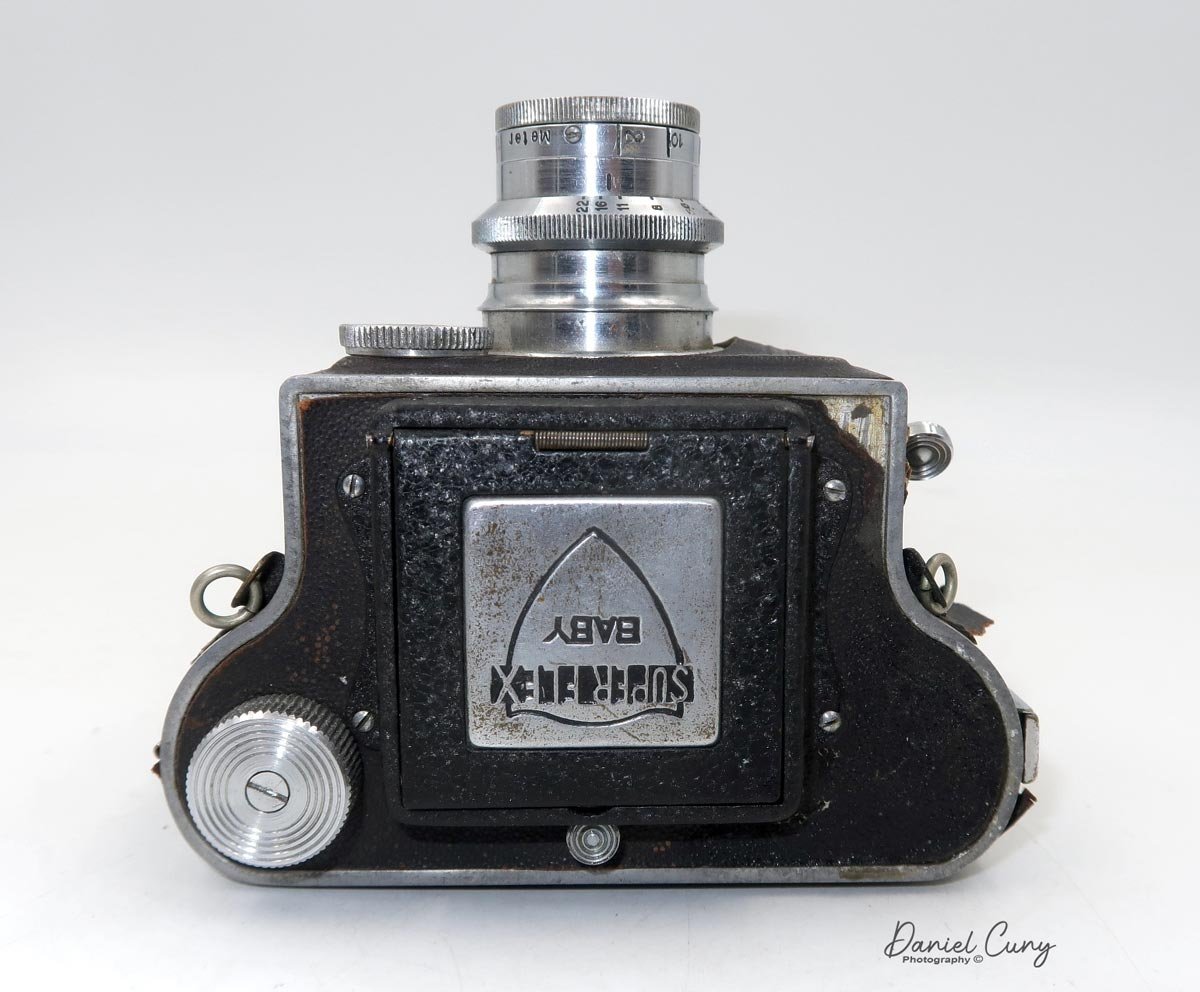
Using the camera is pretty straightforward. There is a latch on the camera's right side, and you slide up to open the back door. You take the empty spool from the right of the camera and put it on the left side where the winding knob is. To take out the spool and put in the roll of film, you'll need to pull out the knob that holds the film into place. Once you have loaded the empty spool and film, pull the leader to the empty reel and thread the leader into the spool and wind. Once it's securely on the take-up reel, close the back.


Here's where it gets exciting, something I learned and did when I looked at the company's website. I have the link to the above in the "history" section. Here's an excerpt from the company history explaining the film numbering sequence and the camera's winding instructions.
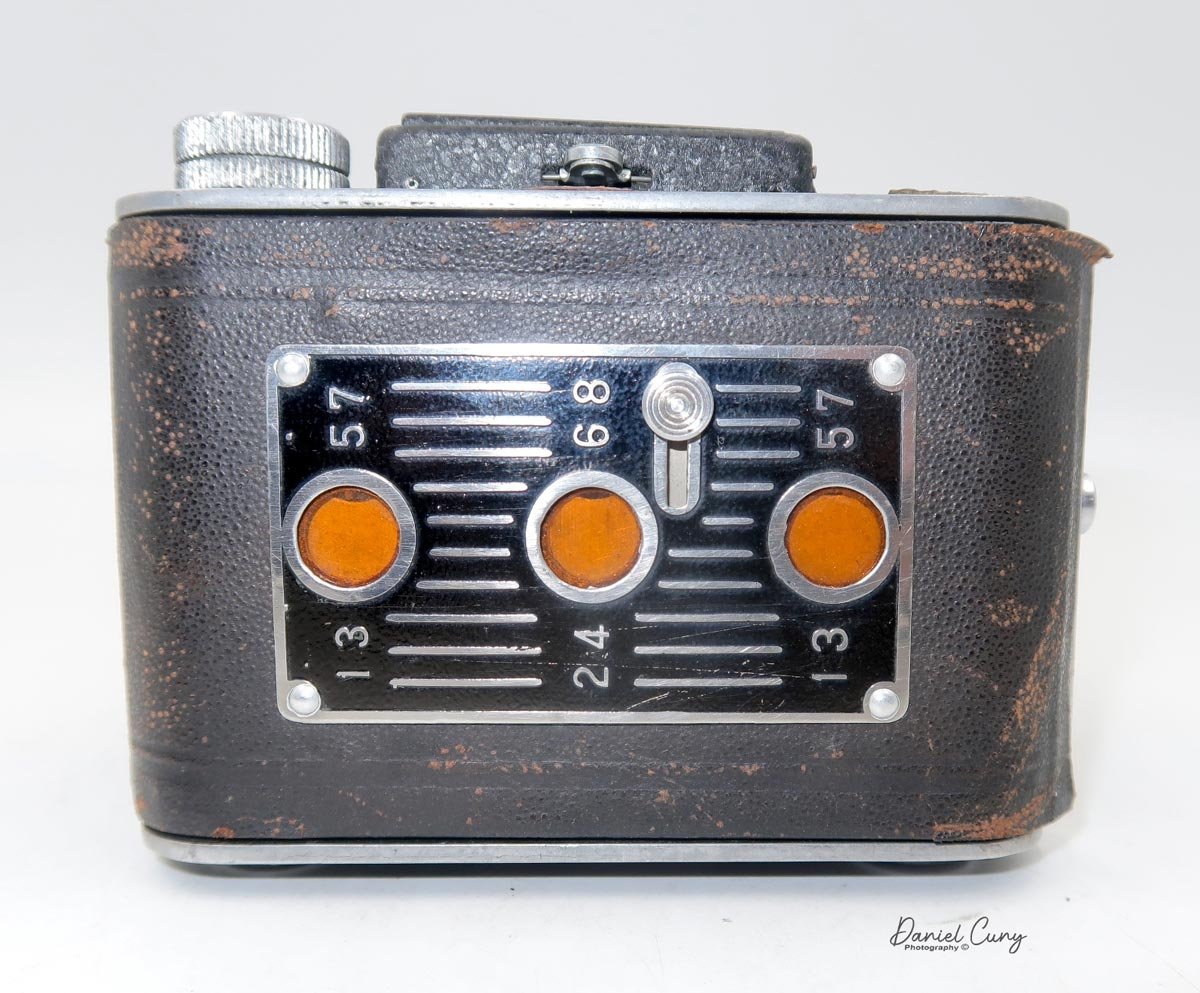
"There are three red windows on the back cover for taking 12 4x4 cm shots. ( It seems that 4x6 cm numbers were used because 127 film did not have numbers for 4x4 cm. ) The left and right windows only accept odd numbers, and the center window only accepts even numbers and is read as follows (ignore the ○ parts). 1st photo) 1○○ 2nd photo) ○○1 3rd photo) ○ 2○ 4th photo) 3○○ 5th photo) ○○3 6th photo) ○4○ ... 11th photo) ○○7 12th photo) ○8○ I think this operation was quite difficult."

Looking at the numbers by the window openings, the text above now makes sense.
I didn't use this method and only got eight photos on my roll.
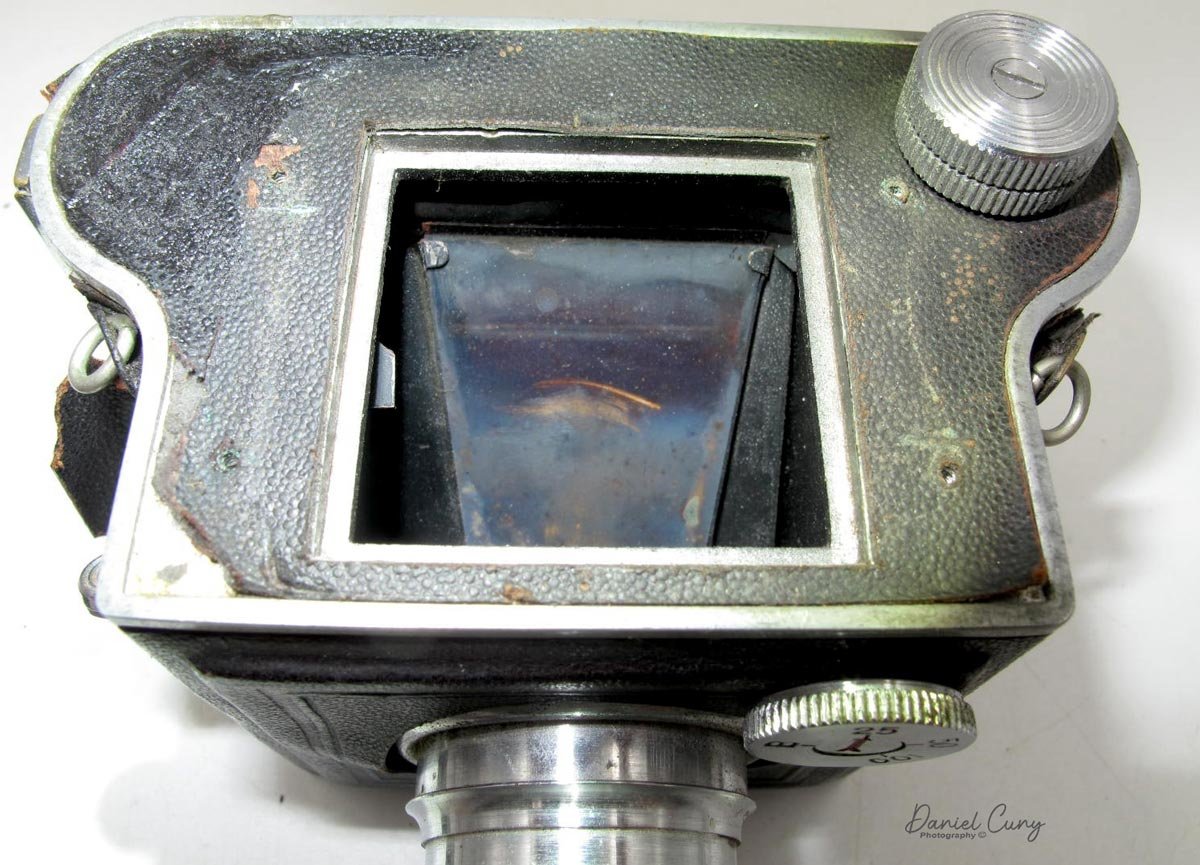
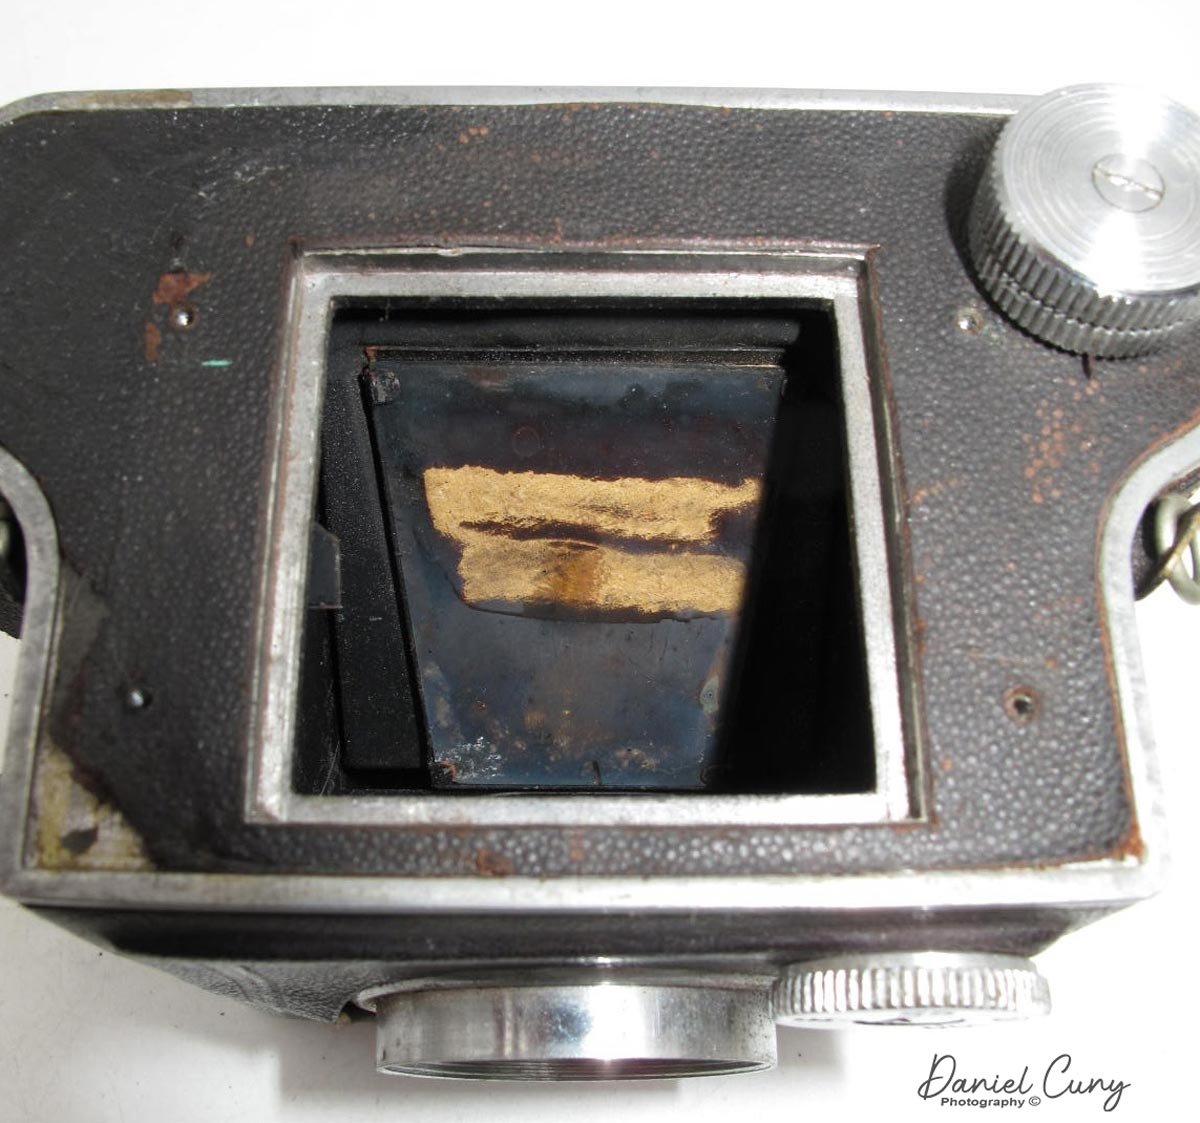
The mirror in my camera was so bad that I couldn't use it and didn't notice before putting in the roll of film, so I was forced to use the sports finder to frame the photos I took. It worked out OK, so I wasn't too upset.
I used my trusty light meter to get the needed exposures. I also needed to find a roll of 100 ISO film, as anything faster would have run into issues since the fastest shutter speed on the camera is 1/100, and the lens stopped down to f22. Luckily, I noticed that the lens focusing was in meters instead of feet, which I'm used to with most cameras I use. I needed to keep that in mind when composing my photos.


The camera case I have is in moderately good condition. The strap is intact, and it covers the camera well. The only thing missing is the snap that holds the front and back together but stays closed and protects the camera well.
The film was used up quickly; now it was time to process it.
Results:
The film I had was some pretty old and out-of-date 127 film, so I had yet to learn what I would get. It was not as good as I anticipated after I pulled the film from the processing tank. While I'll call the "art" prints, the negatives were very mottled, and I'm unsure what caused it, but the images are somewhat sharp.
Here are some of the results from the camera.


Conclusion:
The camera was interesting, but the mirror and the focusing, or lack thereof, could have sat better with me. I decided to remove the finder and clean up the mirror to bring the camera back to life and make it more usable.
Thank you for taking a few minutes to look over this camera blog. I'll have another exciting camera for next week's post, so please be safe until then.
Camera Update:
There were only four screws to hold the light hood on, so I proceeded to take them out. The hood came off quickly enough. Under the hood was a mask on top of the focus screen. I turned the camera upside down slowly, and the focus screen came right out, exposing the dingy mirror.
They always say to test a small part when cleaning first to see if it's OK to proceed. I didn't hear that little voice say that this time, so I cleaned the mirror, thinking the silver paint was on the backside of the glass, which is normal. I took two swipes with my Q-Tip, and the finish came right off. YIKES!!!!

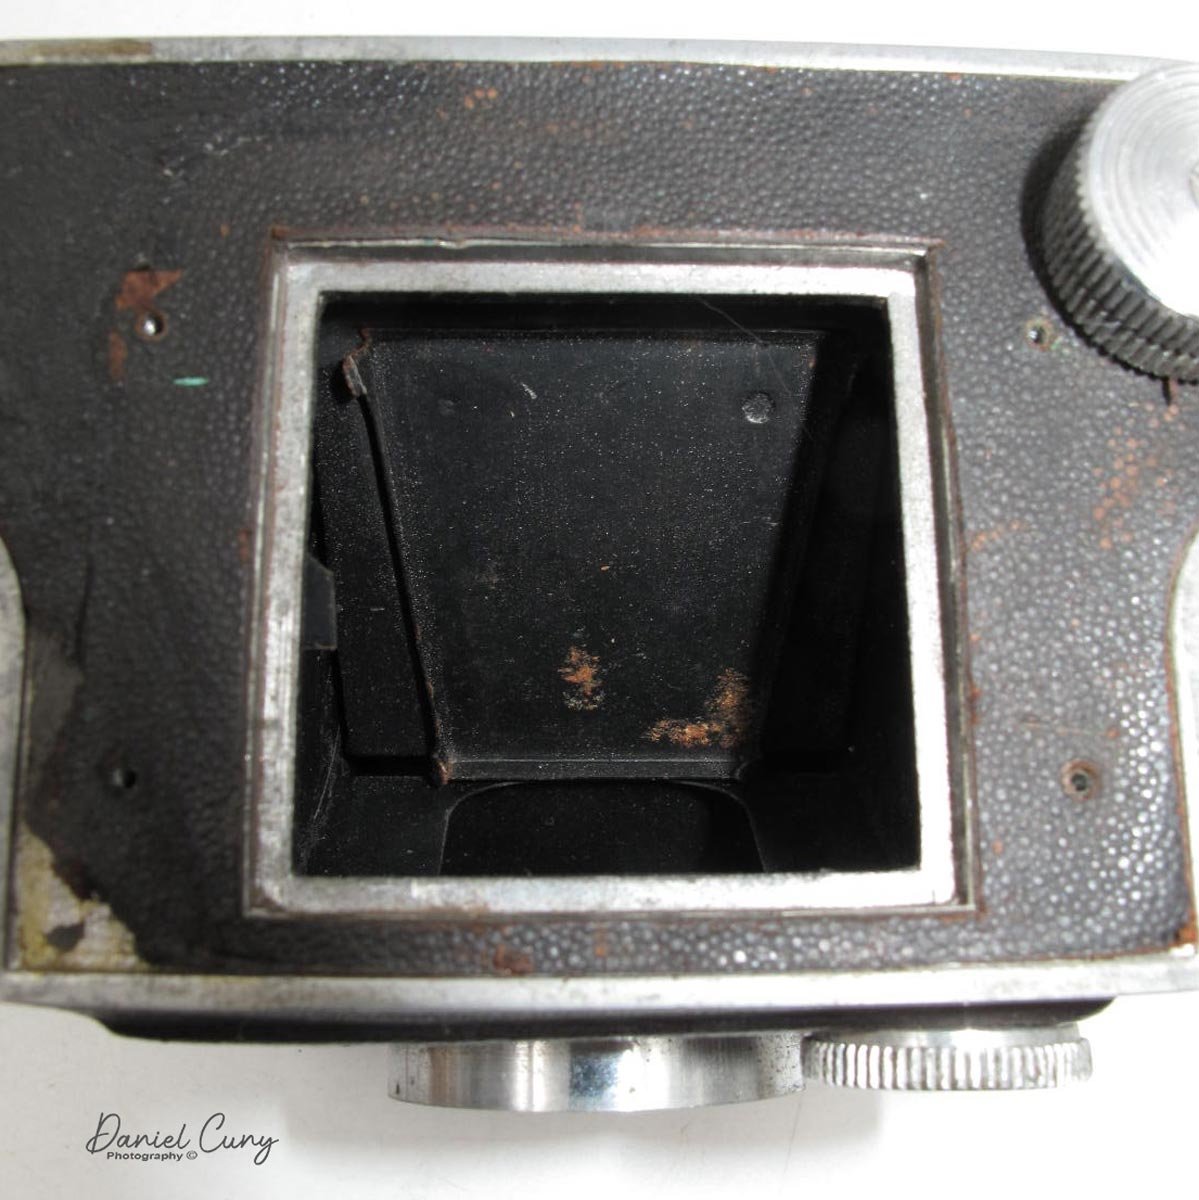
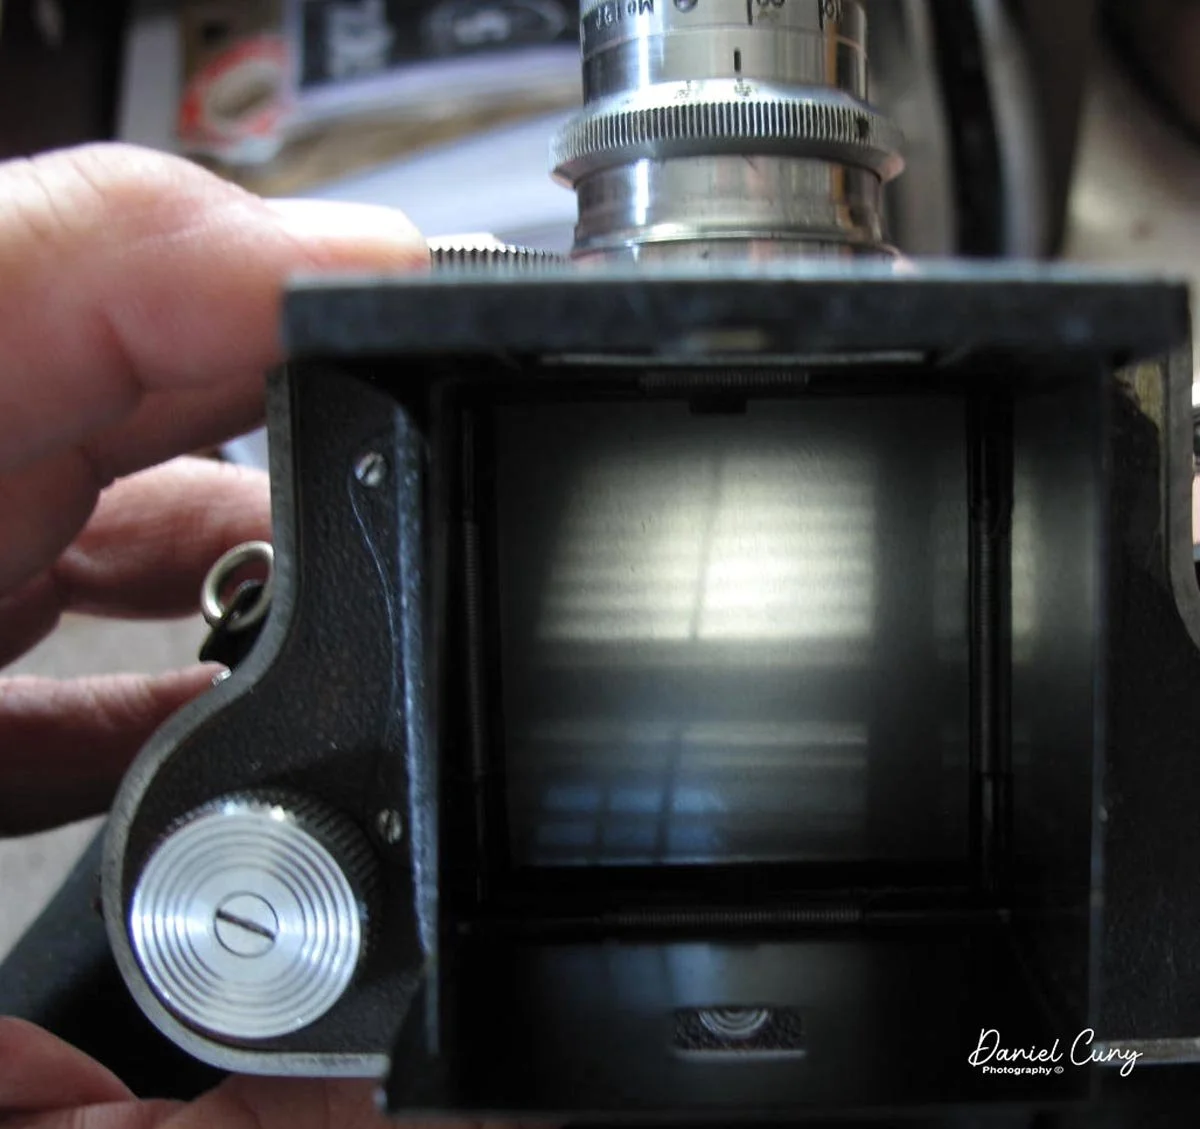
So, I ordered some silver markers to see if that would suffice to bring back the mirror effect to my new piece of glass. The mirror, or glass, now was easy enough to get out as it was held in the bracket with corner clips, which I slowly bent back to take out the mirror.
I received the silver or what’s called Chrome markers late last night. Early the next morning, I applied a generous amount to the glass I removed and let it dry. The markers produced more of a ripple effect as opposed to a clean glass mirror. It was certainly shiny enough, so I reassembled the focus screen and light hood back onto the camera, and the camera actually did a good job of focusing on a subject when viewing through the camera. It’s considerably better than before I disassembled it and when I took photos so I’m happy with how it turned out.
Here are the results.

Thank you again for reading about this interesting camera. Until next time, please be well and safe.