Zeiss Kolibri-The Hummingbird

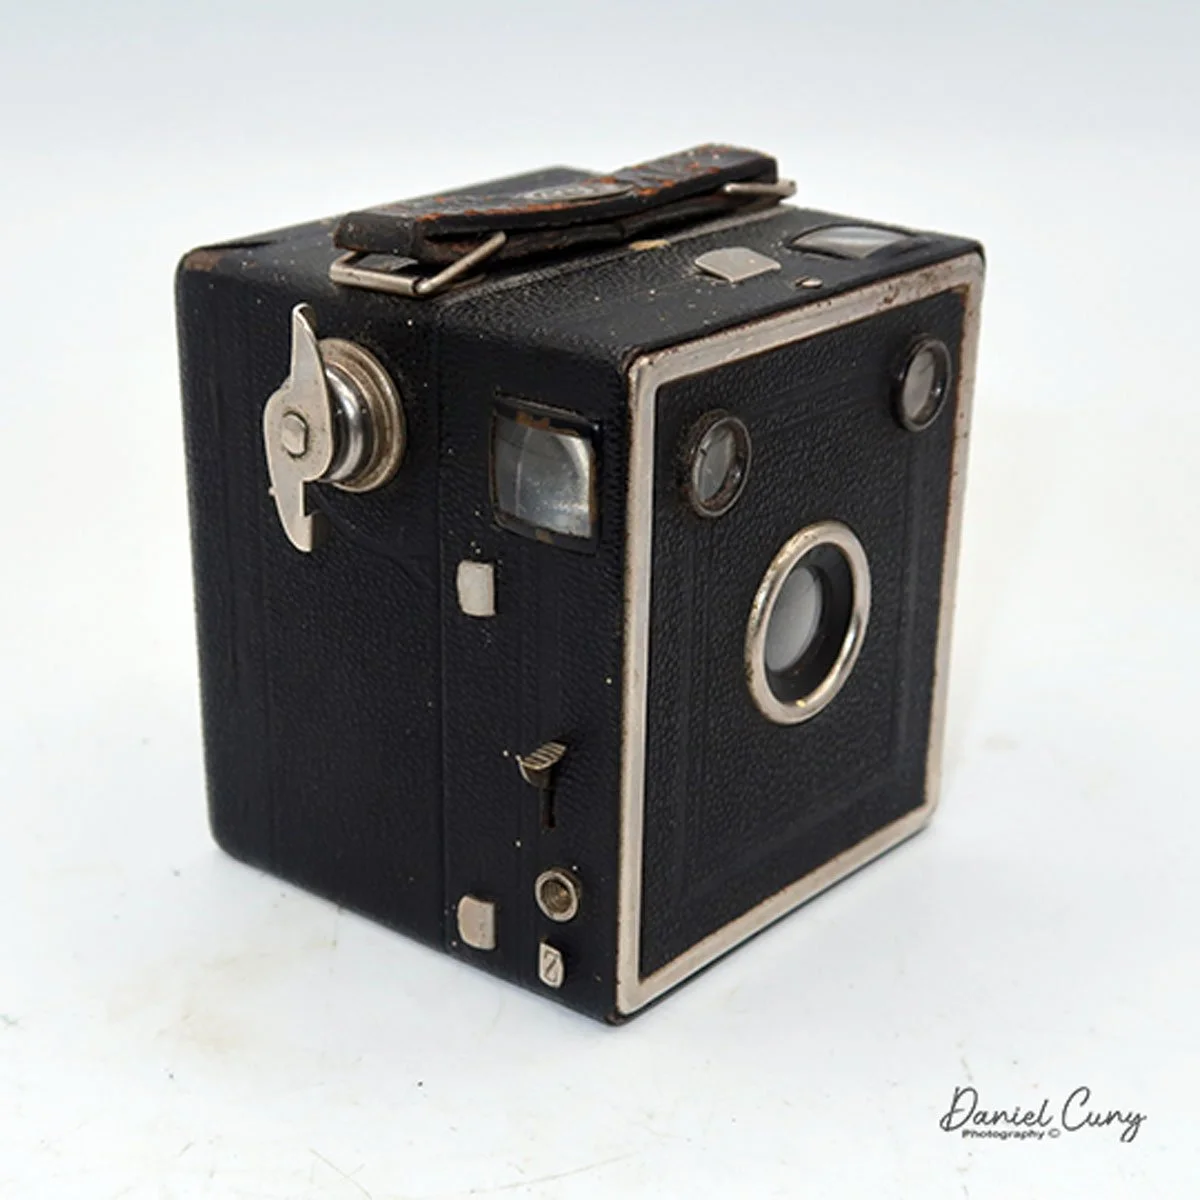
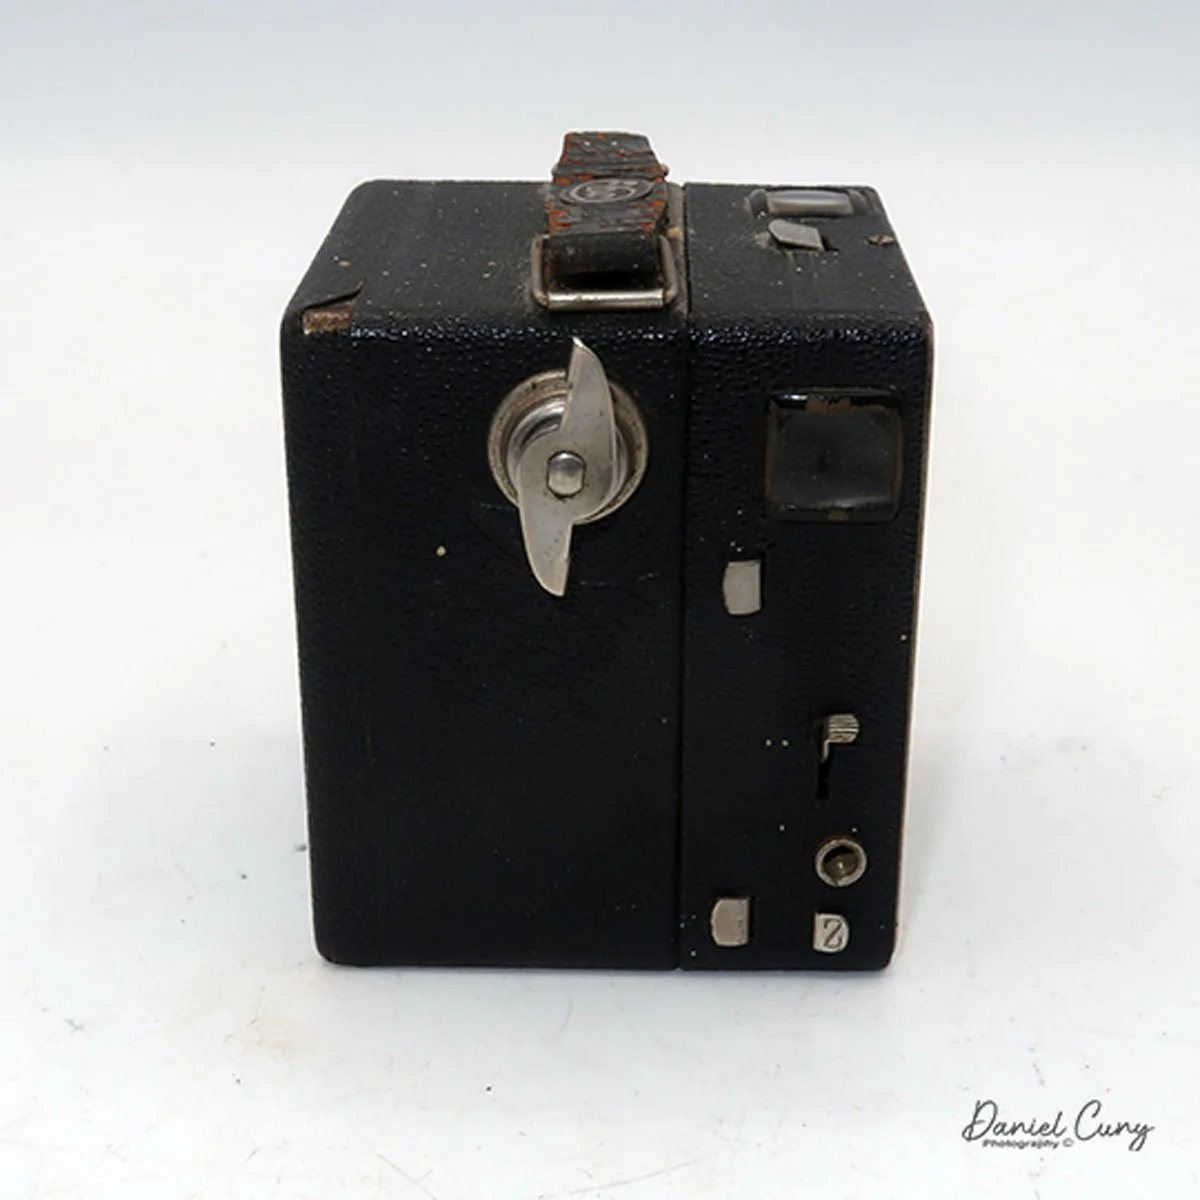
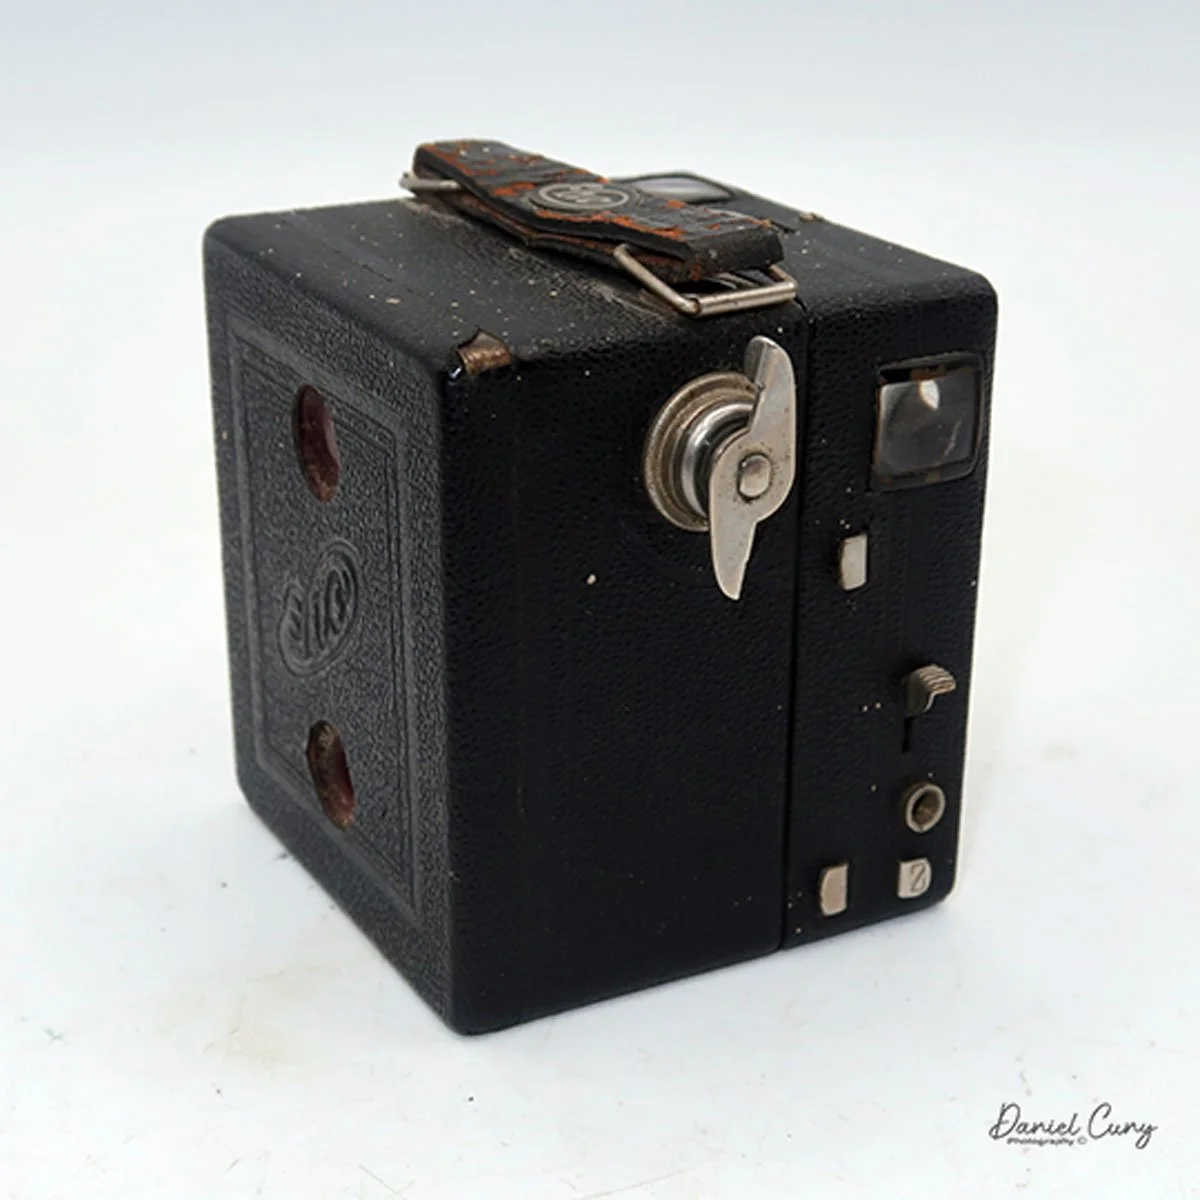
My Zeiss Kolibri Camera

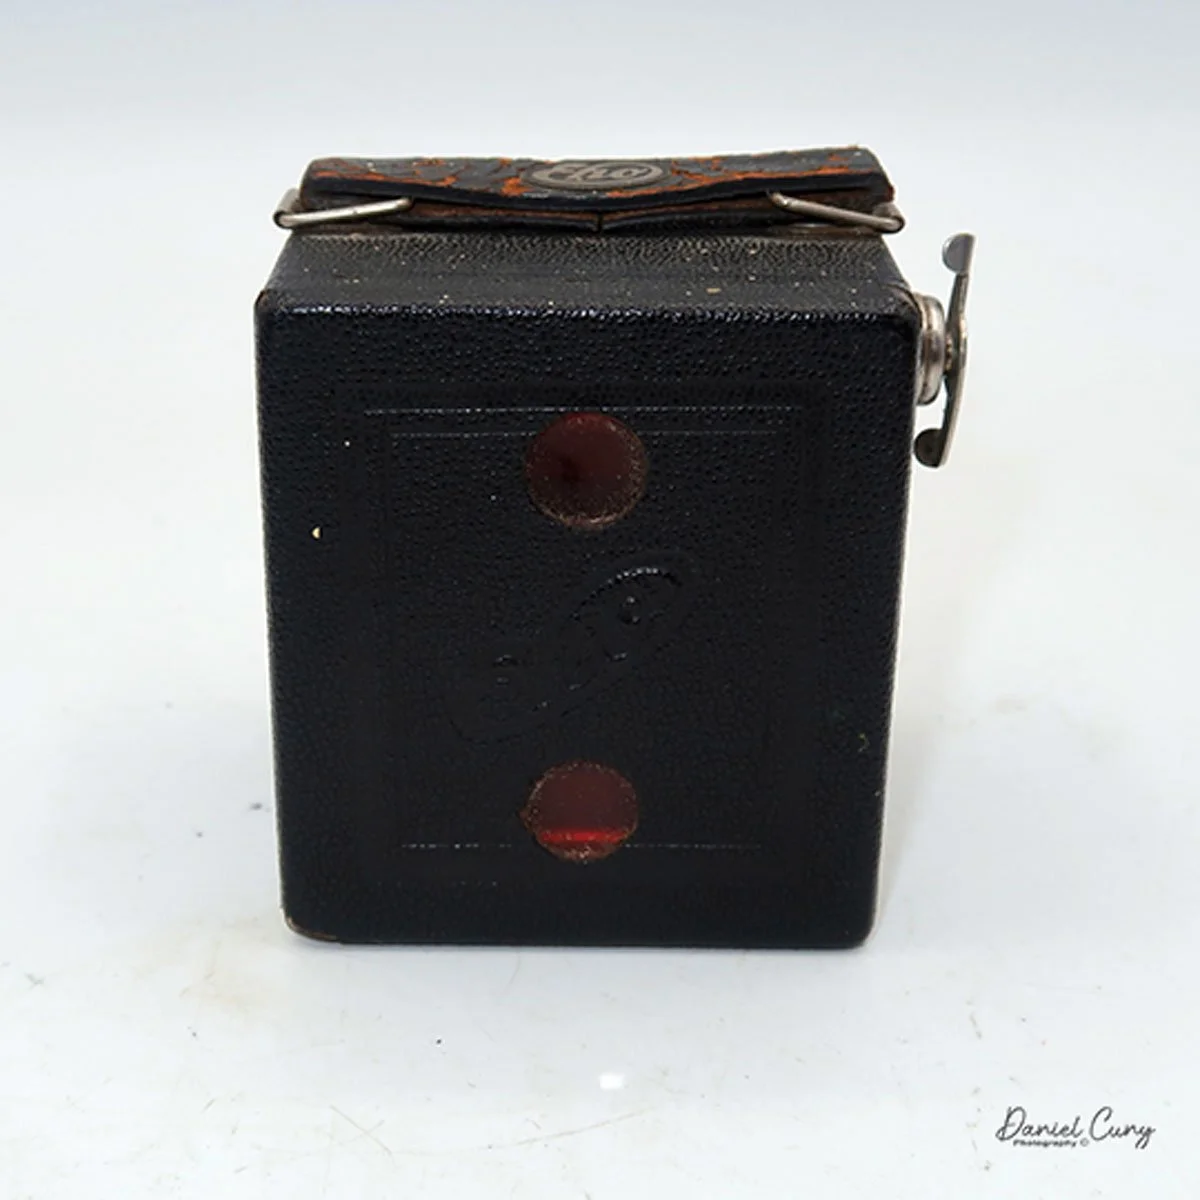
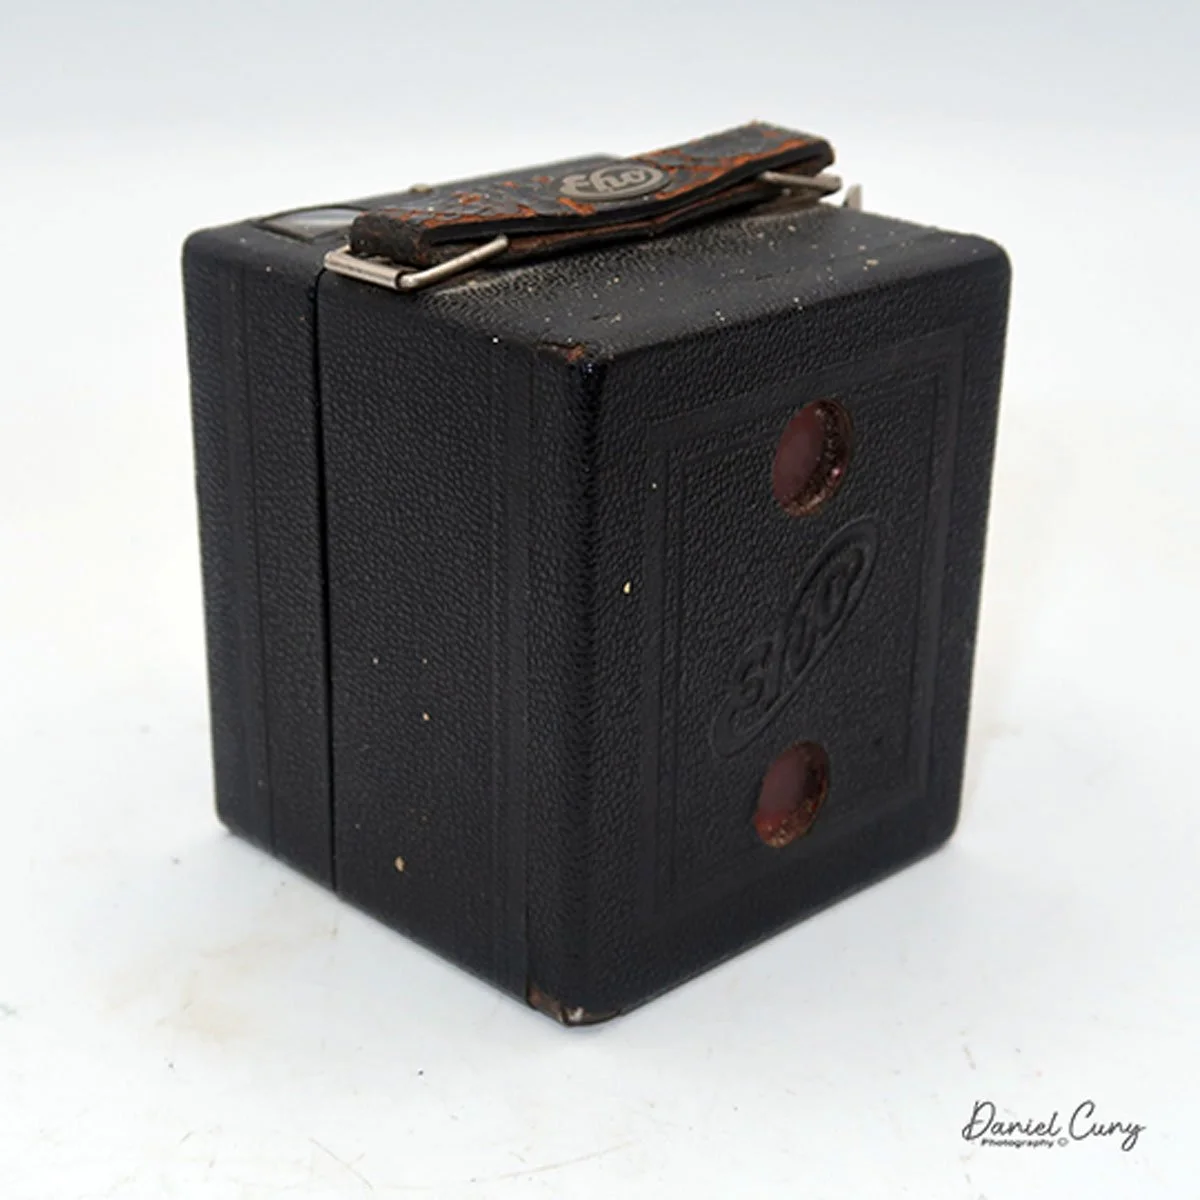
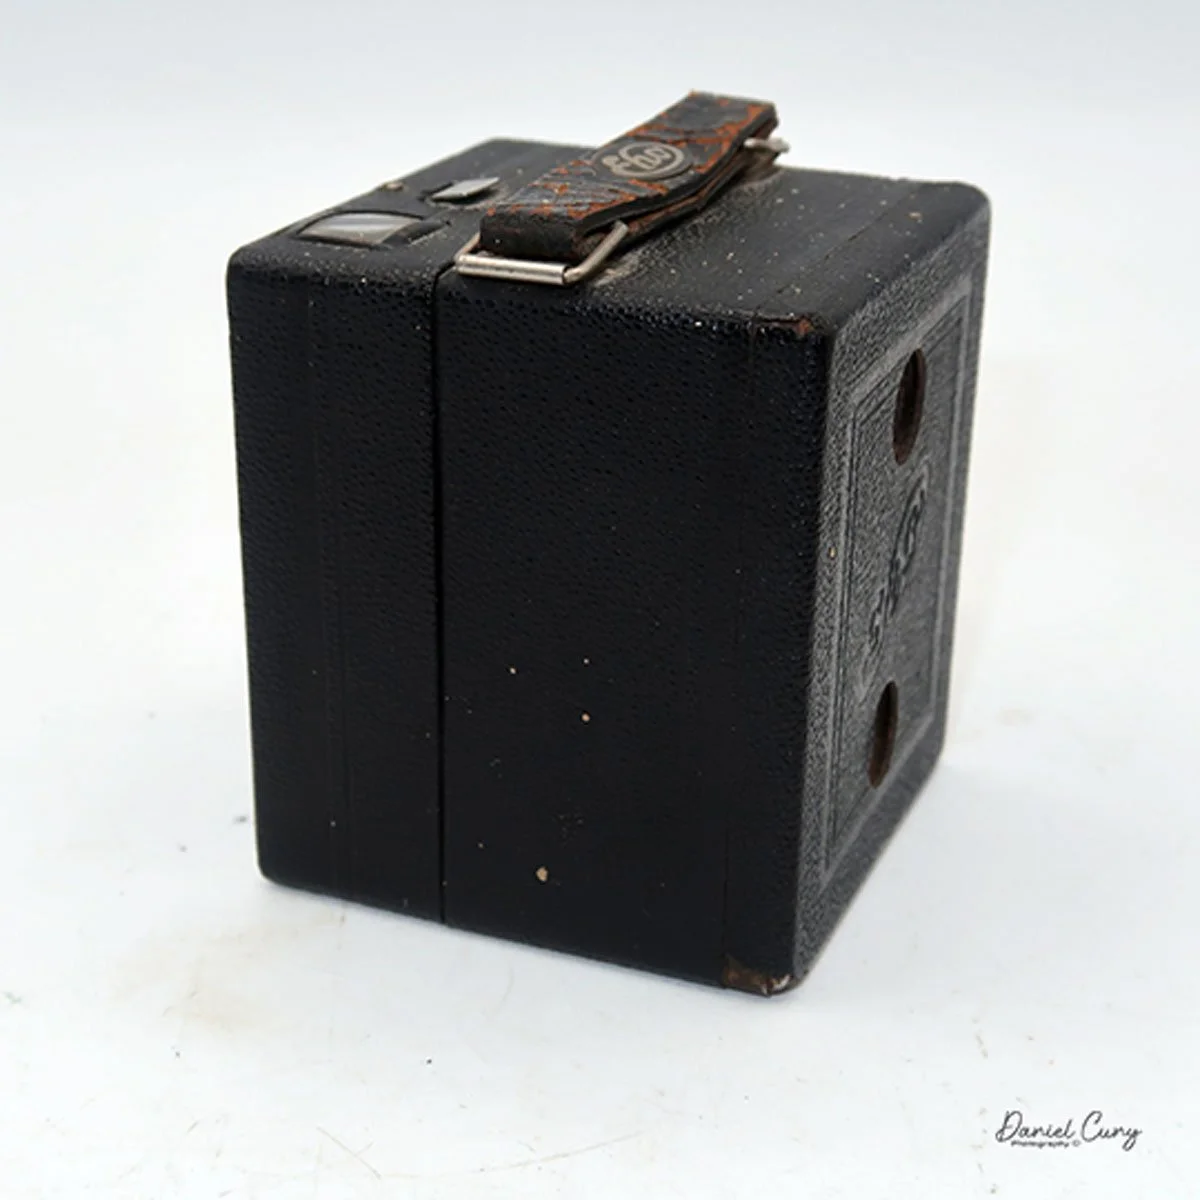
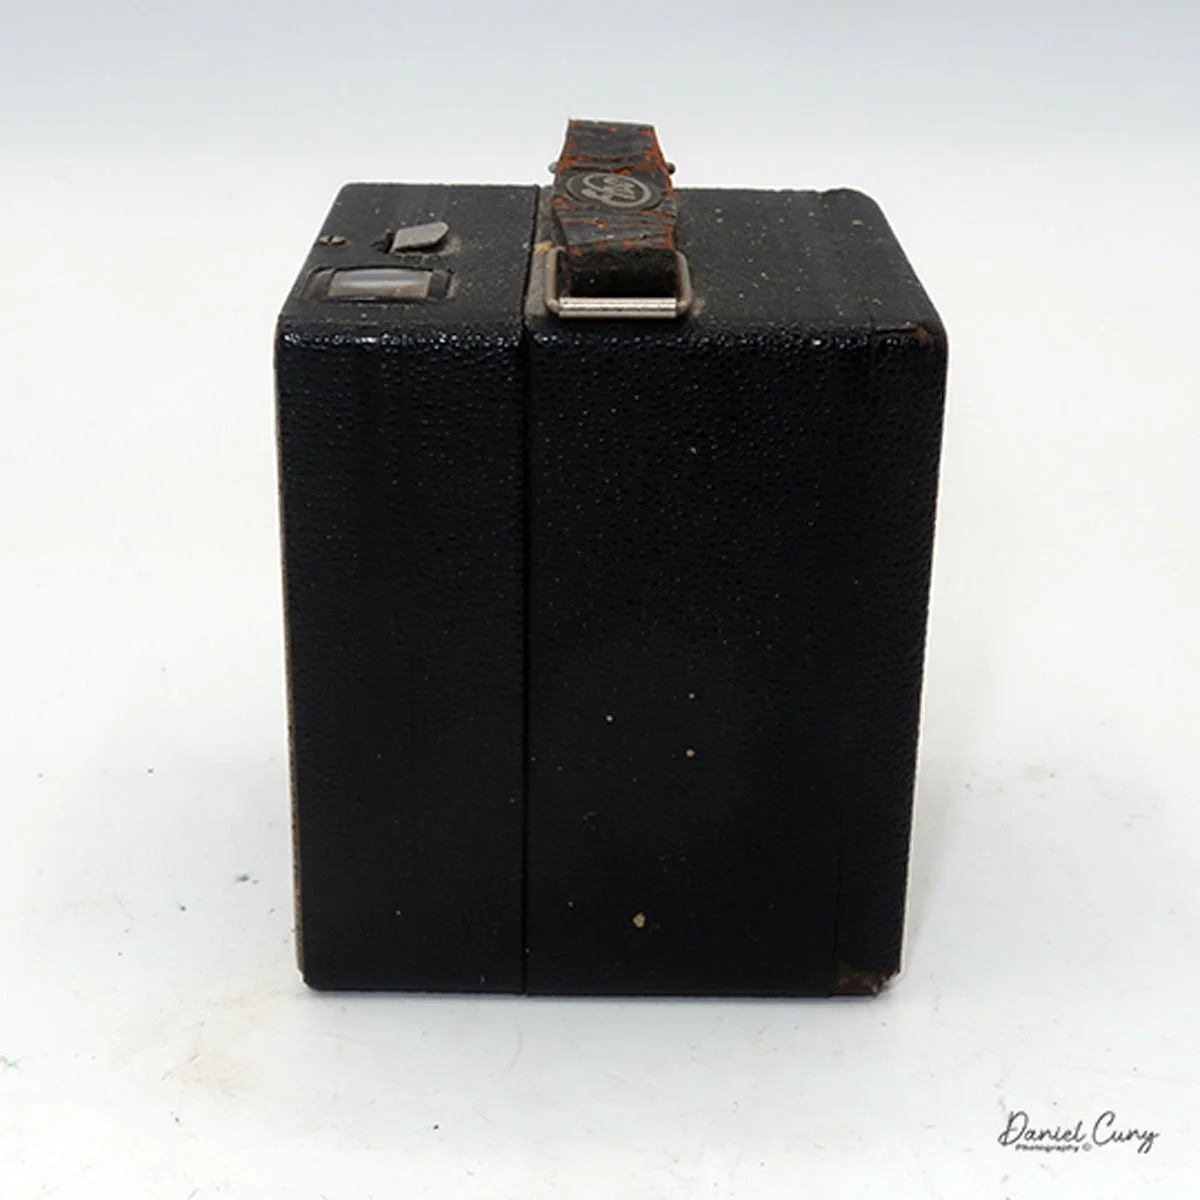
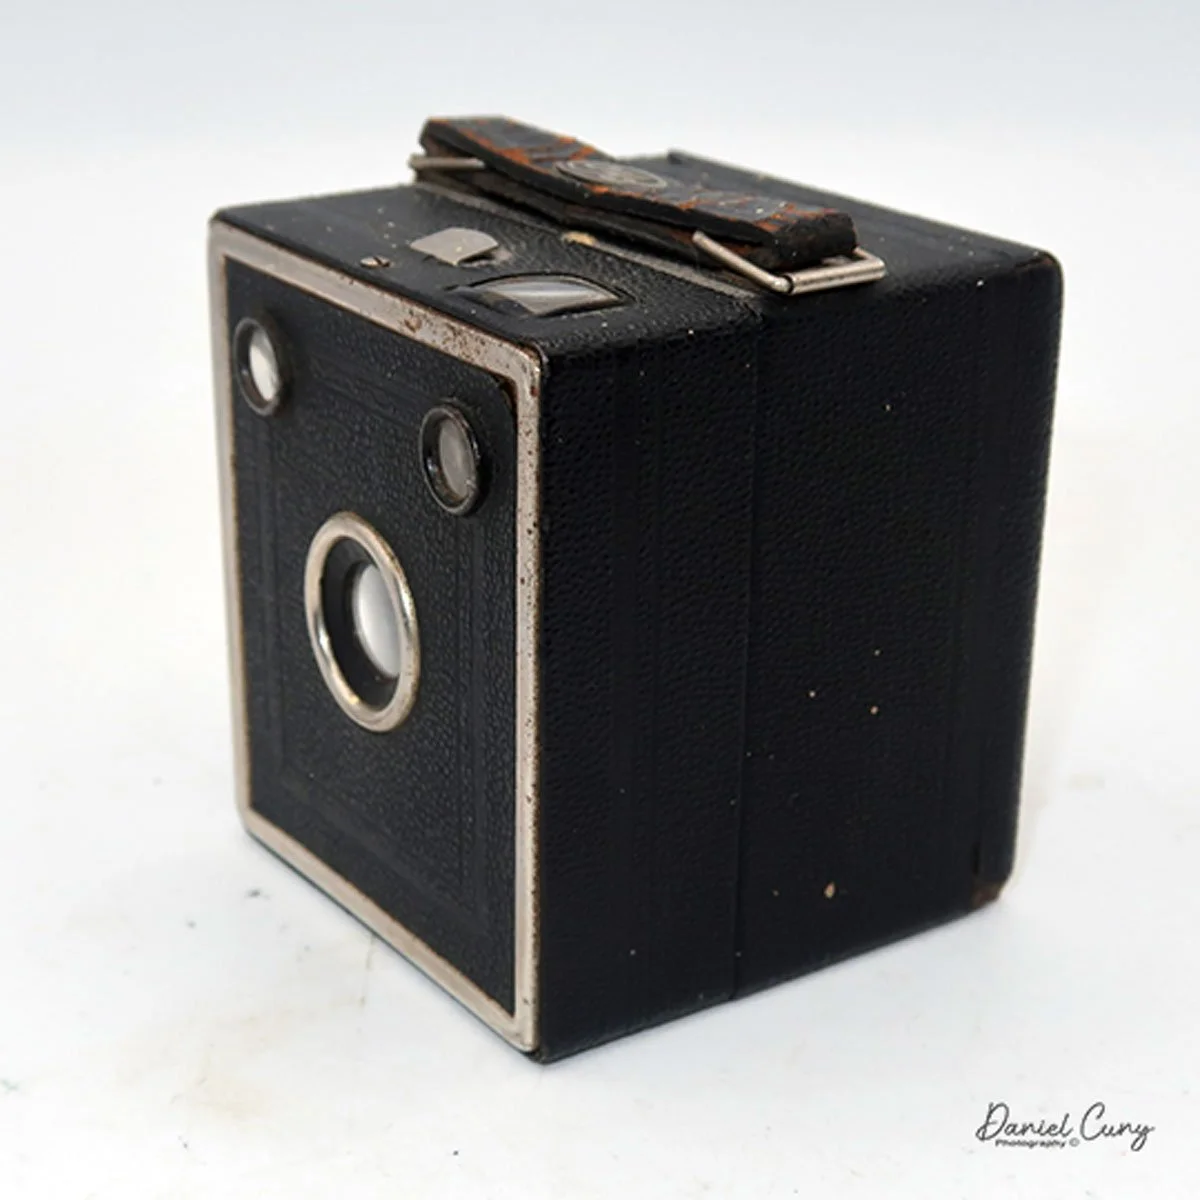
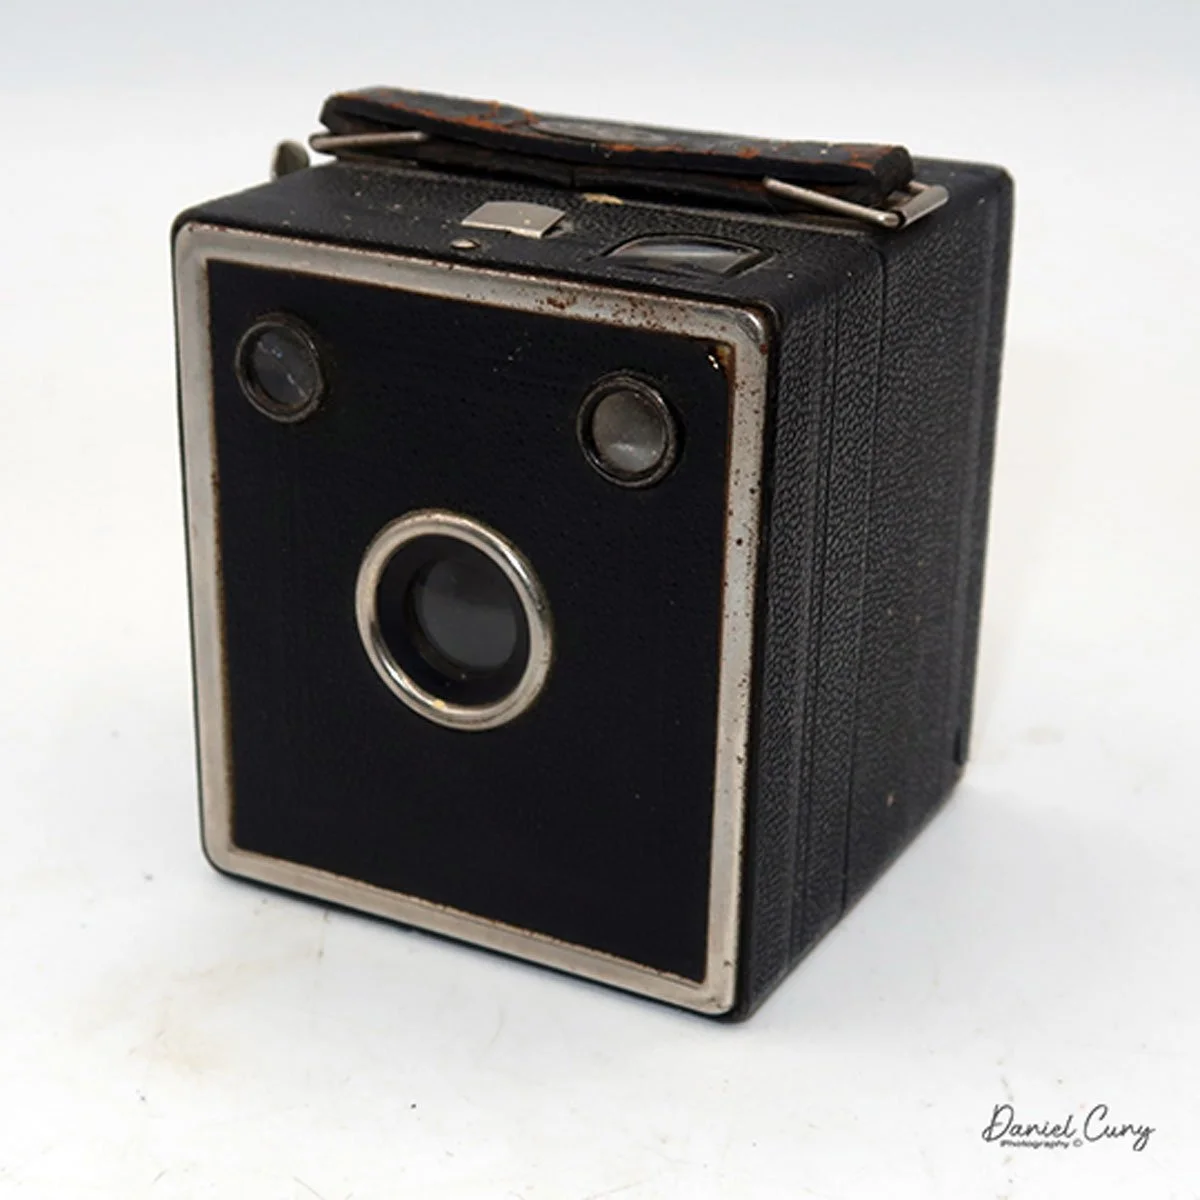
The Zeiss Kolibri, which means "Hummingbird" in German, has always been a camera I wanted for my collection. I liked it mainly because it's very sleek and petite and resembles a 35mm camera, but its main attraction was its use of a larger 127 film size. The camera was built only for a few years, from 1930 through 1932, but I've seen ads for it through 1935.

 I had the opportunity to purchase one when I visited an antique store while on a trip to Minneapolis a couple of years ago. Still, I didn't pull the trigger to buy it, and ever since that trip, I've regretted it, so when I noticed an online auction for a few of the Zeiss Kolibri cameras come up for auction, I jumped on the opportunity and bid on two. At first, I thought these were different years of production, one being older than the other. One is more worn and used than the other. Both have the "cane," which keeps the camera upright, and both are in working condition.

 I won the cameras in the auction for a fair price, including the auction house commission and shipping fees. When the cameras arrived, I was pleased to see both in good working condition. One of the cameras seemed well used, and the other needed the aperture scale indicator, something I didn't notice when I bid on the items. Still, overall, I was pleased with the purchase and wanted to take one of the cameras out to see how it would perform.

History:

The story of Zeiss cameras is deeply intertwined with the evolution of optical technology and the art of photography. Founded in 1846 by Carl Zeiss in Jena, Germany, the company began as a precision mechanics and optics workshop. While its early focus was microscopes, the company's commitment to innovation soon extended to camera lenses and photographic equipment, establishing Zeiss as a pioneer in the optical and photographic industries.

The two Kolibri cameras purchased

 In the late 19th century, Zeiss gained prominence for its advancements in lens manufacturing. In collaboration with physicist Ernst Abbe, the company introduced revolutionary optical theories that improved lens quality and design. This partnership led to the creation of the Zeiss Anastigmat lens in 1889, which minimized distortions and chromatic aberrations, setting new standards for photographic lenses.

First Zeiss Logo

As photography gained popularity in the early 20th century, Zeiss partnered with other manufacturers to produce complete cameras. In 1926, Zeiss joined forces with several German camera companies to form Zeiss Ikon, consolidating its leadership in the industry. Zeiss Ikon cameras, like the Contessa-Nettel and the Ikonta, became renowned for their precision engineering and exceptional optics.

 One of Zeiss's most iconic contributions to photography was the Contax series, introduced in 1932 to compete with Leica. The Contax cameras were known for their innovative designs, including using a rangefinder system and superior Zeiss lenses like the Sonnar and Biotar. These cameras quickly became favorites among professionals and enthusiasts for their sharpness and reliability.

Ad for Zeiss Kolibri camera

During this period, Zeiss also developed a range of lenses that became benchmarks in the industry. The Tessar lens, introduced in 1902, remains one of the most widely used lens designs in photographic history, praised for its sharpness and compact size.

World War II disrupted Zeiss's operations, splitting the company into East and West divisions. The East German division, headquartered in Jena, retained the Zeiss Ikon name, while the West German division, based in Oberkochen, became Carl Zeiss AG. Despite the division, both branches continued producing high-quality photographic equipment.

In the 1950s, Zeiss partnered with Japanese camera manufacturers, most notably Yashica, to produce the Contax series. This collaboration introduced groundbreaking features like TTL metering, which became an industry standard.

 By the late 20th century, Zeiss shifted its focus from producing cameras to developing advanced lenses for various manufacturers. The company collaborated with brands like Sony, Hasselblad, and Nokia, bringing Zeiss optics to a broader audience. In 1996, the Contax G2, a rangefinder camera with autofocus and electronic control, became a cult favorite, blending modern technology with classic Zeiss craftsmanship.

In the digital era, Zeiss continues to push the boundaries of optical technology. Its lenses are widely used in professional photography, cinematography, and even smartphones. The company's commitment to precision, innovation, and excellence defines its legacy.

 From its beginnings in 19th-century Jena to its status as a global leader in optical technology, Zeiss has profoundly shaped the world of photography. Its cameras and lenses have captured countless iconic moments, leaving an indelible mark on history. Today, Zeiss is synonymous with unparalleled optical quality, a testament to over 175 years of innovation and craftsmanship.

My Camera:

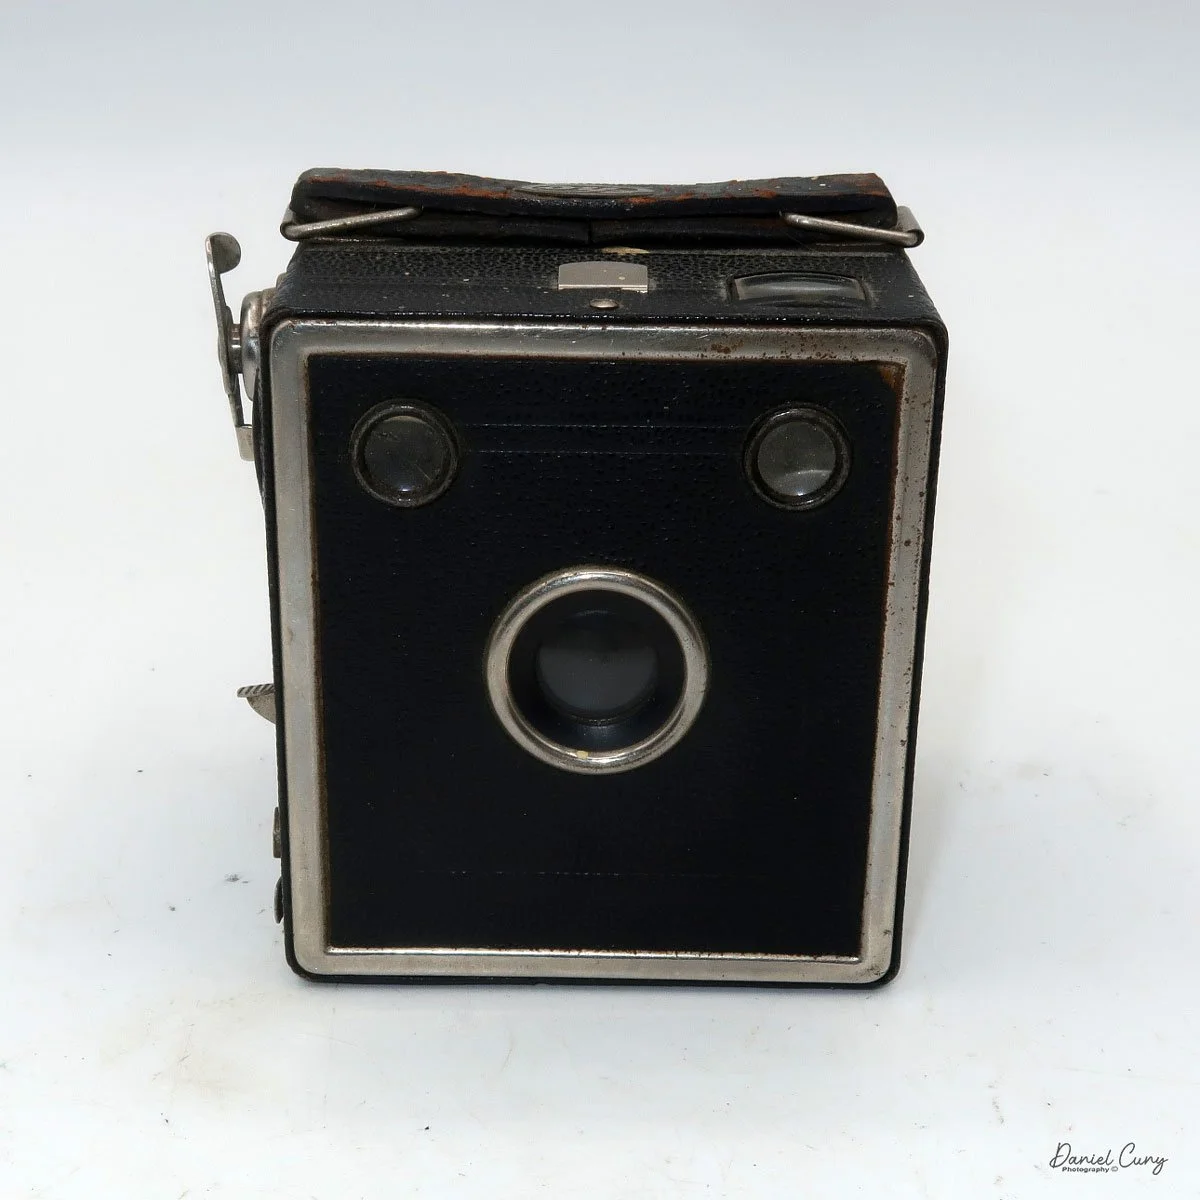
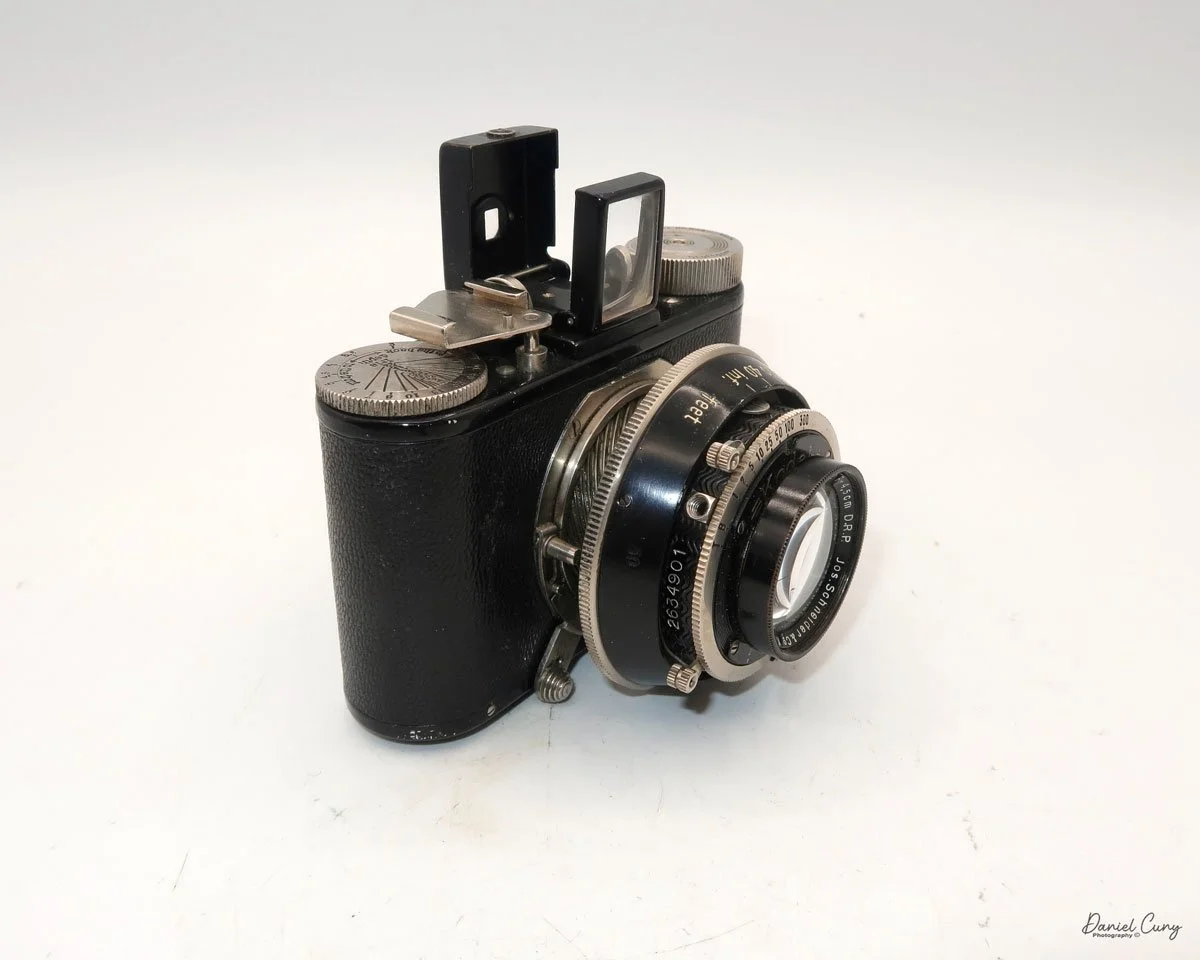
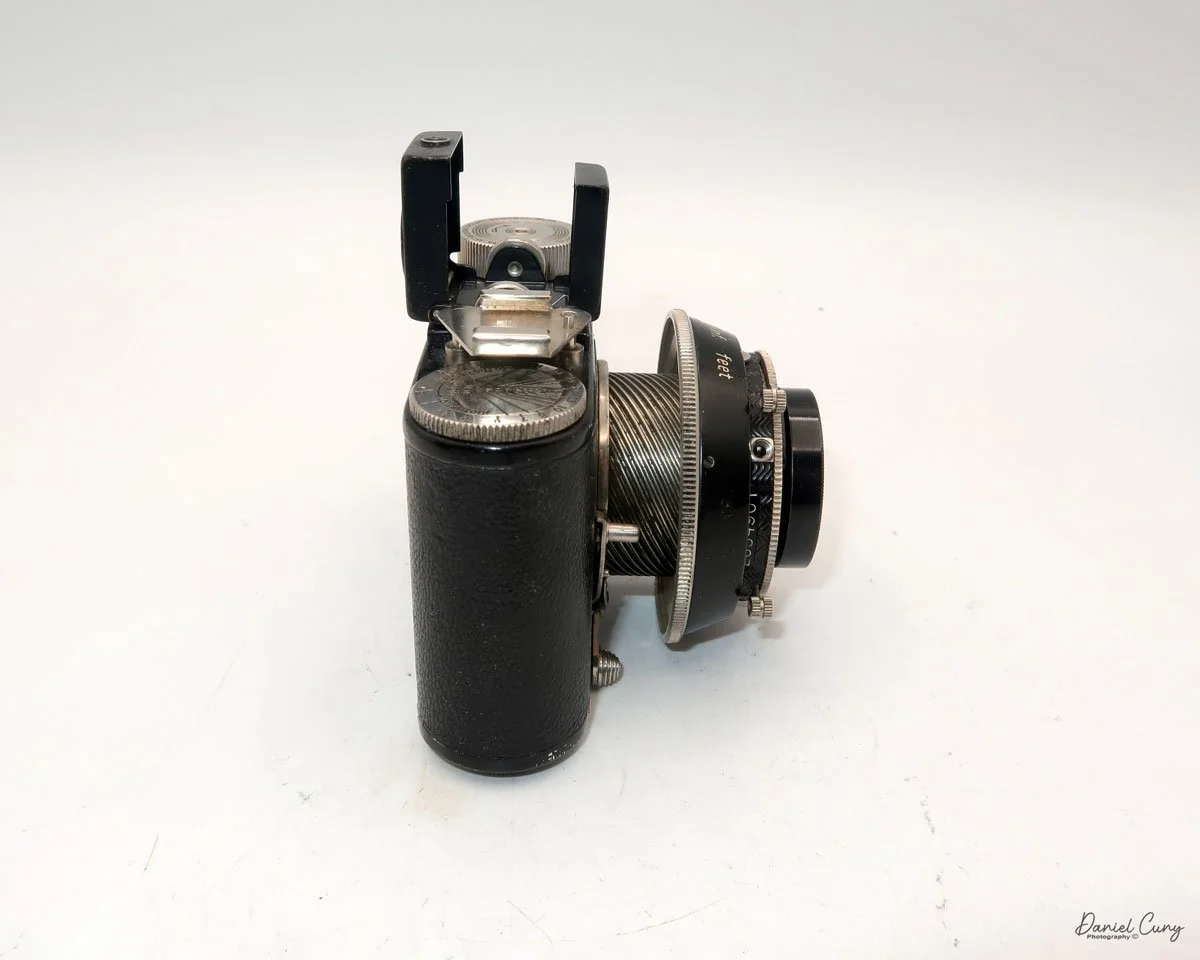
My Kolibri camera is 4.5" tall without the viewfinder erected and 5.5" with it erected, by 3" wide and 2" deep without the lens in the taking position and 2.75" with the lens popped out and in the taking position. My camera weighs just over 1 lbs at 1 lbs .6oz. With the viewfinder down and the lens retracted, it's a very compact and sturdy camera that takes 16, 3x4cm images on 127-size film. The Zeiss Kolibri (523/18) has a couple of different lens and shutter combinations. The one I used to take the photos has a Novar Anastigmat 5cm F4.5 lens in a TELMA shutter. The other camera I received has a Carl Zeiss Jena Tessar 5cm F3.5 lens in a Compur shutter. A third model has a Zeiss Biotar 5cm F2 lens. All of the different lens/shutter combinations are in a chrome polished tube that pulls out to take the photos and to retract, grab the "wings" on either side of the lens, turn the lens slightly counter-clockwise, and press the lens back into the camera body. You also grab the "wings" to pull the lens out to take photos.

The Telma shutter has only three shutter speeds, 1/100, 1/50, and 1/25, along with "B" and "T" for timed exposures. The Compur shutter is more extensive, with shutter speeds starting at 1/300, 1/100, 1/50, etc., to 1 sec along with "B" & "T." The shutter release is on the left-hand side with the Telma shutter, and you do not need to cock the shutter; just press the shutter release and the shutter fires. On the Compur shutter, the cocking mechanism is on top of the shutter, and the shutter release is below, so there is a little difference between the two cameras in the shutter and shutter release function.

Telma shutter

On both cameras, the aperture settings are under the lens with a little slide that points to the aperture setting. Focus on both cameras is done by a slider knob on top of the camera, with the closest focus at 1 meter. On the bottom of the ring that has the "wings" on it is a hole that the "cane" or strut fits into to keep the camera upright, with either the lens out or retracted. Using the "cane" is excellent for timed exposures, connecting a cable release to take a timed exposure. There is a cable release socket on both cameras incorporated into the shutter.

The aperture ring is under the lens. The shutter release is on the left, and the self-timer is on the right with a red dot.

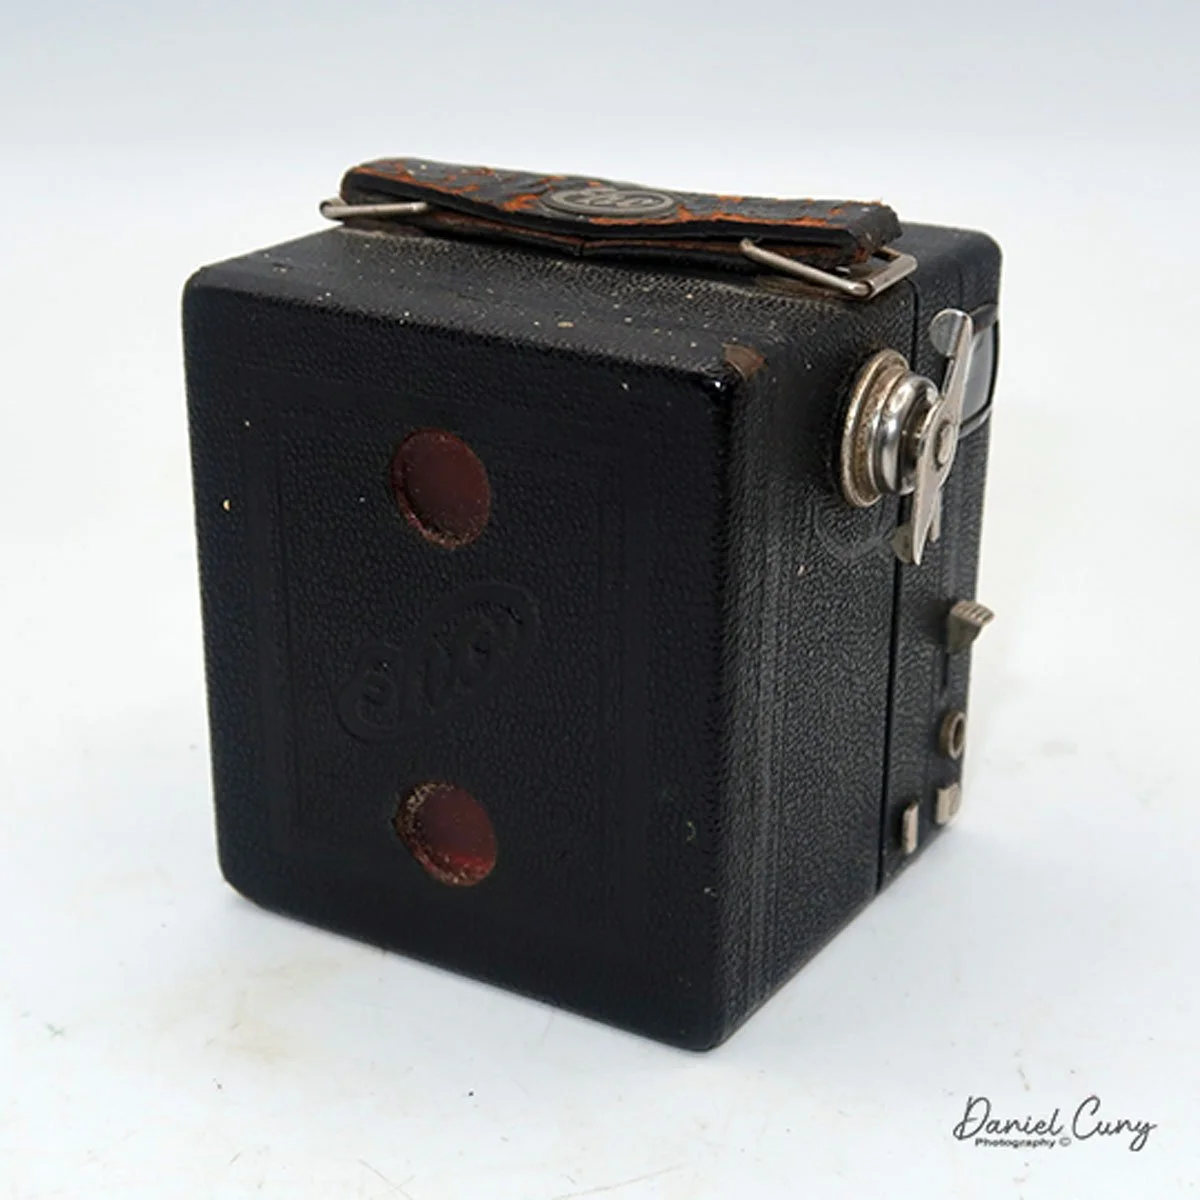
To load the film, you slide the knurled knob on the top of the camera in the direction of the arrow to open the back to load and unload the film. Once you open the back, you take the empty spool and put it on the left end, which has the winding knob, then put the fresh roll of film into the film chamber, pull the leader to the empty spool, put the leader into the slot on the reel and turn the winding knob until you see "start" on the film's paper backing. At this point, close the back of the camera and wind until you see the number 1 in the lower of the two windows. Now that you're ready to take your first photo, lift up the front and rear viewfinders so you can frame the image and take your photo.

 Since the camera has two red windows on the camera's back, the spacing between the top and bottom windows is the same as the negative size. You would take the photo once you wind the film so the number 1 appears on the bottom window. Once the photo is taken, wind until you see the number 1 in the top window, then take the picture. After you take the photo with the number 1 on the top window, roll until you see the number 2 on the bottom window and do this through the number 8.

Here's where I had some issues, and it's something I kept in mind when I was done taking the photos. In my small and simple mind, as I was holding the camera in a vertical position, it was in my mind that the camera would take a vertical photo. Unfortunately, that's not the case. If you're holding the camera in the vertical position, the camera is taking a horizontal image due to the orientation of the frame area in the camera. So, the photos I took that should have been horizontal were taken vertically and vice versa. I felt like an amateur when I finished taking the photos, only to realize I did it wrong.

 The viewfinder is tiny, and since I wear glasses, it's challenging to use. Its size also made it difficult to frame the photo accurately. Toward the end of the roll, I would just point the camera at the subject and "guess" on the framing, which seemed pretty good, with the exception of the vertical/horizontal format mishap.

Small viewfinder and glasses do not mix well.

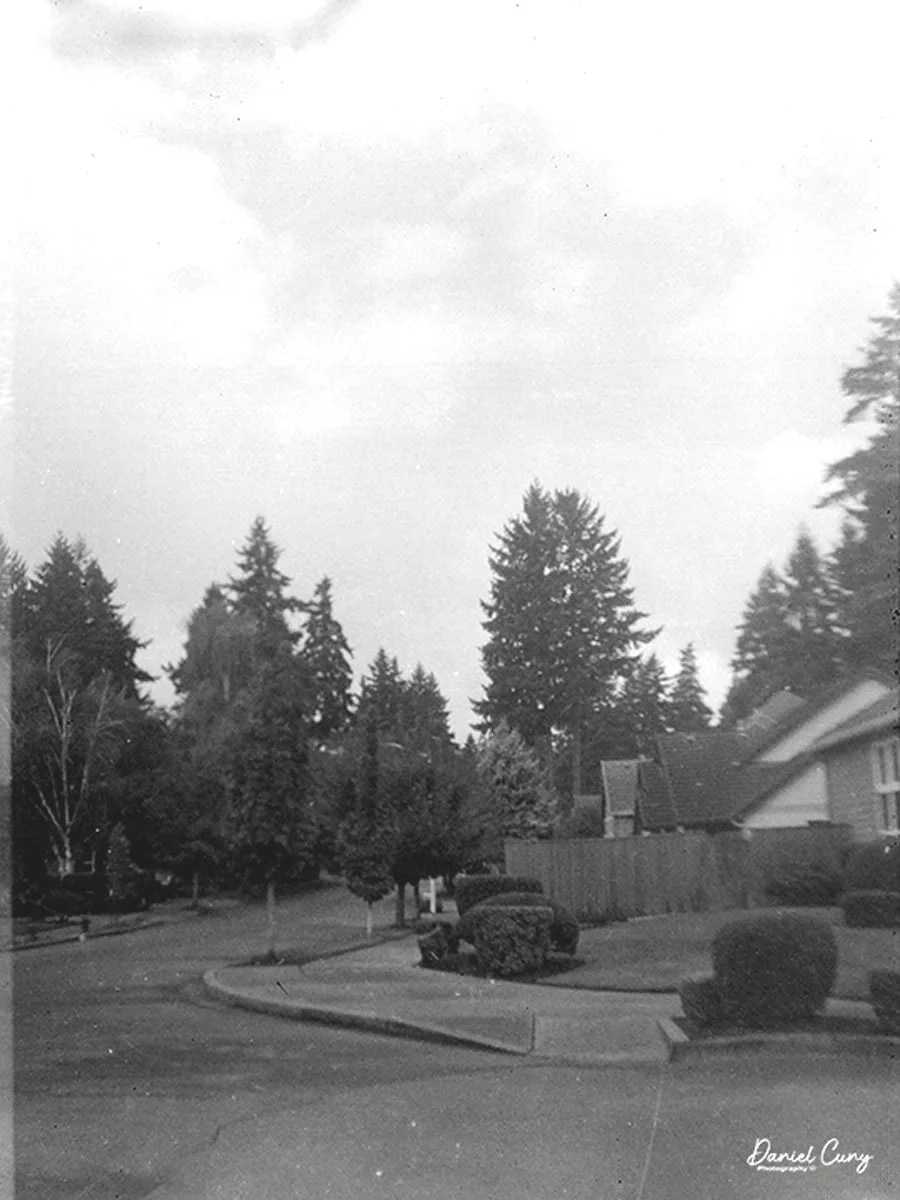
 Once the photos were taken, I unloaded the film and processed them, and they turned out nicely.

 The serial numbers for my two Kolibri cameras are only 40 pieces off. The more well-used version is S.98995, and the Kolibri with the Compur shutter is S.98955, so they were built relatively close to each other. 

 My initial belief was that the camera with the Telma shutter was an older version. I believed that it was an older model because one camera was more used than the other. Now, I realize that the shutter and lens combination would be for a more or less expensive model that the consumer would purchase. If someone wanted the less expensive Telma shutter with a slower lens or the more expensive faster lens and Compur shutter, that made more sense to me.

My Results:

Here are some of the images taken with my more well-used Kolibri camera. I used it because the other camera didn't have the aperture settings, and I would have had to guess at the aperture. That would have been okay, and I'm a pretty good judge of that, as I could have marked on the camera what I thought the aperture setting should be.

Conclusion:

Except for my confusion about the vertical/horizontal format and the camera orientation, it's a fun camera. It is very well made, the photos are nice and sharp, and the camera fits nicely in my pocket when the lens is retracted and the viewfinder is down. As it is compact and sturdy, I can use it more often.

I look forward to shooting more photos with this in the future, but I must remember that when the camera is vertical, it's taking a horizontal photo.

 Thank you for taking a few minutes from your day to read about this gem of a camera. I hope to see you next week when I review another camera from my collection.

 Until next week, please be safe.
 

Purma Special Camera

As I was cleaning out a box of cameras, looking for the next camera to shoot with and use for my next camera blog, I grabbed a brown case that I had put in the box a long time ago. As I turned the case around, I saw the name Purma on the front of the case and thought to myself, This will be my next camera to discuss or talk about in my blog.

My Purma Special Camera

 The Purma Special is a camera I purchased well over 20 years ago. I remember it was early in my collecting and when I was buying and selling on eBay. I started on eBay as a seller and buyer back in early 1997. When you engaged with eBay then, you didn't have your name as an ID, but they assigned you a number you'd use to log in and for sales purposes. I remember my number was 1032 before changing it to my current name, "Clix."

 At that time on eBay, there were no photos on the site, and it was similar to a message board where people would describe what they had for sale, what you were asking for, etc., Very similar to what Craigslist was before photos. Having McKeown's guide for cameras and thumbing through it daily, I was intrigued by cameras from other countries, and the Purma Special was one that I desired at the time due to its odd diamond shape and the fact that it was made in England.

Because the Purma Special camera is, in my opinion, a camera oddity due to the design of the camera, the shutter used, and the somewhat popularity of the camera, it's been reviewed and discussed by several of my camera blog friends like Peggy of Go Camera Go and Mike Eckman. Still, I wanted to make sure people were aware of my odd and unusual take on cameras from yesteryear, so this is more like Peggy's post about my thoughts on using the camera and the overall take on what a camera gem this is.

My Purma Special with Case

The Company:

Purma Cameras Ltd. was founded in 1935 in London. The name Purma is a combination of the two owners of the company: Tom Purvis, a well-known artist and lithographer who worked for LNER (London and North East Railway) from 1923 to 43, producing beautiful and popular advertising posters. 

Diagram on how the shutter system works on Purma Camera

 The other partner in the company was inventor Alfred Croger Mayo, who, along with Joseph Terrett, invented the unusual and very simple gravity-controlled focal plane shutter used in the Purma cameras. I believe this is Purma's real claim to fame and set them apart from other camera companies of the time. They also had financial backing from David Brock of Brock Fireworks, a company that started in 1698 and is the oldest British fireworks manufacturer.

Purma introduced its first camera in 1936, the Purma Speed. It was an enameled metal and chrome camera with a pop-up viewfinder. The Purma Speed camera had six shutter speeds and looked like a more traditional rounded-corner, rectangular camera.

Ad for the Purma Special

 With the introduction of the Purma Special camera in 1937, the company turned to an all Bakelite camera, along with a flatted diamond shape design with an art deco appeal to the camera due to the thin ridges built into the camera, which extend all around the camera. The Purma Special only had three shutter speeds but has a classic sleek design, and one that was the camera that set them apart design-wise from other cameras. The unique diamond shape and the use of Bakelite, a revolutionary material at the time, gave the Purma Special a distinct look and feel, setting it apart from its contemporaries. 

 The Purma Special was imported to many different countries, including the United States. According to an ad I found from 1939, the camera sold in the US for $14.95. It's my understanding that this was their most popular camera, although I cannot find sales records to prove these claims, as it's just from what I see for sale and the quantity of Purma Special cameras available today. The Purma Special was a popular choice among amateur photographers and was widely available in the market, contributing to its popularity and the large number of units still in circulation today.

There are a couple of unique features of the Purma camera. One is the 'pop out' lens, which is concealed by a thread in the lens cap, a clever design that protects the lens when not in use. When you screw the lens cap back onto the camera, it also locks the shutter. Unfortunately, these lens caps get lost, and many of the used Purma cameras are sold without the lens cap. The second is the use of plastics in the viewfinder. Purma was the first to do this, a pioneering move that made the camera lighter and more durable. These innovative features were ahead of their time and contributed to the Purma Special's appeal among photographers.

Purma also introduced the Purma Plus in 1951, which had an aluminum body and sold for £12.00 at the time. Production for the Purma Plus lasted until 1959. I cannot find why the company stopped producing its camera, so I assume it closed around 1960.


The Camera:

My Purma Special camera measures 6 3/4" wide by 2 3/4" tall by 2 1/4" deep with the lens cap on the camera, and the camera weighs 12 oz without the fitted leather case.  The camera has a Beck 2 1/4"  F6.3  lens with a fixed focus from 12' to infinity. Purma did sell a series of close-up and portrait attachment lenses that allowed for focus from 3.5 to 5' but were sold separately. These are items I do not have.

The Purma cameras use 127-size roll film and produce 16-1 1/4" square images on the negative. The Purma special doesn't have a locking mechanism to keep the back attached to the front of the camera. They are held together just by friction, but the back of the camera fits tightly to the front. The friction held back doesn't prevent it from accidentally opening if something were to happen. To open the back of the camera, there is a tiny thumb notch where you put your fingernail in and pull the back from the front.

The camera utilizes two red windows on the back of the camera, so you get 16 frames on the film; the photographer winds the film to the #1 exposure on the left window, then after taking the photo, winds the film so the #1 exposure shows up on the right side window utilizing the same frame number for both the left and right red window on the back of the camera. Once you shoot frame #1 on the right red window, the photographer winds to frame #2 on the left side window, and so on.

The Purma Special has a curved film track that holds the film flat against the shutter with a two-sided pressure plate attached to the camera's back door. The shutter system only has three shutter speeds. The shutter uses a series of different size slits in the metal curtain along with a brass weight within the camera to determine what shutter speed is used. The camera also depends on how you hold it, which would set the shutter speeds used. Remember, the negative is square, so having the camera in either vertical position doesn't change the image in the frame. It will only change the orientation of how the image is captured on the negative.

When you hold the camera in the usual horizontal position, the shutter would shoot, and the medium shutter speed would be 1/150th second. Turning the camera so the advance lever was at the bottom, or the "slow" speed, the shutter, the camera shutter is set to 1/25th sec. When you turn the camera in the other direction, with the film advance lever at the top, which puts the shutter in the "fast" position, the shutter speed is set to 1/450 sec.

Top view of Purma Special camera with circular wheel to cock the shutter, and shutter release

To take a photo, the photographer needs to cock the shutter. To do this, you turn the circular wheel on the top of the camera in the direction of the arrow. There is a small piece of bakelite sticking out to turn the wheel fairly easily. Once you turn the wheel in the counterclockwise position, the wheel will stop, and you'll hear a click which means the shutter is cocked and ready to make the exposure. You can do this with the lens cap on, but the shutter won't release until the lens cap is off. 

 The shutter release is on the top and left side of the camera. Simply press the shutter release to trip the shutter. BUT REMEMBER. Turn the camera as needed to change the shutter speed, especially since the camera has a fixed aperture lens. Wind the film to the next frame, then repeat until. It was odd for me to use this camera as I'm not used to having the shutter release on the camera's left side.

For those interested, here’s the original instruction manual for the Purma Special Camera

My Results:

I did have some outdated Film for Classics 127 film in my drawer, so I loaded up the camera and went to a local waterfall to take photos on an overcast Sunday afternoon. Go figure a cloudy day when living near Portland, Oregon. That will be my life for the next four months or so. The results were OK, but I was mildly disappointed when I looked at what Peggy and Mike did with the camera.

 It may also have been the fact that the film I processed was processed in a different tank than I'm used to using for 127 film, and I messed up putting it on the developing reel, so that was my fault. I have noticed whenever I use the Film From Classics film, the imprint from the paper backing seems to bleed onto the negatives, and I'm unsure if that's due to the film's age and being out of date by a year or two or something else.

 Here's what I salvaged from the messed-up developing roll I put through the Purma Special camera. It's nowhere near as lovely as Peggy or Mike's photos, but overall, it yielded decent results.

My Conclusion:

It was a fun camera to shoot with. Turn the camera to set the speed, point at your subject, and shoot the camera (with your left hand). Wash, rinse, and repeat. I hoped for better results but tried a different reel to process the film.

 Thank you for reading the blog post on the Purma Special camera. I'll definitely use it in the future due to its simplicity and unique shutter system.

 Until next week, please be safe.
 

PIC Camera

The PIC camera was on my list of cameras to review just before I returned to work after the two years lost years of COVID-19. Recently, when I looked up from my desk and saw the odd and unusual camera, I wanted to put a film into the camera, run it through its paces, and do a blog post on it. The main thing that caught my eye was the shape and size of the camera. You don't come across many round cameras with a straightforward design.

 I am trying to remember where the PIC camera came from, as I've owned it for five to six years. Like many of the other cameras I write about, the PIC camera was included in a group or "lot" of cameras purchased. I do remember when I received it; my first thought was that it was a "toy" camera, which I own many of. 

The more I examined the camera, the more I realized it was not a serious camera. It does not have the ability to set shutter speeds, aperture settings, or even focus at a specific distance. It's just a simple point-and-shoot camera made for quick snapshots, a camera you can keep in your pocket for when you travel on holidays or visit friends and family. 

The Company:

From what I can see online, the PIC camera is another camera with very little information regarding the manufacturer. There's conflicting information about the camera and who and when it was made. Some of the information I found states the camera was made in England sometime in the early 1950s by a company named Pressure Sealed Plastics Ltd. and distributed by Pic Distributors Limited.

 When I looked up information about Pressure Sealed Plastics Ltd., it was initially a London-based company. It states that the company existed from 1955 to 1966 when it was purchased. It was transferred from Peckham to Chesterfield in May 1970. Some online information also states that the company was not in London but in Southend on Sea. I'll leave it someplace in England.

In 1986, the organization was divided into two trading operations: Consumer Products and Industrial Products. The former was responsible for waterbeds. The latter took over the remaining operations and manufactured Rompa products, waterbeds, etc.

 From the information I found and posted above, I have no idea where the idea or manufacturing of the PIC camera came from. If you have other information on the camera, who designed it, or the company that made it, please let me know, and I'll change the information in the post.

The Camera:

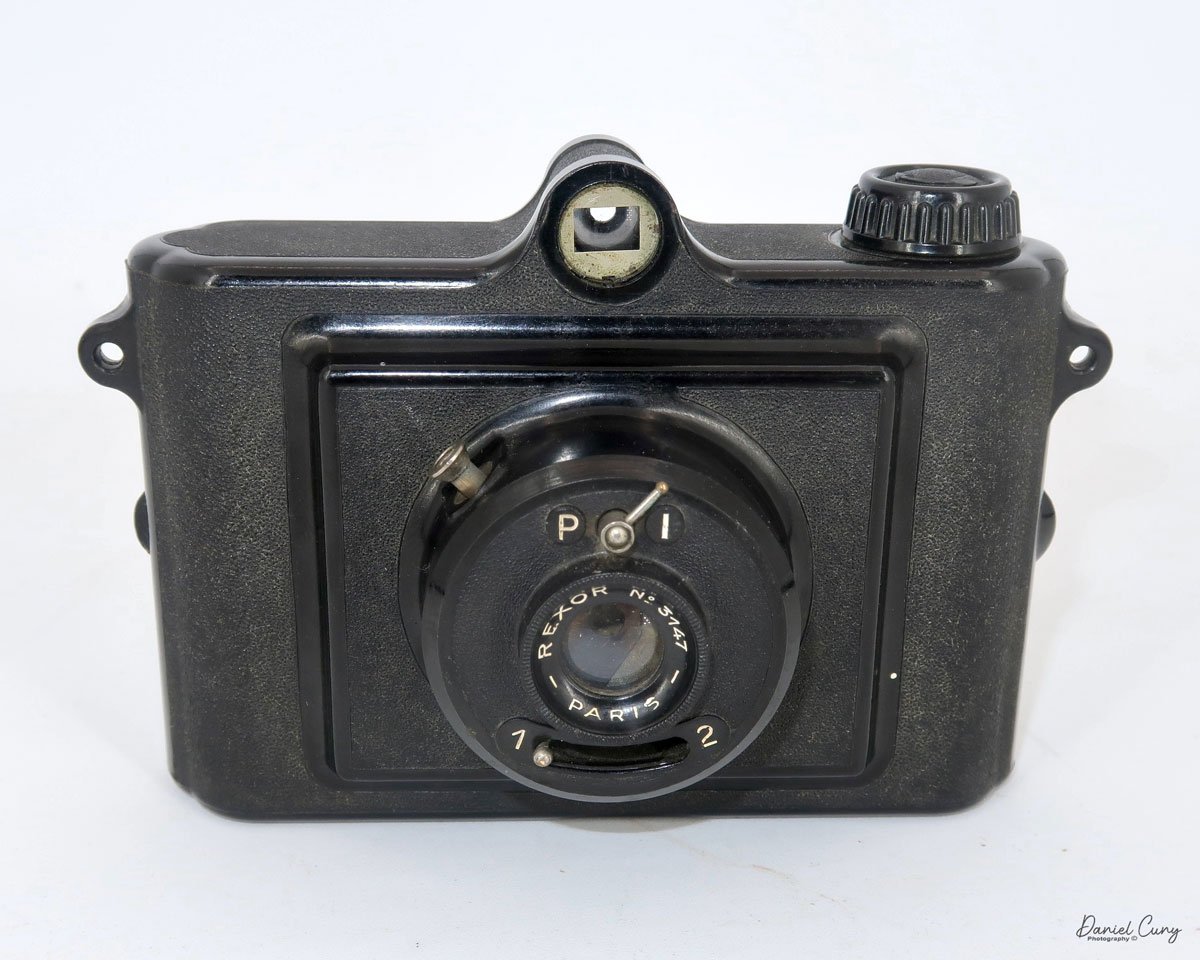
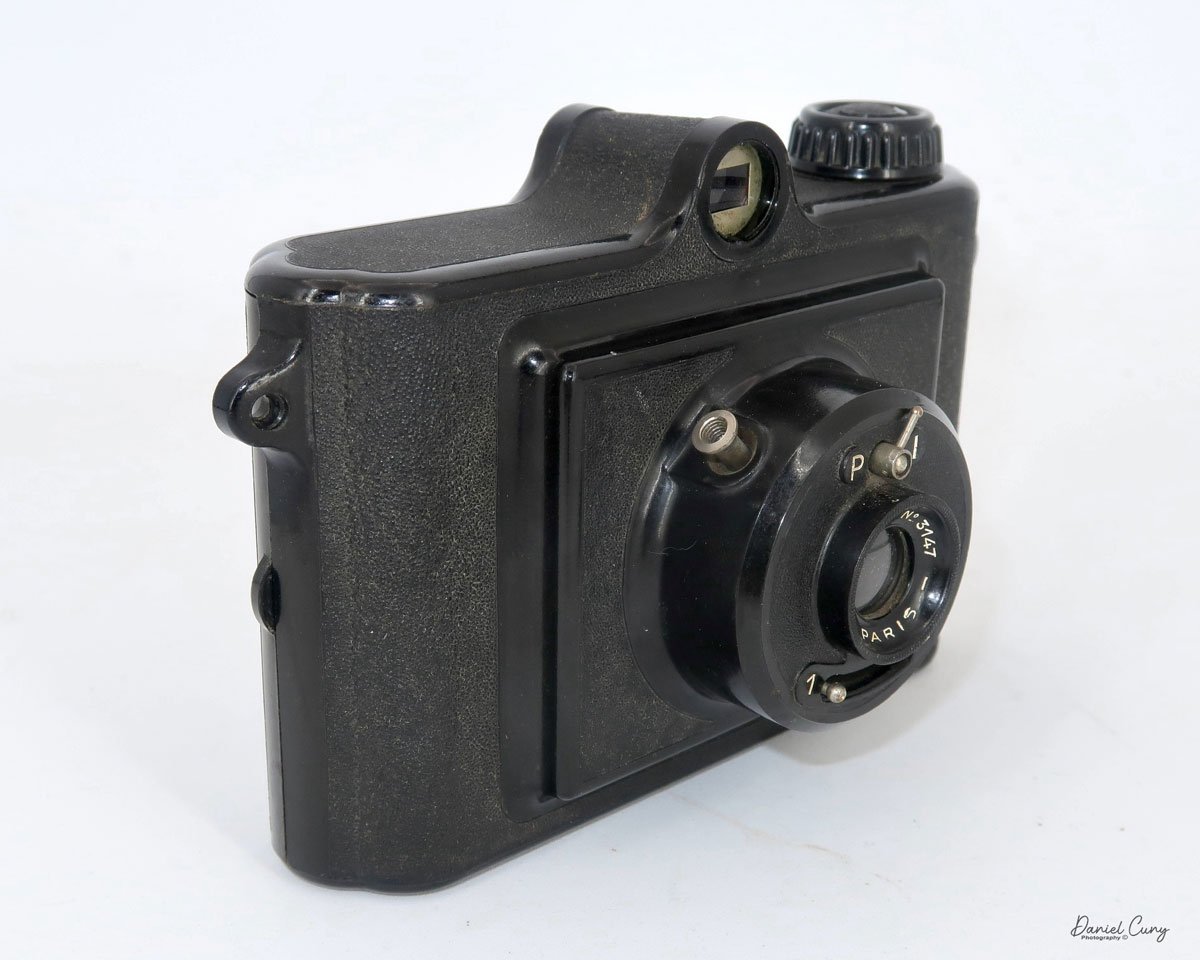
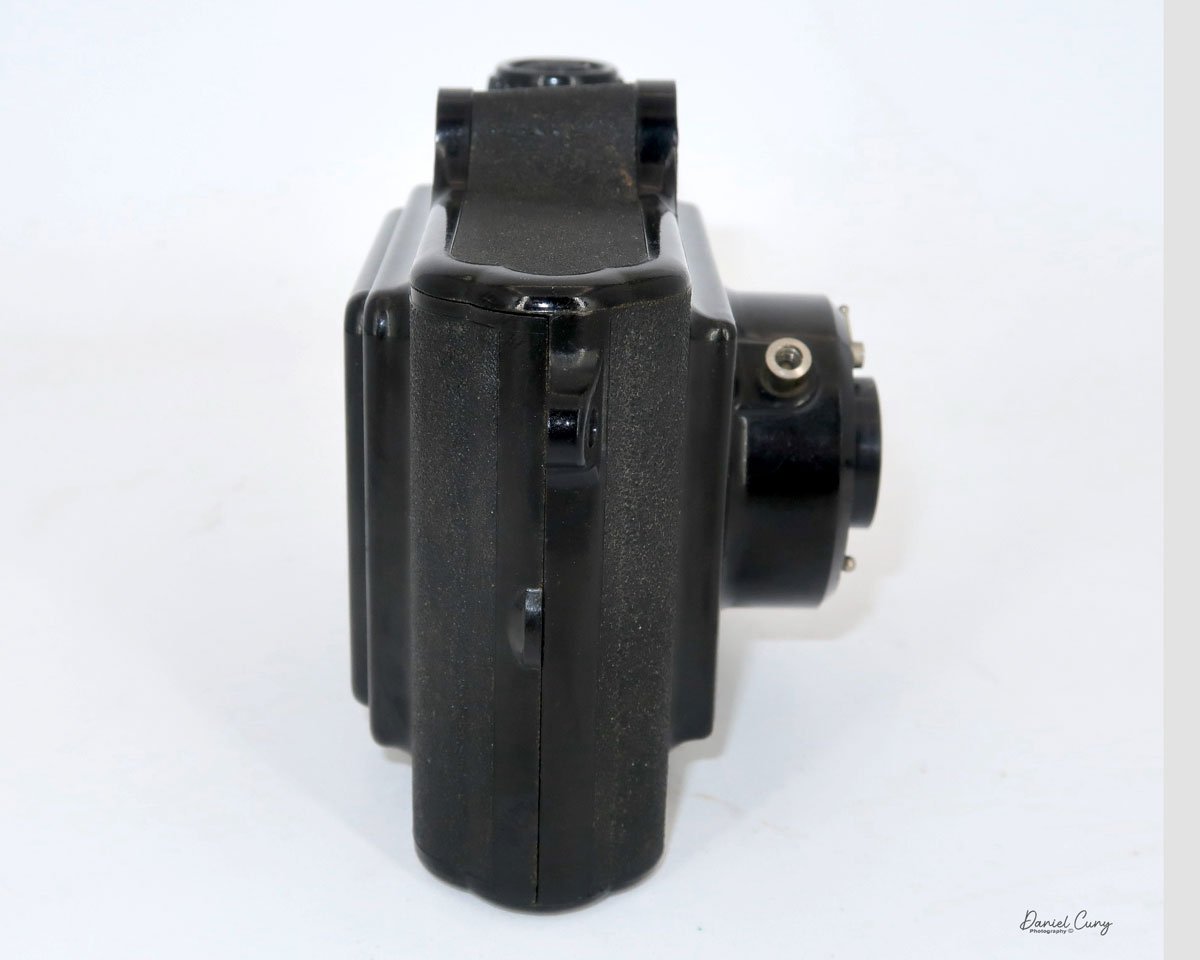
The PIC camera is a round camera that measures 3 3/4" in diameter, is 1 7/8" deep, and weighs 3.7 oz. with a fixed focus meniscus lens. The camera has a slight convex shape on the back along with the front, but halfway into the convex shape on the front, there are two tiers of flat surface where the shutter and lens are placed. The side view of the camera resembles a spaceship or UFO.

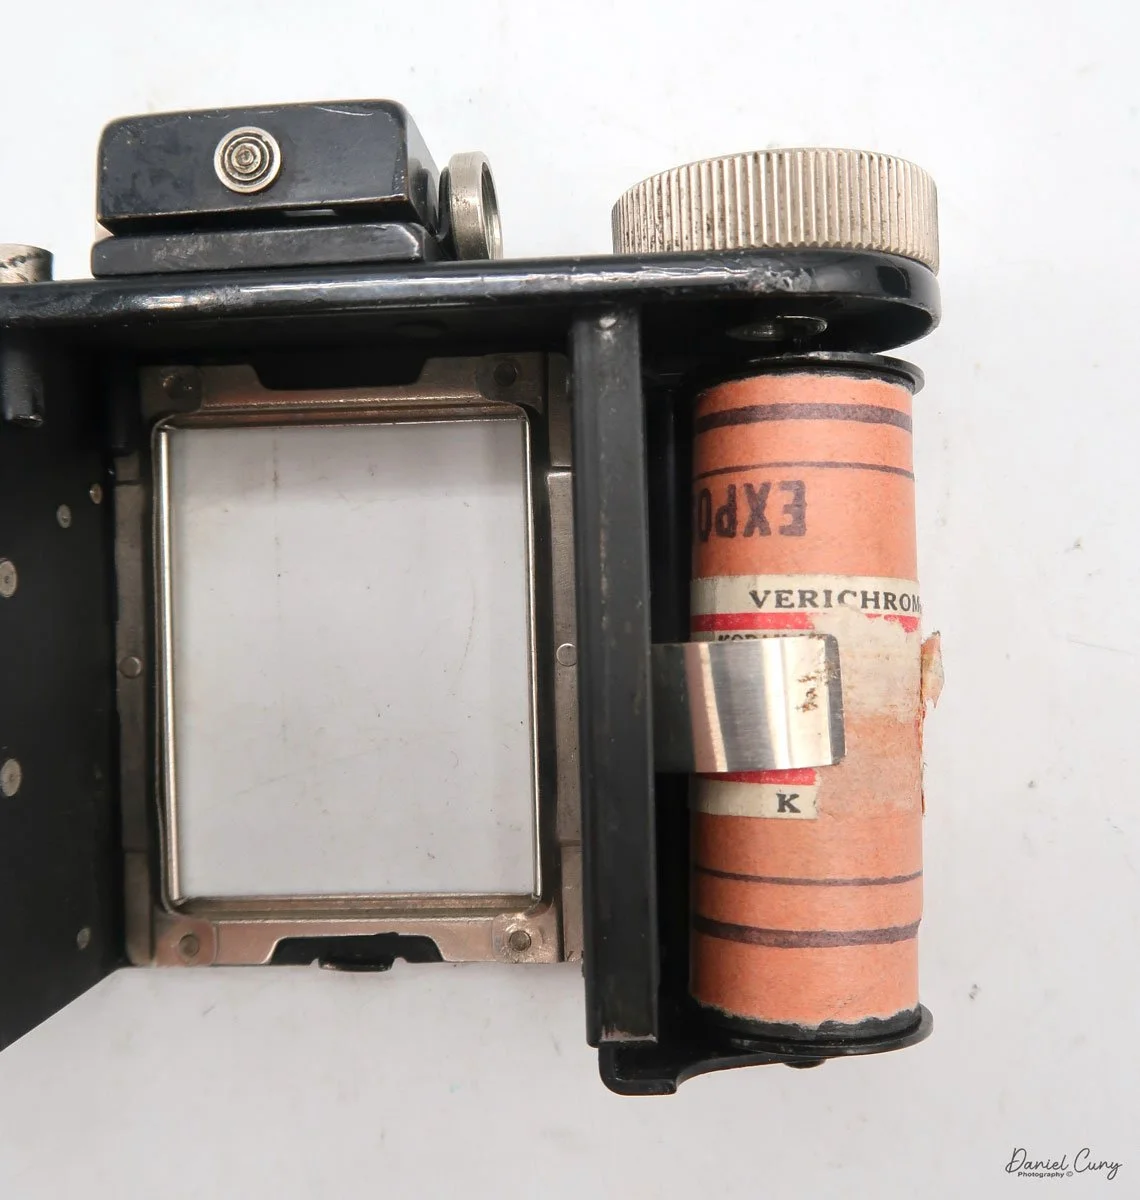
To open the camera to load the film, there is no latch or hinge to open the back of the camera, but you slide the front of the camera from the back of the camera and pull it off. My guess is this is where the "Pressure Sealed Plastic" comes from, as it's held together by a tightly fitting front that fits onto the rear of the camera.

 The rear of the camera has nothing other than two red windows that tell you the frame number you're on when advancing the film. On the outside of the back of the camera is written, Pats. Pend. Reg Dsgn No. 870468, Made in England. On the bottom right of the back of the camera is a slot where the film advance wheel fits.

In front of the camera, you load the film via an insert that fits into that area. The insert is a place to put the take-up spoon on the right and a new roll of film on the left. There's an opening for the negative, which measures 1 3/8" wide by 1 7/16", the exposed image size on the negative. A hinged wire acts as a pressure plate to keep the film flat when loaded into the camera. The insert is removable to make loading and unloading the film more accessible.

Underneath the film insert is a metal disc that covers the shutter assembly. When I received the camera, the shutter wasn't working, and I didn't notice that the metal disc covering the shutter assembly wasn't in its correct place. When I decided to write a post on this camera, I wanted to see if I could get the shutter working. This assembly is elementary and something even the non-mechanical person I am could get working again. I popped off the disc, and the shutter has two different levers corresponding to the levers on the front of the camera. My guess is that there is a shutter lever for "T" or timed exposures and another lever, "S," for snap. Generally the second shutter setting is "I" for instant, but this one is different.

 In the middle, there is a disc on the end of a piece of thin aluminum with a hinged rivet on the bottom that has the shape of an open safety pin, but the pin part is short, so it doesn't fit into the safety part. A spring holds the lens cover assembly in the closed position. Above the lens cover are your shutter levers, which also have hinged rivets, with a more extended metal arm that is bowed in the middle to fit over the lens covering disc, and on the bottom of the arm is a slight bend that allows the arm to interact with the shutter cover assembly. On the left of the shutter cover is a lever for the "T" shutter release for timed, and on the right is "S" for snap. A spring is between these two shutter assemblies to hold the arms away from the lens cover assembly.

Here's how the different shutter levers work. When you pull down the "T" lever, the shutter assembly arm slides over and pushes the lens cover away from the lens. Holding the shutter lever down keeps the lens open for the length of time you hold the lever down. When you pull the "S" lever down, it slides the shutter arm over the  "short pin" arm and grabs the shutter cover assembly. When you release the "S" arm, the shutter arm pulls the lens cover away from the lens, and due to the short pin arm, it slides off, and the lens cover closes, making a short exposure somewhere in the 1/50 sec timeframe.

The viewfinder on the PIC camera

There is a round viewfinder on the top of the camera, which doesn't correspond to the shape or the distance you get within your photos. 


The Results:

I had some expired 127 film from Film for Classics, which I purchased just for these cameras to test out. I fixed the very basic shutter, replaced the metal disc covering the shutter assembly, loaded a roll of film into the camera, walked around my house, and took photos, and here are the results.

My Conclusion:

You can tell from the photos that the lens isn't very sharp. It has a very "Lomo" look to it. I didn't get to photograph something close because I felt the plastic fixed focus lens wouldn't produce tack-sharp images, but it did take pictures. It was easy to use, but I'd take nothing on holiday unless the photos I wanted to create were similar to a Diana or Holga-style camera. Overall, the camera worked, and I discovered it's relatively rare due to the plastic construction and short camera run. People ask for around $500.00 on eBay when you can find them. I'll put it back in my collection and move on to a different camera next week.

 Please comment on your thoughts on this or other cameras I've discussed. I'd love to hear your thoughts on this camera.

 Please be safe until next week's camera post.

Super Flex Baby II Camera

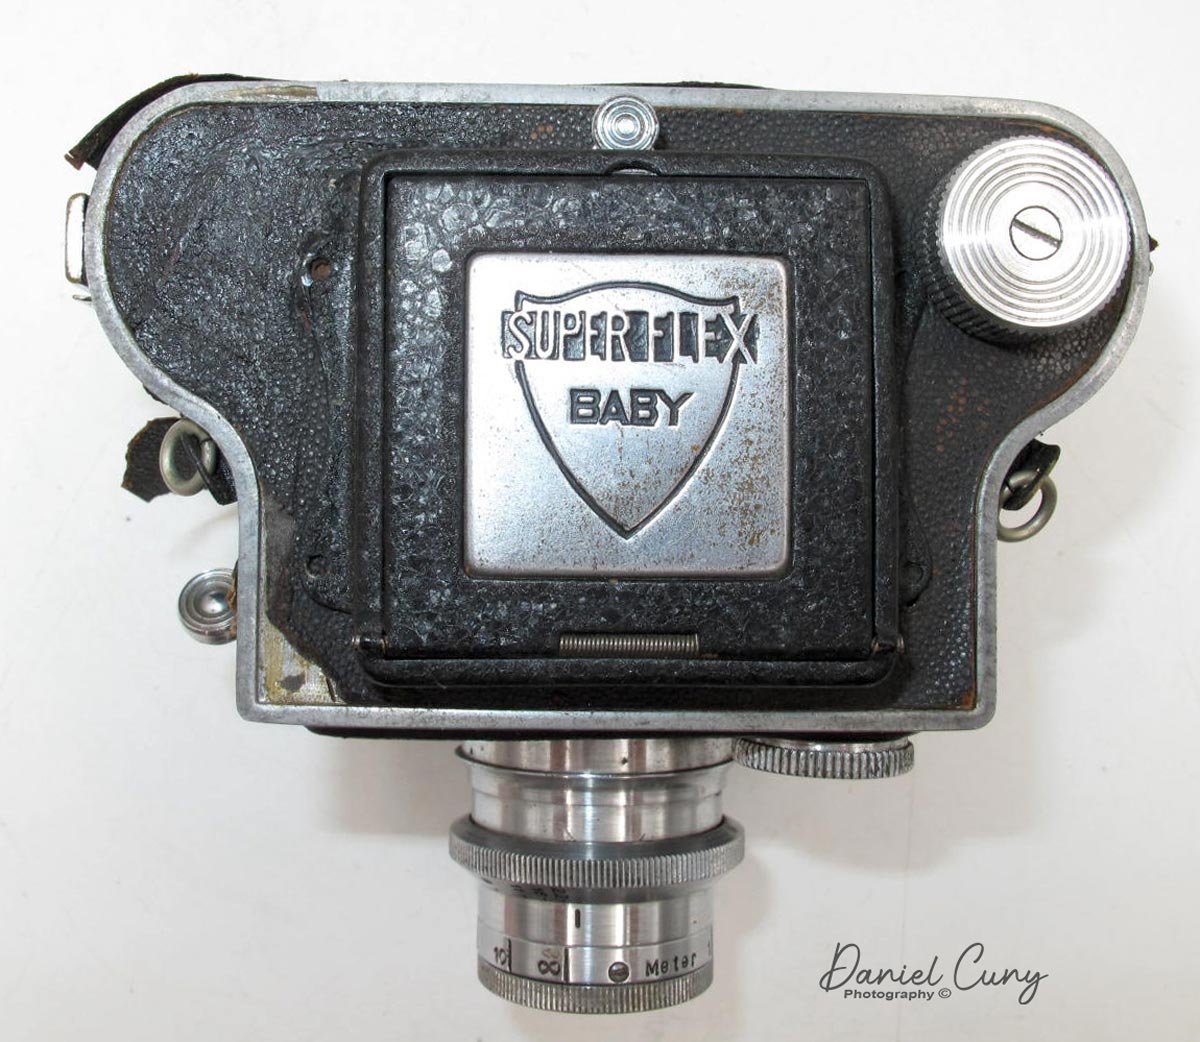
When I first got this camera, I initially thought it was from somewhere in Europe, possibly Germany or Eastern Europe, due to its design and feel placement and shutter release, which resembles the Karma-Flex camera from Germany. 

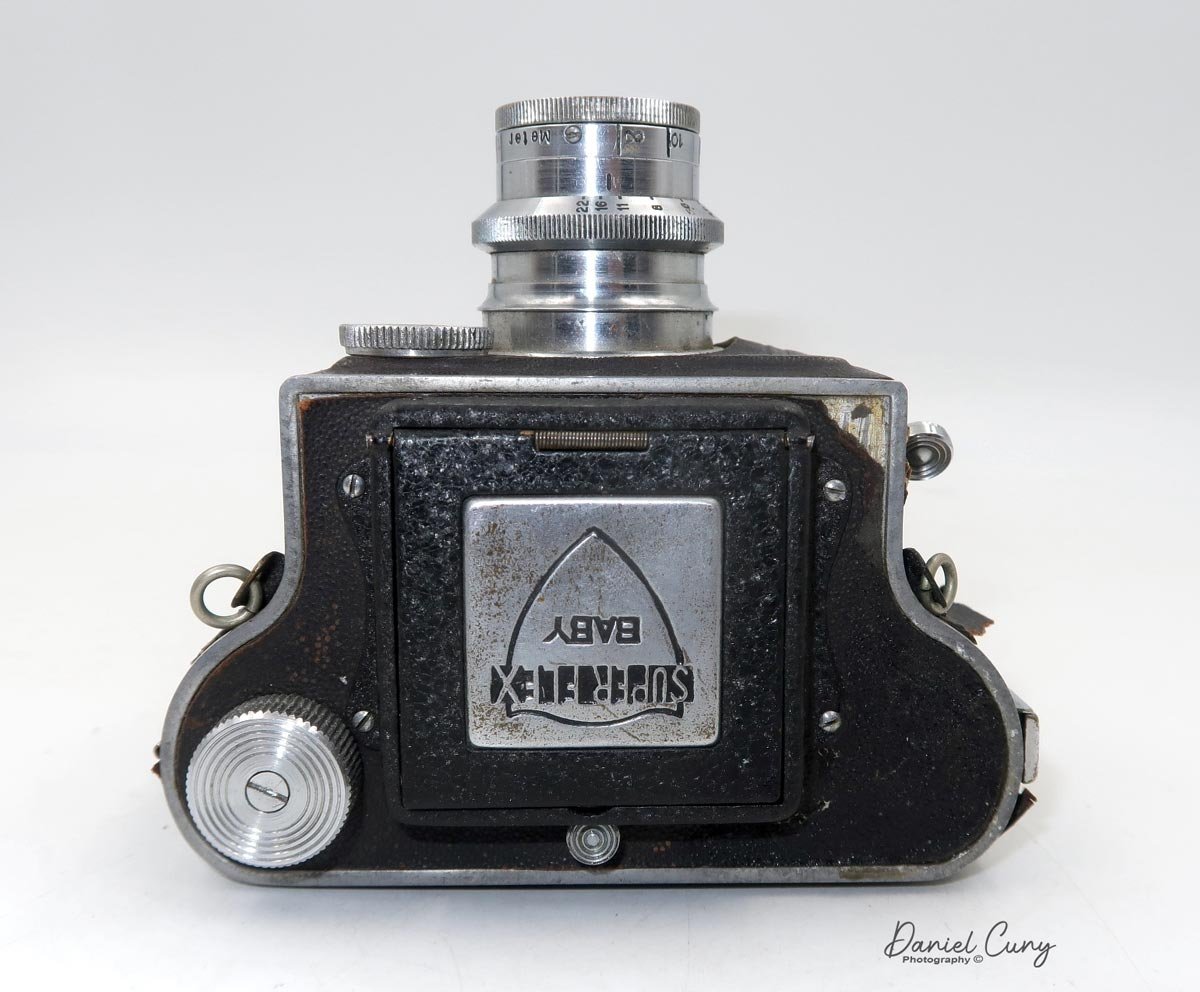
 After doing some research on the camera, I found out that it was made in Japan. It was the first medium-format single-lens reflex (SLR) camera with a leaf shutter.

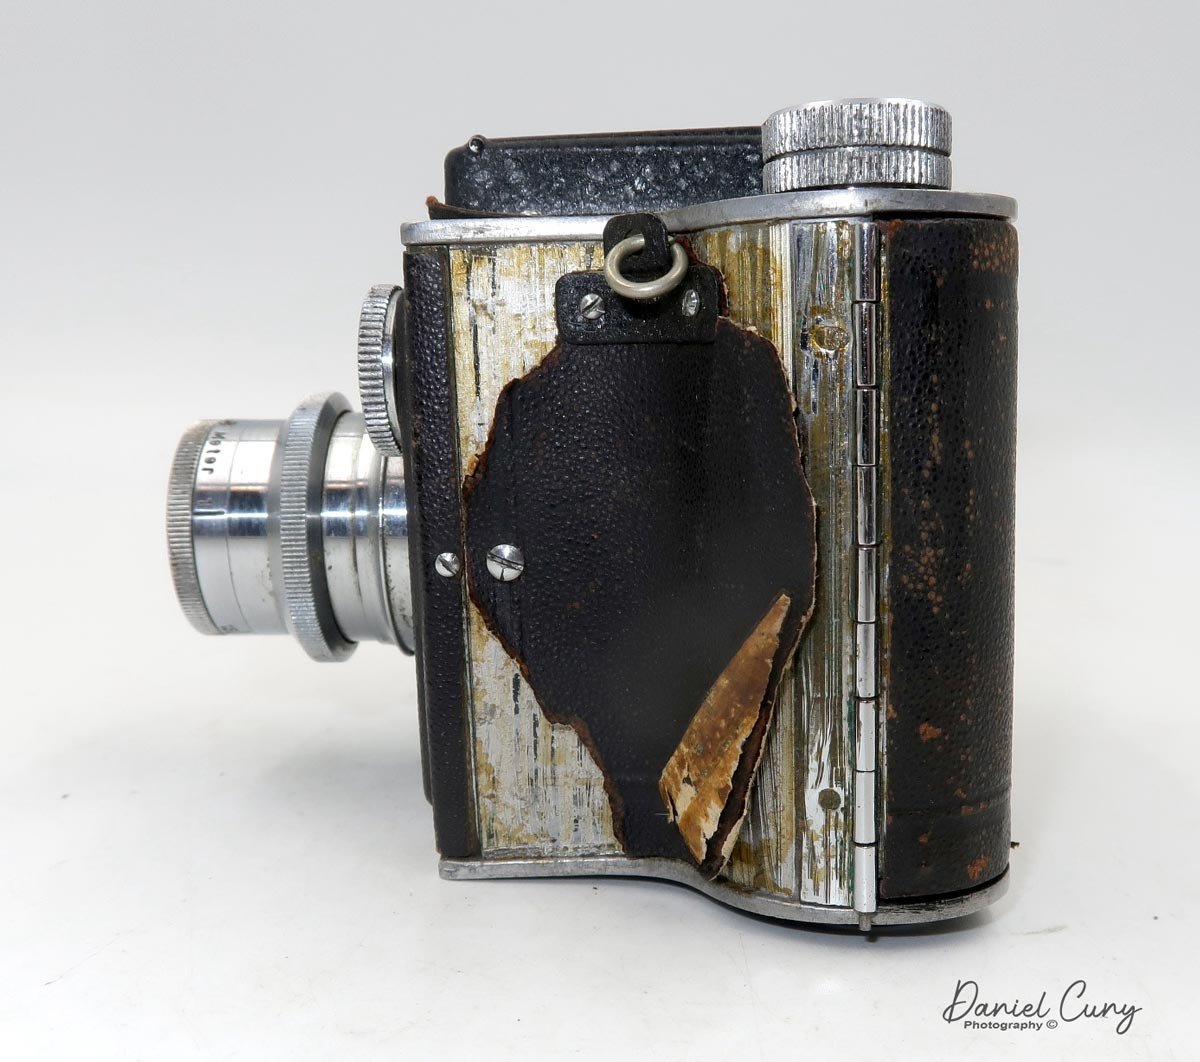
 The Super Flex II camera is odd and relatively small, too. When I took the camera out of the case, my hands are average size, but the camera seemed lost, and it was only a minute before I held it. It's not a miniature camera, but everything seems much smaller than I'm used to. The light tube or waist level finder, the lens and focus control, and even the winding knob appear to be smaller than what I'm used to. In the back of my mind, this will be a fun camera to test and write a blog post on.

History:

Umemoto Seisakusho manufactured the Super Flex camera between 1938 and 1942. It was started by Umemoto Kinzaburō, who started a small manufacturing plant in Yokokawa in 1931. In 1932, he was asked to open a new camera manufacturing plant in Toyko, which was completed in 1935. Their first cameras were the Super Makinet Six in 1936 and Neure Six in 1937, both 6x6 strut-folding cameras.

 As mentioned above, they took inspiration from the Karma-Flex camera in 1938. They developed the first Japanese medium-format, single-reflex camera, the Super Flex camera, built around the popular 127 film 4x4cm format camera.

In 1939, they modified the camera's design to what's known as the Super Flex Baby II. The modifications included a fully chrome shutter speed dial as opposed to the chrome and black of the original design. They also came out with a new lens with a full chrome barrel and a focal length of 70mm instead of 7cm on the original lens. They also lost the black and chrome on the viewfinder logo and went all chrome, like the shutter speed dial and lens.

Advertisement of the Super Flex Baby camera from 1942.

 During the tumultuous years of WWII, the company shifted its focus from camera manufacturing to supporting the war effort. Despite the challenges, they produced the Semi-Makinet camera, a 6x4.5 folding camera, between 1941 and 1943. The factory was tragically destroyed during the Allied bombing of Tokyo in 1945. However, the company's spirit remained unbroken. They relocated the plant to Yamagata in 1945 and rebuilt the plant in Tokyo in 1948, which was a remarkable display of resilience.

 After the war, the company briefly took the name Umemoto Kōki Seisakusho and produced the Rocky Semi in 1953. This camera didn't do well, and in 1962, it became Y.K. Umemoto Seisakusho, which still produces photo-related parts for Kenko today.

 Here is a wonderful Japanese website with a lot of insight on the company Umemoto . I used Google Translate so I hope it comes through properly.

My Camera:

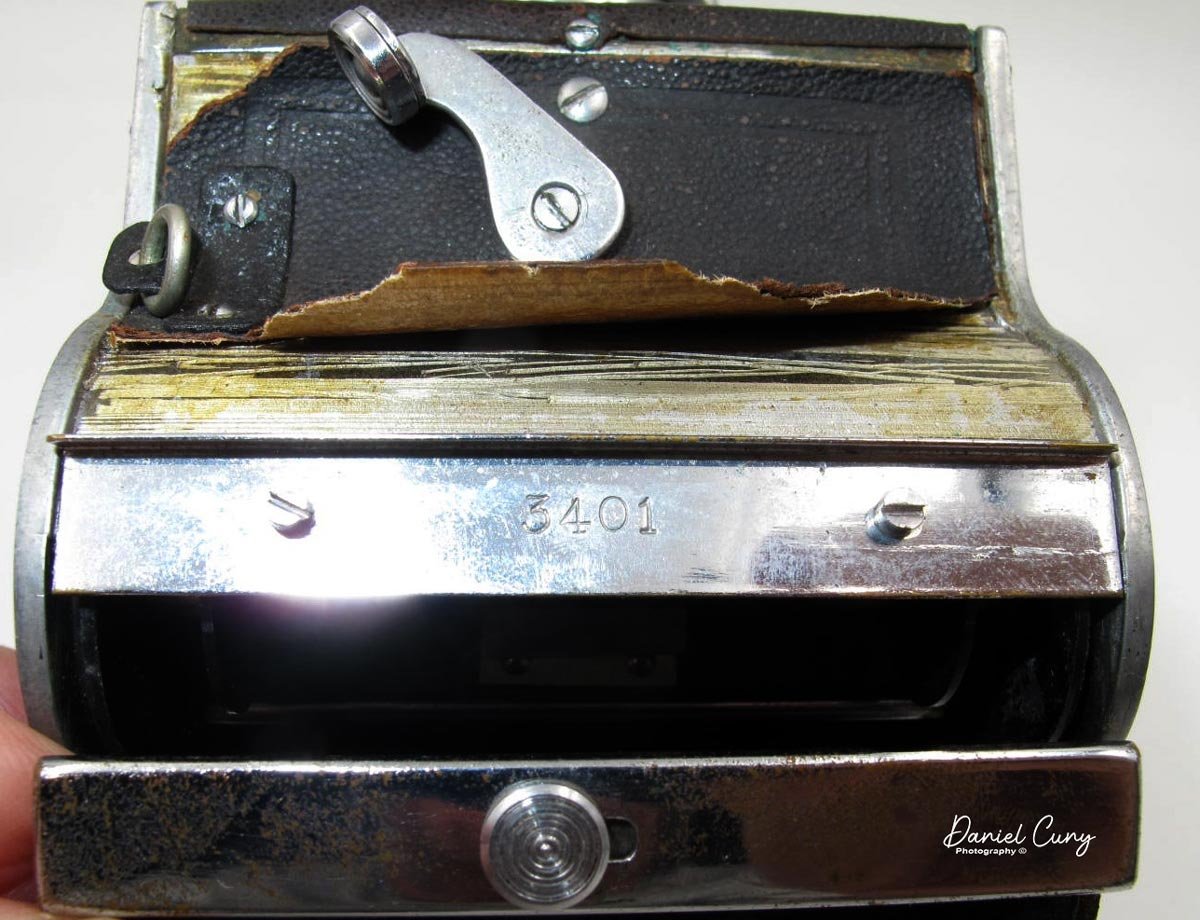
My camera, with its serial number 3401, is a fascinating blend of the original Super Flex Baby and the model II version. It features the original chrome and black viewfinder, a Model II shutter speed dial and lens, both in chrome, and a lens measured in 'mm' rather than 'cm.' This unique combination, a result of the transition period, added an element of surprise and excitement to my discovery of the camera.

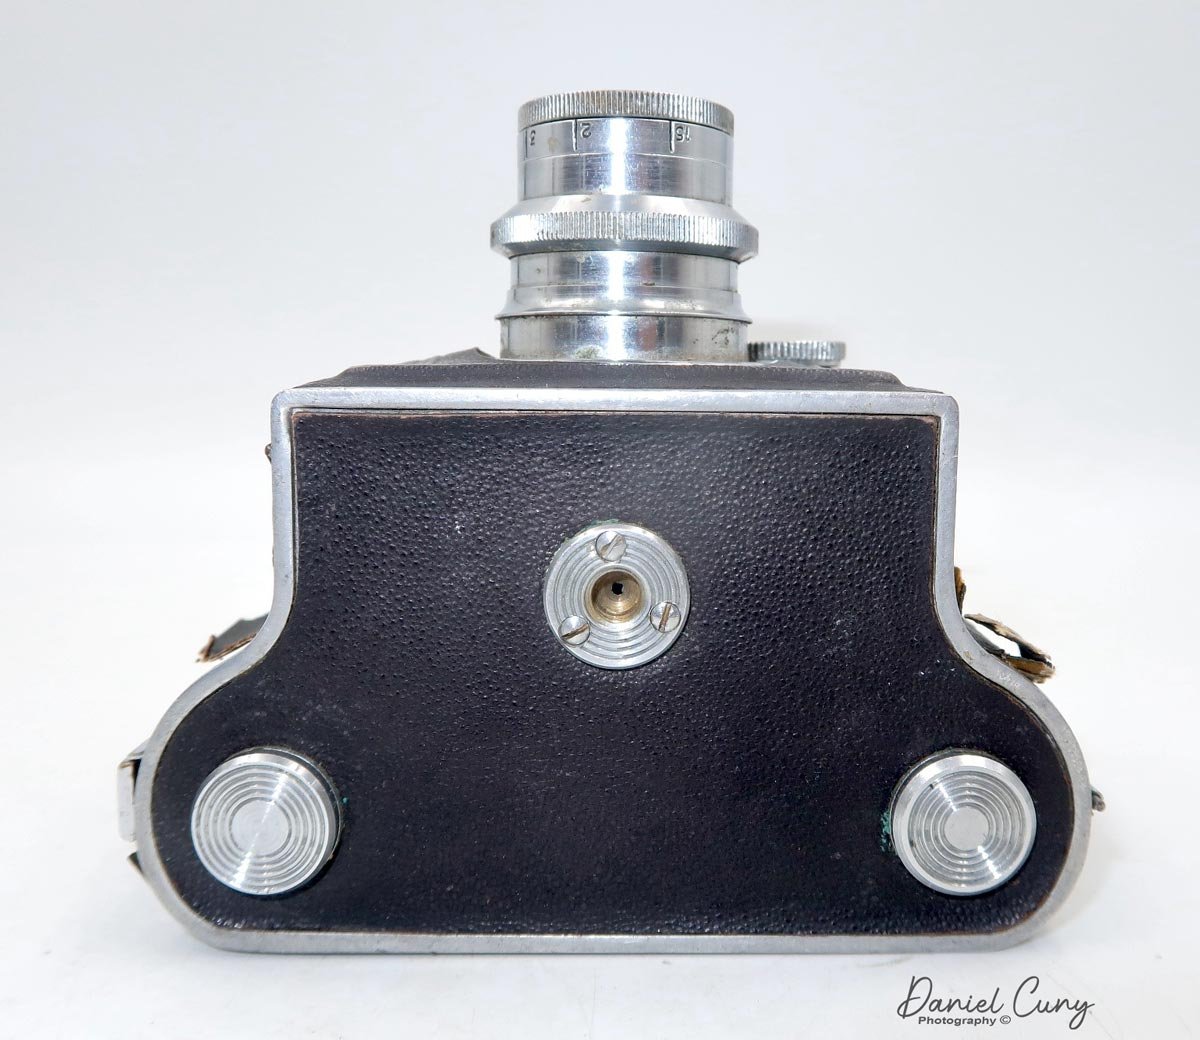
 The serial number on my camera is 3401, which you can find on the inside of the latch that holds the back of the camera. My camera measures 4" from the back to the front of the lens and 2.75" from the back to the lens mount on the camera. It measures 4.25" wide and 3.25" tall if the viewfinder is closed and 4.75" tall with the light hood opened. My camera weighs 1 lb. 3.2oz without the case.

Using the camera is pretty straightforward. There is a latch on the camera's right side, and you slide up to open the back door. You take the empty spool from the right of the camera and put it on the left side where the winding knob is. To take out the spool and put in the roll of film, you'll need to pull out the knob that holds the film into place. Once you have loaded the empty spool and film, pull the leader to the empty reel and thread the leader into the spool and wind. Once it's securely on the take-up reel, close the back.

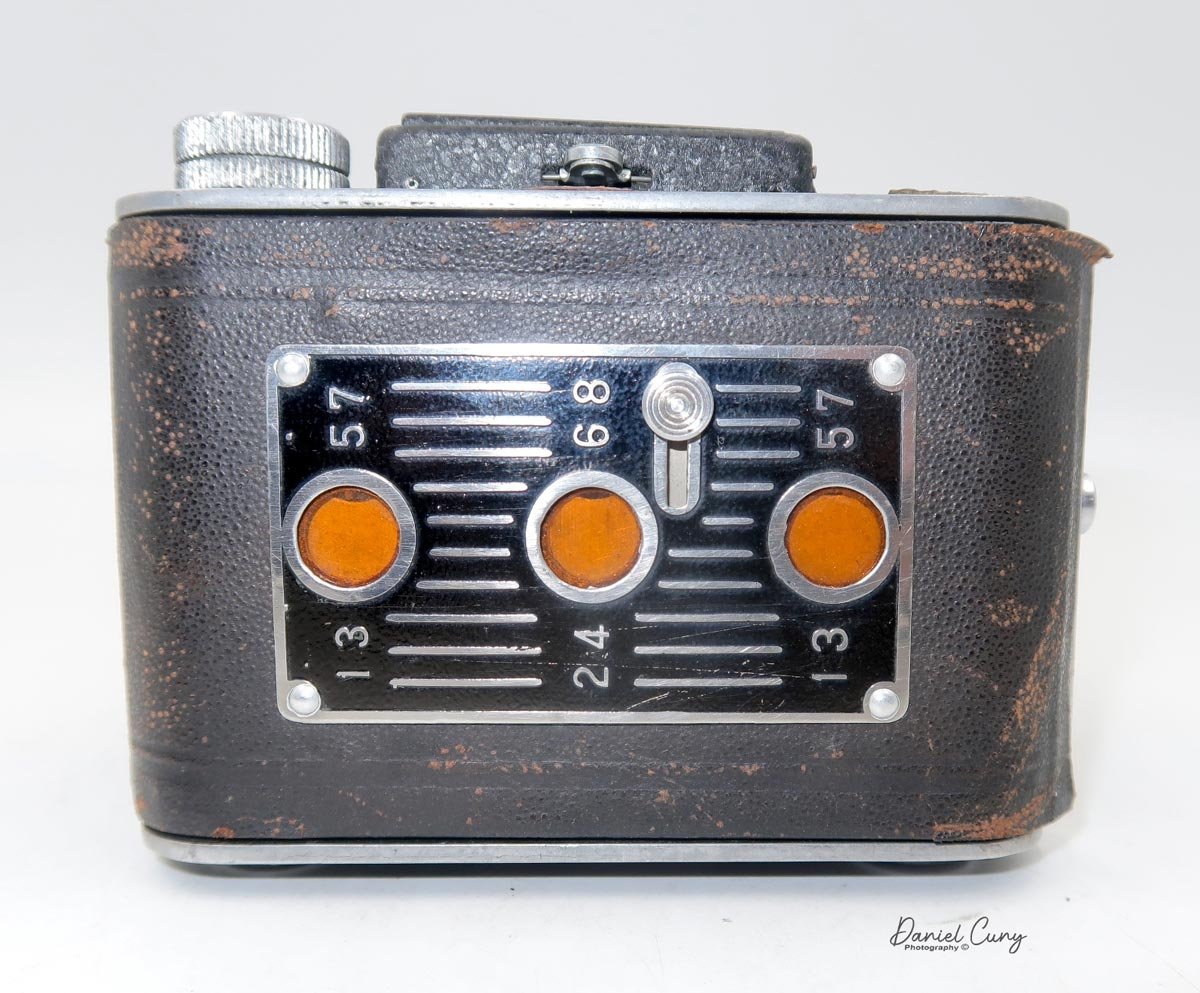
 Here's where it gets exciting, something I learned and did when I looked at the company's website. I have the link to the above in the "history" section. Here's an excerpt from the company history explaining the film numbering sequence and the camera's winding instructions.

 "There are three red windows on the back cover for taking 12 4x4 cm shots. ( It seems that 4x6 cm numbers were used because 127 film did not have numbers for 4x4 cm. ) The left and right windows only accept odd numbers, and the center window only accepts even numbers and is read as follows (ignore the ○ parts). 1st photo) 1○○ 2nd photo) ○○1 3rd photo) ○ 2○ 4th photo) 3○○ 5th photo) ○○3 6th photo) ○4○ ... 11th photo) ○○7 12th photo) ○8○ I think this operation was quite difficult."


Looking at the numbers by the window openings, the text above now makes sense.

I didn't use this method and only got eight photos on my roll.

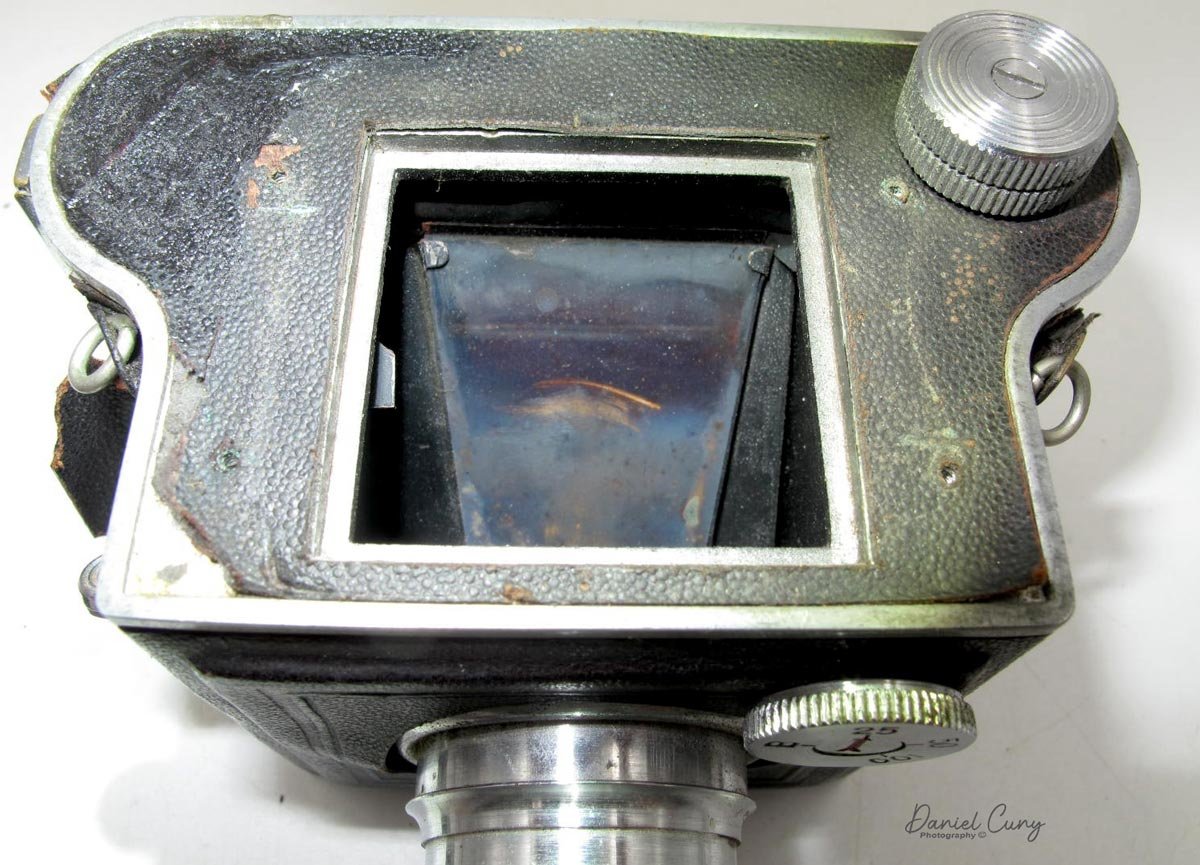
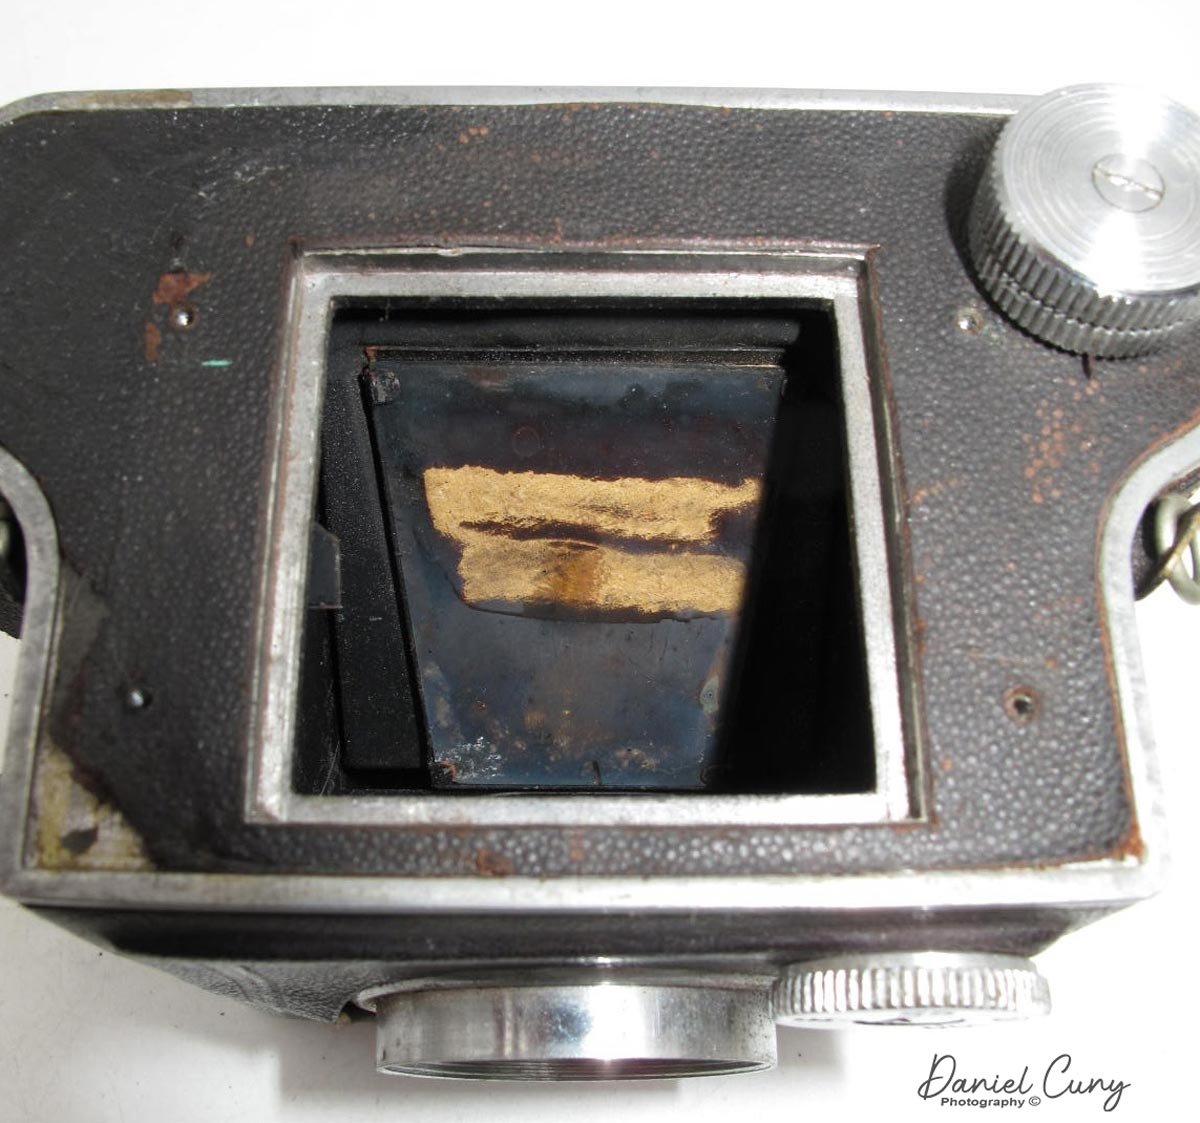
 The mirror in my camera was so bad that I couldn't use it and didn't notice before putting in the roll of film, so I was forced to use the sports finder to frame the photos I took. It worked out OK, so I wasn't too upset.

 I used my trusty light meter to get the needed exposures. I also needed to find a roll of 100 ISO film, as anything faster would have run into issues since the fastest shutter speed on the camera is 1/100, and the lens stopped down to f22. Luckily, I noticed that the lens focusing was in meters instead of feet, which I'm used to with most cameras I use. I needed to keep that in mind when composing my photos.


The camera case I have is in moderately good condition. The strap is intact, and it covers the camera well. The only thing missing is the snap that holds the front and back together but stays closed and protects the camera well.

 The film was used up quickly; now it was time to process it. 


Results:

The film I had was some pretty old and out-of-date 127 film, so I had yet to learn what I would get. It was not as good as I anticipated after I pulled the film from the processing tank. While I'll call the "art" prints, the negatives were very mottled, and I'm unsure what caused it, but the images are somewhat sharp.

 Here are some of the results from the camera.

Conclusion:

The camera was interesting, but the mirror and the focusing, or lack thereof, could have sat better with me. I decided to remove the finder and clean up the mirror to bring the camera back to life and make it more usable.

 Thank you for taking a few minutes to look over this camera blog. I'll have another exciting camera for next week's post, so please be safe until then.

Camera Update:

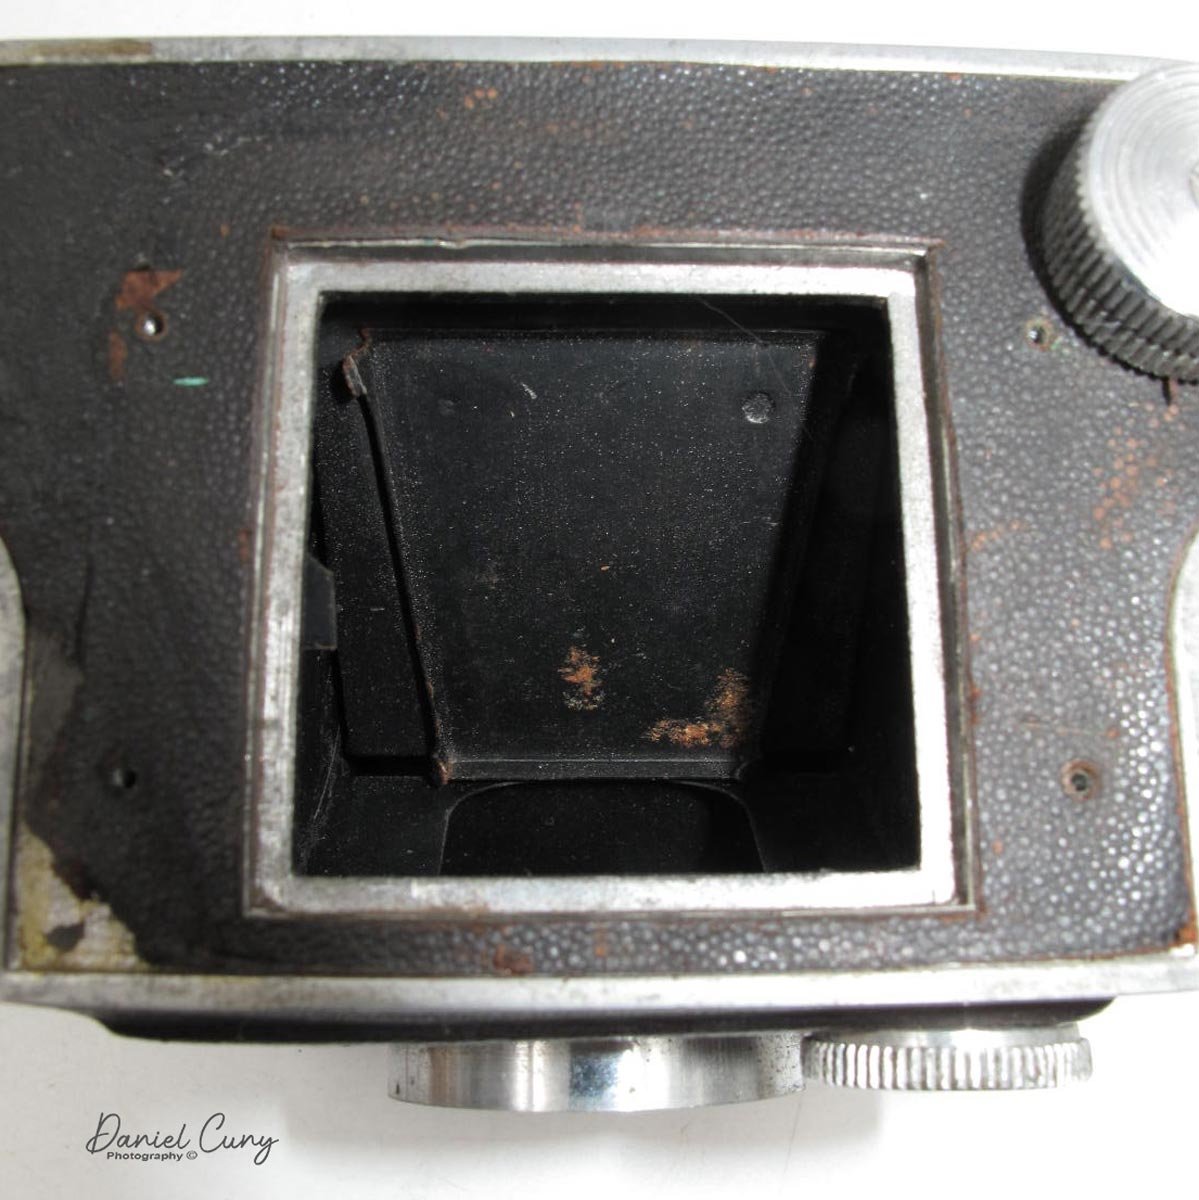
There were only four screws to hold the light hood on, so I proceeded to take them out. The hood came off quickly enough. Under the hood was a mask on top of the focus screen. I turned the camera upside down slowly, and the focus screen came right out, exposing the dingy mirror.

 They always say to test a small part when cleaning first to see if it's OK to proceed. I didn't hear that little voice say that this time, so I cleaned the mirror, thinking the silver paint was on the backside of the glass, which is normal. I took two swipes with my Q-Tip, and the finish came right off. YIKES!!!!


So, I ordered some silver markers to see if that would suffice to bring back the mirror effect to my new piece of glass. The mirror, or glass, now was easy enough to get out as it was held in the bracket with corner clips, which I slowly bent back to take out the mirror.

I received the silver or what’s called Chrome markers late last night. Early the next morning, I applied a generous amount to the glass I removed and let it dry. The markers produced more of a ripple effect as opposed to a clean glass mirror. It was certainly shiny enough, so I reassembled the focus screen and light hood back onto the camera, and the camera actually did a good job of focusing on a subject when viewing through the camera. It’s considerably better than before I disassembled it and when I took photos so I’m happy with how it turned out.

Here are the results.

Thank you again for reading about this interesting camera. Until next time, please be well and safe.

VP Exakta Model B

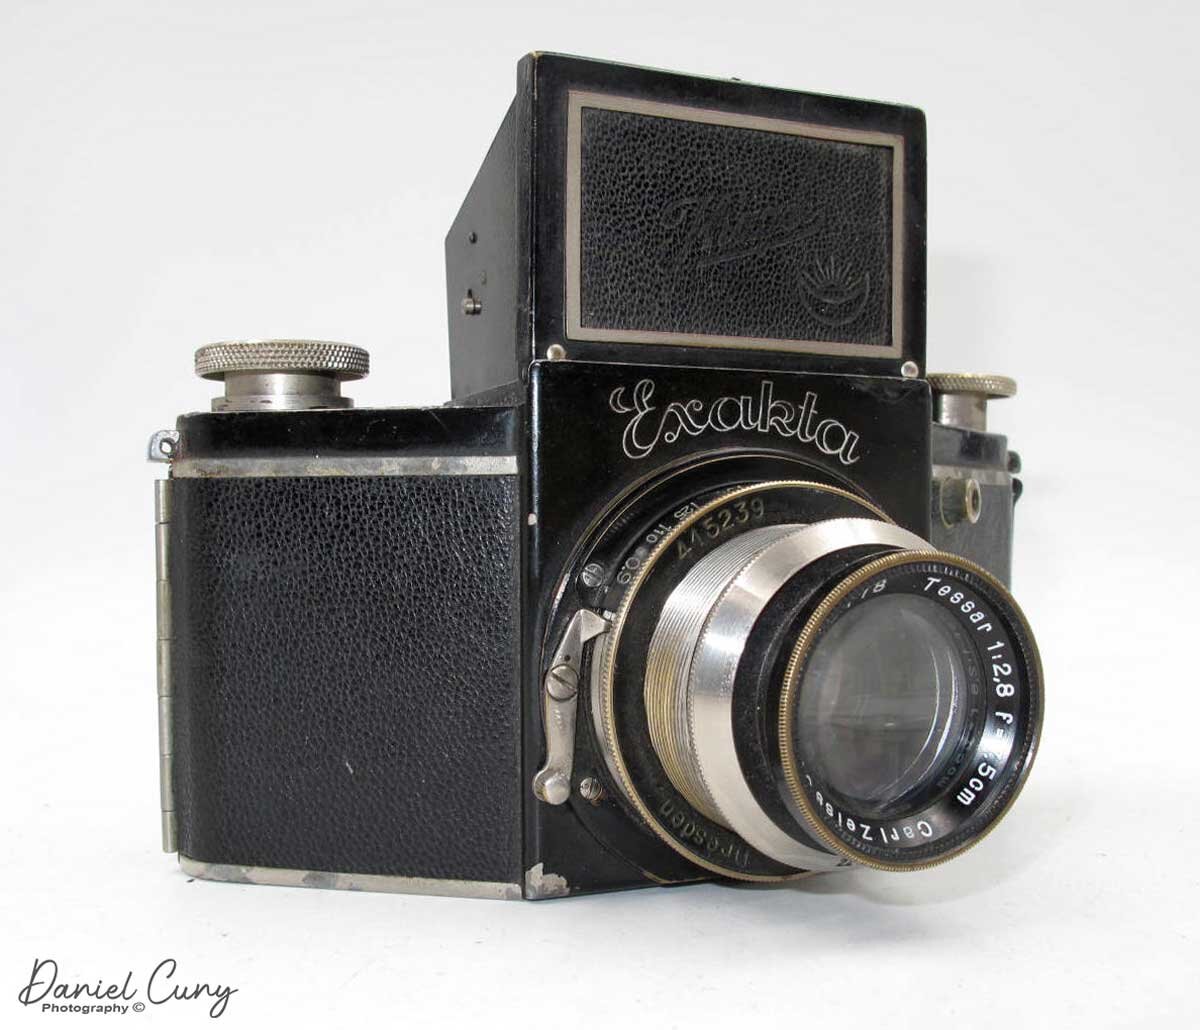
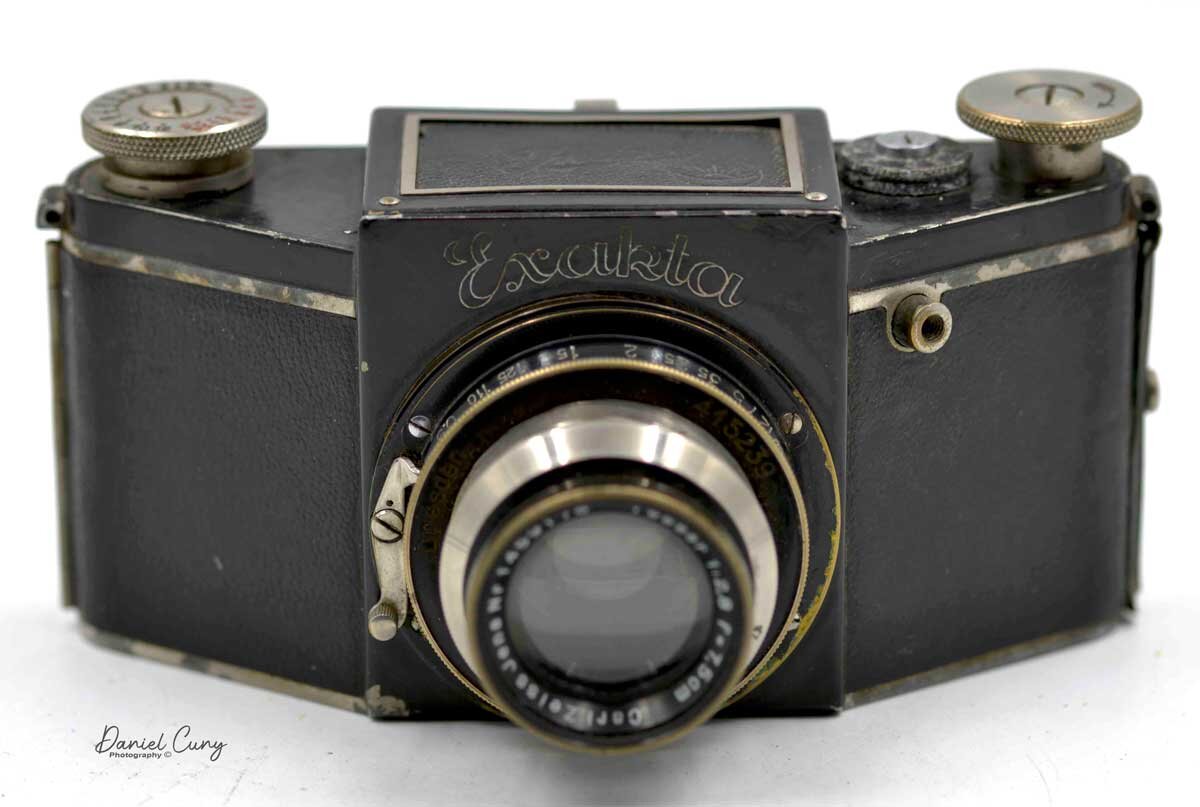
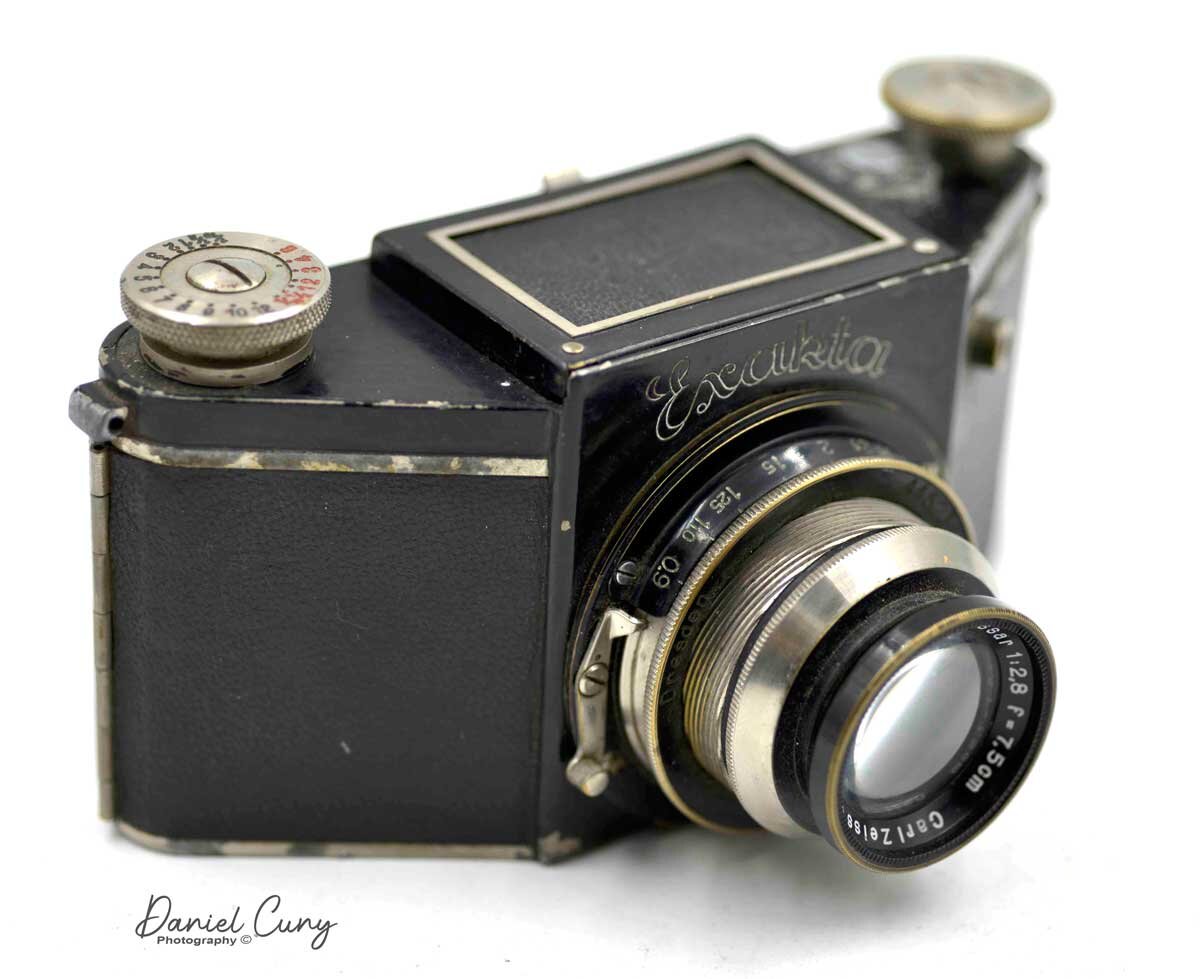
Knowing me, the more odd and unusual the item is, the more I enjoy it. The VP Exakta, also known as the "standard" Exakta, is just one of these cameras. The VP Exakta camera has such a classic design. They are sleek, angular, somewhat small but fits well into your hands when holding them. The VP stands for Vest Pocket, which refers to the 127 size film used in this camera and was introduced to fit into the folding Vest Pocket cameras from Kodak started in 1912. This camera isn't small by any stretch of the imagination, but interesting. They call this the VP model due to the size of the film used.

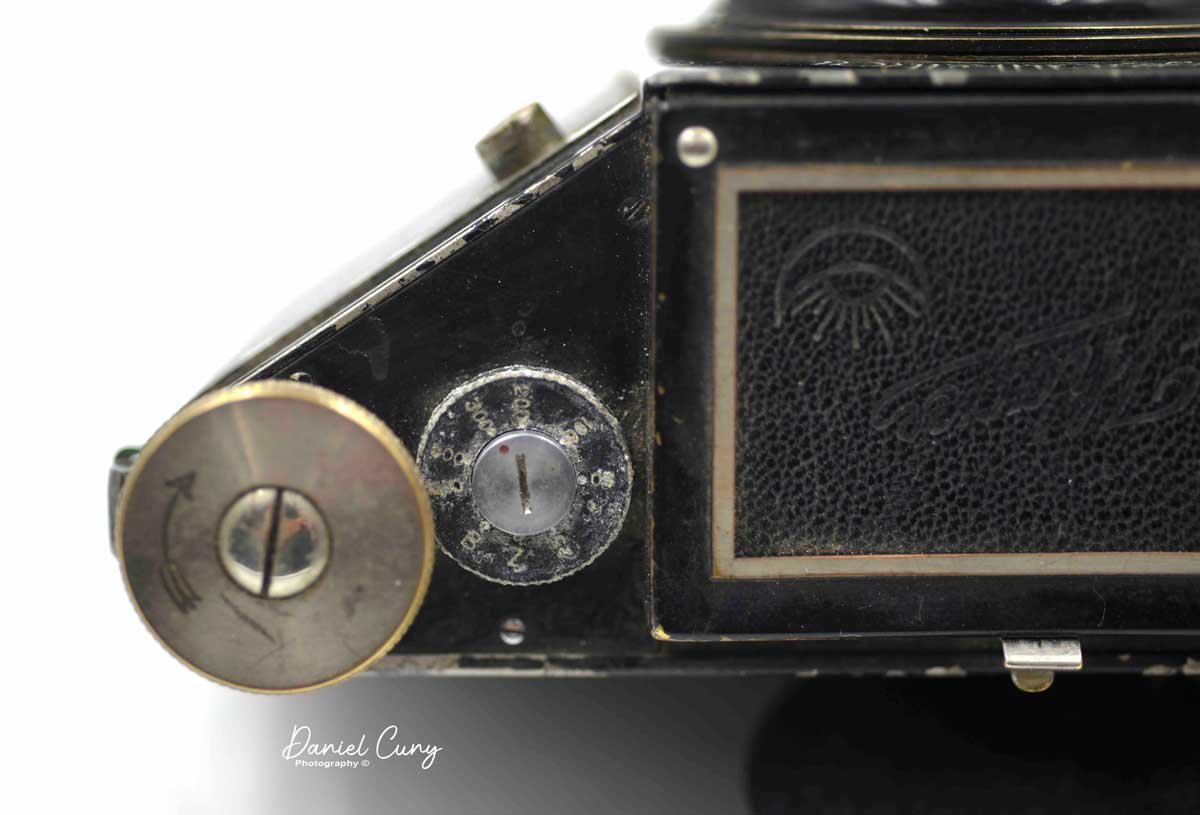
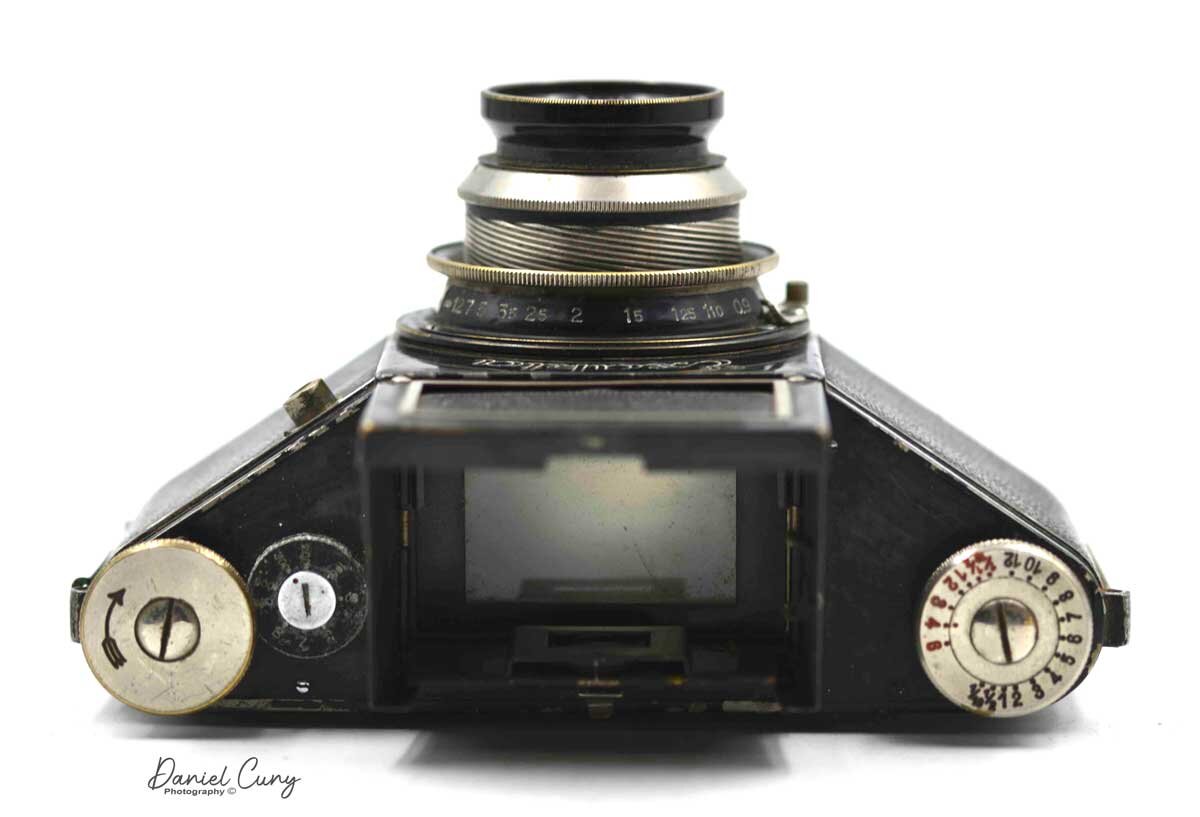
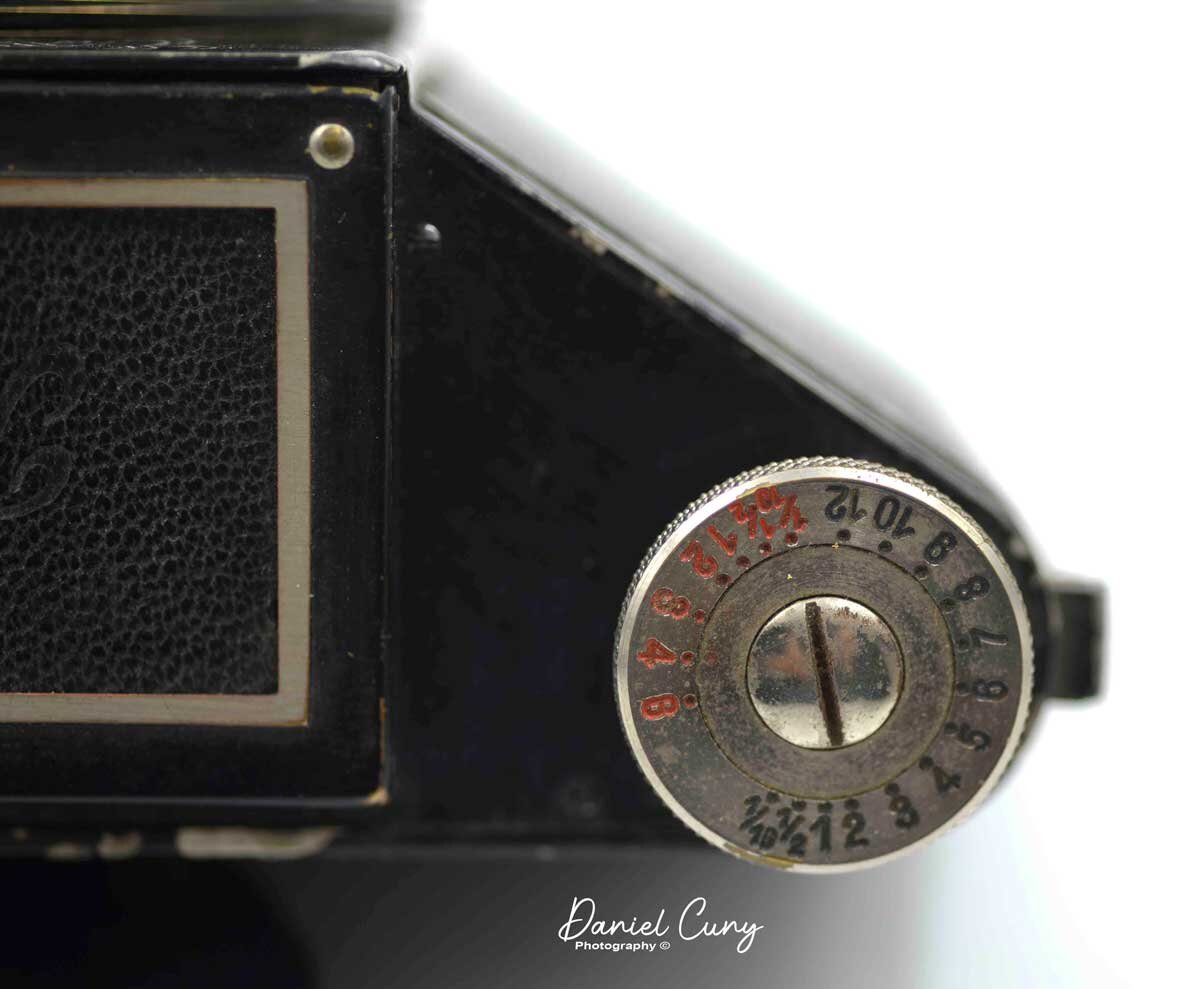
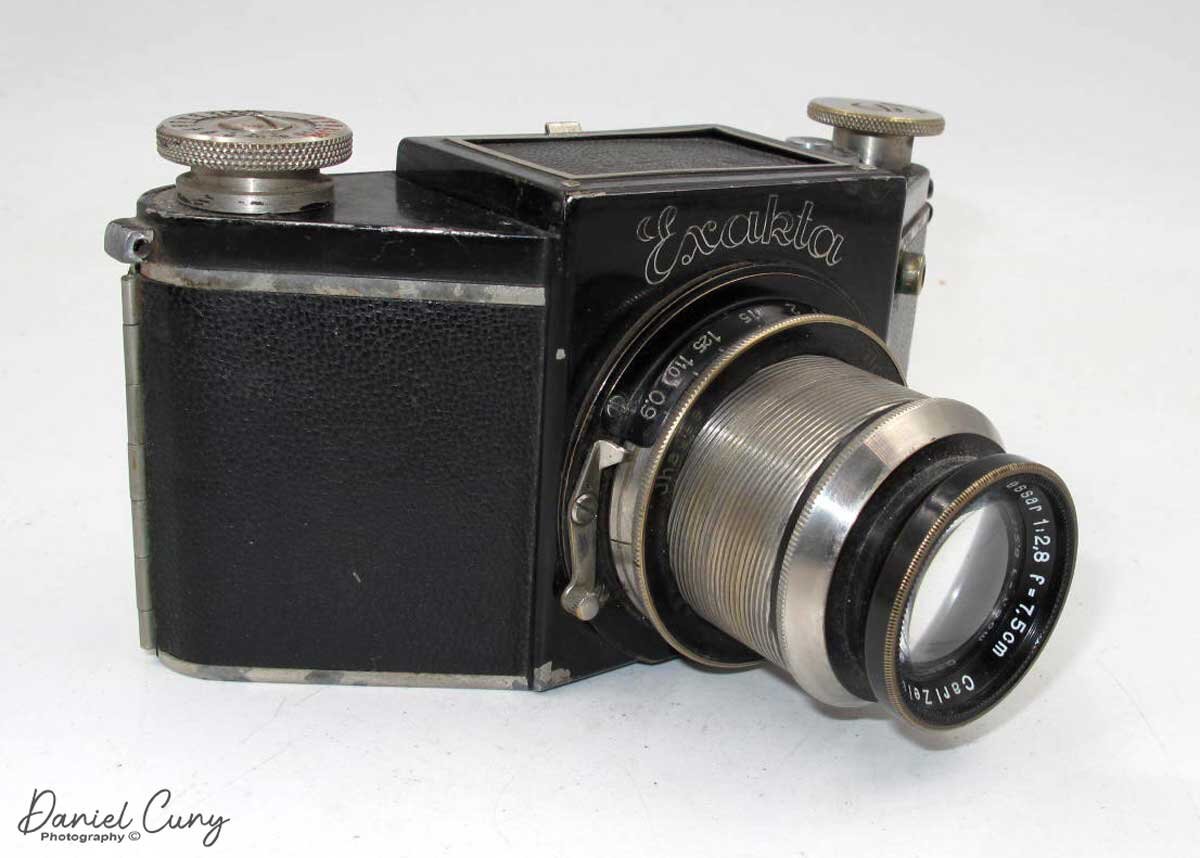
My VP Exakta Model B camera

My VP Exakta Model B camera

The VP Exakta started being produced in 1933 and is an SLR or Single Lens Reflex camera utilizing the 127 size film made by Ihagee in Dresden, Germany. The Ihagee company has a very long history and well known in the photographic community for its cameras and accessories. Here is one of the best websites about the company and cameras. Let me tell you a little about the company before I get more into the camera.

The Company

The company started as Industrie- und Handelsgesellschaft in Dresden, Germany. Johan Steenbergen, a Dutchman, started it in 1912. The name changed to Ihagee due to the German pronunciation of IHG or "ee-hah-get." In the early years, the company was making wooden plate style cameras. You can see their 1914 German language catalog here. In 1918 they changed their name to Ihagee Kamerawerk Steenbergen & Co and six woodworking employees producing products.
After WWI, they had some horrible financial problems, much as other German companies did. After the war, the company dissolves but reappears in the early 1920s, whereby in 1925, they are producing 1000 roll film cameras a day. In 1933 they introduced the first in this line of cameras known as the Exakta A. The camera has a cloth focal-plane shutter that had shutter speeds up to 1/1000 sec, which was extremely fast for its time. Even the Leica's of the same era only had shutter speeds to 1/500 sec.

During WWII, production ceased, and Steenbergen, a Dutch national, transferred ownership of the company to an excellent friend and the company employees due to the tensions between the Netherlands and Nazi Germany. After WWII, Dresden was part of the Soviet-occupied part of Germany. Because Ihagee was Dutch-owned, the East Germans didn't want to damage international relationships, so they produced their popular 35mm Kine Exakta. These were the first 35mm SLR cameras made, and the VP Exaktas paved the way for this prevalent model. It's the camera most people are familiar with or associate what Exakas are today.

 In 1950, Pentacon took over Ihagee and was producing cameras under their name. In 1959, Steenbergen returned to Frankfurt, Germany, and started Ihagee West, making some unsuccessful camera. Steenbergen died in 1967, and the company dissolved in 1976.

The Camera.

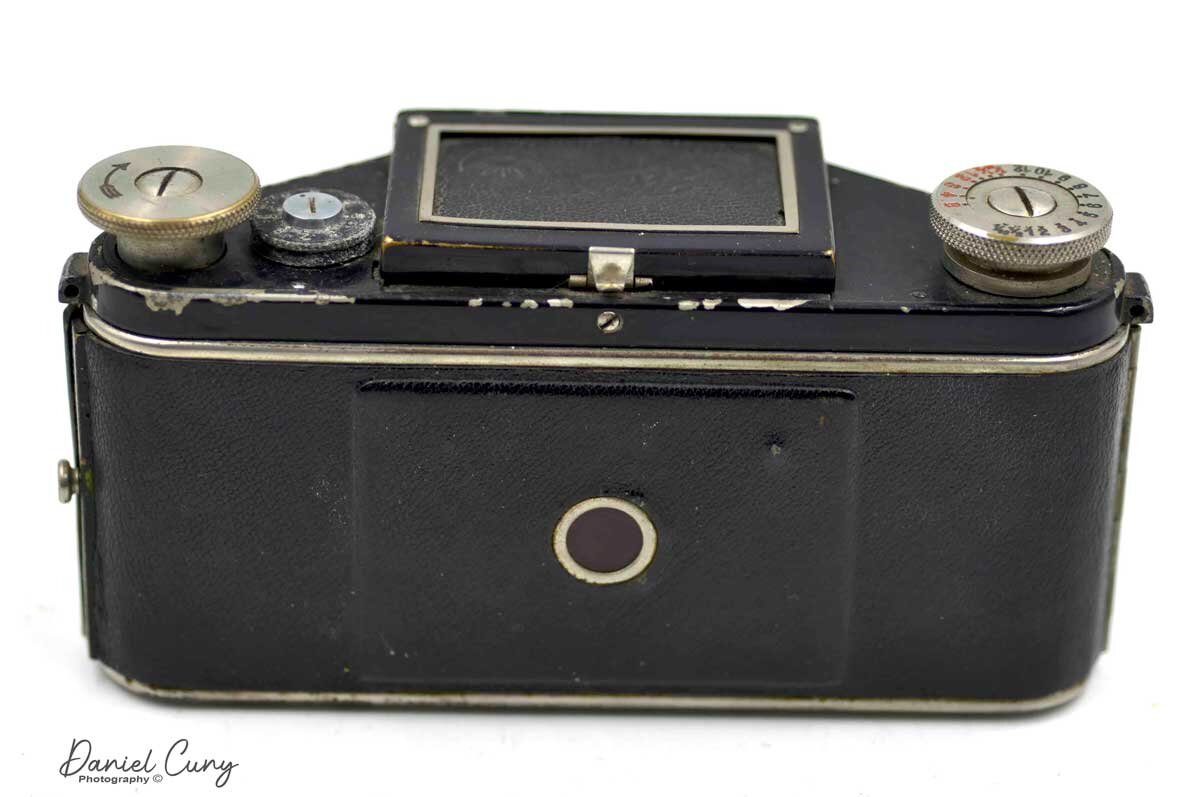
The VP Exakta or Standard Exakta took eight 6x4.5cm exposures on 127 size film. They have shutter speeds from 1/25, 1/50, 1/100, 1/200, 1/300, 1/600, and 1/1000 plus "B." The newer "B" model came out later the same year. They started calling the original model "A." The more recent "B" model incorporated extended shutter speeds and a self-timer. The extended shutter speeds were 1/10, 1/2, and seconds of exposure up to 12 seconds, giving the "B" model a shutter speed range from 12 sec. to 1/1000. There are also settings for B and Z. The Z setting is for "time" exposures on the shutter speed dial. I own this model of Exaktas. The later model "C" incorporated interchangeable backs for ground glass focus and film plates. It also had a film advance lever, and they also made the camera with a chrome finish.

The camera's size is 6" wide by 2" tall by 2.5" deep, including the lens, and it weighs 28 oz. I enjoy the camera's trapezoid shape, which, to me, is one of the finer points. The cameras came with several different lenses. The camera I have has the more expensive Tessar f2,8 lens, similar in price to the Zeiss Xenar 2.9 lens. You can look through the 1933 German catalog here. The aperture range on my camera goes from f2.8-22 and is set by the knurled ring outside the lens. I also enjoy seeing the exposed helicoid when you focus the lens. It gives the camera a more industrial look. The helicoid on my camera freezes up and is next to impossible to move unless I put some lighter fluid on the helicoid to loosen it up, but that only lasts a few hours, then it freezes up again.

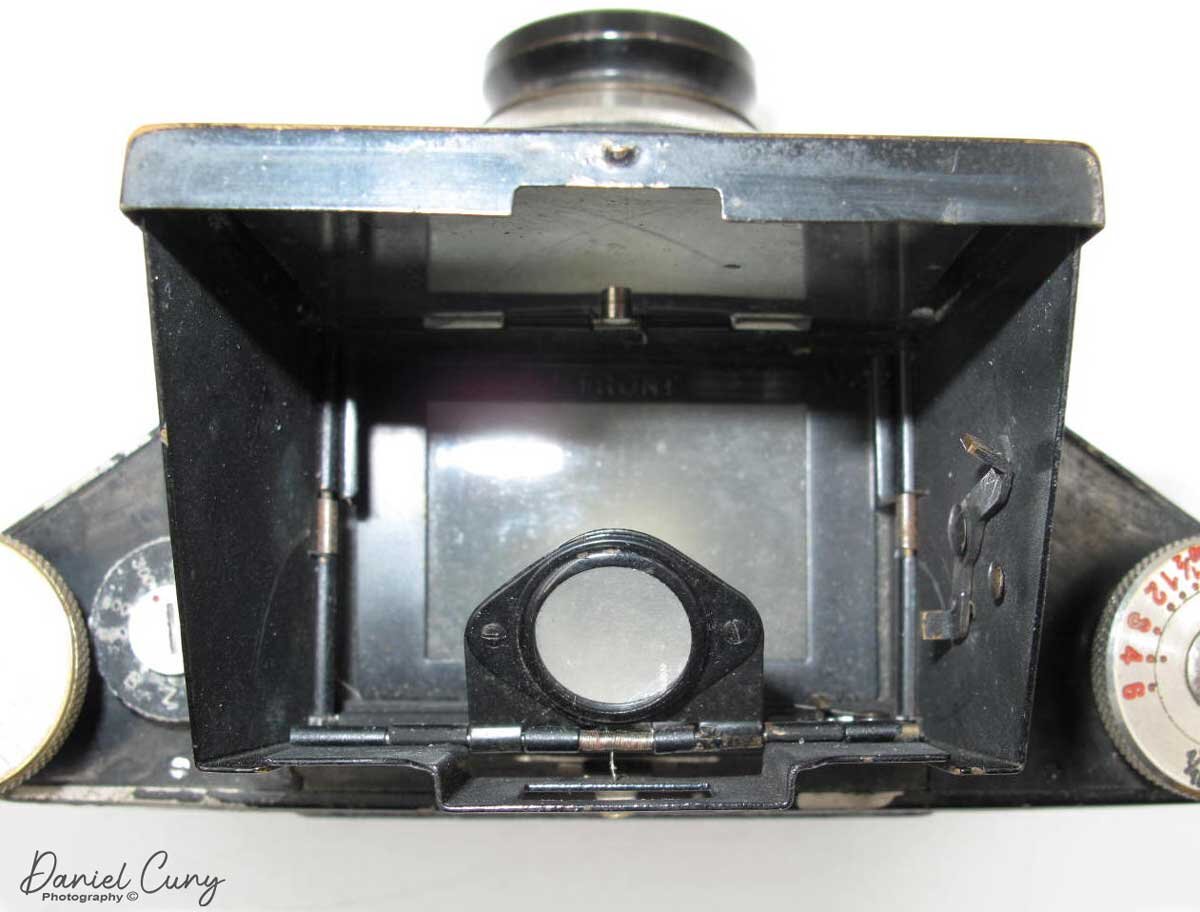
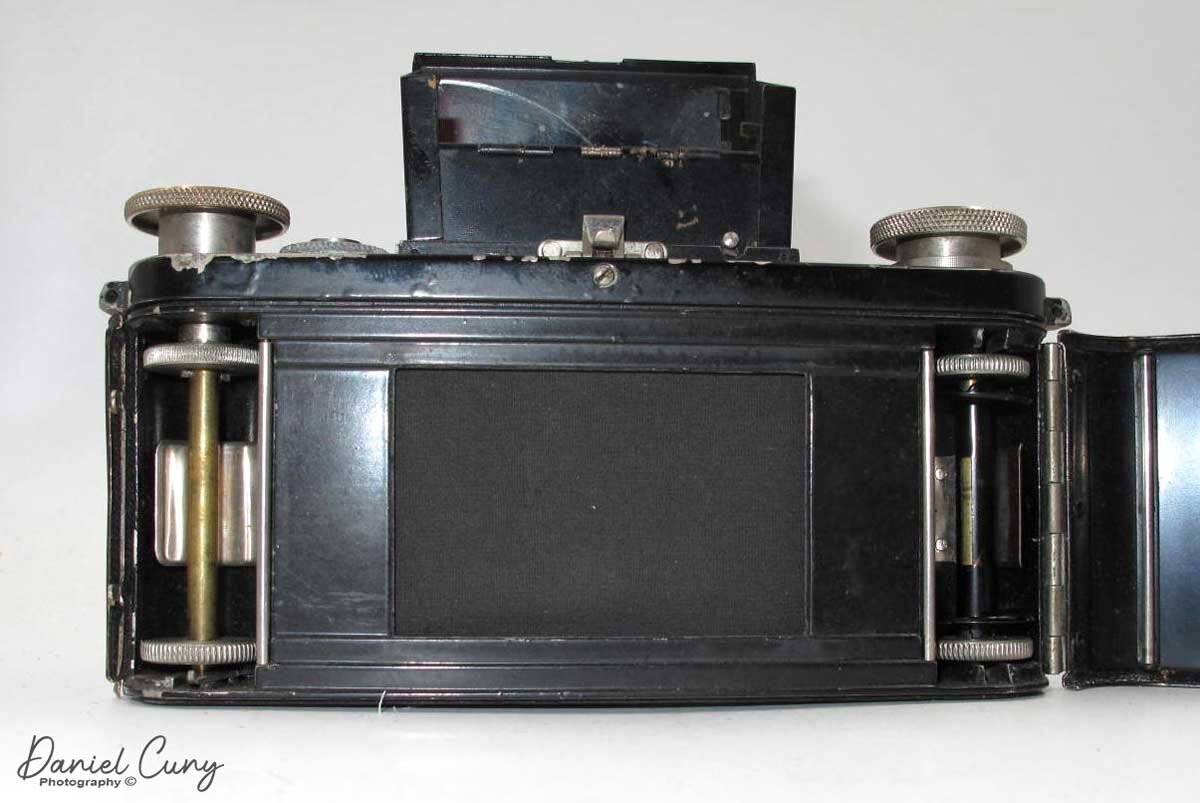
The focal plane shutter on my camera sometimes works, but it is mainly in the closed position. I can get it to fire at times, but winding the camera to advance the shutters is exceptionally challenging, so I mostly use the camera for display purposes. The film fits into a holder, which then fits into the camera body. To put the film spool on the holders, you unscrew the film holder's bottom and slide the film reel over the holder's center and screw the base back onto the holder before putting it back into the camera.

Conclusion:

I enjoy this camera and am looking into getting the camera repaired to shoot film through it. If any of you out there have had one repaired or know of a reputable repair facility in the US that can handle the repair, please let me know. I'd enjoy running through some 127 films through it to see how it operates, especially if I can get it to shoot for 12 seconds.

 Thank you for taking a few minutes from your schedule to read my post. If you have questions or concerns regarding this post or any of the others I've written, please email me. I'd love to hear from you.

 Until next week, please be safe and hope you have a joyous holiday.