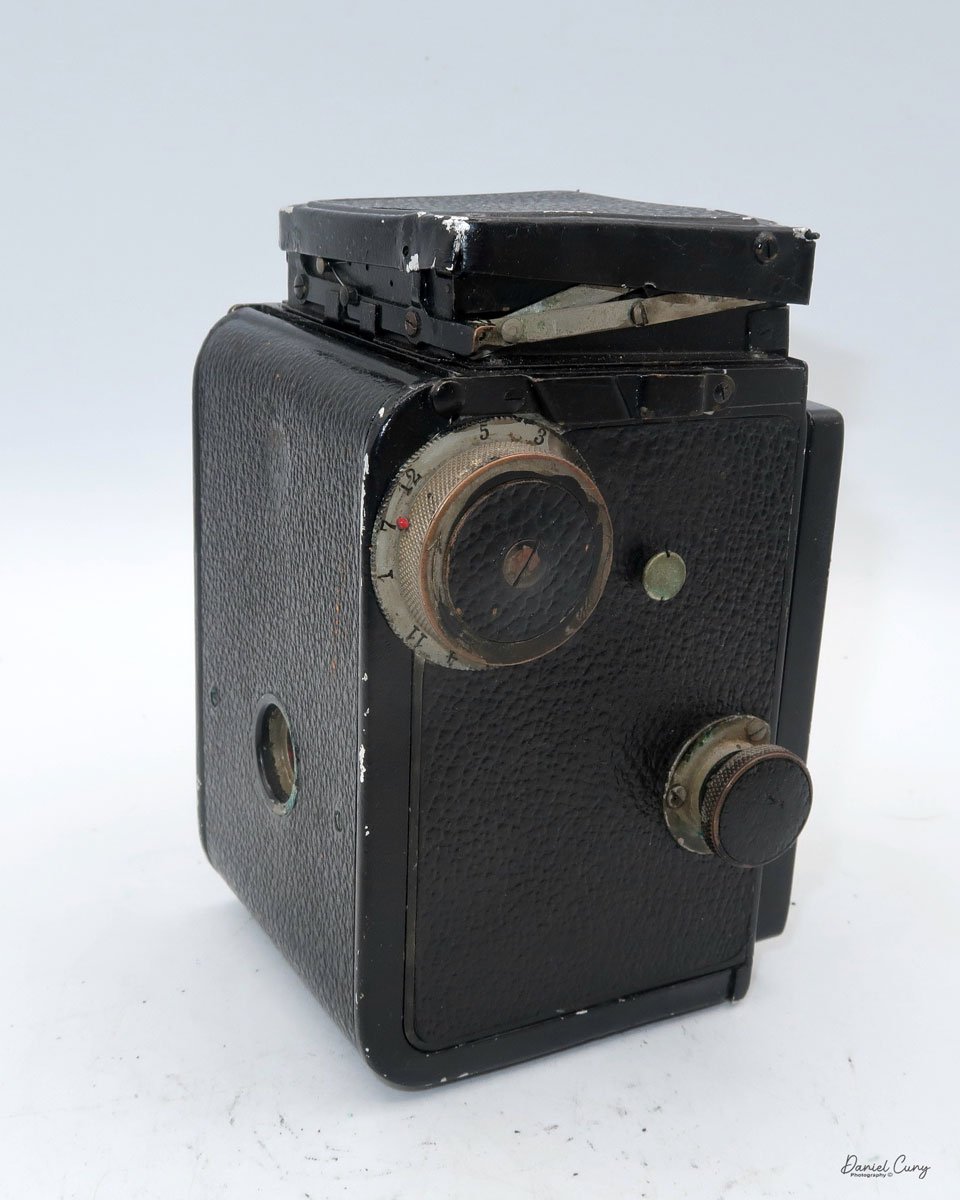
Gallus Derlux Camera

I can still remember when my wife and I visited Paris about 10-12 years ago and went to a small flea market in one of the arrondissements we were staying near and seeing for the first time the Gallus Derlux camera. My first impression was the camera needed the leather coverings that usually adorn cameras. Still, upon further inspection of the camera, it was made to have a silverish metal body as its covering. This was a camera I needed to have since its appearance was so different from any camera I had seen in the past.

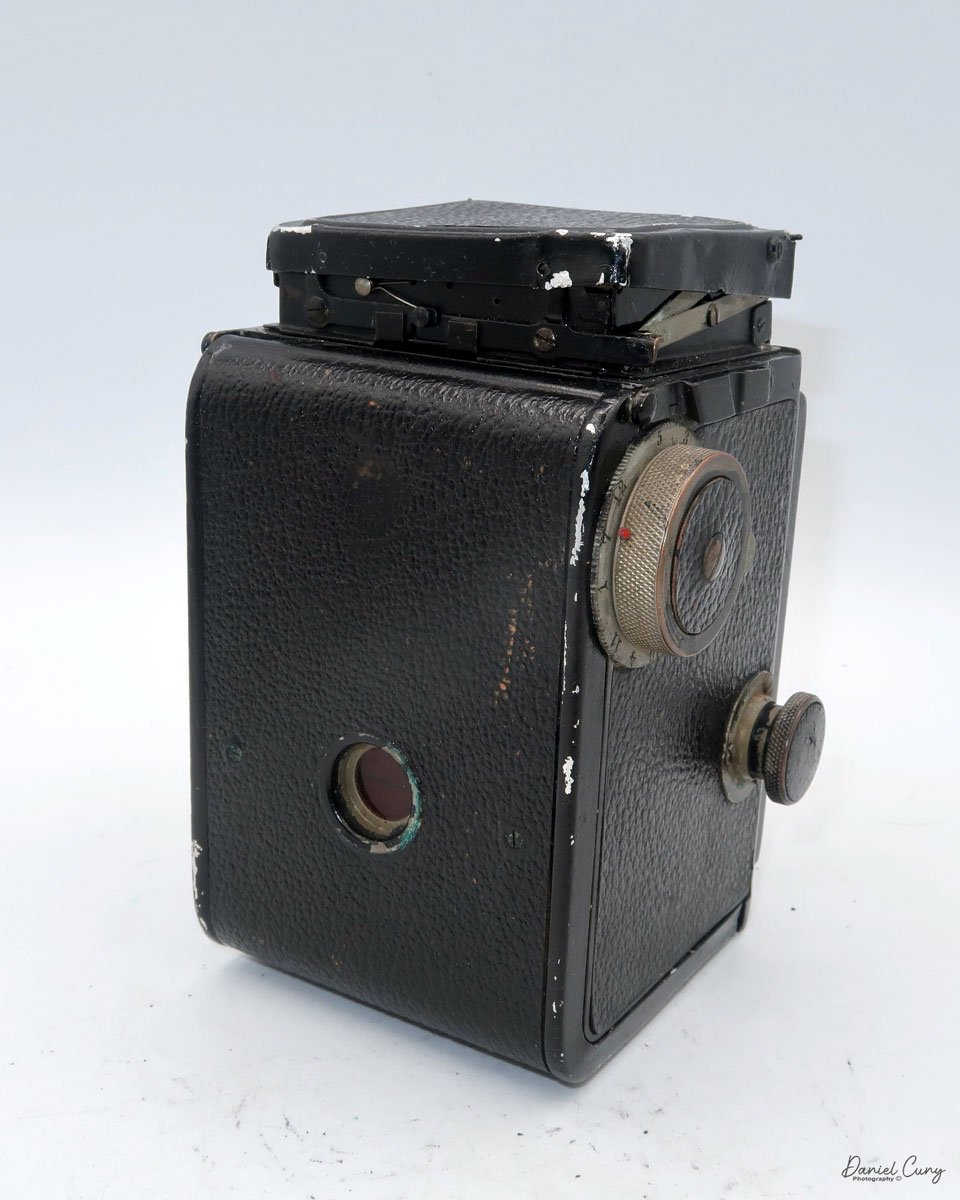
My Gallus Derlux camera

 That was the first Gallus Derlux I've owned over the years. I sold that camera at the Paris flea market a couple of years after purchasing it, and I have bought and sold a couple of other Gallus Derlux cameras over the years. Recently, I had the bug to purchase it again to add to my collection. 

 I talked to a fellow camera collector, and he told me he had one and would sell it to me for a reasonable price, as I know he's downsizing his collection. I need to do the same thing but I purchased it from him. This camera has a working shutter and a nice pouch case. At this point, since I've had a few of these in my life, it's time to put some film in the camera, take it for a spin around the neighborhood, and write a post on it.

The Company:

To discuss the camera company, Gallus, we need to include the German company Foth in this discussion. After WWII, Gallus, which was in Paris, was either licensed by Foth or Foth moved their operation to Pari and renamed the company Gallus due to what was going on in Germany after the war. Let's start with a bit of information on Foth and work our way forward.

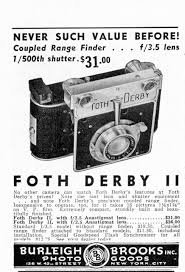
 The C.F. Foth Company, established in 1930 in Berlin, Germany, gained recognition for its innovative design and engineering of compact cameras. The Foth Derby series stands out as a celebrated line of cameras known for their portability, affordability, and reliability. The original models were a less expensive alternative to the more expensive Leica and Contax cameras of their time, but they utilized 127 film as opposed to 35mm from Leica and Contax. These cameras catered to the needs of amateur photographers and gained a reputation for their high-quality performance in a compact form.

 The Foth Derby cameras were introduced in the 1930s and remained in production through the late 1940s. They were designed with portability in mind, featuring a folding bellows system and compact dimensions that made them a popular choice for travelers and casual photographers. The cameras used 127 roll film, producing images in 4x6.5 cm format, a size well-suited for personal and artistic photography.

One of the defining features of the Foth Derby was its focal-plane shutter, which was uncommon in compact cameras of its time. This shutter system allowed for faster shutter speeds, up to 1/500th of a second, allowing photographers to capture motion and shoot in bright lighting conditions. The Derby series was also equipped with high-quality lenses, such as the Foth Anastigmat, or later upgraded models like the Foth Derby Anastigmat f/3.5, ensuring sharp and well-resolved images.


The Foth Derby evolved through several iterations, each offering incremental improvements and adaptations to meet changing photographic trends. Here are some general differences:

  1. Foth Derby I (1930): The original model featured a basic lens and a simple shutter mechanism. It utilized a 24x36mm format on 127 film and was praised for its ease of use and portability, making it accessible to novice photographers. 

  2. Foth Derby II (1931-): This version introduced the 3x4 (30x40mm) film format. The camera's build quality was also refined for greater durability, and several different lens options were offered.

  3. Foth Derby III (1935-39): This model had several different viewfinder and lens options. Some models had interchangeable mounts that allowed the use of some Zeiss and Dallmeyer lenses.

  4. Foth Derby IV (1936-40): This model had an aluminum front standard that housed an integrated rangefinder for focus. It also offered a choice of different lens options.

 Somewhere around 1937, the combination of both Foth and Gallus became intertwined because in 1937, Foth came out with:

  1. Derby V: Made by C.F. Foth & Cie in Paris. It still has the 30x40 film format on 127 film, but the build quality was a bit rougher coming out of the French factory.

  2. Gallus Derby (1937-) was the start of the Gallus line of cameras, taken from the Foth Derby. The build quality was rougher than that of the German-made cameras and about 10% heavier.

 As a collector, you can see the progression of design and features from the Foth Derby and how it morphed into the Gallus Derlux, using part of the Derby and Delux naming and wanting to separate from the originating company.

My Camera:

My Gallus Derlux camera is 5" wide by 3" tall by 2" deep with the lens retracted and 3" with the lens extended in the usual picture-taking position. My camera weighs just under 15 oz, at 14.9 oz. and has a Gallus 50mm f3.5 lens built into the camera. The camera is a fundamental one without an integrated focusing system, but rather a simple viewfinder on top of the camera for general framing of the photo you desire. The Gallus Derlux has a vertical focal plane shutter and takes 16 30x40mm exposures on a roll of 127 film. 

To take a photo, you must pull the front lens section from the body. The lens plate has a small "hump: on the top and bottom to grip onto to pull the lens plate away from the camera body. The lens plate is on a strut on either side of the plate, which exposes the internal bellows built into the camera. After taking photos, you push the lens plate back into the body, where it stays for transportation. This makes the camera slimmer and more manageable to slip into the case or pocket for transportation.

 The lens and focus system are located on the lens plate. To focus the lens, hold onto the larger focus arm, which is very similar to what's used on the Leica system, and rotate the helicoid lens to the desired guessed distance to the subject. There is a stop arm, so you cannot unscrew the lens from the body. The minimum focus distance is 1 meter to infinity. The aperture settings are on the lens. The aperture goes from f3.5 to F18. To adjust the aperture, turn the lens to the desired aperture settings, which is the same indicator that tells the focus distance. This makes it easy to use because you can set aperture and focus in the same area.

The shutter speeds are set on the camera's top. The shutter speeds go from 1/500 down to 1/25, along with "B" for timed exposures. To set the different shutter speeds, you need to lift the shutter speed dial and rotate the dial to the desired speed, which is indicated by a small dot. You also need to wind the shutter to cock the shutter as it's not incorporated in the winding process, which is what most current cameras have. To cock the shutter, just turn the knob on top of the camera, which have the shutter speed on it in the clockwise direction until it stops. The shutter is now cocked and ready for the subsequent exposure. The shutter release is located on the front of the camera on the right side and just next to the film plate.

Shutter speed dial. Lift and turn to set speed..

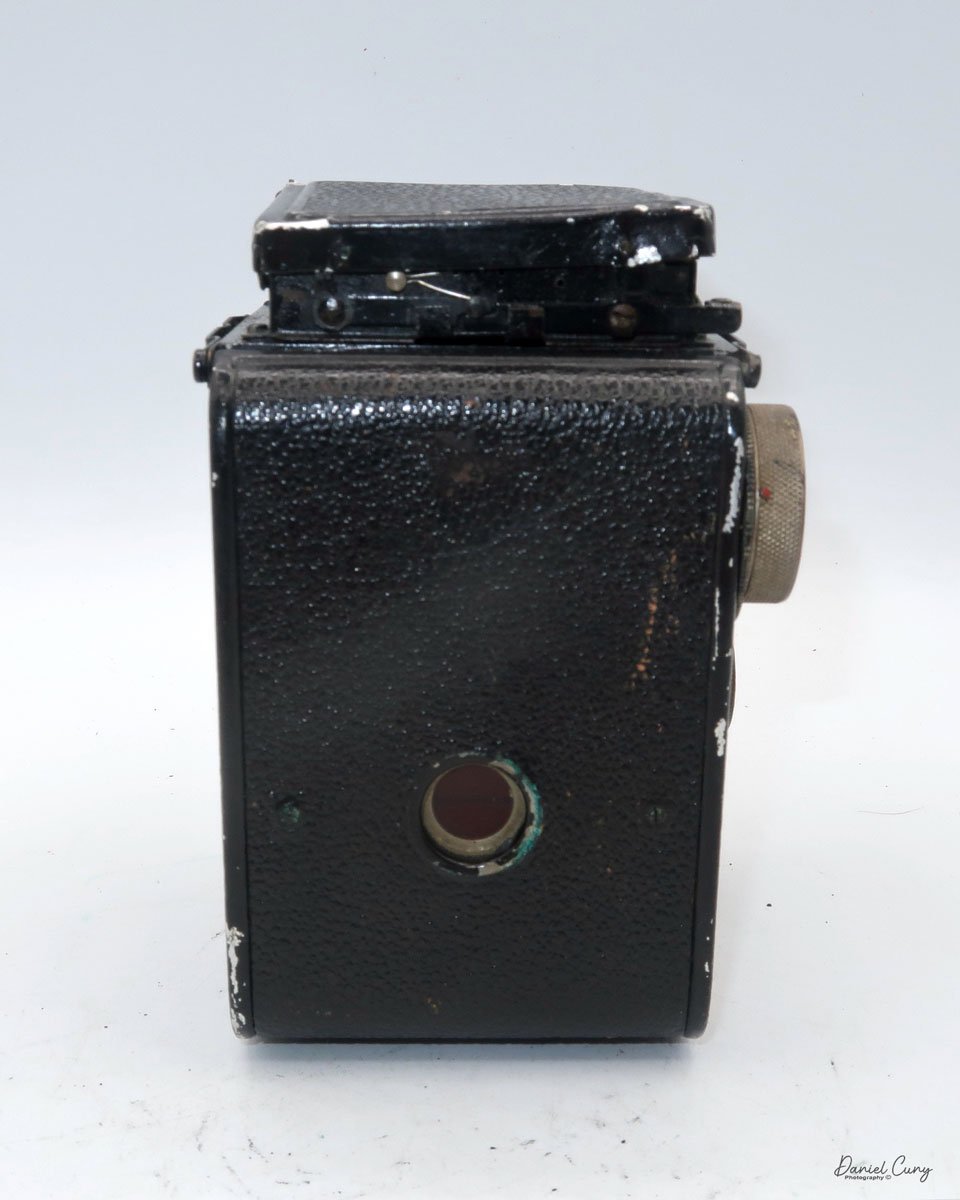
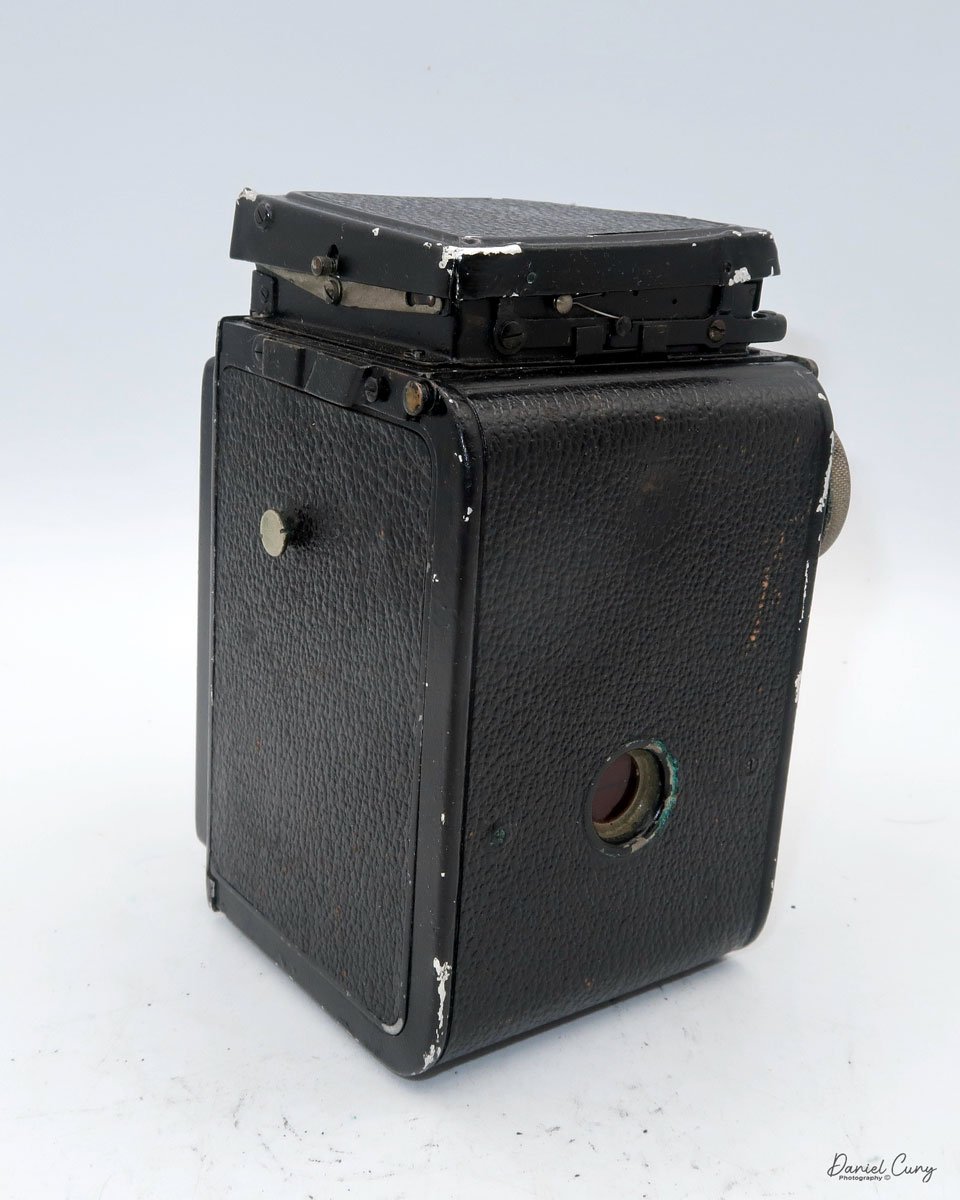
The Gallus Derlux utilizes two red (and green) windows on the back of the camera. These two windows are inside an immense depth-of-field scale on the back of the camera. Two windows allow the photographer to get 16 images on 127-size film. 

Back of Gallus Derlux camera

The film doors release is located on the right side of the camera to load the camera with film. Pull down the release button and swing the door open, which exposes the film chamber. Take the blank 127 reels from the right side of the film chamber by pulling up the knob above it and taking out the blank reel. Put the blank 127 film reel into the left side where the film transport knob is located. Lift the winding knob to insert the blank reel. Put your fresh and unexposed roll in the right chamber and press down the knob that holds it into place. Put the paper from the unexposed toll into the blank reel and wind it, ensuring the film moves. Stop when you see "start" and close the back of the camera.


To get 16 exposures on your roll of 127 film, wind the roll of film in the camera to frame number 1 to the first window, which on this camera is the window on the right-hand side of the backdoor. After you take that photo, wind the film until you see frame number 1 in the other window or the one on the left side of the backdoor. After you take that photo, frame number 2 will appear on the right side of the red window. Continue this process until frame number 8 is taken on the left side of the window. Wind until the film is all the way onto the take-up spool, open the back, and take the film out for processing.

My Results:

I put a roll of 400 ISO film in the camera and wandered around my backyard and the neighborhood streets. I used 400 ISO because the fall and winter in my neck of the woods are usually overcast. During my walk, the sun just so happened to come out, so I was forced to use the faster speeds on the camera.

After I took the photos and processed the film, I also noticed a gap between the two shutter curtains when winding the shutter to the next photo, causing a light leak on many of the images. I must have pointed the camera down or had the lens in a darker area several times because there were a few good images, but many were terrible. I also don't have a lens cap for this camera, so the next time I use the camera, I'll need to cover the lens when cocking the shutter so I don't expose the film to light before or after exposure.


If you have this or similar cameras and are mechanically inclined, I found a great article on someone overhauling the shutter on his Gallus Derby Lux camera.


Conclusion:

This was a fun camera to use. It's very simple, takes a nice larger image, and is small and compact. I'll need to find a lens cap for the one before I shoot again or just place my hand over the lens when cocking the shutter.

 Thank you for taking a few minutes from your day to look over this post.

 Until next week, please be safe.


Purma Special Camera

As I was cleaning out a box of cameras, looking for the next camera to shoot with and use for my next camera blog, I grabbed a brown case that I had put in the box a long time ago. As I turned the case around, I saw the name Purma on the front of the case and thought to myself, This will be my next camera to discuss or talk about in my blog.

My Purma Special Camera

 The Purma Special is a camera I purchased well over 20 years ago. I remember it was early in my collecting and when I was buying and selling on eBay. I started on eBay as a seller and buyer back in early 1997. When you engaged with eBay then, you didn't have your name as an ID, but they assigned you a number you'd use to log in and for sales purposes. I remember my number was 1032 before changing it to my current name, "Clix."

 At that time on eBay, there were no photos on the site, and it was similar to a message board where people would describe what they had for sale, what you were asking for, etc., Very similar to what Craigslist was before photos. Having McKeown's guide for cameras and thumbing through it daily, I was intrigued by cameras from other countries, and the Purma Special was one that I desired at the time due to its odd diamond shape and the fact that it was made in England.

Because the Purma Special camera is, in my opinion, a camera oddity due to the design of the camera, the shutter used, and the somewhat popularity of the camera, it's been reviewed and discussed by several of my camera blog friends like Peggy of Go Camera Go and Mike Eckman. Still, I wanted to make sure people were aware of my odd and unusual take on cameras from yesteryear, so this is more like Peggy's post about my thoughts on using the camera and the overall take on what a camera gem this is.

My Purma Special with Case

The Company:

Purma Cameras Ltd. was founded in 1935 in London. The name Purma is a combination of the two owners of the company: Tom Purvis, a well-known artist and lithographer who worked for LNER (London and North East Railway) from 1923 to 43, producing beautiful and popular advertising posters. 

Diagram on how the shutter system works on Purma Camera

 The other partner in the company was inventor Alfred Croger Mayo, who, along with Joseph Terrett, invented the unusual and very simple gravity-controlled focal plane shutter used in the Purma cameras. I believe this is Purma's real claim to fame and set them apart from other camera companies of the time. They also had financial backing from David Brock of Brock Fireworks, a company that started in 1698 and is the oldest British fireworks manufacturer.

Purma introduced its first camera in 1936, the Purma Speed. It was an enameled metal and chrome camera with a pop-up viewfinder. The Purma Speed camera had six shutter speeds and looked like a more traditional rounded-corner, rectangular camera.

Ad for the Purma Special

 With the introduction of the Purma Special camera in 1937, the company turned to an all Bakelite camera, along with a flatted diamond shape design with an art deco appeal to the camera due to the thin ridges built into the camera, which extend all around the camera. The Purma Special only had three shutter speeds but has a classic sleek design, and one that was the camera that set them apart design-wise from other cameras. The unique diamond shape and the use of Bakelite, a revolutionary material at the time, gave the Purma Special a distinct look and feel, setting it apart from its contemporaries. 

 The Purma Special was imported to many different countries, including the United States. According to an ad I found from 1939, the camera sold in the US for $14.95. It's my understanding that this was their most popular camera, although I cannot find sales records to prove these claims, as it's just from what I see for sale and the quantity of Purma Special cameras available today. The Purma Special was a popular choice among amateur photographers and was widely available in the market, contributing to its popularity and the large number of units still in circulation today.

There are a couple of unique features of the Purma camera. One is the 'pop out' lens, which is concealed by a thread in the lens cap, a clever design that protects the lens when not in use. When you screw the lens cap back onto the camera, it also locks the shutter. Unfortunately, these lens caps get lost, and many of the used Purma cameras are sold without the lens cap. The second is the use of plastics in the viewfinder. Purma was the first to do this, a pioneering move that made the camera lighter and more durable. These innovative features were ahead of their time and contributed to the Purma Special's appeal among photographers.

Purma also introduced the Purma Plus in 1951, which had an aluminum body and sold for £12.00 at the time. Production for the Purma Plus lasted until 1959. I cannot find why the company stopped producing its camera, so I assume it closed around 1960.


The Camera:

My Purma Special camera measures 6 3/4" wide by 2 3/4" tall by 2 1/4" deep with the lens cap on the camera, and the camera weighs 12 oz without the fitted leather case.  The camera has a Beck 2 1/4"  F6.3  lens with a fixed focus from 12' to infinity. Purma did sell a series of close-up and portrait attachment lenses that allowed for focus from 3.5 to 5' but were sold separately. These are items I do not have.

The Purma cameras use 127-size roll film and produce 16-1 1/4" square images on the negative. The Purma special doesn't have a locking mechanism to keep the back attached to the front of the camera. They are held together just by friction, but the back of the camera fits tightly to the front. The friction held back doesn't prevent it from accidentally opening if something were to happen. To open the back of the camera, there is a tiny thumb notch where you put your fingernail in and pull the back from the front.

The camera utilizes two red windows on the back of the camera, so you get 16 frames on the film; the photographer winds the film to the #1 exposure on the left window, then after taking the photo, winds the film so the #1 exposure shows up on the right side window utilizing the same frame number for both the left and right red window on the back of the camera. Once you shoot frame #1 on the right red window, the photographer winds to frame #2 on the left side window, and so on.

The Purma Special has a curved film track that holds the film flat against the shutter with a two-sided pressure plate attached to the camera's back door. The shutter system only has three shutter speeds. The shutter uses a series of different size slits in the metal curtain along with a brass weight within the camera to determine what shutter speed is used. The camera also depends on how you hold it, which would set the shutter speeds used. Remember, the negative is square, so having the camera in either vertical position doesn't change the image in the frame. It will only change the orientation of how the image is captured on the negative.

When you hold the camera in the usual horizontal position, the shutter would shoot, and the medium shutter speed would be 1/150th second. Turning the camera so the advance lever was at the bottom, or the "slow" speed, the shutter, the camera shutter is set to 1/25th sec. When you turn the camera in the other direction, with the film advance lever at the top, which puts the shutter in the "fast" position, the shutter speed is set to 1/450 sec.

Top view of Purma Special camera with circular wheel to cock the shutter, and shutter release

To take a photo, the photographer needs to cock the shutter. To do this, you turn the circular wheel on the top of the camera in the direction of the arrow. There is a small piece of bakelite sticking out to turn the wheel fairly easily. Once you turn the wheel in the counterclockwise position, the wheel will stop, and you'll hear a click which means the shutter is cocked and ready to make the exposure. You can do this with the lens cap on, but the shutter won't release until the lens cap is off. 

 The shutter release is on the top and left side of the camera. Simply press the shutter release to trip the shutter. BUT REMEMBER. Turn the camera as needed to change the shutter speed, especially since the camera has a fixed aperture lens. Wind the film to the next frame, then repeat until. It was odd for me to use this camera as I'm not used to having the shutter release on the camera's left side.

For those interested, here’s the original instruction manual for the Purma Special Camera

My Results:

I did have some outdated Film for Classics 127 film in my drawer, so I loaded up the camera and went to a local waterfall to take photos on an overcast Sunday afternoon. Go figure a cloudy day when living near Portland, Oregon. That will be my life for the next four months or so. The results were OK, but I was mildly disappointed when I looked at what Peggy and Mike did with the camera.

 It may also have been the fact that the film I processed was processed in a different tank than I'm used to using for 127 film, and I messed up putting it on the developing reel, so that was my fault. I have noticed whenever I use the Film From Classics film, the imprint from the paper backing seems to bleed onto the negatives, and I'm unsure if that's due to the film's age and being out of date by a year or two or something else.

 Here's what I salvaged from the messed-up developing roll I put through the Purma Special camera. It's nowhere near as lovely as Peggy or Mike's photos, but overall, it yielded decent results.

My Conclusion:

It was a fun camera to shoot with. Turn the camera to set the speed, point at your subject, and shoot the camera (with your left hand). Wash, rinse, and repeat. I hoped for better results but tried a different reel to process the film.

 Thank you for reading the blog post on the Purma Special camera. I'll definitely use it in the future due to its simplicity and unique shutter system.

 Until next week, please be safe.


Kodak Chevron Camera

A week or so ago, when I was looking for another camera to write about in my weekly camera blog, I looked up on the shelf above my desk, and one camera stood above the rest. Maybe that's because I have it on a small tabletop tripod, and it literally was above many of the other cameras on my shelf. The camera is one of my favorite designs, the Kodak Chevron camera.

My Kodak Chevron camera

 I've owned the Kodak Chevron camera for many years. I remember buying it at a camera show early in my camera collecting years. It caught my eye because the design, along with the look and feel, is just wonderful. The camera is large, striking in design, and a medium-format camera with wonderful optics. 

 The Chevron, produced between 1953 and 1956, mirrors the post-war American era. Its design philosophy echoes the American auto industry of the time, reminiscent of the large, sturdy, and well-crafted automobiles by Chevrolet, Ford, and Cadillac. The Kodak Chevron is a testament to the classic cameras of this era.

The Company:

I don't believe I've ever written about one of my favorite companies. The Eastman Kodak Company, known to many as Kodak, was founded in 1888 by George Eastman, a visionary who revolutionized photography by making it accessible to the general public. Before Kodak, photography was an elaborate and expensive process that required significant expertise. Eastman's innovations in camera design and film processing transformed the photography industry.

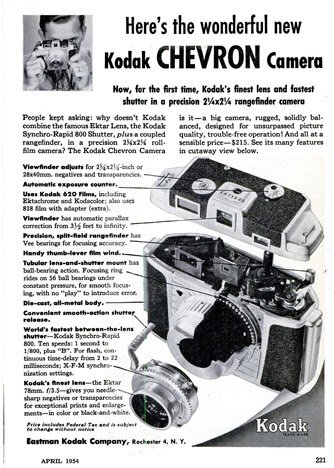
A wonderful ad showing the benefits of the Chevron camera

 George Eastman, a former bank clerk in Rochester, New York, initially became interested in photography as a hobby in the late 1870s. Frustrated by the cumbersome process of wet plate photography, which involved heavy equipment and complicated chemical preparations, Eastman sought to simplify the process. In 1880, he patented a dry-plate coating machine, which allowed for the mass production of photographic plates, and soon opened the Eastman Dry Plate Company.

Eastman's breakthrough came when he shifted focus from plates to roll film. In 1884, Eastman and businessman Henry A. Strong, who would later become the company's first president, formed a partnership to expand the business. They developed a flexible roll film, which replaced glass plates that had previously been used. This was a significant innovation because it created simpler, more portable cameras.


In 1888, the company launched its first Kodak camera, a compact box camera preloaded with enough film for 100 exposures. The marketing slogan, "You press the button, we do the rest," succinctly captured Kodak's appeal. After taking pictures, customers would send the entire camera back to Kodak for developing and reloading, eliminating the need for users to handle the film or chemicals themselves. This ease of use democratized photography and made it accessible to amateur photographers for the first time.

 Eastman chose "Kodak" because he wanted a distinctive and memorable trademark that was not associated with any existing words. He believed the letter "K" had a solid and unforgettable sound, so he experimented with various combinations of letters before arriving at Kodak.

 Kodak continued to innovate through the late 19th and early 20th centuries, producing increasingly sophisticated 35mm cameras like the Kodak Ektra and Retina lines, along with many medium—and larger-format cameras used during international conflicts. All the while refining its film development processes.

 Eastman built Kodak into a dominant force in the photography industry by introducing flexible film and creating simple, user-friendly cameras.

My Camera:

The Chevron camera is a rather large, heavy, and, some say, "bulky" camera that measures 6.25" wide, by 4.5" tall, by 4"deep, and weighs in at a whopping 2 lbs. 9.9 oz. without film loaded. I like how the camera feels. It's taller and wider than the Medalist, after which this camera was made. The Kodak Medalist is a marvel for its time, but when I hold the Medalist, the body feels too "fat" in my hands, although I do like the 6x9 format the Medalist has, whereas the Chevron is a proper 6x6 square format camera.

Some people discuss cameras in a much more technical manner, which I genuinely enjoy reading. There are times when I don't understand many of the technical "hows and whys," but that allows me to learn new things, which I enjoy. I prefer to talk about using the camera and my personal experiences.

To load the camera, you can open the back from the left or right side, which I like. You can take the whole back off if you want to. The empty spool will go onto the camera's left side, as the film advance lever is on the left. You put the fresh roll on the right, which is counterintuitive for many photographers, but it didn't bother me when using the camera. Before you load the film into the camera, the frame counter is on top of the camera, which you need to set to "N." The camera is supposed to have an automatic film advance stop when the film reaches the next frame. My auto-stop camera wasn't working, so I just used what was normal to me and looked at the red window on the back of the camera to get to the next frame. Here is the Chevron Camera Instruction manual. Thank you, M. Butkus, for your service in supplying manuals.

Now that I have film in the camera, it's time to take photos. To focus the camera on the subject, the rear viewfinder has two windows. The top window is used to frame your subject, and the bottom is to use the rangefinder, which uses a magnified split image to focus on the subject. Both windows are very close together, and for me, who wears glasses was a bit more challenging to use, but once I got used to it, it wasn't difficult. This is the same rangefinder system used in the Medalist and Ektra cameras.

One of the most delightful aspects of this camera is its exceptionally smooth focus ring. It's not so loose that it slips, like some lenses that feel very sloppy. Instead, it's a perfect balance of smoothness and precision, making the process of focusing a joy. It's a testament to the high-quality design and construction of the Kodak Chevron, and it's a feature that I find truly fabulous to use.

It's time to set the shutter speeds and aperture to create the proper exposure. The shutter speeds are located on the far outside ring around the lens. They go from a fantastic speed of 1/800 sec on the top end to "B", going down by half to get the "B" setting, so 1/400, 1/200, 1/100, etc.

The lens is a Kodak Ektar 78mm f3.5 lens. The aperture settings are set by a bar on the bottom of the lens. Sliding the bar over to the next setting is smooth and easy. The setting also has click stops, so there is no getting it if the aperture is set correctly. A visual setting is on the bottom by the bar and on top of the lens, which you can see with a red arrow. The aperture indication is just behind the arm you cock the shutter.

I've yet to make an image, the film advance was very smooth to move the film to the next frame. I would advance the lever four times to get to the next frame. The red window is on the back of the camera to check where you are advancing the film. The red window has a blackout bar, which you slide up to view the film inside. Being right-handed, it was easy to hold the camera, slide the bar up with my right hand, and advance the film to the next frame with my left hand.

One of the advantages Chevron offered was the ability to shoot 828-size films. The 828 film accessory kit consisted of a film mask for 828 film, 2- 828 film spool holders and an 828 spool. This would have been purchased as an accessory. To use the 828 adapter, the photographer needed to do a couple of things to adapt to the film format. First, a switch from the regular 620 to 828 film is on top of the camera. You take a coin and turn the "finder" settings to 828. Then, a switch at the back of the camera changes the viewfinder from the standard 620 film to the smaller 828 film. By using the 828 film, there is a magnification factor of 1.5x.


My results:

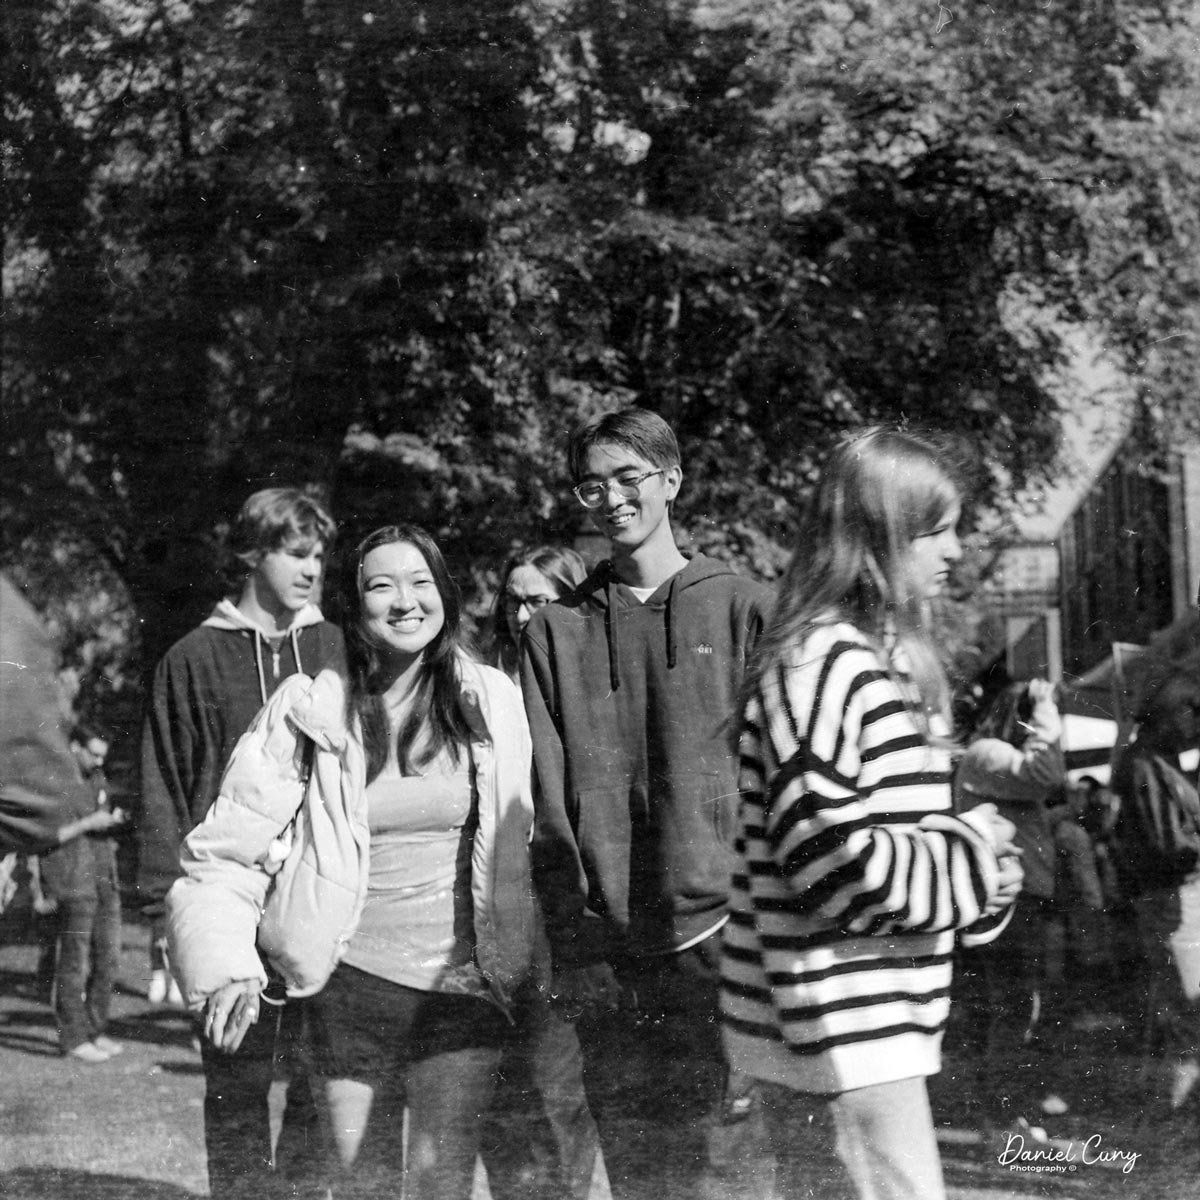
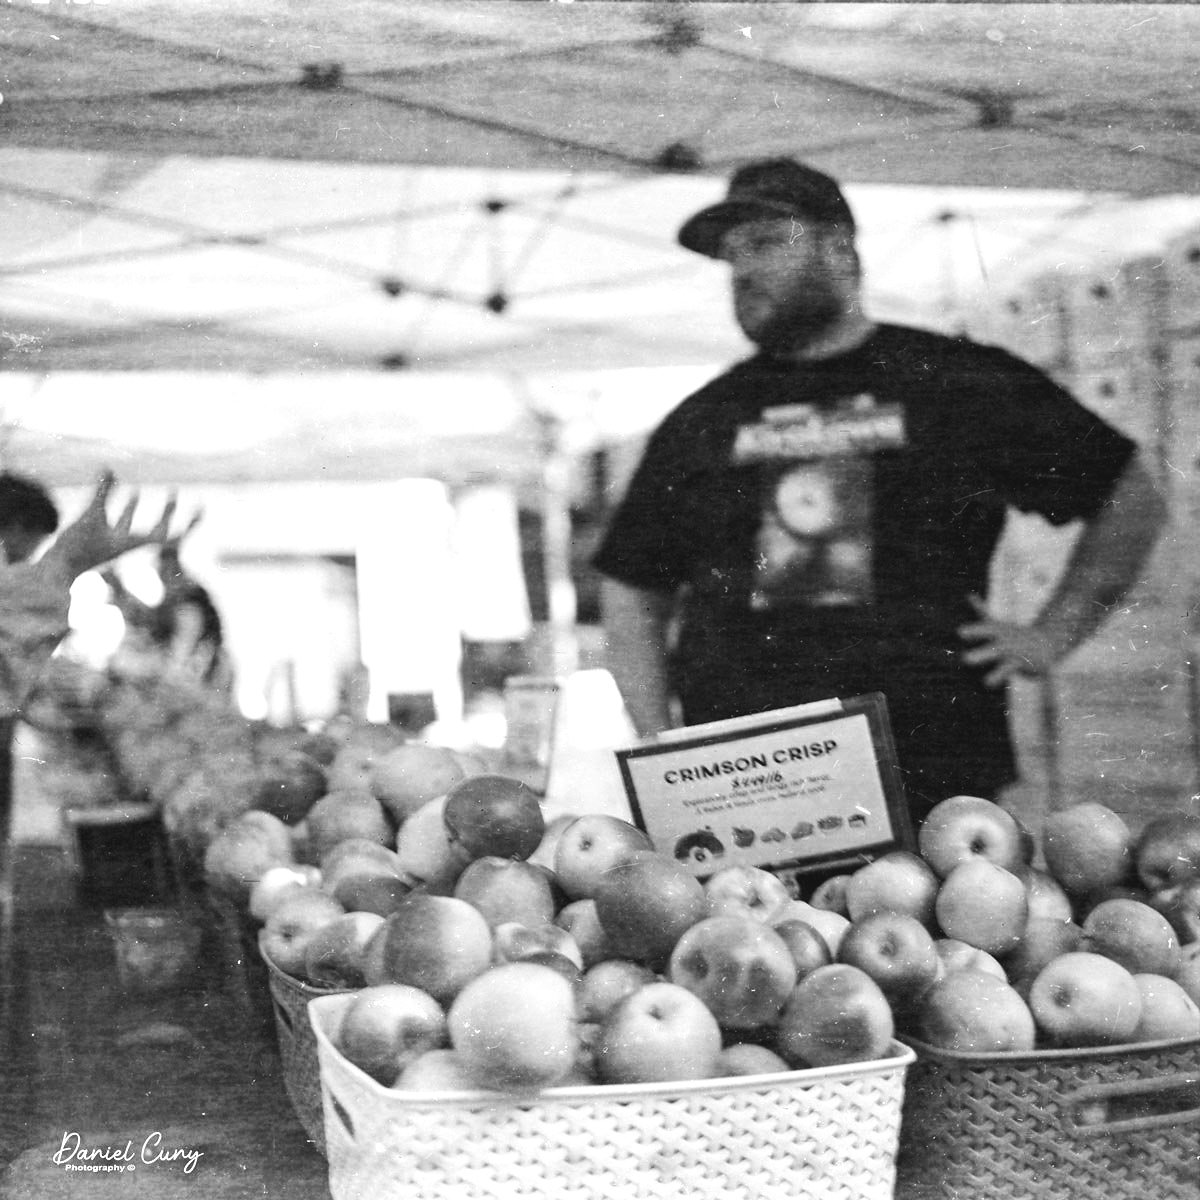
Recently, at a local camera show, I purchased about 50 rolls of Agfa ISS 620 film, which I have for sale on my eBay store. I wanted to test the film to see how usable it was, so I loaded it into the camera and went to the local farmers market to take photos. Here are some of the results from the camera, along with the film I have for sale.

My Conclusion:

WOW!!!! What a fun camera to use. The camera fits very nicely in my hand; the focus is smooth, and I prefer using it over many of the folders and TLR cameras I've used. The Chevron camera outperformed my expectations. It felt similar to what a Mamiya Seven feels like in your hand. While it didn't have the capabilities of interchangeable lenses or TTL viewing of the Mamiya Seven, the camera handled great. 

 The only downside to this camera is the small viewfinder and rangefinder window. There were times when I was walking around the market and just pre-focused, especially when I wanted to be somewhat inconspicuous when shooting. The light was fairly dim, too, so my shutter speed was generally 1/50, and my aperture was wide open.

 I also understand that due to the low number of cameras made, especially compared to the very popular Medalist and Medalist II cameras, they are selling at a premium price on the used market.

 Thank you for taking a few minutes from your day to read my post on this lovely camera. I plan on shooting with it more often, especially since I have many rolls to shoot with.

 Until next week, please be safe.