Early M.I.O.M. Camera

My early MIOM camera

This blog is a journey into the world of a camera I stumbled upon during our European escapade last year. Whenever we venture to a new destination, I make it a point to unearth the local flea markets, a treasure trove of unique cameras and photo items that are often elusive in the US. The thrill of discovering these items, especially being on the West Coast, where European finds are a rarity, is an experience in itself. 

 One of my favorite flea markets was just outside Prague, and my wife and I went to it. It was in an industrial area, and we took the train to get to it, but it wasn't so much the cameras and photo items found as the atmosphere of the place that made it memorable. I did find some great cameras there, too, that are harder to find on the West Coast of the US.

 While in Brussels, my wife and I went to a flea market in a square or small park in town. There were about 40-50 vendors there. Most of the items were in boxes with many other items, so you needed to rummage through a lot of items to find what you were looking for. I didn't have much time to look as my wife was under the weather, and it would start to rain later in the morning. I picked up a few Rollei parts for a reasonable and fair price along with this MIOM compact bakelite camera, for which I paid 1-2 euros.

The Company:

Let's delve into the intriguing history of MIOM, a brand that has left an indelible mark on the world of photography. The journey of MIOM begins in 1887 with architect Félicien César and engineer Fabius Henrion, who founded the local lighting distribution company: 'Fabius Henrion et Cie,' with a capital of 100,000 francs in the Nancy and Lorraine region. Despite facing numerous challenges, the company's legacy was preserved when it was acquired by the CGE, Compagnie Générale d'Électricité (General Electric Company), in 1898.

 MIOM, an acronym for Manufacture d'Isolants et Objets Moulés, (Manufacture of Insulators and Molded Objects) was a subsidiary of the Compagnie Générale d'Électricité (General Electric Company) which started in 1929. As the MIOM name suggests, It was created to produce electrical components for the company. 

 As photography grew during this time, MIOM created a photographic department in 1937 that molded simple cameras in "Cégéite," which was similar to what we now call bakelite. The name derived from the name of the parent company: the Compagnie Générale d'Électricité.

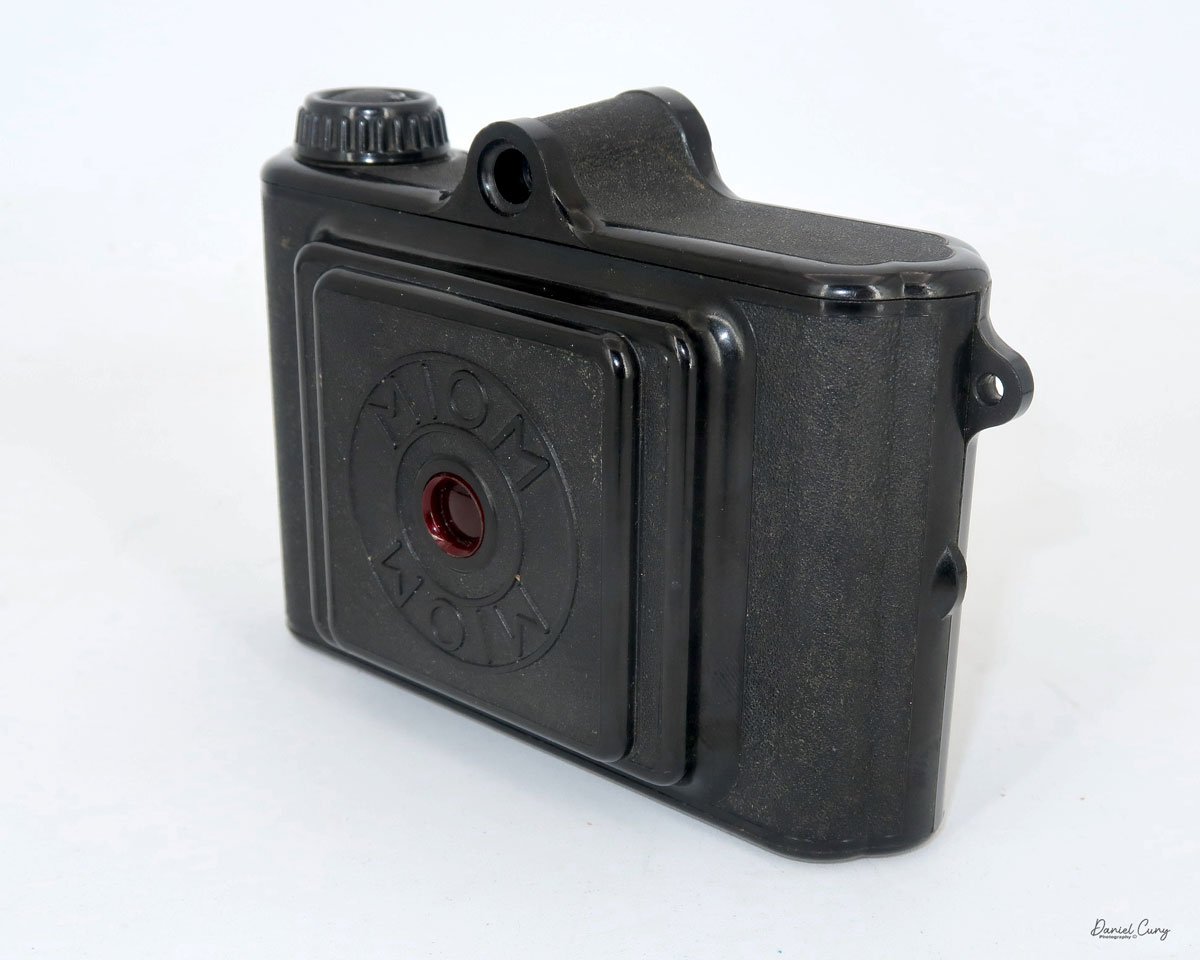
MIOM's early cameras were very similar to the model I have. They were very flat in appearance and used 127 film to produce 6x4.5cm negatives. Some of the other early models were the Rex and Lec Junior. I believe the model I have is only known as the MIOM, which is printed on the back. There is no camera name produced on the camera like the REX or other cameras of that time.

MIOM Ad in the 1930s

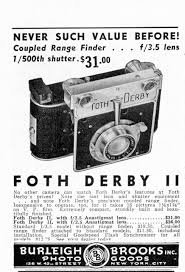
Then, in 1938, the cameras took on a different appearance, resembling the Czechoslovakian Pyonyr cameras, designed by Fritz Kaftanski, who had recently moved to France to get away from the war problems taken on within that region during the late 1930s. It's suspected that Fritz Kaftanski was involved in the design of the newer Photax camera.

 The Photax cameras had a larger negative area, used 620-size film, and produced 6x9cm negatives. The Photax design had a lens that rotated out from the body on a helical and included a very simple shutter that only worked when the lens was in the extended position.

This new system was beneficial to amateur photographers at the time. It prevented the camera from accidentally taking a photo if the lens was retracted. The new Photax camera also included lenses from Boyer, a French optical company that produced wonderful optics.

 Photax cameras were the best-selling cameras in France for 20 years and produced cameras well into the 1960s, with the Photax VI released in 1966. However, like many European camera manufacturers of the era, MIOM faced significant challenges in the 1960s with the rise of Japanese brands such as Nikon, Canon, and Minolta.  

 Today, MIOM's legacy lives on in the vintage camera market, where its models are sought after for their distinctive design and the quality of their optical systems. The story of MIOM reminds us of a golden age in photography when craftsmanship and innovation defined the industry.

My Camera:

This description should be straightforward and short, as this camera is simple without many bells or whistles. However, its simplicity and unique design make it a valuable addition to any vintage camera collection.

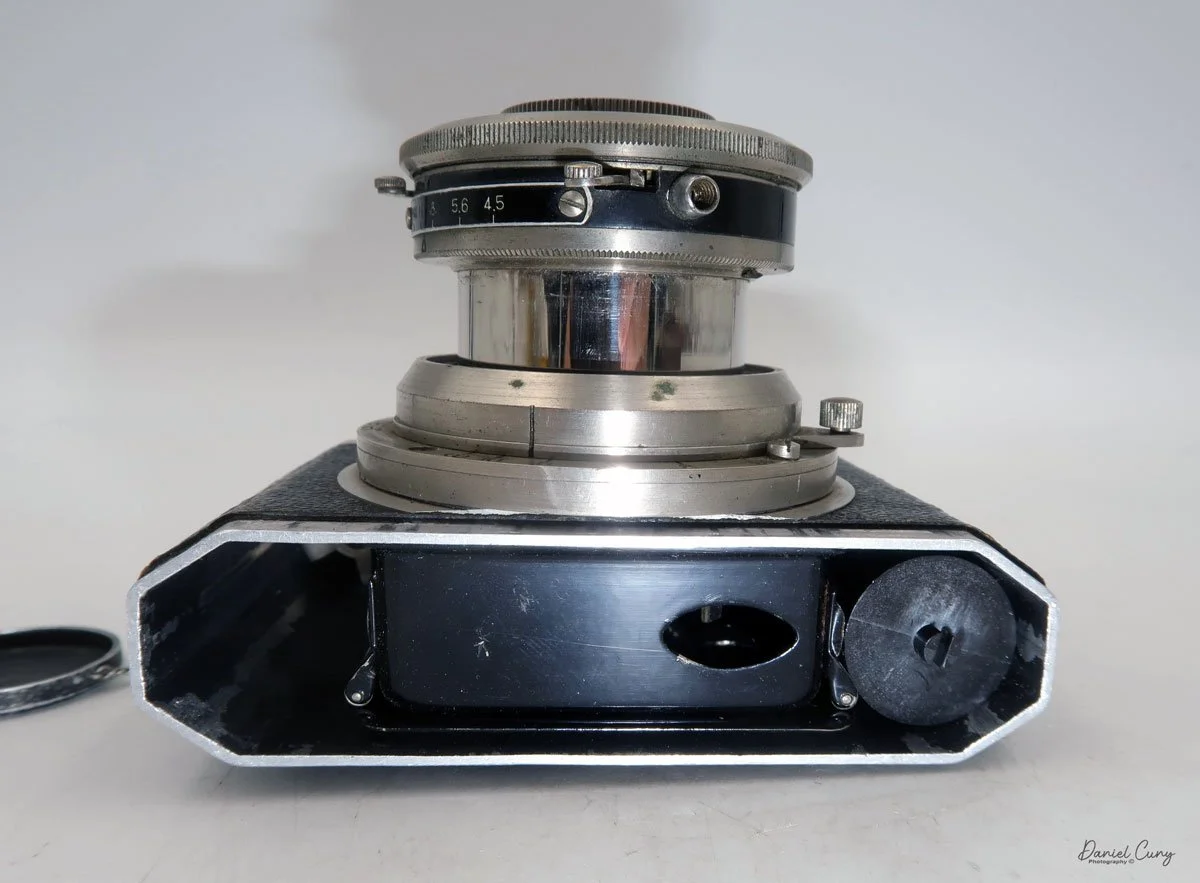
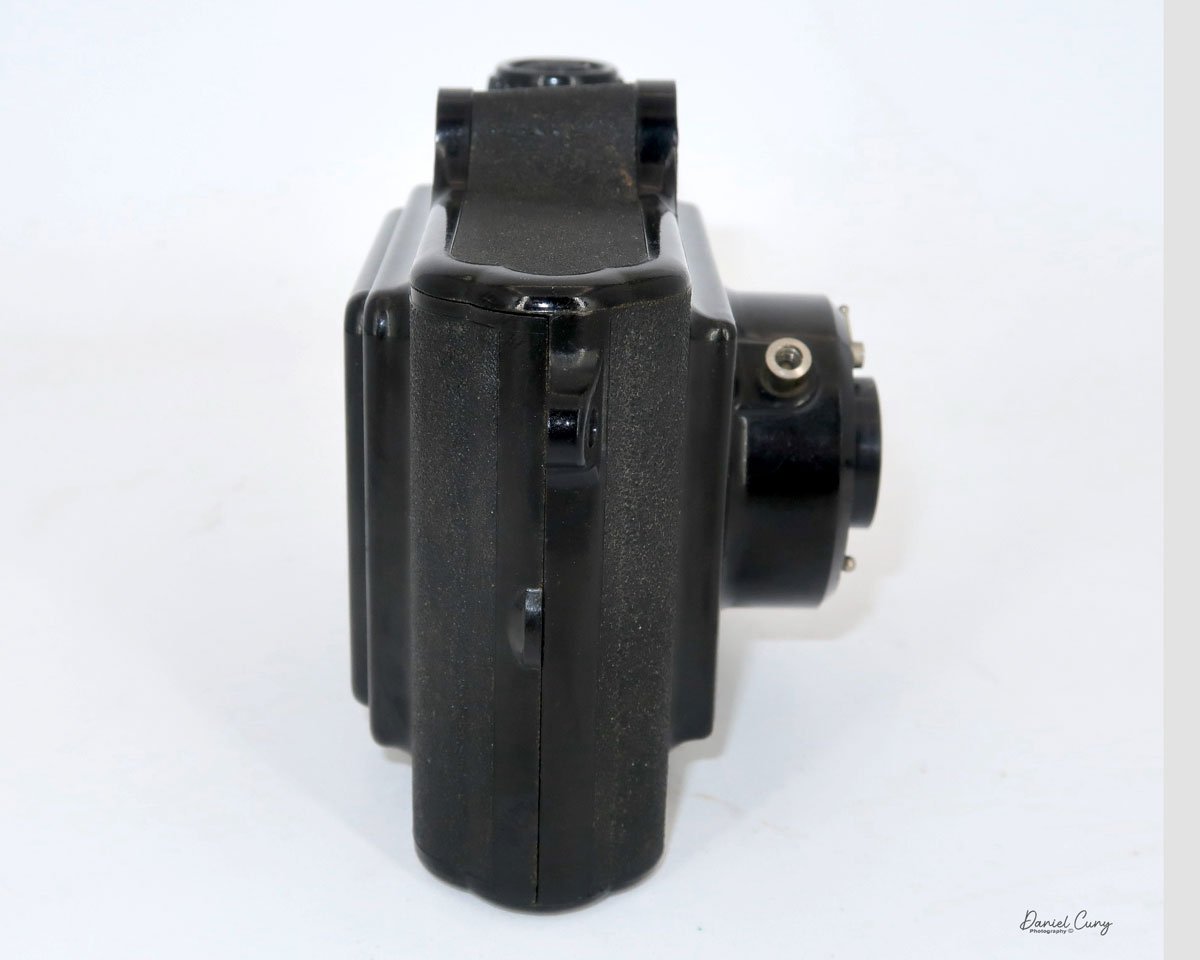
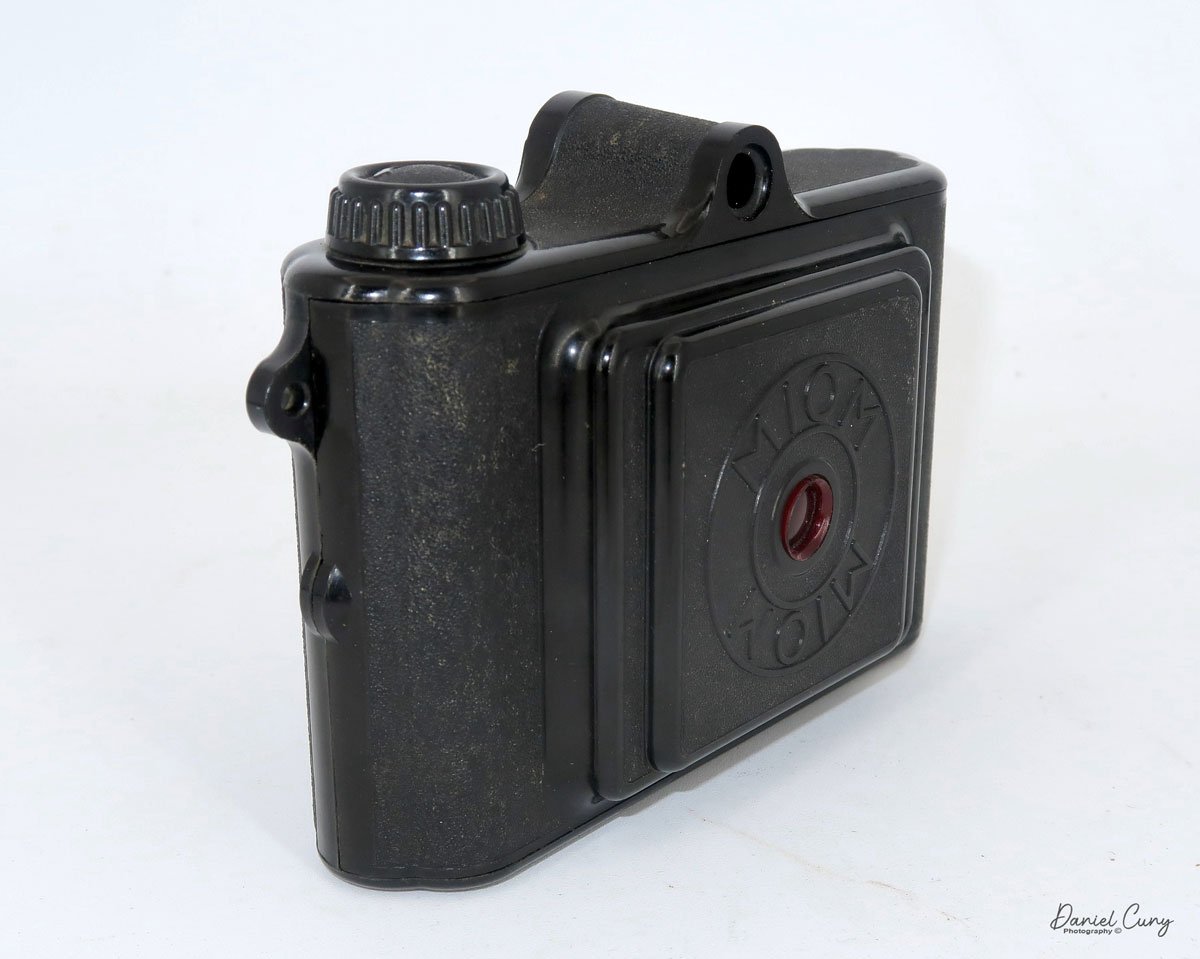
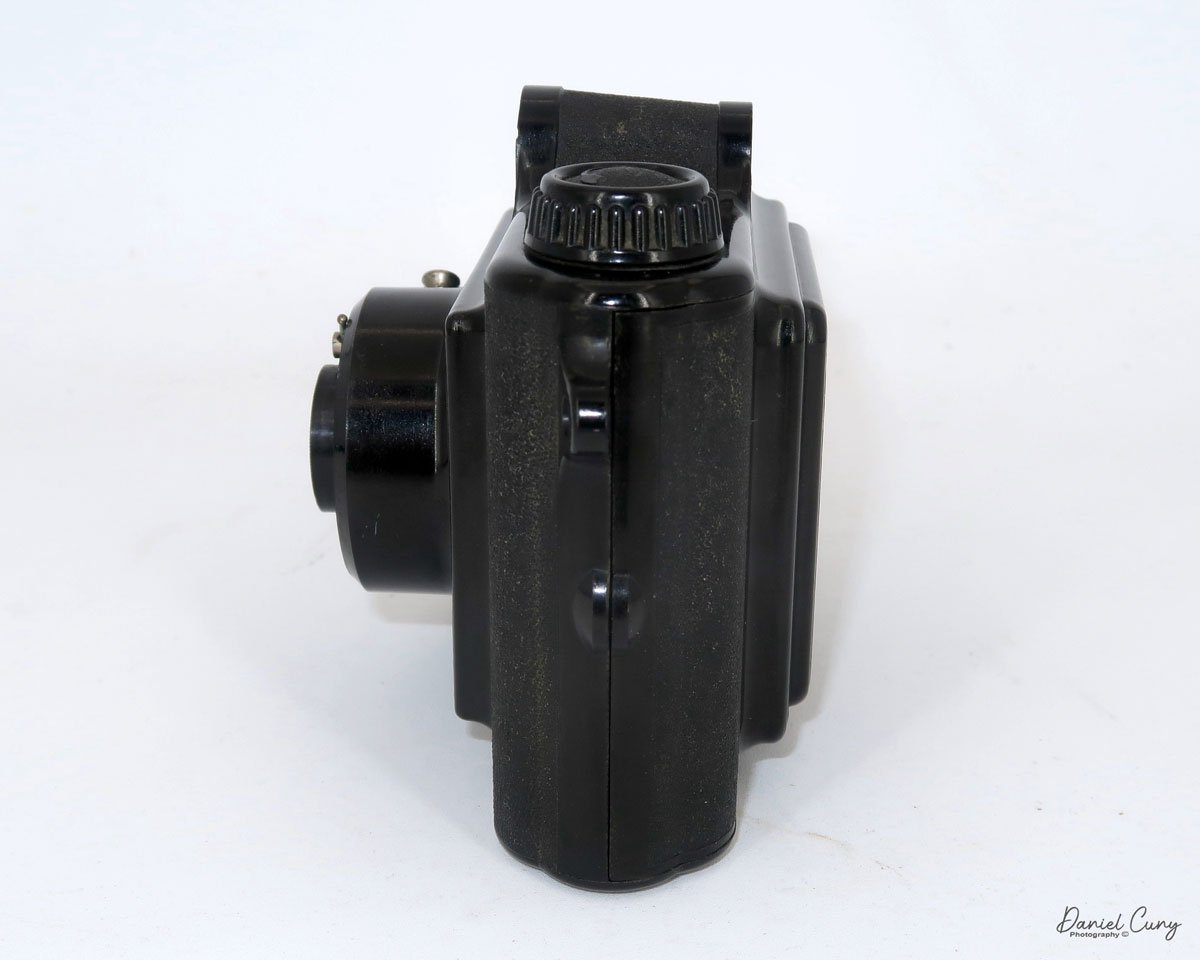
 My MIOM camera is 3.5" tall, including the viewfinder, by 5.5" wide, including the strap lugs, and 3" deep, weighing 9.4oz. It is very lightweight and compact. On the front of the camera, there are two shutter options. These settings are on the top and bottom of the 60mm Rexor lens, serial number 3147, on the camera. The camera has a crinkle finish within the acrylic, which makes the gripping easy and somewhat drop proof.

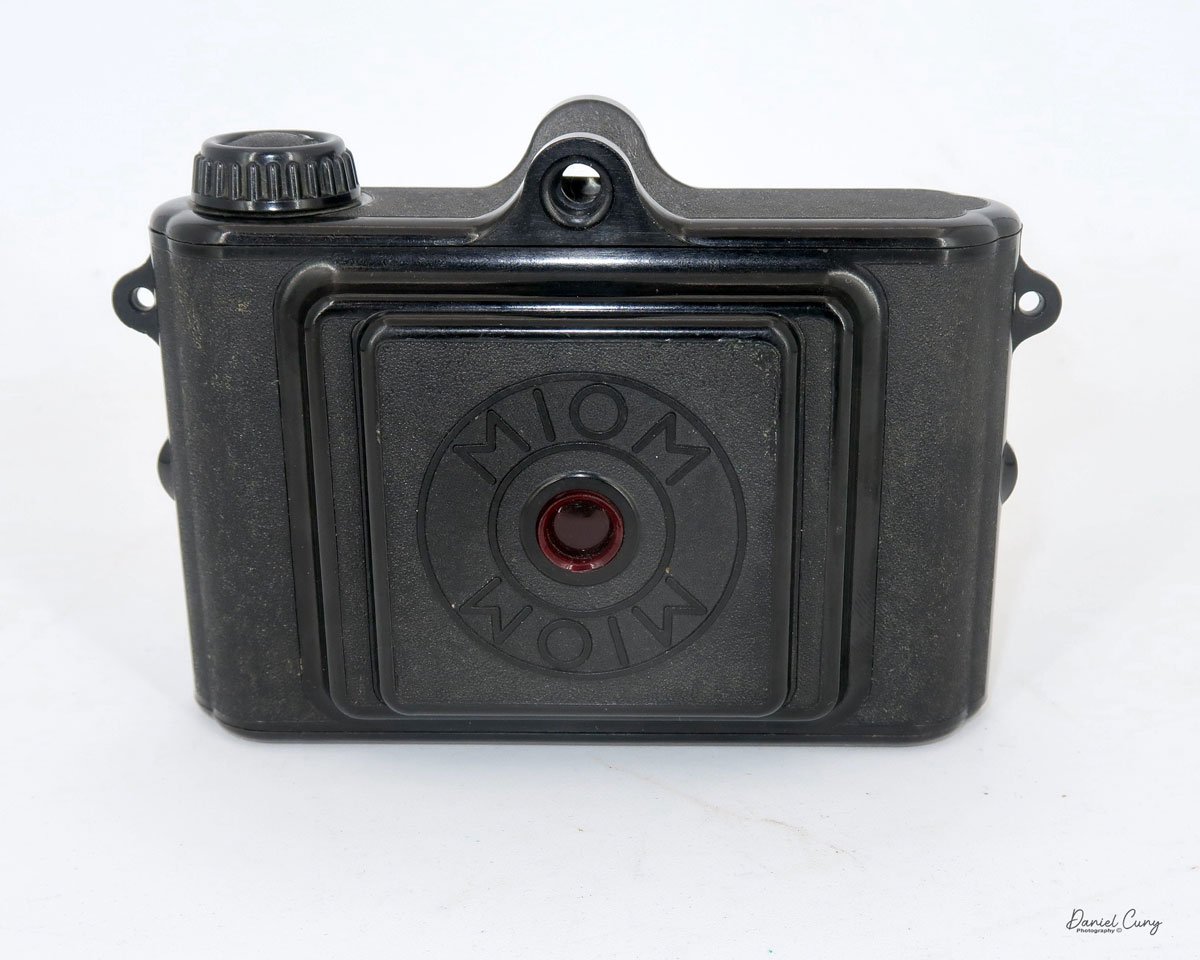
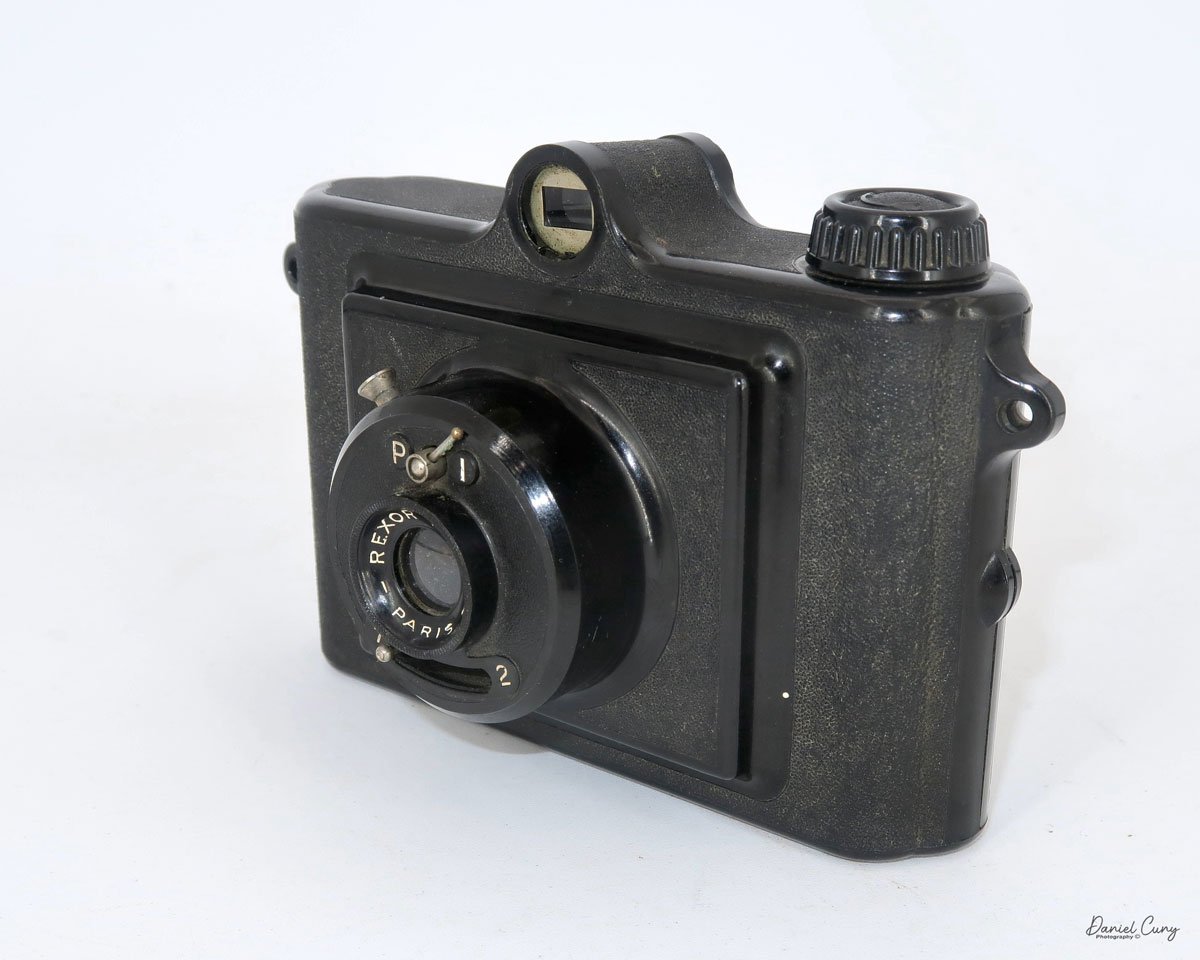
Above the lens are your shutter settings: "I" for instant, which has a shutter speed of approximately 1/50 sec., or "P" (B) for timed photos. Below the lens are two options for aperture settings. Looking online at other information on the Photax camera, the settings are 1 (Grand Diaphragme) for f16 or 2 (Petite Diaphragme) for f22. The words in the paratheses are written inside the camera's back door.

There is no latch or lock to hold the back onto the camera to load the MIOM camera with film. The back is held onto the camera's body with friction, and the back fits snuggly onto the camera's body. On either side of the camera are a couple of protrusions. I put my fingernail in between these nubs and pull, and the back will pull away from the body. You must do this on both sides so as not to crack the plastic and render the camera useless.

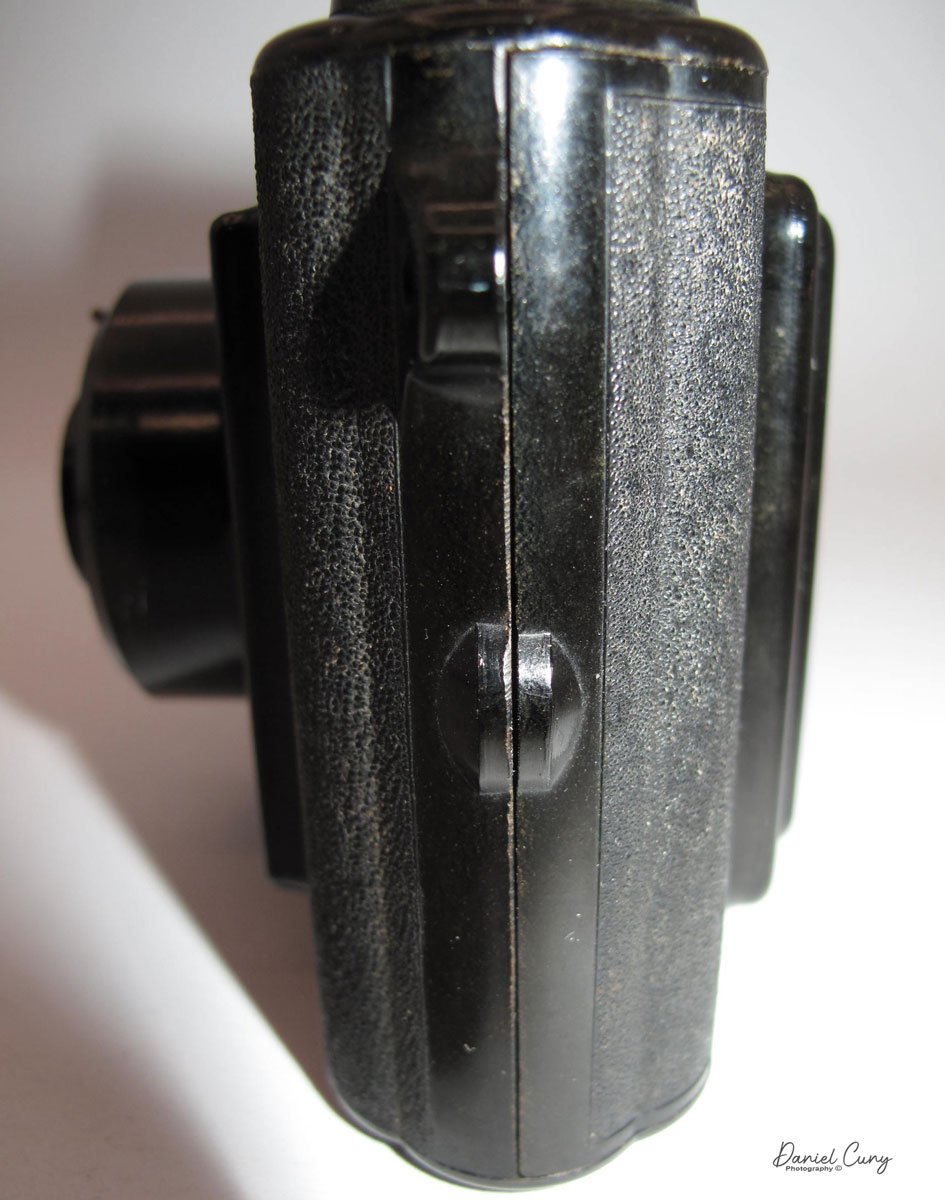
Once you get the back off the camera, I notice there are two red dots on the protruding nubs, which indicate which side fits together. The camera winds to the left, so you put the empty spool from the previous 127 rolls from the right side to the left and put the fresh roll of 127 films into the right side. Break the tape on the roll and bring the leader to the empty spool. Thread the leader into the spool slots and wind the film a few turns to ensure the film is lining up on the spool or until you see the arrows on the paper backing pointing outwards. Once you reach this point, it's time to put the back onto the camera. Once the back is on the camera, wind the film until you see the number 1 in the red window. Now you're ready to take the first photo.

 Once you take the photo and wind to the next frame, you'll get eight exposures on each roll of 127 film. Now that all the frames are taken, it's time to take the back off the camera and process your film.

My Results:

For total transparency, I had three rolls of older VP 127 film in my drawer. One roll's expiration date was June 1971. That roll went through the camera fine, but when I rolled the film onto the developing reel, something went array, and the film didn't process correctly. I loaded one of the other two rolls I had left, dated Sep.1968. This roll got jammed within the camera, so I'm unsure if I didn't load it properly or, due to the age of the film, it broke, but the film was very crinkled when I went to process it, and none of the images came out.

 It was an operator malfunction, and I didn't load it properly. Five rolls of film are arriving today from one of my favorite camera stores, Glazer’s Camera, in Seattle, WA, so I'd like to take the film, process it, and scan the images today.

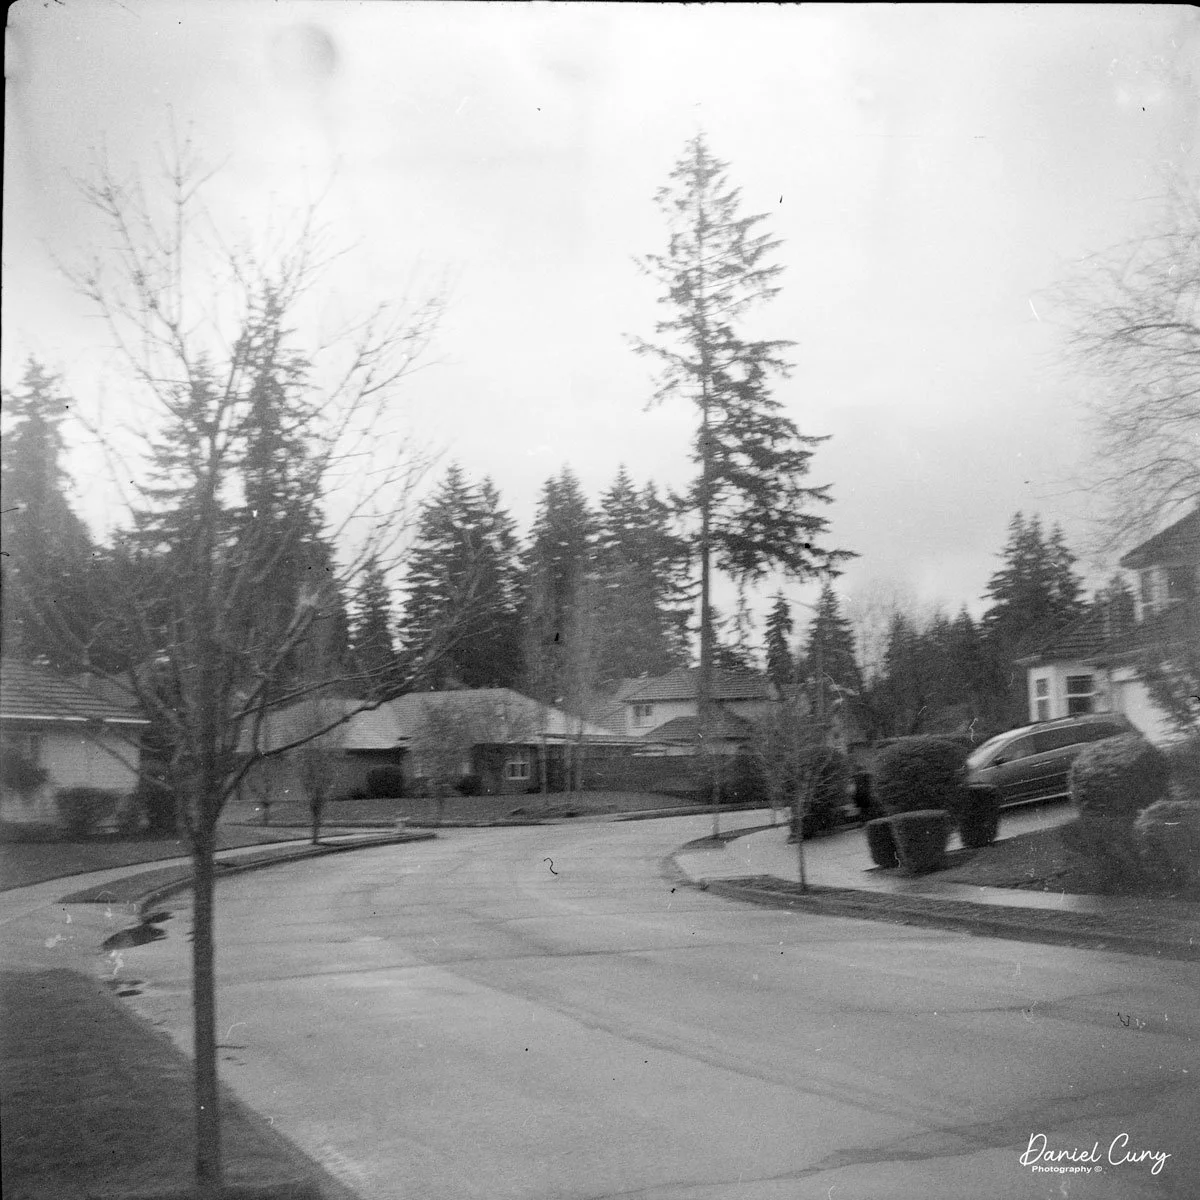
I received the film, loaded the camera, walked through the neighborhood, and took images. Luckily, this roll turned out, and you can see the results below.

My Conclusion.

I'm writing this portion of my conclusion before I have images from the camera, so at this point. In contrast, the camera is compact, and an earlier version of the MIOM cameras made, the film issues have made the experience somewhat frustrating. Once I get the images, I'll complete my conclusion and give you an honest assessment of the camera.

The images confirmed my suspicions. The camera was made to put cameras in the masses hands and for them to go and take photos of friends, family, and memorable moments. This camera did a decent job for a camera almost 90 years old. The plastics are rugged and on my camera, I’m missing the rear viewfinder glass so it was a bit more difficult to fame the images, but overall a decent camera.

 Thank you for taking a few minutes from your day to read about this early version of the MIOM cameras.

 Until next week, please be safe.

Arsen Camera

My Arsen Camera

When I first started collecting cameras, I was drawn to colored cameras, like the Kodak Beau brownies, the Rainbow Hawkeyes, Kodak Petites, and other brand colors or odd and unusual-looking cameras. I also like cameras with bold designs or odd or unusual faceplates on box cameras. I've always liked cameras with a bit of color or pazazz, as opposed to the more common black box or folding camera, which has black bellows. Heck, I still have many Kodaks and other brands with red bellows, which I prefer.

 I got a bug about purchasing another Gelto gold-finished camera a while back. I've owned a few in my camera-collecting life but sold them, and soon after doing so, I regretted that I did. I can remember looking on eBay and coming across a seller who was selling a couple of Gelto cameras, hoping that one of them was the gold version. However, the price for both was really low, so I pulled the trigger and purchased both what I thought were Gelto cameras.

 Upon the arrival of the package, I eagerly anticipated two distinct Gelto cameras. However, as I unveiled the contents and examined them closely, I was taken aback. One of the cameras was indeed a Gelto, but the other I had yet to anticipate, an Arsen camera. This unexpected discovery piqued my curiosity, prompting me to delve into the origins and features of the Arsen camera. To my surprise, I learned that the Arsen is a cousin of Gelto, which is produced by the same company.

The Company:

The Gelto, Arsen, and a few other cameras were made by camera maker Tōa Kōki, who might have been called Takahashi Kōgaku in the company's early years. The company was based in Tokyo. The earliest document with the Tōa Kōki name is from 1939, so it's unclear what the former name was. There were advertisements in 1937 and 1938 that have Gelto Camera Werke, but there's no record that was the actual name.

Ad for a Gelto Camera

 Before WWII, Tōa Kōki introduced the Gelto cameras in late 1936 or early 1937. They were a 3x4 format camera with 127 size film and a telescoping lens focused on a helicoid. Tōa Kōki survived WWII and was one of the 17 early members of the Optical and Precision Instruments Manufacturers' Association in Japan. Production of the Gelto cameras resumed in 1946.

From all my research, the Arsen camera was introduced in 1938 and was sold through Ars, which was Ars Seiki Kōgyō and the owner of the publication Ars Camera. It is the belief that's where the name of the Arsen camera originated from. Production of the camera ran through 1944. The Arsen camera had a different film format, 4x4, but still utilized 127 film. Another unique feature of the Arsen camera was that it used an "auto-stop" mechanism in the film's advance.

 By 1952, Gelto was now advertised by  Shinwa Seiki and was still based in Tokyo. It's not documented when the company ceased production, but it's assumed they closed soon after 1952.

My Camera:

My Arsen camera is 3.75" wide by 3.25" tall by 2.25" deep with the lens retracted and 2.75" deep with the lens extended. My camera weighs 15.5 oz. so the camera is relatively small, compact, lightweight, and easy to carry around. ARSEN is embossed into the leather on the left side of the camera. My camera has a metal lens cap, which a previous owner painted black, and it is difficult to read "Arsen" through all the scratches screwed to the camera body with a small chain is how the camera was originally sold.

The camera has an Anastigmat Grimmel 50mm f4.5 lens mounted in a retractable tube that you extend to take photos and then push back for transport. The lens aperture ranges from f4.5 to f22. To set the aperture, you rotate a ring on the back side of the lens tube to the desired aperture. 

 The shutter speeds on the Arsen camera go from 1/250 down to 1/5 sec. along with "B" for bulb exposure and "T" for timed exposure. The shutter speed settings are located on a ring on the outside of the lens tube, which you rotate to set the desired speed. ARSEN is written along the bottom of the camera, under the lens, and on the same faceplate as the shutter speeds. Also on the film tube is the helicoid focus. An arm rotates to focus the lens from 0.5 meters to infinity. The focus marker is on the ring the lens pulls away from. There is also a "stop" on the focus ring, so you cannot move the focus ring past the minimum focus distance and infinity.

Like most cameras, you'd think the baseplate comes off to load film into it, but on the Arsen camera, the baseplate only contains the serial number (my serial number is 26725) and tripod socket. The camera is loaded by removing the top of the camera.

 A locking lever with a turning key is on the top of the Arsen camera. Lift up the turning lever and turn from "L" to "O" to unlock the top from the camera body. Lift the top off the camera to expose where you load the film. The film advance knob is on the right side of the camera, so you need to take the empty spool from the left out of the camera. The camera loads similarly to a Leica, where you need to start to load the film onto the take-up spool before you put both the take-up spool and roll of film into the camera. 

Sliding both the unexposed film on the left and the take-up spool with some of the film's rolled paper backing onto the take-up spool, sliding the paper backing into the small slot behind the lens. It's easy, but it is something that could be more intuitive. Holding both the roll of unexposed film, the take-up spool with some of the paper backings rolled onto it, and trying to slide both into their slots and the paper backing into a small slot behind the lens took me a few tries, but it happened.

 Once the film is in the camera, you open the door covering the back window and wind the film until you see the number 1 in the window. The camera does have a film auto stop built into the winding mechanism. Just to the right of the viewfinder on top of the camera is a small lever you must pull out to let the camera advance to the next frame. I needed to pull this lever several times until I got to frame number 1. This will need to be done to rotate the winding knob to advance the film to the next frame. There is also a frame counter on the top of the camera just to the left of the winding knob.

Top plate showing Winding knob, Frame counter, Locking mechanism, Lock release for auto-stop on film advance, Viewfinder and accessory shoe.

 Also on the top of the camera is the small viewfinder, which is easy to view through, and an accessory shoe. The shoe is for a flash attachment or accessory rangefinder if you want a more critical focus on the camera instead of using your best judgment on guessing distance.

My results:

I loaded the last roll of 127 film into my Arsen camera and took it with me when I took my dog for a walk around the block. As I pulled the lens away from the body, I started to turn the lens, and it came out of the lens mount. I was getting ready to take my first photo and I have the lens loose still on the camera. I got the lens back onto the camera but lost a few shots of the film. I was also still determining where the proper settings would be regarding the focus of the lens, but I guessed. After processing the film, there were images, but still determining if the focus or lack of focus could be attributed to the mounting of the lens in the field. Most likely, it's not where it should be, and the camera actually performs better than what these photos show.

Conclusion:

The Arsen camera isn't rare or unusual, but like many cameras in my collection, it's fun to use. That's something I enjoy about trying, and using so many different cameras is how they all work just a bit differently, so it's all about how you feel and how easy it is to use. This camera was very average. Other than the auto-stop with the film advance, there's nothing earth-shattering about the camera, but still fun to shoot.

 This is the last camera review before the holidays. For all my Christian friends, Merry Christmas; my Jewish friends, Happy Hanukkah; and my African American friends, Happy Kwanza; and for all others, Happy Holidays. May you be healthy and enjoy it with friends and family

 Until next week, please be safe.


Gallus Derlux Camera

I can still remember when my wife and I visited Paris about 10-12 years ago and went to a small flea market in one of the arrondissements we were staying near and seeing for the first time the Gallus Derlux camera. My first impression was the camera needed the leather coverings that usually adorn cameras. Still, upon further inspection of the camera, it was made to have a silverish metal body as its covering. This was a camera I needed to have since its appearance was so different from any camera I had seen in the past.

My Gallus Derlux camera

 That was the first Gallus Derlux I've owned over the years. I sold that camera at the Paris flea market a couple of years after purchasing it, and I have bought and sold a couple of other Gallus Derlux cameras over the years. Recently, I had the bug to purchase it again to add to my collection. 

 I talked to a fellow camera collector, and he told me he had one and would sell it to me for a reasonable price, as I know he's downsizing his collection. I need to do the same thing but I purchased it from him. This camera has a working shutter and a nice pouch case. At this point, since I've had a few of these in my life, it's time to put some film in the camera, take it for a spin around the neighborhood, and write a post on it.

The Company:

To discuss the camera company, Gallus, we need to include the German company Foth in this discussion. After WWII, Gallus, which was in Paris, was either licensed by Foth or Foth moved their operation to Pari and renamed the company Gallus due to what was going on in Germany after the war. Let's start with a bit of information on Foth and work our way forward.

 The C.F. Foth Company, established in 1930 in Berlin, Germany, gained recognition for its innovative design and engineering of compact cameras. The Foth Derby series stands out as a celebrated line of cameras known for their portability, affordability, and reliability. The original models were a less expensive alternative to the more expensive Leica and Contax cameras of their time, but they utilized 127 film as opposed to 35mm from Leica and Contax. These cameras catered to the needs of amateur photographers and gained a reputation for their high-quality performance in a compact form.

 The Foth Derby cameras were introduced in the 1930s and remained in production through the late 1940s. They were designed with portability in mind, featuring a folding bellows system and compact dimensions that made them a popular choice for travelers and casual photographers. The cameras used 127 roll film, producing images in 4x6.5 cm format, a size well-suited for personal and artistic photography.

One of the defining features of the Foth Derby was its focal-plane shutter, which was uncommon in compact cameras of its time. This shutter system allowed for faster shutter speeds, up to 1/500th of a second, allowing photographers to capture motion and shoot in bright lighting conditions. The Derby series was also equipped with high-quality lenses, such as the Foth Anastigmat, or later upgraded models like the Foth Derby Anastigmat f/3.5, ensuring sharp and well-resolved images.


The Foth Derby evolved through several iterations, each offering incremental improvements and adaptations to meet changing photographic trends. Here are some general differences:

  1. Foth Derby I (1930): The original model featured a basic lens and a simple shutter mechanism. It utilized a 24x36mm format on 127 film and was praised for its ease of use and portability, making it accessible to novice photographers. 

  2. Foth Derby II (1931-): This version introduced the 3x4 (30x40mm) film format. The camera's build quality was also refined for greater durability, and several different lens options were offered.

  3. Foth Derby III (1935-39): This model had several different viewfinder and lens options. Some models had interchangeable mounts that allowed the use of some Zeiss and Dallmeyer lenses.

  4. Foth Derby IV (1936-40): This model had an aluminum front standard that housed an integrated rangefinder for focus. It also offered a choice of different lens options.

 Somewhere around 1937, the combination of both Foth and Gallus became intertwined because in 1937, Foth came out with:

  1. Derby V: Made by C.F. Foth & Cie in Paris. It still has the 30x40 film format on 127 film, but the build quality was a bit rougher coming out of the French factory.

  2. Gallus Derby (1937-) was the start of the Gallus line of cameras, taken from the Foth Derby. The build quality was rougher than that of the German-made cameras and about 10% heavier.

 As a collector, you can see the progression of design and features from the Foth Derby and how it morphed into the Gallus Derlux, using part of the Derby and Delux naming and wanting to separate from the originating company.

My Camera:

My Gallus Derlux camera is 5" wide by 3" tall by 2" deep with the lens retracted and 3" with the lens extended in the usual picture-taking position. My camera weighs just under 15 oz, at 14.9 oz. and has a Gallus 50mm f3.5 lens built into the camera. The camera is a fundamental one without an integrated focusing system, but rather a simple viewfinder on top of the camera for general framing of the photo you desire. The Gallus Derlux has a vertical focal plane shutter and takes 16 30x40mm exposures on a roll of 127 film. 

To take a photo, you must pull the front lens section from the body. The lens plate has a small "hump: on the top and bottom to grip onto to pull the lens plate away from the camera body. The lens plate is on a strut on either side of the plate, which exposes the internal bellows built into the camera. After taking photos, you push the lens plate back into the body, where it stays for transportation. This makes the camera slimmer and more manageable to slip into the case or pocket for transportation.

 The lens and focus system are located on the lens plate. To focus the lens, hold onto the larger focus arm, which is very similar to what's used on the Leica system, and rotate the helicoid lens to the desired guessed distance to the subject. There is a stop arm, so you cannot unscrew the lens from the body. The minimum focus distance is 1 meter to infinity. The aperture settings are on the lens. The aperture goes from f3.5 to F18. To adjust the aperture, turn the lens to the desired aperture settings, which is the same indicator that tells the focus distance. This makes it easy to use because you can set aperture and focus in the same area.

The shutter speeds are set on the camera's top. The shutter speeds go from 1/500 down to 1/25, along with "B" for timed exposures. To set the different shutter speeds, you need to lift the shutter speed dial and rotate the dial to the desired speed, which is indicated by a small dot. You also need to wind the shutter to cock the shutter as it's not incorporated in the winding process, which is what most current cameras have. To cock the shutter, just turn the knob on top of the camera, which have the shutter speed on it in the clockwise direction until it stops. The shutter is now cocked and ready for the subsequent exposure. The shutter release is located on the front of the camera on the right side and just next to the film plate.

Shutter speed dial. Lift and turn to set speed..

The Gallus Derlux utilizes two red (and green) windows on the back of the camera. These two windows are inside an immense depth-of-field scale on the back of the camera. Two windows allow the photographer to get 16 images on 127-size film. 

Back of Gallus Derlux camera

The film doors release is located on the right side of the camera to load the camera with film. Pull down the release button and swing the door open, which exposes the film chamber. Take the blank 127 reels from the right side of the film chamber by pulling up the knob above it and taking out the blank reel. Put the blank 127 film reel into the left side where the film transport knob is located. Lift the winding knob to insert the blank reel. Put your fresh and unexposed roll in the right chamber and press down the knob that holds it into place. Put the paper from the unexposed toll into the blank reel and wind it, ensuring the film moves. Stop when you see "start" and close the back of the camera.


To get 16 exposures on your roll of 127 film, wind the roll of film in the camera to frame number 1 to the first window, which on this camera is the window on the right-hand side of the backdoor. After you take that photo, wind the film until you see frame number 1 in the other window or the one on the left side of the backdoor. After you take that photo, frame number 2 will appear on the right side of the red window. Continue this process until frame number 8 is taken on the left side of the window. Wind until the film is all the way onto the take-up spool, open the back, and take the film out for processing.

My Results:

I put a roll of 400 ISO film in the camera and wandered around my backyard and the neighborhood streets. I used 400 ISO because the fall and winter in my neck of the woods are usually overcast. During my walk, the sun just so happened to come out, so I was forced to use the faster speeds on the camera.

After I took the photos and processed the film, I also noticed a gap between the two shutter curtains when winding the shutter to the next photo, causing a light leak on many of the images. I must have pointed the camera down or had the lens in a darker area several times because there were a few good images, but many were terrible. I also don't have a lens cap for this camera, so the next time I use the camera, I'll need to cover the lens when cocking the shutter so I don't expose the film to light before or after exposure.


If you have this or similar cameras and are mechanically inclined, I found a great article on someone overhauling the shutter on his Gallus Derby Lux camera.


Conclusion:

This was a fun camera to use. It's very simple, takes a nice larger image, and is small and compact. I'll need to find a lens cap for the one before I shoot again or just place my hand over the lens when cocking the shutter.

 Thank you for taking a few minutes from your day to look over this post.

 Until next week, please be safe.


Zeiss Kolibri-The Hummingbird

My Zeiss Kolibri Camera

The Zeiss Kolibri, which means "Hummingbird" in German, has always been a camera I wanted for my collection. I liked it mainly because it's very sleek and petite and resembles a 35mm camera, but its main attraction was its use of a larger 127 film size. The camera was built only for a few years, from 1930 through 1932, but I've seen ads for it through 1935.

 I had the opportunity to purchase one when I visited an antique store while on a trip to Minneapolis a couple of years ago. Still, I didn't pull the trigger to buy it, and ever since that trip, I've regretted it, so when I noticed an online auction for a few of the Zeiss Kolibri cameras come up for auction, I jumped on the opportunity and bid on two. At first, I thought these were different years of production, one being older than the other. One is more worn and used than the other. Both have the "cane," which keeps the camera upright, and both are in working condition.

 I won the cameras in the auction for a fair price, including the auction house commission and shipping fees. When the cameras arrived, I was pleased to see both in good working condition. One of the cameras seemed well used, and the other needed the aperture scale indicator, something I didn't notice when I bid on the items. Still, overall, I was pleased with the purchase and wanted to take one of the cameras out to see how it would perform.

History:

The story of Zeiss cameras is deeply intertwined with the evolution of optical technology and the art of photography. Founded in 1846 by Carl Zeiss in Jena, Germany, the company began as a precision mechanics and optics workshop. While its early focus was microscopes, the company's commitment to innovation soon extended to camera lenses and photographic equipment, establishing Zeiss as a pioneer in the optical and photographic industries.

The two Kolibri cameras purchased

 In the late 19th century, Zeiss gained prominence for its advancements in lens manufacturing. In collaboration with physicist Ernst Abbe, the company introduced revolutionary optical theories that improved lens quality and design. This partnership led to the creation of the Zeiss Anastigmat lens in 1889, which minimized distortions and chromatic aberrations, setting new standards for photographic lenses.

First Zeiss Logo

As photography gained popularity in the early 20th century, Zeiss partnered with other manufacturers to produce complete cameras. In 1926, Zeiss joined forces with several German camera companies to form Zeiss Ikon, consolidating its leadership in the industry. Zeiss Ikon cameras, like the Contessa-Nettel and the Ikonta, became renowned for their precision engineering and exceptional optics.

 One of Zeiss's most iconic contributions to photography was the Contax series, introduced in 1932 to compete with Leica. The Contax cameras were known for their innovative designs, including using a rangefinder system and superior Zeiss lenses like the Sonnar and Biotar. These cameras quickly became favorites among professionals and enthusiasts for their sharpness and reliability.

Ad for Zeiss Kolibri camera

During this period, Zeiss also developed a range of lenses that became benchmarks in the industry. The Tessar lens, introduced in 1902, remains one of the most widely used lens designs in photographic history, praised for its sharpness and compact size.

World War II disrupted Zeiss's operations, splitting the company into East and West divisions. The East German division, headquartered in Jena, retained the Zeiss Ikon name, while the West German division, based in Oberkochen, became Carl Zeiss AG. Despite the division, both branches continued producing high-quality photographic equipment.

In the 1950s, Zeiss partnered with Japanese camera manufacturers, most notably Yashica, to produce the Contax series. This collaboration introduced groundbreaking features like TTL metering, which became an industry standard.

 By the late 20th century, Zeiss shifted its focus from producing cameras to developing advanced lenses for various manufacturers. The company collaborated with brands like Sony, Hasselblad, and Nokia, bringing Zeiss optics to a broader audience. In 1996, the Contax G2, a rangefinder camera with autofocus and electronic control, became a cult favorite, blending modern technology with classic Zeiss craftsmanship.

In the digital era, Zeiss continues to push the boundaries of optical technology. Its lenses are widely used in professional photography, cinematography, and even smartphones. The company's commitment to precision, innovation, and excellence defines its legacy.

 From its beginnings in 19th-century Jena to its status as a global leader in optical technology, Zeiss has profoundly shaped the world of photography. Its cameras and lenses have captured countless iconic moments, leaving an indelible mark on history. Today, Zeiss is synonymous with unparalleled optical quality, a testament to over 175 years of innovation and craftsmanship.

My Camera:

My Kolibri camera is 4.5" tall without the viewfinder erected and 5.5" with it erected, by 3" wide and 2" deep without the lens in the taking position and 2.75" with the lens popped out and in the taking position. My camera weighs just over 1 lbs at 1 lbs .6oz. With the viewfinder down and the lens retracted, it's a very compact and sturdy camera that takes 16, 3x4cm images on 127-size film. The Zeiss Kolibri (523/18) has a couple of different lens and shutter combinations. The one I used to take the photos has a Novar Anastigmat 5cm F4.5 lens in a TELMA shutter. The other camera I received has a Carl Zeiss Jena Tessar 5cm F3.5 lens in a Compur shutter. A third model has a Zeiss Biotar 5cm F2 lens. All of the different lens/shutter combinations are in a chrome polished tube that pulls out to take the photos and to retract, grab the "wings" on either side of the lens, turn the lens slightly counter-clockwise, and press the lens back into the camera body. You also grab the "wings" to pull the lens out to take photos.

The Telma shutter has only three shutter speeds, 1/100, 1/50, and 1/25, along with "B" and "T" for timed exposures. The Compur shutter is more extensive, with shutter speeds starting at 1/300, 1/100, 1/50, etc., to 1 sec along with "B" & "T." The shutter release is on the left-hand side with the Telma shutter, and you do not need to cock the shutter; just press the shutter release and the shutter fires. On the Compur shutter, the cocking mechanism is on top of the shutter, and the shutter release is below, so there is a little difference between the two cameras in the shutter and shutter release function.

Telma shutter

On both cameras, the aperture settings are under the lens with a little slide that points to the aperture setting. Focus on both cameras is done by a slider knob on top of the camera, with the closest focus at 1 meter. On the bottom of the ring that has the "wings" on it is a hole that the "cane" or strut fits into to keep the camera upright, with either the lens out or retracted. Using the "cane" is excellent for timed exposures, connecting a cable release to take a timed exposure. There is a cable release socket on both cameras incorporated into the shutter.

The aperture ring is under the lens. The shutter release is on the left, and the self-timer is on the right with a red dot.

To load the film, you slide the knurled knob on the top of the camera in the direction of the arrow to open the back to load and unload the film. Once you open the back, you take the empty spool and put it on the left end, which has the winding knob, then put the fresh roll of film into the film chamber, pull the leader to the empty spool, put the leader into the slot on the reel and turn the winding knob until you see "start" on the film's paper backing. At this point, close the back of the camera and wind until you see the number 1 in the lower of the two windows. Now that you're ready to take your first photo, lift up the front and rear viewfinders so you can frame the image and take your photo.

 Since the camera has two red windows on the camera's back, the spacing between the top and bottom windows is the same as the negative size. You would take the photo once you wind the film so the number 1 appears on the bottom window. Once the photo is taken, wind until you see the number 1 in the top window, then take the picture. After you take the photo with the number 1 on the top window, roll until you see the number 2 on the bottom window and do this through the number 8.

Here's where I had some issues, and it's something I kept in mind when I was done taking the photos. In my small and simple mind, as I was holding the camera in a vertical position, it was in my mind that the camera would take a vertical photo. Unfortunately, that's not the case. If you're holding the camera in the vertical position, the camera is taking a horizontal image due to the orientation of the frame area in the camera. So, the photos I took that should have been horizontal were taken vertically and vice versa. I felt like an amateur when I finished taking the photos, only to realize I did it wrong.

 The viewfinder is tiny, and since I wear glasses, it's challenging to use. Its size also made it difficult to frame the photo accurately. Toward the end of the roll, I would just point the camera at the subject and "guess" on the framing, which seemed pretty good, with the exception of the vertical/horizontal format mishap.

Small viewfinder and glasses do not mix well.

 Once the photos were taken, I unloaded the film and processed them, and they turned out nicely.

 The serial numbers for my two Kolibri cameras are only 40 pieces off. The more well-used version is S.98995, and the Kolibri with the Compur shutter is S.98955, so they were built relatively close to each other. 

 My initial belief was that the camera with the Telma shutter was an older version. I believed that it was an older model because one camera was more used than the other. Now, I realize that the shutter and lens combination would be for a more or less expensive model that the consumer would purchase. If someone wanted the less expensive Telma shutter with a slower lens or the more expensive faster lens and Compur shutter, that made more sense to me.

My Results:

Here are some of the images taken with my more well-used Kolibri camera. I used it because the other camera didn't have the aperture settings, and I would have had to guess at the aperture. That would have been okay, and I'm a pretty good judge of that, as I could have marked on the camera what I thought the aperture setting should be.

Conclusion:

Except for my confusion about the vertical/horizontal format and the camera orientation, it's a fun camera. It is very well made, the photos are nice and sharp, and the camera fits nicely in my pocket when the lens is retracted and the viewfinder is down. As it is compact and sturdy, I can use it more often.

I look forward to shooting more photos with this in the future, but I must remember that when the camera is vertical, it's taking a horizontal photo.

 Thank you for taking a few minutes from your day to read about this gem of a camera. I hope to see you next week when I review another camera from my collection.

 Until next week, please be safe.