Ansco Memo Camera

My Ansco Memo camera

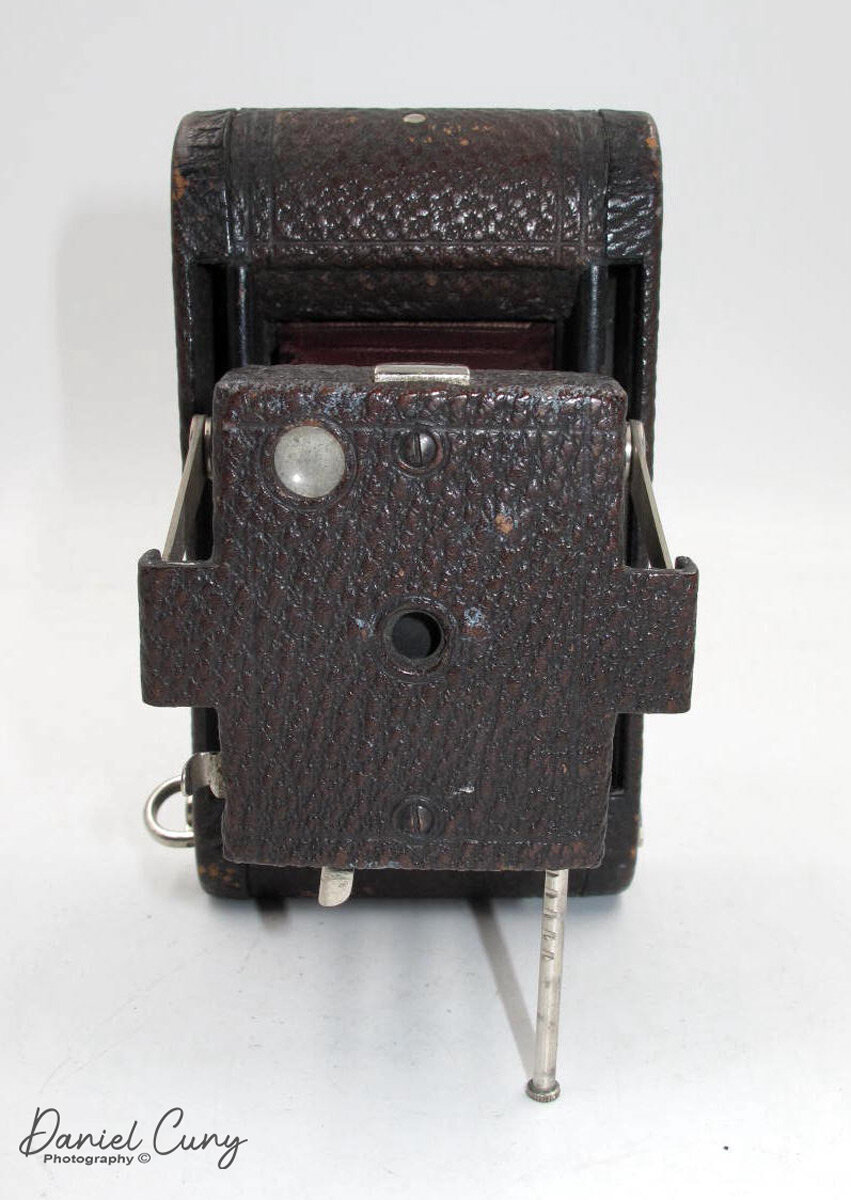
The Ansco Memo camera is this week's camera that I'm spotlighting, and it's a camera I've been itching to use for a while now. It's also the second time I've owned this particular camera. The first time was almost 35 years ago when I came across it at a camera show and was struck by its vertical design with the small round viewfinder on top. At first, I thought it may have been a small, odd box camera, but upon further inspection, it was a fairly early 35mm camera.

 My camera collection is constantly evolving, and I had sold the Memo camera I owned. However, my fascination with the Ansco Memo camera persisted, leading me to seek out another one a few years back. This time, I was on the lookout for the Boy Scout version of the Memo camera, a rare find that commands a price twice that of the standard version. 

 I found the current Memo camera online at an excellent price. The purchase was during the lost COVID years. The camera came with a significantly worn leather case, but it didn't have the needed film cassettes to use the camera. The Ansco camera was introduced between 1926-27, and the regular 35mm cassettes we're accustomed to now weren't standardized until 1934. Any camera manufacturer that made 35mm cameras during this time period had their own 35mm cassettes to use in their cameras. There is another Memo camera that's made by Agfa, which has similar cassettes and is somewhat interchangeable with the Ansco version. Still, I'll talk more about that later in the post.

 My Memo camera appeared to be in good working condition, with a functional shutter, so I was eager to use it for this post. I reached out to my friends in the camera-collecting community, and one of them, who had acquired a substantial collection in the past, came to my rescue. He not only had the empty cassettes I needed but also a roll of Agfa pre-loaded film in a cassette that would fit my Ansco camera. His generosity was overwhelming, and I was now fully equipped to use my camera.

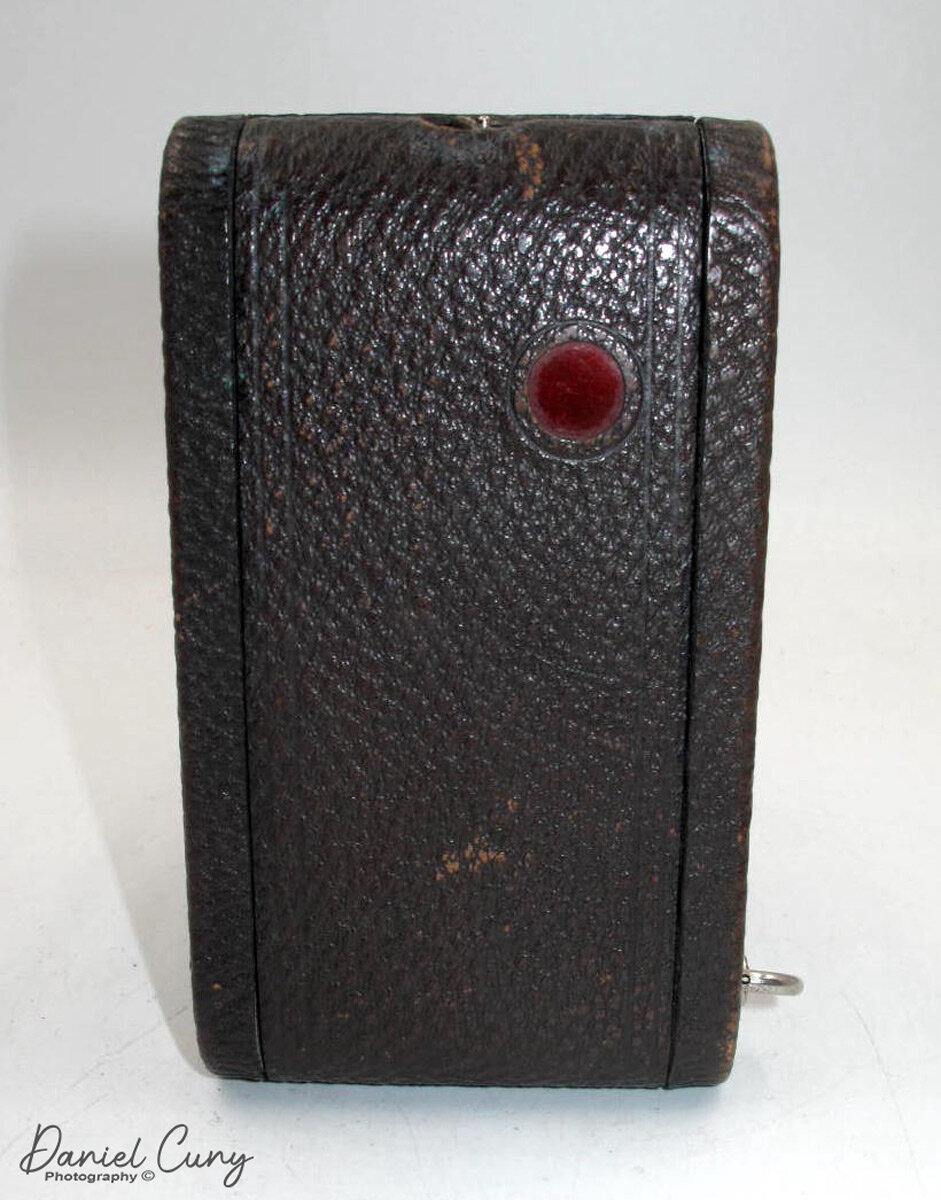
My Ansco Memo camera with very worn case.

The Company:

The Ansco Camera Company has a fascinating history and is a key player in the evolution of photography. Its roots can be traced back to 1842 when Edward Anthony, a prominent photographic supplier in New York, established E. Anthony & Co. Initially, the company focused on importing and selling daguerreotype supplies, but as the industry progressed, it began producing its own photographic equipment.

 In 1854, Edward's brother, Henry T. Anthony, joined the business, leading to its rebranding as E. & H.T. Anthony & Co. The company thrived during the American Civil War by supplying cameras, chemicals, and photographic plates, which were critical for documenting the conflict. By the late 19th century, Anthony & Co. was one of the largest photographic supply houses in the United States.

 The pivotal moment in the company's history came in 1902 when it merged with the Scovill & Adams Company, a long-time competitor. This merger resulted in the formation of the Anthony & Scovill Company, which adopted the name "Ansco" for branding purposes. Ansco emerged as a significant player in the early 20th century, producing cameras, film, and related accessories.

Ansco Memo Ad.

 Ansco's fortunes were closely tied to innovation and competition. It introduced popular products like the Ansco Memo in 1927, one of the earliest subminiature cameras, and the Anscoflex in the 1950s, a unique twin-lens reflex camera designed by the famous industrial designer Raymond Loewy. Its cameras were known for reliability and affordability, appealing to amateur photographers.

During World War II, Ansco faced a significant challenge due to its ties to the German company Agfa. Ansco was owned by the German chemical conglomerate IG Farben, leading to its seizure by the U.S. government under the Trading with the Enemy Act. Post-war, the company was Americanized, and its assets were sold to General Aniline & Film (GAF) Corporation in 1943.

Under GAF, Ansco continued to produce innovative products, including cameras and color film. However, by the 1960s, it struggled to compete with industry giants like Eastman Kodak and Polaroid. GAF eventually shifted its focus to industrial applications of photographic film, and Ansco's consumer products gradually disappeared from the market.

 Despite its decline, Ansco's legacy endures in the history of photography as a company that made significant contributions to camera technology and film production. Its influence is still appreciated by collectors and photography enthusiasts who treasure its vintage cameras and historical impact on the field.

My Camera:

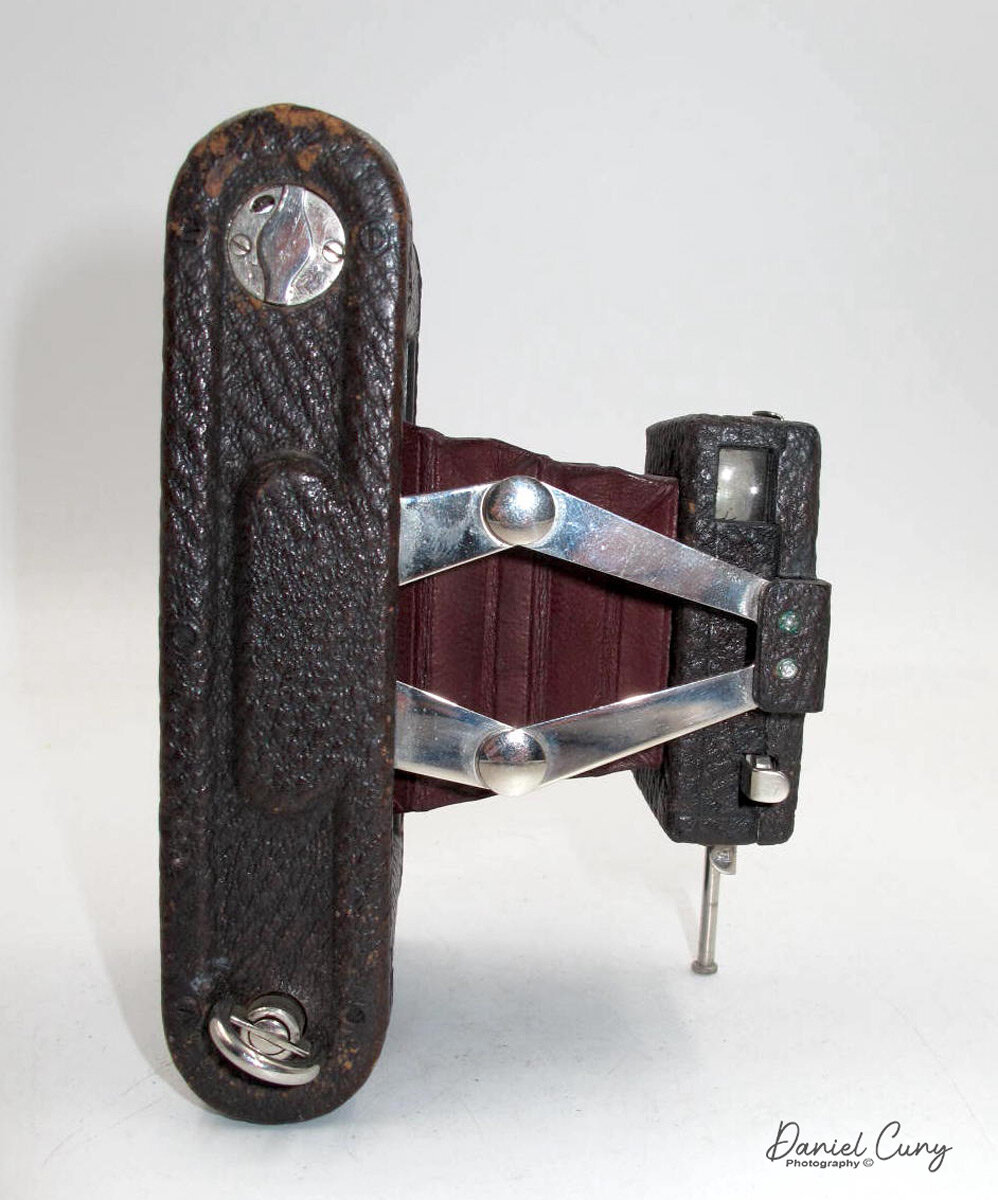
My Ansco Camera is 5" tall, including the round viewfinder, by 2 3/8" wide, including the shutter release, by 2 5/8" deep, and weighs 13.8 oz with two empty film cassettes in the camera. The original Ansco Memo camera wasn't leather-covered like mine is or has the shutter release guard. It was a stained wood camera with just a knob ion a lever sticking out of the camera to release the shutter. It wasn't until later in the camera's production that Ansco covered the camera in black leather and then added the shutter release guard to help prevent unnecessary shutter tripping. A wire handle on top of the camera makes it easy to carry the camera when you're not shooting.

 The camera has a Wollensak Velostigmat F6.3 lens with an unknown focal length and fixed focus. The camera only has three different shutter speeds, 1/25, 1/50, and 1/100, along with "B." The lens does offer aperture control that goes from f6.3-f16. Both the shutter speed setting on top of the lens and the aperture settings on the bottom of the lens are set by a small slider arm. The shutter release is on the right side of the camera and is protected by a small curved piece of metal intended to help with unexpected double exposures when you're not using the camera. It was more of a nuance than a help. The viewfinder on the top of the camera is easy to look through but doesn't give you an actual rectangular image. It has a more square look, so you must keep that in mind when framing your images.

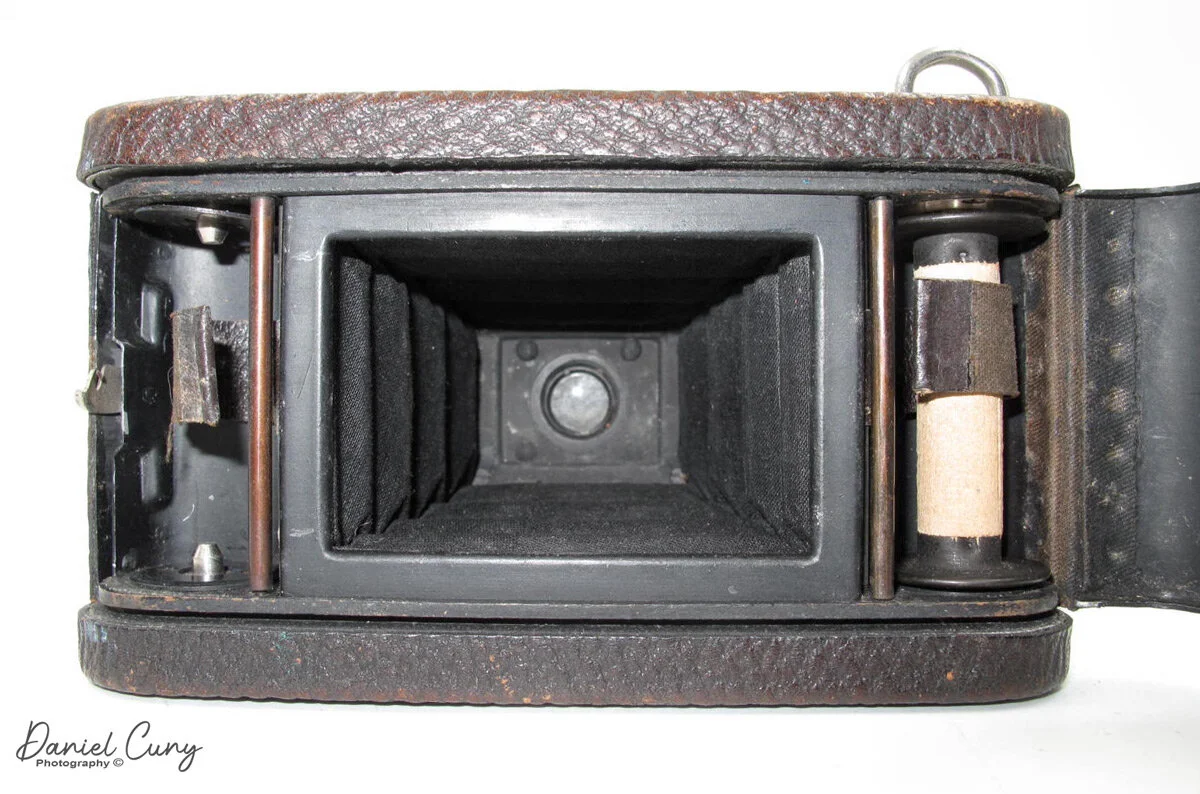
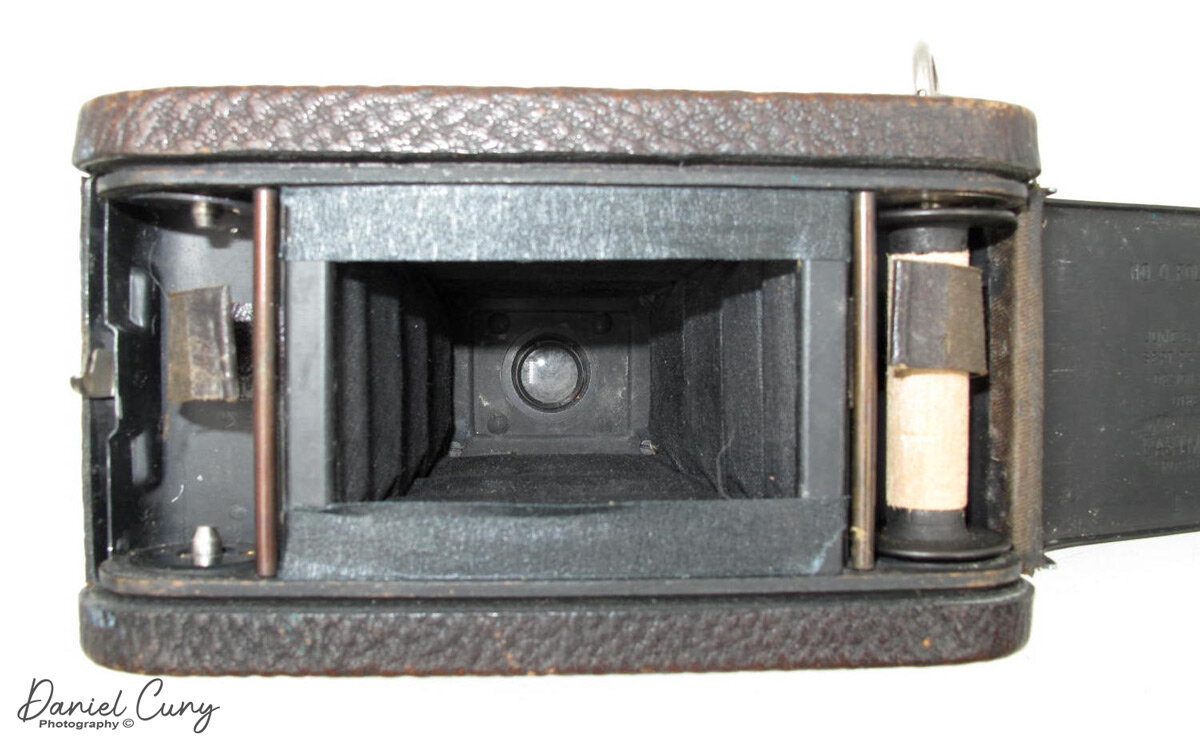
During this era, 35mm film was mainly used in motion picture cameras. The Ansco Memo uses 35mm, which travels vertically in the camera instead of horizontally, which is more commonplace nowadays. To transport the film across the shutter, the camera utilizes a "claw" method of grabbing the film sprockets on the edge of the 35mm frame and pulling it down across the shutter. The back of the camera, which is removable to lead the film, has a claw mechanism. The film doesn't need to be moved very far as the Ansco Memo isn't a full frame 35mm camera (24mmx36mm). It has a half-frame size of 18mm x 24mm and is in the horizontal format when holding the camera. The film only needs to move about 19-20mm to get to the following exposure.

I was gifted two different cassettes for this camera. I received an original Ansco cassette with a curved side and a fully loaded Agfa cassette, which is the squared-off version. Due to how the camera is made, you can put the Agfa version on top of the Ansco camera. The top is for unexposed film, and the take-up of the cassette with the curved side needs to go on the bottom of the camera. If you look at the camera's take-up area, there are some wooden braces that don't allow the squared-off cassettes into it, but the curved cassettes fit as they should. At this point, I put the unexposed Agfa cassette into the top of the camera and put the film leader into the take-up cassette, and we're ready to go. 

 To open the film cassettes, one of the sides comes off the cassette. The easiest way to open it is to slightly pince the corner of the cassette; this will release some pressure, and the cap will come right off. Inside the cassette is a coiled wire, which is used to guide the film into the cassette and not have it bunch up. When loading film into the cassette or unloading it into my processing reel, the film would move very smoothly, and there was no problem getting the film in or out, which was a worry when I first started.

To open the camera to load the film, on top of the camera is a slider that you push over, and the back of the camera comes off. Due to the smaller frame size, the Ansco camera takes 50 images on a pre-loaded roll of film. The frame counter on the camera advances up to 50. To advance the film to the next frame, you slide the advance bar on the back of the camera down once, advancing the film to the next frame. Similar to the current 35mm camera, the camera is in the horizontal format, and to take a vertical image, you need to turn the camera. This is awkward, but it wasn't bad when I ran some film through the camera.

My Results:

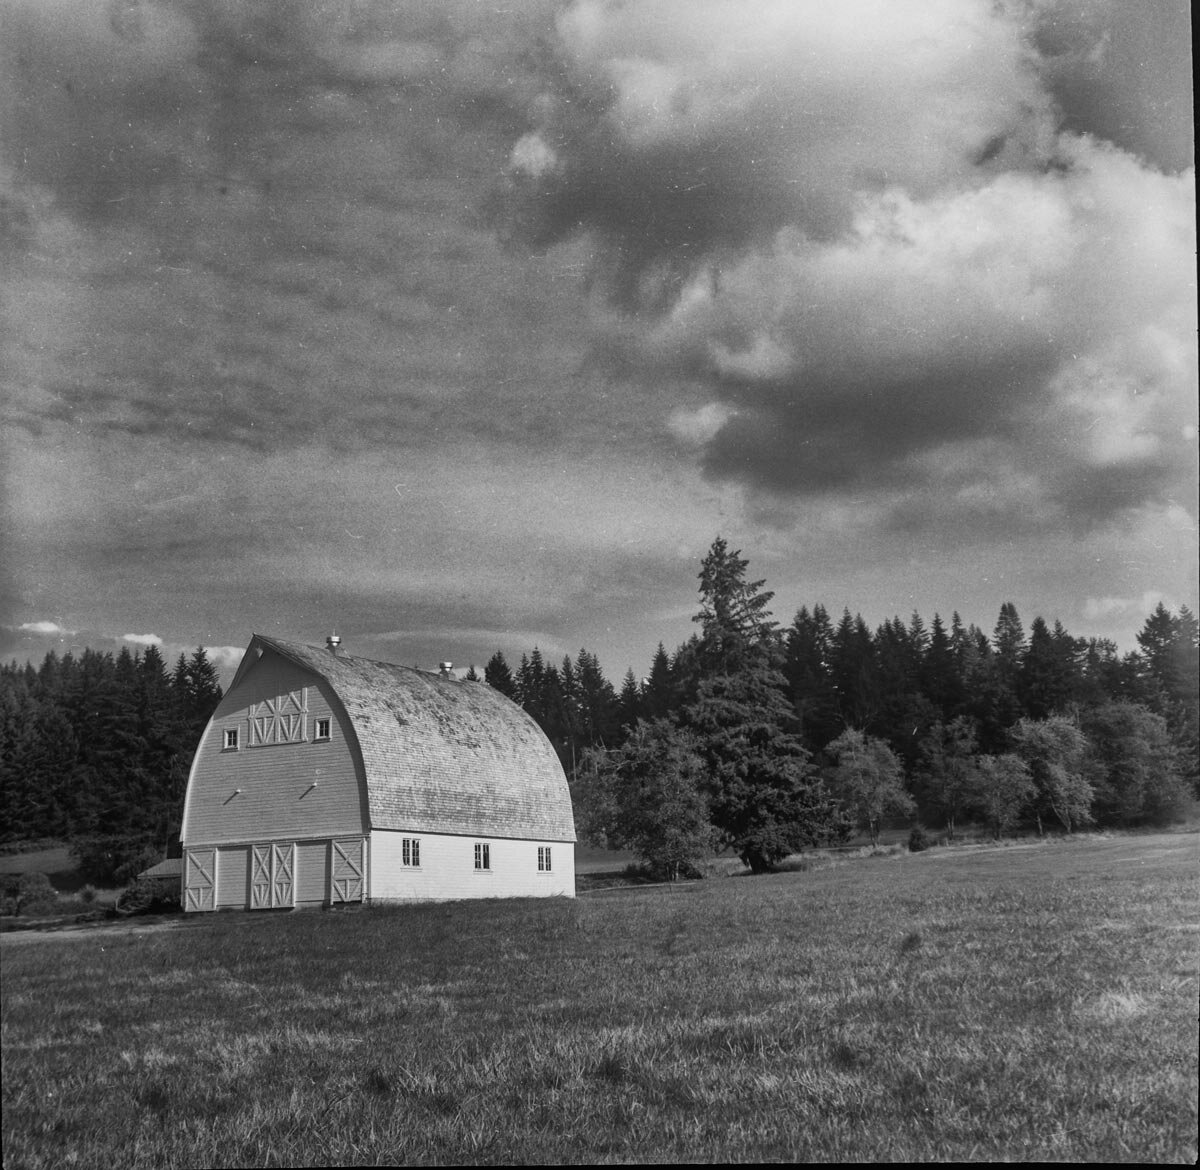
I put the roll of Agfa Rapid film into the camera and shot about 50 images of walking my dog around the neighborhood. I didn't have a good sense of processing time since the film was close to 90 years out of date. I did a lot of exposure bracketing for each image and exposed the film as if it was around ISO 5 due to the time past prime. After I processed the film, it was completely black, so I figured it was either at some point opened, but there was absolutely nothing on the frames. I looked under a very bright light to see if I could see anything that resembled an image, but absolutely nothing. Not even on the film's perforations.

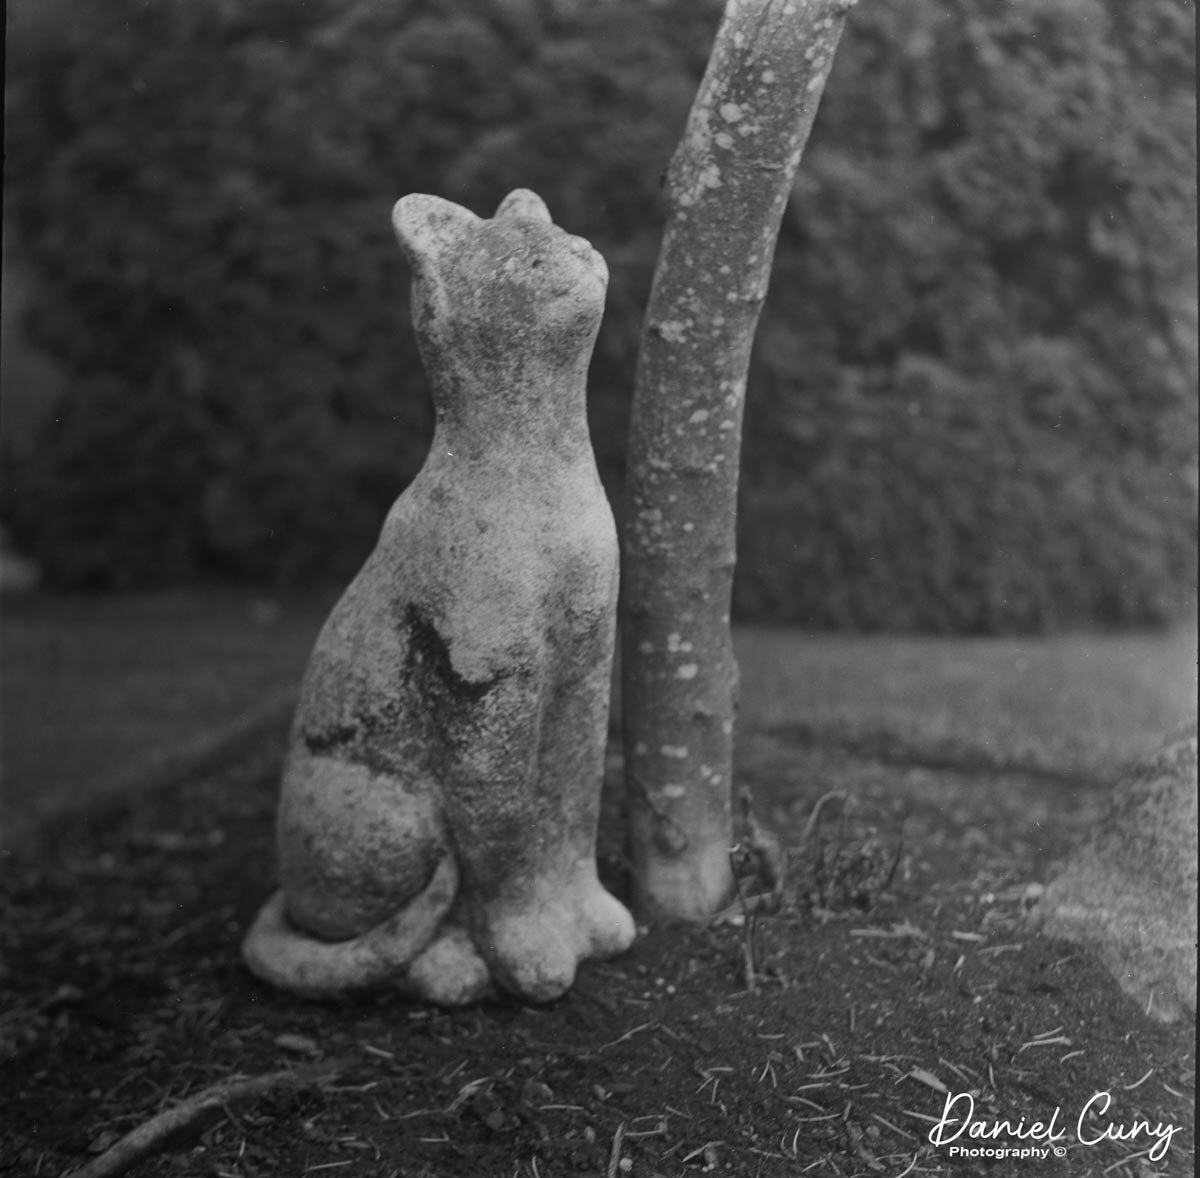
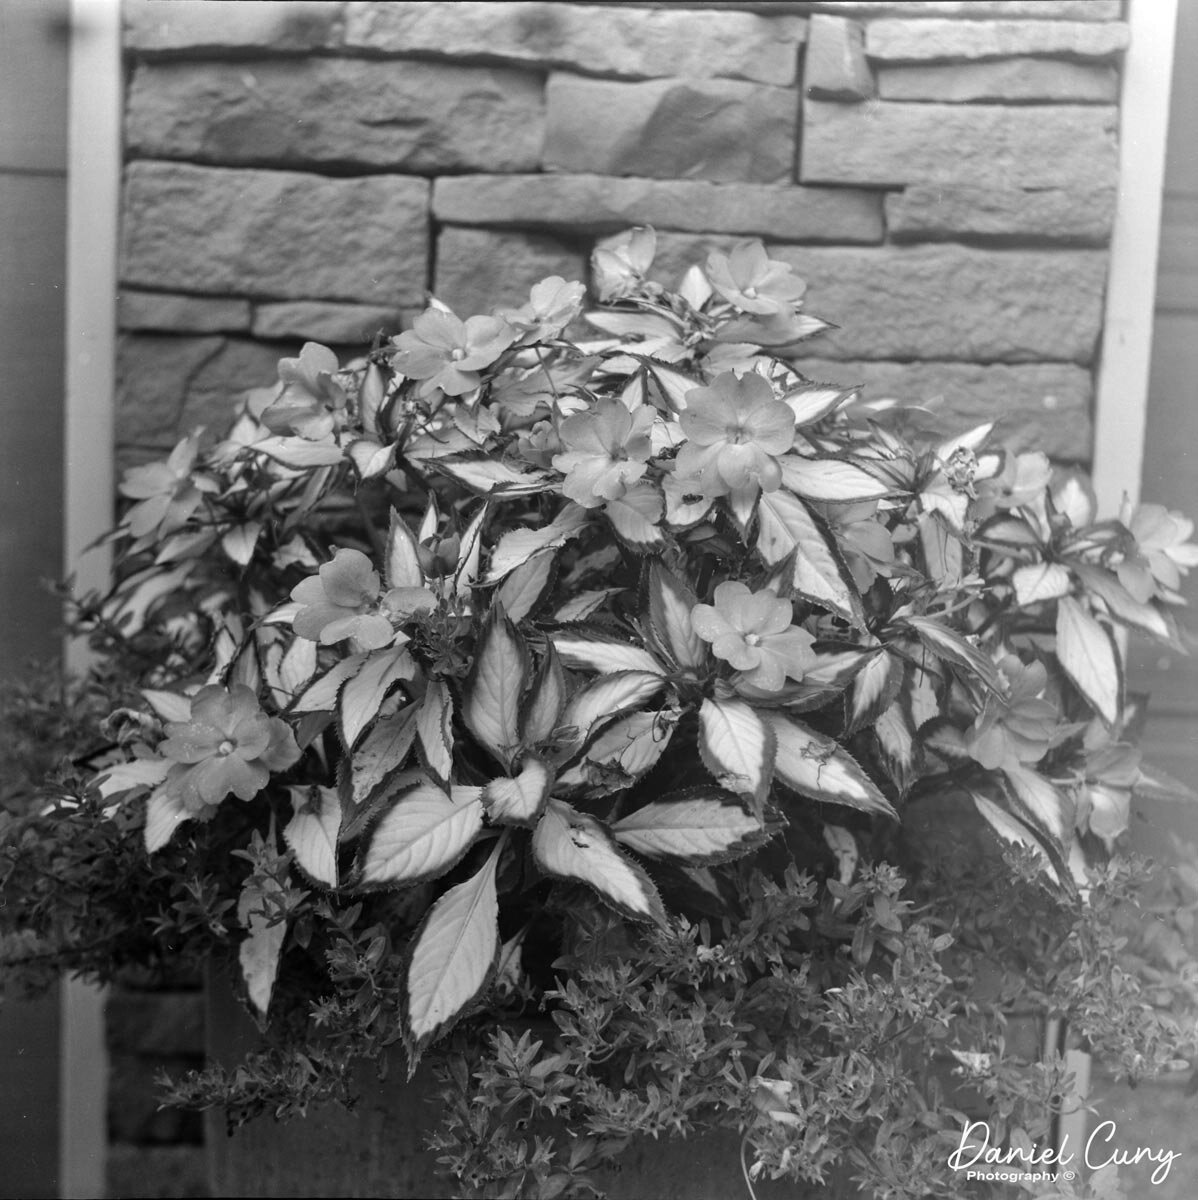
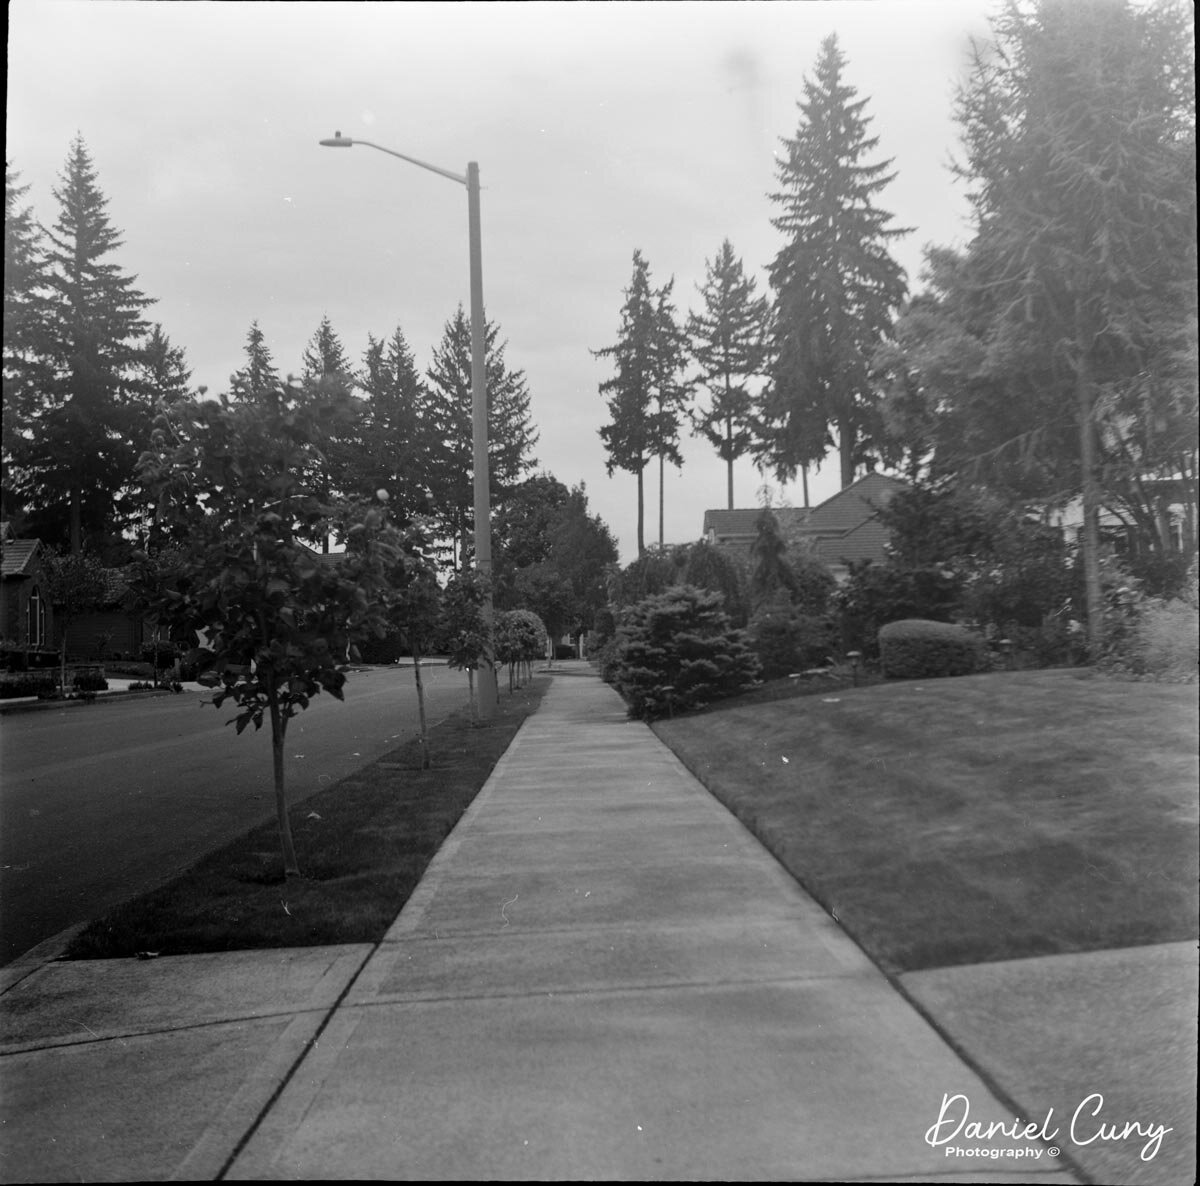
 I have another roll of 35mm film, a roll of Tri-X, which came with another lot of cameras purchased, and on the cassette, it said fresh roll, and knowing that this roll may be bad, I thought I'd load it into the cassettes and give it a whirl. I pulled out the dark bag and loaded this roll of film into the cassettes. This was very easy, and I went through the neighborhood, taking more images. I got home and processed this film roll. I know that Tri-X has been an older film. I did some push processing, and the film turned out OK, but it wasn't a fresh roll of film, and there were other exposures on it.

I didn't want to postpone this post any further, so some of the images have double exposure. I picked the images that either had one or very little, so upfront, my humble apologies for the images from this camera, but overall, these aren't that bad.

Conclusion:

This camera did a fantastic job for a camera approaching 100 years old, and you need to remember it's a half-frame camera.

 Besides the bad film on the first roll taken and the double exposures on the second, the camera was fun to shoot. The film cassettes were easy to load with some current film. Now, I'll need to get a fresh roll and try it for the third time. Just knowing the shutter is working and the camera takes images is 90% of the battle. Now I can take my time and update the post with cleaner images once I get some film for the holidays, shoot images, and repost them here.

 Thank you for taking a few minutes from your day to look over this post. I can't tell you how much it means to me. Please feel free to email me if you have questions or concerns.

 Until next week, please be safe.

Gallus Derlux Camera

I can still remember when my wife and I visited Paris about 10-12 years ago and went to a small flea market in one of the arrondissements we were staying near and seeing for the first time the Gallus Derlux camera. My first impression was the camera needed the leather coverings that usually adorn cameras. Still, upon further inspection of the camera, it was made to have a silverish metal body as its covering. This was a camera I needed to have since its appearance was so different from any camera I had seen in the past.

My Gallus Derlux camera

 That was the first Gallus Derlux I've owned over the years. I sold that camera at the Paris flea market a couple of years after purchasing it, and I have bought and sold a couple of other Gallus Derlux cameras over the years. Recently, I had the bug to purchase it again to add to my collection. 

 I talked to a fellow camera collector, and he told me he had one and would sell it to me for a reasonable price, as I know he's downsizing his collection. I need to do the same thing but I purchased it from him. This camera has a working shutter and a nice pouch case. At this point, since I've had a few of these in my life, it's time to put some film in the camera, take it for a spin around the neighborhood, and write a post on it.

The Company:

To discuss the camera company, Gallus, we need to include the German company Foth in this discussion. After WWII, Gallus, which was in Paris, was either licensed by Foth or Foth moved their operation to Pari and renamed the company Gallus due to what was going on in Germany after the war. Let's start with a bit of information on Foth and work our way forward.

 The C.F. Foth Company, established in 1930 in Berlin, Germany, gained recognition for its innovative design and engineering of compact cameras. The Foth Derby series stands out as a celebrated line of cameras known for their portability, affordability, and reliability. The original models were a less expensive alternative to the more expensive Leica and Contax cameras of their time, but they utilized 127 film as opposed to 35mm from Leica and Contax. These cameras catered to the needs of amateur photographers and gained a reputation for their high-quality performance in a compact form.

 The Foth Derby cameras were introduced in the 1930s and remained in production through the late 1940s. They were designed with portability in mind, featuring a folding bellows system and compact dimensions that made them a popular choice for travelers and casual photographers. The cameras used 127 roll film, producing images in 4x6.5 cm format, a size well-suited for personal and artistic photography.

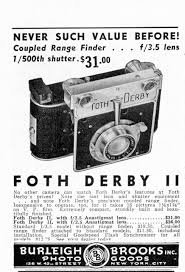
One of the defining features of the Foth Derby was its focal-plane shutter, which was uncommon in compact cameras of its time. This shutter system allowed for faster shutter speeds, up to 1/500th of a second, allowing photographers to capture motion and shoot in bright lighting conditions. The Derby series was also equipped with high-quality lenses, such as the Foth Anastigmat, or later upgraded models like the Foth Derby Anastigmat f/3.5, ensuring sharp and well-resolved images.


The Foth Derby evolved through several iterations, each offering incremental improvements and adaptations to meet changing photographic trends. Here are some general differences:

  1. Foth Derby I (1930): The original model featured a basic lens and a simple shutter mechanism. It utilized a 24x36mm format on 127 film and was praised for its ease of use and portability, making it accessible to novice photographers. 

  2. Foth Derby II (1931-): This version introduced the 3x4 (30x40mm) film format. The camera's build quality was also refined for greater durability, and several different lens options were offered.

  3. Foth Derby III (1935-39): This model had several different viewfinder and lens options. Some models had interchangeable mounts that allowed the use of some Zeiss and Dallmeyer lenses.

  4. Foth Derby IV (1936-40): This model had an aluminum front standard that housed an integrated rangefinder for focus. It also offered a choice of different lens options.

 Somewhere around 1937, the combination of both Foth and Gallus became intertwined because in 1937, Foth came out with:

  1. Derby V: Made by C.F. Foth & Cie in Paris. It still has the 30x40 film format on 127 film, but the build quality was a bit rougher coming out of the French factory.

  2. Gallus Derby (1937-) was the start of the Gallus line of cameras, taken from the Foth Derby. The build quality was rougher than that of the German-made cameras and about 10% heavier.

 As a collector, you can see the progression of design and features from the Foth Derby and how it morphed into the Gallus Derlux, using part of the Derby and Delux naming and wanting to separate from the originating company.

My Camera:

My Gallus Derlux camera is 5" wide by 3" tall by 2" deep with the lens retracted and 3" with the lens extended in the usual picture-taking position. My camera weighs just under 15 oz, at 14.9 oz. and has a Gallus 50mm f3.5 lens built into the camera. The camera is a fundamental one without an integrated focusing system, but rather a simple viewfinder on top of the camera for general framing of the photo you desire. The Gallus Derlux has a vertical focal plane shutter and takes 16 30x40mm exposures on a roll of 127 film. 

To take a photo, you must pull the front lens section from the body. The lens plate has a small "hump: on the top and bottom to grip onto to pull the lens plate away from the camera body. The lens plate is on a strut on either side of the plate, which exposes the internal bellows built into the camera. After taking photos, you push the lens plate back into the body, where it stays for transportation. This makes the camera slimmer and more manageable to slip into the case or pocket for transportation.

 The lens and focus system are located on the lens plate. To focus the lens, hold onto the larger focus arm, which is very similar to what's used on the Leica system, and rotate the helicoid lens to the desired guessed distance to the subject. There is a stop arm, so you cannot unscrew the lens from the body. The minimum focus distance is 1 meter to infinity. The aperture settings are on the lens. The aperture goes from f3.5 to F18. To adjust the aperture, turn the lens to the desired aperture settings, which is the same indicator that tells the focus distance. This makes it easy to use because you can set aperture and focus in the same area.

The shutter speeds are set on the camera's top. The shutter speeds go from 1/500 down to 1/25, along with "B" for timed exposures. To set the different shutter speeds, you need to lift the shutter speed dial and rotate the dial to the desired speed, which is indicated by a small dot. You also need to wind the shutter to cock the shutter as it's not incorporated in the winding process, which is what most current cameras have. To cock the shutter, just turn the knob on top of the camera, which have the shutter speed on it in the clockwise direction until it stops. The shutter is now cocked and ready for the subsequent exposure. The shutter release is located on the front of the camera on the right side and just next to the film plate.

Shutter speed dial. Lift and turn to set speed..

The Gallus Derlux utilizes two red (and green) windows on the back of the camera. These two windows are inside an immense depth-of-field scale on the back of the camera. Two windows allow the photographer to get 16 images on 127-size film. 

Back of Gallus Derlux camera

The film doors release is located on the right side of the camera to load the camera with film. Pull down the release button and swing the door open, which exposes the film chamber. Take the blank 127 reels from the right side of the film chamber by pulling up the knob above it and taking out the blank reel. Put the blank 127 film reel into the left side where the film transport knob is located. Lift the winding knob to insert the blank reel. Put your fresh and unexposed roll in the right chamber and press down the knob that holds it into place. Put the paper from the unexposed toll into the blank reel and wind it, ensuring the film moves. Stop when you see "start" and close the back of the camera.


To get 16 exposures on your roll of 127 film, wind the roll of film in the camera to frame number 1 to the first window, which on this camera is the window on the right-hand side of the backdoor. After you take that photo, wind the film until you see frame number 1 in the other window or the one on the left side of the backdoor. After you take that photo, frame number 2 will appear on the right side of the red window. Continue this process until frame number 8 is taken on the left side of the window. Wind until the film is all the way onto the take-up spool, open the back, and take the film out for processing.

My Results:

I put a roll of 400 ISO film in the camera and wandered around my backyard and the neighborhood streets. I used 400 ISO because the fall and winter in my neck of the woods are usually overcast. During my walk, the sun just so happened to come out, so I was forced to use the faster speeds on the camera.

After I took the photos and processed the film, I also noticed a gap between the two shutter curtains when winding the shutter to the next photo, causing a light leak on many of the images. I must have pointed the camera down or had the lens in a darker area several times because there were a few good images, but many were terrible. I also don't have a lens cap for this camera, so the next time I use the camera, I'll need to cover the lens when cocking the shutter so I don't expose the film to light before or after exposure.


If you have this or similar cameras and are mechanically inclined, I found a great article on someone overhauling the shutter on his Gallus Derby Lux camera.


Conclusion:

This was a fun camera to use. It's very simple, takes a nice larger image, and is small and compact. I'll need to find a lens cap for the one before I shoot again or just place my hand over the lens when cocking the shutter.

 Thank you for taking a few minutes from your day to look over this post.

 Until next week, please be safe.


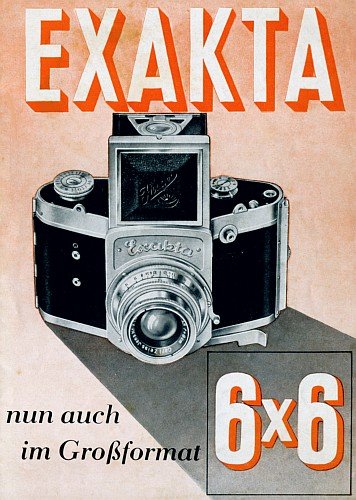
Exakta 66 Vertical Camera

I've been holding onto this camera for a few years now and wanted to do a blog post on it a few years ago when I was asked to come back to work and run a couple of photo companies for a former boss. At the time, the opportunity was too good to pass up, so I put my camera blog on the back burner and dove into my work promoting and selling some top-of-the-line photo equipment.

My Exakta 66 Vertical camera and lens.

Now that I'm formally retiring after spending 52 years in the photo industry, I pulled the Exakta 66 vertical off the shelf, which I had serviced a couple of years ago, shortly after returning to work. I put 120 black-and-white films into it and gave it a whirl to see what a medium-format camera from the early 1950s would feel like.

History:

I previously wrote about the company's history when I posted on the Exakta Vest Pocket Model B camera in December 2020. If you're interested in what I wrote about Ihagee History, click the link.

Early horizontal Exakta 66 model.

 In this area, I'd like to talk about the history of the Exakta 66. Exakta made an earlier version of the 66, a horizontal version developed just before WWII. Since this model is known as the "Vertical" version, it concerns the film transport on the camera. In this version, the film transports vertically, unlike the previous model, which went horizontally.

The original Exakta 66 was designed in 1938. Ihagee, the manufacturer of Exakta, had even set aside a series of serial numbers for the Exakta 66, which was a first for Ihagee. Until now, the camera model would have consecutive serial numbers when the cameras left the factory, but  552,000 to 556,999 had been reserved for the 6x6.

Due to technical issues with the film transport, Ihagee only produced about 2,000 cameras in the first year. The issues were somewhat common for other Exakta cameras from this time period. Production for the Exakta 66 was stopped after one year. It could have been due to technical issues or the outbreak of WWII. 

In 1951, Ihagee decided to start production on the camera again. They reserved the serial numbers 600,000 to 607,999 for the new Exakta 66. Unfortunately, production was halted due to lackluster interest and low sales numbers. Many of the cameras produced were from old stock produced before WWII, and the cameras again had very poor film transport issues. 

 Introduced in the fall of 1952 with production was the new Vertical Exakta 66 with vertical film transport, which was to compete with Hasselblad for medium format camera. With the Vertical Exakta 66, Ihagee introduced interchangeable light shafts, focusing screens, film cassettes, and a prism finder, which were planned but never introduced. It also had flash synchronization and shutter speeds similar to their 35mm cameras from 12 sec. to 1/1000

Again, the vertical Exakta 66 ran into the same film transport and other issues during production. The problem was so bad that Ihagee recalled cameras delivered to stores to destroy the camera. It's estimated that there are only a few hundred cameras due to poor production and lack of sales.


In 1985, Ihagee's West German company reintroduced the Exakta 66. The camera was very similar to the Pentacon and even had Pentacon mount lenses. It had a current design with a black body and other accessories like finders, focus screens, lenses, etc. This version lasted into the early 1990s.

My Camera:

 The Exakta 66 is a clunky and somewhat awkward camera, especially without a shoulder strap. While I got the camera serviced a few years ago, I'll discuss some issues with the body and film back. 

 My camera has a Carl Zeiss Jena Tessar T 80mm f2.8 lens. It measures 5.5" tall by 4.5" wide by 6" deep, measuring from the back of the film plane to the front of the lens focused at infinity or back into the body. If the light chamber is opened, the camera is just under 8" tall and weighs 3 lbs 7.4 oz without film or a strap.  

The vertical shape made the camera very similar to shooting with a twin-lens reflex camera, just bigger and heavier. As I have fairly large hands, using it wasn't that bad. 

To take the back off, on the camera's left side, as you hold it to take a photo, is a long lever next to the horizontal tripod socket. Slide that lever up to release the lock of the film back, and slide the cack off to the left to load the film. Loading the film is pretty straightforward. Take the empty film spool from behind the hinged door and put it into the top chamber inside where the gears are. Put the new film in the chamber with the hinged door and slide the leader around the wheel and over the pressure plate to the empty spool. Slide the end into the spool and wind it up just a bit so it's not coming loose from the take-up spool.

That's the easy part. I went online to look at the instruction manual on the proper procedure to load the camera, and now I understand the complexity of the camera. Well, the instructions that I read didn't make sense. One of the reasons is that the film back I have isn't 100% functional. The frame counter isn't working on my film back and doesn't go to the "Red F" as stated in the manual (show manual). Here's what I did. I put the back on the camera, advanced the film 5-6 frames, and started to shoot photos. The film advance lever is on the right side of the camera and has a large "wing nut" appearance right in the center of the camera.

The shutter speed dial is in two sections, similar to other cameras. From 1/1000 to 1/25 sec, it is on the top dial along with "T" and "B," closest to the light chamber. A second shutter speed wheel on the bottom of the camera has a dual function. It's the low end of the shutter speeds, from 1/10 sec to 12-second exposure; yep, 12-second exposure is built into the camera. It also serves as the camera's self-timer. The cameras' self-timer numbers are red, and the long exposure numbers are black.

The right side of the Exakta 66 vertical camera shows the shutter speed control dials on top and bottom.

To make a more prolonged exposure with the built-in shutter speeds, you set the SS dial to either T or B, then turn the bottom dial to the desired length of exposure in black. Press the shutter, and the shutter stays open until the end of the exposure, and the focal shutter closes. To use it as a self timer, set the shutter speed at anywhere on the top dial from 1/1000-1/25, then on the bottom dial set the length of self timer to the desired RED number and press the shutter button. This will delay the shutter from open/close function for the desired seconds picked from the red number picked.

You open the light hood, press down on the rear tab on the back of the hood. Mine pops up and is ready for action. Like many other medium format cameras, there is also a magnifying glass that allows for fine focusing. When you press the front of the chamber, the glass pops up. You can also remove the hood to get to the focus screen by pressing the lever between the two 6s on the front of the camera and just below the Exakta nameplate. When the light hood is removed, you can remove the focusing screen by sliding the bar on the right side but not back where the film advance and shutter speed dial is. It's the rod right next to "Ihagee". Slide that lever up, and the focus screen can be removed. To close the light hood, the four pieces that make up the light hood are numbered, 1,2, and 3, so you know which order to close them. If not in that order, the cover doesn't close.

There is a second rod on the right side of the camera between the two shutter buttons and the lock for the shutter button just above the shutter release. In the down position, it'll let you trip the shutter. When the bar is up, the shutter release is locked, and you cannot release the shutter.

 On the left side of the camera is the back release rod. Slide it up to release the lock to take the film back off and down to lock the film back onto the camera. There is a horizontal tripod socket. Also, there is a flash delay wheel that delays the flash sync depending on the flash and bulb used and the lens release button. Sliding the button back will release the bayonet mount lens.

The camera body, film back, light hood, Focus screen, and lens are separated.

The lens has a manual aperture, which doesn't stop the aperture down automatically when you press the shutter button. Focus wide open for the brightest viewing, then stop down the desired aperture. By doing this it also allows the photographer to see the depth of field in the finder before releasing the shutter. There is a red dot that you can move to the desired aperture. This allows the photographer to open and close the aperture quicker, and you cannot go further than the ring with the red dot will allow.

My results:

 Once I loaded the film, put the back onto the camera, and shot photos, here's the result. As you can see from some of the first images, I, too, had issues with the film transport. The technician told me he did his best to fine-tune the back, but the first few images had spacing issues, as seen in these images. After that, the images had spacing between them that grew to more and more spacing between the images.

Thing get better for the rest of the roll.

From the front yard.

Looking down our street.

Conclusion:

 After I played with the camera and finally got past the mumbo jumbo of the loading procedure, the camera was fun to shoot. I really didn't mind the manual aperture, and while I didn't use the self-timer or longer exposures as I was shooting ISO 400 on a somewhat sunny day, setting the shutter speeds and aperture was straightforward.

 Having the large indent on the film back provided extra area to hold the camera, especially when I was carrying the camera without a strap. I think the images turned out pretty good, and I'm looking forward to shooting it again—maybe at dusk with longer exposures this time.

 Thank you for taking the time to read through this post and until my next post, please be well and stay safe.

Bolsey-Flex Trio Camera

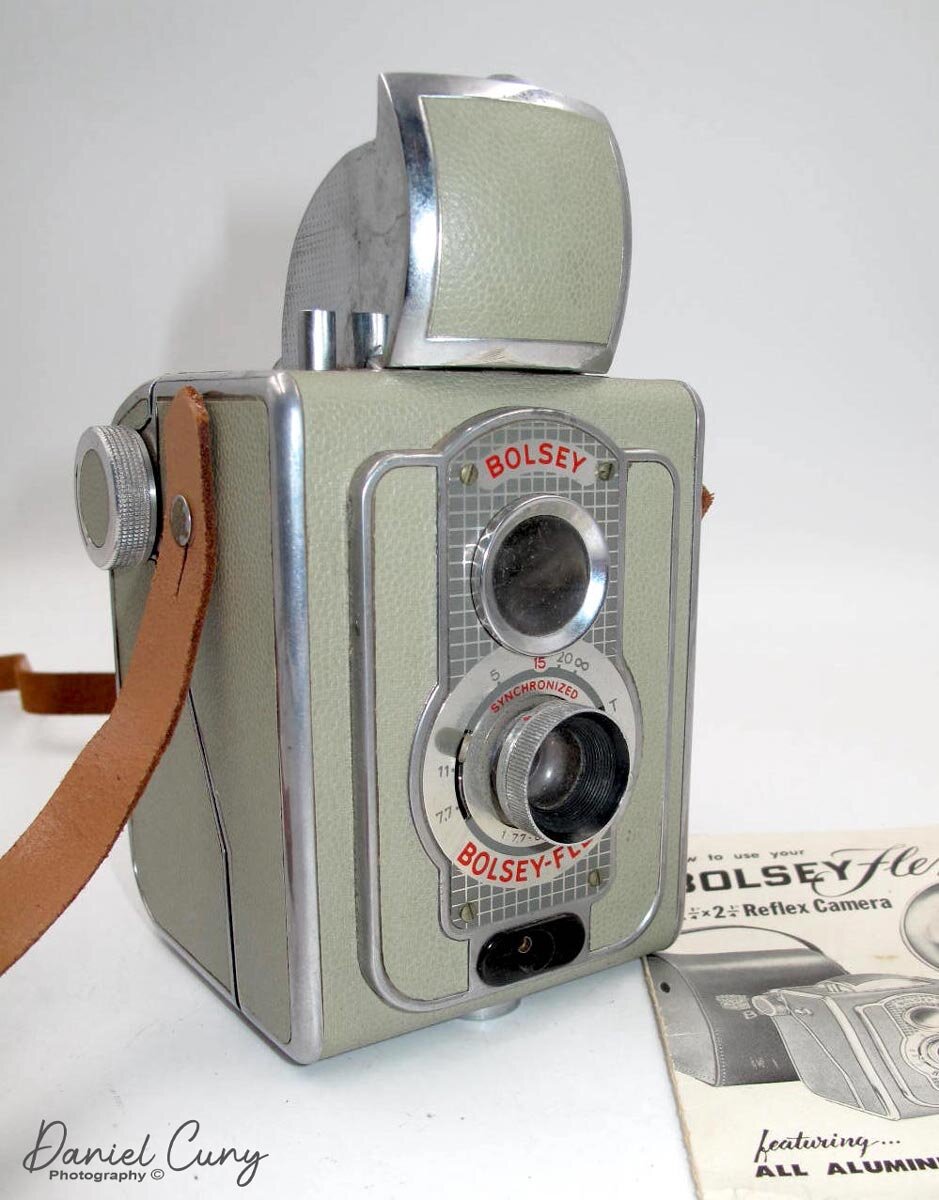
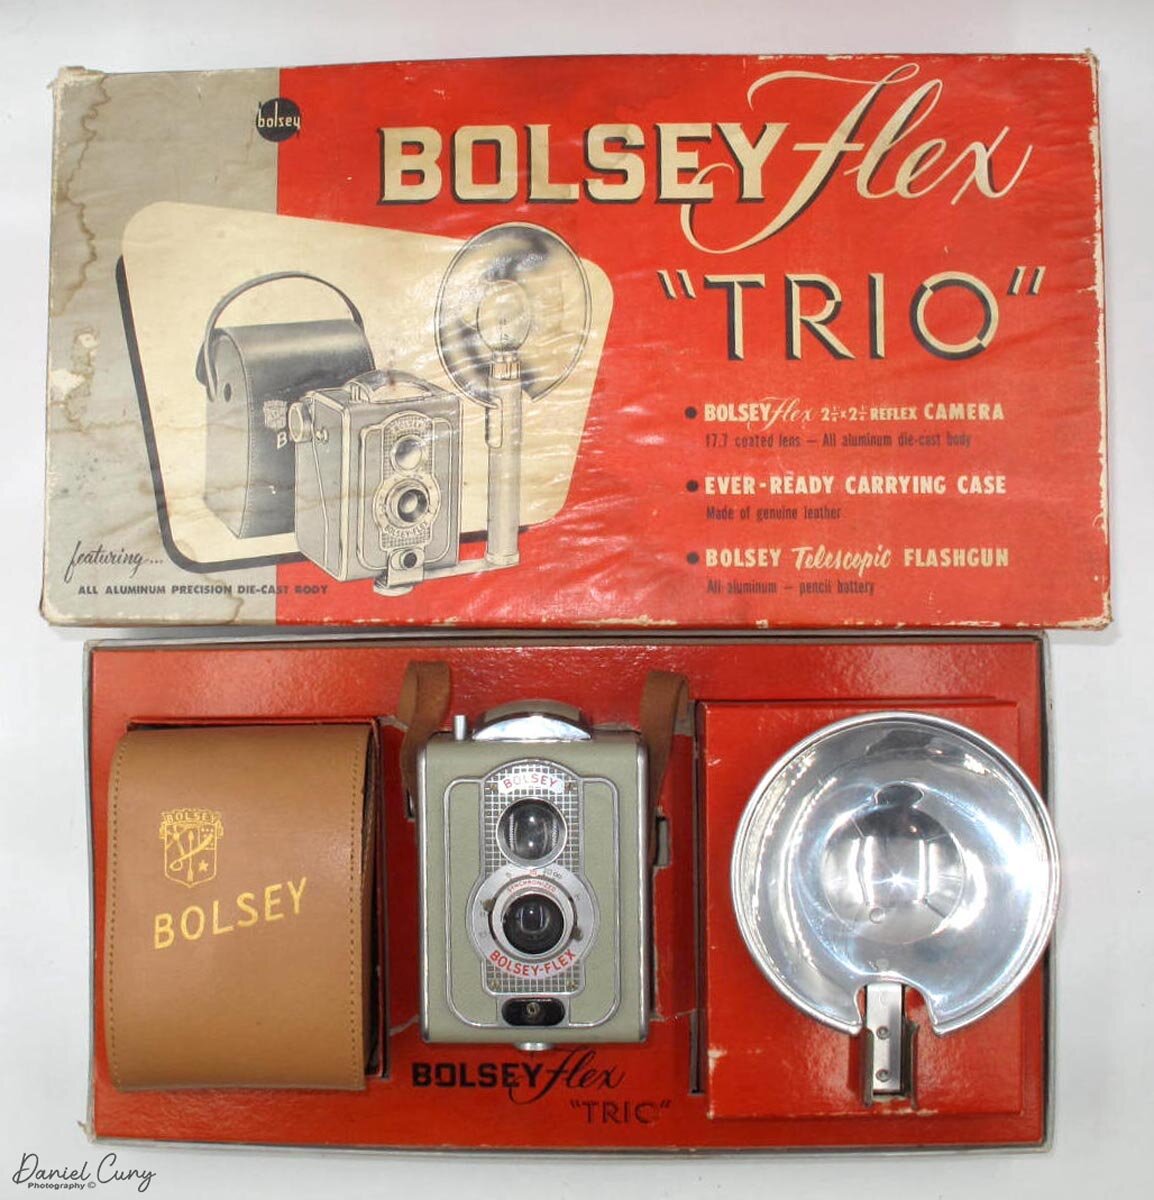
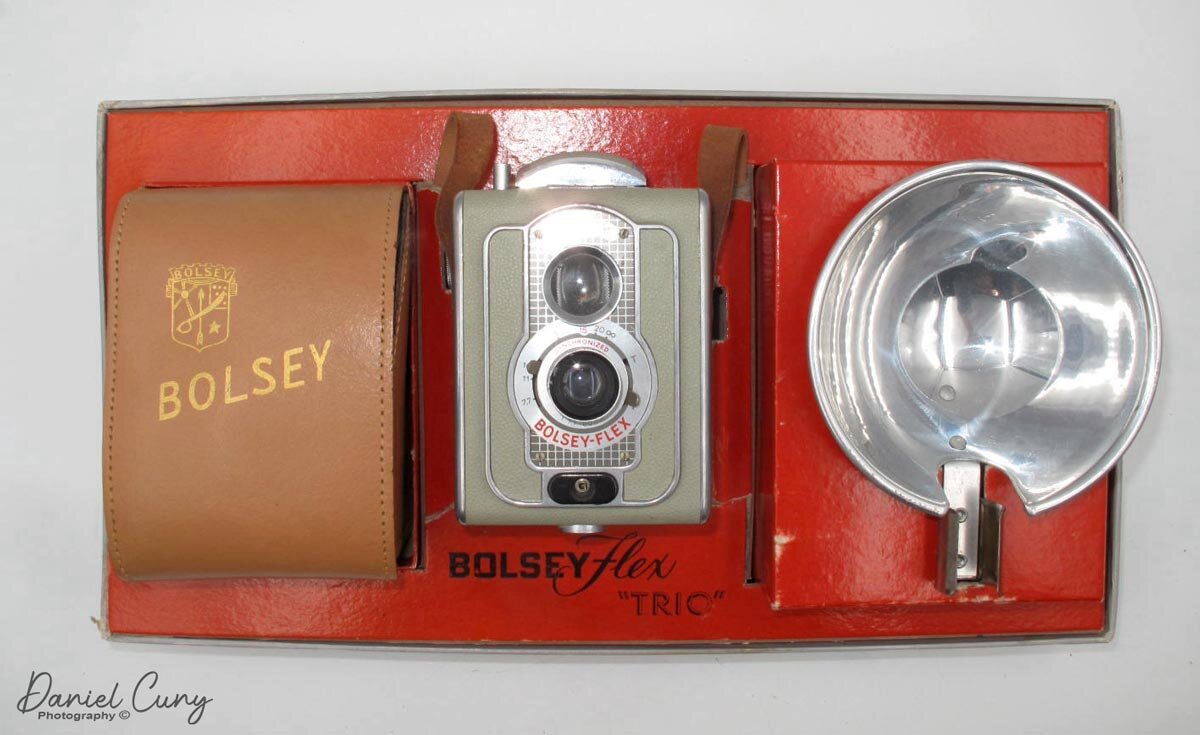
As I was sitting at my desk a few weeks back as I was figuring out what camera to write about next, I looked down at a box of cameras I have in my office, and on top was the Bolsey Flex Trio, which is in the box and complete with the instructions. As I started putting together my thoughts about the camera, I had to pull out the camera, and many different ideas came into my mind.

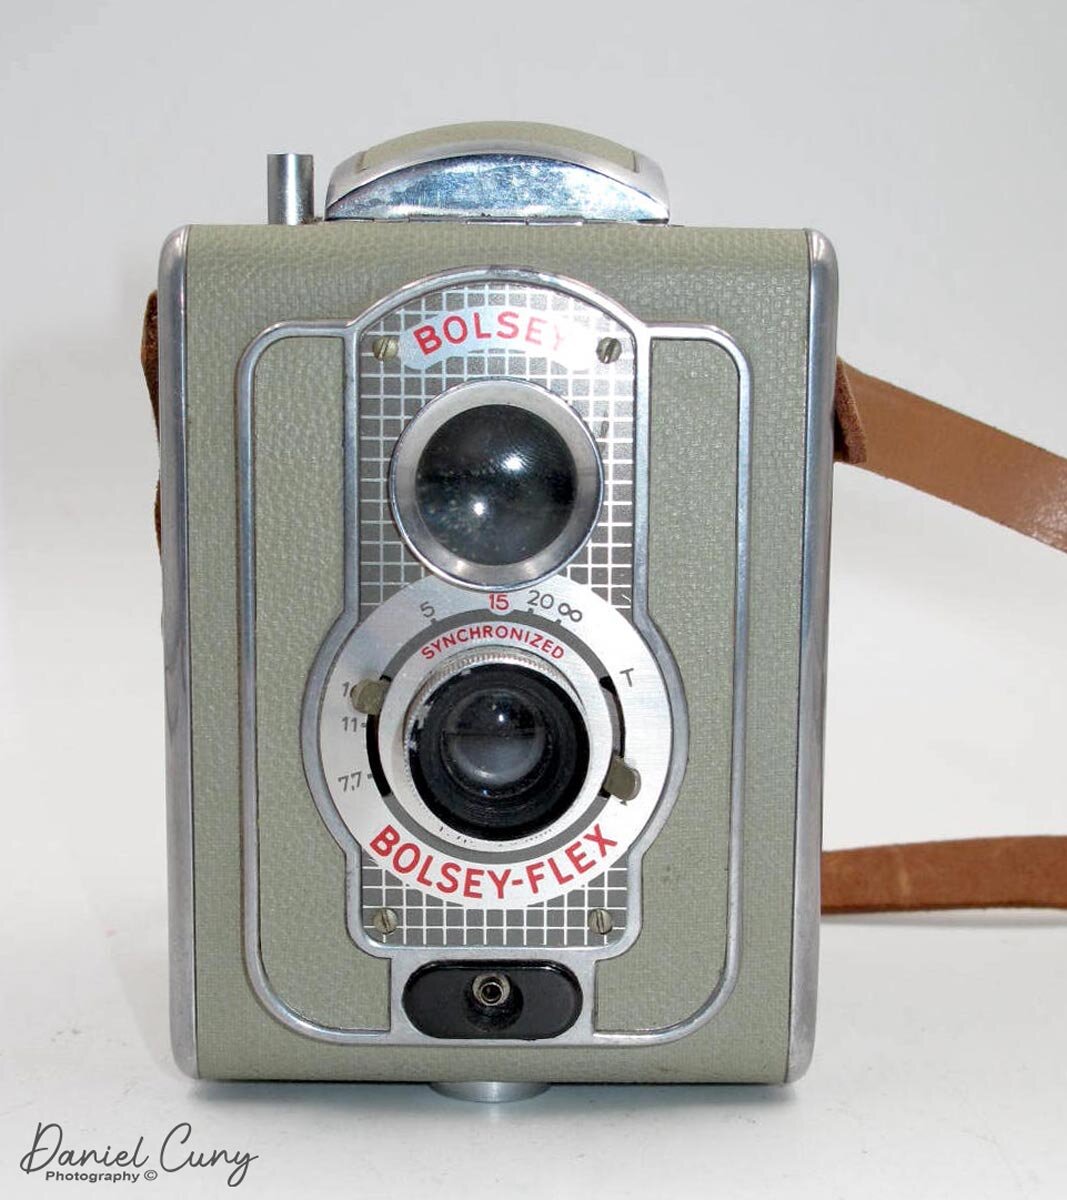
My Bolsey-Flex Camera & Instructions

My Bolsey-Flex Camera & Instructions

The camera for its age isn't in great shape but does work. The camera uses 120 size film, which is a HUGE benefit to me since the film is so readily available. I decided to load a roll of Black and White film in it to shoot as I walked through my neighborhood. I processed the film and was somewhat impressed by the Bolsey-Flex. It's a Pseudo Twin Lens Reflex camera, which means it looks and feels like a TLR camera but works more like a Box Camera due to its simplicity.

Camera Research

I was researching the camera, only to find that a friend of mine, a brilliant writer and camera collecting blogger, Mike Eckman did a blog post on the same camera just a few months ago, which you can read here. With that said, Mike has quite a bit of information on the designer, Jacques Bogopolsky, and camera companies he worked for. The famous movie camera, Bolex, was named after Jacques Bogopolsky, and he also designed cameras for Pignons S.A., the original company that made Alpa Cameras.

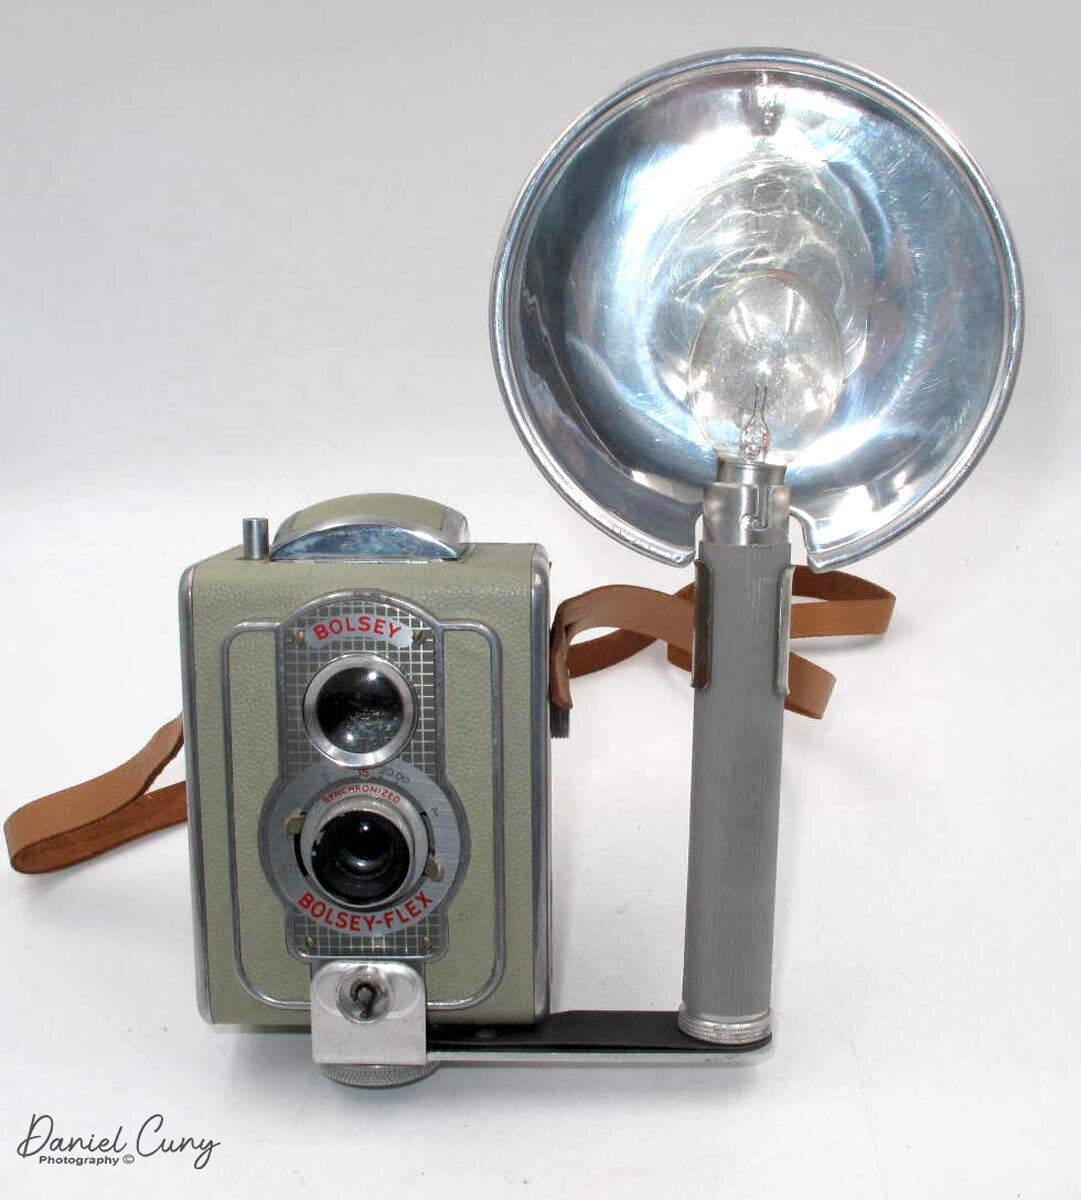
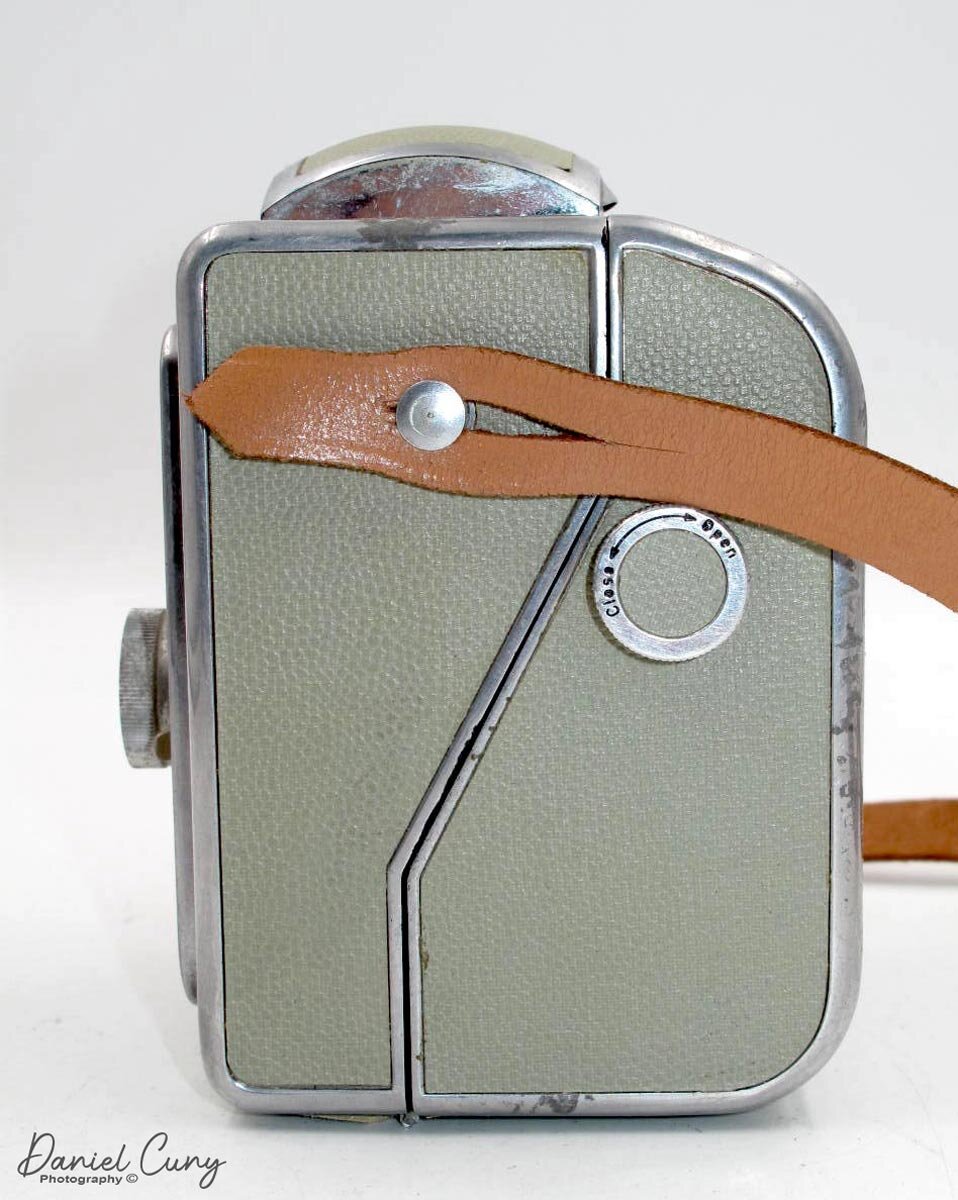
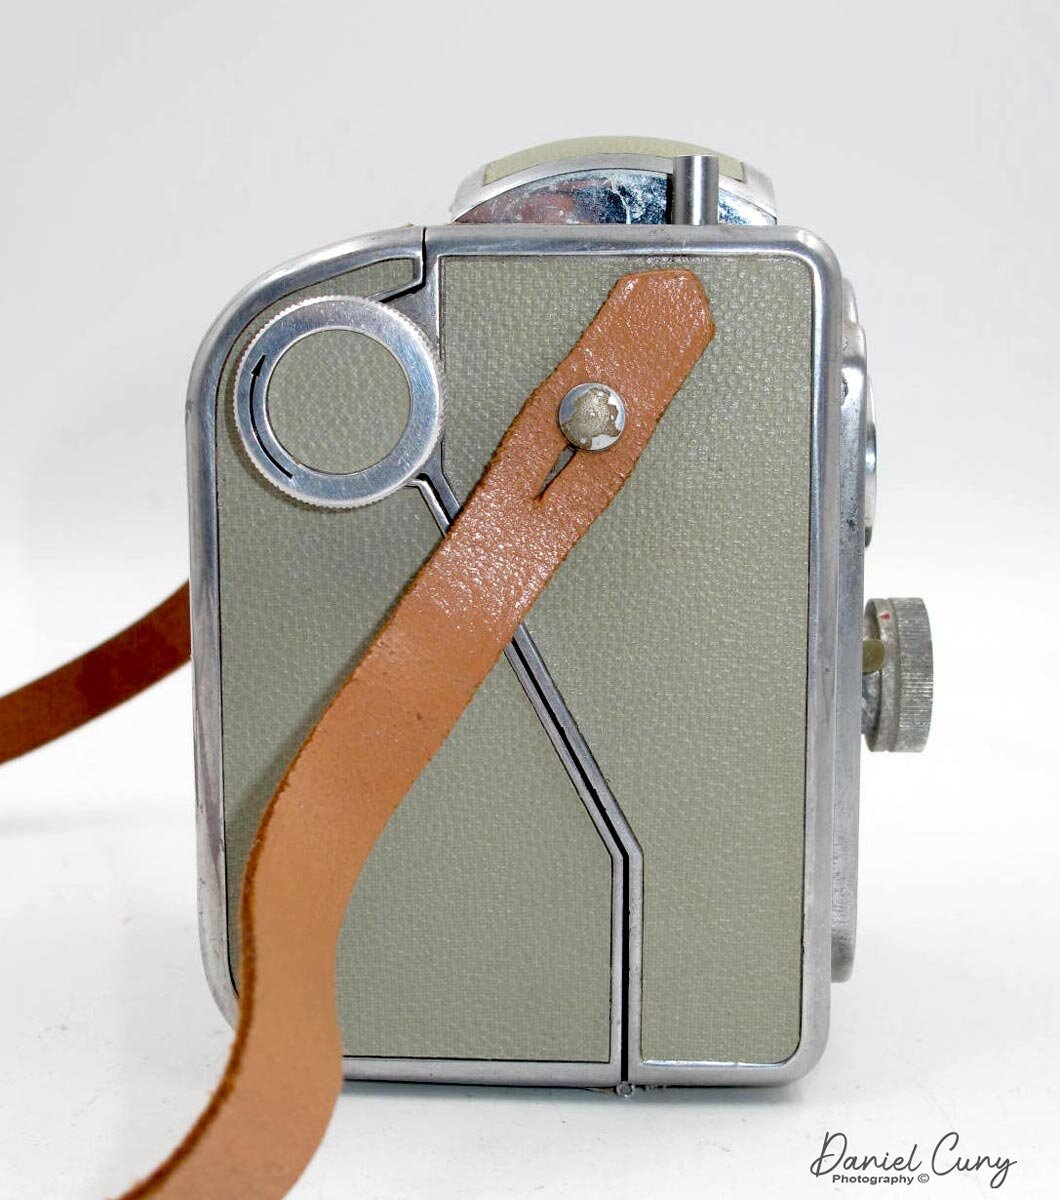
For my blog post, I want to concentrate on the experience of using the camera, the image quality, and my overall thoughts on how such a beautifully designed camera handles out in a natural shooting environment. I want to offer a few facts on the camera in general. The camera is an all-aluminum cast body with beautiful light green coverings. In the box comes all you need to take the camera out into the world to take photos.

The Camera

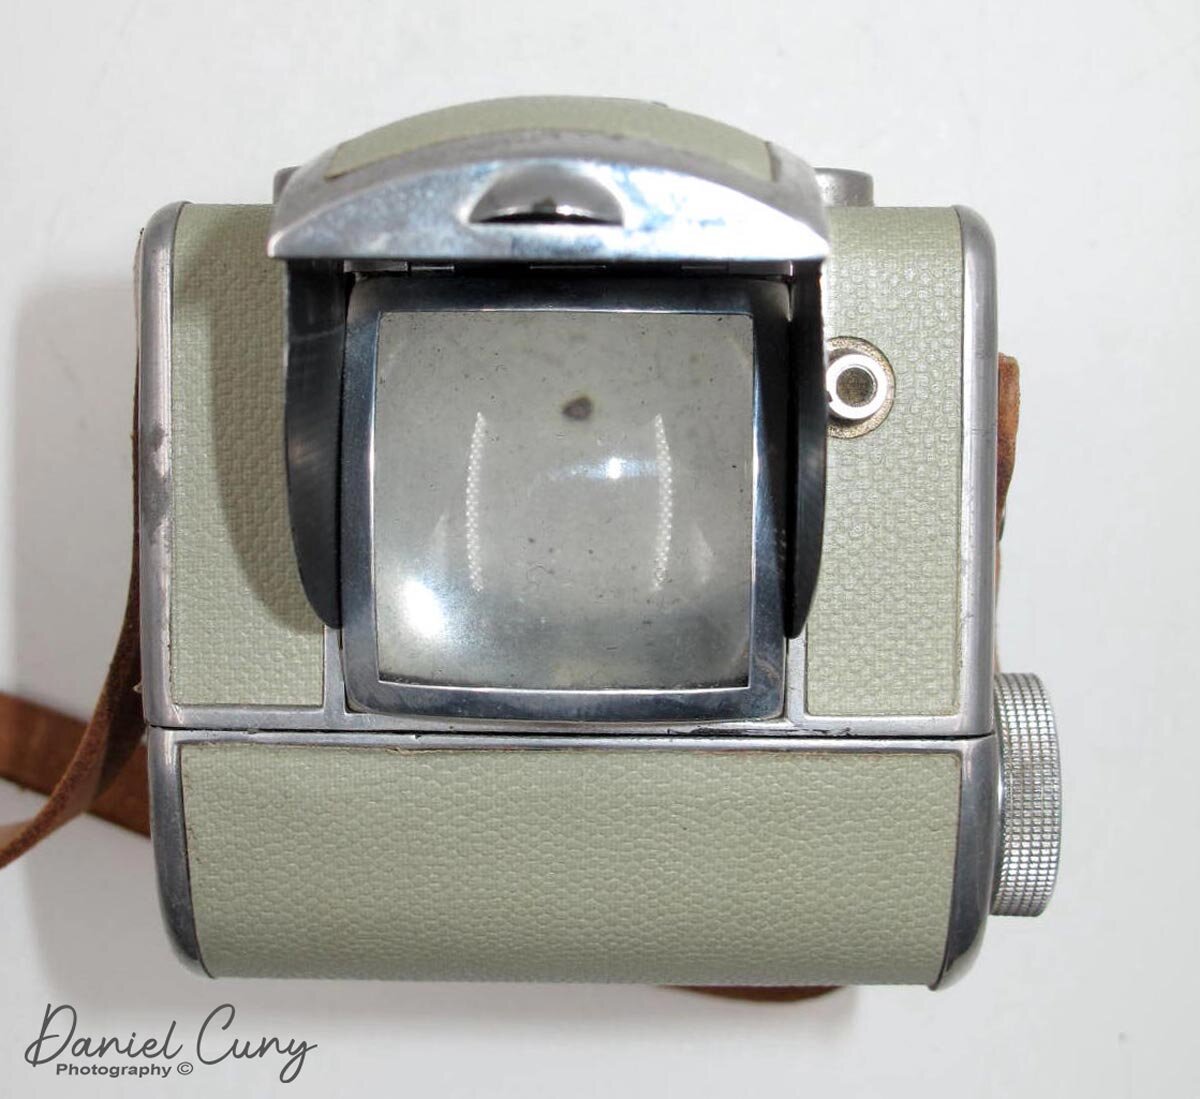
The camera measures 4.75" tall without the viewfinder in the closed position and 6" with the finder in the "up" position. The camera is 3.75" wide, which includes the width of the knobs. It is 3.75" deep, including the lens in the focused to the closest focused position, and 3.5 with the lens focused to infinity. The Bolsey-Flex incorporates an elementary zone focusing lens which can focus from 5 feet to infinity. The focus on the camera is strictly a "guess focus" style. While this is a Psuedo TLR camera, the top lens does nothing more than frame the photo in the camera. There is no focusing capability when looking through the viewfinder.

On the Bolsey-Flex shutter, you have the capability of "I" for an instant, which shoots the shutter at 1/50th of a second shutter speed, and "T" for a time exposure. The camera does have a synchronized shutter which couples with the flash attachment. The camera also has an 80mm lens with three aperture settings, F7.7, f11, and f16. 

The flashgun takes 2-"AA" batteries to power the Type No.5 flashbulbs that fit the top. You unscrew the bottom of the flashgun to put the batteries into it. It would be best if you took the camera case off the camera to use the flash. The flashgun fits into the camera synchro port, which is below the lens and held by the screw that holds the case into place. When you trip the shutter, the camera sends a signal to the flashgun, which fires the flashbulb. 

My unit seems to be in good working condition. Unfortunately, I didn't have bulbs when I loaded the camera with film and did all my shots outdoors. It would have been fun to shoot with bulbs. I'll need to test another camera that uses a flashbulb in a future post, not that I have some bulbs to try.

To load film into the camera, there is a knob on the left side of the camera with "Open," Close" on it. Turn the knob to "open," and the top of the back swings down open to load the film into the camera. Nothing special here as the. Put the empty spool on the top and film onto the bottom area. The shutter won't fire until the winding lever is turned to advance the film. On the back of the camera is the red window with a sliding cover to see when the film is advanced to the following frame number.

 Images

Here are some of the images I took with the Bolsey-Flex camera.

Rocks

Rocks

Backyard Aspen

Backyard Aspen

Evergreen Tree

Evergreen Tree

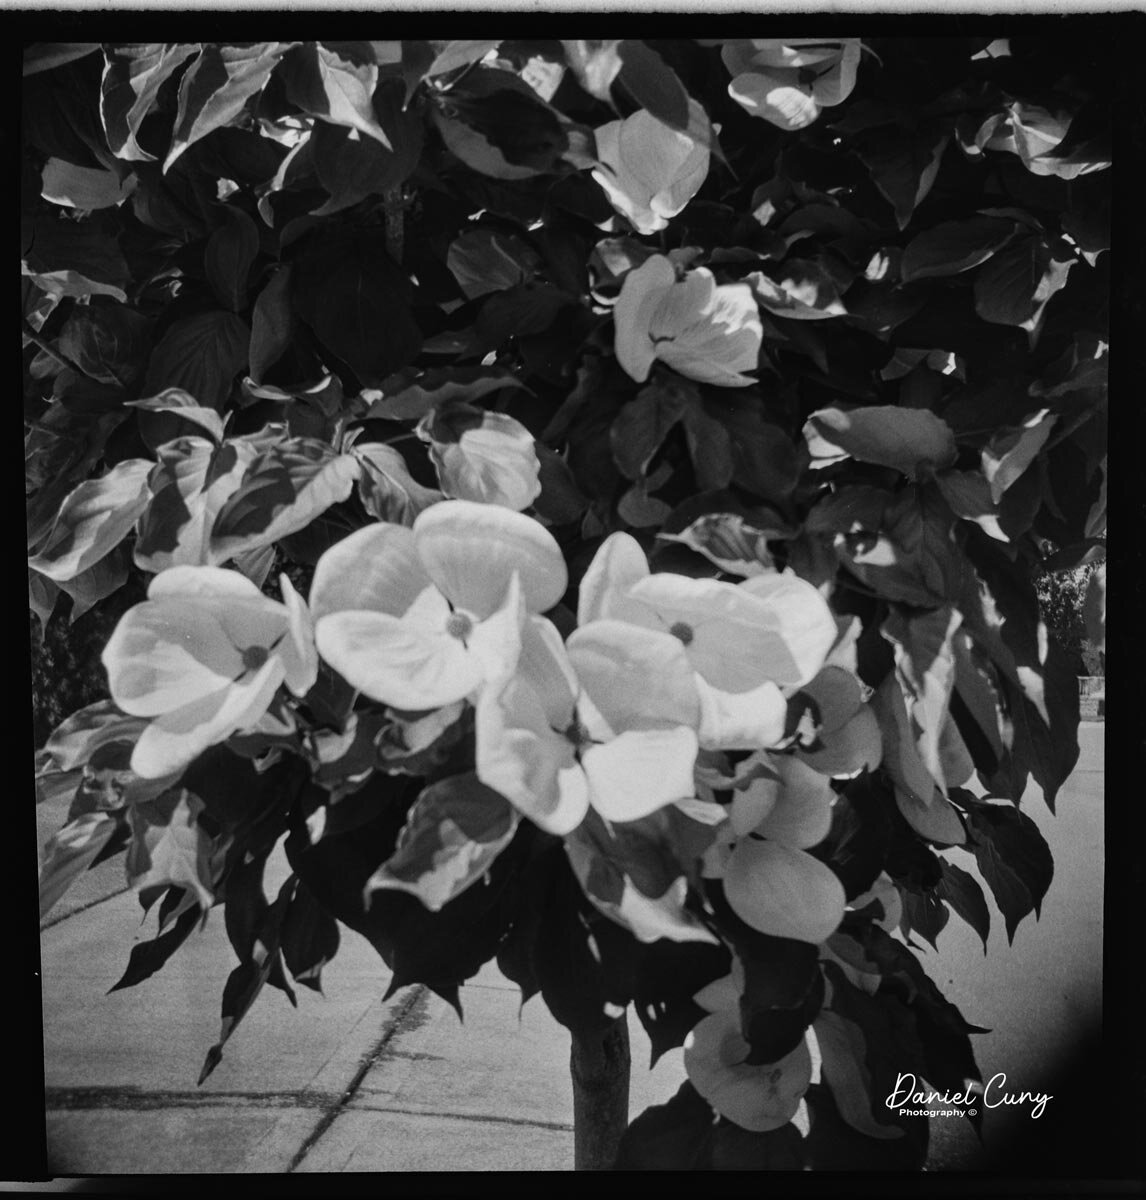
Dogwood

Dogwood

Conclusion

I thought the camera did a very excellent job for a pseudo-TLR camera. It's not much more than a glorified box camera. The camera was easy to hold, the exposures were good, thanks to my sunny 16 rule when exposing to sunlight. The lens vignettes a bit, but I enjoy that. The ease of operation and see the frames in the red window when advancing were spot on. I'd recommend this very well-built camera to anyone.

 Thank you for taking some time to look over this post. Until next time, please be safe.

No. 0 Folding Pocket Kodak

Due to the holiday season, I thought I'd do something a bit different for the blog this week. I did pick out a camera to write about, but as you can imagine, I didn't have a lot of time to do the research, but I did have an opportunity to take the camera out and use it. The camera I picked for this week's post is a camera that's well over 110 years old, and I received some pretty peculiar looks when I took it out to shoot.

No. 0 Folding Pocket Kodak

No. 0 Folding Pocket Kodak

The Camera

This week's camera is the No.0 Folding Pocket Kodak camera built between 1902 and 1906. It's a very compact folding camera that takes  121 size film that produced 1 5/8" x 2 1/2 size film negatives. The No.0 folding pocket Kodak is one of the earliest Kodak folding cameras and measures 5 5/8" long by 3 1/4" wide by 1 1/4" deep when closed, and 3 1/2" deep with the lens extended and weighs in at 11.5 oz.

The No.0 folding pocket Kodak is a fundamental camera that was marketed for horizontal shooting. When you pull the lens away from the body, it has a scissor-style hinge system to keep the lens erect, along with a pull-down leg on the front, right side of the camera so the camera can stand on its own. I'm a big fan of the red bellows style cameras produced during this period, and the bellows on my camera are light tight and a vibrant dark red color. The No.0 folding pocket Kodak has a Meniscus lens along with an Eastman Automatic shutter. To open the back of the camera is just a simple latch on the left side of the camera, and it opens on a hinge to load the film.

When you're holding the No.0 folding pocket Kodak with the lens extended and ready to take a photo, there is only one viewfinder, and it's for horizontal images. Most cameras have two viewfinders, one for horizontal and one for vertical photos. On the other side of the viewfinder is the shutter release button for normal instant style photos, which I'm guessing is approximately 1/60 sec. On the right side of the extended lens area is a protruding shutter release for time exposures. You click once to open the shutter and a second time to close it. On the left side of the extended lens area is the sliding mechanism, which changes the aperture setting. There are three different aperture settings set by moving the slider out to get to the desired aperture.

I am preparing the camera to shoot.

When I played with the camera, I had a roll of 35mm film on my desk. When I opened the back, the camera, it still had the wooden take-up spool in it. I picked up the 35mm film and laid it in the film chamber, and noticed how well it fit there. Pulling the film leader over to the take-up spool, I figured I'd be able to shoot 35mm through this camera.

The 35mm film's width was too small, so I needed to put something across the film area to keep the film flat when shooting. I had some black masking tape in my office, which I use to mask my light table when shooting glass negatives. I measured the width of 35mm film in the camera and cut some masking tape to fit across the film chamber so the film would lay flat.

Now I needed to figure out how many turns of the winding lever would take to advance the film to the next frame without overlapping frames. I did this with a dummy roll I had in my office. It takes two full turns of the winding lever to advance to the next frame. It probably is 1 3/4 turns, but I like to keep it simple. There is a red window on the back of the camera, which I needed to block out the light since 35mm film isn't a paper-backed film like other roll films. I put a couple of black tape layers over the red window to block that light as well.

 I loaded up the film into the camera and took my dogs to the local dog park to try out the No.0 folding pocket Kodak. Once I took the roll of film, I brought it home to unload the film. There is no rewind on the No.0 folding pocket Kodak, so I put the camera into my trusty dark bag for film processing and unloaded the film.

Photos from the camera.

My local dog park, from No. 0 Folding Pocket Kodak camera

My local dog park, from No. 0 Folding Pocket Kodak camera

Lulu from the dog park. She was sitting so nicely, then got too close. Photos from No. 0 Folding Pocket Kodak

Lulu from the dog park. She was sitting so nicely, then got too close. Photos from No. 0 Folding Pocket Kodak

Vertical photo from the No. 0 Folding Pocket Kodak

Vertical photo from the No. 0 Folding Pocket Kodak

Conclusion.

It was enjoyable to put a film through this 110 plus-year-old camera. There were a couple of hiccups as I hit the time exposure shutter button a couple of times to take the photo as I'm used to having the trigger on the side of the camera instead of on top, but other than that, the results are pretty good.

 Thank you for taking a few minutes to read my camera collecting blog. I enjoy hearing from you about this or any of the other posts I've made so far. I hope everyone has a very happy and safe new year and until next week, please be safe.

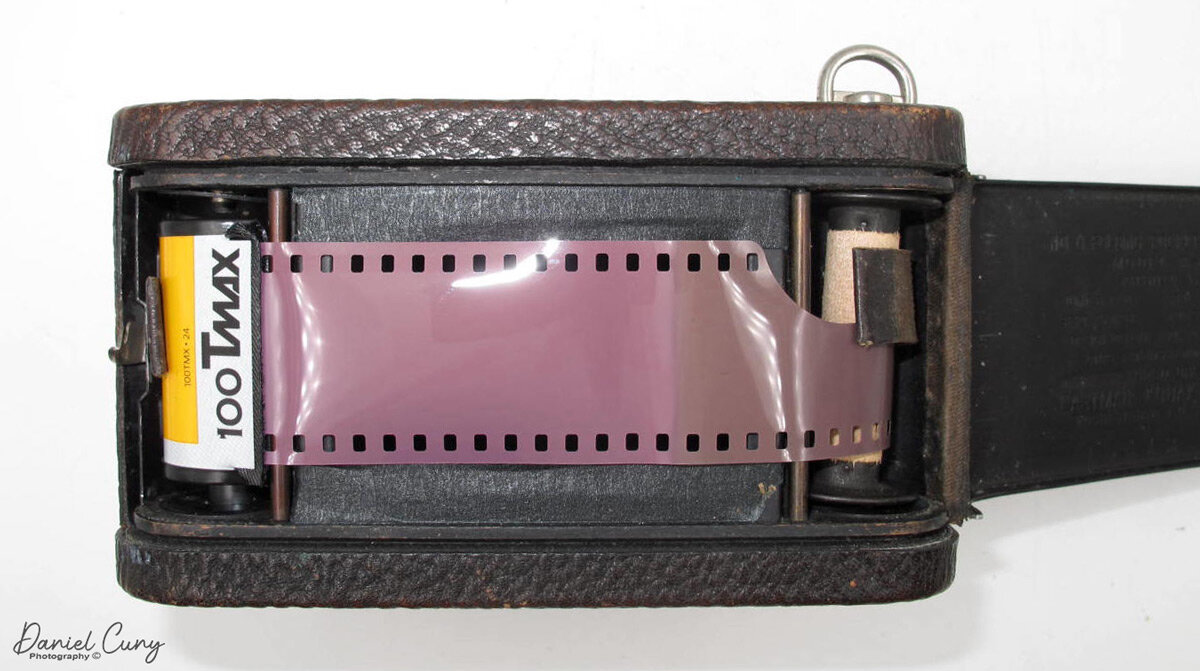
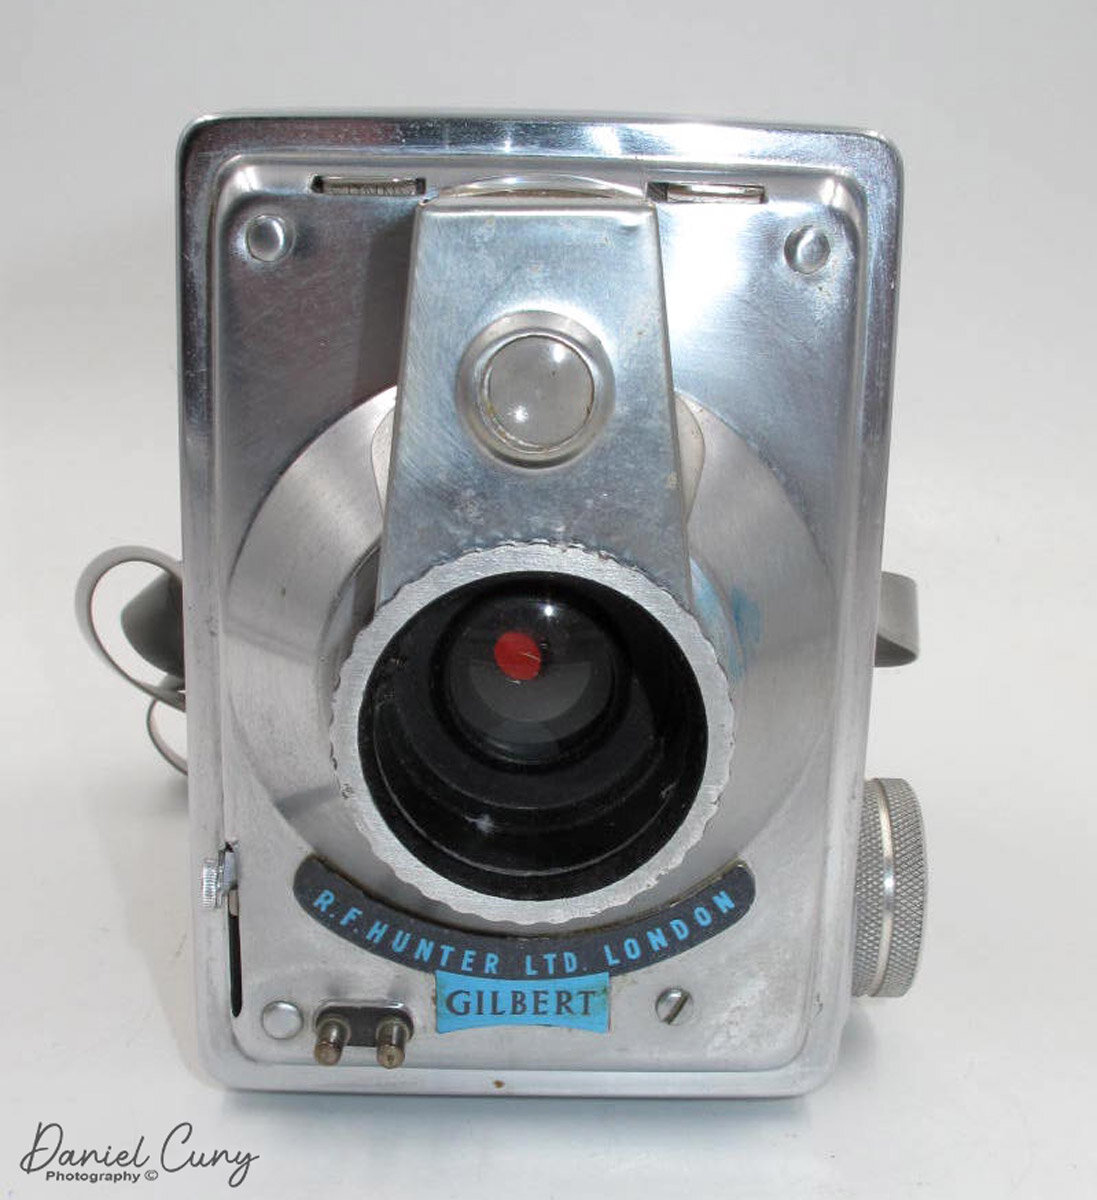
R. F. Hunter, Gilbert Box Camera

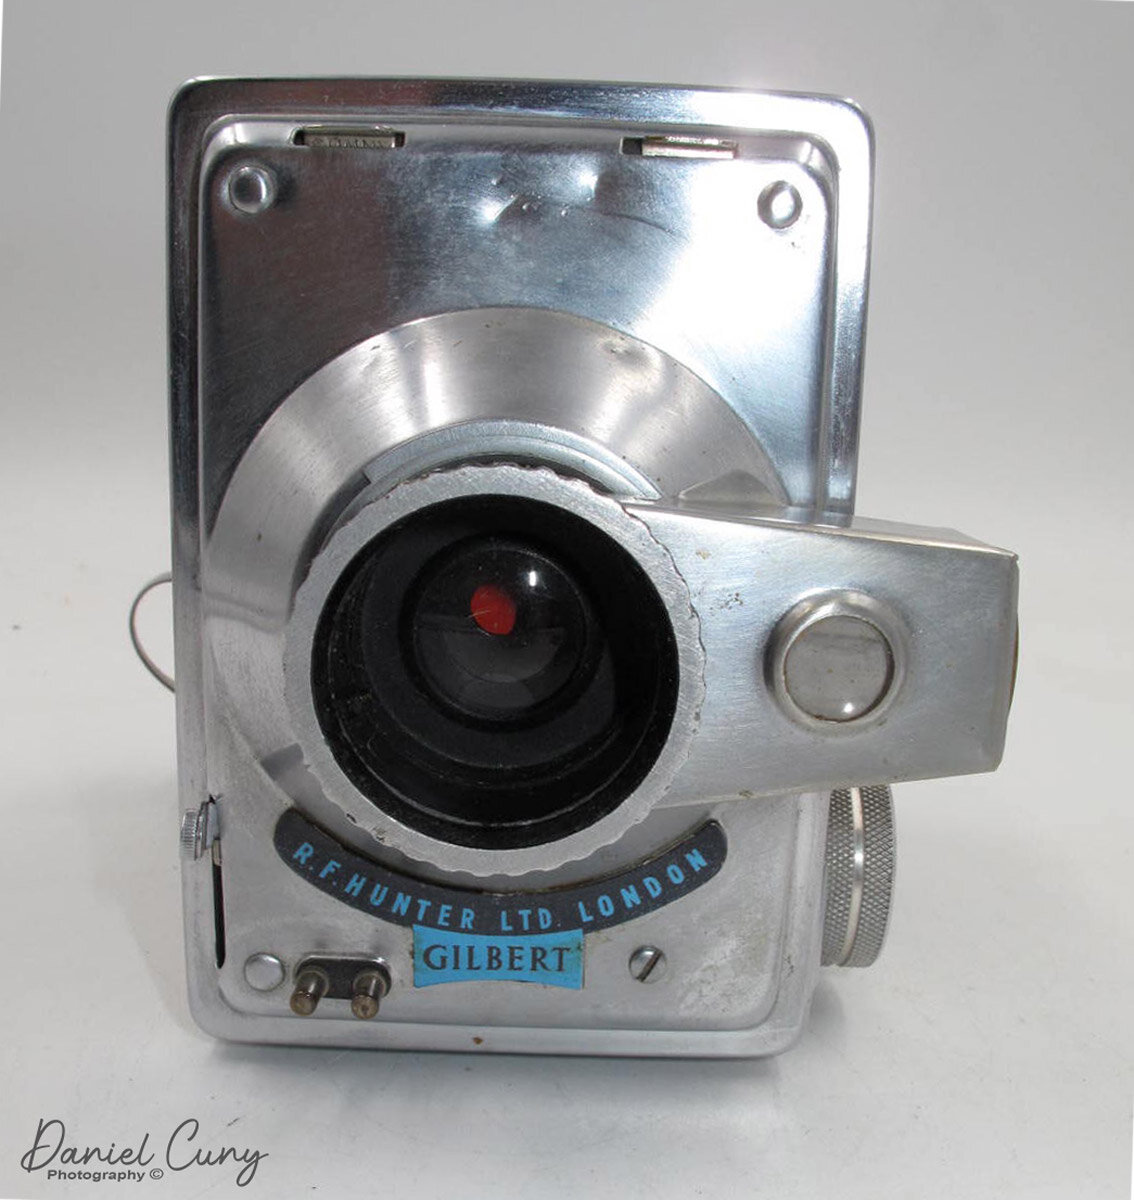
The cameras that caught my eye early in my collecting years were mainly colored cameras. Red, blue, green, brown tan cameras were the cameras I enjoy. If they had the original color bellows, it was that much better, or If the cameras had some design, even better still. Then I started to add red bellows cameras, as well as the odd and unusual cameras. When I first got a look at the Gilbert Box camera, which had the name R. F. Hunter LTD. London, under the lens, I knew I needed to own one. I thought it was not only a great camera but close to a work of art and a mid-century masterpiece.

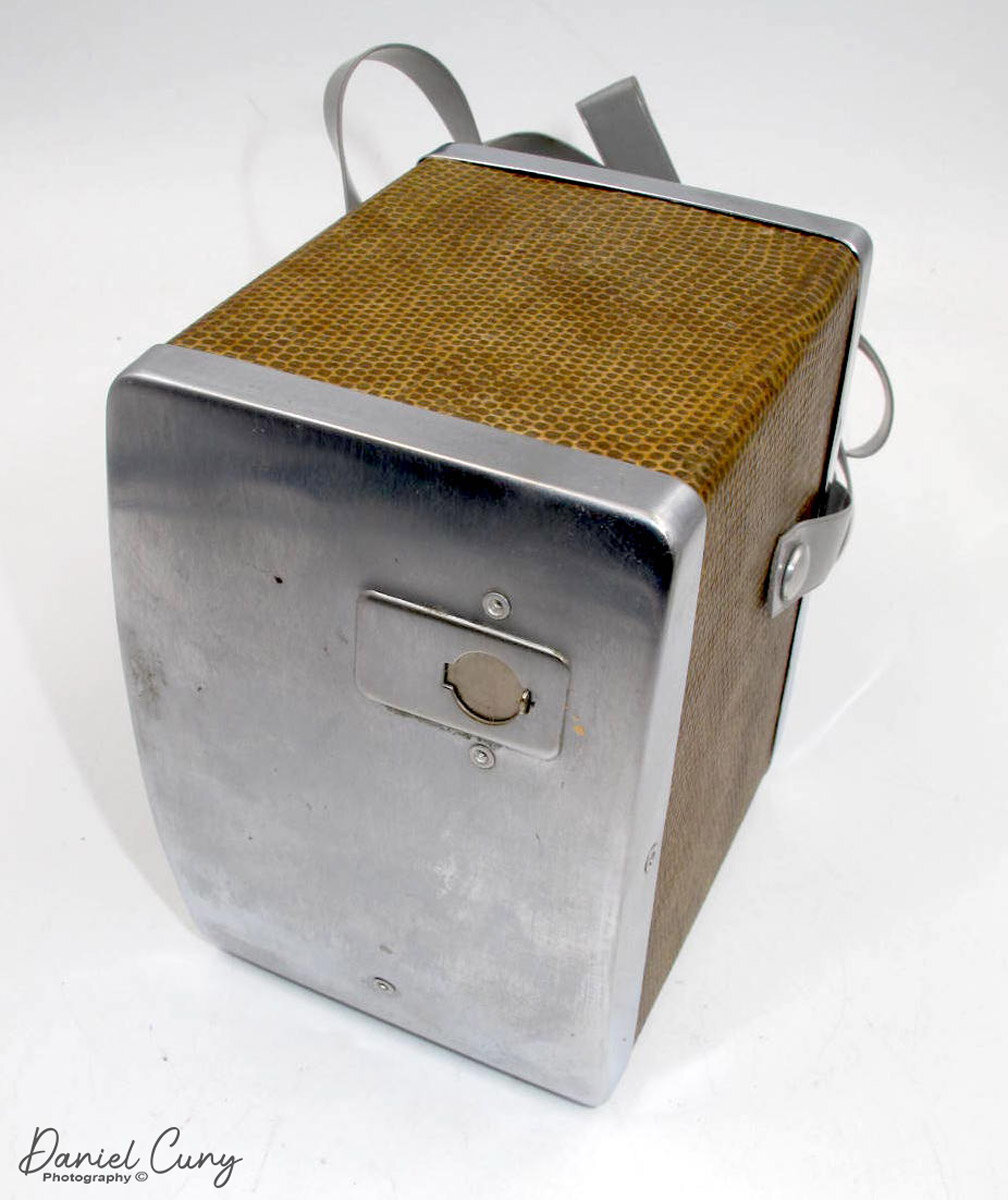
R.F. Hunter, Gilbert Box Camera with filter

R.F. Hunter, Gilbert Box Camera with filter

Company Background

R. F. Hunter, LTD. London was an importing and distribution company which was initially located at 40 Doughty St., in central London, England. In their later days before going out of business, they were located at 51 Gray's Inn Road, London. They started in the early 1930s, mainly distributing cine projectors and cameras.

Their main claim to fame was Franke & Heidecke Rollei products in the UK in the 1930s. This was the first distribution of their products outside of Germany, mainly due to Cyril Hunter, the Managing Director of R. F. Hunter's close relationship with Herr Franke. The story goes that Herr Franke brought his son to the UK just before WWII and asked Cyril Hunter to watch him in the UK during the wartime. He did so but needed to report to the authorities frequently with his son.

After the war, Franke & Heidecke went back into full production, but licensing the UK's distribution was limited. It wasn't until 1950 that the country changed the licenses, and robust distribution could of the product started to flow freely. According to advertising for the Gilbert camera, R.F. Hunter introduced it in 1953.

The Camera

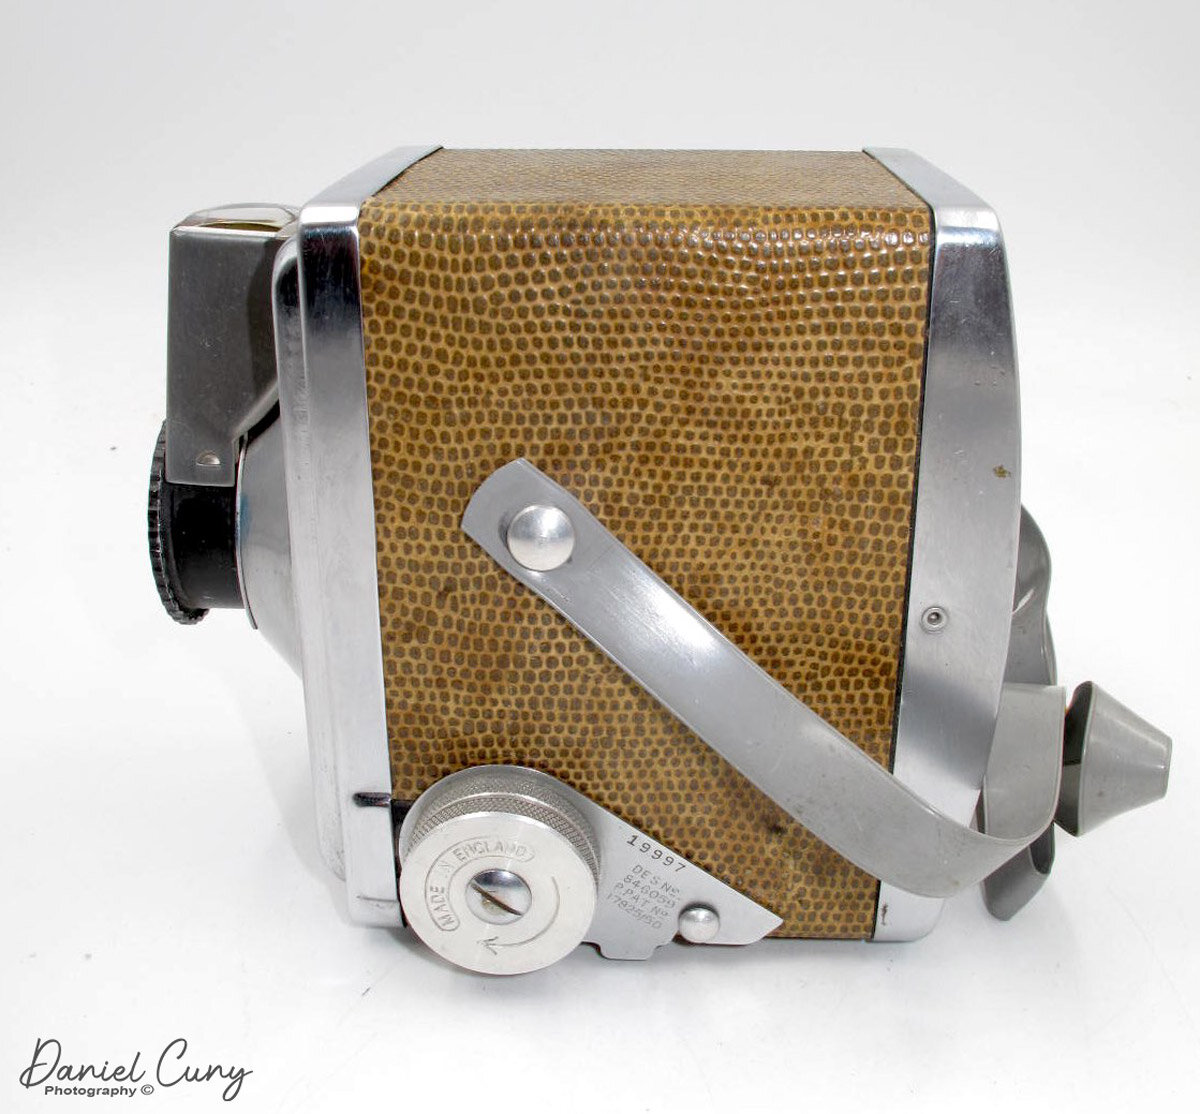
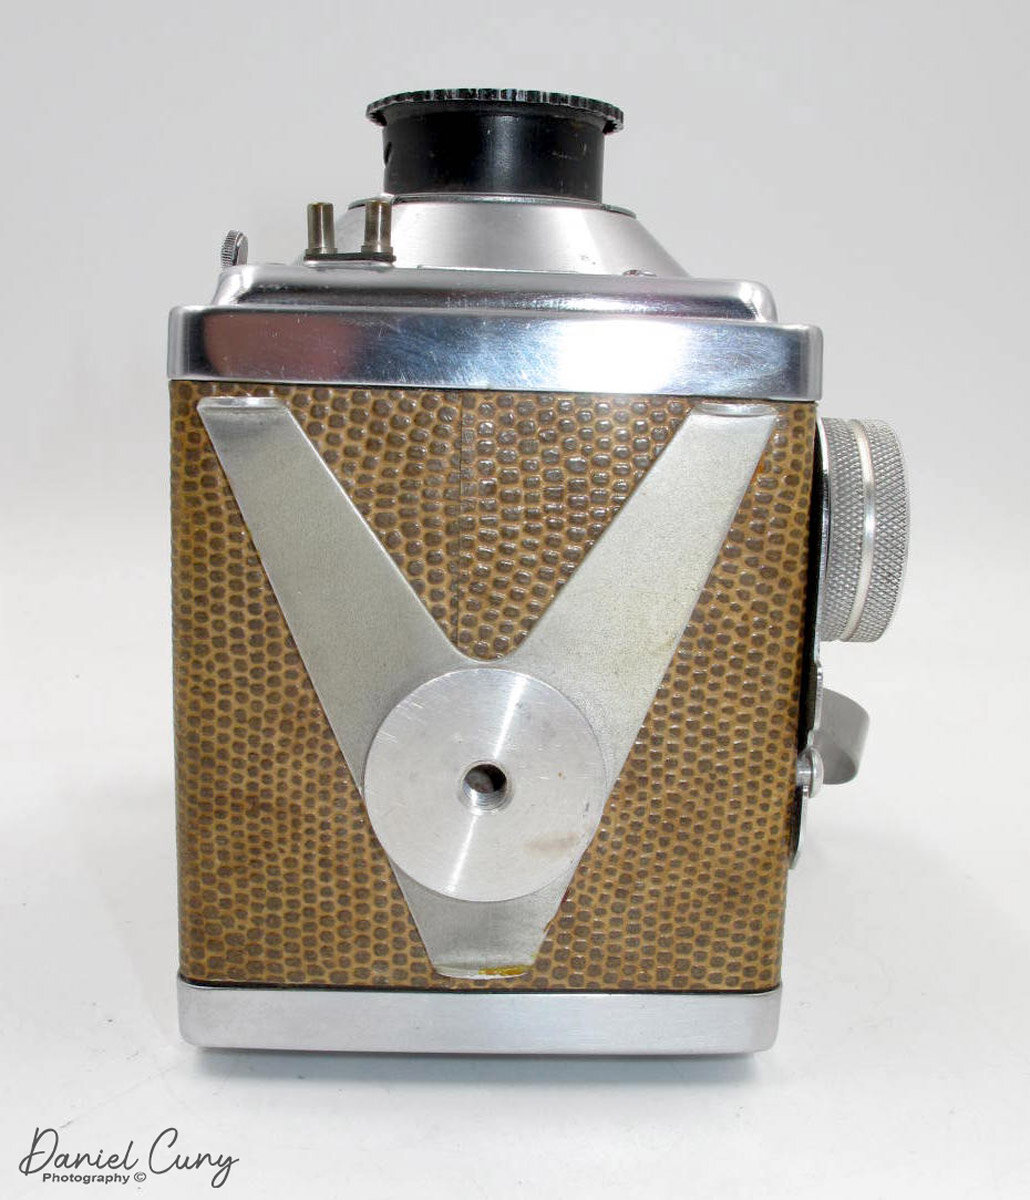
The brushed stainless steel body with lizard skin sides are what drew me to this camera. When I first saw it, I needed to have it for my collection, just for the camera's refined look, the shine, the color, and Lizard skin sides. It had everything someone like me coveted. It had it all. Once I bought it and received it and started to play with it, I knew I had a superb camera. The whole viewfinder rotates for vertical or horizontal photos. The camera has a double exposure lock, so you can't take multiple images on the same frame. It takes 8-6x9 negatives on 120 film.

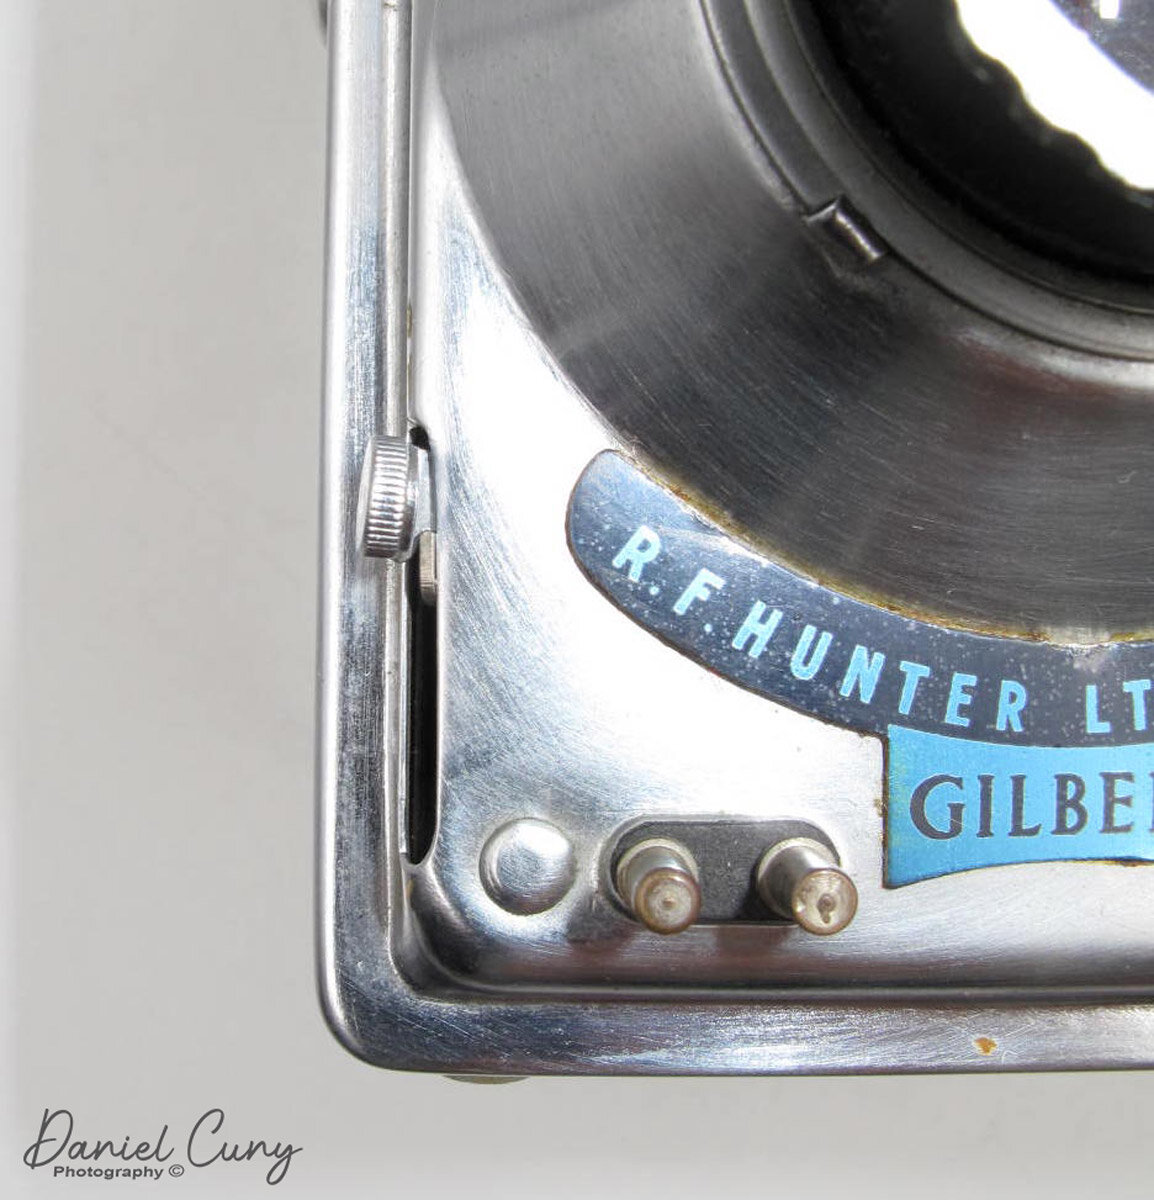
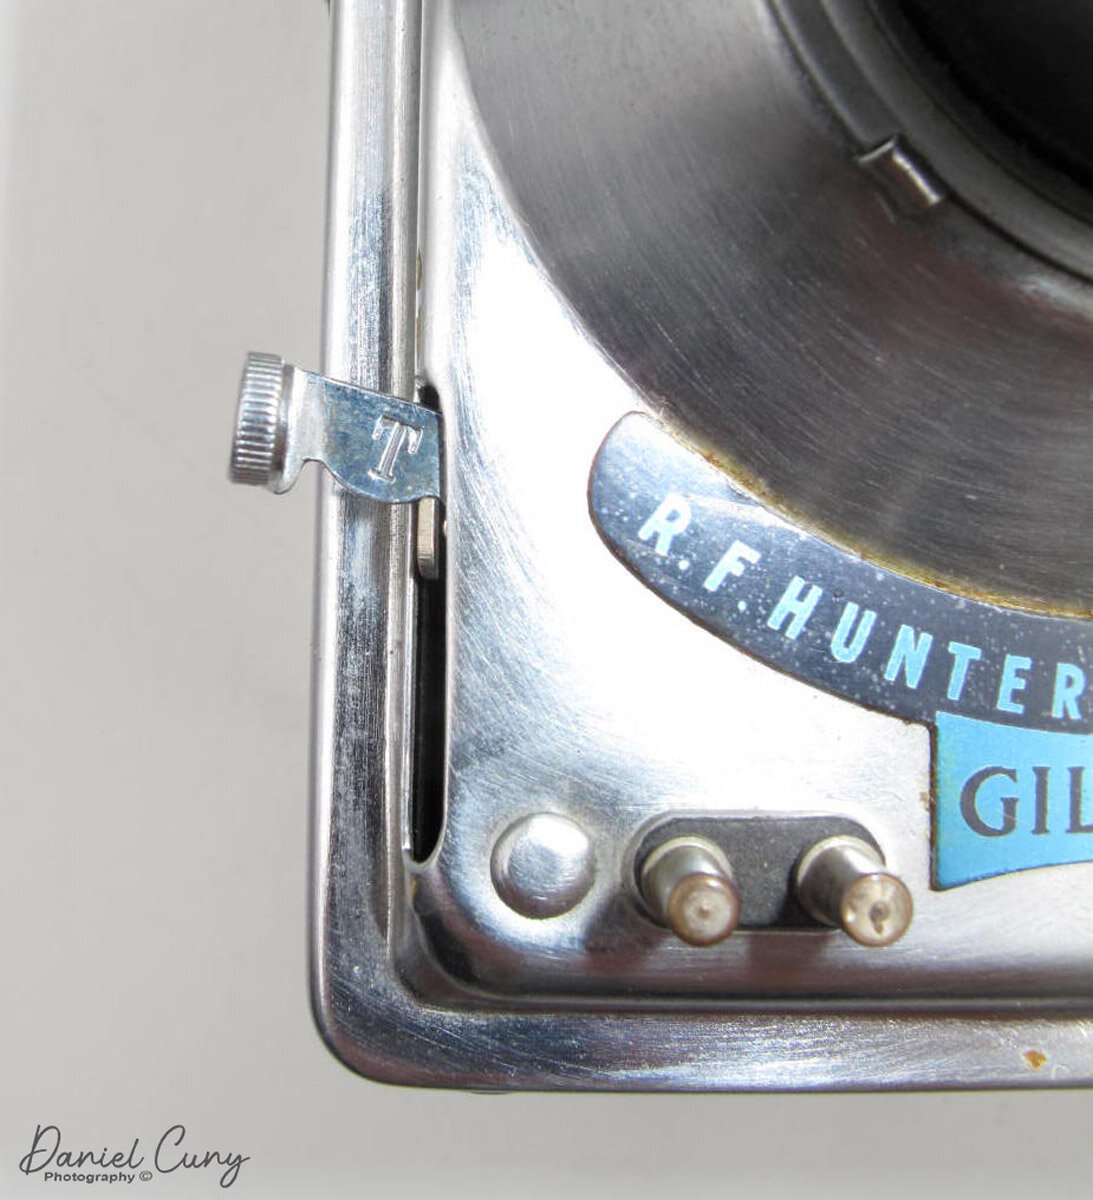
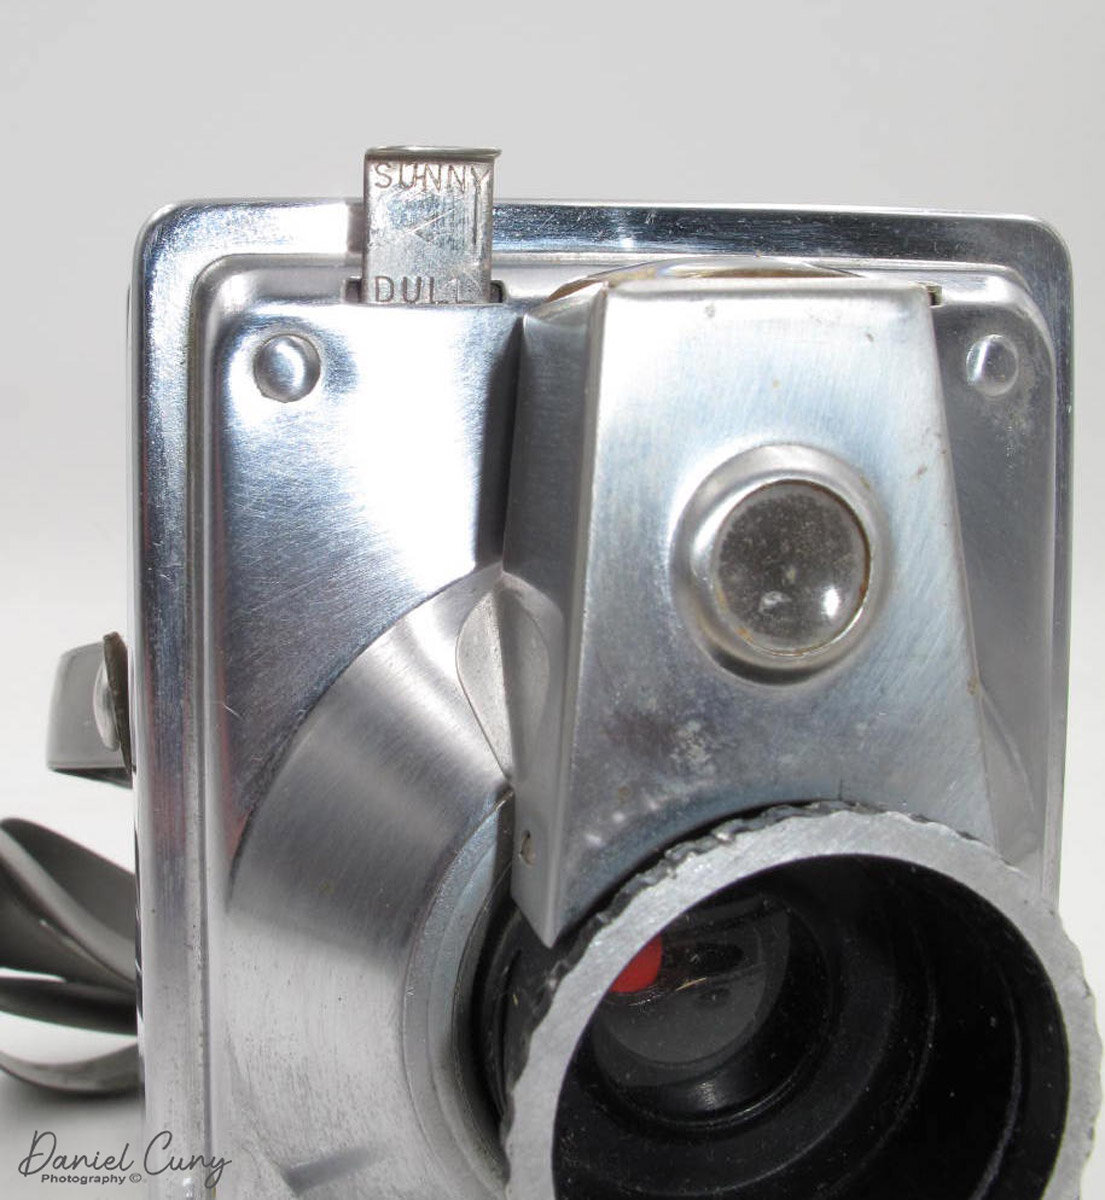
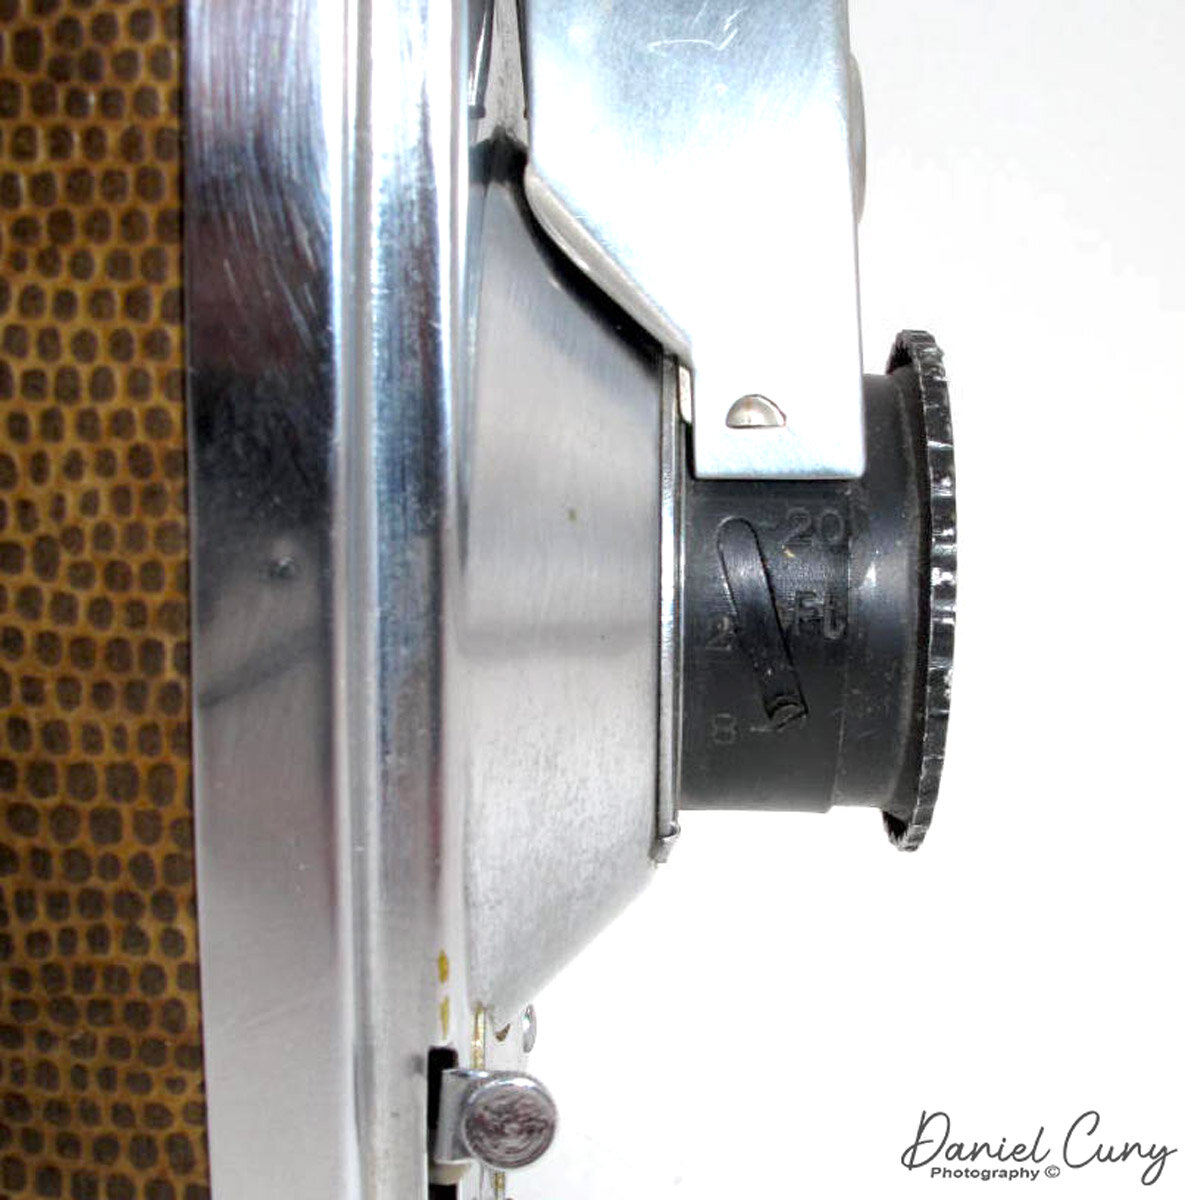
The camera measures 4.5" tall by 3.5" wide by 5" deep, including the lens. The lens is an approximate 105mm lens with two aperture setting (Dull) F5.6 or (Sunny) F11. The aperture settings are controlled by lifting or depressing a tab on the camera's upper right, next to the viewfinder. There are two shutter speeds for taking photos (fast) 1/50 and (slow) 1/30, a tab on the camera's left side. My camera doesn't allow me to pull up the tab to get the "slow" settings, so mine is 1/50. There is another setting located on the shutter release of the camera. If you pull the shutter release away from the body, there s an option for "T" or time exposure if needed. Another oddity about this camera is on the side where you focus the lens. As you rotate the lens, there are settings for 8,12, or 20 feet. I wonder why this was in feet as opposed to meters? Was this made for the US market?

On the left side of the camera is the film advance knob, which also cock the shutter, preventing double exposure. Behind the film advance wheel is a liftable latch that holds the camera's body portion to the lens/shutter area. Lifting the latch and pulling the body away from the lens, opens the camera for film loading. The camera's back has a slight curve outwards to replicate the film plane's arc, and there's a window that opens/closes so the photographer can see the frame numbers pass by when advancing the film.

Looking at the top's rotating viewfinder, you can see the etched line for registering your image for vertical or horizontal photos. I prefer the etched lines instead of the cropped corners many other box cameras have. My camera also came with the yellow filter, which fits snuggly into the lens. Next to the shutter release is a couple of flash sync posts. The camera's bottom has a tripod socket in the middle of 3 legs that prevent the camera from sitting directly on a table or ledge, which keeps the bottom from getting scuffed up.

Images

I loaded the camera up with Ilford Delta 125, black and white film. I only wished I had a faster film to shoot as the day I went to shoot was very overcast, so the photos are a bit dark, but not too bad. These images are also unretouched and quickly scanned for the post.

Conclusion

I've enjoyed this camera for many years from afar as it was sitting with my other cameras, but I am happy that I took it off the shelf and took photos with it. To me, it's a beautiful camera. I love the design, the look, and the lizard skin coverings. It is a mid-century beauty that I intend to cherish for many more years for an almost seventy-year-old camera.

 Thank you for taking a few minutes out of your day to look this over. I'd love to hear from you about your experience with the camera and if you've taken it out to use. If you have questions or comments about this or any of the other cameras I've written about, drop me a line. Until next week, please be safe.

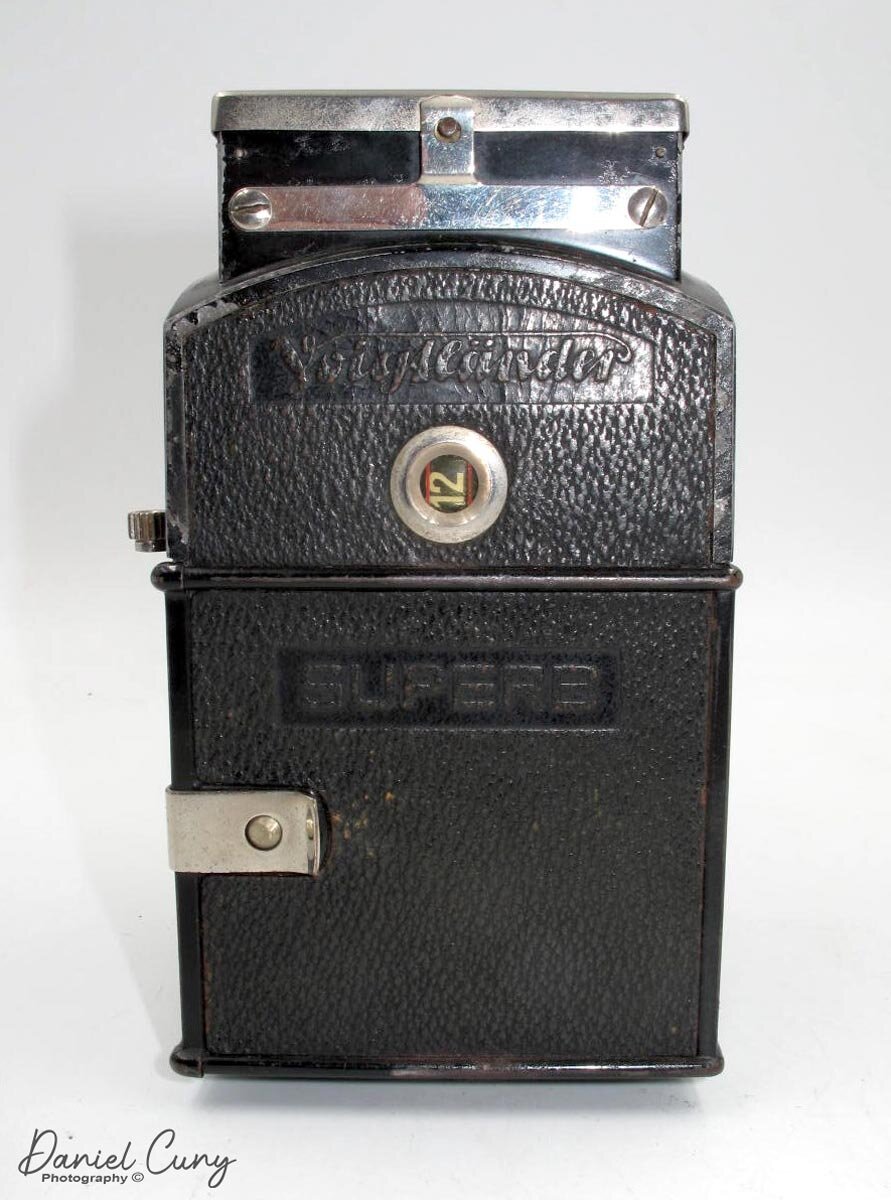
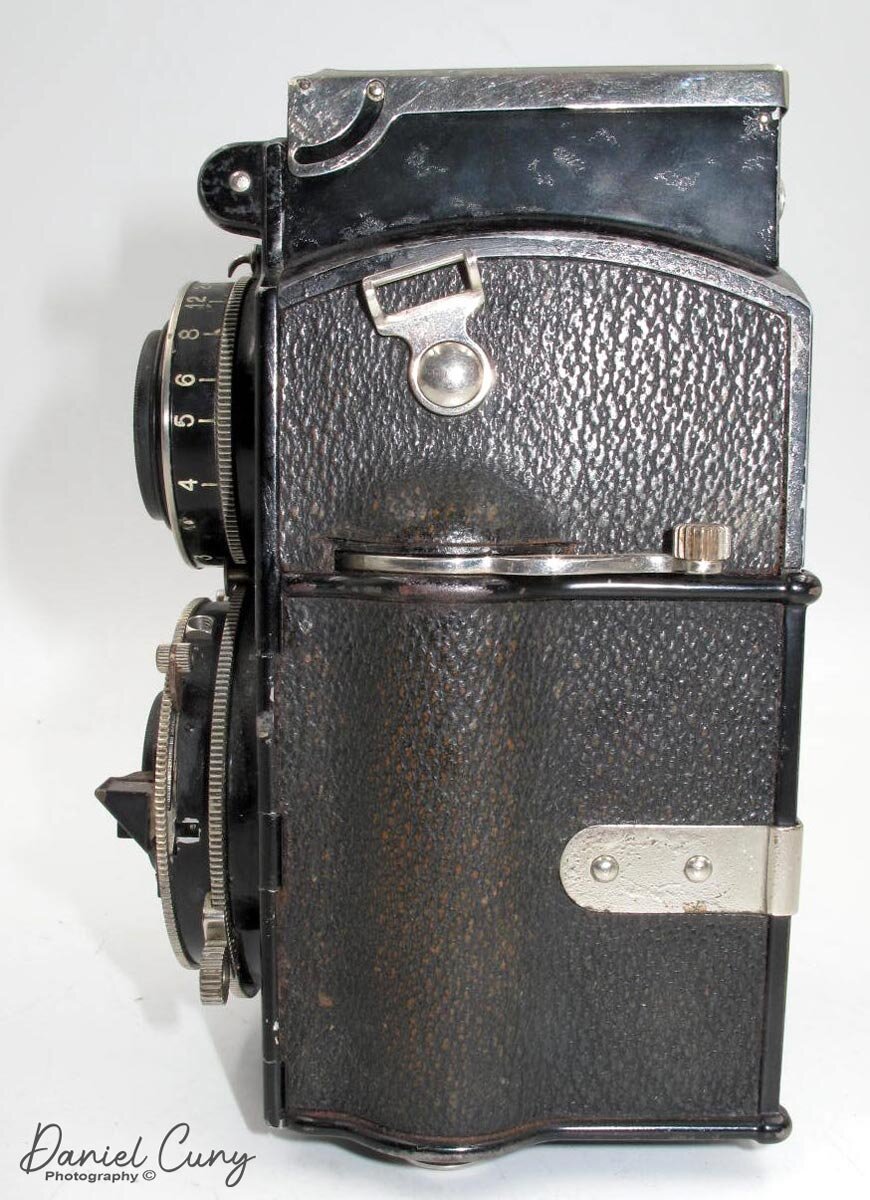
Voigtlander Superb

The Voigtlander Superb is a camera I owned for a short time, almost thirty years ago. At that time, I was buying and selling cameras rapidly and not using them. To me, at the time, it was more of a commodity. The Superb I owned also had a more rare lens, and someone was willing to pay me handsomely for it. At the time, with growing children, It's something I needed to do. Things have changed, and I've evolved in my appreciation for cameras.

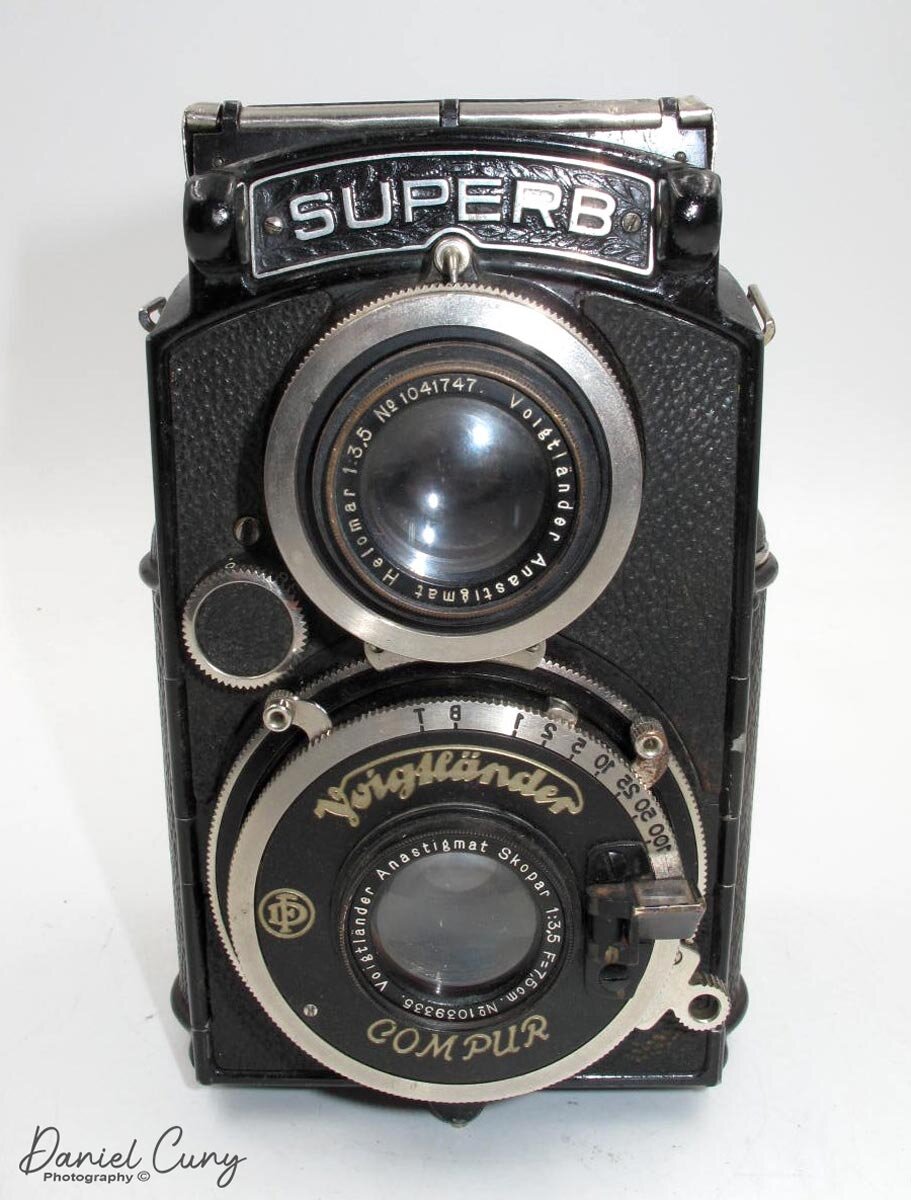
My Voigtlander Superb.

My Voigtlander Superb.

Company Background

In my post about the Voigtlander Vitessa, I made a brief history of the camera company that you can see here. The thing that amazes me about Voigtlander is how early they got into the photography industry and the names and products associated with them.

 In 1839, publications introduced photography to the public; Voigtlander's optics were the first mathematically calculated optics made by mathematics professor Josef Petzval. Peter Voigtlander gave technical advice regarding these lenses, which cut down exposure times to about one minute. That was revolutionary. By 1840, they were not only producing cameras, the all-metal Voigtlander Daguerreotype camera, they also introduced the first Petzval photographic portrait lens, with a maximum F stop of F3.6, know as the fastest lens of the time.

 
Camera and case

Camera and case

In 1923, Schering AG's photo division purchased Voigtlander, and by 1925, they started mass production of cameras and photo equipment. Voigtlander introduced such everyday items as the zoom lens, the 36–82/2.8 Zoomar in 1959, and the first 35mm compact camera with a built-in flash, the Vitrona in 1965. Voigtlander introduced the Superb model from 1933 until 1939. There weren't many modifications during that time. The early cameras had "bunny ears" as camera strap holders and the later years had a winged slot for the strap. You can see a version here, and there is an instruction manual here.

My Camera

Recently, a Voigtlander Superb became available to me, and the price was fantastic, so I immediately jumped on the offer. The seller stated it was in excellent working condition and also had the original case. Voigtlander made the Superb with two different lenses. The rarer and challenging to find 7.5cm (75mm) f3.5 Heliar, the one I owned previously. The more common lens is the 7.5cm (75mm) f3.5 Skopar, which this camera had. When I received the camera, there was no mold, mildew, or fungus on the lens, and indeed the camera was in fine working condition. Now it was time to take the camera out for a spin.

Using the Camera

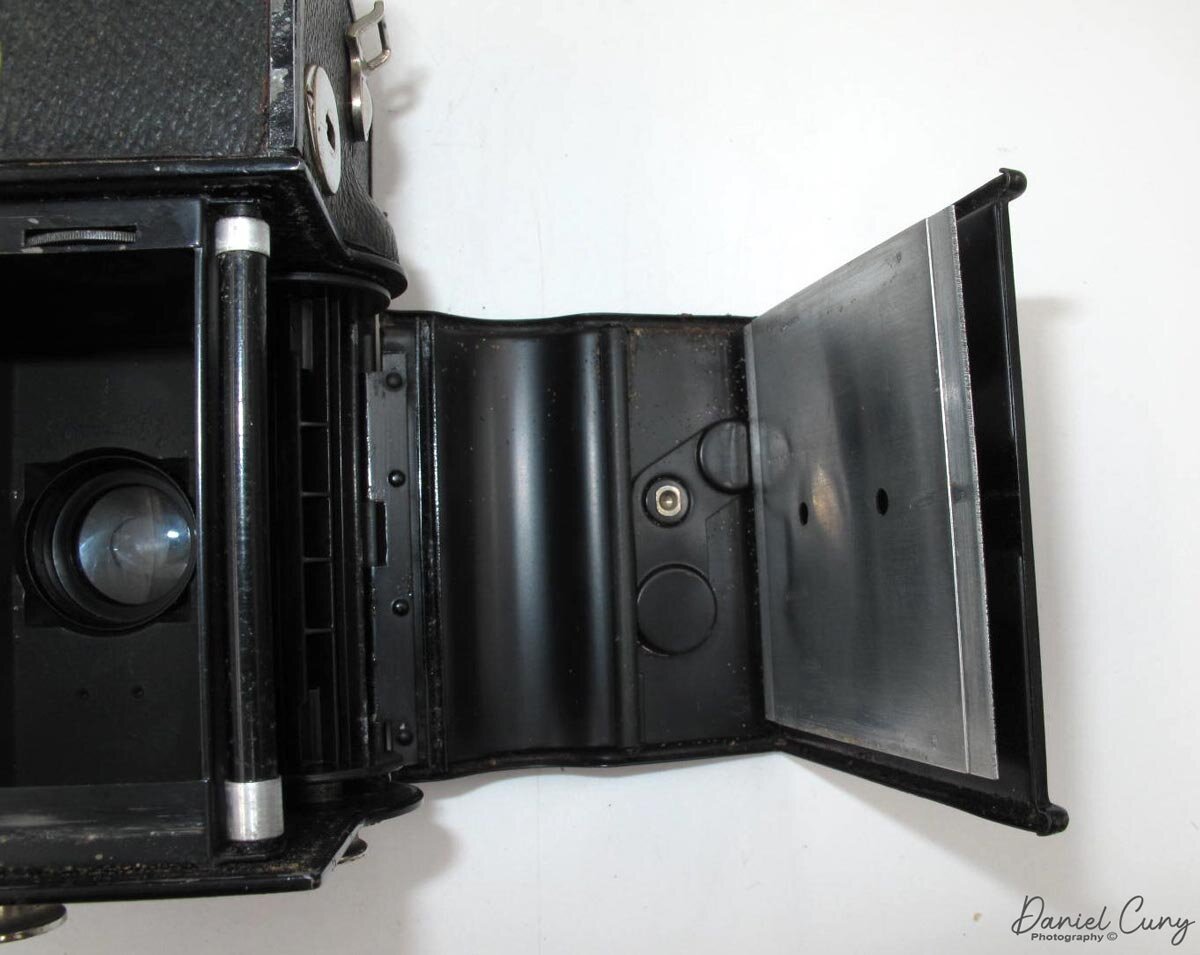
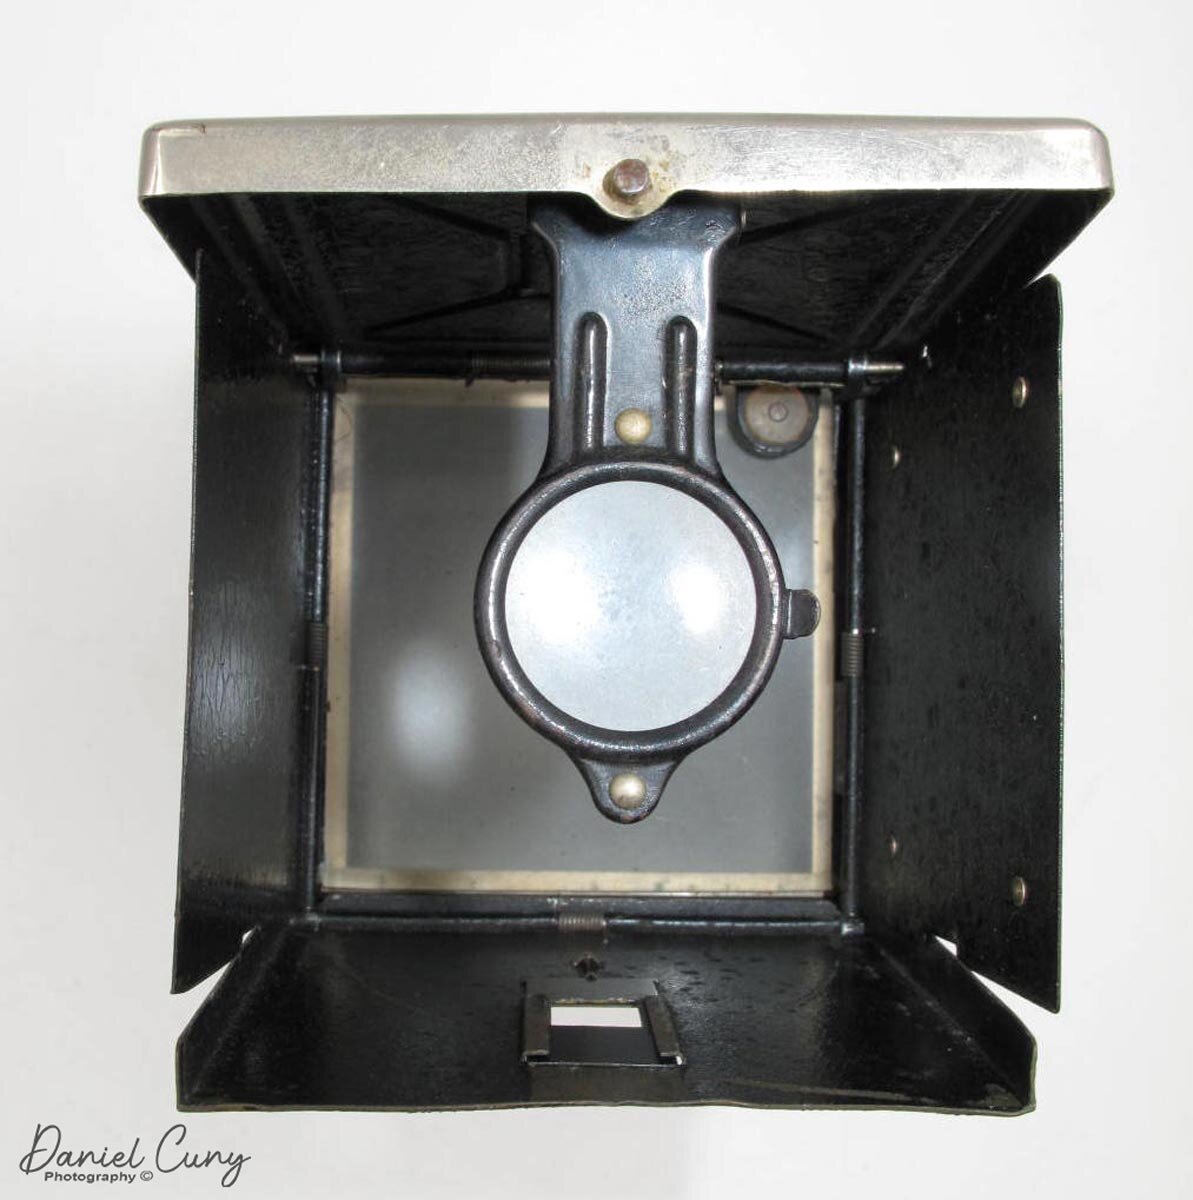
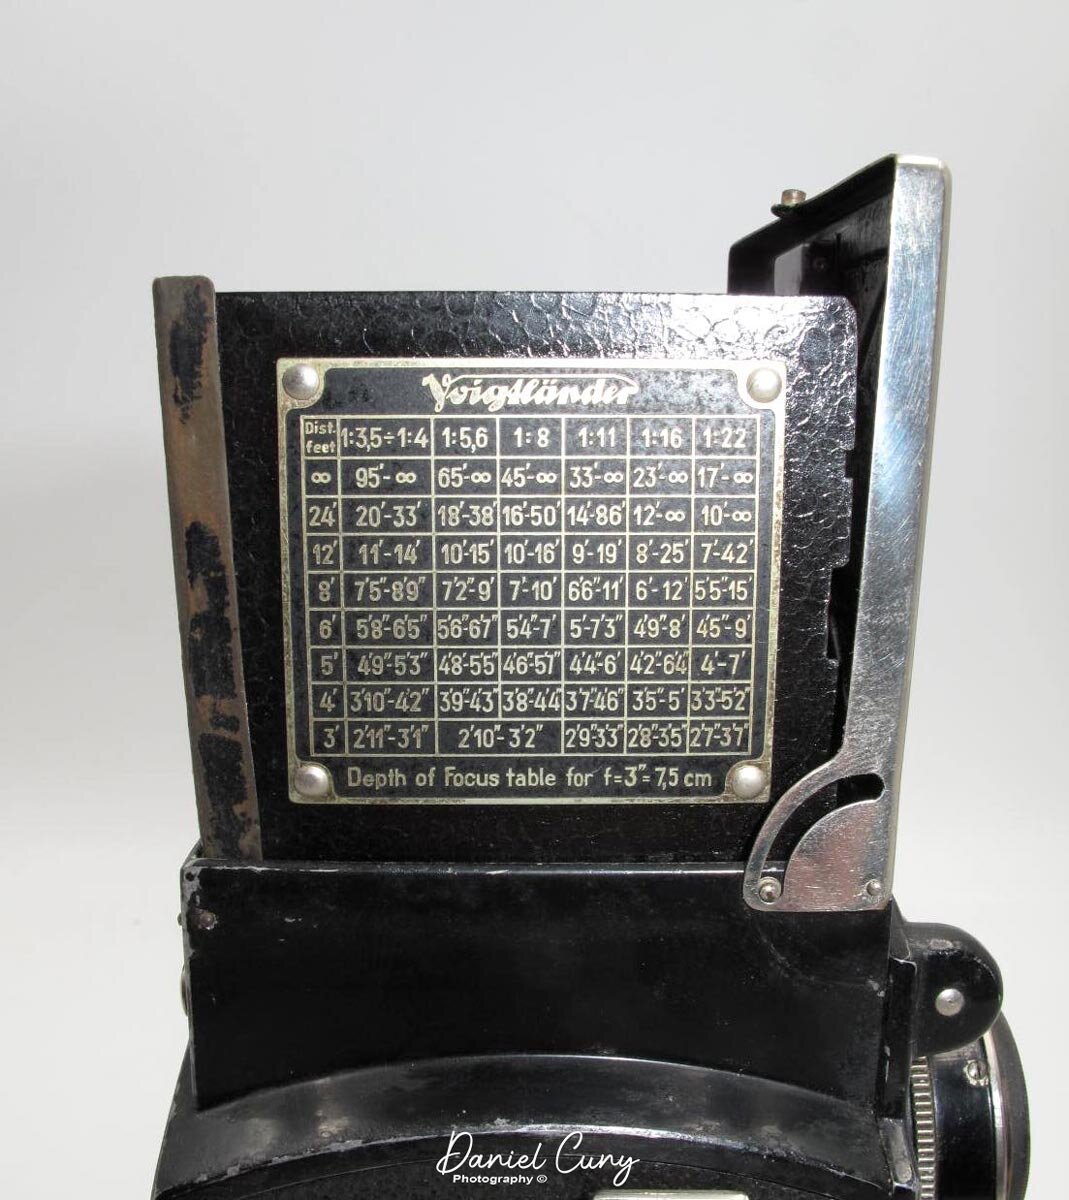
It was time to get myself familiar with the camera again. Holding the camera is very comfortable. Popping up the viewfinder, I immediately noticed there's a bubble level in the upper right-hand corner. I liked that. The magnifier is held in place by a small clip, so it doesn't pop up when you press on the front of the hood like the Rolleiflex's do. At least mine didn't. You focus the camera by sliding a bar on the bottom of the taking lens. The focusing is very similar to the Minolta Autocord. I prefer this method as opposed to the focus knob on the side of the camera. It allows me to keep my hands under the camera when focusing. The viewing lens points down when you focus closer, which corrects for parallax. That's fantastic.

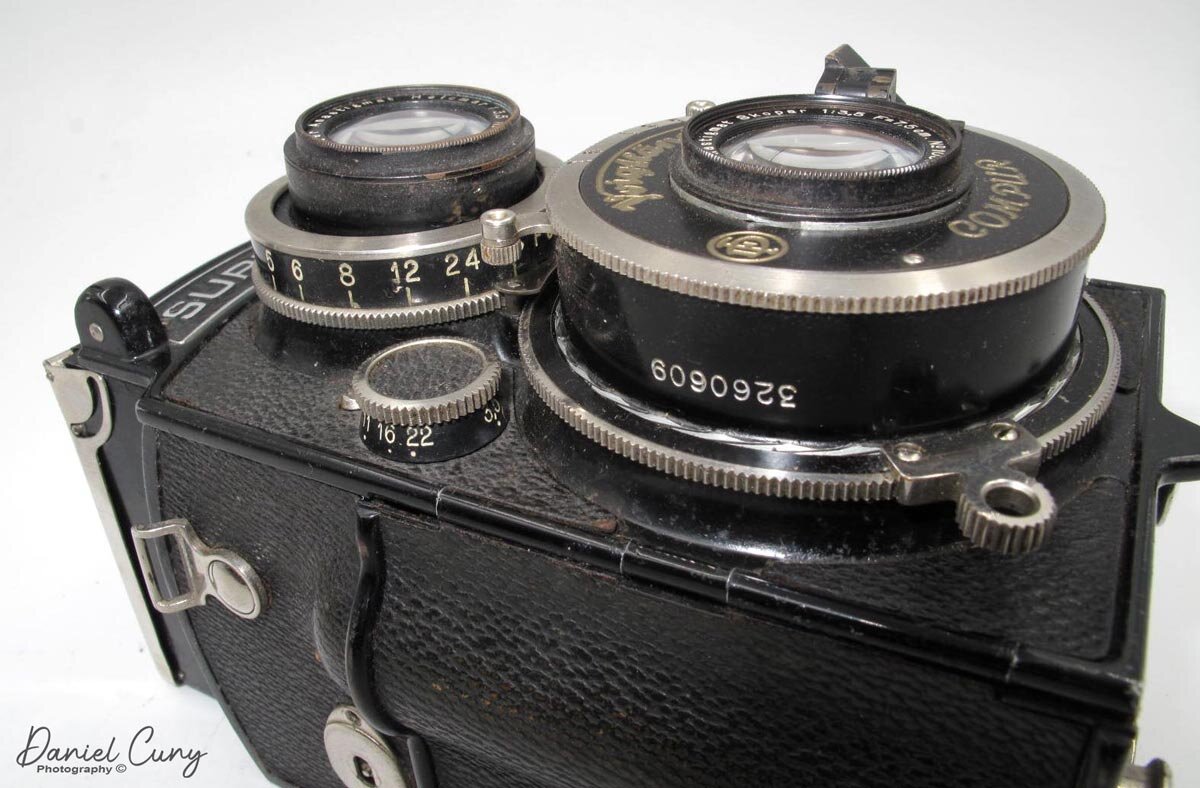
Looking at the shutter speeds around the Compur shutter, I noticed they are reverse. Then I noticed a small prism/mirror right next to the lens. Holding the camera and looking down allows you to see the shutter speed set in the window of the prism/window. That's genius. The shutter speeds go from 1/250 to 1 sec, along with 'T' and 'B.' The aperture settings are f3.5-22 and on a small dial to the right of the viewing and taking lens. When you're looking down from the top of the camera, you can see the shutter speeds and aperture settings without tilting the camera up to view them. You can easily see the focus distance, which you can see on the top of the viewing lens.

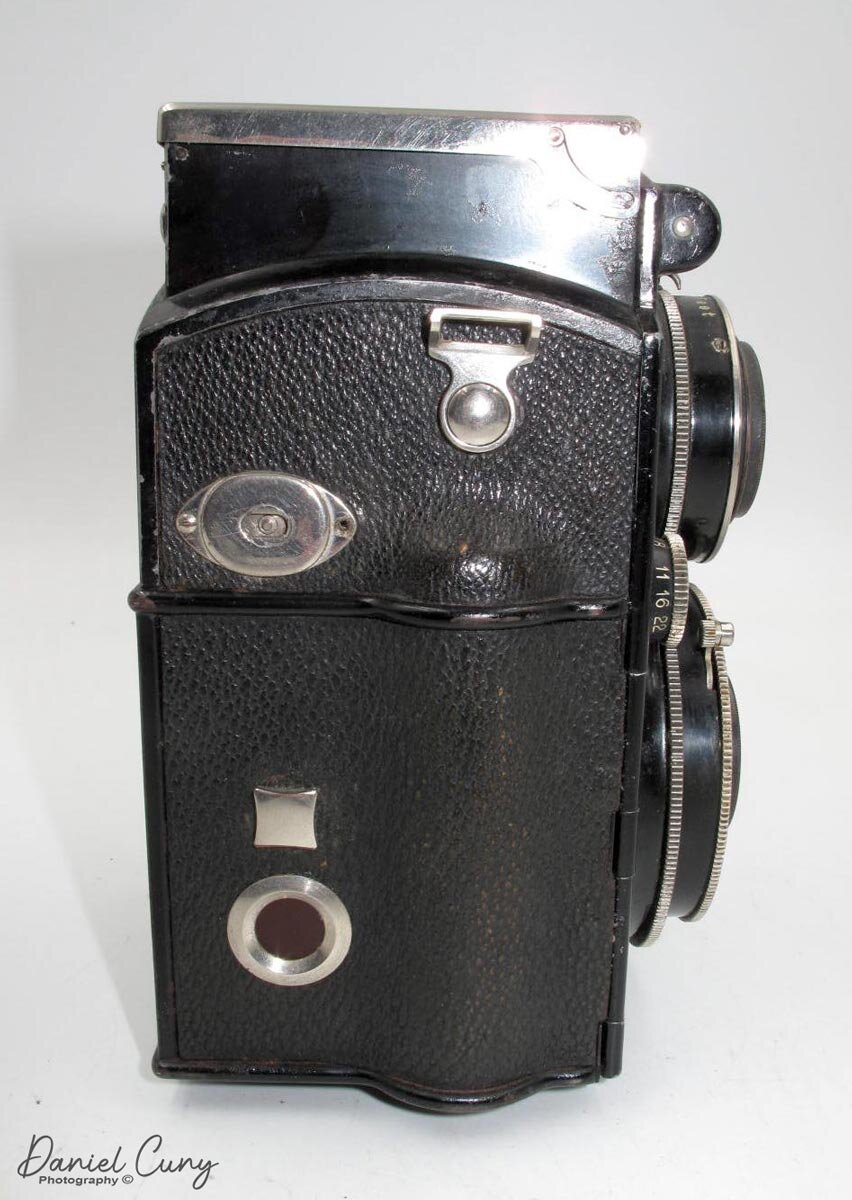
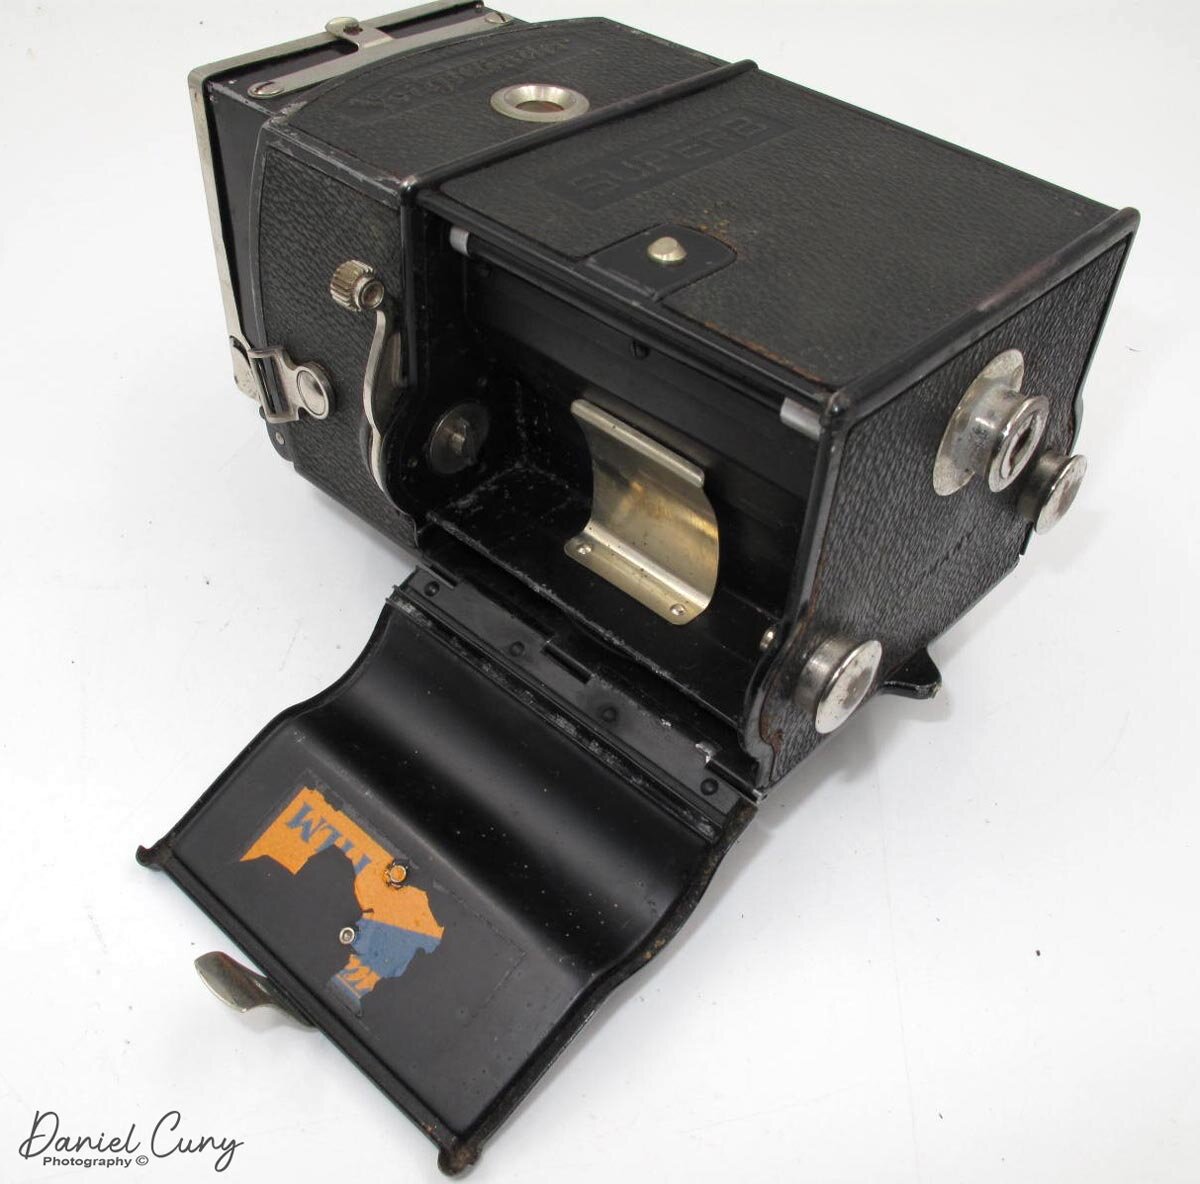
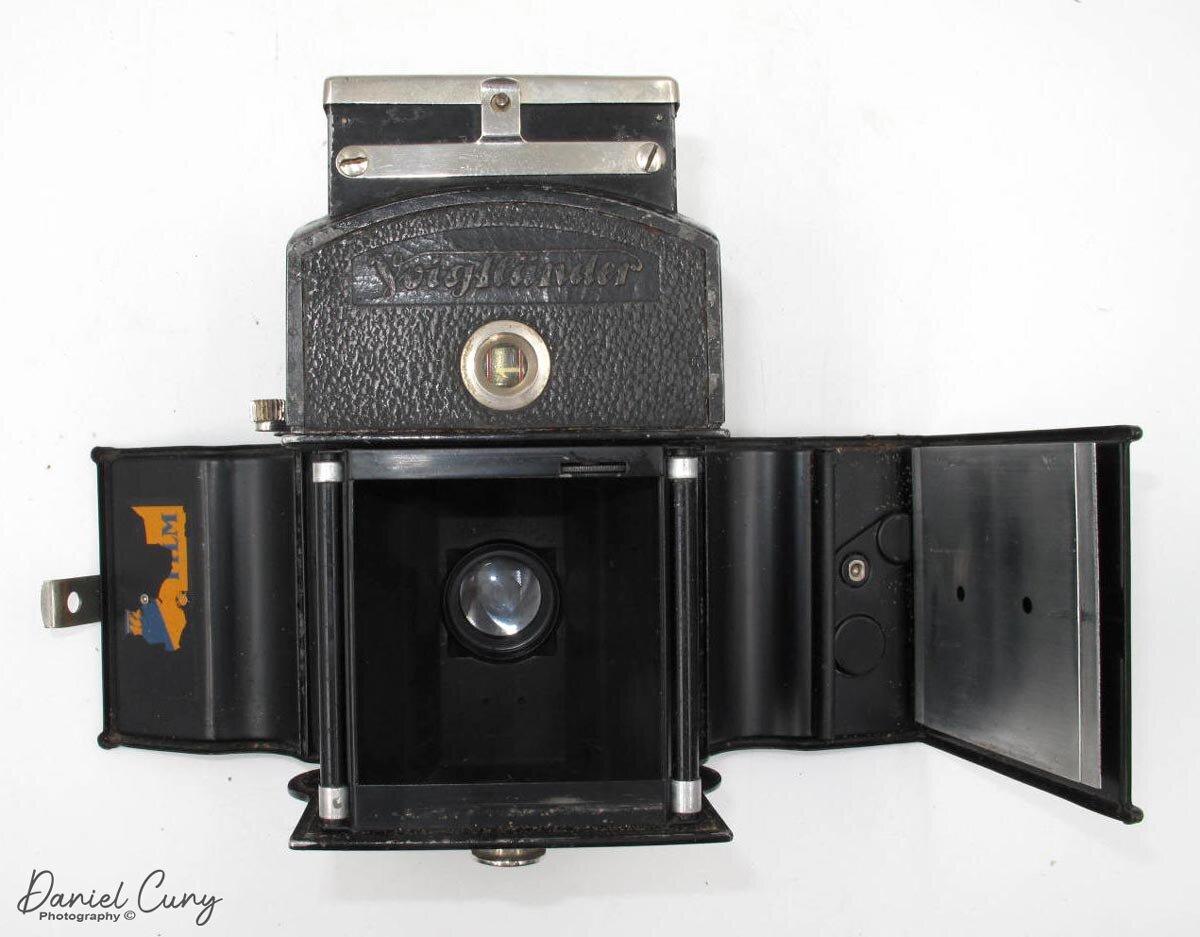
Here's where the camera gets fun, loading the film. The Voigtlander Superb has a horizontal loading and transport system. If not all other Twin Lens Reflex cameras, the majority use a vertical loading and transport system. On the left side of the camera is an angled bar that attaches to a metal nub on the back. Lifting the bar from the nub and opening it to the left exposes the take-up spool on the camera. Opening the back to the right reveals where you load the film in the camera. Put the fresh roll of film on the right, and pull the leader across the shutter area to the take-up spool on the left.

Viewing the shutter speeds.

Viewing the shutter speeds.

Just above the film chamber is an advance lever. Wind the lever to advance the film. Close the back. On the right side of the camera is the red window. There is an inside cover for the window. It's opened/closed by the square knob above the red window. I watch until the frame number reaches #1. Then I close the window. Above the square knob is a switch. This switch resets the frame counter, which you can see on the back of the camera. The film advance lever doesn't automatically stop at the next frame, so you need to advance it until you see the frame number which is five cranks.

Images

I took the camera out a couple of times this week. Here are some of the images from the camera.

Conclusion.

The Voigtlander Superb is an 80-year-old gem of a camera. It's easy to load and unload. The ability to see the shutter speed and aperture settings when looking down on the camera is excellent. I enjoy the bubble level in the viewfinder, so I know my camera is level. It fits nicely in my hand and isn't too heavy. The viewfinder is just a bit dark, but nothing to deter me from using it in the future. Another oddity is when I processed the film, and the images are across the film sideways instead of running top to bottom. It just kind of surprised me, but putting the negatives in my sleeves, they work better that way. If you run across one for a reasonable price, buy it, and I don't think you'll be disappointed. A great camera.

 I truly appreciate you taking the time to read my post. It does mean a lot to me. If you have comments or concerns about the article or the camera, please drop me a line. I'd love to hear from you. Until next week, please be safe.

You can subscribe to my Camera Collecting Blog below.