Kodak Retina Model 117

My Kodak Retina 117 camera

I purchased this original Kodak Retina 117 with a group of various Kodak and other branded cameras from the daughter of a Kodak engineer several years ago. She mentioned that the Retina was in his office in Rochester and was one of his favorite cameras, and she could remember him using it to take family photos. She didn't know what this model was other than it was the camera that Dad used to take family photos with.

 These stories bring a human element to purchasing items from family members. The cameras are not just mechanical items, which I happen to enjoy, but they are objects that evoke memories of dad, mom, aunt, or uncle holding the camera and taking photos at family Bar-B-Ques, birthday parties, Christmas morning, and so many other memories families have together.

Kodak Retina 117 Front View

 When the group of cameras arrived, I knew there was an early Retina in the group. Still, I didn't realize that it was the first Retinas model to be made. During the unwrapping of the camera, I first noticed how worn the camera's leatherette was. The was smooth in many locations, which gave the first indication that the camera was well used and most likely loved by the person using it. The front door was a bit sticky to open, but that's not unusual for a camera made 90 years ago. I'm sure the spring has lost some of its pulling power with age. Once opened, I wanted first to check the shutter. That seemed in great shape; even the 1 second seemed accurate to the ear. The transport was working, and I didn't see any real issues with the camera. I put it on my shelf with many of the other cameras I have.

 This week, while thinking about what camera to write about, I started to look over one of the shelves with cameras, and the Retina popped out to me. I know it was in good working condition, at least when I put it on my shelf a year or so ago. Opening the camera was as good as the day I put it on the shelf, so I decided to put a roll of film into the camera and see what a 90-year-old, German-made 35mm camera could offer. 

Retina History

The Kodak Retina series is a fantastic camera design, blending American ingenuity with German precision. Introduced by Kodak in 1934, the Retina cameras were manufactured in Stuttgart, Germany, by Kodak AG, formerly known as Nagel Kamerawerk, which Kodak had acquired in 1931. The Retina line is celebrated for its compact design, quality construction, and innovations in photography, becoming a favorite among amateurs and professionals. The Retina series began with the Kodak Retina I (Type 117), a 35mm folding camera. The Retina was one of the first cameras to use Kodak's new 135 film cartridge, which would become the industry standard. The Retina I was compact, featuring a collapsible lens and a rugged design. The model underwent several iterations, improving lens quality, shutter speeds, and build but always retaining the folding design that defined the early Retinas.

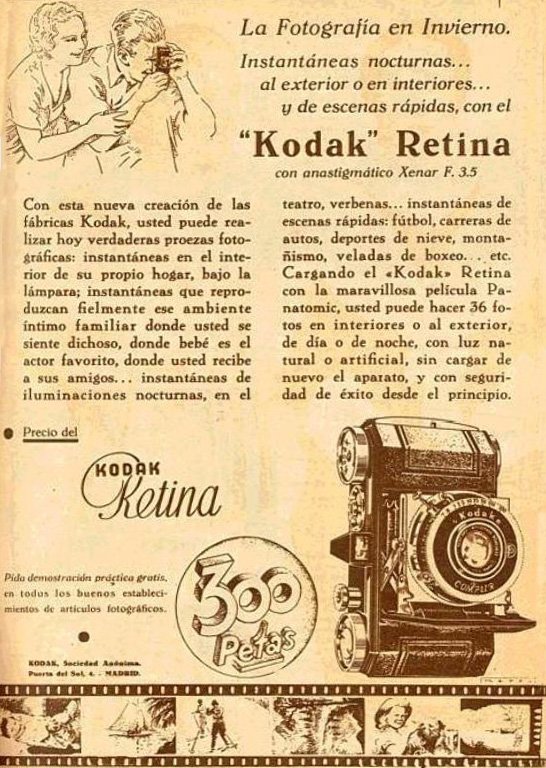
Spanish ad for Kodak Retina 117 camera

 In 1936, Kodak introduced the Retina II (Type 122), which added a coupled rangefinder, making focusing more precise. This feature positioned the Retina as a premium camera for enthusiasts. By the mid-1950s, the Retina line had evolved into non-folding models with the introduction of the Retina Reflex series. These single-lens reflex (SLR) cameras incorporated interchangeable lenses, advanced metering, and a sharp Schneider-Kreuznach or Rodenstock lens, which appealed to serious photographers.

 The post-war years saw significant advancements. The Retina IIc and IIIc, introduced in the 1950s, became icons of the series. They featured interchangeable front lens elements, making the cameras versatile while maintaining their compact, folding design. These models also integrated advancements like exposure meters and faster shutters, ensuring the Retina line kept pace with competitors.

The Retina Reflex series launched in 1957, showcasing Kodak's foray into the SLR market. While innovative, these cameras faced stiff competition from Japanese manufacturers like Nikon and Canon. Despite this, they remain a testament to Kodak's ability to innovate during an era of rapid technological change.

 By the 1960s, the Retina line gradually faded due to the rise of inexpensive, high-quality Japanese cameras. The last Retina camera, the Retina S2, was produced in 1969. Despite their discontinuation, Kodak Retina cameras remain highly collectible, admired for their craftsmanship and role in popularizing 35mm photography. Their legacy remains a reminder of Kodak's golden era in the photography industry.

My Camera:

My Kodak Retina 117 camera is a wonderfully small and compact camera that you can put into your pocket and travel with very easily. One thing I enjoy about the look of the camera is all the knobs on the outside of the camera are nickel as opposed to the shinier chrome, which can give reflections when using the camera.

 The camera is 5" wide, just under 3" tall, and 1.5" deep with the lens closed and 3.5" deep with the front door opened and the lens out, ready to take a photo, and weighs just under a pound at 15.7 oz. My camera has a Schneider-Kreuznach Xenar 5cm f3.5 lens in a Compur-Rapid shutter. The shutter has speeds from 1/500 of a second to 1 second, along with "B" and "T" settings for timed exposures. The aperture of the lens has a range of f3.5 to f16.

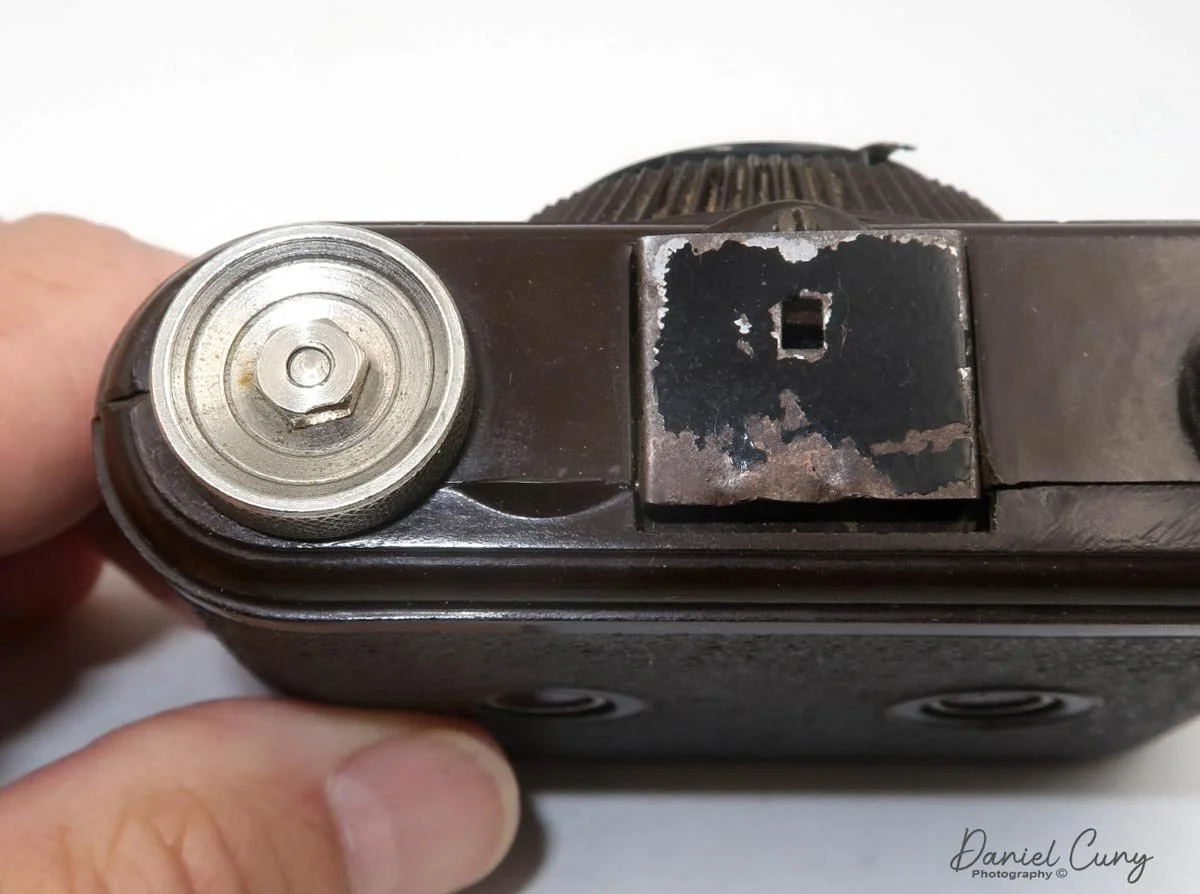
 To open the lens on the camera, you press a small button on the bottom of the camera. Once depressed, the front door should usually spring open, and the lens, which is on a very short bellows system, should come out into the erect position. As previously mentioned, my front door doesn't spring open, so I needed to give it a little bit of help and pull it open.

Once opened, the camera is relatively straightforward in the settings. The shutter speeds are set by turning a dial on the top of the camera if you have it in the vertical position. Like many Kodak cameras from this era, or for many folding styles of cameras, the front door has the ability to set the camera upright just by pulling out the "Kodak" logo on the front door, which will make for a leg for the camera to rest on if you want to set it down for display or to take a photo. I always do that when in a store or seeing a folding camera on display. I'll flip down the camera's leg, allowing the camera to stand upright instead of on the platform the lens pulls out onto.

Select shutter speed by turning wheel. The top lever cocks the shutter and the one on the left side trips the shutter.

A small slider sets the aperture on top of the shutter as you hold the camera horizontally. The focus on the camera is by guess only as this camera doesn't incorporate a rangefinder. This function will come in later models. There are two different sets of focus distance numbers, both on the top of the shutter, but it depends on if you have the camera either vertically, in which the numbers are black, or if you're holding the camera horizontally, then the numbers are red. To focus the lens, there is a small knob on the bottom of the lens as you hold the camera horizontally that rotates the focus collar.

To take a photo, you'll need to cock the shutter with the lever on the top of the shutter while holding the camera vertically. Once the shutter is cocked, the other lever releases the shutter making the exposure. I've seen a very small shutter release button that fits into the cable release socket on the Retina camera. Unfortunately, my camera is missing this. I wish it did have it because when I was taking photos with the camera and looking through the viewfinder on top of the camera, my finger would cover some of the viewfinder, obstructing the subject when releasing the shutter. It wasn't too bad, but the small release would have made the experience a bit better. Now, I'm hunting for a small release to put onto the camera for future use.

 To close the front door, the lens must be focused to infinity so it is in the retracted position on the camera. You'll need to depress two small buttons on the lens strut, one on top and one on the bottom, to retract the lens back into the camera body. Once this is done, the front door will click closed.

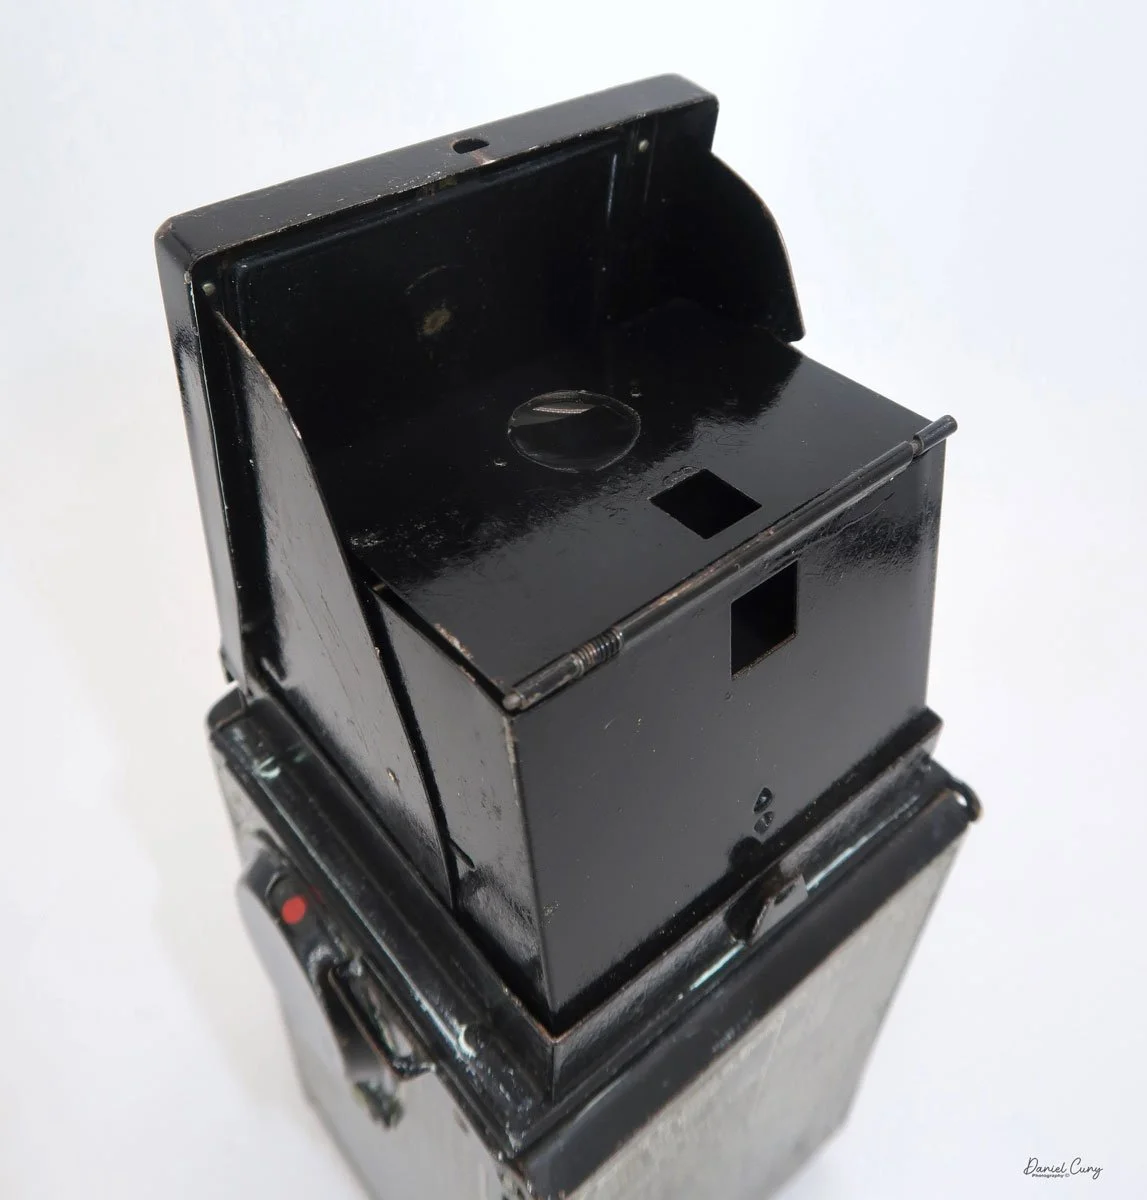
Loading the camera with film is pretty straightforward. On the side of the camera is a lever you pull down, and the back door unlocks so it can be opened. Loading the film is just like any other 35mm camera. I needed to do a couple of operational things to advance the film to the next frame. Looking on top of the camera going from left to right is the rewind wheel, the frame counter, the viewfinder, a round knurled wheel with an arrow pointing counterclockwise, and the film advance wheel. Inside the advance wheel is a second rotating wheel with a small cutout and arrows pointing in clockwise and counterclockwise directions. This inner wheel can rotate to have either an "A" showing for advancing the film forward or an "R" for rewinding the film into the film canister when all the photos have been taken. 

After making an exposure, keep the inner wheel to "A." To wind to the next frame, the knurled wheel just to the left of the advance wheel needs to be turned slightly until you feel a slight release, then you can use the larger wheel to advance to the next frame. If you don't move the knurled ring slightly, the film won't advance. This wheel is the unlocking lever that allows the camera to advance to the next frame. Also, once you load the film, be sure to set the frame counter to the number 1 to keep track of how many exposures you've taken. Once you've taken the entire roll of photos, turn the inner wheel on the advance wheel to the "R" position to rewind the film back into the film cassette. Open the back of the camera and process your film.


My Results:

I loaded the camera with a roll of T-Max 125 film, and while taking our dog, Ernie, a 15-year-old Pug, through the neighborhood, I took photos of things that caught my eye. Here are some of the results of our walk.

Conclusion:

I must be getting better at guessing distance, which has always been a problem (one of many) of mine. I also understand that the sunny day and smaller aperture helped with some of the focusing distances I would generally have with "guesstimate" focusing. Nonetheless, the camera was small, compact, accurate in the exposures, and fun to shoot.

 As I previously mentioned, if I could find one of the small shutter release items to add to the cable release socket, this would have helped and made the camera easier to use. Besides that small item, I can see why the previous owner enjoyed shooting with this camera.

 While I enjoyed this camera, I have it for sale on my eBay store. If you're interested in this or any other items in my eBay store, please email me to work out a deal.

 Thank you for taking a few minutes from your day to read about this fun and historic Eastman Kodak camera. The Retina line of cameras is often overlooked but highly collectible and usable.

 Until next week, please be safe.


Art Deco Rolleicord 1

My Rolleicord 1

Some cameras look so amazing that you consider them more of a work of art than a mechanical piece of metal and glass that takes photos. That was my thought the first time I saw the Rolleicord 1. While the Rolleicord 1 is a fairly plain camera, it's the "skin" that gives it a "wow" factor.

 It's the same feeling I had when I saw cameras like the cameras designed by Walter Teague, like the Kodak Beau Brownies, The Petite Coquette, and the Gift Kodak. They are more of something you'd see in a museum rather than take out and take photos with.

 It has more to do with the Art Deco era; these items were manufactured in, and along with the pride in artistry, the companies had to present something to their audience than we currently have. The fact that a camera company in the 1930s would introduce a new line of cameras with such a striking appearance is a bold statement and a testament to the Rollei name.

The History:

Rollei holds a significant place in photographic history. Founded in 1920 in Braunschweig, Germany, by Paul Franke and Reinhold Heidecke, the company originally bore the name "Franke & Heidecke." Initially, it focused on precision mechanical devices, but by the mid-1920s, Rollei began producing cameras that would revolutionize photography.

 Rollei gained international recognition in 1929 with the launch of the Rolleiflex, the first twin-lens reflex (TLR) camera. The Rolleiflex was compact, robust, and designed for medium-format photography. Its unique twin-lens system featured one lens for viewing and focusing and another for capturing the image on film. This innovative design allowed photographers to frame shots at waist level, making candid photography more discreet and practical. The Rolleiflex quickly became a favorite among professionals and enthusiasts, particularly for portrait and documentary work.

The success of the Rolleiflex led to the introduction of the Rolleicord, a more affordable version aimed at amateur photographers. Both models showcased Rollei's commitment to precision engineering and optical excellence, which became hallmarks of the brand.

 During the 1930s and 1940s, Rollei continued to innovate, refining the Rolleiflex and Rolleicord lines with features such as automatic film winding and improved optics. Despite the challenges of World War II, the company maintained its reputation for high-quality cameras. In the post-war era, Rollei played a significant role in the resurgence of the German camera industry.

French ad for Rolleicord 1

The 1950s and 1960s marked a golden age for Rollei. The Rolleiflex TLR became synonymous with professional photography and was used by renowned photographers such as Richard Avedon, Diane Arbus, and Vivian Maier. Rollei also ventured into other formats and technologies. The Rolleiflex 35mm SLR, introduced in the late 1950s, showcased the company's adaptability to the changing market demands.

By the 1970s, the rise of Japanese camera manufacturers like Nikon, Canon, and Minolta introduced intense competition. These companies offered high-quality single-lens reflex (SLR) cameras at more affordable prices, challenging Rollei's dominance in medium-format and professional photography.

In response, Rollei diversified its product line, introducing the Rolleiflex SL66, a medium-format SLR, and the compact Rollei 35, which became one of its most miniature 35mm cameras. Despite these innovations, Rollei struggled to maintain its market share due to its higher production costs and its competitors' rapidly advancing technology.

 In the 1980s and 1990s, Rollei faced financial difficulties, leading to changes in ownership and restructuring. The company shifted focus to digital imaging and niche markets, including high-end studio cameras and digital backs for medium-format systems.

The Rollei legacy endures as a symbol of German engineering and innovation, reflecting a century of dedication to the art and science of photography.

My Camera:

The Rolleicord 1 was made between 1933 and early 1936, with 32,508 units sold. The camera is nickel-plated and decorated with a trompe-l'oeil grid on all sides except the bottom, giving it its unique look. In 1934, Franke & Heideke produced a version of the camera without the beautiful pattern finish and covered the body in drab black leather, which was the Rolleicord 1, model 2.

 My Rolleicord 1 is 5.25" tall with the chimney closed and 8" tall with the chimney up, by 4" deep, by 3.5" wide, including the focus knob. It weighs 1 lb, 15.4 oz, so just under 2 lbs. The serial number on the camera is 029789, which is stamped into the body with the back door opened. The camera has a Carl Zeiss Jena Triotar 7.5cm f4.5 lens in a Compur shutter. 

The shutter speeds range from 1/300 to 1 sec., along with "B" and "T" settings. For transparency purposes, my shutter isn't in the best condition and only works on the top three speeds (1/300, 1/100, 1/50 sec.). It doesn't close if I use any of the slower speeds. The shutter speeds are set by turning the collar around the lens to the desired shutter speed, which is indicated by a triangle. 

 The camera's aperture setting ranges from f4.5 to F32. A pointing triangle and a separate collar on the other side of where you set the shutter speed determine the aperture setting.

 To cock the shutter, you slide the bar under the lens to the right as you're holding the camera to take a photo. With the same lever, you slide the lever to the left to take the photo. There aren't separate levers for cocking the shutter and tripping the shutter. It's all done with the same bar. Me, I like that, so you're not looking to cock the shutter in one area and take the photo in a different area. Very smooth and easy. There is also a socket for a cable release on the bottom of the shutter at approximately the 7 o'clock position.

To load the camera with film, simply pull the back release on the bottom of the camera, and the back will swing open. To take the empty spool of 120 film from the bottom chamber, you'll need to pull out the film knob on the right, which will allow you to take the empty spool out of the camera. 

 Pulling out the winding knob will allow you to put the empty spool in the top portion of the camera to advance the film to the next frame. Press the winding knob to keep the empty film spool in place. Put the new roll of film into the bottom chamber and press back in the film knob to keep the roll in place.

 Once you have the empty spool on the top and the new roll of film on the bottom, remove the tape that keeps the roll closed, pull the leader over the bottom and top roller, and slide the film's end into the take-up spool slot. Wind the film onto the take-up spool with the advance knob until you see an arrow pointing to the ends of the film. At this point, you can close the back door and wind the film to your first frame.

The frame counter on the left side of my camera body isn't working. Luckily, on the bottom of the camera, there is a red window you can use to see when you're in the first frame. Unfortunately, this numbering system on the film rolls is used for 6x9 format, so using this method, I only got eight images on a roll of 120 film instead of the standard twelve for 6x6 format cameras.

 To focus on your subject, pull up the chimney by slightly pulling back the release on the back of the chimney, and pull up, which will expose the large focusing screen. On the right side of the camera is the focusing knob. The focusing distance is from 0.8 meters to infinity. Turn the focusing knob to bring your subject into focus on the screen.

A fine focus magnifier on a spring rests on the back of the chimney. Bring the magnifier around to the top of the viewfinder. Mine stays in place, allowing the photographer to bring their eye closer to the magnifying glass for fine focus. When not using the fine focus magnifier, it can be swung back to the back of the finder so you can see the full image on the focusing screen. You can also slide the front portion of the chimney back and use the chimney as a sport finder if needed.

Exposure index and depth of field scale on back of the Rolleicord 1 camera.

On the back of the camera is an exposure guide and depth of field scale. This scale was produced in German, French, and English for the different markets. My guide on the back is in German. According to the Rolleicord 1 manual, the exposure guide is rated for DIN 26, which would be ASA/ISO 320


My Results:

It's in the northwest United States in early January, which means very little sunshine. So I loaded up the camera with some 400 ISO film and walked around the neighborhood to see what I could get from this Rolleicord 1 camera. Knowing I only had the top three speeds to work with, this wasn't too much of an issue as the sun was generally behind clouds most of the day; it wasn't that dark out, and it typically shows between 1/300 and 1/100 shutter speed.

 Here are some of the results from my Rolleicord 1 camera.

Conclusion:

WOW!!! What a fun camera to shoot with. I forget how much I enjoy shooting with a TLR camera. It reminds me of my wedding shooting days many years ago. Looking down at your subjects and seeing such a nice big image brings back many good memories.

Even though the Rolleicord was made for amateur photographers, the lens is fantastic, easy to use, and excellent Rollei camera quality. I only had to keep reminding myself that when you see something going right in the finder, you need to turn left. If something comes into the frame on the right, it is really on the left in real life. I like the ability to keep things square, and while I prefer a panoramic format, having a square image is interesting and gives a new perspective.

 Thank you for taking some time from your day to read about this fantastic camera.

 Until next week, please be safe.

Bussox-Sport Luxe Camera

he Bussox-Sport Luxe camera is another beautiful camera purchased at the Paris flea market when my wife and I traveled there this past summer. While visiting one of the hundreds of stalls within many buildings comprising the Paris flea market, I found a wonderful gentleman with a case of cameras and other photographic items for sale. 

My Bussox-Sport Luxe Camera

As I mentioned in many of my previous blog posts, I love cameras that are colorful or unusual. Maybe they are toy cameras shaped like a soccer ball or a cartoon character. I own many colored box and folding cameras that are different from ordinary black box or folding cameras. That's what drew me to this wonderful, small, and odd camera.

 Within the stall, there was a case containing a group of glass negatives, the Zeiss Super Nettel that I previously wrote about, and this lovely exotic brown camera, which looked very familiar but had a name that I wasn't familiar with. I purchased all the items and went on my way to find other treasures.

 When I returned to the hotel, I took the brown bakelite camera from its case and did some more research. I found out the camera is called Bussox-Sport Luxe, made by Ruberg & Renner and explicitly exported to France from their factory in Germany. Also, looking at the back of the camera, it appeared to have a roll of film still in the camera, and the number on the frame was four, so with any luck, I could process the film and find other photos that might interest me.

The Company:

A few years ago, I wrote a blog post on a different Ruberg & Renner camera, and at that time, there needed to be more information regarding the company. In that post, I wrote: The Ruberg cameras were manufactured by the Ruberg & Renner company, located in the Delstern district of Hagen, Germany, during the 1930s.  The company was started in 1918 by Josef Ruberg, who originally started producing drive trains for bicycles, motorcycles, and automobiles. After 1930, the company began making simple cameras. In 1931, Josef obtained a patent for constructing a simple camera in Germany. He also received a patent in the United States in February 1932.

 The patent application states that the simple and very inexpensive production of all the camera parts from synthetic resin, which was done from a single pressing process, "makes it possible to place a cheap camera on the market that is affordable to all. " In the 1930s, Ruberg & Renner manufactured four models with 25 designs for export to the USA, Great Britain, and France. The cameras' construction ended in the mid-1930s when the company started producing products to help the German war effort.

 After doing some digging, I came up with the following: Along with cameras, chains remained the company's main business. From 1935 onwards, the series production of ammunition belts marked the end of camera production in Hagen, which shortly afterward followed. 

 Josef Ruberg had designed new metal cartridge belts for machine guns in 1917. The Treaty of Versailles banned the production of automatic weapons and accessories from 1919 to 1935. In February 1936, Ruberg & Renner applied for a patent for a metal cartridge belt for the MG 17 (caliber 7.92x57 mm). These specialized units are equipped with ammunition for machine guns and military equipment in the military air force. The sons also worked in the company. Felix (1909-1994) was born in 1937 in Delstern. It manufactured on-board gun carriages until the beginning of 1945. In 1941, his son Werner (1912-2005) took over the management of the Ruberg & Renner chain works.

 Ruberg & Renner continued producing drive and transport chains in 1947. The Felix Ruberg metal goods factory manufactured household appliances. From the early 1950s, Ruberg & Renner promoted cycling and motorcycle sports. Roller chains were used in particular here. Until 1967, the company, like the Schweinfurt Torpedo Works and Fichtel & Sachs, had its racing teams in the Federal Republic. In the following years, the firm of the US-American company Rexnord was taken over. Rexnord Kette GmbH relocated its production from Delstern to its current location in the Lennetal near Fley in 1982. Much of the historical information comes from the Westfalen Museum.

My Camera:

My Bussox-Sport Luxe camera is 3" tall, including the winding knobs, by 3 5/8" wide, by 1 5/8" deep with the lens retracted and 2.5" deep with the lens away from the body and focused to the closest focus distance, which is 1 meter. The camera weighs 6.1 oz, which is very small and compact, and takes 127 rolls of film, producing 1.25" by 1 5/8" sized negatives. On my camera, it's etched by the previous owner 4x6 1/2 in many different places.

To open the camera to load the film, a chrome button is on the left side of the camera if you're holding it to take a photo. Press the chrome button, moving a brass grip from holding the door closed on the camera. There are a couple of "thumb grips" on both the back door's top and bottom, which you hold onto to open the back. The back door doesn't come off the camera as it's hinged, and the door swings to the right to open.

On many cameras, to load the film into the camera, you pull up the tabs that hold the spool into place, which I tried, but the knobs didn't move. You need to turn the knobs which make you think you're unthreading them. By doing so, the knobs move away from the body of the camera, and you can load a roll of film or move the empty spool into the take-up position. The fresh roll of film goes into the camera's right side and you pull the leader to the left side where the take up spool is. This is backward to many cameras, or the many that I use, as the take-up spool is generally on the camera's right side.

Now that the film is loaded into the camera, it's time to take photos. The camera has a straightforward meniscus lens. There is a knurled collar around the lens that you need to turn in a clockwise motion to extend before taking a photo. The lens barrel is on a helicoid, which extends the lens when the knurled ring turns, much like on a bolt.

 For the shutter, two settings are located in the upper right of the lens and include settings "I" for instant or turn the wheel to "T" for time. Below the lens are the aperture settings. On this camera, since it's for the French market, there is Grand for the widest setting and Petit for a smaller aperture setting. One of the settings is Ferme, which means firm. When the aperture is set at Ferme, it does not open over the lens or block all light from reaching the film. 

Focus control on Bussox-Sport camera

Since there is no lock for the shutter, the shutter release in the 7 o'clock position on the lens can fire at any time when pressed. Whether the lens is out or in, the shutter will fire. This setting is similar to a lens cap, and by putting it in position, if the shutter fires, no frame will be exposed to light or wasting film. The photographer would need to consciously set the camera into and out of this setting every time they put it into the case or pocket, then change it when taking a photo.

To retract the lens to put it back into the camera case, you turn the knurled ring counterclockwise, and the lens retracts into the camera body. I can now understand the "Ferme" setting, as many of the negatives on the roll in the camera when purchased were exposed with the lens in the retracted position, as you can see in the results area on the post.

The results:

As mentioned, the camera had a roll of 127 Agfa film, so I walked in front of my house and took photos of a planter box and some trees in our neighborhood. There were only about four photos left. After taking the photos, I went home and processed the film. It didn't surprise me, but the images within the camera didn't turn out, and the ones I did around our hose turned out barely and were extremely thin in the exposure on the negatives.

 Here are the results from the film in the camera. As I mentioned earlier, I did note that it's easy to take a photo when the lens is retracted, making the image size smaller on the negative, which you can see on the negatives.

My Conclusion:

The shutter on my camera doesn't always work, so while I'd like to put a fresh roll in it and try it again, I don't think the shutter can take it as it's barely opening and closing as it is. I'll get brave and see if I can take the front off and fix it, but it's resting along with many other cameras in my collection. I love the color and the helicoid lens system.

Thank you for taking a few minutes to look over this week's blog post. I'd love to hear from you, so let me know your thoughts and if you have any of the Ruberg & Renner cameras in your collection.

Until next week, please be safe.


Dan 35 I Camera

My Dan 35 Model I camera

I need to start this post back in time. I first started collecting cameras and other photo items in the late 1970s or early 1980s. I can remember purchasing one of McKeown's Camera Price Guides and spending hours combing through each camera manufacturer, looking at the cameras they had made in the past. There were so many odd and unusual like very rare original Leica; the very first bullet-shaped brass Voigtlander camera, the Compass camera or Photosphere that I could only dream of owning, and many were so far from the price budget that I knew there were only a pipedream.

 Many large companies, like Eastman Kodak, Polaroid, and Zeiss, made hundreds of different model cameras, which were abundant. Then, there were the smaller camera companies that produced unique cameras, like Univex, which was the first camera I owned. It was a Uniflex that was given to me by my uncle Bud, who, to this day, along with my brother Tim, I owe my love of photography.

 Then, I can remember thumbing through the price guide and finding a tiny company that produced a camera near and dear to me, the Dan camera. I immediately thought I needed to find one of these to put into my collection. My initial search was hopeless, as many of the local flea markets and antique stores I'd frequent only had the very common Kodak, Polaroid, Zeiss, and other companies like Herbert George and other American brands.

Online Auctions:

It would help to remember that this was before eBay, which didn't exist before the mid-1990s. I was an early adopter of buying and selling on eBay in 1997. At that time, there were no photos, and it was mainly just a buy/sell board with an auction element so you could post a camera or item for sale, but you only had the description from the seller to go by. When I first joined eBay, there was no name to have but a number. My original number was 1034; you had to do everything through DOS.

 EBay made a massive difference as it gained popularity. It changed how people bought and sold items. Adding photos gave the buyer more confidence in their purchase, and rarer items could hit higher pricing due to the inability to find them.

 For many years, the Dan Camera was very elusive, and since the camera was from a smaller company, the scarcity and pricing made the purchase of it next to impossible up until a couple of years ago when I was looking through a different online auction website, and I found a grouping of cameras which piqued my interest. As I zoomed in to look at this lot, there was a portion of a lens I could see.   I could barely read "Dan" on the ring around the lens as I looked closer. Here was my chance to finally own the elusive Dan 35 camera.

Name embossed on the back of the camera.

 The auction happened, and there was minimal interest in this group of cameras as many of them were very common items. However, these are the groups that I really enjoy because tucked away in the corner "could" have a gem hidden, and in this case, there was. I won the camera lot, got the items shipped to me, and there it was as I unwrapped it: the Dan 35 camera. To my amazement, it was the first model.

History:

The Dan 35 is a simple Bolta film camera made in Japan after WWII. Bolta film was invented by Johann Bolten, who founded Bolta-Werks in Nuremberg, Germany, in 1936. The film was to go into his smaller, more compact cameras named the Boltavit. Bolta Werk later produced the Photovit line of cameras from 1936 to the 1950s. Bolta film was incorporated into many different cameras during this period and was a nonperforated 35mm film with a paper backing loaded into special cassettes. Later models of film were spooled similar to films like 828 and 127.

Stetch of Dan 35 Camera by Hagimoto Danji.

 The Dan 35 camera was made by Hagimoto Danji. He built a small plant in Suwa to manufacture the Dan 35 camera, which he sold in his camera shop in Ginza after WWII in 1945. After the moderate success of the Dan 35, there were three different distributors for the camera between 1945 and 1950, when the camera company went bankrupt. The logo on the camera coincides with the company's name, which is H for Hagimoto above Dan for Danji on the far right of the camera.

 Here's where it gets a bit fuzzy. Yamato Koki Seisakusho was a camera company that started in Tokyo in 1943. It made shutters for Japanese camera companies like Gelto and Leotax. The first cameras produced by Yamato were the Minon 35, Minon Six, and Pax 35.

 Yamato, known to produce the Minon 35, a copy of the Dan 35 III and later the Pax 35, is a camera that is a copy of the Super Dan 35. Some sources say Yamato made the Dan 35 and Dan 35 II, but others say they took over producing the Dan 35 after Hagimoto went bankrupt in 1950. Yamato produced the Pax line in the 1960s.

My Camera:

The Dan 35 is a very simple camera with a torpedo-shaped viewfinder on top. It measures 3.25" wide by 2.25" tall from the base to the top of the finder and is 2" deep from the front of the lens to the back of the camera. The camera weighs a whopping 5.2oz and is considered a miniature camera. The Dan 35 has a Dan Anastigmat 40mm f4.5 lens with a Silver-B shutter.

Around the lens is the focus ring, a helicoid focus measuring from 1 meter to infinity. Just behind the aperture numbers on the lens is a knurled ring that sets the aperture. In front of the aperture numbers is another knurled ring that sets the shutter speeds on the camera. There are only shutter speeds, 1/25, 1/50, and 1/100 sec, along with B. On the left of the knurled ring is a cocking lever to cock the shutter, and the shutter release is on the right side to expose the film.

Logo and Torpedo viewfinder

 To load the film, on the top of the camera is a locking lever with "L" for lock and "O" for open. Switch the lever to "O," and the top comes off to load the film. The base comes off to load in later models like the Dan 35 Model II. My camera has no spools to load the film, and the shutter doesn't work. On the back of the camera is a red window with an open/close lever to see the numbers on the paper backing of the film so you know where to stop for your next exposure. Also, Dan 35 is embossed on the back of the camera.

Conclusion:

Unfortunately, I don't have film, and the camera's shutter doesn't work, so I couldn't take photos with this camera to share.

 I mainly have this camera for a couple of reasons. One is its rarity; the more important reason is that it has the same name as me, so I get a kick out of that. I have another miniature camera set aside for next week's blog post, which I also find fascinating.

 Thank you for taking a few minutes to review my blog post about the cameras in my collection. Please be safe until next week.