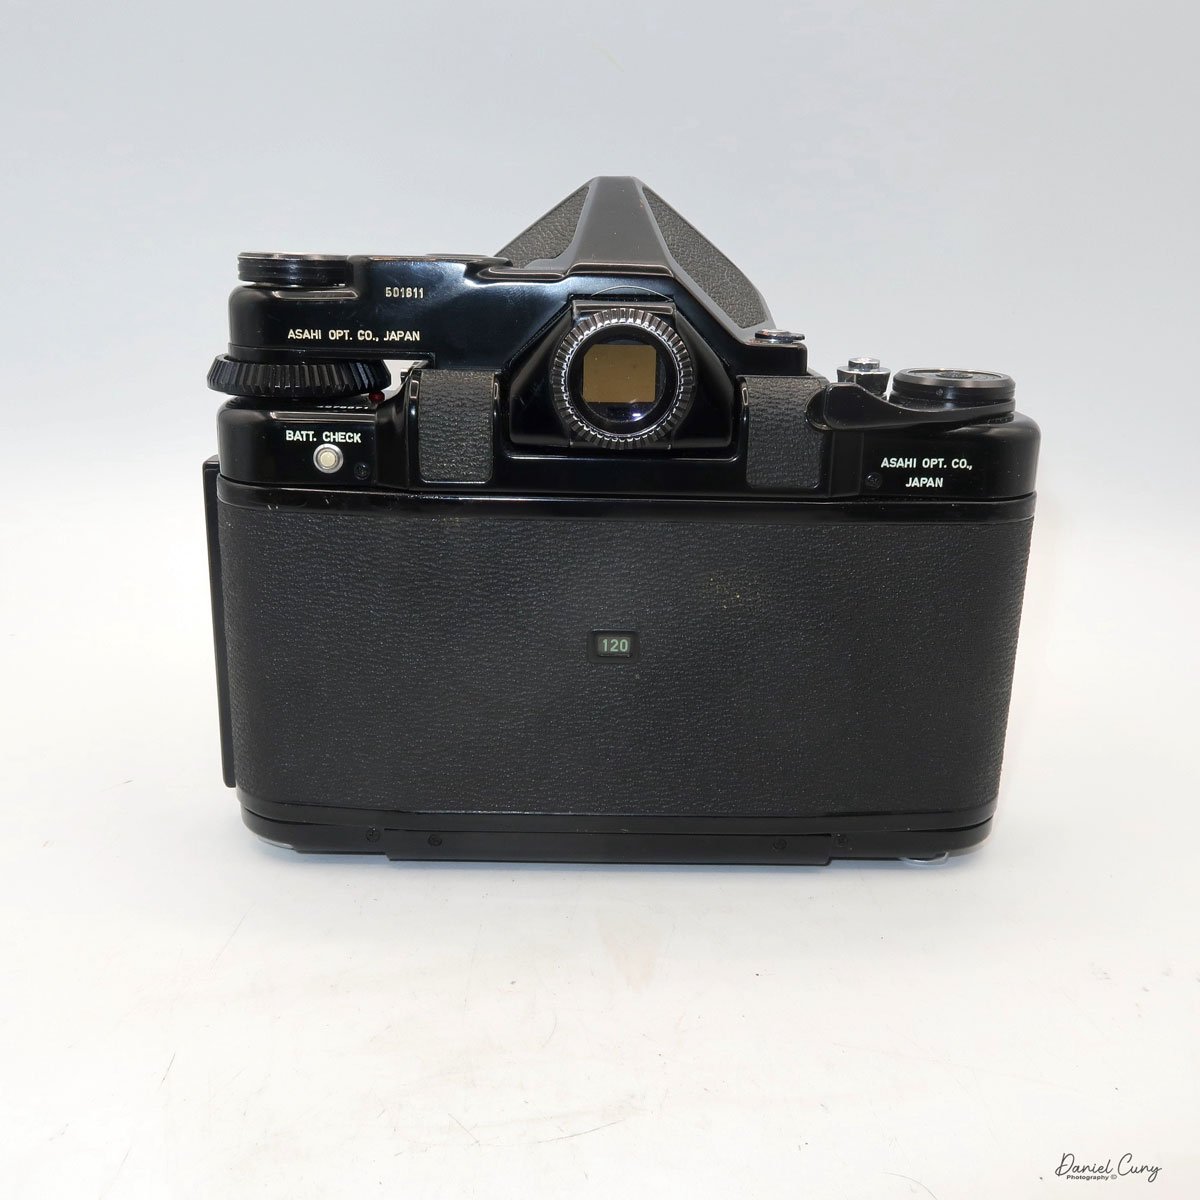
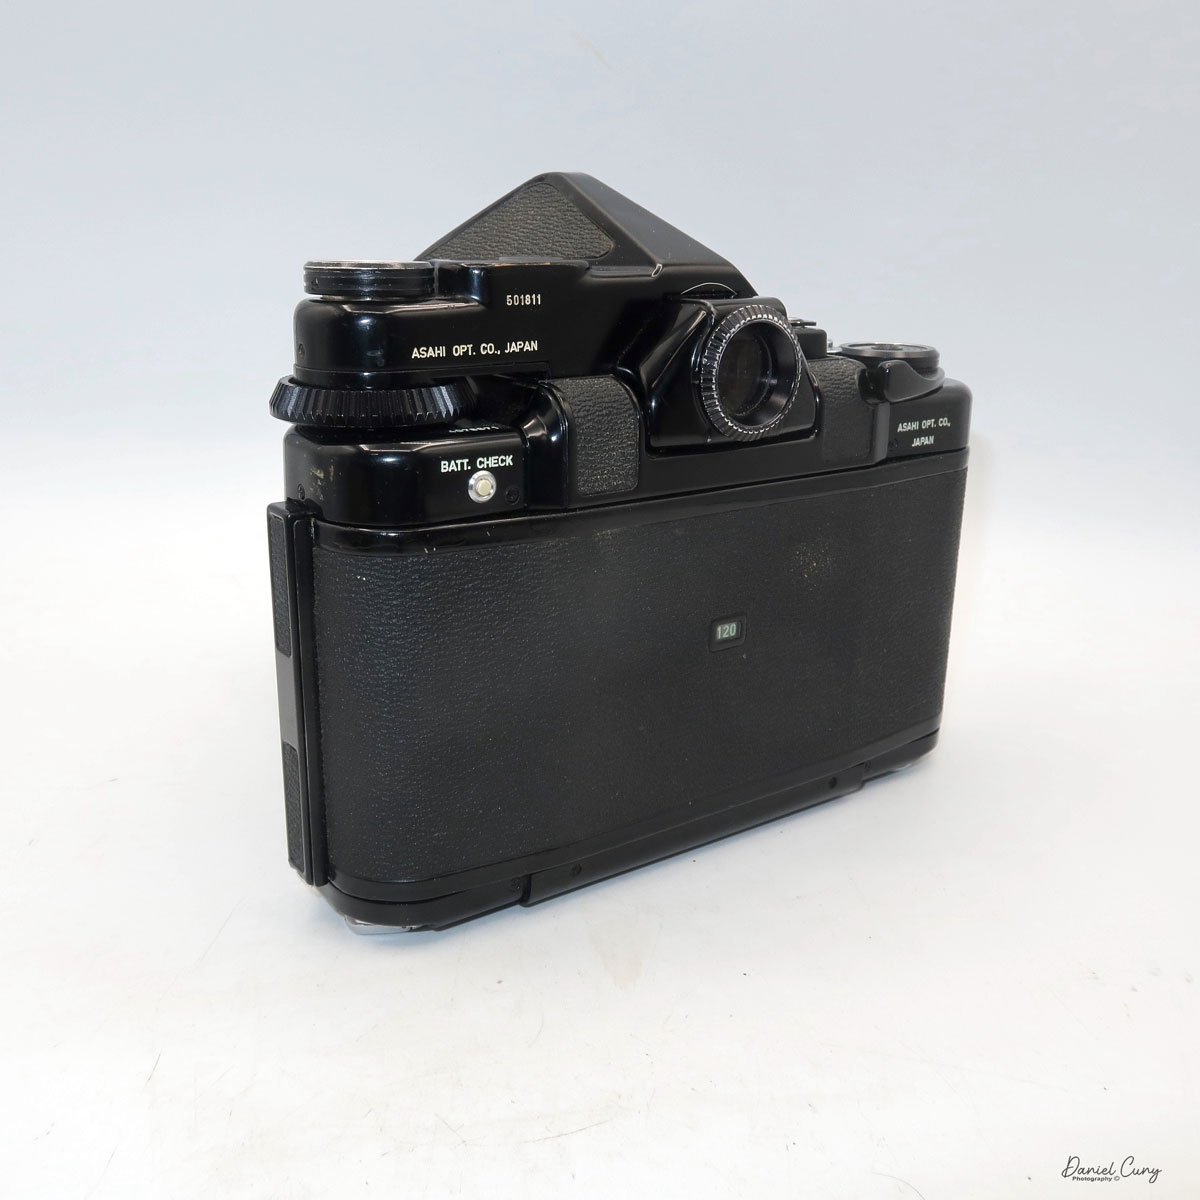
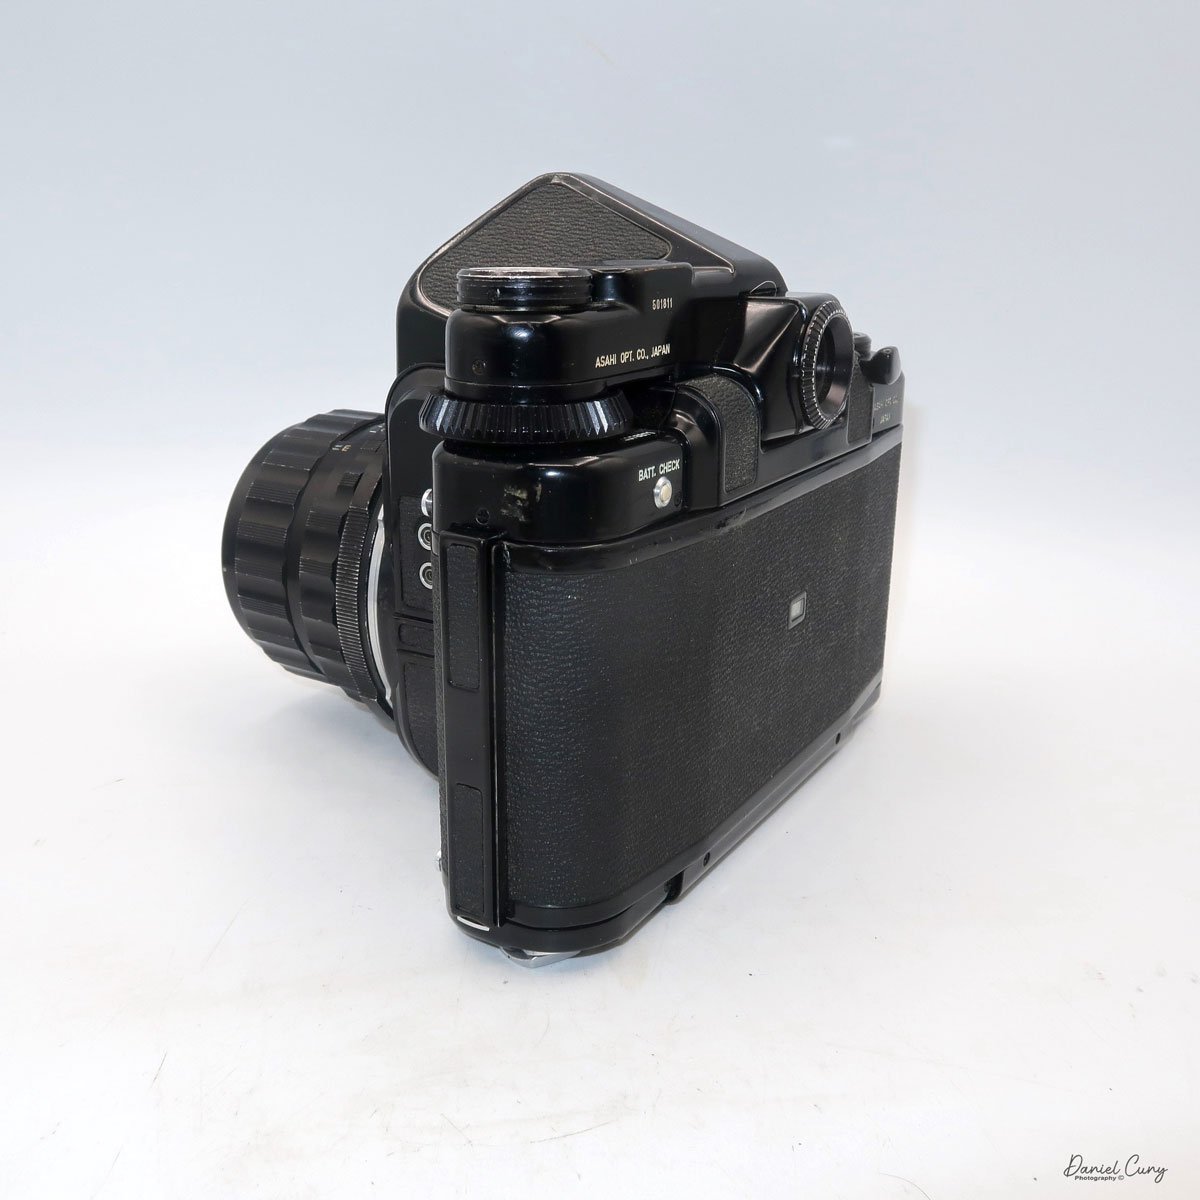
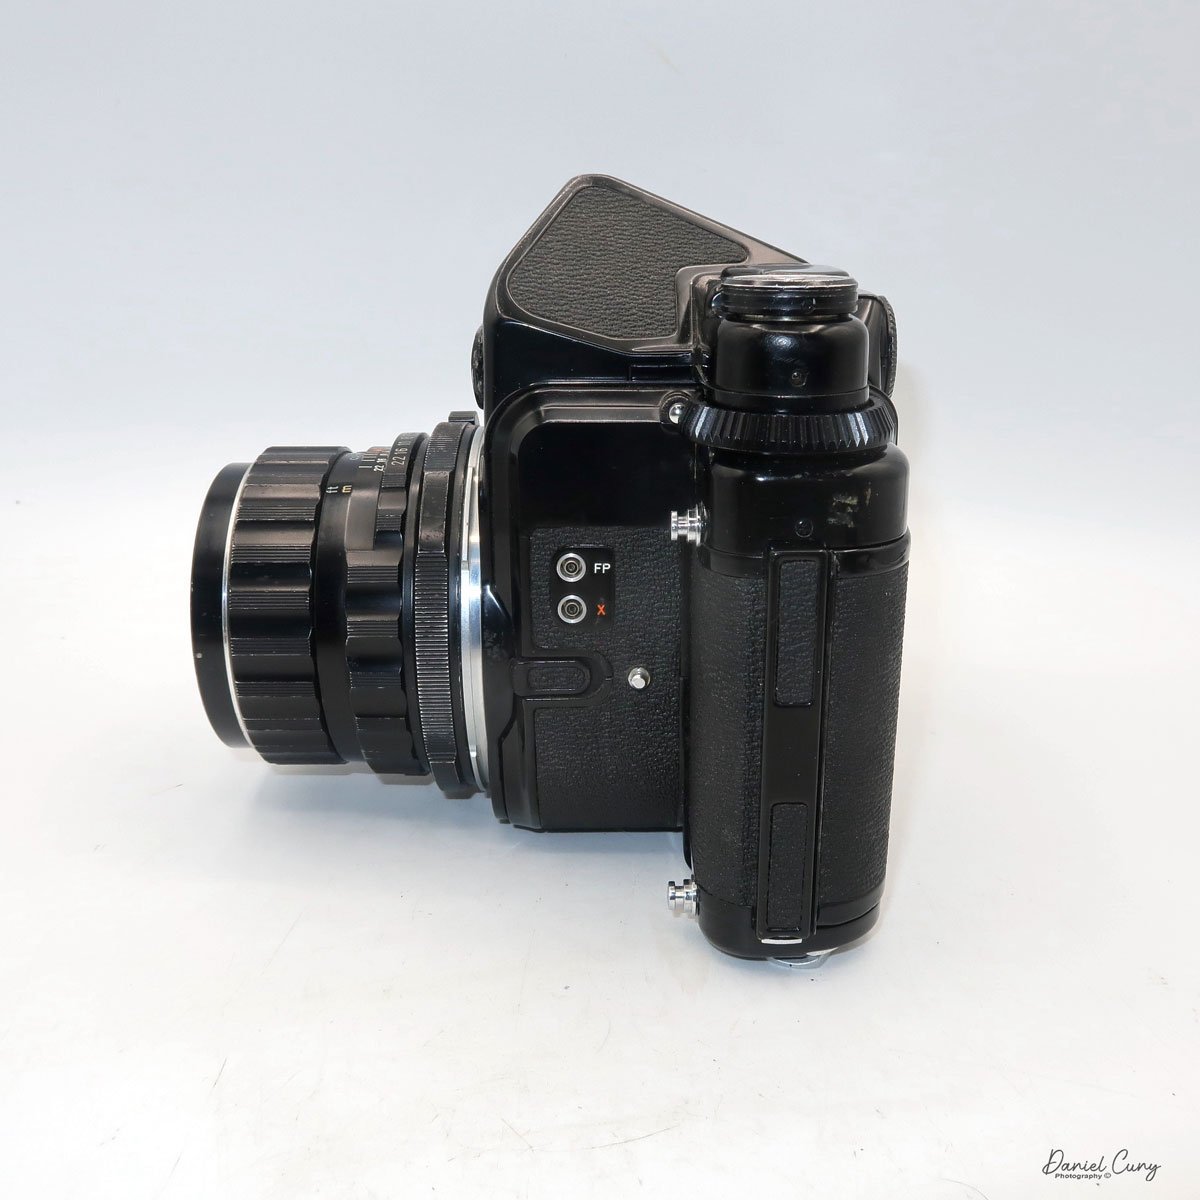
Hasselblad 1600F Camera

Looking through my collection, I had a couple of different cameras in mind, but they use 127-size film, which I ordered a few days before the intended day to take photos. Unfortunately, the film hasn't arrived in time for me to shoot photographs when the weather is nice and sunny, so I'll put them off for the next blog. 

 As I gazed at the items in my collection, the Hasselblad 1600F caught my eye. I had purchased it many years ago, and the last time I had the pleasure of using it was a couple of years ago. The thought of loading a roll and exercising the focal plane shutter in this early version of the Hasselblad camera filled me with anticipation. 

 I generally use the Zeiss 80mm f2.8 lens on the camera, but looking through some of the lenses I have for this and the 1000F, I do have the Kodak Ektar 80mm f2.8 lens, which was the lens initially sold with the 1600F here in the US, and later the Zeiss 80mm f2.8 was available. For this shoot, I got out a roll of Ilford FP4 125 film, which I loaded into the film back, and I put on the Ektar lens to see how it would work. I was pleasantly surprised.

The Company:

When I think of cameras that have made an indelible mark on the field of photography, Hasselblad undoubtedly comes to mind. They are known for capturing iconic moments on Earth and beyond. Hasselblad cameras are synonymous with precision, durability, and unmatched image quality. At the heart of this remarkable brand is the story of its founder, Victor Hasselblad, and his relentless pursuit of excellence.

Original Swedish Ad for Hasselblad 1600f

 Victor Hasselblad was born in Gothenburg, Sweden, in 1906 into a family with a photography and photographic supplies background. While Victor initially followed in his family's footsteps, he soon developed a desire to innovate and improve upon existing camera technology. At 18, he traveled to Dresden, Germany, to work with the best optical manufacturers of the time, gaining invaluable experience in the technical aspects of cameras and photography. This laid the foundation for his future endeavors and innovations.

 During World War II, Victor's knowledge of cameras caught the attention of the Swedish Air Force. They approached him with a German aerial surveillance camera they wanted to replicate. Victor accepted the challenge and famously responded, "I don't want to make a copy of it—I want to make a better one." This led to the development of the first Hasselblad camera, the HK7, designed explicitly for military aerial photography. Victor's ingenuity soon proved invaluable, and his cameras became crucial tools for aerial reconnaissance.

 After the war, Victor focused on developing cameras for the consumer market. In 1948, the first consumer-oriented Hasselblad, the 1600F, was introduced. This camera was revolutionary for its time, featuring a modular design that allowed photographers to change lenses, viewfinders, and film magazines, making it highly versatile. The 1600F also used medium-format film, which produced images of superior quality compared to 35mm film cameras available at the time. However, the early models faced technical issues, particularly durability, and required further refinement.

Ad for the Hasselblad 1600F

Despite the initial technical issues, Hasselblad was committed to improving its designs. By the 1950s, Hasselblad cameras had developed a reputation for being highly reliable, and photographers worldwide began to take notice. In 1952, Hasselblad introduced the 1000F with an improved shutter and slower maximum speed of 1/1000. The camera also came with a Zeiss 80mm f2.8 lens, marking a significant improvement in the brand's offerings.


The subsequent 500C model, released in 1957, solidified Hasselblad's place in the professional photography world. With its leaf-shutter system and modular components, the 500C became a workhorse for studio photographers, renowned for its reliability and image quality. This camera design remained in production, with upgrades, for decades and became the foundation of Hasselblad's success.


Hasselblad cameras are most famous for their role in space exploration. In 1962, NASA astronaut Walter Schirra brought a Hasselblad 500C on the Mercury-Atlas 8 mission, sparking a long-standing relationship between Hasselblad and NASA. The camera's build quality, high resolution, and adaptability made it an ideal choice for capturing images in the challenging conditions of space.

Walter Schirra and the Hasselblad 500C

 Hasselblad worked closely with NASA to modify the cameras for space use. The resulting 500EL model was specially adapted for the Apollo missions, where it would ultimately capture some of the most iconic images in history, including the first steps on the moon by Neil Armstrong in 1969. The modifications included [specific modifications], which allowed the camera to function effectively in the challenging conditions of space. To this day, the image of Earth from space, known as the 'Blue Marble,' remains one of the most famous photographs ever taken, and it was captured with a Hasselblad. The brand's involvement in the space program elevated its reputation further and established Hasselblad as a premium name in photography.

 With the arrival of digital photography, Hasselblad continued to innovate, embracing the transition while retaining the high standards that defined its analog cameras. In the early 2000s, Hasselblad launched the H-System, a line of digital medium-format cameras that maintained the quality associated with the brand while integrating advanced digital features. This line set new benchmarks in the industry, offering extremely high-resolution sensors, modular components, and sophisticated imaging capabilities that appealed to professional photographers and high-end studios alike.

 More recently, Hasselblad has also embraced the mirrorless trend, launching the X1D, a compact digital medium-format camera that balances portability with the image quality of medium format. This new direction has helped the brand stay relevant, catering to a new generation of photographers who demand portability without sacrificing image quality.

 Today, Hasselblad remains a symbol of excellence in photography. Known for its attention to detail, superior image quality, and dedication to craftsmanship, Hasselblad has cultivated a loyal following of professional photographers, collectors, and photography enthusiasts. While the digital age has transformed the landscape of photography, Hasselblad continues to adapt and push the boundaries of what is possible, ensuring that its legacy endures.

Victor Hasselblad's legacy is a testament to the power of innovation, and his vision inspires photographers worldwide. From capturing wartime reconnaissance to the moon's surface and beyond, Hasselblad has not only documented history but has become a part of it.

My Camera:

My Hasselblad with the Kodak Ektar 80mm f2.8 lens is 6.5" long by 4.5" wide, including the winding knob, and is 4" tall with the waist level finder closed. The camera weighs in at 2 lbs. 15.9oz. This camera is in excellent condition for being around 75 years old. Hasselblad made this camera with a maximum shutter speed of 1/1600, which was very ambitious for a medium-format camera. There is some minor tarnish on some chrome, a small dent in one of the shutter curtains,  and the leatherette is starting to come loose around the waist level finder, but that seems to be it. It's also important to know that the 1600F and the 1000F use focal plane shutters. After these models, the 500c and model moving forward have leaf shutters in the lenses, not the camera body. The exception was the 2000FC model.

Having owned several different Hasselblad models, the camera operations are similar to mine. The film back on my camera is the older C12 film back. To load the film, you need to take the film back off the camera. Well, you don't need to, but I've always done it. You have to have the dark slide in the slot on the left to remove the film back from the camera. The dark slide in the holder presses a pin within the film back that allows the back to come off. If the dark slide isn't in the film back, you cannot take the back off the camera. To remove the film, on the top of it is a sliding circle with a Hasselblad "V" logo that you slide to the right and pull back down to remove it from the body.

 On the left side of the film back is the lock. Pull up the tab on the lock and turn it counterclockwise until it stops, then pull it away from the film back, and the insert will pull out. The film insert is what you load the film into. With the lock on the left, take the empty film spool from the bottom holder by pulling out the roll holder on a hinge to quickly load and unload the rolls of film. Put the empty spool onto the top. The top has a knurled grip on the hinged holder to wind the film before loading it back into the film back to shoot. Put your fresh roll of film into the lower holding area, pull the paper over the black pressure plate and slide the leader into the empty spool and turn the knurled knob to load the film onto the reel. Keep turning the knob until you see the "start" word on the paper backing. 

 Slide the film into the body portion and lock the back securely into the body. On the right side of the film back is a winding knob. Lift one of the handles and wind. On my film back, which is a C12 back, there is a hinged door where you can see the frame numbers as you turn the winding handle. Open the backdoor, watch for "1" to appear, and stop winding. At this point, turn the winding lever in a counterclockwise motion, and the frame counter under the winding knob will reset to number 1. Put the back onto the camera and prepare for the first photo. As you take photos, the film will advance back in, and you can check the frame counter on the film back to see what frame you're on.

Now that the film is loaded into the camera let's go out and shoot a few frames. Remove the front lens cap to focus the camera and pop up the waist level finder. A smaller "V" Hasselblad logo slider is on top of the waist level finder to open the finder. Slide that to the right, and the waist-level finder will pop open, showing an image you're pointing the camera toward. Turn the focus ring on the lens to get a sharp image. If you want a more critical focus, you can slide the slider to the right again, and a magnifying lens will pop up. You can put your eye closer to the magnifying lens to see an enlarged area of the focusing screen to fine focus on your subject. To close the waist level finder, one by one, flip down the side panels over the focusing screen, then the back panel, and close the top, which will click when closed.

 Before you press the shutter button on the front of the camera in the lower right corner, as you're holding the camera, you need to take out the dark slide from the film's back. The camera will not fire if the dark slide is engaged in the film's back. Be sure the shutter is cocked and ready to shoot. To cock the shutter, there is a large knob on the right side of the camera. Pull out the dark slide and turn that knob in a clockwise motion, or so the knob is going forward. This cocks the shutter. Set the shutter speed, which is on the right side of the camera, on the knob that cocks the shutter. 

 Because this model and the 1000F cameras use a focal plane shutter, it's VERY IMPORTANT: DO NOT SET THE SHUTTER SPEED WITHOUT COCKING THE SHUTTER FIRST. If you do, the camera can jam, and with this and the 1000F models, it's extremely expensive to service and, due to the age, possibly not able to be serviced due to lack of parts.

On my Eastman Kodak Ektar lens, the aperture is entirely manual, meaning you need to open the aperture for focus and then stop down to take the photo. Being used to "automatic" apertures where the aperture closes during exposure and opens after the exposure, it's easy not to remember to stop the lens down before taking the photo. Being one that uses a myriad of different cameras, I'm getting used to checking before, but every once in a while, I forget and need to retake the photo.

 If you want to change the lens on your camera, as you hold the camera, there is a button on the front of the camera in the lower left corner, opposite the shutter release. Press the button and turn the lens in a counterclockwise motion to release the lens and put on a new one. To put on a different lens, line up the red dot on the lens and the red dot on the camera body and turn the lens clockwise until the lens "clicks" into place and is secure on the body.

 Now that you've shot the 12 frames on the roll of film, it's time to take the film out, get it processed, and see how you did. To do so, take the dark slide out of the film back, remove the film back from the camera, open the film chamber, unload the film, and put in a fresh roll to shoot some more.

My Results:

After walking around my block taking photos on a sunny afternoon, I wanted to see how the lens would handle and the image quality it would produce. The lens focuses close, down to 20" from the film plane, so I was able to get in close for detail. Here are the results from the Eastman Kodak Ektar 80mm f2.8 lens.


 Conclusion:

I'm a photo nerd. I love using cameras, especially the older mechanical versions. There's something gratifying and calming about having a mechanical camera in my hands. Whether looking through an eye-level or waist-level finder, taking photos is an absolute joy.

 The Ektar 80mm f2.8 lens is terrific. I liked how the focus was fluid and easy to turn, the ease of opening and closing the aperture, and the picture quality was better than expected. The older Ektar lenses are superb, like those on the Ektar 35mm camera.

 Thank you for taking a few minutes out of your day to read about this early Hasselblad camera. I plan to use it for more shoots in the upcoming months.

 Until next week, please be safe.

Reference:

Hasselblad Website: https://www.hasselblad.com/about/history/first-consumer-camera/

SportShot Senior Twenty Camera

One of the first memories I have of the SportShot Senior Twenty camera was looking through McKeown's camera (bible), collecting cameras, and noticing the odd shape of the camera as I thumbed through the pages. Then, upon doing a little more digging into what made this camera special to me, a company in Australia made it, and it only existed for a couple of years. These are the cameras I desire, and these it's these items separate cameras in my collection. 

My ACMA Sport Shot Senior Twenty camera.

 Whenever I travel alone for business or when my wife and I travel internationally, I always try to find the local flea market to see if I can find items that are rare in my part of the world. There are thousands of extremely popular Kodak box-style cameras, whether made from cardboard and leatherette covered or the bakelite cameras you see in every corner of the world. When I first started collecting, I would snatch up any camera because they were a "camera." But as time goes on and I see more of the odd and unusual items, I increasingly appreciate them.

I traded the SportShot Senior Twenty camera about a year ago for some items I had from a dealer who frequents the US occasionally from Australia. The trade happened at a camera show near to me. I got the SportShot Senior Twenty camera. I picked up a few other cameras from Australia, like the red Swiftshot and the Lexa box camera with an excellent metal faceplate. I believe he was happy getting tradeable items he could return to Australia, as it was hard to find items here in the United States.

The Company:

The SportShot Senior Twenty camera maker was the very short-lived ACMA, which stands for Australasian Camera Manufacturers Australia. They were based in Sydney, NSW, Australia, and existed from 1948 to 1950. I've looked at many different commerce sites in Australia and cannot find anything new about the ACMA company. They were one of Australia's only post-WWII camera manufacturers producing cameras. Inside the logo on the camera where the wording Australasian Camera Manufacturers Australia is located, the words British Make are there. There must have been British backing in the company to produce the cameras. 

My best guess is that while the camera is somewhat awkward to hold and use, it wasn't very popular, and sales never caught on, so the company folded, and what was made are the only examples available today.

 Since a large part of my collection is colored cameras or cameras other than black, I like the fact that this camera came in red and green as well and had a matching plastic strap to match the camera itself. These are now on my radar for future purchases. 

My Camera:

The SportShot Senior Twenty camera is triangular or trapezoidal in shape with what appear to be wings in the back to hold onto when taking a photo. The camera measures 5.5" wide in the back and 2.25" in the front. The camera is 4.5" deep, including the lens, and is 3.5" tall with the viewfinder closed but including the winding knob. The camera weighs 13.2 oz without the strap, which I don't have for this camera. The camera has a single red window on the back and shoots 6x9 format, producing eight exposures on either 120 or 620 film.

The camera is comprised of two separate parts. The top comes off with an effortless latch on the back that is somewhat spring tensioned with a hole that fits into a small knob holding the top to the bottom of the camera. On the top portion of the Sport Shot Twenty camera is also a pop-up viewfinder, along with a very odd winding knob. The winding portion of the film advance that fits into the film roll has a triangular shape; it will fit both 120 and 620 films. 

 Because the camera can shoot both 120 and 620 films, the useability is a bit more interesting as this opens the camera's film up to different types. The downside of having the winding portion shaped as it is is that the film advance is more difficult to use, which is what I experienced when I shot a roll of film through the camera. On the top of the camera adjacent to the film advance knob is stamped ACMA S20.

The camera loading is also not the easiest thing to do. Once you have the top off, you can take the empty roll from the right side and put t on the left side where the advance knob is. When loading the film, the tricky part was the channel it slid into to keep it flat for exposure. You can't just put in the roll, slide it over the shutter, and attach it to the empty spool like you do on the majority of cameras. The SportShot Senior Twenty has a thin slot the film needs to go into to keep the film flat, as you can see in the photos.

To load the film, I put the leader into the take-up spool and rolled out a bit of film to slide it into the thin channel. It took me a few times to get it in because the channel was so thin the film paper packing would crinkle and fold a bit, along with the curvature of the channel. It wasn't an easy load, but eventually, It slid in, and I got the camera loaded. How you load the camera was another factor against it when trying to sell to the masses. You don't want to make things more complicated than they need to be.

Note the thin slot film needs to be slid into to load film.

When I went to shoot the film, I loaded it into the camera, and I went to clean the lens. When cleaning it, one of the sides pressed in. I thought, "This wouldn't work with one side of the lens, not in the right position." I turned the lens, and it unscrewed from the camera body. I pressed the lens back into place, then re-screwed it back onto the camera.

 There are only two settings for the shutter. "T" for time, where the shutter stays open as long as you keep the shutter button depressed, and "I" for an instant for everyday shooting. The lens is a 13.5cm or 135mm lenticular lens f3.5 aperture. The lever above the lens is the shutter release, and you press it down towards the lens to take the photos. The viewfinder is a simple pop-up style and closes when not in use. There are no other settings to choose a different aperture, which makes this an extremely simple-to-operate camera.

My Results:

After struggling to load the camera, I had put a roll of Ilford FP-4 in the camera and walked out in front of my house to see how it did, and here's the results.

Conclusion:

Other than struggling to load the film into the camera, along with advancing the film. Due to the shape of the advanced knob that fits into the take-up spool, it didn't grab very well, and there were several times when the knob turned, and the film didn't move, but as long as I took my time, it did advance. Maybe it would do better with 620 film since the slot on the spool is thinner, and the advance knob would fit and hold into the spool better. I'm not going to say the camera was hard to use, but it wasn't the easiest, and I can understand why people would get frustrated using it. None of the images are sharp, but some are better than others. This may have been caused by removing the lens.

 Thank you for taking a few minutes from your day to look over this review. I realize it's not a sophisticated camera, but it definitely has an unusual shape.

 I have an odd camera set for next week's post and hope to hear your thoughts on it or other cameras I've written about.

 Until next week, please be safe.

Minolta Six Camera

It seems like I purchase items from camera auctions in "lots," and there is always a treasure hidden in the background that you either didn't notice at first, is hidden within all the photos of the items, or, in this case, the camera wasn't taken out of the case, and the case was obscured, so there was no visual evidence that the camera was.

 As I unwrapped the cameras won from the auction, one brown case caught my eye. It bore a striking resemblance to the Mamiya Six in my collection. But upon closer inspection, the name 'Minolta Six' was revealed. I initially thought it might be similar to the Mamiya Six, but the truth was far more exciting, as I'll reveal when I introduce the camera.

History:

In an earlier post, I did on the Minoltaflex CDS, I did a brief history of the company, which read, 

Kazuo Tashima founded Minolta in Osaka, Japan, in 1928 as Nichi-Doku Shashinki Shōten, which means Japanese-German Camera Shop. In 1931, the company updated its name to Minolta, which stands for Mechanism, Instruments, Optics, and Lenses by Tashima. In 1937, the company was reorganized as Chiyoda Kogaku Seikō, K.K. They are now introducing their first Twin Lens Reflex (TLR) camera, the MinoltaFlex, based on the German Rolleiflex cameras. The MinoltaFlex was only the second TLR introduced from Japan after the Prince Flex by Neumann & Heilemann. In 1947, Minolta introduced rangefinder cameras like the Minolta-35, and in 1959, the Single Lens Reflex (SLR) SR-1 camera. In later years, they signed agreements with Leica and came out with the first autofocus SLR, The Minolta Maxxum 7000, which carried on to several in their autofocus system.

 To expand slightly from the above text, in the early years, there was a big German influence on the Minolta company, which was known as Nichidoku Shashinki Shōten, which means Japanese, German camera shop. In the early years, the company received help from camera technicians Billy Neumann and Willy Heilemann, and the shutters and lenses were supplied from Germany. Their first camera was the Nicarette, which was released in 1929.

In 1931, the company was transformed into a stock corporation named Molta Gōshi-gaisha. Molta is an abbreviation of Mechanism, Optics, and Lenses by Tashima. Neumann and Heilemann left the company in 1932, returning to Germany to start their own company, and the German influence left with them. In 1933, the name Minolta was adopted. In 1937, the company became Chiyoda Kōgaku Seikō K.K anexpanded the production of cameras into TLR and press cameras similar to the Plaubel Makina. 

Minolta Six in the July 1938 catalogue and price list by Asanuma Shōkai. Scan by A. Apra. (Image rights)

 In 1940, the famous Minolta Rokkor lens was produced, but it was only used for the military. Consumer camera production ended in 1943 to concentrate on the war effort. Three of its four plants were destroyed by Allied forces during WWII. Soon after the war, Minolta released the Semi Minolta III, and throughout the 1950s, Minolta expanded its line of cameras to include folding cameras, TLRs, SLRs, and rangefinder cameras.

 In 1958, the SR-2 was released, and it was Minolta's first system camera. This reign of SLR system cameras included partnerships with Leitz in the 1970s, which helped produce CLE cameras. Minolta had a full line of autofocus cameras, the Maxxum line of bodies and lenses, and Minoltas final SLR camera ended in 1995 with their X-370.

 Minolta produced many different 35mm, APS, and DISC cameras and partnered with Konica in 2003, but by 2006, the camera company had discontinued camera production and relied heavily on the copier business.

My Camera:

Opening the case and looking at the camera for the first time, I was surprised by the Minolta logo and text on top. Since it was made in 1936, it has a genuine Art Deco design in the look and feel of the camera. My biggest surprise was when I initially pulled the lens out from the body and found the camera didn't have a cloth bellows. Instead, it has a series of stacking cubes that pull away from the camera body, AND these boxes are reinforced with another Art Deco element, metal brackets that resemble an "M" when the camera is laid on its back with the lens pointing up. WOW, Just a fantastic design.

The Minolta Six camera measures 6 inches in width, 4.75 inches in height with the finder up, 3.75 inches with the finder closed, and 4 inches in depth with the lens out, or 2.25 inches with the lens closed. It weighs 1 lb. 5.7oz. without the case or loaded with film. The camera's body is made from a bakelite or plastic material, covered in a high-quality leatherette.

 To pull the lens out to take photos, there are two grips, one on either side of the lens, that you grab onto to pull the lens out and away from the body. You need to expose three stacking cubes before the camera is ready to take the photos. Under the lens are two curved chrome bars you can slide down to prop the camera up so that when the lens is out, it doesn't tip forward and keeps the lens level.

Around the top of the lens is Patents-Nippon, and below is Crown, which is the shutter on the camera. The actual lens is an 80mm f5.6 Coronar Anastigmat Nippon lens. Around the lens is a manual focus ring that focuses from under 1 meter to infinity. The focus line to judge distance is a protruding tab with a line at approximately 10 O'Clock on the lens face. The lens also has a stopping screw that prevents the lens from rotating past the infinity mark on the tab.


My camera has only four shutter speeds: 1/150, 1/100, 1/50, and 1/25, along with "b" and "T" for timed exposures. On the top of the camera is a pop-up viewfinder with etched or lined crosshairs to line up horizontal or vertical subjects as needed. The back of my camera sports three red windows with different numbers, which are used to line up with the number on the paper backing to get to the proper frame number. In later cameras, they went to a single window system, which is more common with current 6x6 format cameras using 120 film.


To open the back of the camera, there is a latch behind the strap on the left side with an arrow pointing down. Slide the button down, and the camera's back opens. The chrome winding lever was used on the older models. Later they went to a plastic or bakelite knob in the later models. My first thought when I looked at the back of the camera was that it was not a full-frame 6x6 camera, but that was because I was looking at the retracted plastic cubes from the bellows. It is indeed a full 6x6 format camera. Load the film on the right side and bring the leader to the left to take up the spool. The knobs on the bottom of the camera pull out so you can put in the film and take up the reel easily.

 The case for my camera is in great condition. There's a pretty cool instruction tab on the inside of the case, which was made for the three window cameras.

 The crown shutter doesn't have a cocking mechanism. There's just the shutter release to take the photos. I loaded the film. I pulled out the cube below and started to take pictures of the neighborhood with my trusty light meter. Once I reached the end, I unloaded the film and processed the negatives.

My Results:

Here are some of the photos taken with the Minolta Six camera. The photos were a bit flat in exposure and contrast.

Conclusion:

I enjoyed shooting with the camera, but I am still primarily impressed with the innovative and beautiful bellows system in the camera. Not only is it functional, but it is very light and tight and only wears out slowly compared to the style bellows. The flip side is, if something happens to this bellows, the replacement is hard to replace due to the material. I wished there were faster shutter speeds, but I was using 125 iso film, and with the aperture range of the lens, I didn't have an issue.

 I have a great and fun camera for next week's blog post, so I hope you'll stick around to read that one, too. Thank you for your time, and please be safe until then.

Update:

According to Andrea Apra, who corrected and let me know initially, a small cardstock table was provided with this camera. This table was used to calculate the Depth of Field. The card I have in the case with the wrong translation is just instructions for using this table provided with the camera, which I don’t have.

The table has a horizontal scale at the top with the various distances on the focus ring: 7, 5, 3, 2, 1.5, 1 Mtr.

Then, on the vertical column, the diaphragm has various apertures: F 5.6, 6.3, 9, 12.5, 18, 25.

Two pairs of values, the minimum and maximum distance of the DoF, are intersecting at the table's intersection.

This explains how to read the table.

This is the text translated in its original graphic structure of the text.

Zeh Zeca-Flex Camera

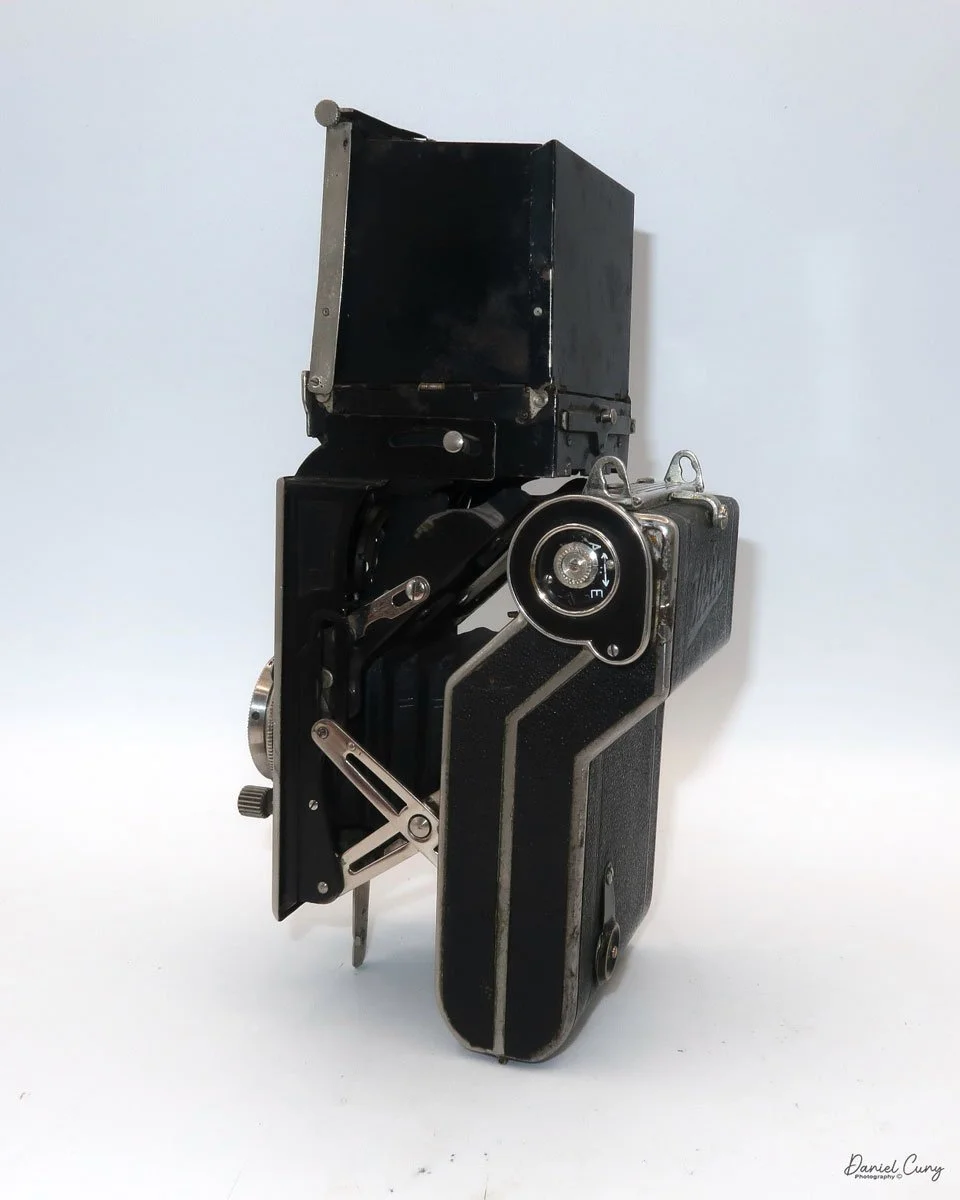
This camera combines the compactness of a folding camera with the quality and handling of a twin-lens reflex camera. The Zeh Zeca-Flex is just the camera mentioned above, and I've had my eye on it for many years. However, the rareness and price have always eluded me until I went into a great used camera store in Salt Lake City, UT, Acme Camera.

 The first time I went into Acme Camera, they were in their older location, and the store was filled with photo knickknacks. I struck up a conversation with the people there who were selling used gear, servicing cameras, and renting for the local photo community. On my second visit, back in one of the cases was the Zeca-Flex I currently have. The camera was in excellent condition, with clean optics and a working shutter. I offered a trade for the camera, and they accepted. I was elated to have the camera so I could do a blog article on my Zeca-Flex.

History:

In the early 1900s, around 1901-1902, Paul Zeh produced camera parts like shutters in his workshop in Dresden for some of the other local camera companies in Germany. In 1913, he started producing cameras, and by 1922, the company Paul Zeh Kamerawerk was started. In the early years, the company mainly produced folding plate cameras or cameras that took images on glass plates, which was very common at that time period.

During the 1920s, the company did very well. At this time in photo history, roll film was starting to become more popular. The photographer or photo enthusiast didn't need to carry bulky film holders. All the photographer needed to do was put in a roll of film and get 8, 10, 12, or 16 different photos on the same roll of film without the hassle or inconvenience of loading and carrying the film holders. 

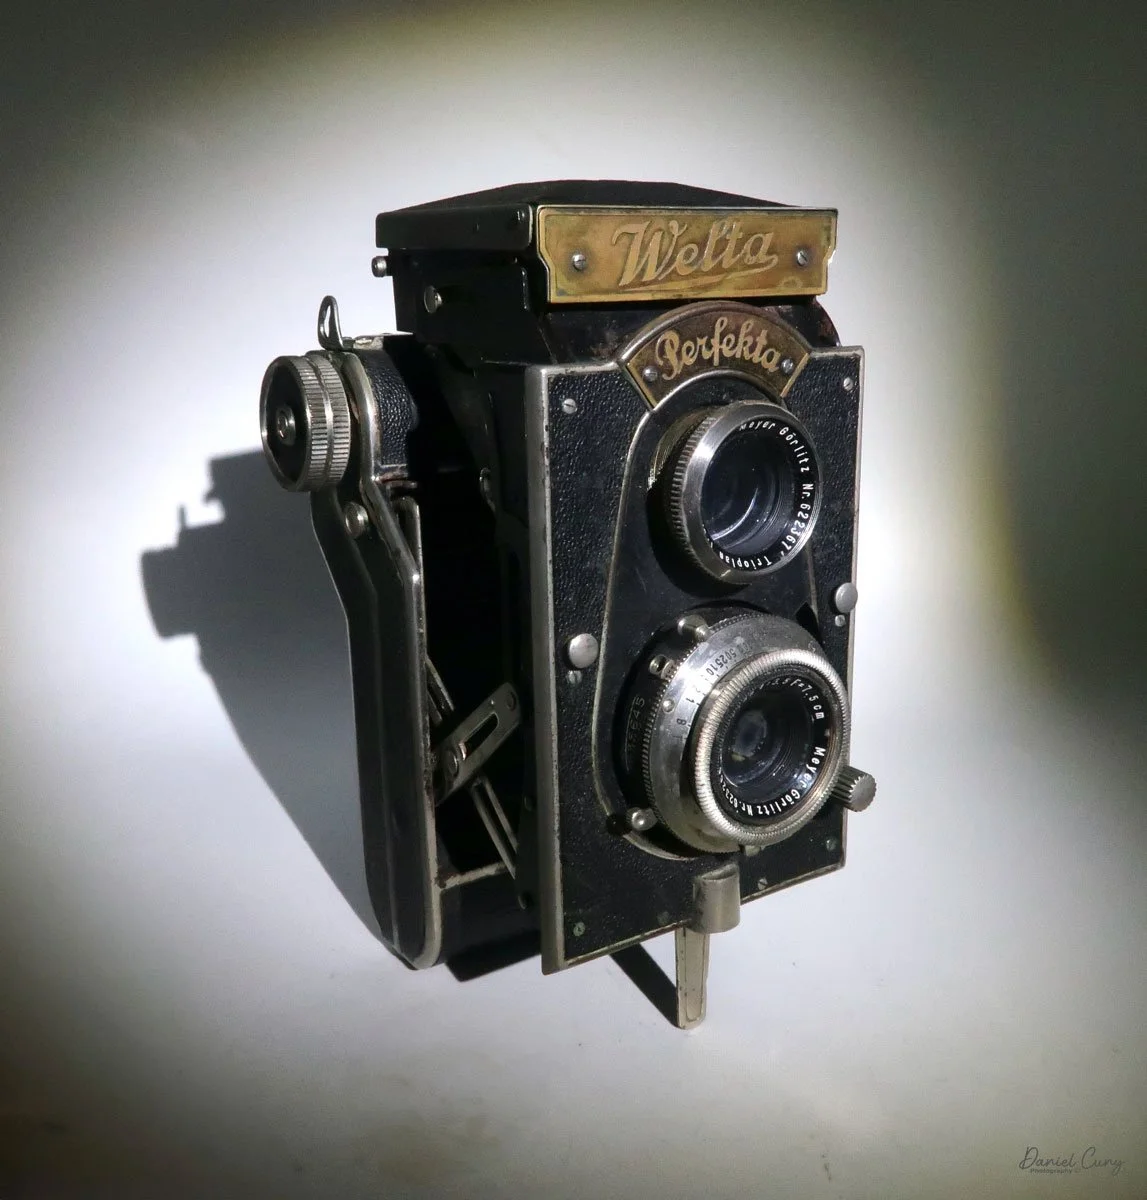
The Pilot Reflex camera, produced in 1931 by Kamera-Werkstätten Guthe & Thorsch in Dresden, has a very similar style and appearance to the Perfekta and the Super Perfekta; you can see a review by Mike Eckman of the Pilot.

 During the late 1920s and 1930s, the company expanded production into folding roll film cameras. These cameras were more compact and allowed the photographer to travel with less equipment, so their popularity grew.

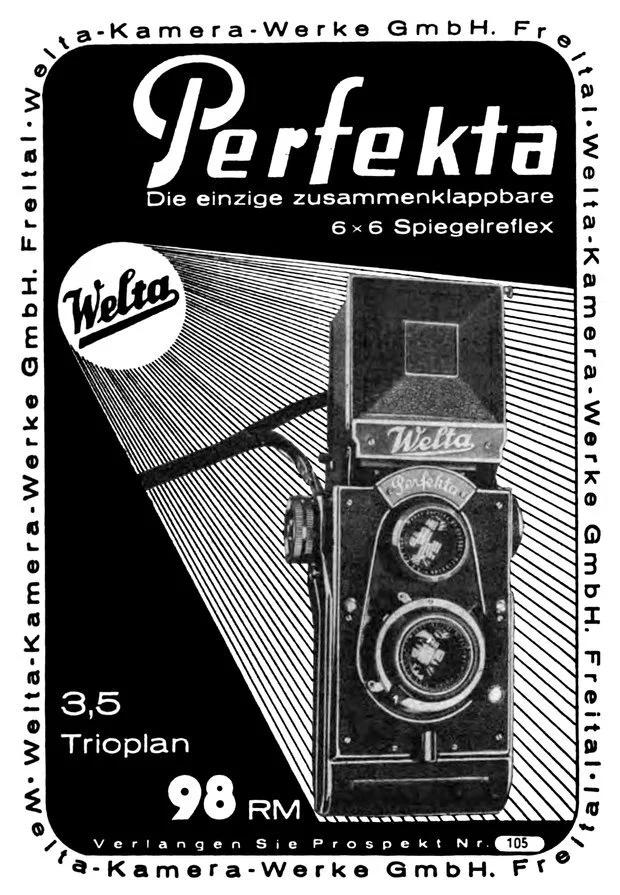
 By 1937, Zeh produced the Zeca-Flex, a folding, twin-lens reflex camera. Its design is very similar to that of the Welta Perfekta, which was produced in the 1933-34 timeframe, and the more robust Super Perfekta introduced in 1935. The Perfekta and Super Perfekta were made by Welta Kamera Werk, which was in Freital, a very close town to Dresden. 

I'm confident Zeh wanted to compete with Welta on this camera style. Unfortunately, this camera style didn't catch on with consumers. Hence, with all three cameras, the Perfekta, Super Perfekta, and Zeca-Flex were the only cameras made and are rare and somewhat expensive.

 WWII took a toll on Dresden as the Allies leveled the city due to its large manufacturing capabilities. By 1948, the Zeh plant closed, and the company went out of business. My guess is that some of the Russian companies took some of the camera manufacturing machines to produce some of the after-war cameras. This is just my guess, though.


My Camera: 

The condition of my Zeca-Flex is unusually excellent for a camera that is almost 90 years old. The metal is still shiny, and all the functions move like when the camera was first purchased in the late 1930s.

 The camera measures 7.5" long without the light hood open. When the light hood is open, it measures 9.25" tall. The Zeca-Flex is 3.75" wide and closed; it's 2.5" from the front of the viewing lens to the rear of the camera. When the camera is open, it measures 4.75". The Zeca-Flex weighs 2lb—5.2 oz.

The lens on my Zeca-Flex is a Schneider Xenar 7.5cm (75mm) f 3.5 in an F. Deckel Compur Rapid shutter. The shutter speeds go from 1/400 to 1 sec with both "T" and "B" settings. Since I don't have a proper shutter tester, all the shutter speeds sound accurate to my trained ear. The viewing lens is a Sucher Anistigmat f2.9 lens.

To open the camera, there is a small button on the left side as you hold it to take a photo. Press that small button in, and the lens door unlocks. On my camera, you need to pull out the lens to put it into the taking position. There are knurled grips on the sides of the lens door to pull the lens out. Also on the lens door is a flip-out stand that allows you to stand the camera up, which is very common in folding cameras.

Note the small button on the side of the camera used to open the lens.

To close the lens, there are two buttons on either side of the backdoor. You press in towards the camera body, then slide the lens back into it and close it until you hear the locking "click" sound, which means the lens is back and locked in the camera body.

 On the back of the light hood, there is a sliding bar you slide over to open the light hood for viewing purposes, and on the side of the light hood is a switch you can flip up or down the magnifying glass for critical focusing.

There is a latch at the top of the back door, which you slide up to open the film door to load and unload film. In my camera, there is a roll film holder you put the roll of film into before putting it into the camera. The film holder is something I've never seen before, and on the first roll, I needed to figure out which way the film rolled across the shutter, but it was easy to figure out. Now that I've done it, it makes sense, and I won't have difficulty in the future.

 The frame counter resets to number 1 when I close the back of my camera, or at least it was there when I put film in it. There is a button on top of the frame counter. When I slide that button over, the frame counter goes to number 5, so my guess is that isn't correct. I can't find an instruction manual for this camera online, so I'm not 100% sure of the correct way to get maximum frames from the camera. 

There is a red window on the back, which I'll use in the future, as I did miss a few frames at the beginning of the roll when I shot with it. The film advance is on the bottom of the camera and is directly tied into the frame counter, whether you have film in it or not. The frame spacing on my camera was good once I got to the first frame and used the frame counter to find the next frame.

 To focus the lens, as you hold the camera to take photos, there is a wheel next to the viewing lens. I rolled my finger across it one way or the other to achieve proper focus, which was the easiest and made the most sense to me.

This is the focusing wheel. I used my finger to slide back and forth to focus.

Results:

Now that I had a roll of film in the camera, I took it out and walked around the neighborhood to get some photos.  Here are some pictures I took on my walk with the stunning Zeca-Flex camera.


Conclusion:

The viewfinder wasn't the brightest, and achieving good focus was difficult even with the magnifying glass up. Another negative about using the camera is where the shutter release is placed. There is no shutter release button, so you need to cock the shutter and then release it with the shutter release button, which is in an awkward place and thought my finger would be in the photo, but it wasn't.

Besides these two items, the camera was a joy to shoot with, and I feel lucky that my camera is in such good condition. I will use it again, but I'm putting it back on the shelf and trying something different for next week's blog post.

 Thank you for taking a few minutes to review some of the cameras in my collection.

 Please be safe, and I hope to hear from you soon.

Bolsey-Flex Trio Camera

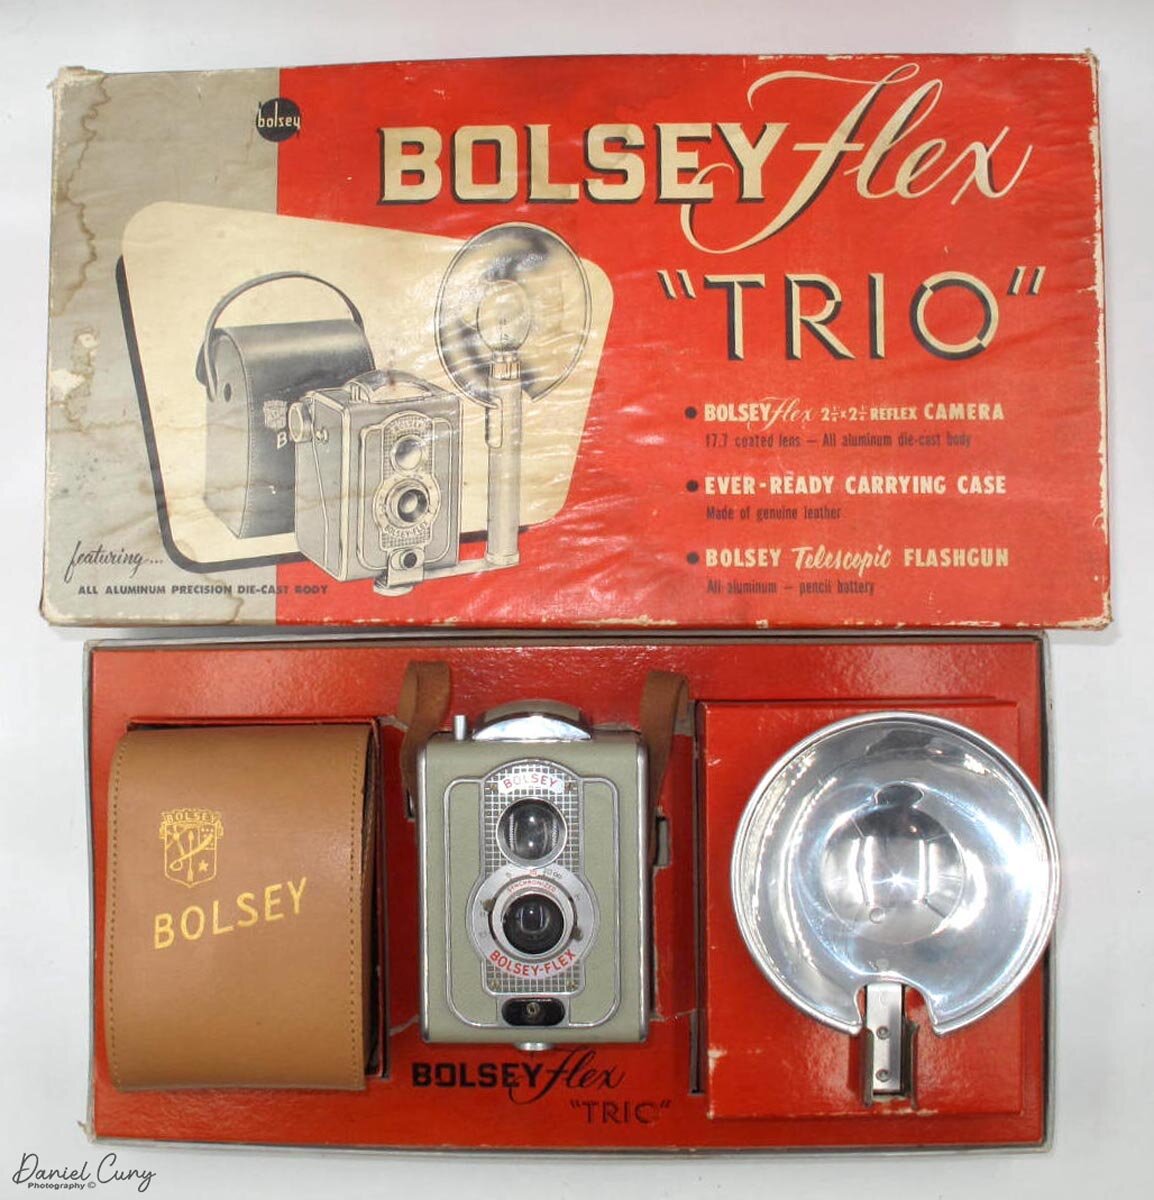
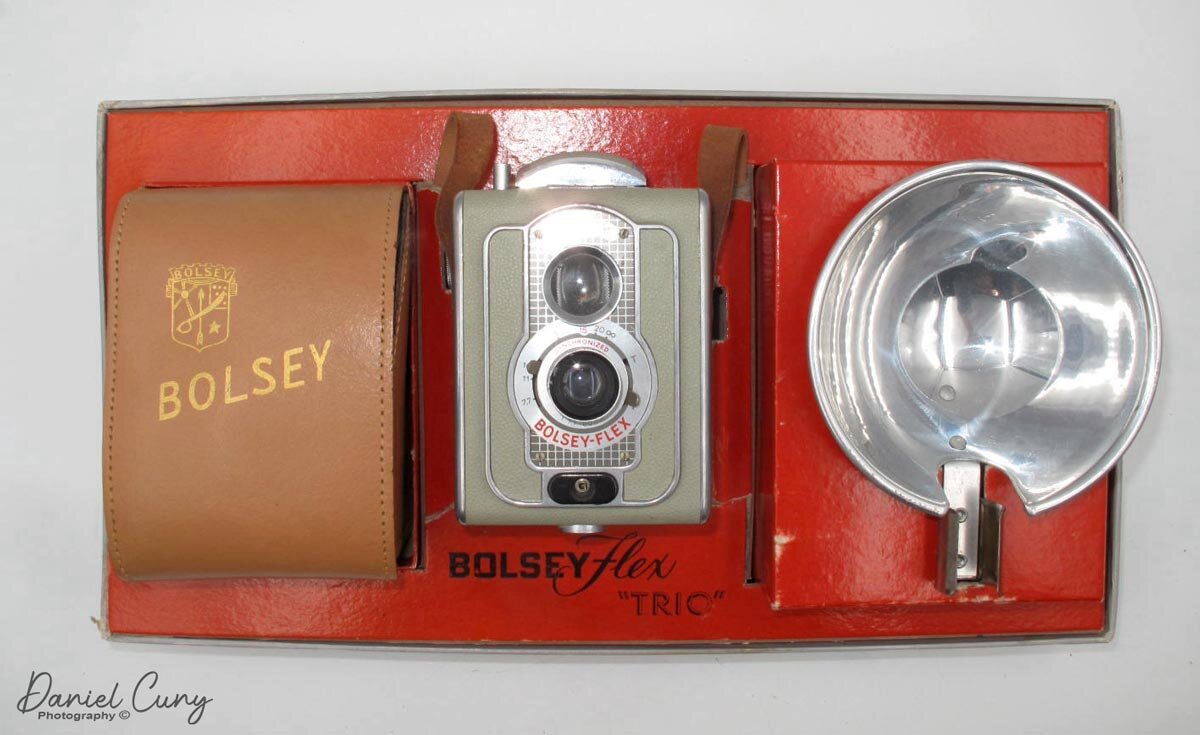
As I was sitting at my desk a few weeks back as I was figuring out what camera to write about next, I looked down at a box of cameras I have in my office, and on top was the Bolsey Flex Trio, which is in the box and complete with the instructions. As I started putting together my thoughts about the camera, I had to pull out the camera, and many different ideas came into my mind.

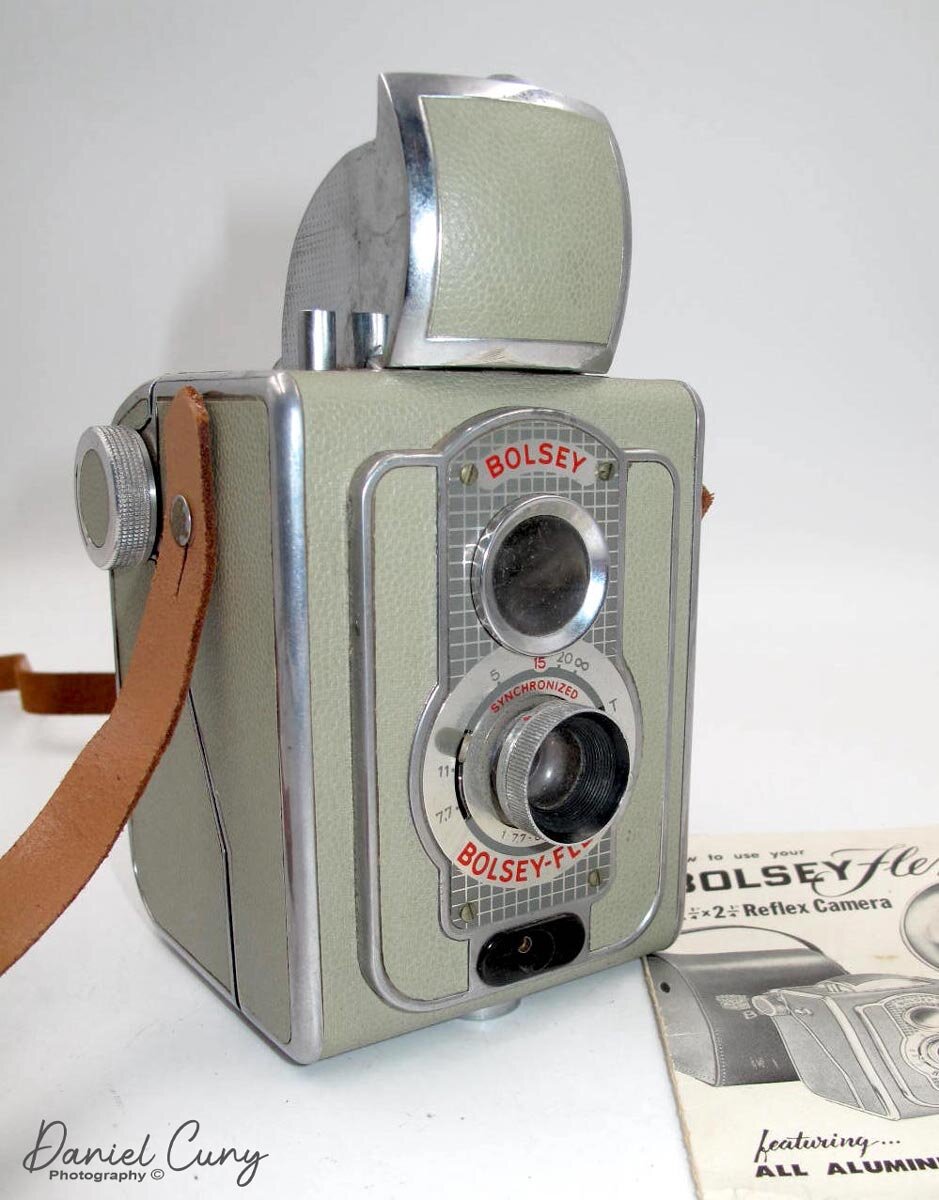
My Bolsey-Flex Camera & Instructions

My Bolsey-Flex Camera & Instructions

The camera for its age isn't in great shape but does work. The camera uses 120 size film, which is a HUGE benefit to me since the film is so readily available. I decided to load a roll of Black and White film in it to shoot as I walked through my neighborhood. I processed the film and was somewhat impressed by the Bolsey-Flex. It's a Pseudo Twin Lens Reflex camera, which means it looks and feels like a TLR camera but works more like a Box Camera due to its simplicity.

Camera Research

I was researching the camera, only to find that a friend of mine, a brilliant writer and camera collecting blogger, Mike Eckman did a blog post on the same camera just a few months ago, which you can read here. With that said, Mike has quite a bit of information on the designer, Jacques Bogopolsky, and camera companies he worked for. The famous movie camera, Bolex, was named after Jacques Bogopolsky, and he also designed cameras for Pignons S.A., the original company that made Alpa Cameras.

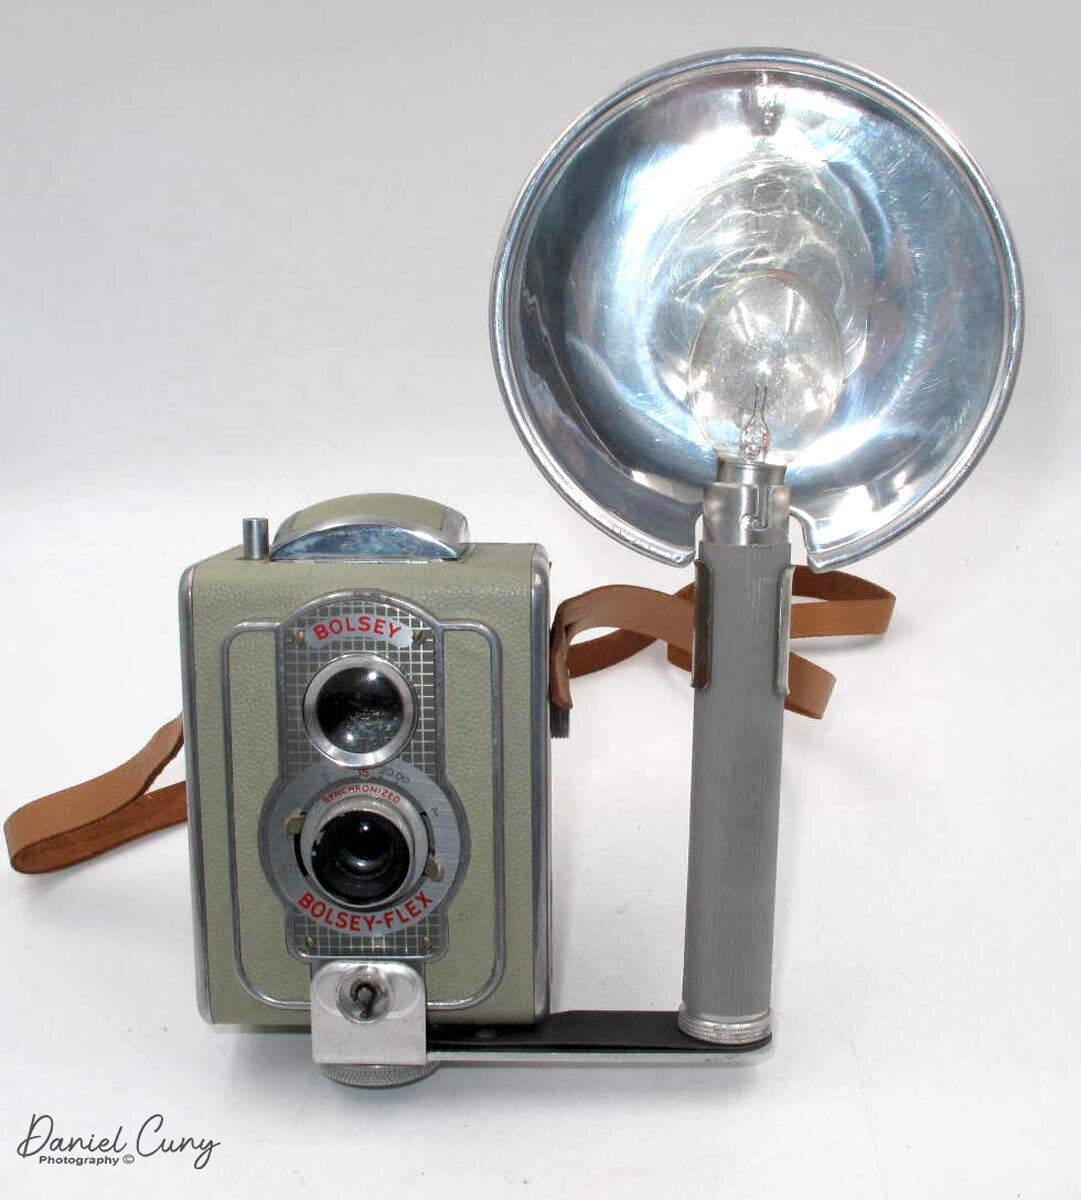
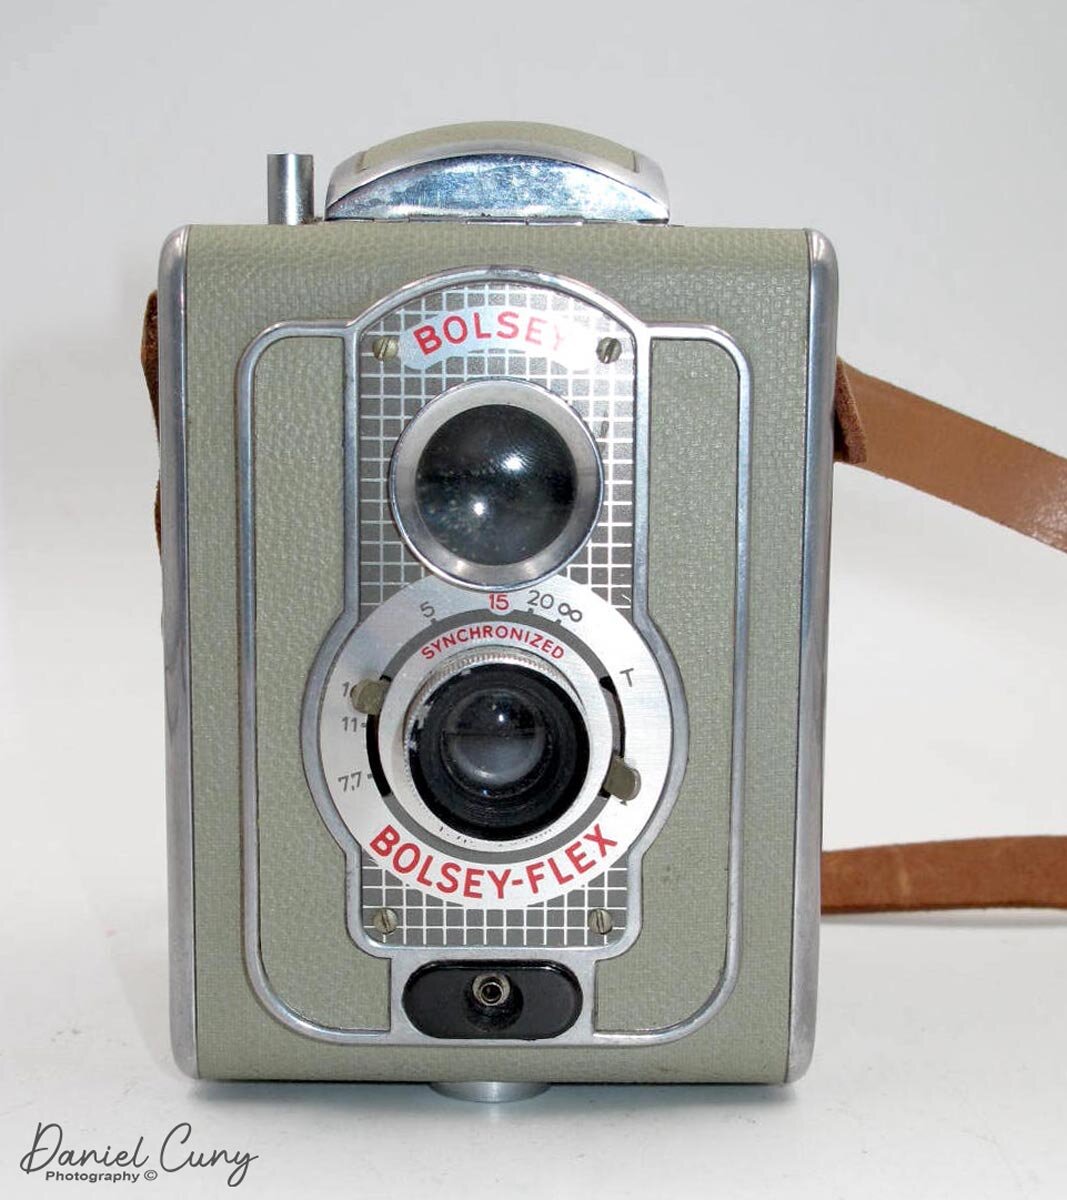
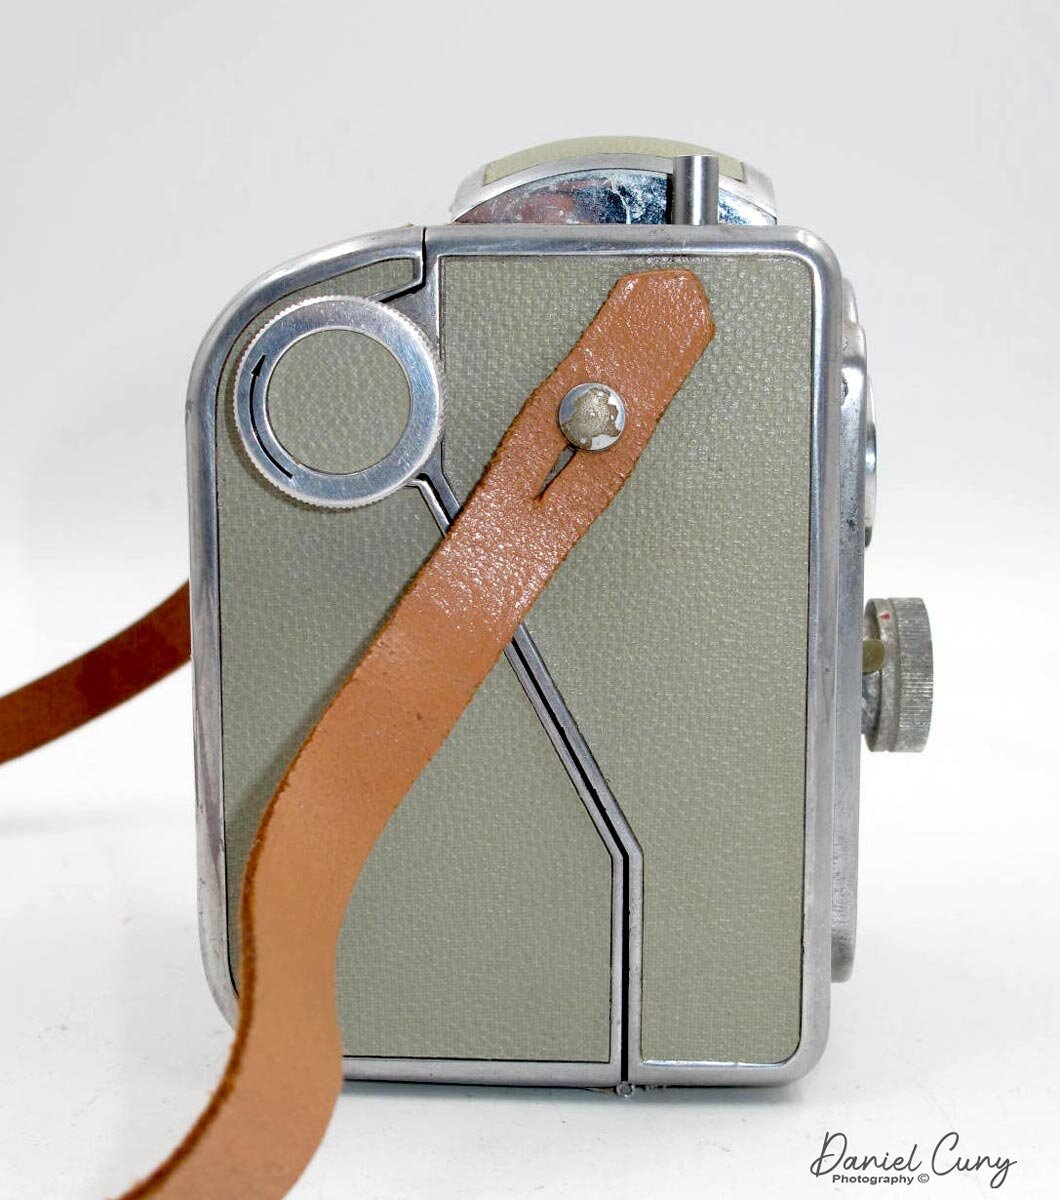
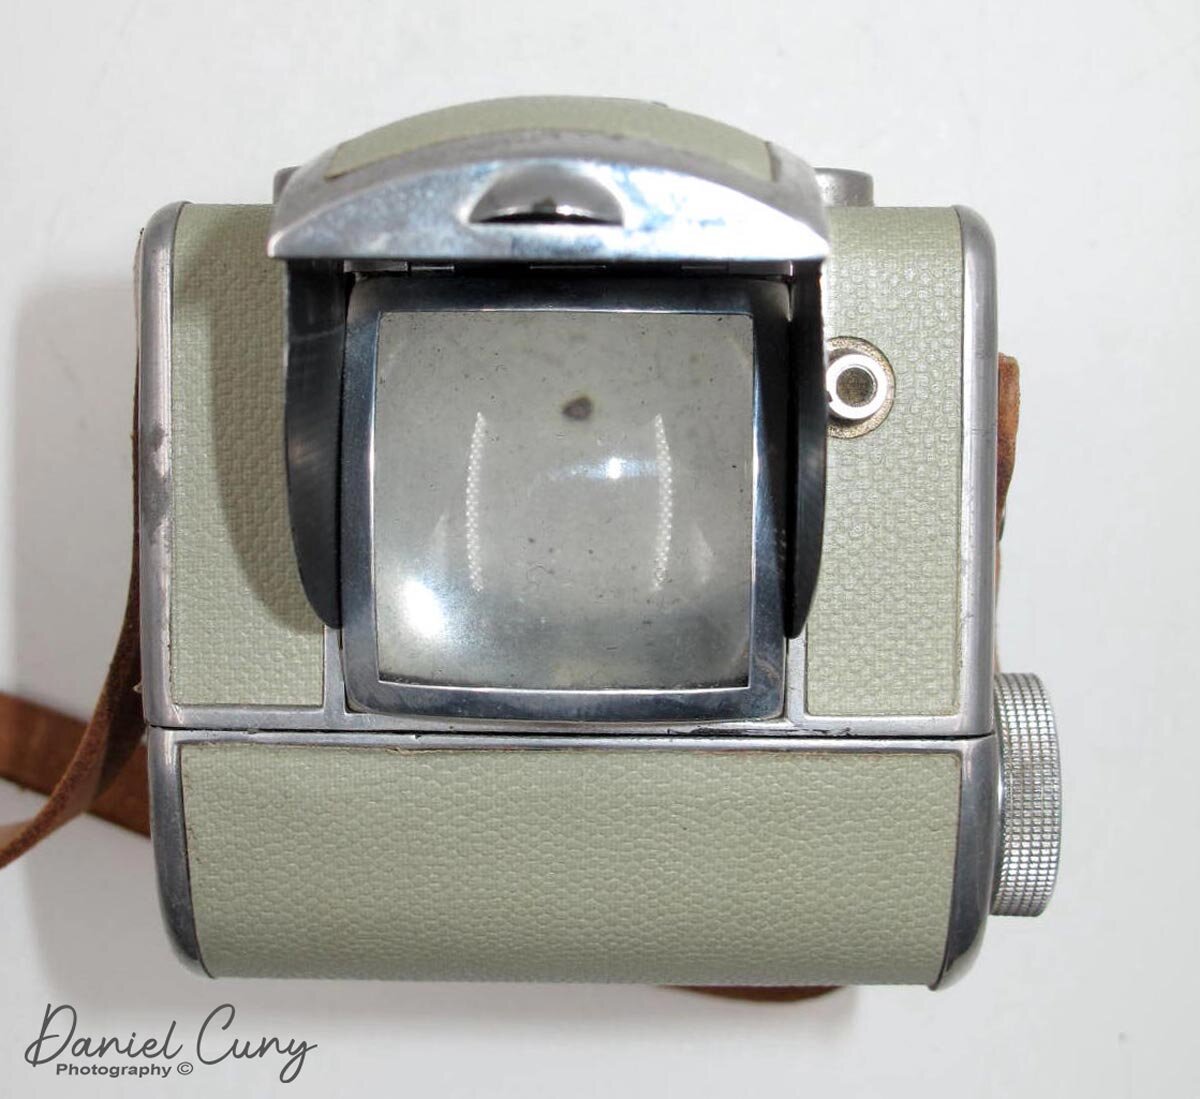
For my blog post, I want to concentrate on the experience of using the camera, the image quality, and my overall thoughts on how such a beautifully designed camera handles out in a natural shooting environment. I want to offer a few facts on the camera in general. The camera is an all-aluminum cast body with beautiful light green coverings. In the box comes all you need to take the camera out into the world to take photos.

The Camera

The camera measures 4.75" tall without the viewfinder in the closed position and 6" with the finder in the "up" position. The camera is 3.75" wide, which includes the width of the knobs. It is 3.75" deep, including the lens in the focused to the closest focused position, and 3.5 with the lens focused to infinity. The Bolsey-Flex incorporates an elementary zone focusing lens which can focus from 5 feet to infinity. The focus on the camera is strictly a "guess focus" style. While this is a Psuedo TLR camera, the top lens does nothing more than frame the photo in the camera. There is no focusing capability when looking through the viewfinder.

On the Bolsey-Flex shutter, you have the capability of "I" for an instant, which shoots the shutter at 1/50th of a second shutter speed, and "T" for a time exposure. The camera does have a synchronized shutter which couples with the flash attachment. The camera also has an 80mm lens with three aperture settings, F7.7, f11, and f16. 

The flashgun takes 2-"AA" batteries to power the Type No.5 flashbulbs that fit the top. You unscrew the bottom of the flashgun to put the batteries into it. It would be best if you took the camera case off the camera to use the flash. The flashgun fits into the camera synchro port, which is below the lens and held by the screw that holds the case into place. When you trip the shutter, the camera sends a signal to the flashgun, which fires the flashbulb. 

My unit seems to be in good working condition. Unfortunately, I didn't have bulbs when I loaded the camera with film and did all my shots outdoors. It would have been fun to shoot with bulbs. I'll need to test another camera that uses a flashbulb in a future post, not that I have some bulbs to try.

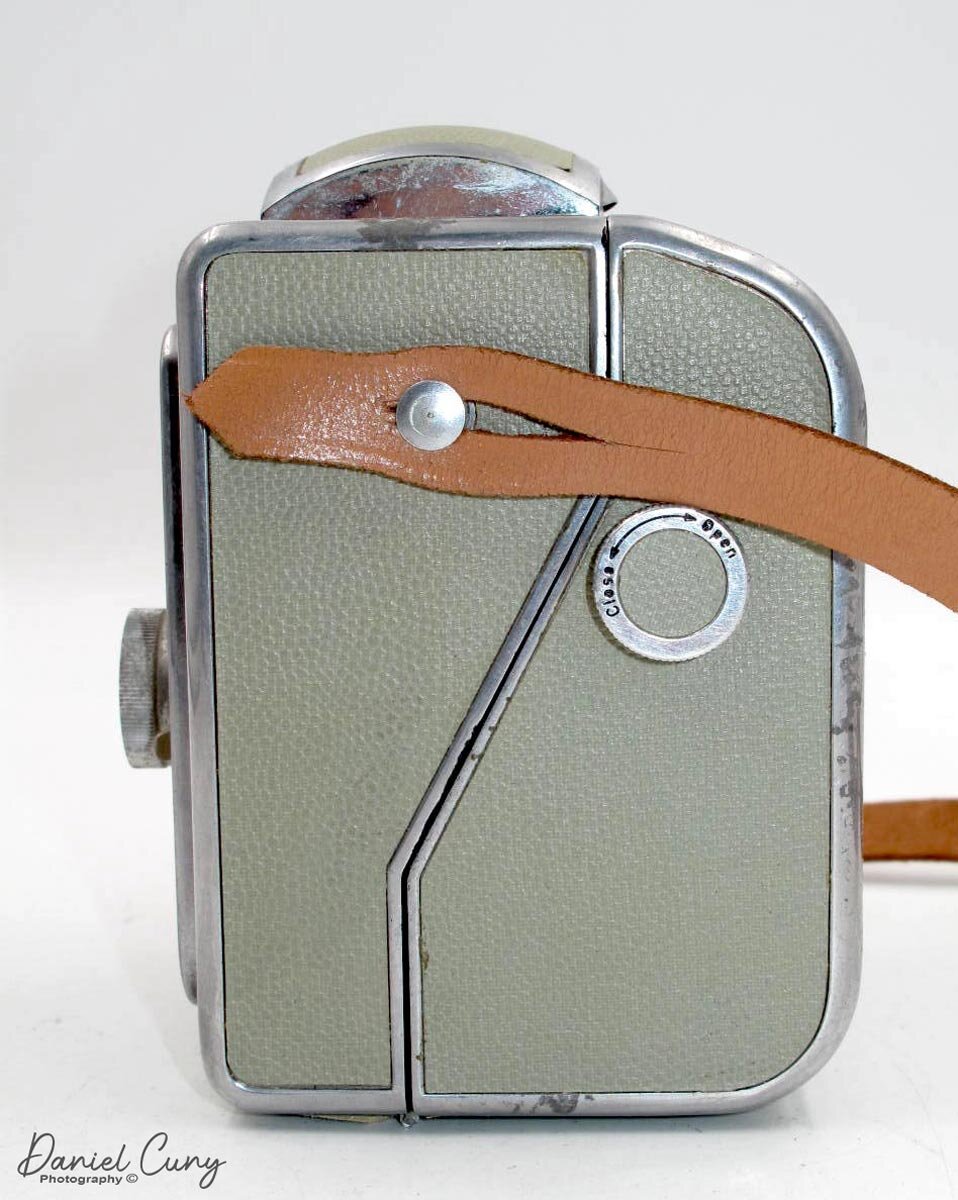
To load film into the camera, there is a knob on the left side of the camera with "Open," Close" on it. Turn the knob to "open," and the top of the back swings down open to load the film into the camera. Nothing special here as the. Put the empty spool on the top and film onto the bottom area. The shutter won't fire until the winding lever is turned to advance the film. On the back of the camera is the red window with a sliding cover to see when the film is advanced to the following frame number.

 Images

Here are some of the images I took with the Bolsey-Flex camera.

Rocks

Rocks

Backyard Aspen

Backyard Aspen

Evergreen Tree

Evergreen Tree

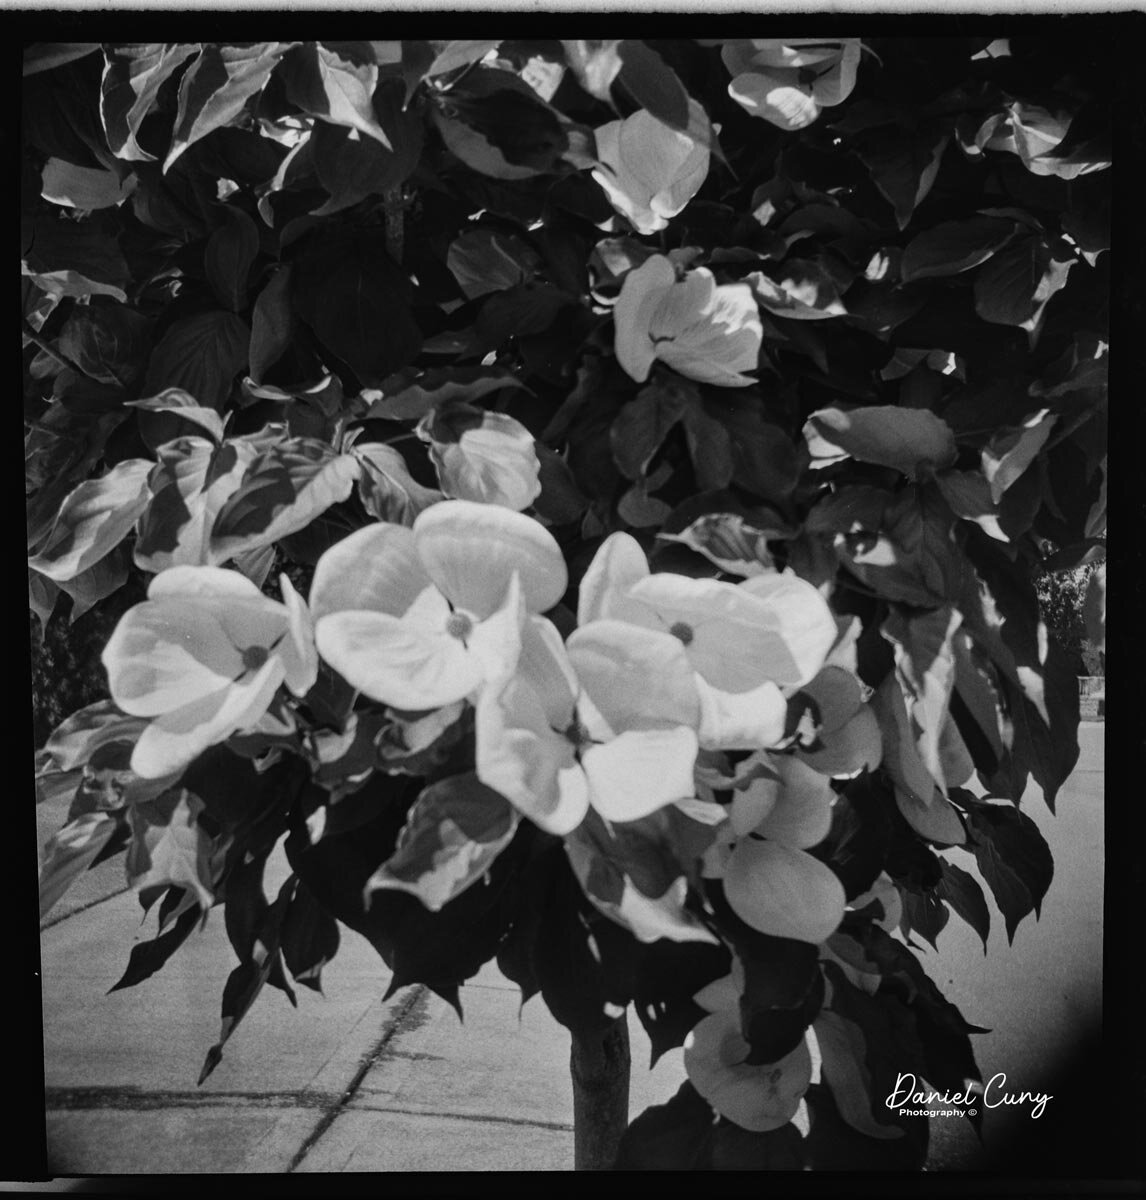
Dogwood

Dogwood

Conclusion

I thought the camera did a very excellent job for a pseudo-TLR camera. It's not much more than a glorified box camera. The camera was easy to hold, the exposures were good, thanks to my sunny 16 rule when exposing to sunlight. The lens vignettes a bit, but I enjoy that. The ease of operation and see the frames in the red window when advancing were spot on. I'd recommend this very well-built camera to anyone.

 Thank you for taking some time to look over this post. Until next time, please be safe.