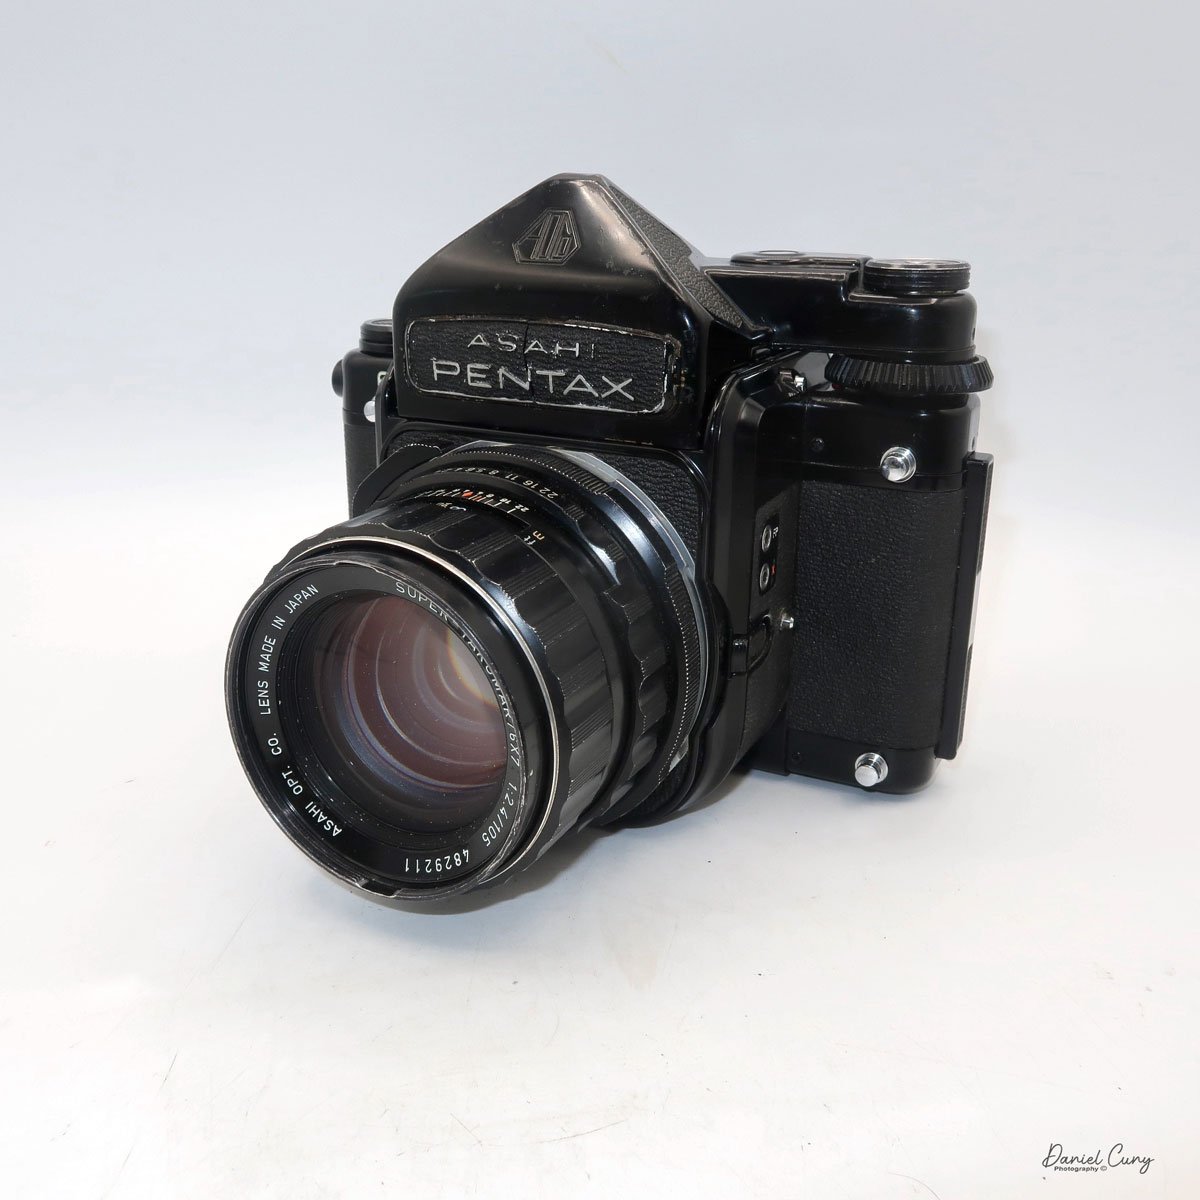
Asahi Pentax 6x7 Camera

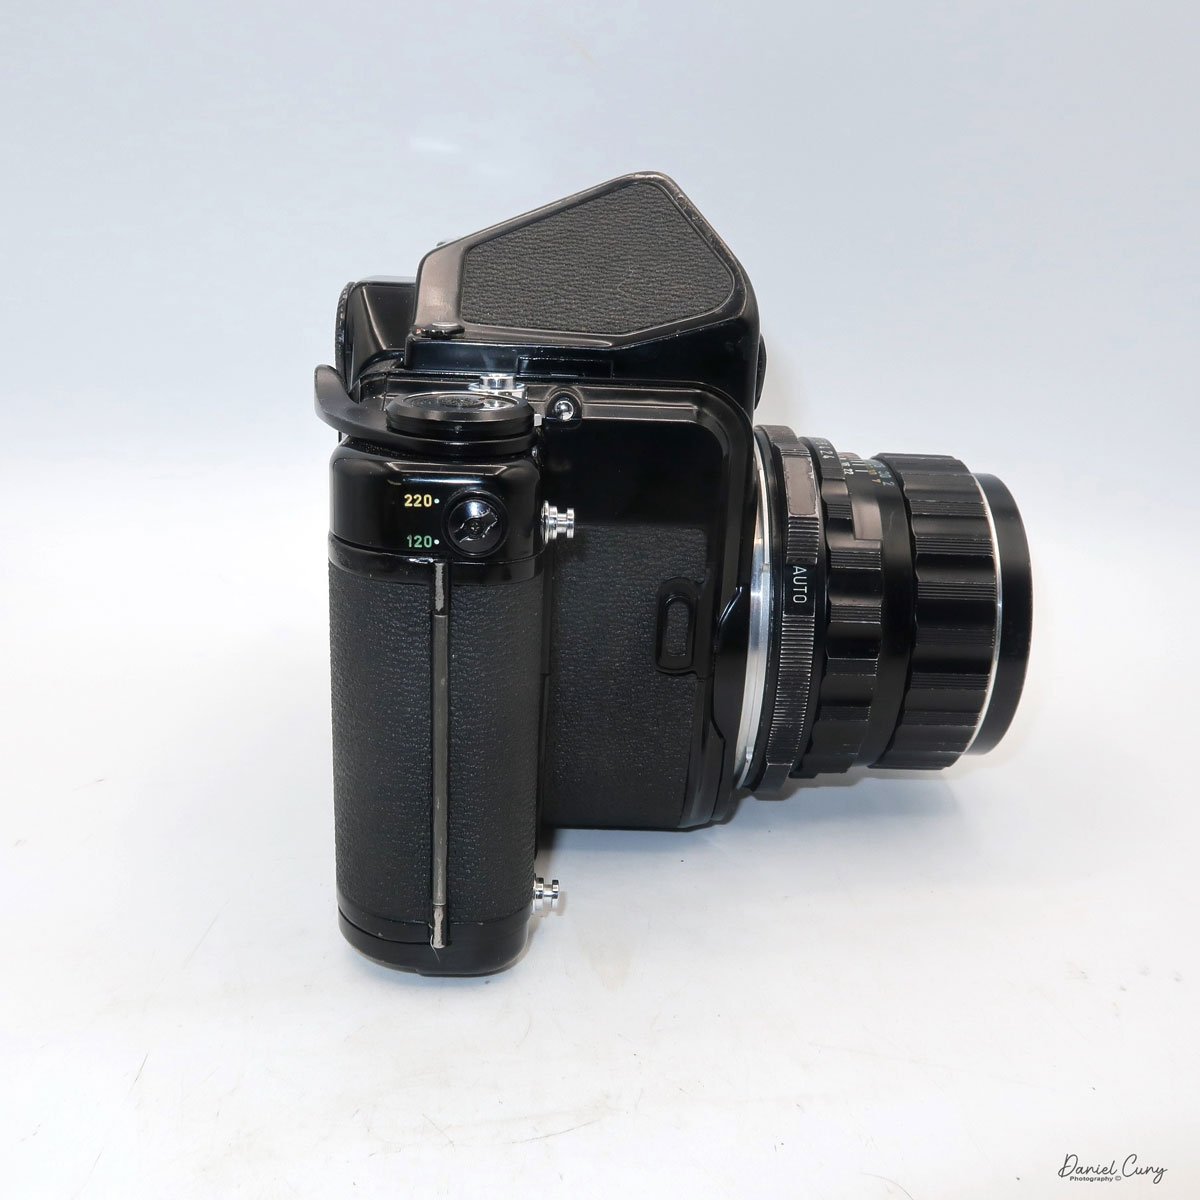
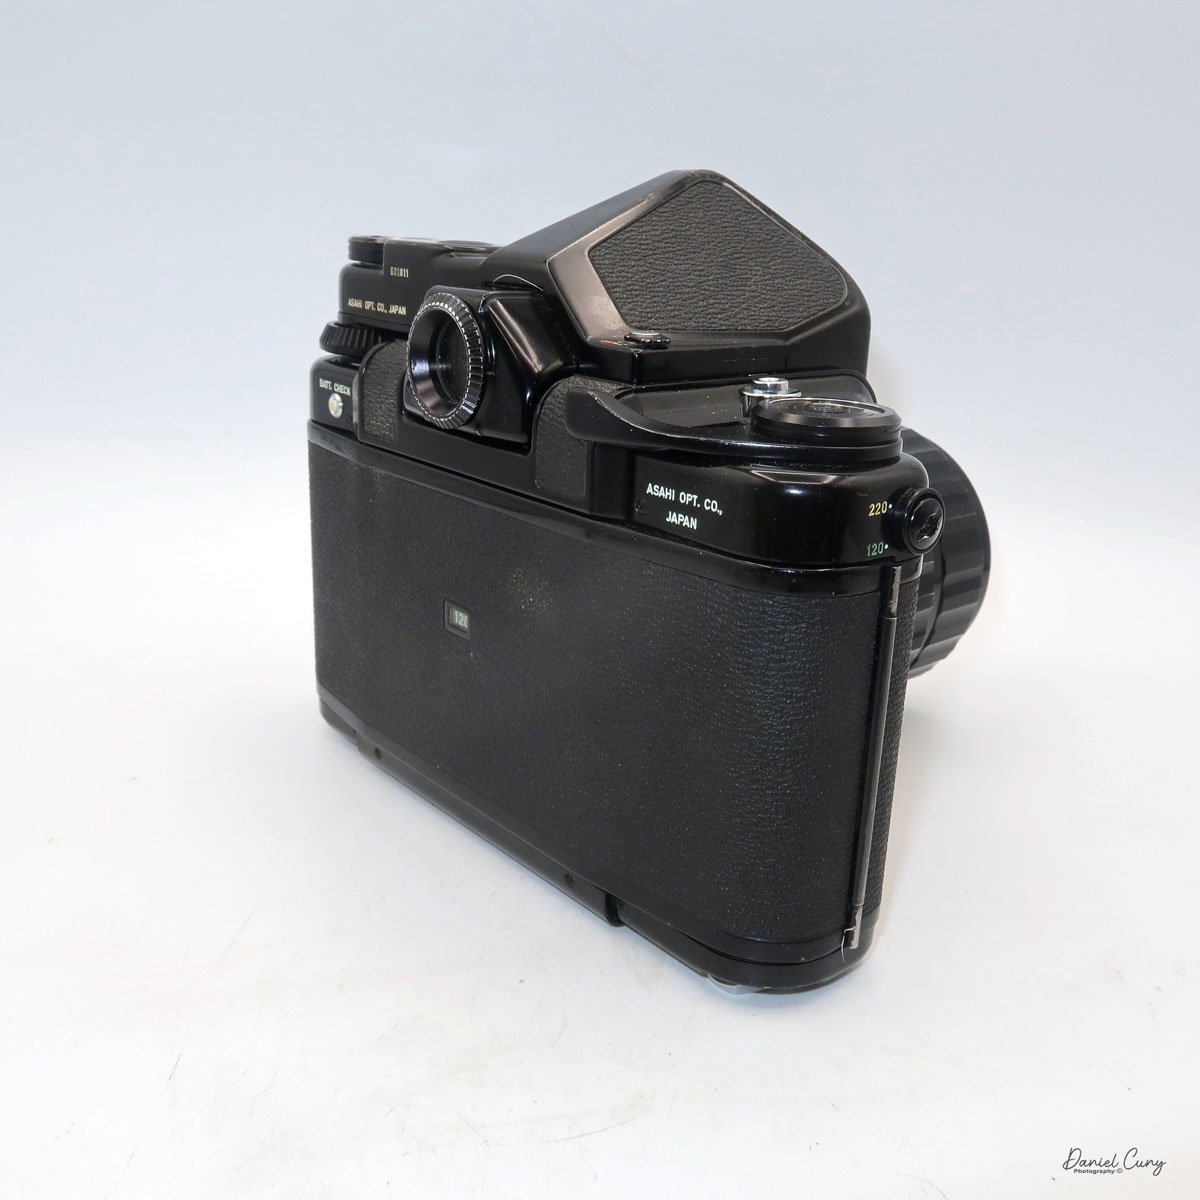
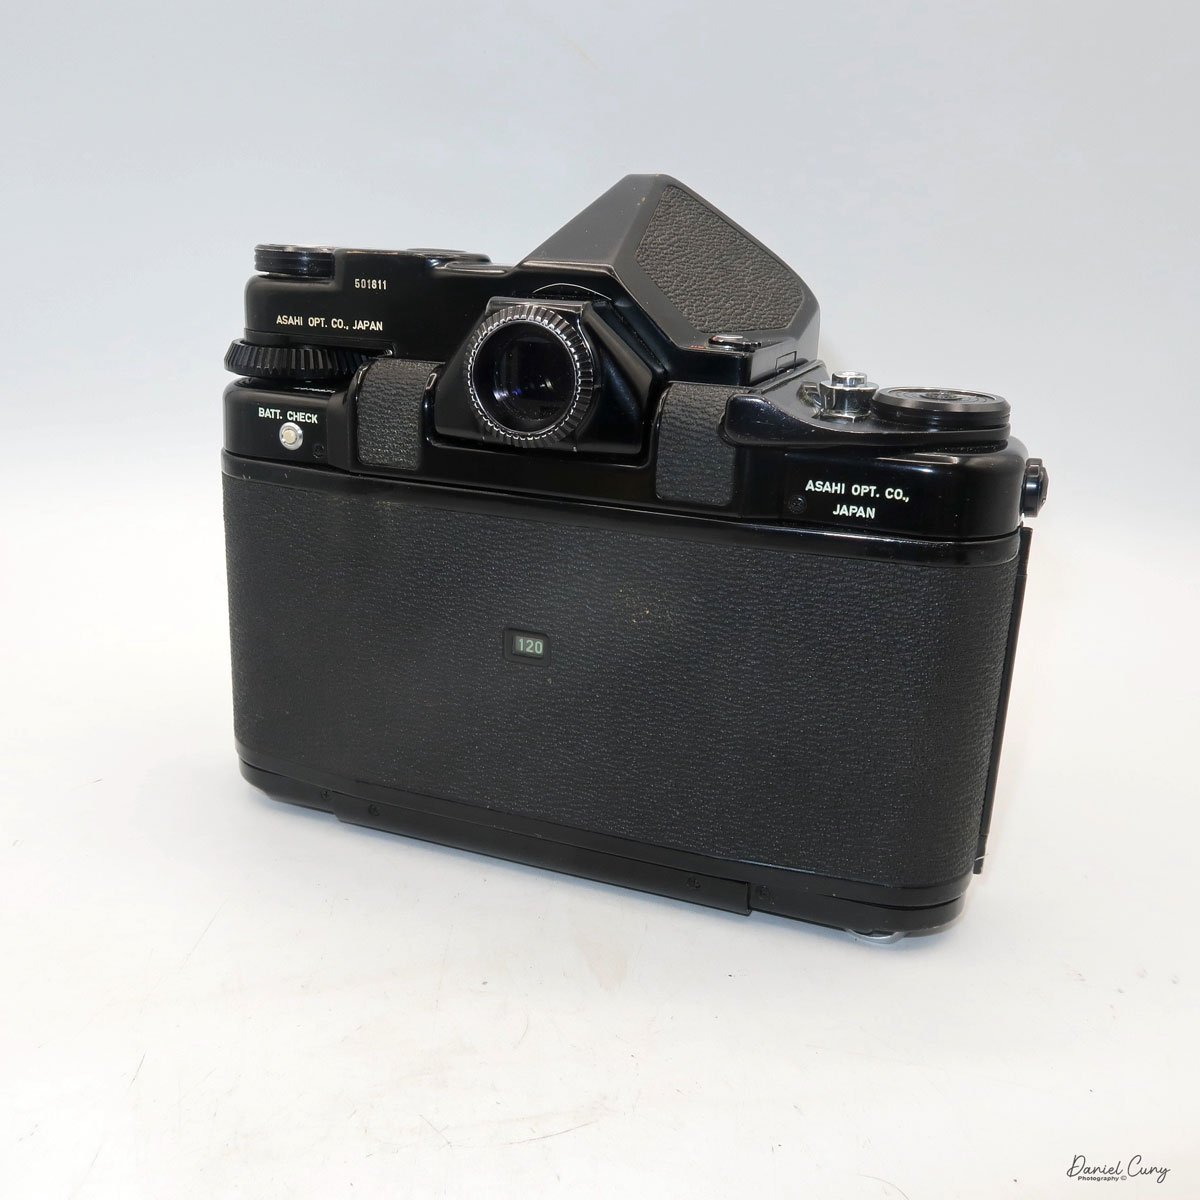
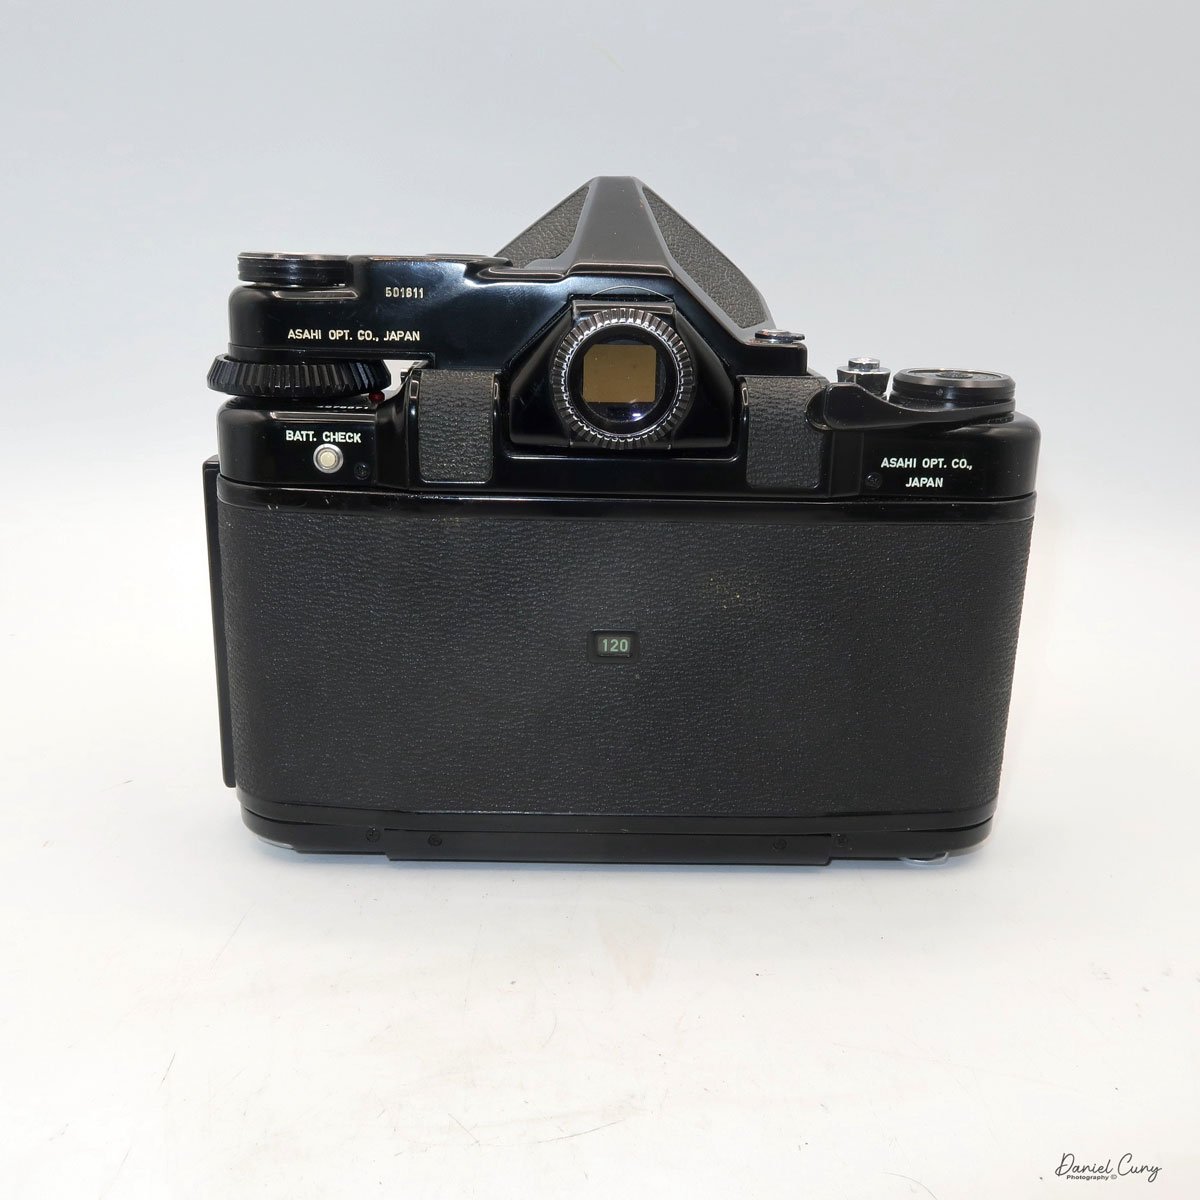
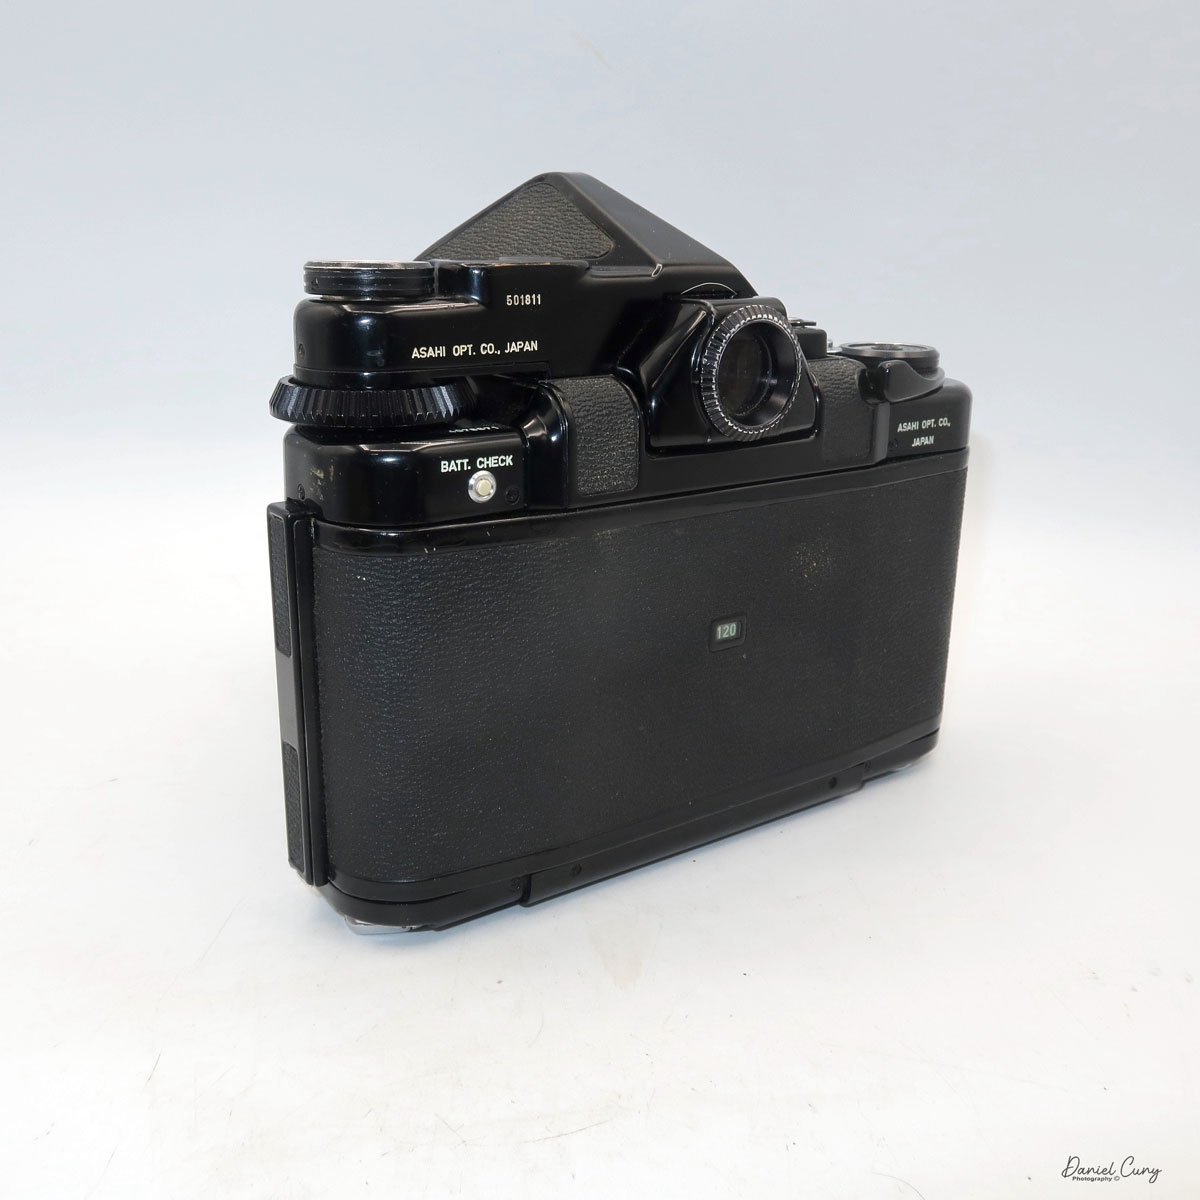
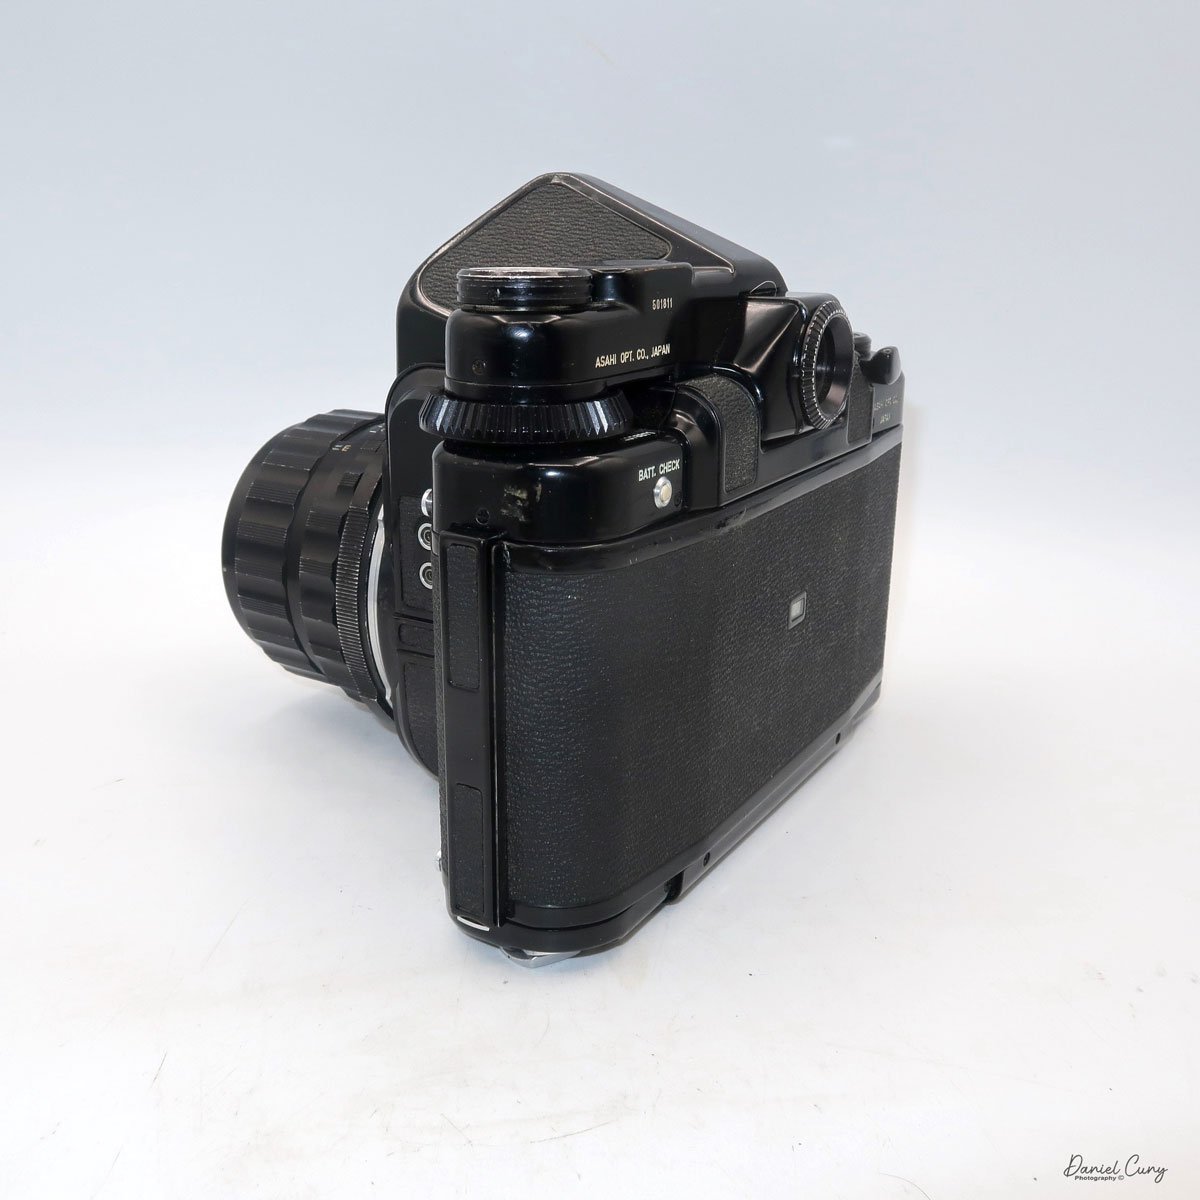
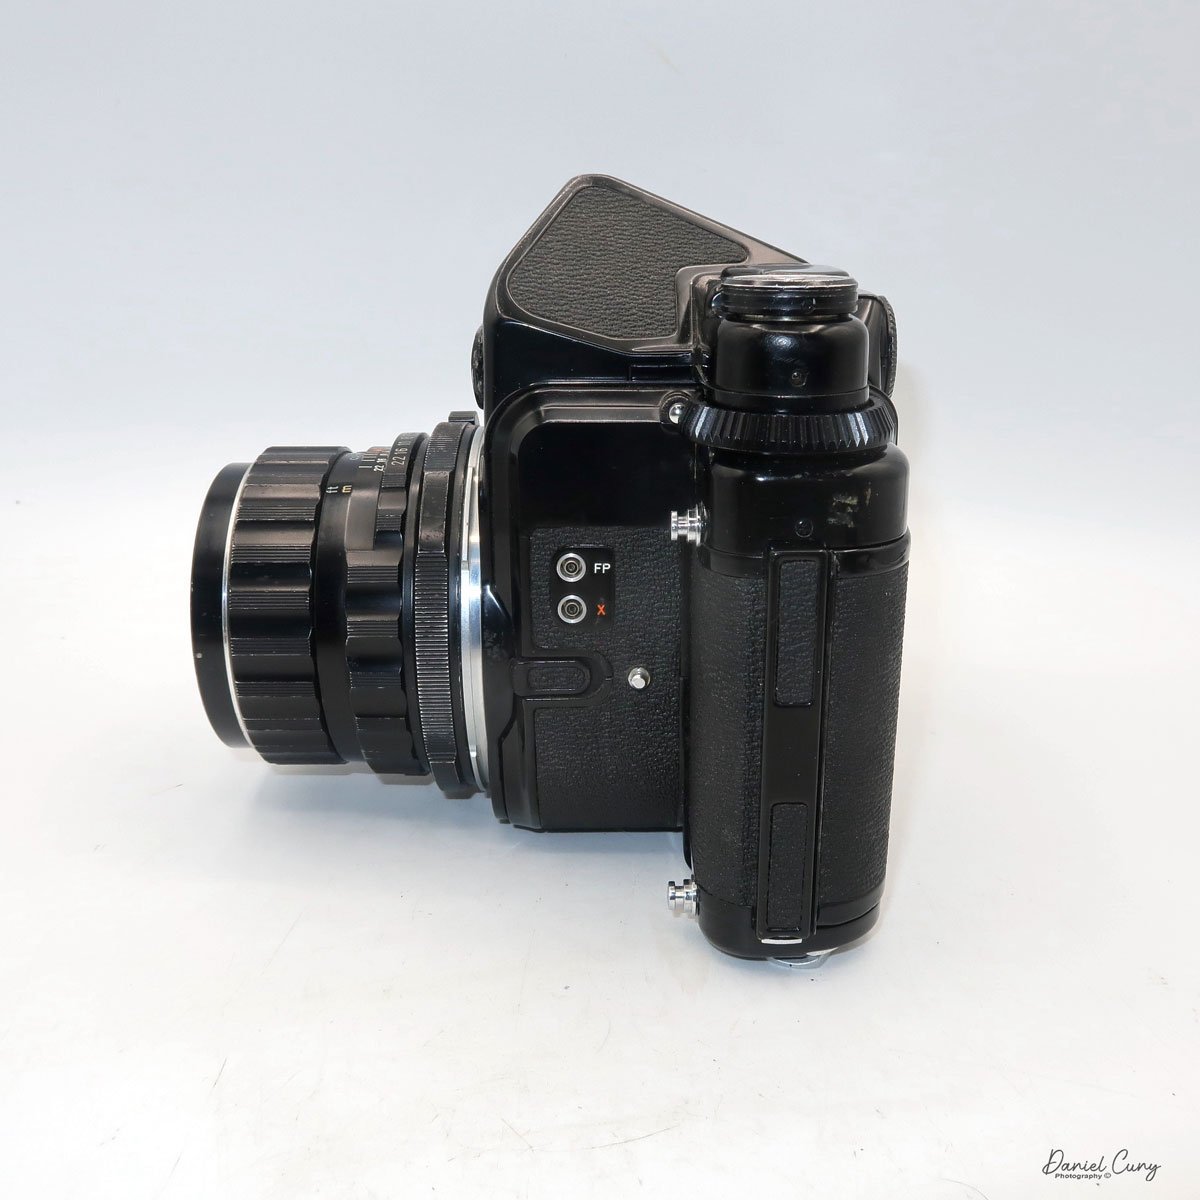
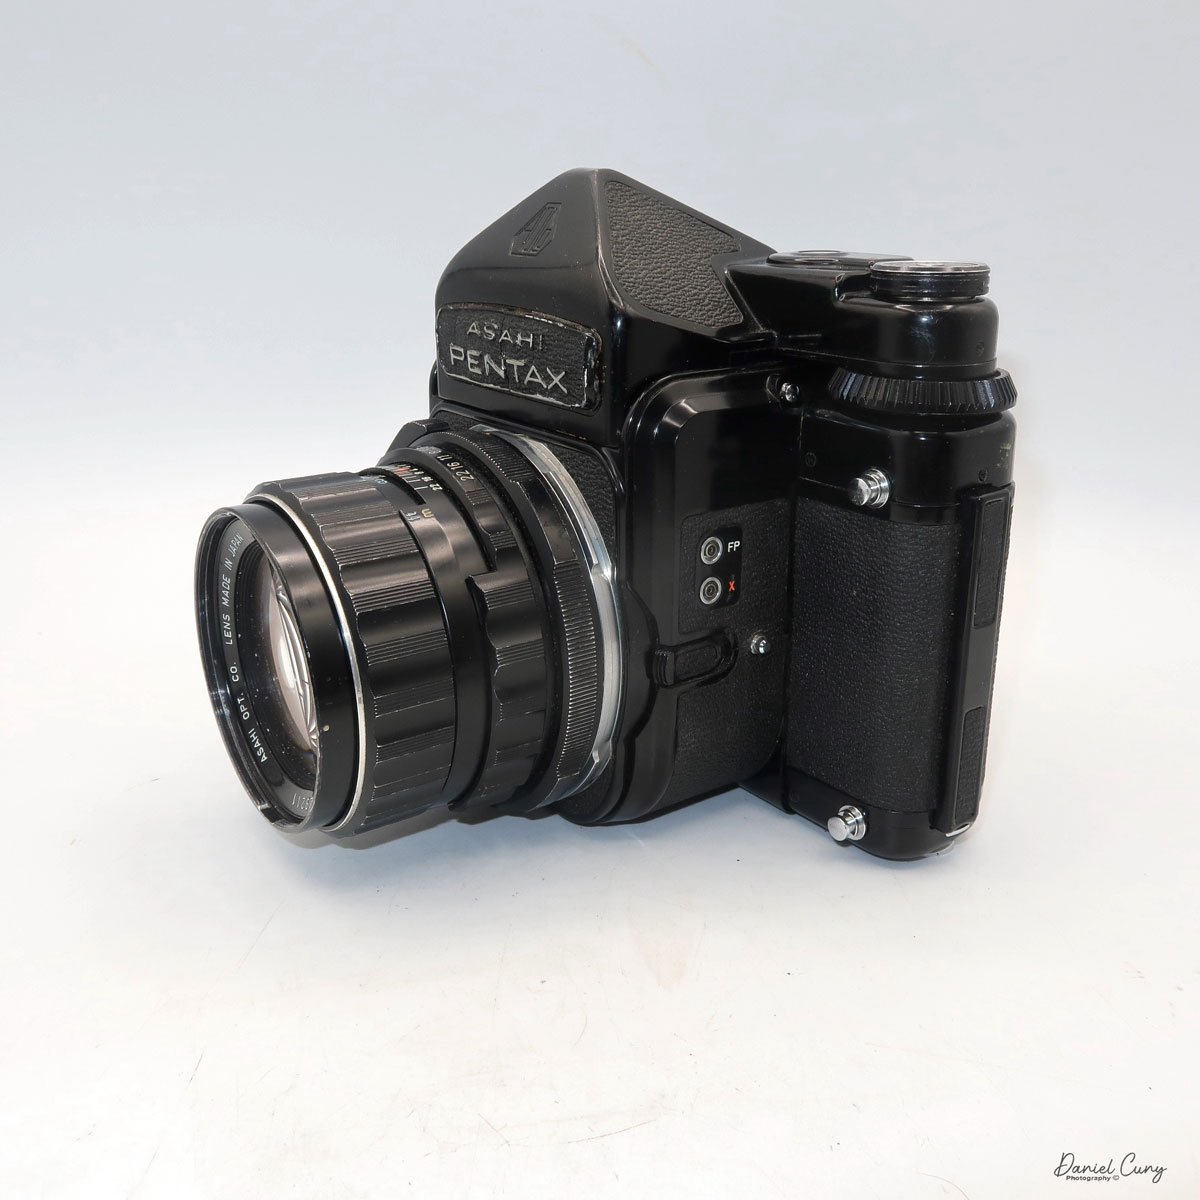
My Pentax 6x7 camera with 105mm f2.4 lens, TTL Finder and wood grip.

When I started photography, I used an older Univex Twin Lens Reflex-style camera that my uncle gave me when I was around 8-9 years old. From there, palling around with my buddies, that camera was too big and bulky to bring around with us. So, I opted for the smaller, more compact 35mm camera, which I could keep around my neck and under my coat when it was colder outside. 

 The Pentax 6x7 cameras have always held a special place in my heart, perhaps due to their unique blend of size and resemblance to a larger 35mm camera. While I still cherished the Twin Lens Reflex style, there was an undeniable elegance and familiarity about the Pentax 6x7 cameras. The interchangeable lenses and finders were reminiscent of the Nikon system I had grown to love in my later teen years.

 I purchased my Pentax 6x7 camera a few years ago at an online auction. It appeared to be in good condition, and its camera is complete with the TTL finder, standard 105mm lens, wood handle, and Pentax-branded strap, all wrapped up in a wonderful cube-shaped case that it all fits nicely into. I noticed a pouch on the top portion of the case. There were a few accessories in it that the seller didn't show, so when I received the camera, an external battery holder, and covers for the finder, A focus grip was included in the kit. Now it's time to look at the Pentax 6x7 manual to double-check all the ins and outs of the camera.

The Company:

The history of Pentax cameras is deeply rooted in the evolution of photographic technology, with a legacy that spans over a century. Pentax began as Asahi Optical Joint Stock Co., founded in 1919 in Tokyo, Japan. Initially, the company produced lenses for eyeglasses and later expanded into camera lenses and optical equipment. Not until after World War II did Asahi make its mark in photography.

Ads for the Pentax 6x7 camera system

 In 1952, Asahi released its first camera, the Asahiflex, the first Japanese 35mm single-lens reflex (SLR) camera. This launch marked a significant milestone for the company and Japan's emerging camera industry. Asahiflex featured innovative mirror-return mechanisms that set the stage for modern SLR design.

 The turning point came in 1957 with the release of the Asahi Pentax, which gave birth to the Pentax brand name. The camera combined the best features of previous SLRs. It introduced a pentaprism viewfinder, allowing photographers to see their subject right-side up and laterally correct. It also standardized the use of the M42 screw mount, which would become a popular lens mount for decades. The success of the Asahi Pentax was so profound that the company eventually adopted "Pentax" as its corporate name.

 Throughout the 1960s and 1970s, Pentax established itself as a leading manufacturer of SLR cameras, competing with brands like Nikon and Canon. They moved into the medium format by introducing the Pentax 6x7 camera. Iconic models like the Spotmatic series (launched in 1964) introduced TTL (through-the-lens) metering, significantly improving exposure accuracy. Pentax cameras became known for their durability, reliability, and affordability, making them popular among professionals and amateurs.

 In 1980, Pentax expanded the medium format market with the Pentax 645, which offered larger film sizes for high-resolution photography. These systems were found to favor studio and landscape photographers.

 Pentax transitioned to digital imaging in the early 2000s with models like the Pentax istD. It later gained attention for its weather-sealed DSLRs and in-body image stabilization. In 2011, Ricoh acquired the brand, becoming Pentax Ricoh Imaging Company.

 Today, Pentax focuses on traditional photography experiences, emphasizing optical viewfinders and rugged build quality in an era dominated by mirrorless technology. Their commitment to DSLR development and legacy lens compatibility maintains a loyal following, preserving the Pentax name as a significant part of photographic history.

My Camera:

Researching the Pentax 6x7 camera for the article revealed three upgrades to the original Pentax 6x7 camera when it was introduced in 1969. The Pentax 6x7 camera was shown at the 1966 Photokina as a prototype camera, and it was called the Pentax 220 and had chrome and black bodies. The official introduction was in 1969, with the name Pentax 6x7, and only black bodies were available. The Honeywell Pentax 6x7 was available for the US market, but here in the US, I rarely see the Honeywell Pentax 6x7 around; the vast majority were Asahi Pentax 6x7.

Dual Bayonet mount for longer or shorter focal length lenses.

 In 1976, the Pentax 6x7 (MLU) camera added a mirror lock-up mechanism, and in 1990, with their third modification, they made a few minor cosmetic changes to the camera. Now, the camera is named Pentax 67. No more 6x7. The fourth change camera in 1999 was when Pentax launched the Pentax 67II camera, which offers a built-in right-hand grip, a brighter viewfinder with interchangeable focusing screens, a more advanced AE metering system with three different modes, a dedicated time mode switch, a self-timer, and multiple exposure capabilities. 

 I own the Asahi Pentax 6x7, so mine is the second-generation camera with the mirror lock-up capability. The camera weighs a whopping 5 lbs. 5 oz without the wood grip. The camera is 7.5" wide by 6" tall by 6.75" deep, measuring from the back of the camera to the front of my 105mm f2.4 lens. The Pentax 6x7 cameras have a dual bayonet lens mounting system, with lenses from 35mm to 300mm fitting inside the body, similar to many 35mm cameras and lenses from 400mm to 1000mm mounting on the outer bayonet. Even the front lens cap has a bayonet mount on my camera, so it's not a clip or press-on style of a lens cap.
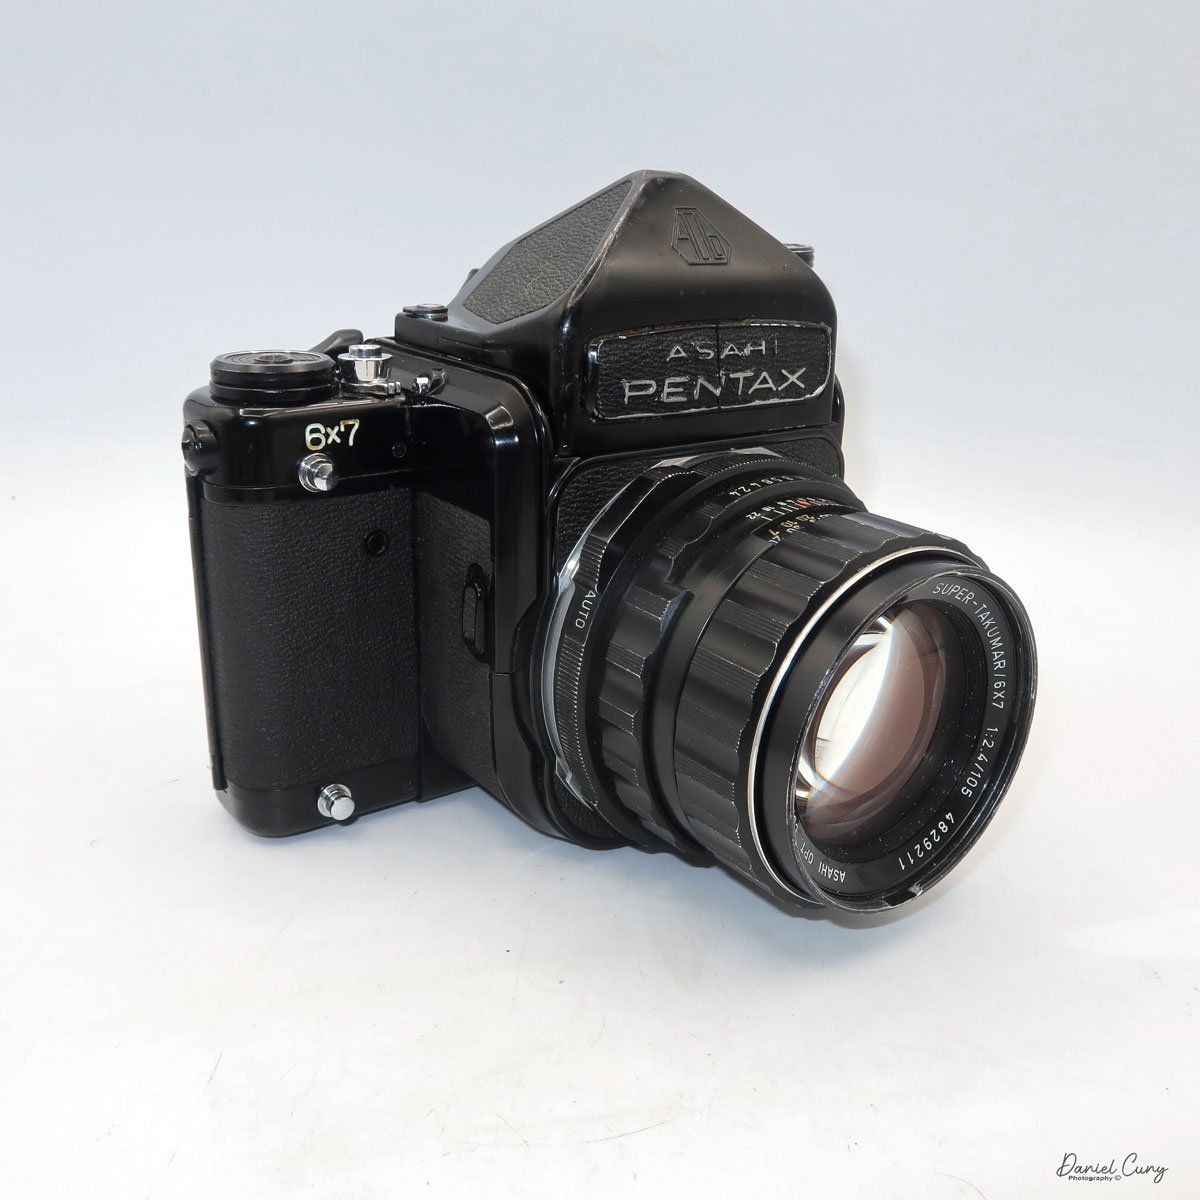
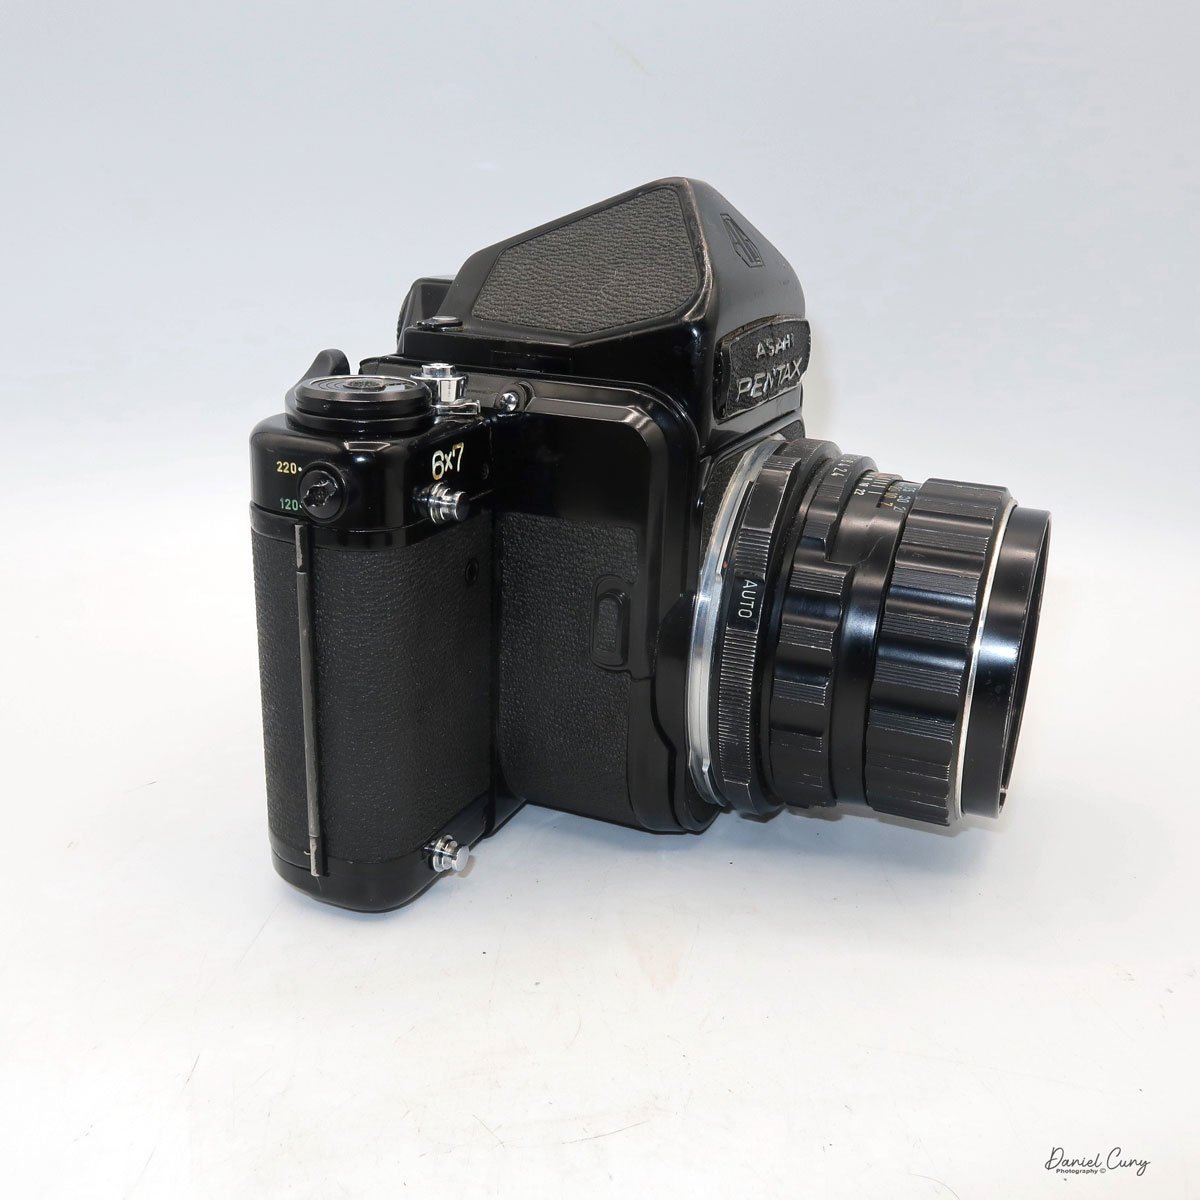
The Pentax 6x7 camera is a fully electronic camera system. The entire camera is dependent on the PX28, 6v battery. The meter, or the shutter, won't work without the camera battery. After putting in the battery, I discovered the metered finder was working, which was good news. At first, I thought it wasn't working, but after reading the manual, I learned that you need to remount the lens once the meter is removed so the lens will couple with the meter.  I didn't think it would work because there is a crack on the front running across the nameplate, but you never truly know until you try. With the fresh battery in the camera, I still wasn't sure the camera was working because there needed to be film in the camera for the shutter to fire. 

 Looking online, I did find a video showing a way to trick the camera into thinking there was film in the camera, which is by opening the back of the camera and, before closing the back, turning the frame counter to just past the first frame while holding the frame counter there and closing the back of the camera allows you to wind and fire the camera. The only issue is that there is no way to honestly tell if the shutter is opening or closing when you depress the shutter. You can tell at slower speeds by taking the lens off and looking into the mirror chamber to fire the camera. If you can see the film's pressure plate, you can tell if the shutter is opening and closing. What do you do to achieve faster shutter speeds?

Looking online, I did find a way to trick the camera into thinking there was film in the camera, which is by opening the back of the camera and, before closing the back, turning the frame counter to just past the first frame while holding the frame counter there and closing the back of the camera allows you to wind and fire the camera. The only issue is there is no way to honestly tell if the shutter is opening or closing when you depress the shutter. You can tell at slower speeds by taking the lens off and looking into the mirror chamber to fire the camera. If you can see the film's pressure plate, you can tell if the shutter is opening and closing. What do you do for the faster shutter speeds?

 One thing I did was use my cell phone in video mode and use the "slow motion" setting. I started the video and then tripped the shutter. I could then go back to the video and look at a few of the frames of the video tell if I could see the slit from the shutter move across the film plane. It did, so I knew the shutter was working on all shutter speeds. That's fantastic, so now I was good to go. I prefer to use my Sekonic meter for all my metering needs as they are always more accurate than most camera meters.

 Shutter speeds on the Pentax 67 camera range from 1/1000 to 1 sec. Along with "B" for timed exposures and "X" for flash sync, the shutter speed dial is on the far left side of the camera body and is turned with a large ring that is easy to grip and move. Just below the shutter speed dial is a battery check button, with a red light lighting up just to the right of the shutter speed dial if the battery is good.

Moving around the camera, on the front and the left side of the camera body are the flash sync terminals for both FP and X, and just below the flash terminals is the lens release knob, which needs to be pressed towards the camera's body to unmount the lens. To unmount the lens, press the lens release button and twist the lens counterclockwise. To mount the lens onto the camera body, line up the red dot on the lens to the red dot on the camera body and turn clockwise until the lens clicks into place.

 The mirror lock-up switch is on the other side of the camera body, still on the front. Pressing this switch locks the mirror up to reduce vibration in the camera, which is good for longer exposures or using longer lenses that are more sensitive to camera movement. On the far right side of the camera body is a switch for using either 120 or 220 film.

The film advance lever is on the top, far right side of the camera, with the frame counter inside the center of the winding lever. There is a serrated dial that you can turn to change the frame counter if needed. This is also the knob that I turn to trick the camera, as mentioned previously. Right next to the film advance lever is the shutter release button, which can be locked by turning the outer ring from the white dot to the orange dot to "locked."  

 On top of the meter, a finder is an on/off switch used to turn the meter on. Two silver buttons must be pressed on either side of the camera body to remove the finder and put on a different finder. You can lift the finder off the camera body to replace it with a few different viewfinders available for the camera. The metered finder extends over the shutter speed dial, so when metering, you can change shutter speeds to adjust the meter settings. You should remove the lens before taking the viewfinders off the Pentax 6x7 cameras, then put the lens back on the body once the viewfinder has been reattached.

To load film into the camera, pull down on the silver tab on the left side to open the back door. Two locking switches are on the bottom of the camera, just under where the film reels go. These need to be unlocked, allowing you to pull them down to load the take-up and fresh roll of film into the camera body. Once the film is in the camera, turn them to the locked position to keep them in place. Bring the leader to the take-up spool, thread it into the slot,  and advance the film to start the film advance. Bring the arrow on the film leader to the arrow next to the 120 at the top of the shutter curtain, close the back, and wind until the camera stops. You're now at frame 1 and ready to take 10 photos on a roll of 120 film.

I wanted to put the wood handle on the camera before I took the camera out for a spin and tried it out. I always thought it was odd to have a grip on the camera's left side, as it's the left hand that I cradle under the lens for focus and setting the aperture. Let's give it a try because so many people think it's a great selling point for the camera.  The wood handle also has a cold shoe for a flash attachment or other items you might want to put, like an external meter.

 To put the handle on the camera, you need to unscrew the locking screw, which is located in the middle between the two areas that fit onto the camera lugs, which are on the top and bottom of the left side of the camera. Snap the handle into position and screw down the locking screw to lock the handle into position, which also presses a small knob on the camera in. To take it off, unscrew the knob and pull out the knob and slide the handle up to take the handle off. The handle won't fit on the right side.

 The camera has four lugs located on the front and in each corner. These can be used for the camera strap to carry the camera vertically or horizontally or to put the wood handle on one side and the strap on the other. There are many ways to carry the camera comfortably while lugging 5 pounds around.

My Results:

This time, I walked through the neighborhood, taking a few photos. While I was taking my normal photos, I ran into a good neighbor who is an artist. He was showing me his studio, so I took a picture or two around his studio, then proceeded to take some of the regular photos I do when trying a new camera. 

 Here are the results of my walk through the neighborhood.

Conclusion:

I had a lot of fun shooting with this camera, considerably more than anticipated. I used the wood handle more as a tool to walk around with the camera than to shoot with it because it made transporting a 5-pound camera easy. I had the strap on the camera, but found the handle easier.

 My lens is very sharp, and the camera felt comfortable in my hand. The focus was smooth and accurate, the transport was soft, and all the camera operations seemed effortless. 

 I'll need to look into other lenses for the camera and possibly a few other accessories, as this is a keeper camera for now.

 Thank you for taking a few minutes from your day to read about a fun and extensive camera system to use.

 Until next week, please be safe.

 Here's a link to my other camera reviews if you want to see some of the other cameras in my collection.

 If you're interested in some of the vintage cameras and accessory items I have for sale, please look at my online store: 

Leica I

My Leica I camera

I purchased the Leica I camera and accessories around 6 years ago when I saw a local ad of someone wanting to sell off a recently departed family member's old cameras. I responded to the ad, and for some reason, the person liked my passion for cameras and photography, so when I heard that the camera they had from a grandparent was a Leica, it piqued my interest. They had mentioned that the camera was in good shape and had some accessories in a case; I told them I was interested in seeing what they had.

 I try not to get into situations where you meet someone with some valuable equipment at a random location, so for safety reasons for both parties, we met at a local police station, which was agreeable to both. When they pulled out the case and I saw it was an early Leica, my heart fluttered a bit. 

My Leica I outfit

 Pulling the camera from the case, I found it in excellent condition and working. All the shutter speeds sounded accurate to the ear, and the rangefinder and extra film cassette were in the metal container and within the case, too. The owner wanted to be sure the camera was going to a good home and not just being sold. I reassured the person that I planned on keeping the camera and shooting with it, which they loved.

 Since adding the Leica I to my collection, I've made a point to keep it in top condition. Every now and then, I take it out and give the shutter a few test clicks to ensure it's in good working order. However, due to my busy schedule, I hadn't had the chance to load a roll of film and actually use the camera until recently.

 I wanted to write about the Leica 1 for my blog about a month ago.  I took the camera out and started to put a roll of film into the camera to shoot with it, and the shutter jammed. What bad luck! I called my friend Allen Wade at CameraWerks in NY, who always does a terrific job servicing my cameras and lenses. I sent the Leica 1 along with a few other items to him to get serviced. About a month later, I received the cameras back from him, and they were in fabulous condition. At this point, I put a fresh roll of film into the camera to see how the camera worked so I could write about it.

The Company:

Oskar Barnack was a German optical engineer who revolutionized photography by inventing the first practical 35mm camera, the Leica I. Born in 1879, Barnack initially worked in the optical industry, eventually joining Ernst Leitz Optische Werke, a German company specializing in microscopes and optical instruments. His pioneering work in miniaturizing cameras led to the creation of the Leica, which forever changed the way photographs were taken.

Ad for Leica 1

 Before Barnack's innovation, photography relied on bulky, cumbersome cameras that used large-format glass plates or film sheets. These devices were difficult to transport and required long exposure times, limiting their usability. An enthusiastic amateur photographer, Barnack sought to develop a more compact and convenient camera system that would still produce high-quality images. He turned to 35mm cinema film, which was already used in the motion picture industry, and repurposed it for still photography. He aimed to create a small, lightweight camera that could capture multiple images on a single roll of film.

 Around 1913-1914, Barnack developed a prototype of what would later become the Leica (short for "Leitz Camera"). This early model, known as the "Ur-Leica," used perforated 35mm film and a horizontal transport mechanism. The key innovation was that the film was advanced in small increments, allowing multiple exposures on a roll rather than requiring a single frame per exposure. Barnack also incorporated a focal-plane shutter, providing precise control over exposure times.

 The outbreak of World War I delayed the commercialization of the Leica. Still, in 1924, Ernst Leitz II, head of the Leitz company, decided to move forward with production. The Leica I was officially introduced at the Leipzig Spring Fair in 1925, marking the beginning of the 35mm camera revolution. The camera instantly succeeded due to its portability, superior image quality, and innovative design.

 Leica cameras quickly became popular among professional and amateur photographers, particularly in journalism and street photography. Their ability to take quick, candid shots without cumbersome equipment made Leica the camera of choice for legendary photographers like Henri Cartier-Bresson and Robert Capa.

 Over the decades, Leica continued to innovate, introducing models such as the Leica II (1932) with interchangeable lenses and the Leica M series (1954), which refined the rangefinder design. The company also played a crucial role in developing optical advancements, such as high-quality lenses like the Summicron and Noctilux.

 Today, Leica remains an iconic brand known for its precision engineering and commitment to craftsmanship. Oskar Barnack's vision laid the foundation for modern photography, and his pioneering work continues to influence camera design and photographic culture worldwide.

My Camera:

The first thing I noticed when I started to use the Leica I was how compact the camera is. When the lens is retracted, the camera is one you can put into your coat pocket to have handy when traveling or just for everyday use. The camera is 5.25" wide by 2.5" tall, including the winding knobs and viewfinder, by 1 5/8" deep when the lens is retracted and 2.5" deep when the lens is extended. My Leica 1 weighs just under 1 lb. and comes in at 15.6 oz without film loaded into the camera. The serial number on my camera is 19569, which, according to the lists online, the camera was made in 1929, along with a bit over 8,000 made that year. The Leica 1 cameras were made between 1926 and 1931 and were popular, producing approximately 70,000 cameras during that time. My camera comes with a Leitz Elmar 50mm f3.5 lens, and I've looked everywhere but do not see a serial number on the lens. This could be because the camera didn't have interchangeable lenses, and the serial number for the camera was enough.

The early Leica is different from the later models as the rangefinder is separate and needs to be attached to the accessory shoe for the photographer to achieve fine focus on the subject. Once the photographer uses the rangefinder, they need to transfer the focus distance shown on the rangefinder to the lens focus before taking the photo, so the process is longer and more tedious. The viewfinder on the top is for composition purposes only.

 Also, the lens needs to be extended from the camera body and "locked" into position by turning the lens clockwise until you feel the lens cannot be turned anymore. Now you're in the "taking" position of the lens. To retract the lens for transportation or to put it away, turn it counterclockwise, press it back into the body, and put the lens cap on so you don't damage the optics. The lens on the Leica 1 isn't interchangeable due to a pin at the 11:00 position on the camera body, which prevents the lens from being unscrewed from the camera body. The pin also limits the lens's ability to focus only from the minimum focus distance of 1.5 feet to infinity. Unscrewing the pin will remove the lens from the body for servicing or cleaning if needed.

Also on top of the camera is the shutter speed dial with speeds of 1/500, 1/200, 1/100, 1/60, 1/40, 1/30, 1/20, and "Z" for timed exposures. You must lift and turn the dial to change the shutter speed. Still, it's always recommended to do so after you cock the shutter, which is done by winding the film advance lever until it stops. The shutter release is next to the film advance lever and just behind the switch for film advance, which is in the "A" position, flipping it to "R" for film rewind.

Loading the film on a Leica is different than what people are now used to when they load a 35mm camera. The back on early Leica's and rangefinder cameras do not swing open. You must remove the base plate by turning a switch on the bottom to the "open" position, then pull the baseplate off the camera. You can take out the film's take-up spool, which you can grab and pull out. The easiest way to load the camera is to put the film leader into the take-up spool, then pull a bit of the film leader out so you can slide the film cassette and take-up spool into the camera body at once. Push the cassette and take the spool into position, ensuring the film is behind the shutter. Put back on the baseplate and turn the switch to "locked." 

Before I wind to the first frame, I always take up the slack by turning the rewind knob a bit, so when I do wind to the first frame, I watch the rewind knob turn so I know the film is transporting across the shutter. Set the frame counter to 1, which is around the film advance knob and can be moved by two pegs on either side of the knob. Double-check to ensure the film advance switch is in the "A" position and wind to your first frame.

 Now that I have the camera loaded with film, I'm going to take a stroll through the neighborhood and see how it performs.

My Results.

After attaching the rangefinder to the camera, I wanted to get the whole experience of what it was like to photograph with the Leica I, as people did almost 100 years ago. I also have my trusty Sekonic L-308X-U around my neck for accurate metering; I went walking through the neighborhood, focusing on the subject, then transferring from what the rangefinder said the focus. Using the meter to get proper meter readings and setting both the shutter and aperture to the meter settings. I really took my time taking photos with this camera.

 Here are a few of the different images I took with the early Leica I camera.

Conclusion:

I can see why people would have liked and wanted to use this camera almost 100 years ago. It's small, compact, and lightweight. The process of taking photos was slower. Still, it was fun compared to what they needed to do 100 years ago. As a photographer, taking your time, metering your subject, focusing on your subject, and composing the photo was fun. It's much different than what we have now with autofocus, automatic metering, and film advance.

I made a short video on the Leica 1 Camera, which shows the controls and loading the camera with film.

 I want to start using the Leica I regularly. It's quiet to shoot with, the lens is sharp, and it's small and compact. Overall, it's a great and fun camera.

 Thank you for taking a few minutes from your day to read about this old gem of a camera.

  I'll be taking next week off, as I'll be helping at a photo conference all week. I'll see you in a couple of weeks. Until then, please be safe.

Ilford Advocate Camera

It's been a year since I first laid eyes on the Ilford Advocate camera, and I've been eager to share my experience with it. The journey began in England, where my wife and I stumbled upon a charming camera and photo reseller, Juliano of Cameras London, on Portabello Road. Little did I know that this encounter would lead to the acquisition of a unique piece of photographic history.

My Ilford Advocate camera and case.

 My wife and I went to Portabello Rd in London on Friday to look at the antiques there and for me to look for photo items, which there were few of, but I was told that Juliano would be there the next day and he was the person to see. While there wasn't much time to return the next day, I took the bus early and arrived while Juliano set up. My intention wasn't to purchase an Advocate, but as we talked and I mentioned I had one before, he said he had a couple and was willing to part with one. He didn't have it with him, so we arranged to have it shipped to my home in the US.

When the camera arrived and a couple of other items I was buying from him, it was in excellent working condition. I was delighted, as the camera isn't typical but more of an oddity. While I collect "colored" cameras, the white color of this camera makes it stand out in the crowd of mainly back cameras. I was happy to have the Ilford Advocate back in the collection, in excellent working condition, and the full-fitted leather case, too.

The Company:

Front view of Ilford Advocate camera

Ilford is known less for its cameras than for its film, photo paper, and now inkjet printing paper, at least within the photo community. The company has had a long history with many name changes. Still, it's always been a significant name in the photo industry before companies like Leica, Rollei, or even Kodak.

 The original company name was Britannia Works, which was started by Alfred Harman in 1879 by making Gelatine Dry Plates in his basement on Cranbrook Rd, in Ilford, Essex. Harman initially started printing services in 1863, and in 1878, he patented "producing enlarged photographs with artistic finish." By 1880, Harman moved to Roden St. and started trading as Brittania Works Company. By 1883, the company was expanding with the popularity of photography, and Harman opened a new factory to produce plates.

Ilford Ad from 1890s

By 1890, Harman produced a popular book, "The Manual of Photography," and the book, "The Ilford Manual of Photography," was created under that name until 1958, when it was in its 5th edition. In 1891, Kodak started producing plates in Harlow, Middlesex, as a competitor to Britannia Works. In 1897 and again in 1903, Eastman Kodak attempted to purchase Britannia Works Company, but both times were unsuccessful. In 1898, Alfred Harman retired at age 50 but did consulting work for many years. In 1900, the company changed its name to Ilford, Ltd. The town council was happy and objected, but with persistence, the name was changed.

 In the 1960s, the company was owned by Ciba, and they merged with the French company Lumiere and Swiss company Tellko and became the Ilford Group. In 1989, the Ilford Group was purchased by the US-based International Paper Company, and together, they merged to become Ilford Anitec. From 1990 to now, the company has gone through a few other acquisitions and receiverships, and the current time is when the parent company is Harman Technology. Through it all, they still produce tremendous film, photo paper, film, and paper chemistry.

 To my knowledge, only one camera manufacturer was under the Ilford umbrella in this long-winded explanation of the Ilford company. That is Kennedy Instruments Ltd., which designed and built the Advocate starting in 1947 and updated it in 1952. The rarely-seen Monobar cameras were produced from 1958 to 1967. All the other cameras with the Ilford name were created by companies like Dacora, AGI, or Kershaw-Soho.

My Camera:

The first thing I noticed about the camera, other than the apparent white color, is the weight of the camera. Or the camera's lack of weight as it's a very light camera. The camera is made from a die-cast aluminum body with an enameled white finish. The camera body is smooth to the touch and lacks any leather or leatherette, which is uncommon for cameras. My camera measures 5 3/8" wide by 3" tall by 2.5" deep and weighs 1lb 1.5oz without the fitted leather case.

 The camera is straightforward and doesn't have a lot of extra knobs or buttons to do different things on a camera which is what makes this one so unique. To open the back to load the film, you only need to pull open the aluminum bar on the right side of the camera, which releases the lock holding the back closed. Once you open the, I noted chrome gear by the advancing cogs and onto the film advance spool. My first thought was, That's unusual. Then when I tried to put in the film, the rewind knob didn't pull up like the majority of 35mm cameras to load the film. As I poked around, I noticed that the rewind knob is actually hinged, and it pulls away from the body, which allows the photographer to put the film into the camera body.

It's always my inclination to put the film cassette into the camera first, then bring the leader to the take-up spool to load. But looking at the instruction manual, they suggest putting the film leader into the take-up spool first, then putting the cassette after. Having the rewind knob on a hinge makes perfect sense to do it that way. Once I put in the film, I always take the slack of the film with the rewind knob, so when I go to advance the film, I know the film is transporting when I see the rewind knob turn ad I advance to the next frame.

 The only other settings needed to take photos are all around the Dallmeyer Anastigmat 35mm f3.5 lens on my camera. There are three different rings around the lens. On the outer or the largest ring, which has "Advocate" printed on the top, is the shutter speed dial, with speeds of 1/200, 1/150, 1/100, 1/50, 1/25, and "B," which are set according to a red dot on the out portion of the ring. The next ring from the shutter speeds is the focus distance, which has the closest focus distance of 3 feet to Infinity. The inner ring has aperture settings, which go from f3.5 to f22. My first inclination was that the inner ring, which is actually on the lens itself, would have the focus ability, but it's the aperture settings. I had to get used to that when shooting.

To take the photos, the shutter release is a pulling action as you pull the shutter release back towards the camera body as opposed to the most common pressing the shutter release down. It's more similar to an Exakta or Topcon Super D. You get used to it when shooting. The feel of the shutter is firm, and you can hear the rotary shutter releasing and firing, so there is no missing if the camera took the photo. There is an auxiliary remote shutter socket on the front of the camera if you choose to put the camera on a tripod and shoot with a more prolonged exposure.

 The viewfinder on the camera is bright and easy to compose images. My camera is the second version made, as the original Advocate cameras didn't have the flash sync capability, which is located at about five O'clock on the lens and is a double-prong sync cable. The original model also has a chrome pressure plate to hold the film flat.

Viewfinder and shutter release on Ilford Advocate camera

 Here's the fun and one of the more exciting things I like about this camera. Once you've shot all the photos and want to rewind the film, there is no button to disengage the winding sprocket. All you need to do is press down the winding knob down, which presses the gearing system down, and the winding gear is free moving, and the film can easily rewind into the canister. I really enjoyed the simplicity of this system.

My Results:

I took the camera to a local farmers market and used a real "shoot from the hip" method. I tried to be somewhat discrete, which may be difficult with a bright white camera around your neck, but here are some of the results.

Conclusion:

I really enjoyed shooting with this camera. The biggest obstacle I had was remembering which ring did which function. I kept going back to the inner ring, which was closest to the lens and was the focus, but it was an aperture, so I needed to keep this in mind during shooting. If I were to use it more often, it wouldn't be that big of an issue; I also liked that the case was in excellent condition, which is only sometimes the case for older cameras.

 Thank you for taking time from your schedule to look over this post.

 Until next week, please be safe.