Minolta-35 Model II

My Minolta-35, Model II

The Minolta-35 Model II camera I have was an unexpected discovery, purchased with several other cameras through an online auction. It wasn't the camera I was originally after in the lot, but the only thing that distinguished it in the photo was the fitted case, with 'Minolta' proudly displayed on the face.

 There were so many different models of camera from Minolta during this timeframe that I wasn't sure what was actually in the fitted case. Still, when I received the "lot" of cameras and uncased the Minolta-35, someone had painted the camera black. And whoever painted it did an abysmal job of it. I only wish I had photos of the camera in that state, but I didn't think of it then. The camera was painted black, and the shutter wasn't working. The good news is that the camera had a good and clean lens.

 Over the years, I have brought the camera to a few different collectible camera shows in hopes of selling it, but no sales have been made. 

 One day, a few months ago, I was browsing the cameras on my shelf, looking for one to write about, when I picked up the Minolta. I felt a personal connection to it, and determined to do a blog post, I sent it off to my trusty camera technician, Allen, at CameraWerks in NY to have it CLA'd. Despite its modest value, the fact that it's from the early 1950s and a very respectable Leica thread mount 'clone' made it worth the investment for me.

My Minolta-35, Model II with case.

 Before I sent the camera to Allen, I wanted to get the black paint off the camera and bring it back to the original chrome camera it was. I had bought some Acetone to see if I could gently get rid of the paint and not ruin any of the other parts of the camera. Unfortunately, the Acetone didn't work well and didn't take much of the paint off. Then, I noticed that if I used my fingernail, the paint would chip off reasonably easily. I also noticed that in our kitchen, we had some bamboo skewers, which seemed to work OK, so to get into some of the tighter spots, I used the bamboo skewer, and to get into the very tight areas, I used the tip of some of the metal tweezers I have for some very minor repairs.

 The camera still has some very minor spotting of black paint, as you'll see in the photos in the article, but 99.8% of the paint is gone. The camera looks considerably better than it did before. It's in great working condition, and even the rangefinder is clean and accurate, so it was time to do my blog on this early Minolta 35mm rangefinder camera.

The Company:

Minolta was a pioneering Japanese camera manufacturer known for its innovative contributions to photography. Founded in 1928 as Nichi-Doku Shashinki Shōten (which translates to "Japanese-German Camera Company"), the company was renamed Minolta in 1933. The name Minolta is derived from "Mechanismus, Instrumente, Optik und Linsen von Tashima," reflecting its German-Japanese technological collaboration.

Ad for Minolta 35 camera.

 Minolta's early cameras were heavily influenced by German designs, particularly Leica and Contax rangefinders. The company released its first camera, the Nifcarette, in 1929, followed by various medium-format folding cameras in the 1930s. After World War II, Minolta resumed camera production, releasing the Minolta-35 in 1947, which became Japan's first 35mm camera with a coupled rangefinder.

 Minolta's breakthrough came in 1958 with the Minolta SR-2, its first single-lens reflex (SLR) camera. Throughout the 1960s, the company expanded its SLR lineup, introducing the Minolta SR-T 101 in 1966, which featured an innovative through-the-lens (TTL) metering system. The 1970s saw Minolta partner with Leica, resulting in co-developed cameras like the Leica R3 and Minolta XE-7.

 One of Minolta's most revolutionary releases was the Minolta XD-7 (XD-11 in North America) in 1977, the world's first camera with aperture-priority and shutter-priority automatic exposure modes. This technological advancement set the stage for further automation in cameras.

 In 1985, Minolta changed the photography world with the Minolta Maxxum 7000 ( Alpha 7000 in Japan and Dynax 7000in Europe). This was the first SLR camera with fully integrated autofocus, making it far easier for photographers to achieve sharp images quickly. The Maxxum series gained popularity, pushing competitors like Canon and Nikon to accelerate their autofocus developments.

During the 1990s, Minolta expanded into digital imaging and compact cameras while maintaining its SLR dominance with the Dynax (Maxxum) series. The Minolta RD-175, released in 1995, was one of the earliest digital SLRs, marking Minolta's transition into the digital era.

 In 2003, Minolta merged with Konica, another Japanese camera giant, to form Konica Minolta. However, due to declining camera sales, Konica Minolta exited the camera business in 2006, selling its assets, including the popular A-mount system, to Sony. This acquisition helped Sony establish itself in the DSLR market, leading to the Alpha series that continues today.

Though Minolta as a brand no longer produces cameras, its legacy lives on through Sony's Alpha series, which traces its roots back to Minolta's innovative technologies.

My Camera:

My Minolta-35, Model II is 5 3/8" wide by 3" tall by 3" deep, which includes the Chiyoko Super Rokkor 5cm (50mm) F2.8 lens. If I take the lens off, the body only is 1.5" deep. The camera weighs 1 lb. 10.9 oz is a very comfortable camera size and weight, and it fits into my hands nicely. The Minolta-35 Model II has shutter speeds ranging from 1/500 down to 1 second, with "T" for timed exposures and "B" for bulb. 

 The Minolta-35 Model II also splits the shutter speeds into two different dials on the camera with the higher speeds on the top dial, which go from 1/500 to 1/25 and "B" and from 1/25 to 1 sec, and "T" on the secondary shutter speed dial on the front of the camera just above the self-timer. To set the shutter speed, you'll need to lift up the dial and turn it to the desired speed for the exposure. Changing the shutter speeds should only be done once you cock the shutter.

To use the secondary or lower shutter speeds, the top dial needs to be set to 1/25, and the lower speed dial needs to be set at whatever of the slower speeds you'll be shooting. This method is prevalent for Leica copy cameras from this era. 

 The Chiyoko Super Rokkor lens on my Minolta-35 is smooth and in excellent condition. To focus, similar to other Leica thread mount lenses, a locking pin is used to lock the lens to the infinity position. To release the lock and focus to a closer range, press the release button and turn the lens to the desired focus distance. Inside the camera is a built-in rangefinder, which will aid the photographer in the distance needed to take a sharp photo. Along the outer rim of the lens is the lens's aperture ring, which goes from F2.8 to F22.

The shutter release is on the top of the camera, just to the right of the shutter speed dial. A small crown-shaped piece surrounds it, which can be removed to use a cable release for the timed or longer exposure times built into the camera.

 Just above the shutter release is the rewind switch, which you slide to the "R" position to release the camera's drive gear so you can rewind the film back into the film canister when you complete the roll of film. Just to the right of the rewind switch is the film winding knob which has an arrow on top to show the user which direction to turn to advance the film to the next frame. At the bottom of the film winding knob is the frame counter which you need to zero out when you load a new roll of film into the camera so you'll know how many photos you've taken on the roll you loaded into the camera.

On the far left of the camera is the film rewind knob. Lift the knob up to make the rewinding of the film back into the film canisters easier. Once the back of the camera is open, you can lift the rewind knob even higher to remove or load the film canister in or out of the camera.

 Right in the middle of the camera, on the top plate, is the Minolta-35 name along with the serial number, which on my camera is 90899, and Chiyoda Kogaku. I enjoy the modernistic font used on the older Minolta camera, which is very elegant.

Top plate with name on the Minolta-35, Model II camera.

 On the back of the camera is the viewfinder window for focus, and on the outside is a dioptric adjustment. This is for people who wear glasses. Turning the dial around the finder window allows you to adjust your glasses prescription to correct vision issues. You can put the camera to your eye without wearing your glasses and still get a sharp photo. In the center of the back of the camera is the flash sync plug, which is just below the accessory shoe used for a flash attachment.

To open the camera to load film, there is a small knob on the bottom of the Minolta-35 that you'll need to turn counterclockwise until the "open" dot is lining up with the arrow. When this happens, the back of the camera springs open, and you load the camera just like you would any standard 35mm camera. 

Lift the rewind knob to load the film cassette into the camera. Pull the leader across the drive gears and put the film leader into the slot on the take-up spool. Take the tension of the film up by turning the rewind knob clockwise to take the slack up on the film. Close the back turn the open/close knob to the "closed" position to lock the camera's back, and wind to your first frame. Watch that the rewind knob is turning when you advance the film so you know the film is transporting in the camera, and set the frame counter to number one.


My Results:

I loaded my Minolta-35 camera with a roll of Ilford Pan F Plus 50 ISO black-and-white film. I wanted to use a slow speed to see how the camera would perform in lower-light situations. I also had my trusty Sekonic L-308 meter with me to achieve accurate exposures. I knew I could always count on Sekonic to give precise light readings. 

 Now that I had film loaded into the newly serviced camera, I walked through my yard and neighborhood to take photos with the Minolta-35 camera. Here are a few of the images I took on my walk.

My Conclusion:

The camera was enjoyable to photograph with. The rangefinder was bright and accurate. I tried many slow shutter speeds to see how the camera performed under these low-light circumstances. I had a great time using this camera and want to continue using it. The overhaul made a tremendous difference; without the black paint on the camera, it also looks terrific.

 Thank you for taking a few minutes from your busy schedule to read about this excellent rangefinder camera from Minolta

 Until next week, please be safe.

Leica I

My Leica I camera

I purchased the Leica I camera and accessories around 6 years ago when I saw a local ad of someone wanting to sell off a recently departed family member's old cameras. I responded to the ad, and for some reason, the person liked my passion for cameras and photography, so when I heard that the camera they had from a grandparent was a Leica, it piqued my interest. They had mentioned that the camera was in good shape and had some accessories in a case; I told them I was interested in seeing what they had.

 I try not to get into situations where you meet someone with some valuable equipment at a random location, so for safety reasons for both parties, we met at a local police station, which was agreeable to both. When they pulled out the case and I saw it was an early Leica, my heart fluttered a bit. 

My Leica I outfit

 Pulling the camera from the case, I found it in excellent condition and working. All the shutter speeds sounded accurate to the ear, and the rangefinder and extra film cassette were in the metal container and within the case, too. The owner wanted to be sure the camera was going to a good home and not just being sold. I reassured the person that I planned on keeping the camera and shooting with it, which they loved.

 Since adding the Leica I to my collection, I've made a point to keep it in top condition. Every now and then, I take it out and give the shutter a few test clicks to ensure it's in good working order. However, due to my busy schedule, I hadn't had the chance to load a roll of film and actually use the camera until recently.

 I wanted to write about the Leica 1 for my blog about a month ago.  I took the camera out and started to put a roll of film into the camera to shoot with it, and the shutter jammed. What bad luck! I called my friend Allen Wade at CameraWerks in NY, who always does a terrific job servicing my cameras and lenses. I sent the Leica 1 along with a few other items to him to get serviced. About a month later, I received the cameras back from him, and they were in fabulous condition. At this point, I put a fresh roll of film into the camera to see how the camera worked so I could write about it.

The Company:

Oskar Barnack was a German optical engineer who revolutionized photography by inventing the first practical 35mm camera, the Leica I. Born in 1879, Barnack initially worked in the optical industry, eventually joining Ernst Leitz Optische Werke, a German company specializing in microscopes and optical instruments. His pioneering work in miniaturizing cameras led to the creation of the Leica, which forever changed the way photographs were taken.

Ad for Leica 1

 Before Barnack's innovation, photography relied on bulky, cumbersome cameras that used large-format glass plates or film sheets. These devices were difficult to transport and required long exposure times, limiting their usability. An enthusiastic amateur photographer, Barnack sought to develop a more compact and convenient camera system that would still produce high-quality images. He turned to 35mm cinema film, which was already used in the motion picture industry, and repurposed it for still photography. He aimed to create a small, lightweight camera that could capture multiple images on a single roll of film.

 Around 1913-1914, Barnack developed a prototype of what would later become the Leica (short for "Leitz Camera"). This early model, known as the "Ur-Leica," used perforated 35mm film and a horizontal transport mechanism. The key innovation was that the film was advanced in small increments, allowing multiple exposures on a roll rather than requiring a single frame per exposure. Barnack also incorporated a focal-plane shutter, providing precise control over exposure times.

 The outbreak of World War I delayed the commercialization of the Leica. Still, in 1924, Ernst Leitz II, head of the Leitz company, decided to move forward with production. The Leica I was officially introduced at the Leipzig Spring Fair in 1925, marking the beginning of the 35mm camera revolution. The camera instantly succeeded due to its portability, superior image quality, and innovative design.

 Leica cameras quickly became popular among professional and amateur photographers, particularly in journalism and street photography. Their ability to take quick, candid shots without cumbersome equipment made Leica the camera of choice for legendary photographers like Henri Cartier-Bresson and Robert Capa.

 Over the decades, Leica continued to innovate, introducing models such as the Leica II (1932) with interchangeable lenses and the Leica M series (1954), which refined the rangefinder design. The company also played a crucial role in developing optical advancements, such as high-quality lenses like the Summicron and Noctilux.

 Today, Leica remains an iconic brand known for its precision engineering and commitment to craftsmanship. Oskar Barnack's vision laid the foundation for modern photography, and his pioneering work continues to influence camera design and photographic culture worldwide.

My Camera:

The first thing I noticed when I started to use the Leica I was how compact the camera is. When the lens is retracted, the camera is one you can put into your coat pocket to have handy when traveling or just for everyday use. The camera is 5.25" wide by 2.5" tall, including the winding knobs and viewfinder, by 1 5/8" deep when the lens is retracted and 2.5" deep when the lens is extended. My Leica 1 weighs just under 1 lb. and comes in at 15.6 oz without film loaded into the camera. The serial number on my camera is 19569, which, according to the lists online, the camera was made in 1929, along with a bit over 8,000 made that year. The Leica 1 cameras were made between 1926 and 1931 and were popular, producing approximately 70,000 cameras during that time. My camera comes with a Leitz Elmar 50mm f3.5 lens, and I've looked everywhere but do not see a serial number on the lens. This could be because the camera didn't have interchangeable lenses, and the serial number for the camera was enough.

The early Leica is different from the later models as the rangefinder is separate and needs to be attached to the accessory shoe for the photographer to achieve fine focus on the subject. Once the photographer uses the rangefinder, they need to transfer the focus distance shown on the rangefinder to the lens focus before taking the photo, so the process is longer and more tedious. The viewfinder on the top is for composition purposes only.

 Also, the lens needs to be extended from the camera body and "locked" into position by turning the lens clockwise until you feel the lens cannot be turned anymore. Now you're in the "taking" position of the lens. To retract the lens for transportation or to put it away, turn it counterclockwise, press it back into the body, and put the lens cap on so you don't damage the optics. The lens on the Leica 1 isn't interchangeable due to a pin at the 11:00 position on the camera body, which prevents the lens from being unscrewed from the camera body. The pin also limits the lens's ability to focus only from the minimum focus distance of 1.5 feet to infinity. Unscrewing the pin will remove the lens from the body for servicing or cleaning if needed.

Also on top of the camera is the shutter speed dial with speeds of 1/500, 1/200, 1/100, 1/60, 1/40, 1/30, 1/20, and "Z" for timed exposures. You must lift and turn the dial to change the shutter speed. Still, it's always recommended to do so after you cock the shutter, which is done by winding the film advance lever until it stops. The shutter release is next to the film advance lever and just behind the switch for film advance, which is in the "A" position, flipping it to "R" for film rewind.

Loading the film on a Leica is different than what people are now used to when they load a 35mm camera. The back on early Leica's and rangefinder cameras do not swing open. You must remove the base plate by turning a switch on the bottom to the "open" position, then pull the baseplate off the camera. You can take out the film's take-up spool, which you can grab and pull out. The easiest way to load the camera is to put the film leader into the take-up spool, then pull a bit of the film leader out so you can slide the film cassette and take-up spool into the camera body at once. Push the cassette and take the spool into position, ensuring the film is behind the shutter. Put back on the baseplate and turn the switch to "locked." 

Before I wind to the first frame, I always take up the slack by turning the rewind knob a bit, so when I do wind to the first frame, I watch the rewind knob turn so I know the film is transporting across the shutter. Set the frame counter to 1, which is around the film advance knob and can be moved by two pegs on either side of the knob. Double-check to ensure the film advance switch is in the "A" position and wind to your first frame.

 Now that I have the camera loaded with film, I'm going to take a stroll through the neighborhood and see how it performs.

My Results.

After attaching the rangefinder to the camera, I wanted to get the whole experience of what it was like to photograph with the Leica I, as people did almost 100 years ago. I also have my trusty Sekonic L-308X-U around my neck for accurate metering; I went walking through the neighborhood, focusing on the subject, then transferring from what the rangefinder said the focus. Using the meter to get proper meter readings and setting both the shutter and aperture to the meter settings. I really took my time taking photos with this camera.

 Here are a few of the different images I took with the early Leica I camera.

Conclusion:

I can see why people would have liked and wanted to use this camera almost 100 years ago. It's small, compact, and lightweight. The process of taking photos was slower. Still, it was fun compared to what they needed to do 100 years ago. As a photographer, taking your time, metering your subject, focusing on your subject, and composing the photo was fun. It's much different than what we have now with autofocus, automatic metering, and film advance.

I made a short video on the Leica 1 Camera, which shows the controls and loading the camera with film.

 I want to start using the Leica I regularly. It's quiet to shoot with, the lens is sharp, and it's small and compact. Overall, it's a great and fun camera.

 Thank you for taking a few minutes from your day to read about this old gem of a camera.

  I'll be taking next week off, as I'll be helping at a photo conference all week. I'll see you in a couple of weeks. Until then, please be safe.

Zeiss Ikon Super Nettel

Upon my first encounter with the Super Nettel camera, I was immediately drawn to its understated elegance and subtle Art Deco influence. This is my second Super Nettel, having previously owned the Super Nettel II, a similar model with a few distinct modifications.

My Zeiss Ikon Super Nettel Camera from 1934

 When my wife and I were in Paris earlier this year, I always enjoyed visiting local flea markets to look for anything photographic, whether it's cameras, lenses, old negatives to digitize, daguerreotypes, or just photo nickknacks or accessories. I made my way to their larger flea market area on a Saturday morning, and in one of the stalls, a lovely gentleman had some Leicas and other rarer cameras. I would have liked to purchase more than I did, but I'd pick up this very nice looking and working Super Nettel camera. In the back of my mind, I always pictured myself doing a blog post on it, especially since the camera was in good working condition, especially for a camera built 90 years ago.

 The Company:

Zeiss Ikon, a company formed in 1929 through the merger of four prominent camera companies in Germany, including Ernemann, Goerz, Ica, and Contessa-Nettel, was a significant investment by the Carl Zeiss Foundation. The company had two main divisions: the camera and the optical. 

 With the new company's formation, almost all of the cameras had Carl Zeiss lenses, and the other companies that had optical manufacturing, like Goerz, had to shut down their optical divisions. With the formation of the new company, almost all of the cameras were using Compur shutters, and like the optical companies, the majority of the shutter companies were also absorbed within the new company.

This group was one of the biggest manufacturers of cameras and lenses in the world, producing many top-quality 35mm cameras like Contax and several high-quality folding cameras like Super Ikonta, which to this day are highly desirable due to their workmanship and quality optics. Until WWII, Zeiss was also a major manufacturer of movie cameras and medical optics.

The cover of the instruction manual. Thank you Pacific Rim Camera.

 After WWII, Zeiss was split into East and West German companies. The company was in Stuttgart in the West, and there were disputes with East Germany about the trademark. The West German ceased production of cameras in 1972. In East Germany, many of the factories were dismantled and sent to the Soviet Union. The Soviet camera manufacturer Kiev received much of the equipment, and in 1948, the Zeiss company became government-owned

 In 1948, the company introduced the new Contax S model, which had a different look from their earlier line of rangefinder cameras, but due to the split between different countries, there were trademark and naming disputes with West Germany, so in 1958, the company changed the name to VEB Kinowerke Dresden and later was rolled into Pentacon.

 After Germany's unification, Carl Zeiss reintroduced the Zeiss Ikon name and produced a rangefinder camera that was introduced at Photokina in 2004. The camera was built by Cosina in Japan and had the Leica M mount for lenses. Like the Contax G and G2, there were lenses made in both Japan and Germany for the camera.

My Camera:

For me, the reason I enjoy shooting with a Rangefinder 35mm camera is due to a few different reasons. The cameras are smaller and more compact to carry. They are less noisy to photograph due to the shutter system and not having the noise of the clunking mirror flopping up and down. Granted, the rangefinder focus is more challenging to use. It takes some time to get used to, or the ability to see what you're getting when you put on different lenses, so there is a trade-off between an SLR and a Rangefinder-style camera.

 The Super Nettel camera was made in 1934 as a "less expensive" camera to their Contax line. To open the front door to expose the lens system, there is a button on the top center of the top plate you press in, and the lens, which is attached to the bellows, pops out. My camera has the less expensive Carl Zeiss Jena 5cm (50mm) f3.5 Triotar lens. The camera had a more expensive Zeiss Tessar 5cm f2.8  or 5cm f3.5 lens. Around the lens are three screws in the 2 O'clock, 5 O'clock, and 8 O'clock positions, which are for holding on an accessory filter or the lens hood.

When closed, my camera measures 5.5" wide by 3" tall by 1.5" deep. When the lens is exposed, it is 4" deep, including the front door, which folds down. The camera weighs 1 lb, 6.3oz. 

 Around the lens is the aperture control, which goes from F3.5 to f22. The Super Nettle incorporates the same or a very similar rangefinder system as the Super Ikonta cameras. Around the outer rangefinder window is a knurled ring that you turn to focus the rangefinder system, bringing the two images together to get a focused image. On the outside of the knurled ring is the focus distance in meters, along with a small depth of field scale.

Note the three screws aaround the lens to hold the accessory filters and hood.

 To retract the lens and close the front door for travel, there are two knobs on the outside of the door that you press in, and at that point, you can press the lens back into the camera body, which will also close the front door, which will lock once pushed in.

 On the back of the camera are two windows. The window on the left is the viewfinder for composing the photo, and the window on the right is the rangefinder window for focus. They are both pretty small windows, but they do an adequate job.

The left window is the viewfinder, and the right is the rangefinder.

On top of the camera is an accessory show for putting on an accessory viewfinder, which has a few different options according to the instruction manual. Next to the accessory show is the frame counter, and next to the frame counter is the advancing knob which also incorporates the shutter speed settings and cocks the shutter. Inside the winding knob is the shutter release. On the far left side is the camera's rewind knob to retract the film when you're finished shooting the entire roll of film. In between the frame counter and the winding knob is a small button. This button unlocks the winding sprocket, so when you rewind the film into the canister, you don't rip off the sprockets of the film.

From left to right are Rewind knob, Viewfinder window, Accessory Shoe with Opening button in front of AS, Frame Counter, Rewind unlock, Winding knob with Shutter Speeds.

To take the back off to load the film, you'll need to look at the bottom of the camera, where there are two handles on either end of the camera. Flip up the handle and turn the handle 90 degrees. One knob will go clockwise and the other counterclockwise. The back will slide off the camera, exposing the incredible metal rolling curtain-style shutter system, the same as the Contax and other Zeiss cameras have incorporated into them.

 You load the camera like you would any other 35mm camera with the film canister going on the left, pulling the leader to the take-up spool, and making sure the sprockets are engaged with the "advancing" sprocket, which is advancing the film across the shutter. Once on the take-up spool, I always take up the slack on the rewind knob, so when I put the back on and advance the film, I watch for the knob to turn when the film pulls out of the canister s. I know the camera is loaded correctly. To put the back on, slide the back into the camera and turn the locking handles the opposite way, and the back is locked into position.

My results:

I need to practice what I teach. I only got a few good photos from this roll of film, as after the sixth frame, the film sprockets tore, and the film didn't advance through the camera. However, the frames I did get were well-exposed and very sharp.

Conclusion:

What another fun camera to shoot with! I enjoyed the camera's ability to focus and handle when out and about shooting. Since I had a mishap with the film tearing, I wanted to get the blog out. I will add more photos down the road when I take the camera for a trip some weekend, and I want a great-quality camera with a very sharp lens to be creative.

 I already have the camera picked for my post next week, which I hope you'll come back to look at at your leisure. 

 Until next week's post, please be well and safe.


Robot Royal 36 Camera

Being a big fan of The Robot cameras and having done an earlier blog post on the Robot Luftwaffen Eigentum camera, I wanted to get a camera I could use when we went on vacation or just out for the weekend. Years ago, I came across an excellent and working condition Robot Royal 36 camera. It was from an online auction, so I made a relatively low offer and won it.

 When I received it, I was surprised by the weight and heft of this particular camera. I put it through routine tests to see if the shutter was indeed opening and closing, which it was. The lens was clean, another positive, and the transport was active and in good working condition.

 When COVID hit, I was laid off from one of my favorite jobs. I started writing my camera blog. After being off work for ten months, I got hired for a better position and loved the job, company, and boss, but I put the camera on my shelf for the next four years until I recently retired and started writing my camera blog again.

History:

Otto Berning & Co. started in Dusseldorf, Germany, in 1933. Otto Berning and Co. began to manufacture amateur cameras in 1934 when a young watchmaker in his 30s, Heinz Kilfitt, designed the first compact camera for what Robot would be so well known for. The design had a spring-loaded motor winder, a unique item brought to the camera industry due to his watchmaking skills. Heinz Kilfitt also designed the camera to have a 24x24mm film format. He offered the format size to both Kodak and Agfa, who rejected it, so he sold the design to a young Hans Berning, who was only 23 and worked for his father's company. 

 Robot cameras provide a film format of 24x24mm on most of their cameras. An advantage of the 24x24mm frame size was that the photographer could get 50 images on a roll of film instead of the standard 36 in the traditional 24x36mm format. Another advantage was that there was no need to turn the camera for vertical shots.

Some unique features of the Robot cameras are that they use a rotary shutter and sprocket film drive system, which are more common in the cine cameras of the time. Robot cameras also have a 90-degree switchable viewfinder, allowing the photographer to point the camera in a different direction while looking through the viewfinder and taking photos. All the cameras have a winding motor of film advance system that allows the photographer to wind the motor and shoot rapidly up to 5-6 frames on a single wind, depending on the camera.

 Robot also provided either Carl Zeiss or Schneider-designed lenses on their cameras, which gave the photographer unparalleled sharpness in their images. The cameras were die-cast zinc and stamped stainless steel bodies chalked full of clockwork inside, and they are very sturdy and extremely well made, a testament to the high-quality materials used in their construction. 

During WWII, Robot produced cameras for the German Luftwaffe to put on their Stuka dive bombers. After the war, Robot continued producing high-end cameras like the Robot Star and Junior cameras. Robot produced the Robot Royal in three formats, with a few feature and film format variations. 

My Camera:

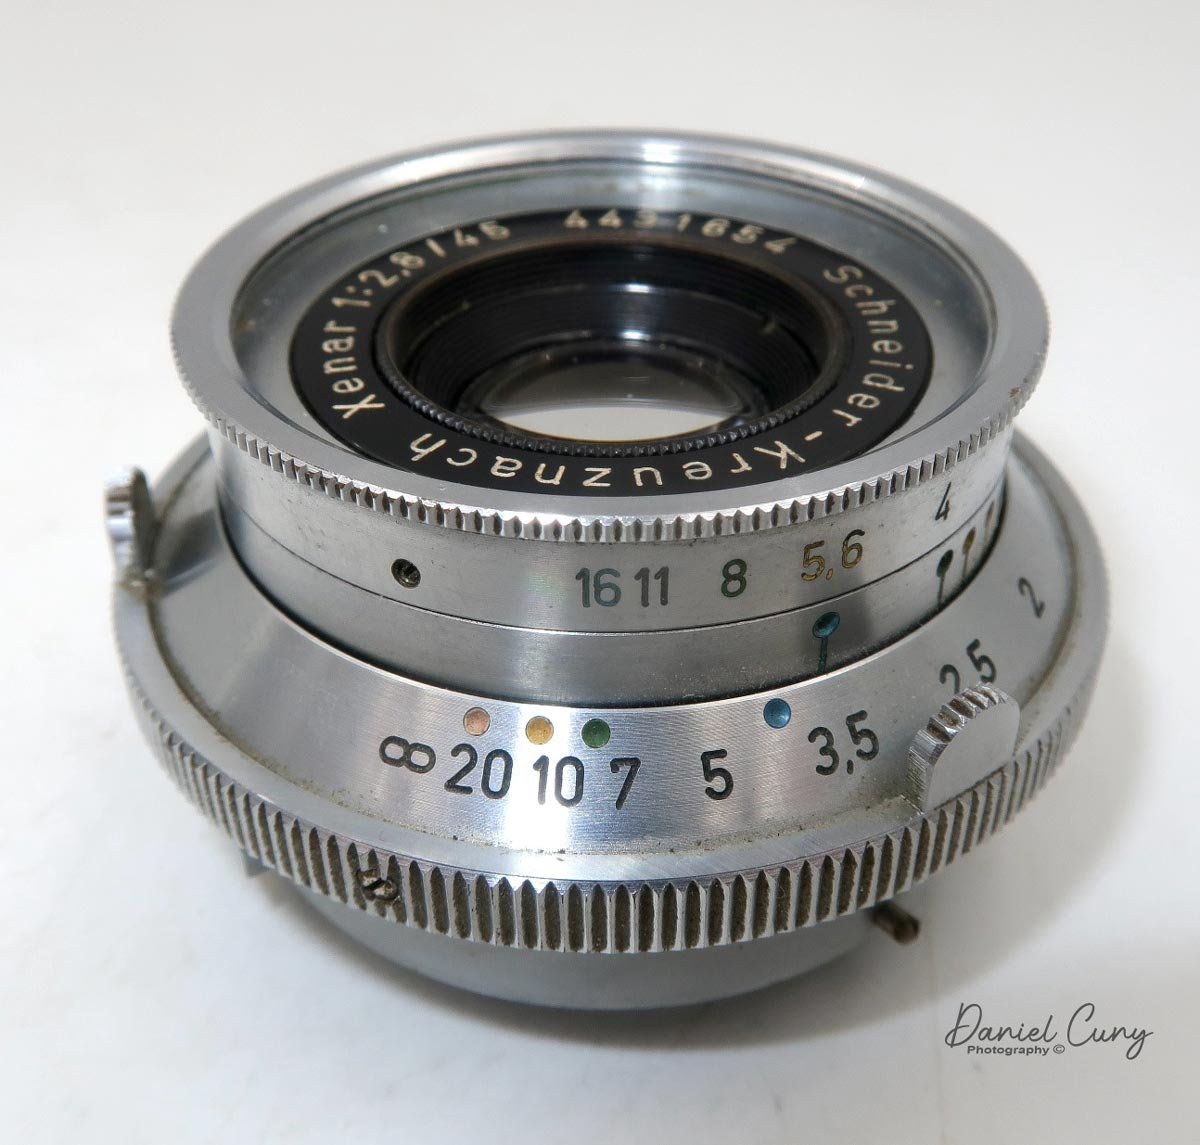
My model is the Robot Royal 36, model III, and it has the film format of 24x36, the most common film format for 35mm cameras. My camera has a Schneider Xenar 45 mm f2.8 lens. My camera has a Schneider Xenar 45mm f2.8 lens. It measures 5.5" wide x 3" tall x 2.75" deep from the front of the lens to the back of the camera and weighs a whopping 2 lbs. 0.4 oz. That's the first thing I noticed when I unwrapped the camera. This is a very solid and well-built camera with unique features that set it apart from other cameras. 

To open the camera, as you hold the camera there is a chrome tab with etching on it on the left side. With your thumb, you lift that and the latch and open the back of the camera. Unlike most 35mm cameras, this camera has a take-up spool you need to load the leader into as opposed to just putting the film leader into the take-up slot, and the camera takes up the film. You need to take the take-up spool apart and thread the film leader into the spool, then put the cassette back together and load the film and take-up cassette into the camera. Then fire two frames, and you're ready to go.

My camera has shutter speeds from 1/2 sec to 1/500 sec, along with B for timed exposures. The bottom of the camera has a winding mechanism that allows me to fire 12 photos at full wind, which takes me about ten and a half cranks to wind fully.

Yellow, Green and Blue dots on lens and Aperture number for Zone Focus.

 The rangefinder on my camera is very bright and easy to focus. The other significant item about the Robot camera and lens system is they allow the photographer to shoot with zone focusing, which is fantastic for street photography. The lenses have yellow, green, and blue dots, which correspond to the colored apertures on the lens. The lens's apertures 2.8 and 5.6 are in yellow, F8 is in green, and f16 is blue. All you need to do is match up the color dot on the focus dial and the aperture used, and the lens shows you your depth of field. This procedure is similar to all other lenses, but the color coding makes the system more "user-friendly."

Removing and reattaching the lens of the Robot Royal 36 is simple. A tabbed collar at the bottom of the lens, when moved to the left, allows the lens to be detached. To reattach the lens, align the two red dots and slide the collar counterclockwise. This careful procedure ensures the lens is securely in place.

Switch for “Green Dot” normal film advance, “Red Dot” Close viewfinder and “R” Rewind film back into canister.

Once I shot the film, One the back of the camera and to the right of the viewfinder is a switch with a green dot for regular forward film transport, there is a red dot which closed the viewfinder half way and "R" for film rewind. I put the camera in the "R" position and reminded the film as a regular 35mm camera procedure. On the bottom front of the camera are the flash sync ports for "X" (electric flash) or "M" (bulb flash) settings.

Results:

 I took a roll of film, put it through my camera, and walked around my backyard to see how the camera performed. This is the first time I got to shoot with the camera since I bought it 4-5 years ago, and there were a few anomalies in the camera. There seems to be a slight light leak, but to be 100% transparent, the film I used was old, and one I had shot just a few frames with and rewound the film with the leader exposed more than ten years ago, so I can't 100% blame it on this camera.

Conclusion:

While Leica has the prestige, Robot and Alpa are probably the best-built cameras in terms of craftsmanship and overall quality. The camera is excellent, the lenses are fantastic, and it offers things built into the system, like motor advancement and an excellent feel. I had a great time shooting with it, and I need to run a fresh roll of film through this beauty more often.

Thank you for taking time from your busy day to review this blog.

Until next time, please be safe.

Mamiya Six II, Early Version

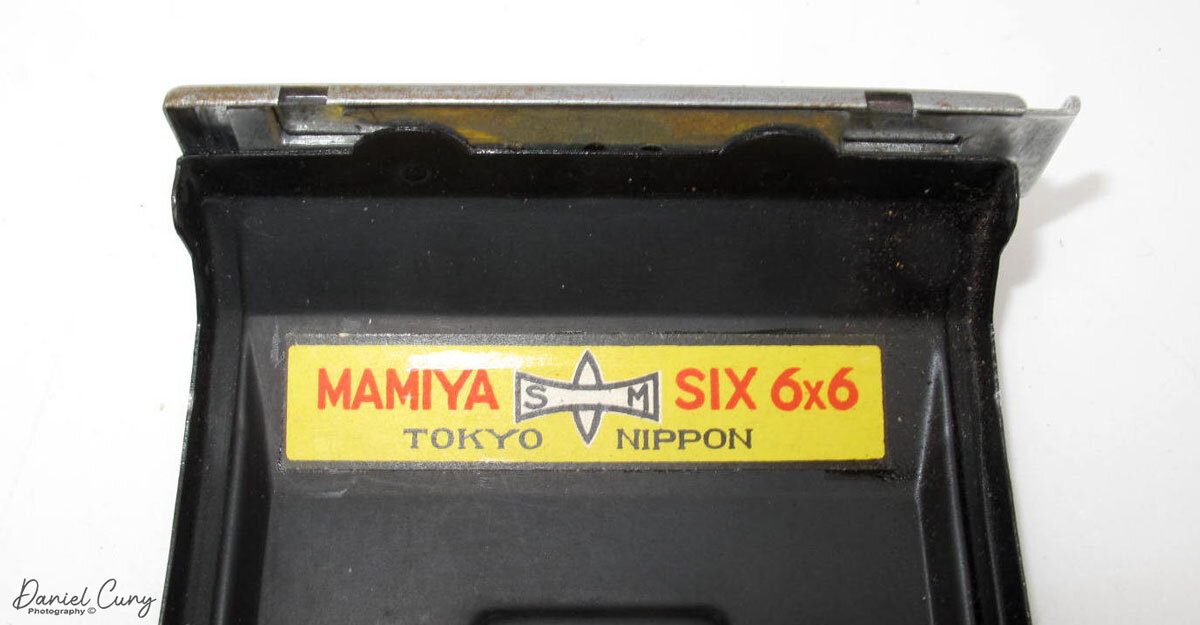
For the past few years, I've enjoyed shooting with older folding medium format cameras. These cameras are generally smaller and something I can fit into my pocket for easy transportation. They also use larger than 35mm film, so the ability to enlarge or crop the image gives more flexibility. Their lenses are somewhat flat in contrast, but I can change that after processing and digitizing the images. The Mamiya Six camera I have is one of the cameras I like to use often. There are some exciting features built into this camera that make the camera fun to use. The Mamiya Six was the first camera manufactured by Mamiya, and the camera I have, I believe, is the second version.

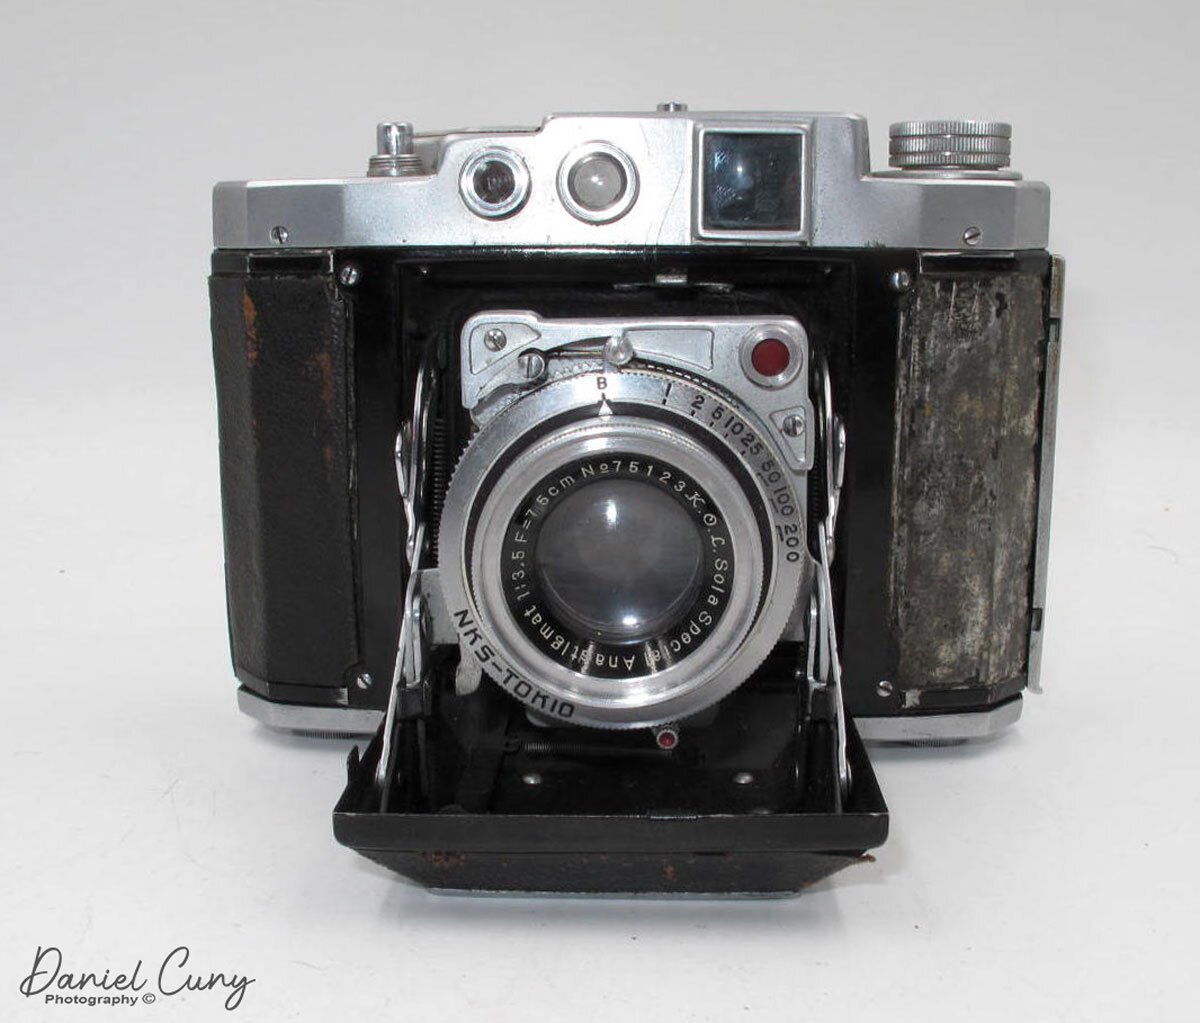
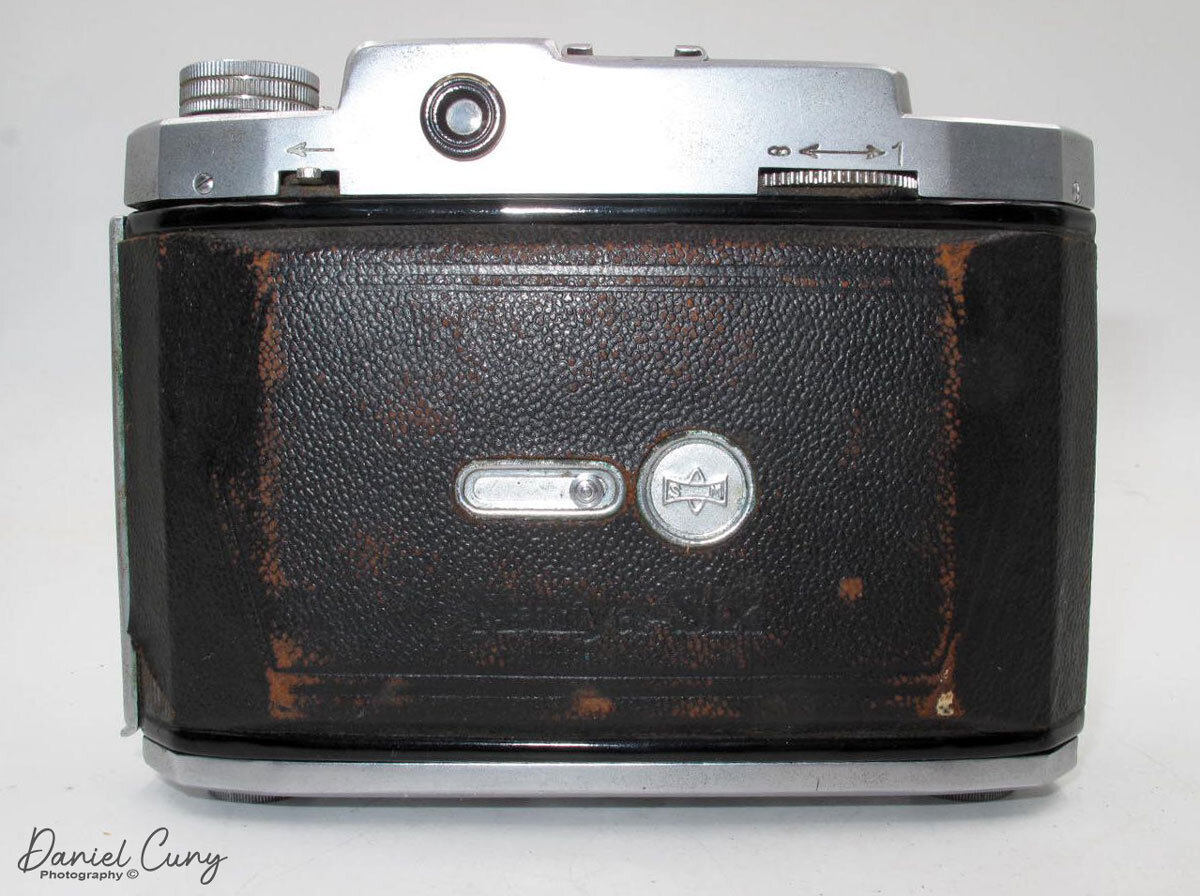
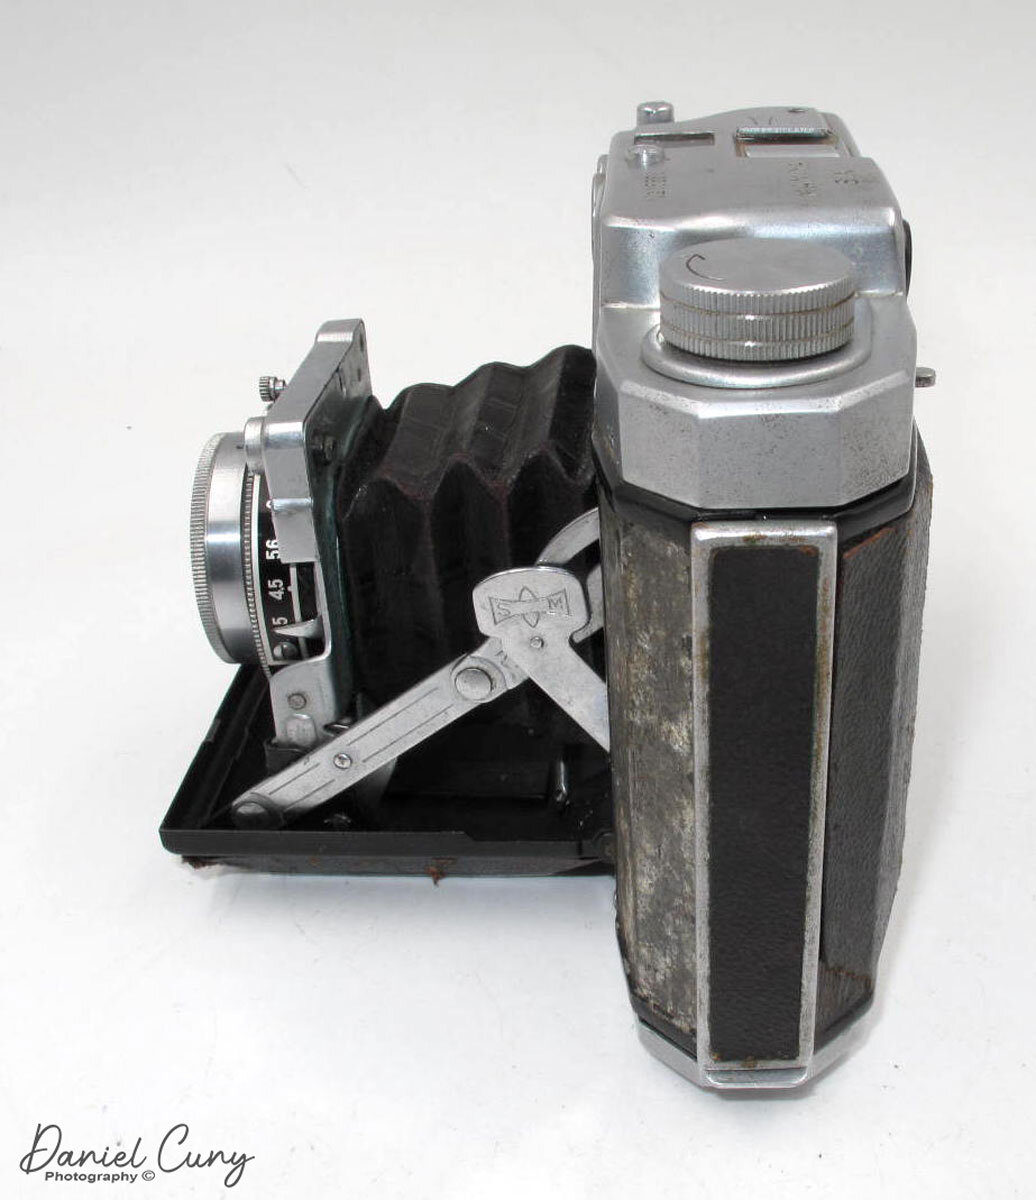
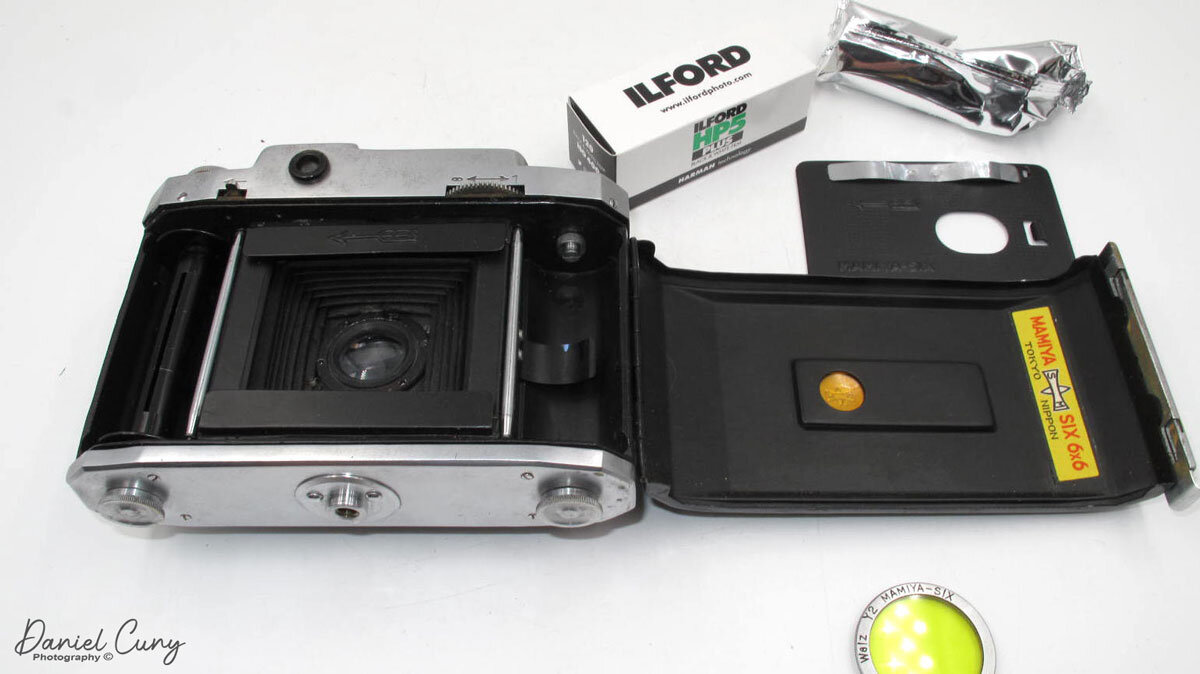
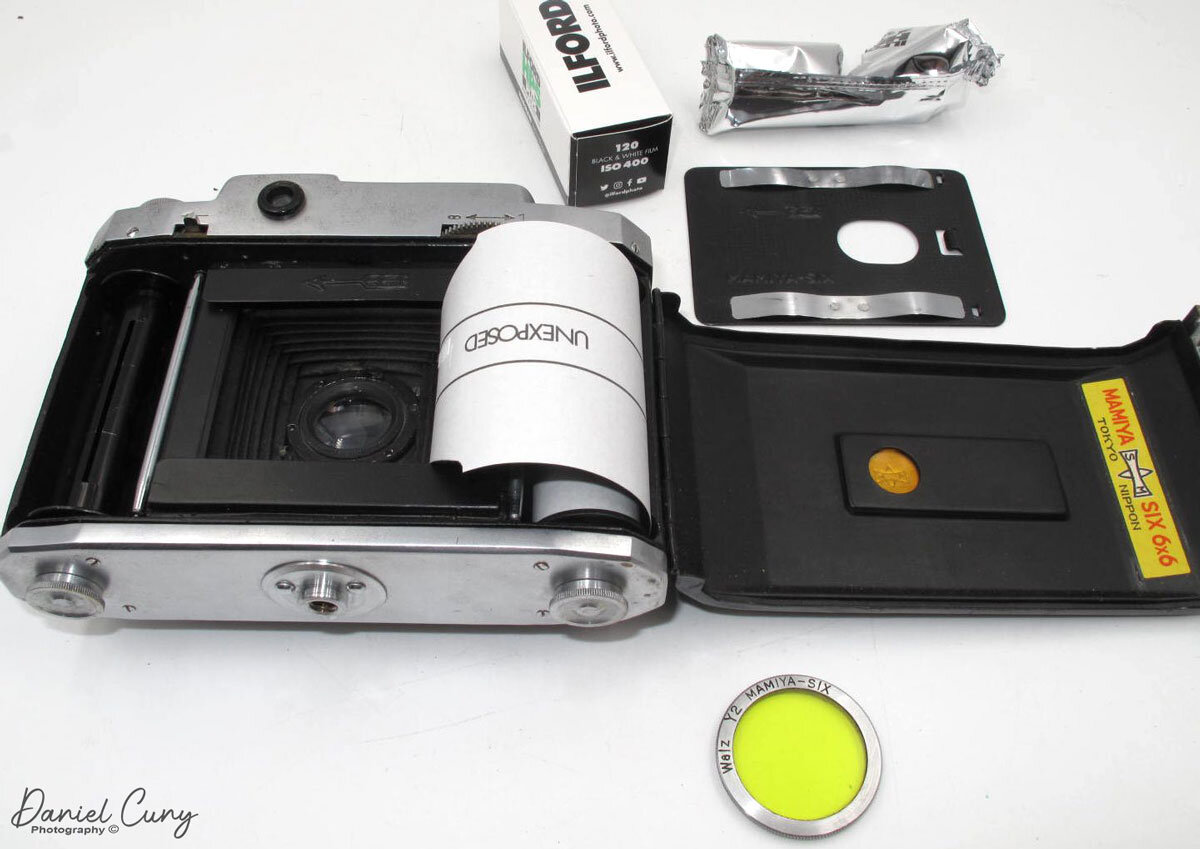
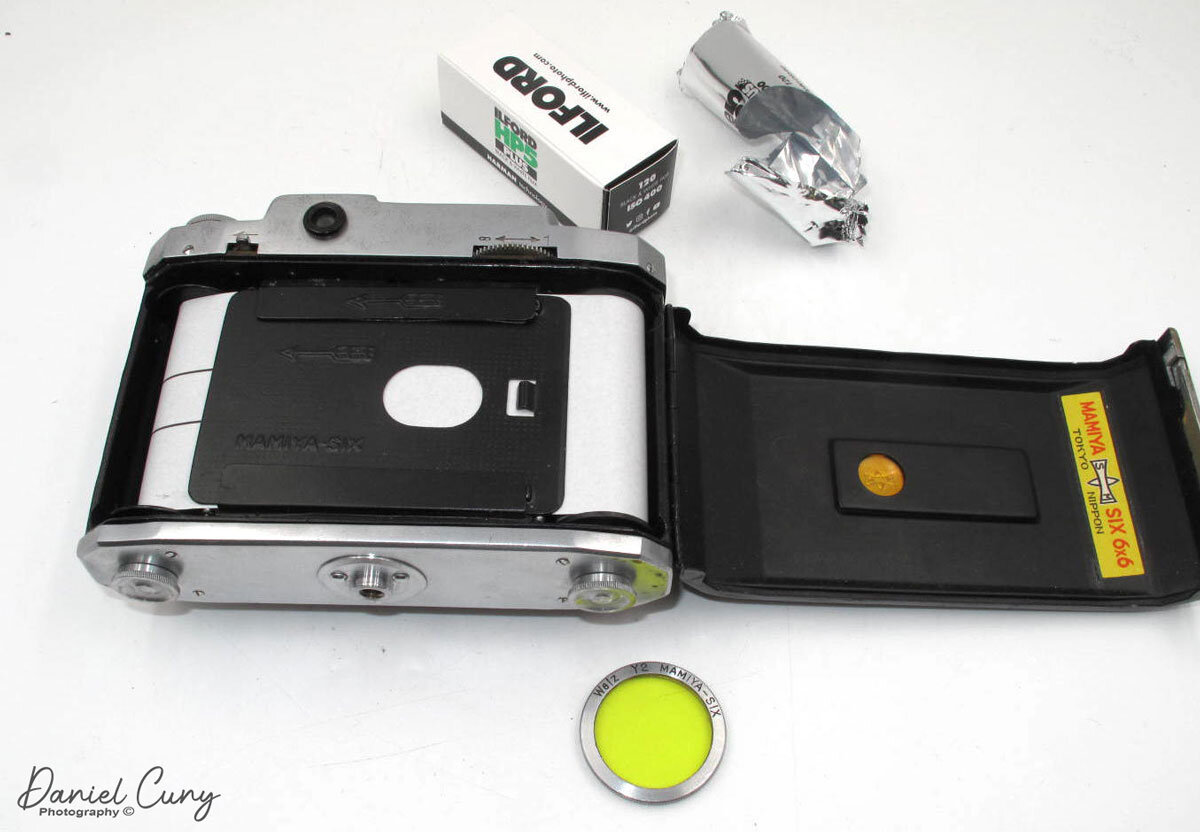
My opened Mamiya Six camera.

The Company

Mamiya was started in May of 1940 by Mamiya Seiichi and Sugawara Tsunejirō in Toyko, Japan. The first and only camera they produced for eight years was the Mamiya Six, which incorporates a coupled rangefinder on a 6x6 camera that moves the film plane for focusing instead of the lens. Even though they only made one camera, Mamiya managed to grow and gain success throughout the wartime. By February 1944, Mamiya had up to 150 employees and had moved their manufacturing to a new facility. In March 1944, they also opened a second manufacturing facility that made and assembled their lenses. In October 1945, just a month after Japan's surrender, Mamiya was the first company to receive a substantial order, bringing them back to full production.

In 1947, Mamiya started to produce Stamina shutters and Neocon lenses. In 1950, the Setagaya plant became the company Setagaya Kōki K.K. making their shutters and lenses. The name Sekor that appears on most Mamiya lenses comes from Setagaya ki, with the r most likely for Renzu meaning lens. 

I should mention one item I have a real fondness for Mamiya cameras as I was an employee for Mamiya America for about six years during the early 2000s. Some of my fondest memories are working with the wonderful people at MAC Group (Mamiya America Corp.). Phase One purchased a 45% stake of Mamiya in 2009 that changed its dynamic, but they still make cameras and lenses under the Phase One name.

The Camera

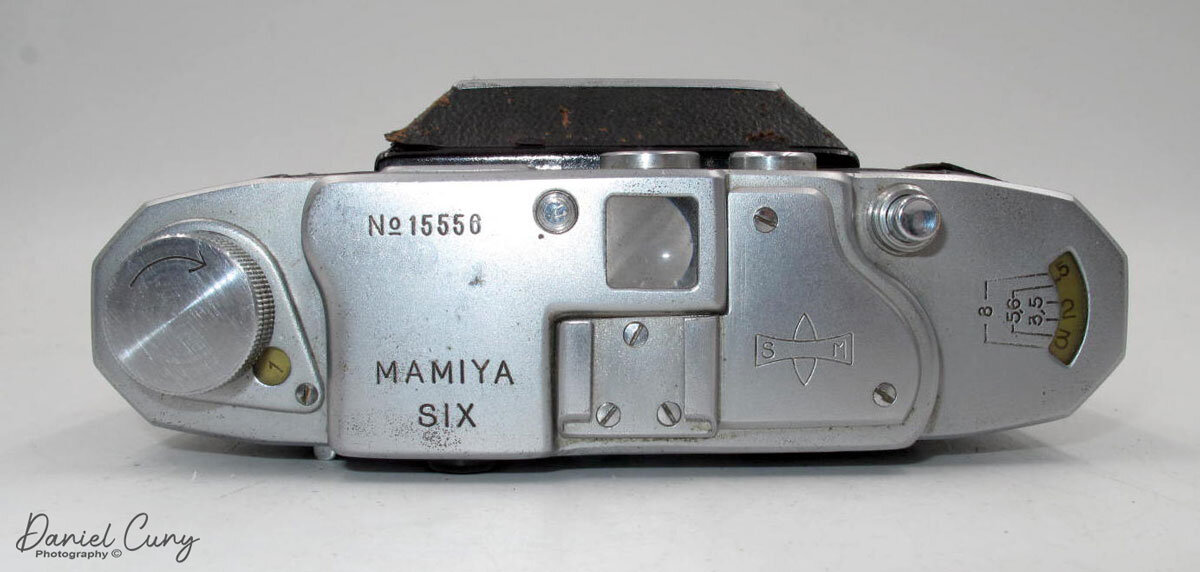
Over the years the Mamiya Six was manufactured there have been many changes and modifications. To see some of the changes, you can look here. This is also not to be confused with the Mamiya 6 which was introduced in 1989. I believe the version I have is the Mamiya Six II because the strap eyelets are no longer on the camera as they were on the original models.  Looking at the camera, the first thing I noticed when I bought it was the camera has both a waist-level finder and an incorporated rangefinder, which you can see from the window on top of the camera. Just to the left of the waist level finder window is a small button to open the camera. Depress the button, and the lens extends downward. To me, it resembles the Zeiss Ikon Super Ikonta 530/16 in size and weight. The Mamiya Six I have is 4" tall by 5.5" wide and 2" deep unopened or 4.5" deep opened, and weighs 1lb 12.5 oz without the case or film.

The Mamiya Six I have has a 7.5cm (75mm) f3.5 K.O.L. Sola Special Anastigmat lens in an NKS-TOKIO shutter with speed from 1-200 & "B." The aperture setting range from f3.5-32. To change shutter speeds, you move the knurled ring on the outside of the lens to the desired shutter speed. There is also a knurled ring on the back of the lens are on the right side that allows you to change aperture settings. It's somewhat hidden and took me a minute to find it, but it's easy to change once found. The pin on the top of the shutter cocks the shutter. There is a self-timer on the bottom of the shutter, which has a red dot. On the top of the camera at the far right are the focus distance and a depth of field scale. My scale only goes to F8, which is standard on the early cameras. The Mamiya Six I have also arrived with a Mamiya Six Y-2 filter.

On the back of the Mamiya Six is the viewfinder window. To the right of that is a thumbwheel that focuses the camera. Looking through the viewfinder is the typical rangefinder for focusing the camera. Once the shutter is cocked and you depress the shutter button on top of the camera, a red window appears in the viewfinder letting the photographer they have taken a photo. Under the viewfinder and to the left is a switch with an arrow pointing to the left. Moving that switch to the left allows you to wind the film to the next frame and also takes the red warning out of the viewfinder. The frame counter is at the top of the camera. It's a small round window next to the film advance knob. On the back of the Mamiya Six is also a red window and cover, which you can see the film advance and stop at the next frame, which is automatic. 


Close-up of lens & shutter on Mamiya Six camera.

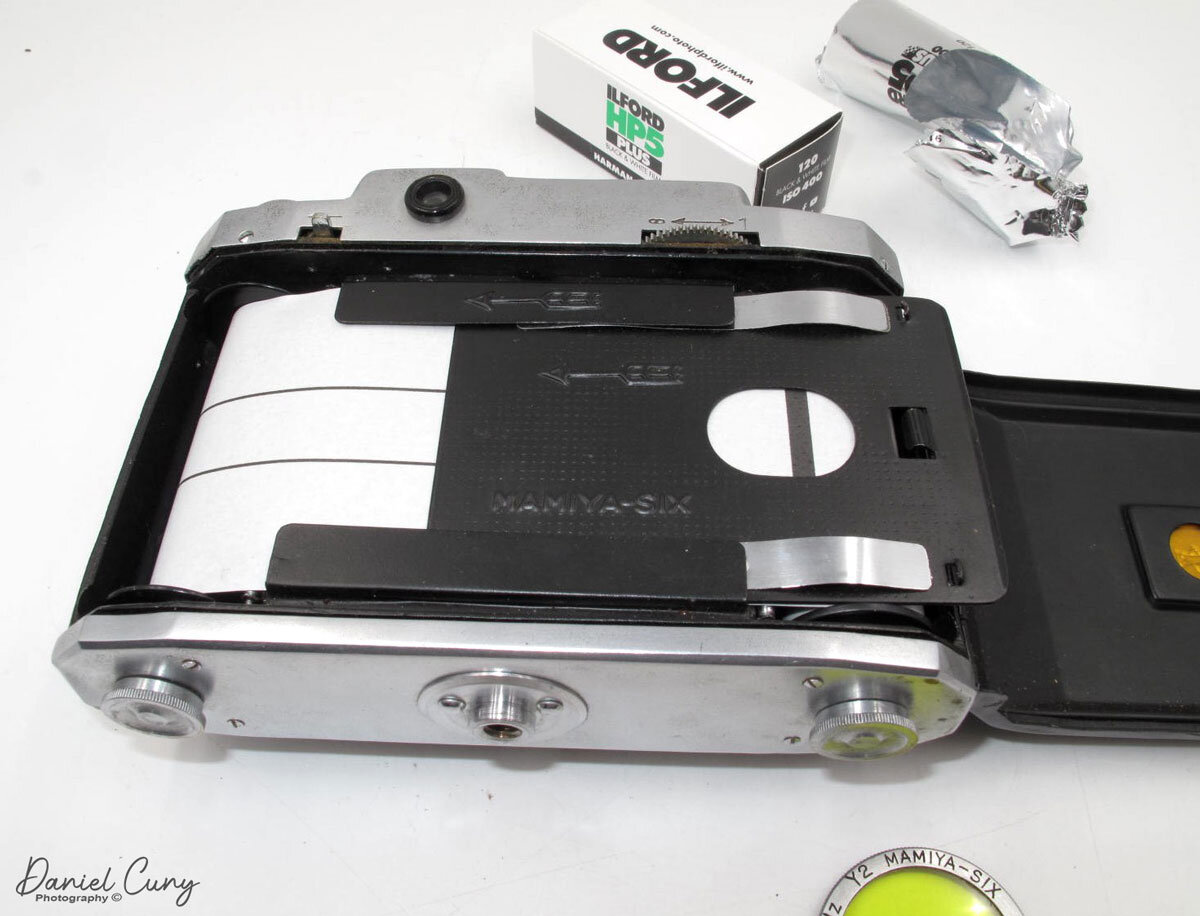
Loading the film is a bit tricky. I always make sure my film counter is at number 1 before loading. Since the film plane moves for focusing, the pressure plate is a removable plate that slides into the film plane. You slide out the pressure plate. Load the film on the right side of the camera. Drag the leader through the slots where the pressure plate goes and wind onto the take-up spool. Slide back the pressure plate into place, and turn the advance knob until you see the starting arrow on the film leader. Close the back and with the rear window open, advance the film to number 1. Now the frame counter and the film frame number coincided with each other. Once you take a photo, slide the switch to remove the red warning label, unlocks the film advance, and wind to the next frame.

Photos

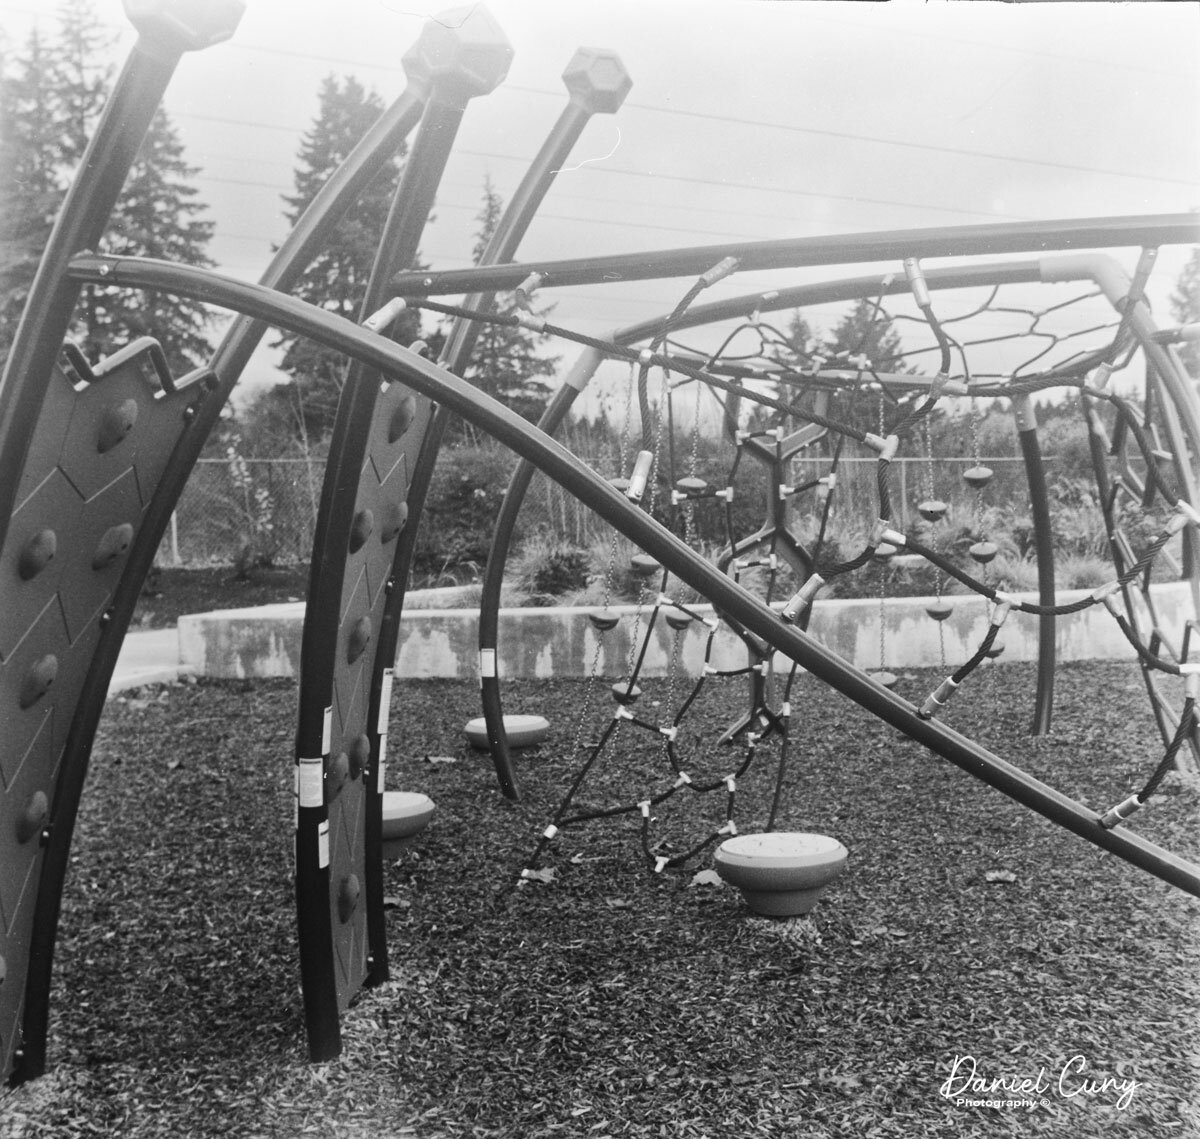
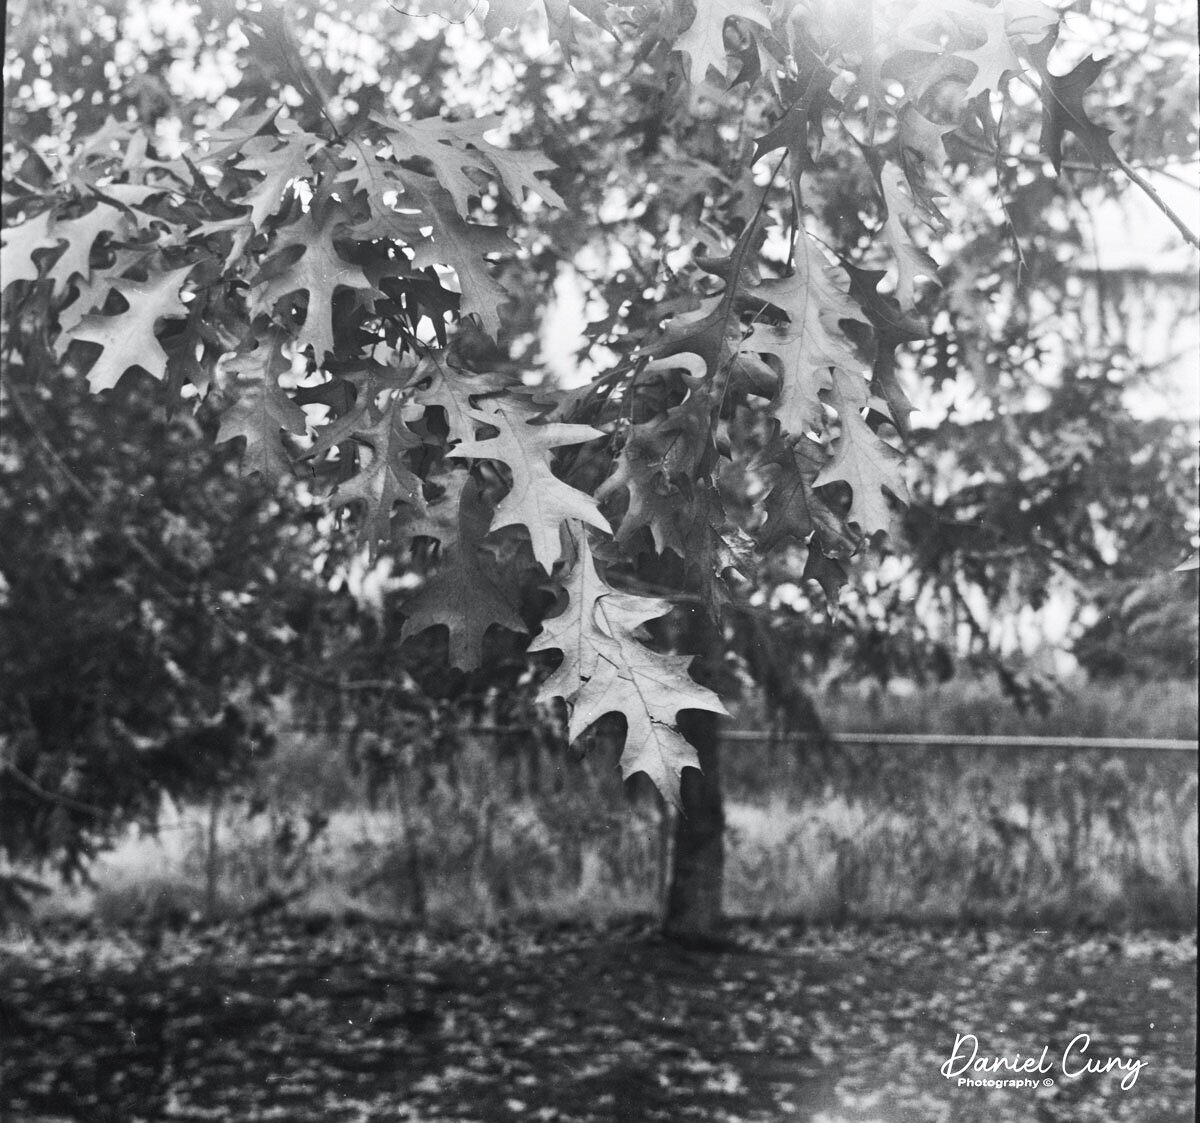
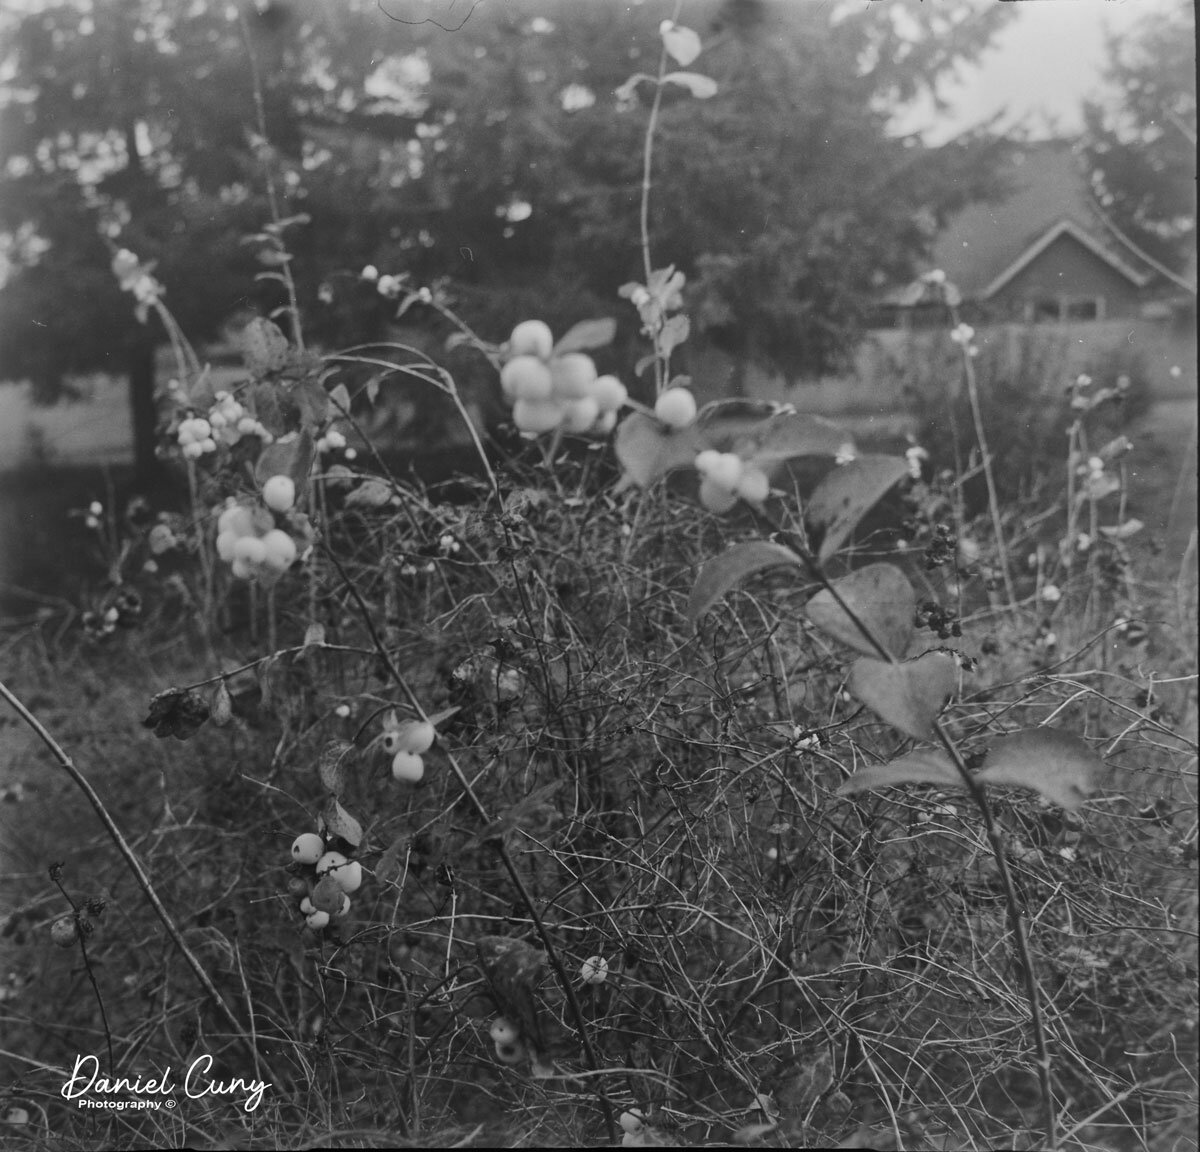
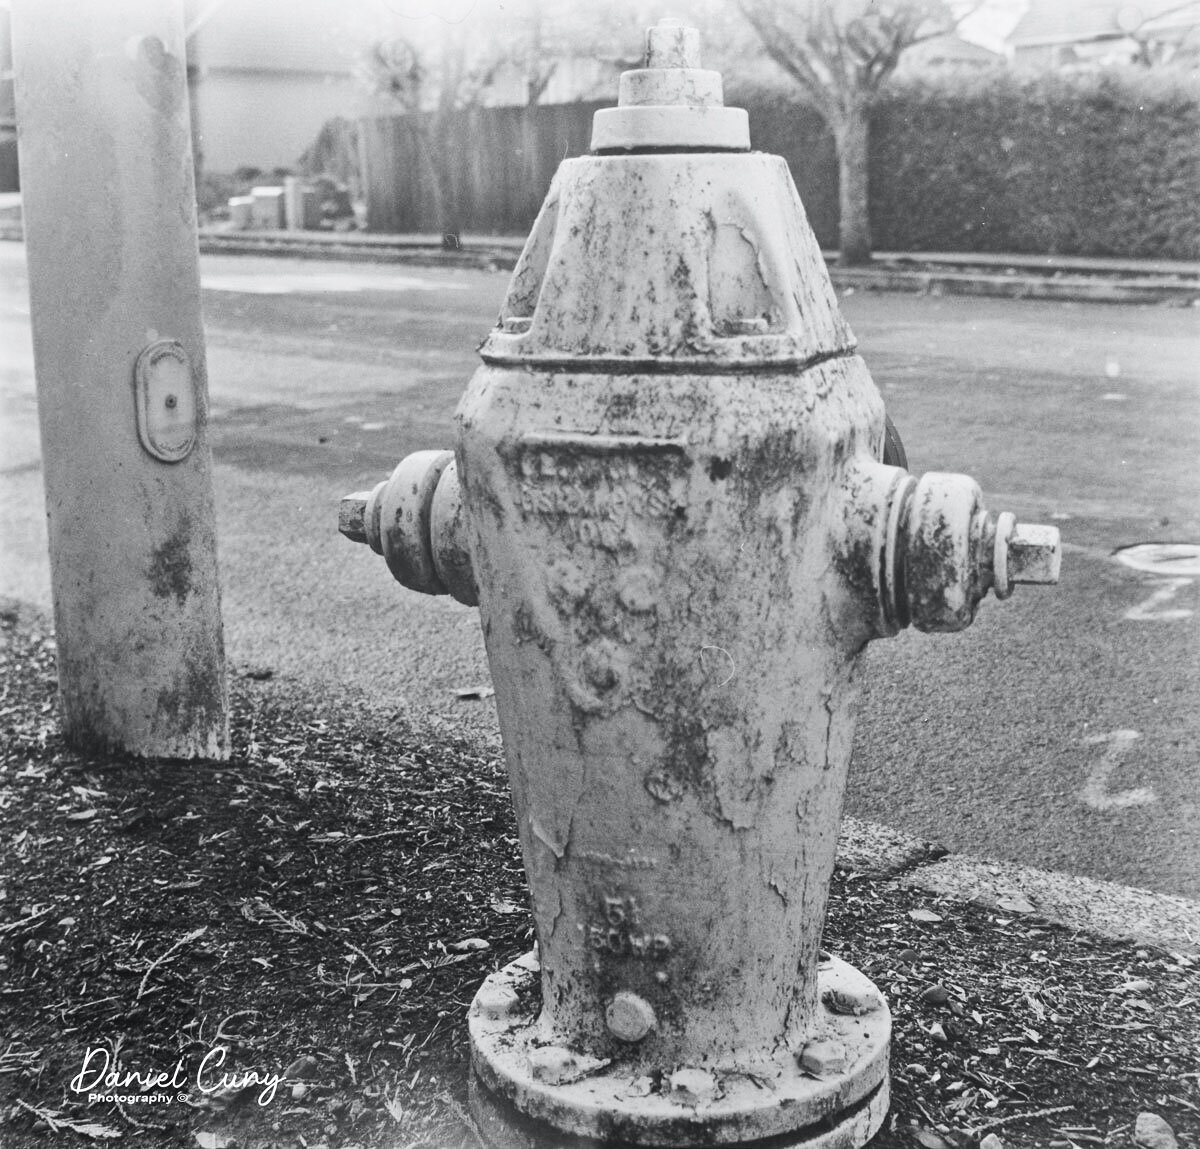
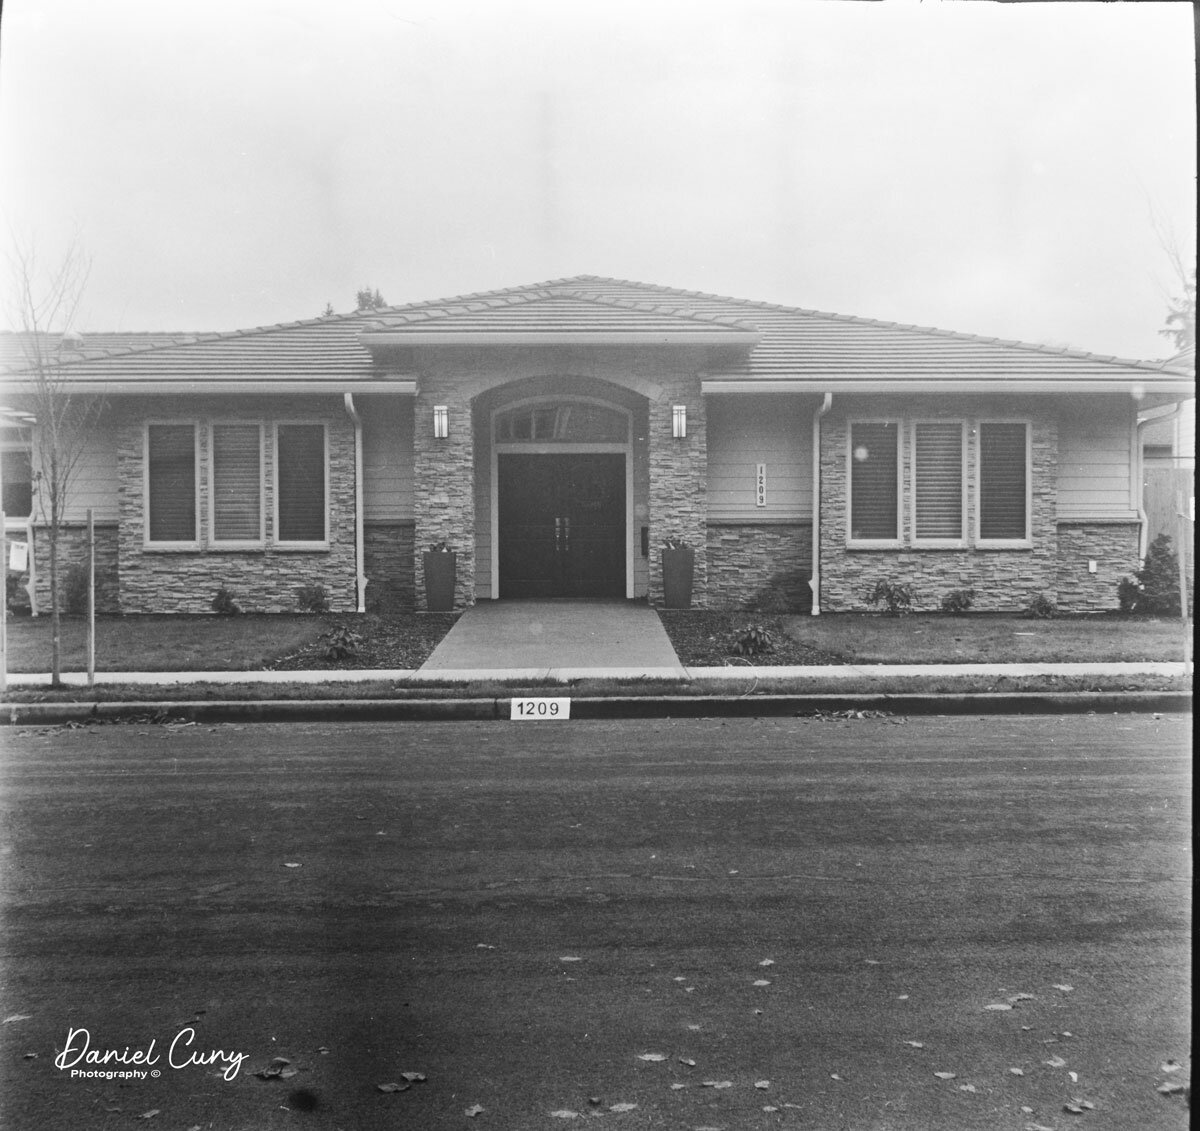
Here are a few quick shots I took walking around my neighborhood.

Conclusion

I enjoy using the Mamiya Six I have. I like the waist level finder, especially when I want to get the camera low to the ground. It's small for a medium format camera, the optics are good, and the aperture goes to F32, which I utilize when in the day time. The Mamiya Six is, in my opinion, a real keeper, especially when I want to put something in my pocket and shoot medium format.

 I appreciate you taking a few minutes to read this week's blog post. I enjoy hearing from you about your experiences with this or any other camera you have in your collection. Feel free to comment if you have a question or concerns regarding this or any other posts I've done.

 Until next week, be safe.