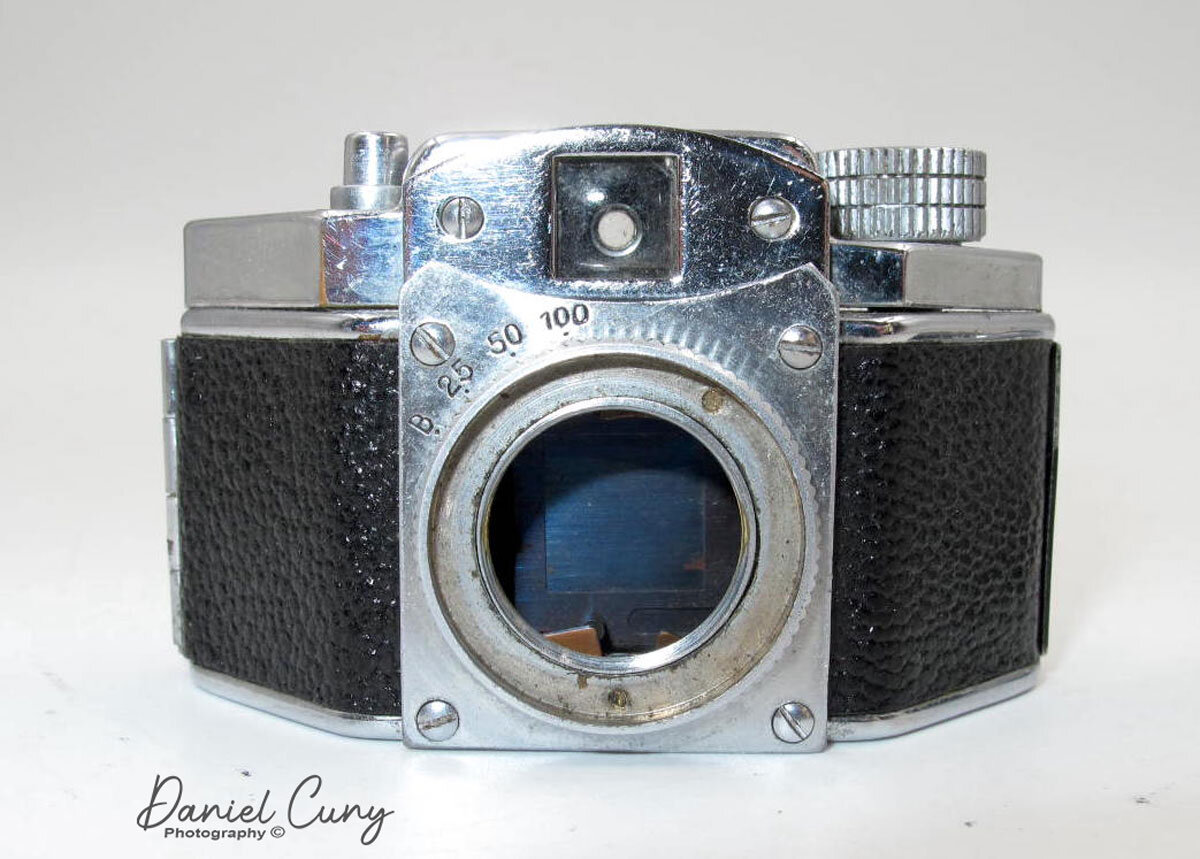
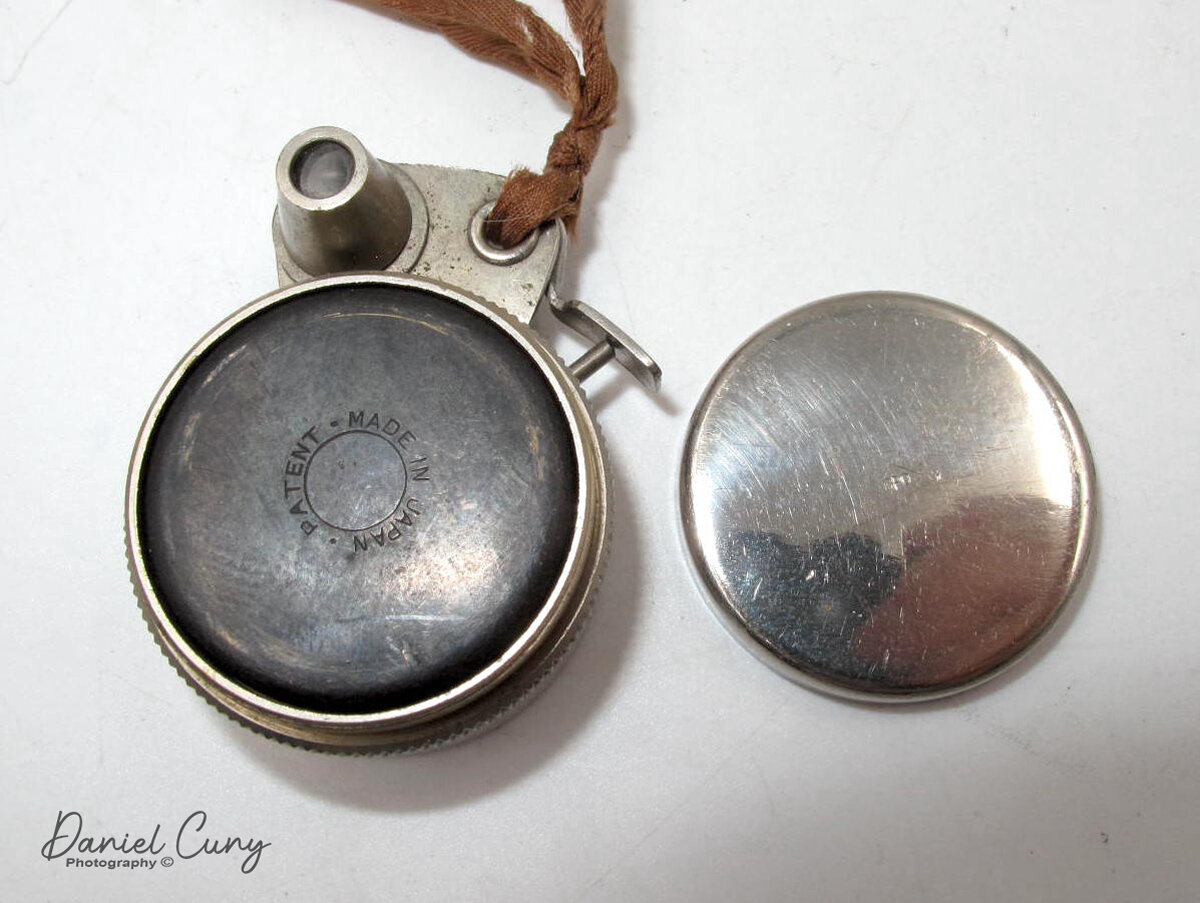
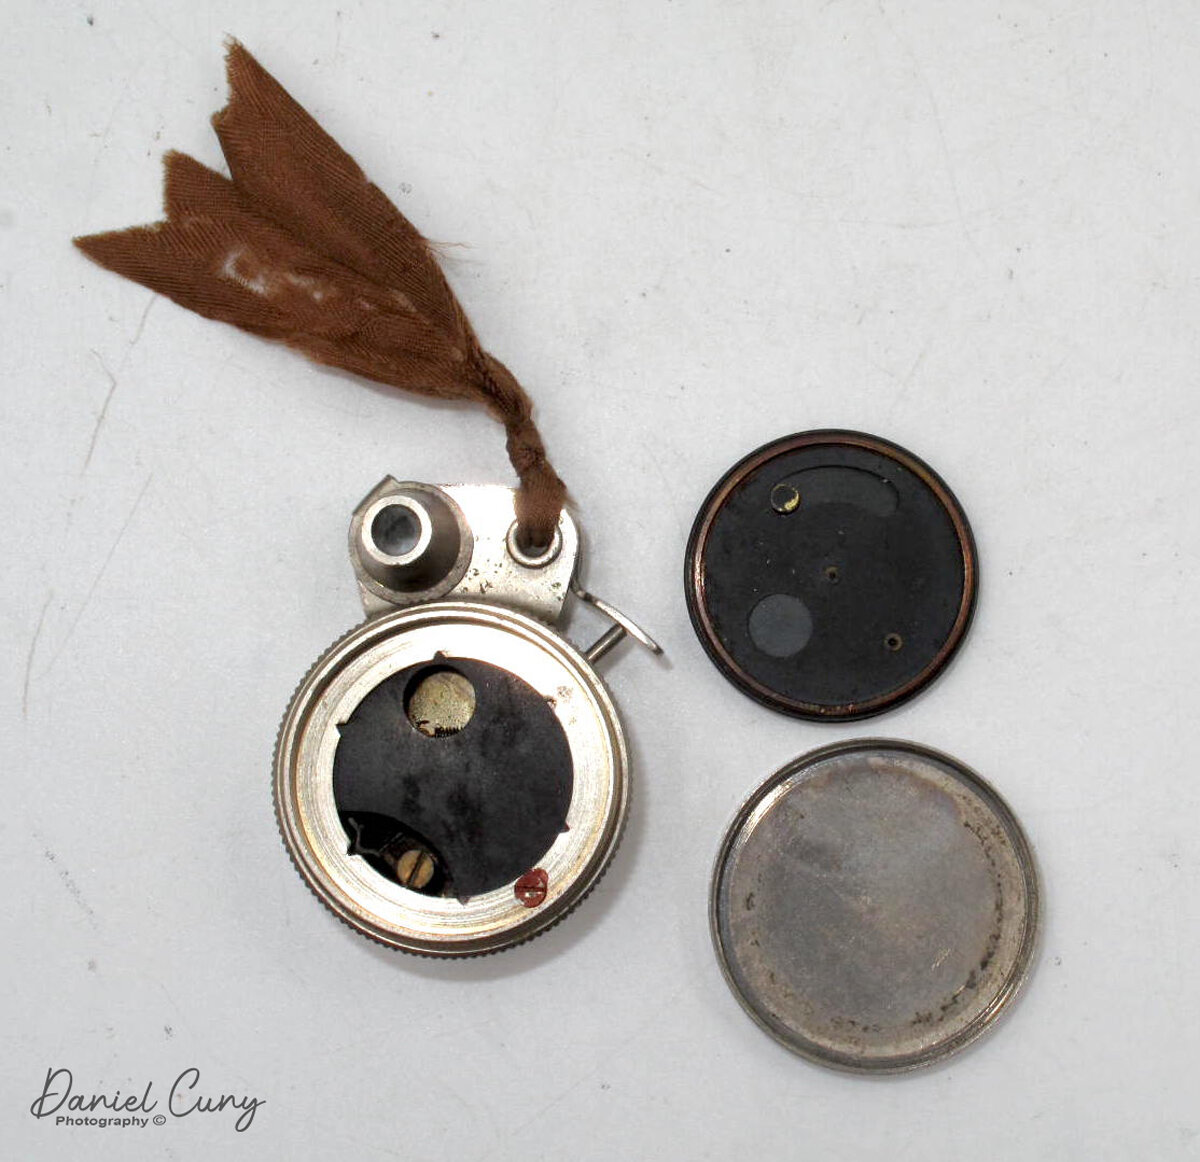
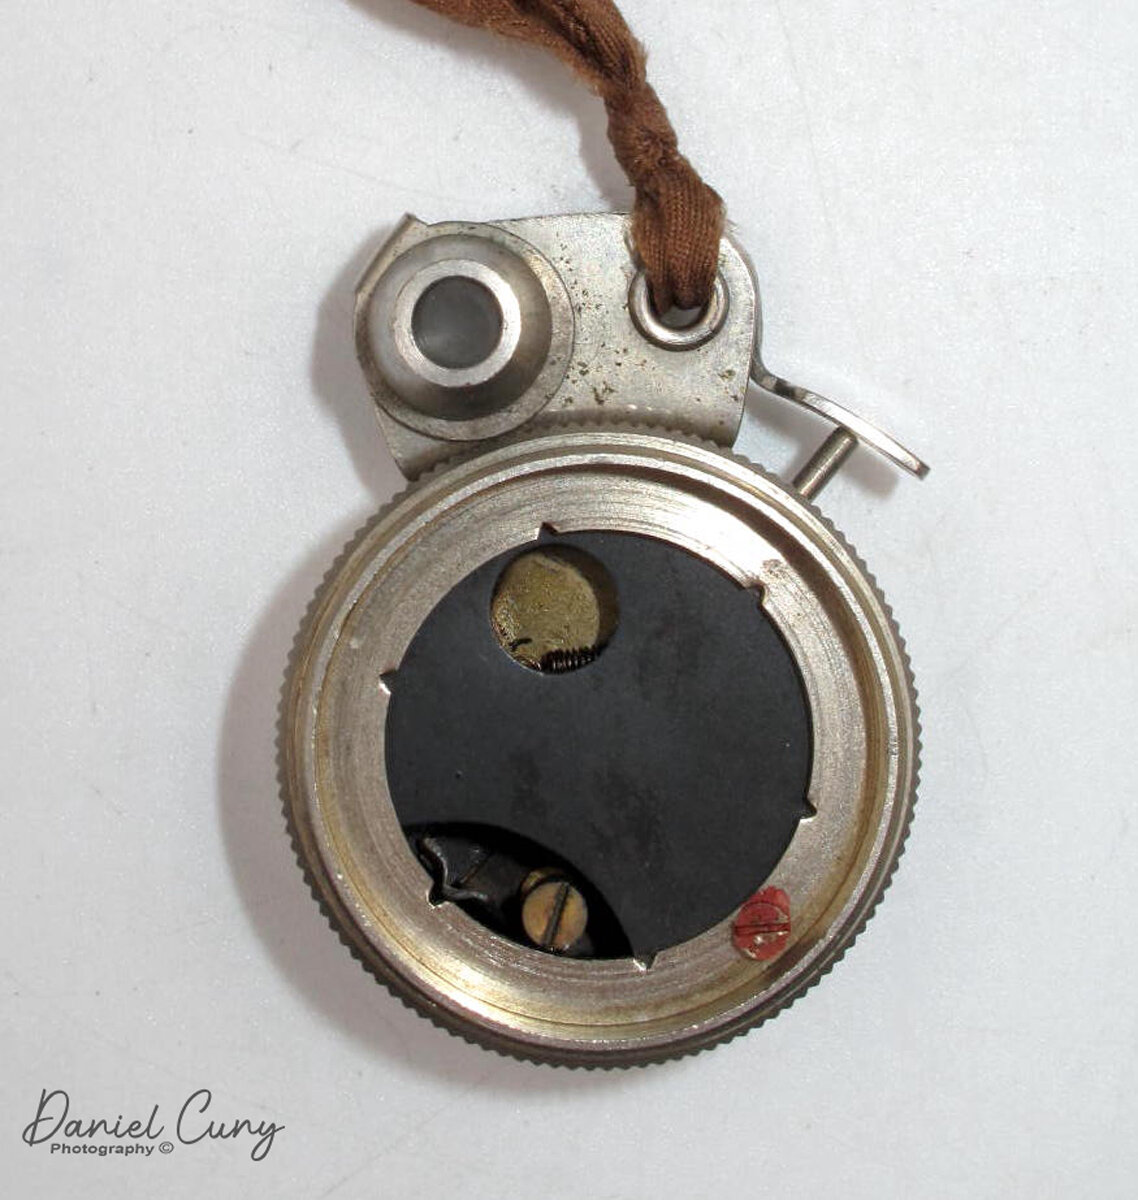
Alpa Rotocamera 6070

My Alpa Rotocamera 6070

As I've mentioned in previous blog posts, I am fond of panoramic cameras and the odd and unusual cameras that most people wouldn't guess are cameras, so I always have my eyes open for these oddball items to add to my collection. The Alpa Rotocamera is just one of these items. Not only is it an odd-looking item that resembles a miniature robot-looking item, but it's also a 360-degree panoramic camera that shoots on 120 or 70-mm film.

 I've owned lenses that shoot 360-degree images and have even written posts on them. The first lens I had that shot 360-degree images was a Be Here Portal S1 lens, which fit onto my Nikon DSLR camera, and with software, it produced a tremendous 360-degree photo. That lens got damaged, and to this day, I'm continually searching for another one of these lenses. In my mind, I kept telling myself that there's something different between shooting with a 360-degree lens and having a camera that can produce a 360-degree negative.

 I found an Alpa Rotocamera on an online auction. When I saw it shot 360-degree images on 120 or 70mm film, I was immediately hooked and wanted to get it. Not knowing much about the camera other than a few tidbits I quickly found online, I bid on the camera lot. To my surprise, I won the camera. I was excited to get the camera and load film into it and start to make some tremendous images that were a view that is mind-boggling when you see them.

 This blog will be different from my other posts because I've spent tens of hours on this specific camera because of its condition. I want to give you a brief overview of the camera, then explain how I received it and what I've done to get it back into working condition.

The Camera:

This camera is a Beast!!!! I didn't realize until I received it, but the camera and film back weigh just under 17 lbs. and are 16 lbs. 15.6 oz. That does not include the power source and cables. It’s built from cast metal with a pebble finish and, it’s 12” tall, 9” wide, and 8” deep and was built in the early 1980s.

 As mentioned, the Alpa RotoCamera produces a 360-degree image on either 120/220 or 70mm film. The camera is powered by a 12v rechargeable battery that powers motors in the camera's base, which rotate the head around a cylinder. According to the manual, you can produce either 90, 180, 270 or 360-degree views with the camera. On the front of the camera is a Rodenstock Grandagon-N 75mm f6.8 lens. Just to the right of the front lens is a lever used for vertical adjustment. If you want to shoot higher or lower, you can slide the lever up or down to adjust the vertical height to avoid getting too much foreground in the photos. There is also a viewer on the side that can be used to see the camera's vertical adjustment.

 The camera has two speeds, and the head rotates around the cylinder. The speed is set on the center column by a switch with an "A" for the faster speeds and "B" for the slower speeds. There also are a series of slits in the head that allows for the camera to shoot at different shutter speeds depending on the motor speed and slit width. Switches on the top of the camera head control the slits. One series of switches is for the slit width, and there is another that allows for the slit angle if you're in a situation where you'll want to control excessive brightness in the sky or ground. The camera can shoot anywhere from 1/20 to 1/250 shutter speed depending on the motor speed and slit width. On the rear of the film's back is a chart showing where to put the different switches should you want faster or slower speeds, along with a controlling light on top or bottom.

 The camera also has a removable film back, and 70mm or 120/220 film can be loaded into it. There is a small hard wheel just below the take-up spool on the film back, which is connected to the film advance cog and fits into the film reel. Just below the slits on the head is a rubber band that goes all around the cylinder. As the head rotates around the cylinder, the hard wheel runs along the rubber under the slit advancing the film as the head spins around the cylinder.

There are two settings on the camera remote control. One is a switch for "Auto" or "Manual," and the other setting is "Rotation." The Auto setting works in conjunction with the angle set on the column for 90, 180, 270, or 360 pans. The manual setting allows you to press as long as you want the camera to pan for. The "rotate" button is pressed to open the shutter and start the camera rotation. The remote and power cable are joined; one end fits into the power pack, and the other fits into the bottom of the camera's center column. There is also an on/off switch for the camera close to where the power and remote cable fit into the camera.

 In theory, you load film into the film back, making sure the take-up spool is engaged into the drive gear on the back. Put the back onto the camera. Plug the cables into the power supply and the camera. Turn the camera on, set the aperture on the lens, and check the height adjustment. Meter your scene, then set the appropriate shutter combination by the series of switches on top of the camera and the speed adjustment on the column. Set the rotation distance, and press "Auto" to start the camera rotation. According to the manual, on a roll of 120 film, you'll get 1- 360-degree or 270-degree images, 2-180-degree images or 4-90-degree images.

The Restoration:

The one thing I didn't realize and wasn't shown in the images at the online auction was the mechanical and physical condition of the Alpa Rotocamera internally because when I received the camera, it wasn't in "good working order." On the outside, the camera looked good. Everything seemed to be there, but when I went to take the back off the camera to view the inside of the camera body, the wheels came off the bus. My heart sank as the excitement of having a working camera came to a crashing halt.  

 The film back still had two 70mm film cassettes inside, but it looked like someone had packed the back of the camera with grease. For what reason, I wasn't immediately aware of it, and the rubber wheel that the film rotates on to advance the film had deteriorated into a yellow mass of goop that looked worse than it was. Another item that was missing was the power supply for the camera. I had the cables for the power supply that led to the camera and the remote control on it. I also had the instruction manual along with a car inverter to charge the battery when in your car. Still, there was no power supply, so I couldn't check whether the camera operated.

I let the camera sit for a few hours as I started thinking about how to get the camera into a somewhat presentable condition. My mind wasn't even on getting the camera, but on starting to clean up all the goop that was not only in visible areas but in areas of the camera I wasn't even sure I could get to. I did another more exhausting internet search when I came across someone who had done a restoration on the camera itself. Bayless Projects has a tremendous video on YouTube that is very comprehensive. He lives in London, so I started an email chain with him, letting him know I, too, had a camera I needed to restore. He helped me with the power supply and with many other questions I had about the camera.

 It was time to get the camera back in (hopefully) working condition. I spent the next couple of days cleaning up the goop on the film back, which got into places I needed to disassemble to clean out. With many Q-tips, Isopropyl alcohol, and lightly soapy water, I cleaned the film back up nicely. The film holders moved well, and the film drive gear turned as I rotated the hard wheel, which wasn't moving smoothly previously. 

 Now, to move onto the camera head. I removed some of the stickers that someone placed with film data from the previous owner. Something was rattling in the head, so I needed to take the top off to see what was rattling around. Once I removed the top, I could see a ground glass still intact and not broken that went where the viewer went. This was used to check the vertical adjustment for the images. Once I got the ground glass in place, it was time to tackle the back of the camera, which had the remnants of the previous rubber band that goes around the cylinder. Luckily, this came off very easily, and I didn't need much cleaning.

Now, to move onto the camera head. I removed some of the stickers that someone placed with film data from the previous owner. Something was rattling in the head, so I needed to take the top off to see what was rattling around. Once I removed the top, I could see a ground glass still intact and not broken that went where the viewer went. This was used to check the vertical adjustment for the images. Once I got the ground glass in place, it was time to tackle the back of the camera, which had the remnants of the previous rubber band that goes around the cylinder. Luckily, this came off very easily, and I didn't need much cleaning.

 Thomas (Bayless Projects) helped me with the power supply, which I purchased from him, and he made it for me and sent it over from the UK. I bought a battery to put in the housing. Once I got the battery in the power supply and connected it to see if the camera was working, my heart sank aging…..nothing. With the power on and the battery connected, I turned the head a bit, and luckily, the head on the Rotocamera started to spin. At that point, I was so happy to see the camera spinning. Was that a fluke? I unplugged the battery and let it sit for a few minutes before I tried it again. The camera started to spin without any help from me, so at this point, I knew the camera was functional. You could also hear the shutter open and close as I pressed the rotation button. What a relief. Now, I had a camera that "could" make images (hopefully). The one thing I couldn't figure out was the "Auto" setting. Nothing in the column needs to be pressed to set the camera at different angles for shooting. Thomas said his camera does the same thing, so I can only use the camera in the "manual" position, where I set the angle of view by pressing the rotation button.

 I needed to replace the rubber band around the cylinder to get the film to rotate when the film was back on the camera. I purchased a replacement that had the same specs that Thomas recommended. He also said it's not perfect, but I wanted to try it. When I received the rubber, it was horrible. The glue backing didn't hold at all. It was so bad that the paper they put on the product to protect the glue didn't stick on. It was also rolled in the opposite direction, so the end of the rubber kept popping out. I tried two-sided tape to hold it in, but that didn't work either.

 Then, I had the idea to turn the rubber around so the curve was going around the cylinder instead of against it. The tape on the back side of the rubber would give more friction as the film wheel rotated. I put a roll of film into the camera and gave the camera a try. Unfortunately, the camera rotated about 90-100 degrees, then stopped as one of the ends of the rubber came off and jammed in the camera. In theory, it made sense, but the rubber was too thick, and the end didn't fit together and kept coming apart. 

 The rubber needed to be a little thinner and without the crappy glue. I rubbed the glue off the rubber, and to get it to be a bit thinner, I stretched the rubber when I put the two-sided tape on the curved side to make it thinner. To keep the ends together, I added some two-sided tape to one side of the rubber so that when it went around the cylinder. There was extra tape to hold the second end in place. I put it back into the cylinder, and it worked well. It's time to put another roll of film into the camera for another test.

 I took the camera to the front of my house, set up the tripod, and crossed my fingers to see if it would work. I put a roll of B&W film into the back, set the camera to the settings the light meter said, and pressed the rotate button. The camera worked!!!! I could hear the shutter open, the camera rotated, and the film come off the spool and wrap around the take-up spool. SUCCESS.

Thrid test worked to perfection.

 With such success on the test roll, I decided to take the camera into Portland near the river with bridges and see what I could get there. Knowing the Cherry trees were recently blooming, I even packed some color film to see the river's edge and beautiful cherry blossoms in the photo. Having lugged the camera to the river's edge, setting the camera up, plugging in the power supply, and pressing the rotation button, I could hear the shutter open, but the head didn't start to turn. So I gave it a gentle push, and it began to turn. Unfortunately, I could also see it wasn't moving smoothly, which would cause banding. 

 The one thing I did notice is that when you have the film in the back of the camera, the camera has a little harder time doing the rotation because of the extra tension the film brings to the camera. Pulling the film out of the spool and running it across the shutter, I'm still trying to figure out if it's the rubber around the cylinder or the power to the motor. I'll continually work on how this works together to make the film move correctly.

 The first roll was B&W, which I processed when I got home and has banding. I also picked up the color film and noticed. At the same time, the camera did a somewhat better job at rotating; the drive wheel that moves the film from one spool to the other didn't have as much pull as it did with the test in front of my house. For the 2-3 rolls I did away from home, the camera film transport didn't pull the film off the spool. It left the tail end of the film exposed to light. Something is going on here, whether the rubber band around the cylinder or the drive wheel needs lubrication. I also agree with the film I did on location; portions of the film look like motion blur, so the film is not transporting, causing slight banding and blur.

My Results:

Here is the image taken in front of my house during the test. I didn't change the vertical adjustment, and I had the lens pretty high, so there's no foreground or yards in the houses on my block.

 These next images were taken down by the river in Portland, Or.

Conclusion:

 This camera is still a work in progress. I did order a slightly thinner rubber to try on the cylinder, so I'm crossing my fingers that it will work well on the camera.

Thank you for taking a few minutes from your day to read about an odd and unusual camera that hopefully will be as rewarding in the images it creates as it is frustrating to get it back in good working order.

 Until next week, please be safe.

Minolta-35 Model II

My Minolta-35, Model II

The Minolta-35 Model II camera I have was an unexpected discovery, purchased with several other cameras through an online auction. It wasn't the camera I was originally after in the lot, but the only thing that distinguished it in the photo was the fitted case, with 'Minolta' proudly displayed on the face.

 There were so many different models of camera from Minolta during this timeframe that I wasn't sure what was actually in the fitted case. Still, when I received the "lot" of cameras and uncased the Minolta-35, someone had painted the camera black. And whoever painted it did an abysmal job of it. I only wish I had photos of the camera in that state, but I didn't think of it then. The camera was painted black, and the shutter wasn't working. The good news is that the camera had a good and clean lens.

 Over the years, I have brought the camera to a few different collectible camera shows in hopes of selling it, but no sales have been made. 

 One day, a few months ago, I was browsing the cameras on my shelf, looking for one to write about, when I picked up the Minolta. I felt a personal connection to it, and determined to do a blog post, I sent it off to my trusty camera technician, Allen, at CameraWerks in NY to have it CLA'd. Despite its modest value, the fact that it's from the early 1950s and a very respectable Leica thread mount 'clone' made it worth the investment for me.

My Minolta-35, Model II with case.

 Before I sent the camera to Allen, I wanted to get the black paint off the camera and bring it back to the original chrome camera it was. I had bought some Acetone to see if I could gently get rid of the paint and not ruin any of the other parts of the camera. Unfortunately, the Acetone didn't work well and didn't take much of the paint off. Then, I noticed that if I used my fingernail, the paint would chip off reasonably easily. I also noticed that in our kitchen, we had some bamboo skewers, which seemed to work OK, so to get into some of the tighter spots, I used the bamboo skewer, and to get into the very tight areas, I used the tip of some of the metal tweezers I have for some very minor repairs.

 The camera still has some very minor spotting of black paint, as you'll see in the photos in the article, but 99.8% of the paint is gone. The camera looks considerably better than it did before. It's in great working condition, and even the rangefinder is clean and accurate, so it was time to do my blog on this early Minolta 35mm rangefinder camera.

The Company:

Minolta was a pioneering Japanese camera manufacturer known for its innovative contributions to photography. Founded in 1928 as Nichi-Doku Shashinki Shōten (which translates to "Japanese-German Camera Company"), the company was renamed Minolta in 1933. The name Minolta is derived from "Mechanismus, Instrumente, Optik und Linsen von Tashima," reflecting its German-Japanese technological collaboration.

Ad for Minolta 35 camera.

 Minolta's early cameras were heavily influenced by German designs, particularly Leica and Contax rangefinders. The company released its first camera, the Nifcarette, in 1929, followed by various medium-format folding cameras in the 1930s. After World War II, Minolta resumed camera production, releasing the Minolta-35 in 1947, which became Japan's first 35mm camera with a coupled rangefinder.

 Minolta's breakthrough came in 1958 with the Minolta SR-2, its first single-lens reflex (SLR) camera. Throughout the 1960s, the company expanded its SLR lineup, introducing the Minolta SR-T 101 in 1966, which featured an innovative through-the-lens (TTL) metering system. The 1970s saw Minolta partner with Leica, resulting in co-developed cameras like the Leica R3 and Minolta XE-7.

 One of Minolta's most revolutionary releases was the Minolta XD-7 (XD-11 in North America) in 1977, the world's first camera with aperture-priority and shutter-priority automatic exposure modes. This technological advancement set the stage for further automation in cameras.

 In 1985, Minolta changed the photography world with the Minolta Maxxum 7000 ( Alpha 7000 in Japan and Dynax 7000in Europe). This was the first SLR camera with fully integrated autofocus, making it far easier for photographers to achieve sharp images quickly. The Maxxum series gained popularity, pushing competitors like Canon and Nikon to accelerate their autofocus developments.

During the 1990s, Minolta expanded into digital imaging and compact cameras while maintaining its SLR dominance with the Dynax (Maxxum) series. The Minolta RD-175, released in 1995, was one of the earliest digital SLRs, marking Minolta's transition into the digital era.

 In 2003, Minolta merged with Konica, another Japanese camera giant, to form Konica Minolta. However, due to declining camera sales, Konica Minolta exited the camera business in 2006, selling its assets, including the popular A-mount system, to Sony. This acquisition helped Sony establish itself in the DSLR market, leading to the Alpha series that continues today.

Though Minolta as a brand no longer produces cameras, its legacy lives on through Sony's Alpha series, which traces its roots back to Minolta's innovative technologies.

My Camera:

My Minolta-35, Model II is 5 3/8" wide by 3" tall by 3" deep, which includes the Chiyoko Super Rokkor 5cm (50mm) F2.8 lens. If I take the lens off, the body only is 1.5" deep. The camera weighs 1 lb. 10.9 oz is a very comfortable camera size and weight, and it fits into my hands nicely. The Minolta-35 Model II has shutter speeds ranging from 1/500 down to 1 second, with "T" for timed exposures and "B" for bulb. 

 The Minolta-35 Model II also splits the shutter speeds into two different dials on the camera with the higher speeds on the top dial, which go from 1/500 to 1/25 and "B" and from 1/25 to 1 sec, and "T" on the secondary shutter speed dial on the front of the camera just above the self-timer. To set the shutter speed, you'll need to lift up the dial and turn it to the desired speed for the exposure. Changing the shutter speeds should only be done once you cock the shutter.

To use the secondary or lower shutter speeds, the top dial needs to be set to 1/25, and the lower speed dial needs to be set at whatever of the slower speeds you'll be shooting. This method is prevalent for Leica copy cameras from this era. 

 The Chiyoko Super Rokkor lens on my Minolta-35 is smooth and in excellent condition. To focus, similar to other Leica thread mount lenses, a locking pin is used to lock the lens to the infinity position. To release the lock and focus to a closer range, press the release button and turn the lens to the desired focus distance. Inside the camera is a built-in rangefinder, which will aid the photographer in the distance needed to take a sharp photo. Along the outer rim of the lens is the lens's aperture ring, which goes from F2.8 to F22.

The shutter release is on the top of the camera, just to the right of the shutter speed dial. A small crown-shaped piece surrounds it, which can be removed to use a cable release for the timed or longer exposure times built into the camera.

 Just above the shutter release is the rewind switch, which you slide to the "R" position to release the camera's drive gear so you can rewind the film back into the film canister when you complete the roll of film. Just to the right of the rewind switch is the film winding knob which has an arrow on top to show the user which direction to turn to advance the film to the next frame. At the bottom of the film winding knob is the frame counter which you need to zero out when you load a new roll of film into the camera so you'll know how many photos you've taken on the roll you loaded into the camera.

On the far left of the camera is the film rewind knob. Lift the knob up to make the rewinding of the film back into the film canisters easier. Once the back of the camera is open, you can lift the rewind knob even higher to remove or load the film canister in or out of the camera.

 Right in the middle of the camera, on the top plate, is the Minolta-35 name along with the serial number, which on my camera is 90899, and Chiyoda Kogaku. I enjoy the modernistic font used on the older Minolta camera, which is very elegant.

Top plate with name on the Minolta-35, Model II camera.

 On the back of the camera is the viewfinder window for focus, and on the outside is a dioptric adjustment. This is for people who wear glasses. Turning the dial around the finder window allows you to adjust your glasses prescription to correct vision issues. You can put the camera to your eye without wearing your glasses and still get a sharp photo. In the center of the back of the camera is the flash sync plug, which is just below the accessory shoe used for a flash attachment.

To open the camera to load film, there is a small knob on the bottom of the Minolta-35 that you'll need to turn counterclockwise until the "open" dot is lining up with the arrow. When this happens, the back of the camera springs open, and you load the camera just like you would any standard 35mm camera. 

Lift the rewind knob to load the film cassette into the camera. Pull the leader across the drive gears and put the film leader into the slot on the take-up spool. Take the tension of the film up by turning the rewind knob clockwise to take the slack up on the film. Close the back turn the open/close knob to the "closed" position to lock the camera's back, and wind to your first frame. Watch that the rewind knob is turning when you advance the film so you know the film is transporting in the camera, and set the frame counter to number one.


My Results:

I loaded my Minolta-35 camera with a roll of Ilford Pan F Plus 50 ISO black-and-white film. I wanted to use a slow speed to see how the camera would perform in lower-light situations. I also had my trusty Sekonic L-308 meter with me to achieve accurate exposures. I knew I could always count on Sekonic to give precise light readings. 

 Now that I had film loaded into the newly serviced camera, I walked through my yard and neighborhood to take photos with the Minolta-35 camera. Here are a few of the images I took on my walk.

My Conclusion:

The camera was enjoyable to photograph with. The rangefinder was bright and accurate. I tried many slow shutter speeds to see how the camera performed under these low-light circumstances. I had a great time using this camera and want to continue using it. The overhaul made a tremendous difference; without the black paint on the camera, it also looks terrific.

 Thank you for taking a few minutes from your busy schedule to read about this excellent rangefinder camera from Minolta

 Until next week, please be safe.

Leica I

My Leica I camera

I purchased the Leica I camera and accessories around 6 years ago when I saw a local ad of someone wanting to sell off a recently departed family member's old cameras. I responded to the ad, and for some reason, the person liked my passion for cameras and photography, so when I heard that the camera they had from a grandparent was a Leica, it piqued my interest. They had mentioned that the camera was in good shape and had some accessories in a case; I told them I was interested in seeing what they had.

 I try not to get into situations where you meet someone with some valuable equipment at a random location, so for safety reasons for both parties, we met at a local police station, which was agreeable to both. When they pulled out the case and I saw it was an early Leica, my heart fluttered a bit. 

My Leica I outfit

 Pulling the camera from the case, I found it in excellent condition and working. All the shutter speeds sounded accurate to the ear, and the rangefinder and extra film cassette were in the metal container and within the case, too. The owner wanted to be sure the camera was going to a good home and not just being sold. I reassured the person that I planned on keeping the camera and shooting with it, which they loved.

 Since adding the Leica I to my collection, I've made a point to keep it in top condition. Every now and then, I take it out and give the shutter a few test clicks to ensure it's in good working order. However, due to my busy schedule, I hadn't had the chance to load a roll of film and actually use the camera until recently.

 I wanted to write about the Leica 1 for my blog about a month ago.  I took the camera out and started to put a roll of film into the camera to shoot with it, and the shutter jammed. What bad luck! I called my friend Allen Wade at CameraWerks in NY, who always does a terrific job servicing my cameras and lenses. I sent the Leica 1 along with a few other items to him to get serviced. About a month later, I received the cameras back from him, and they were in fabulous condition. At this point, I put a fresh roll of film into the camera to see how the camera worked so I could write about it.

The Company:

Oskar Barnack was a German optical engineer who revolutionized photography by inventing the first practical 35mm camera, the Leica I. Born in 1879, Barnack initially worked in the optical industry, eventually joining Ernst Leitz Optische Werke, a German company specializing in microscopes and optical instruments. His pioneering work in miniaturizing cameras led to the creation of the Leica, which forever changed the way photographs were taken.

Ad for Leica 1

 Before Barnack's innovation, photography relied on bulky, cumbersome cameras that used large-format glass plates or film sheets. These devices were difficult to transport and required long exposure times, limiting their usability. An enthusiastic amateur photographer, Barnack sought to develop a more compact and convenient camera system that would still produce high-quality images. He turned to 35mm cinema film, which was already used in the motion picture industry, and repurposed it for still photography. He aimed to create a small, lightweight camera that could capture multiple images on a single roll of film.

 Around 1913-1914, Barnack developed a prototype of what would later become the Leica (short for "Leitz Camera"). This early model, known as the "Ur-Leica," used perforated 35mm film and a horizontal transport mechanism. The key innovation was that the film was advanced in small increments, allowing multiple exposures on a roll rather than requiring a single frame per exposure. Barnack also incorporated a focal-plane shutter, providing precise control over exposure times.

 The outbreak of World War I delayed the commercialization of the Leica. Still, in 1924, Ernst Leitz II, head of the Leitz company, decided to move forward with production. The Leica I was officially introduced at the Leipzig Spring Fair in 1925, marking the beginning of the 35mm camera revolution. The camera instantly succeeded due to its portability, superior image quality, and innovative design.

 Leica cameras quickly became popular among professional and amateur photographers, particularly in journalism and street photography. Their ability to take quick, candid shots without cumbersome equipment made Leica the camera of choice for legendary photographers like Henri Cartier-Bresson and Robert Capa.

 Over the decades, Leica continued to innovate, introducing models such as the Leica II (1932) with interchangeable lenses and the Leica M series (1954), which refined the rangefinder design. The company also played a crucial role in developing optical advancements, such as high-quality lenses like the Summicron and Noctilux.

 Today, Leica remains an iconic brand known for its precision engineering and commitment to craftsmanship. Oskar Barnack's vision laid the foundation for modern photography, and his pioneering work continues to influence camera design and photographic culture worldwide.

My Camera:

The first thing I noticed when I started to use the Leica I was how compact the camera is. When the lens is retracted, the camera is one you can put into your coat pocket to have handy when traveling or just for everyday use. The camera is 5.25" wide by 2.5" tall, including the winding knobs and viewfinder, by 1 5/8" deep when the lens is retracted and 2.5" deep when the lens is extended. My Leica 1 weighs just under 1 lb. and comes in at 15.6 oz without film loaded into the camera. The serial number on my camera is 19569, which, according to the lists online, the camera was made in 1929, along with a bit over 8,000 made that year. The Leica 1 cameras were made between 1926 and 1931 and were popular, producing approximately 70,000 cameras during that time. My camera comes with a Leitz Elmar 50mm f3.5 lens, and I've looked everywhere but do not see a serial number on the lens. This could be because the camera didn't have interchangeable lenses, and the serial number for the camera was enough.

The early Leica is different from the later models as the rangefinder is separate and needs to be attached to the accessory shoe for the photographer to achieve fine focus on the subject. Once the photographer uses the rangefinder, they need to transfer the focus distance shown on the rangefinder to the lens focus before taking the photo, so the process is longer and more tedious. The viewfinder on the top is for composition purposes only.

 Also, the lens needs to be extended from the camera body and "locked" into position by turning the lens clockwise until you feel the lens cannot be turned anymore. Now you're in the "taking" position of the lens. To retract the lens for transportation or to put it away, turn it counterclockwise, press it back into the body, and put the lens cap on so you don't damage the optics. The lens on the Leica 1 isn't interchangeable due to a pin at the 11:00 position on the camera body, which prevents the lens from being unscrewed from the camera body. The pin also limits the lens's ability to focus only from the minimum focus distance of 1.5 feet to infinity. Unscrewing the pin will remove the lens from the body for servicing or cleaning if needed.

Also on top of the camera is the shutter speed dial with speeds of 1/500, 1/200, 1/100, 1/60, 1/40, 1/30, 1/20, and "Z" for timed exposures. You must lift and turn the dial to change the shutter speed. Still, it's always recommended to do so after you cock the shutter, which is done by winding the film advance lever until it stops. The shutter release is next to the film advance lever and just behind the switch for film advance, which is in the "A" position, flipping it to "R" for film rewind.

Loading the film on a Leica is different than what people are now used to when they load a 35mm camera. The back on early Leica's and rangefinder cameras do not swing open. You must remove the base plate by turning a switch on the bottom to the "open" position, then pull the baseplate off the camera. You can take out the film's take-up spool, which you can grab and pull out. The easiest way to load the camera is to put the film leader into the take-up spool, then pull a bit of the film leader out so you can slide the film cassette and take-up spool into the camera body at once. Push the cassette and take the spool into position, ensuring the film is behind the shutter. Put back on the baseplate and turn the switch to "locked." 

Before I wind to the first frame, I always take up the slack by turning the rewind knob a bit, so when I do wind to the first frame, I watch the rewind knob turn so I know the film is transporting across the shutter. Set the frame counter to 1, which is around the film advance knob and can be moved by two pegs on either side of the knob. Double-check to ensure the film advance switch is in the "A" position and wind to your first frame.

 Now that I have the camera loaded with film, I'm going to take a stroll through the neighborhood and see how it performs.

My Results.

After attaching the rangefinder to the camera, I wanted to get the whole experience of what it was like to photograph with the Leica I, as people did almost 100 years ago. I also have my trusty Sekonic L-308X-U around my neck for accurate metering; I went walking through the neighborhood, focusing on the subject, then transferring from what the rangefinder said the focus. Using the meter to get proper meter readings and setting both the shutter and aperture to the meter settings. I really took my time taking photos with this camera.

 Here are a few of the different images I took with the early Leica I camera.

Conclusion:

I can see why people would have liked and wanted to use this camera almost 100 years ago. It's small, compact, and lightweight. The process of taking photos was slower. Still, it was fun compared to what they needed to do 100 years ago. As a photographer, taking your time, metering your subject, focusing on your subject, and composing the photo was fun. It's much different than what we have now with autofocus, automatic metering, and film advance.

I made a short video on the Leica 1 Camera, which shows the controls and loading the camera with film.

 I want to start using the Leica I regularly. It's quiet to shoot with, the lens is sharp, and it's small and compact. Overall, it's a great and fun camera.

 Thank you for taking a few minutes from your day to read about this old gem of a camera.

  I'll be taking next week off, as I'll be helping at a photo conference all week. I'll see you in a couple of weeks. Until then, please be safe.

Panon Widelux F7 Camera

My Widelux F7 camera

I enjoy several different types, styles, or kinds of cameras. When I started collecting cameras over 50 years ago, I was drawn to anything out of the ordinary. If the camera had a different faceplate on a box-style camera or was a different color or shape, these were the items I've always searched for when I go out looking for cameras or anything photographic to add to my growing and now hopefully somewhat shrinking collection as I'm "trying" to downsize my collection.

 One of my favorite types and styles of cameras is panoramic cameras, which fit right in with the odd or unusual types made. They take different forms when you start to look at the various styles of panoramic cameras. They can look like a wood and bellows camera on a geared tripod, which would be a circuit camera and one of the first styles of panoramic camera. They can look like a more extended box style camera but have a lens that rotates across a curved film plane similar to the Kodak Panoram or more intricate Multiscope Al-Vista camera, which employed different sizes of "flags" to speed up or slow down the rotation of the lens. Or an elongated camera similar to the Fuji 6x17 or Horseman 6x12 camera.

Image taken from Widelux F7 Manual

 Essentially, panoramic cameras expose a longer piece of film in the camera itself. They generally have a wide-angle lens to expand the area the camera and film see. It is very similar to cropping the top and/or bottoms of any format film to give the appearance of a longer, broader photo. I remember in the 1980s and 90s when the camera had the "panoramic" feature built into the point-and-shoot camera that did nothing more than have a blade within the camera close to the film plane that would crop the top and bottom of the film frame to take what appeared to be a panoramic negative. Heck, they even had disposable cameras that did just that.

 I have several panoramic cameras, and a few years ago, I purchased a very good Widelux F7 camera. Cosmetically, it wasn't the best, and it needed some work, so I researched where and who could repair the camera for me. Ultimately, I sent the camera to Precision Camera Works in Lakeway, Texas. If the lens turret doesn't move smoothly across the film plane, the camera will cause banding due to the inconsistent movement of the lens.

 Upon completion of the overhaul, they did an outstanding job. They even replaced the difficult-to-turn rewind knob with something better, which makes the camera easier to rewind the film. The best part is the new rewind knob doesn't tear into your skin when you rewind the film, which was one of the big pet peeves of the camera before I had it serviced. They did return the old knob, so if I wanted to have it put back, it's quickly done.

The video below shows the camera being re-wound, then I changed the shutter speed to show the lens movement.

The Old and New Company:

The Old Company:

The Widelux camera was made by Panon Camera Shoko, which was started in 1952 by Nakayama Shozo. A small camera manufacturer originally made the Panon camera, which I wrote about back in 2020. It was a swing-lens camera made for 120-size film. The company was small but specialized in the swing-lens panoramic camera style and improved the larger 120-format camera.

 In 1958, the Panon company, known for its swing lens style of panoramic cameras, introduced its first 35mm panoramic camera, the Widelux F1. This camera, incorporating a 26mm f2.8 lens, exposed a film frame 24x59, approximately 65% longer than the standard 35mm frame. This extra area gives photographers a 140-degree diagonal angle of view and 126 degrees horizontally. Over the years, Panon Camera Shoko continued to innovate and improve its models, leading to the production halt of the F8 model in the mid-1990s.

 1963 Panon introduced the Panophic, a 120-film format swing-lens panoramic camera. This is an updated version of the Panon camera with an interesting design, a curved back, and a much larger viewfinder on top. In 1987, Panon introduced the Widelux 1500.

The New Company:

There is someone more famous than myself who also enjoys panoramic cameras and photography, and that's the Big Lebowski himself, Jeff Bridges, and his wife Susan, a tremendous photographer in her own right. They are partnering with Marwan El Mozayen, Editor-in-Chief of Silvergrains Classic, and Charys Schuler. They have formed SilverBridges, planning to re-introduce the new Widelux X camera. Their goal is to have the camera introduced sometime in 2025. My fingers are crossed, and if they need someone to test the camera and give it a review, I'm personally raising my hand now. I and a thousand other people have a much larger audience than I have.

My Camera:

My Widelux F7 camera is not just a piece of equipment; it's a companion on my photographic journey. It's 6.5" wide, 3 5/8" tall, and 2.25" deep from the front of the lens turret to the rear of the camera. The F7 weighs 1 lb. 14 oz. with a roll of film in the camera. Like all Widelux F7 cameras, I have a 26mm f2.8 lens, serial # 466392. The lens rotates on a cylinder across a curved film plane to get a longer negative area. Because of this longer negative, the camera only takes 21 images on a roll of 36 exposures. I generally get 22 when I use my camera. It will take approximately 13 on a roll of 24. Here is the manual for the Widelux F7.

There are only three shutter speeds on the camera: 1/250, 1/125, and 1/15. The aperture on the lens ranges from F2.8 to F11, so the exposure control, while adequate for most shooting, is less than what most people would consider normal. All of the controls are on the top of the camera, along with a bubble level to make sure things are straight, the film advance and rewind knobs, along with a wide viewfinder to give the photographer an approximate view of what they'll get within the photo.

The more tricky thing about the Widelux camera is the film loading. If not done correctly, which is what happened on my first roll, some of the negative areas won't be sharp. To take the back off the Widelux F7 camera, there is a locking knob on the back to lock by turning counterclockwise to the unlock position and clockwise to lock the back onto the camera, which is clearly seen.

 Once the back is off the camera, the typical film chamber is where you put the fresh roll on the right-hand side. Lift up the rewind knob to put the fresh roll in, then to hold it into place, press the rewind knob down to lock the film cassette into the camera. At this point, I crimp the very end of the film upwards to help the loading process.

There are two columns, one on either side of the curved film plane. The film must go under the first column on the left-hand side, then over the film plane, and then back under the column on the right-hand side. This is where I ran into a problem with my first roll of film. There is a slit between the right-hand column and what you see looking down on the camera. Make sure the film goes all the way down under the column before it comes back up by winding the camera and having the film drive gear pull the film leader back up. The first time I loaded the camera, the film went through the slot, and the right side of my negatives wasn't sharp, and I was disappointed.

One of the reasons why I crimp the end of the film leader is to grab onto the film drive gear when going under the second column. It needs something to catch onto to pull the film up and across the drive gear before I place the leader into the take-up spool. It's not that difficult, but you'll understand once you get the camera. Before I put the back onto the camera, I always take up the slack with the rewind knob, so once I put the film back onto the camera and lock it, I can see the rewind knob turn as I wind to the next frame. This way, I know my film is transporting across the shutter, and I'm taking photos. When I worked retail in a camera store, I can't tell you how many times I had people not load their cameras correctly, and watching the rewind knob turn when advancing the film is a surefire way of telling if the film is loaded correctly.

Arrows showing angle of view.

Now that the camera is loaded and you're ready to start taking photos, it's VERY important to understand how to hold the Widelux camera. You don't hold the Widelux like a regular 35mm camera because of how the lens swings and the wide angle lens; your knuckles and/or fingers will be on the sides of each negative. You want to hold the camera with your thumbs on the bottom of the camera and your fingers on the top—nothing on the sides. Take your meter reading, grab the camera on top and bottom, look through the viewfinder, and press the shutter. You'll hear the whirring of the shutter as the lens swings across the film plane. Wind the film to the next frame and repeat. It will initially feel odd, but once you see your fingers in the photos, you'll quickly correct the holding procedure.

 Now that you've finished the roll of film, press the rewind button on the bottom of the camera and rewind the film into the cassette. Open the back door and take the film to get processed. In my case, take it to the dark bag and processing tank to process the film.

My Results:

I took some photos of walking through the neighborhood for the blog post. I have taken the camera to Africa, Europe, and many other places and absolutely LOVE this camera.

My Conclusion:

What else can I say that I haven't already said in the blog? This is one of my, if not my favorite film cameras. I also love shooting with my Panon, but it's a more prominent and heavier camera, although the results are terrific with the Panon.

 I made a short video on the Widelux F7 basic controls & Loading film.

 Thank you for taking a few minutes from your day to read about this wonderful and exciting camera. I hope many of you have one; if not, you're missing a superb camera.

 Until next week, please be safe.

Merten Merit Box Camera

My Merten Merit Box camera.

We're three weeks into February, which I've deemed Box Camera Month for my blog posts. I purchased this camera about five years ago at a camera show I attended in Kent, WA, a suburb of Seattle. This show, which is a gathering of camera enthusiasts and collectors, is coming up again in early April. It's a great opportunity to see a wide variety of vintage cameras and photography equipment. If you're in the Seattle or Portland area, please stop in. I plan on having another few tables to sell off some of my collection.

 Getting back to the camera of the week, I had previously owned the Merten Merit Box camera many years ago. Still, it wasn't nearly as good of condition as this one. It was missing one of the outer viewfinders, and there were many chips in the Bakelite, so I was pleased to see this example at the Kent camera show, and it was at a very reasonable price. One of the things that initially drew me to the camera was the color of the camera. It has a dark brown color with a smooth texture throughout the camera, with the exception of the faceplate, which has a pebble finish to the Bakelite.

 The other nice thing about this camera is that Merten made two different models. The one I had previously was a 6x4.5cm format camera on 127 film. This camera is a rare version as it takes 120 films and produces a 6x9cm format image, so the negative is larger, and the film type is a lot easier to purchase. The other nice thing about this camera was the handle was intact. Due to how the camera is built, I have seen many examples where the strap is broken or missing. This camera has very few chips in the Bakelite, and the strap is intact and in overall great condition. The shutter also works.

 Since all the stars are aligned with a 6x9cm format camera and a working shutter, the camera takes 120 film. I figured it was time for me to take the camera off the shelf, load film into the camera, dust off and clean the lens, and take a walk around the neighborhood to take photos with this wonderful photo-making machine.

The Company:

French ad for Merit Box

In 1906, the Merten brothers Ernst, August, and Emil founded the Gebrüder Merten Gummersbach (GMG) company in Windhagen-Gummersbach, Germany. They started manufacturing electronic installation components. In 1926, they focused their attention on manufacturing plugs and sockets, which is where their business grew.

 In the early 1930s, Mertens used their Bakelite presses for various purposes, such as producing equipment for laboratories and, yes, in 1933, even producing a series of cameras for the rapidly growing photographic market. These were the only cameras produced by Mertens, and they turned their focus back to the electronic field.

 By 1985, Mertens had grown to the point where they were producing electronic accessories items for the commercial trade, and by the year 2000, intelligent devices were added to their portfolio of electronic products. Merten's products for smart buildings are available in more than 130 countries, where they produce electronic products for residential buildings, offices, public buildings, hotels, schools, hospitals, and businesses. 100 years after they started their business, Schneider Electronics purchased Mertens in 2006.

My Camera:

My Merten Merit Box Camera is 4.5" tall, including the leather strap, 3.5" wide with the winding knob 5.5" deep from the front of the lens to the back of the camera. The camera weighs 1 lb, 1.6 oz without film loaded into the camera. The camera is a typical box camera with two different viewfinders, one for vertical images on top of the camera and one for horizontal images on the right side. 

The Merit Box camera has a Rodenstock lens, around 80mm, and the aperture is F11. There are two positions for the shutter, which is set by a toggle arm below the lens, either a line for instant photos or a round circle setting for timed exposures. There is an option to screw in either a self-timer or cable release just above the shutter release button, which is located just to the right of the lens as you're preparing to take a photo. There is also a sliding bar on top of the camera, which allows for three different aperture settings. When the sliding bar is in the lowest position, the aperture is F11. Then, slide the bar up to the following setting, F16, and all the way to the top would be F22.

On the back of the camera is the name of the camera embossed into the Bakelite, the red window to tell the photographer which frame they are on, Germany, Film B-2, which is an Agfa reference to 120-size film, and finally, the film format 6:9.

 One of the very unique features of the camera other than the beautiful dark brown color is the interwoven strap on top of the camera. The strap or top handle doesn't come off. Instead, it has two interlooped sections that allow the strap to lengthen as you take the front off the back of the camera to load film. This makes it more difficult to load the film as you need to deal with both the front of the camera and the rear when you load film into it. It's not difficult to deal with, but at the same time, it's more than most people are used to when loading a simple box camera, mainly used for the less professional photographer.

There are two locking mechanisms on each side of the camera to load the camera. Rotate the knobs counterclockwise to unlock the back from the front. Then, you'll need to slide the strap apart to allow the camera's front and back to be removed from each other. On my camera, the strap holds the two pieces together as the strap is somewhat tight and stiff. Once you slide the two strap pieces apart, the front and rear of the camera open easily; from there, you can load the film into the camera.

 Once I put a roll of film into the camera, I attached the front to the back of the camera. I turned the locking knobs clockwise to lock the two together and slid the strap back to the shorter position so it would hold the front and the back together a bit better. It could quickly be done if I needed to make the handle a bit longer to hold the strap as I used the camera.

The one thing I noticed when I went to load the film into the camera was the winding mechanism didn't engage with the film spool very well. I needed to press the winding knob, and I was turning the knob to advance the film. The flat end of the winding mechanism that fits into the spool didn't seem long or thick enough to fit tightly into the film spool. The whole winding mechanism seemed very wobbly. I did try t tighten the screw, but that didn't help. The camera is almost 100 years old (92 years), and I'm guessing that it's just worn a bit, but I doubt it's been used very much because the strap is in great condition and still intact.


My Results:

Now that I had wrestled with the strap and held both the front and rear of the camera in my lap to load the camera with a roll of 120 films, it was time to take a walk through the neighborhood to see the results from this beautiful brown bakelite camera from the early 1930s. Here are some of the results from my walk.

Conclusion:

The one thing that I struggle with when using these simple box cameras is the close distance required to get a somewhat sharp image. Since it was somewhat sunny outside, I figured that using the sunny 16 rule would be my rule of thumb for exposures. 

 For those unfamiliar with the Sunny 16 rule, you use the shutter speed closest to the ASA, or as it's known now, ISO in your camera. (Yes, I'm old school.) If it's sunny outside, you use f16. I had ASA 125 film in the camera and figured the shutter speed was close to that, so I put the aperture setting in the middle setting for my exposures outside.

 I photographed my daughter and her dog, Bean, initially about 4 to 5 feet away. Then I took a step back, and the photo still was out of focus, as were many of the images I took between 4-6 feet from the subject. The one image that is nice and sharp is the more scenic photo of one of the neighbors' houses, which turned out very well. My guess is the best minimum distance is 8-10 feet away, looking at some of the results I achieved.

 Thank you for taking a few minutes from your day to look over this unique and simple camera from about a century ago. It was fun to take it off the shelf and use it as it was intended. The results are the best, and my guess is that due to several different reasons, the Merten Merit Box camera wasn't a huge seller during its time.

 Until next week, please be safe.

Gomag Holly Camera

My Gomag Holly Camera

As I declared February as 'Box Camera' month, I found myself gazing at the camera collection on the shelf above my desk. Tucked away in the back corner was a hidden gem, the Gomag Holly camera, a treasure I had forgotten about until I reached my hand back there. The joy of rediscovering this unique piece of history was overwhelming, and it brought back a flood of memories.

 Looking back at my records, I purchased this camera in late 2010 or early 2011 from an online auction with a few other box-style cameras. What intrigued me about this camera was its unique design, with two viewfinders built into one camera, and its ability to set both shutter speeds and aperture, which was unusual for a simple box-style camera. The rarity of the Gomag Holly camera added to its allure, making it a prized possession in my collection. 

 Another thing I liked about the Gomag Holly camera was the rounded corners, which gave it a less industrial look and a more refined appearance—something you'll want to pick up and use. When I picked up the camera to start writing about it, I heard something rattling around in it. My initial thought was that the camera wouldn't be usable. Still, I opened the camera and found one of the film transport rollers lying in the back of the camera.

 When I initially purchased the camera, I can't remember if I noticed that three of the sockets that hold the two rollers on the back of the camera, which prevent the film from scraping across the film plane, were missing. If I remember correctly, I didn't think much of it then because I thought, "I'd never really put the camera to use," as it was mainly for the show in my collection. That was until recently when I viewed the camera and wanted to write about it for my weekly blog post.

The Company:

I've done exhausting searches on the web. I cannot find anything about this camera or its manufacturer. I did come across an article from the Photographic History Society of Canada named The Holly and the Ivy that did a very short article about this camera, and in the article, they state the camera was made by Allgäuer Kamerwerkstatte Gomag, which roughly translates to (Allgäuer) a region in southern Germany, (Kamerwerkstatte) Camera Workshop, (Gomag), which is my guess of the company that produced the camera. They were located in Pfonten, Germany.

Holly camera logo

The only other information I can find about this camera comes from McKeown's Camera Guide from 2005-2006 on Pg. 361, which states there were actually two versions of the camera. The first version was from Gomag and had "HOLLY" embossed above the lens in 1950. Then, the company was purchased by Dr. Riemerschmid & Co., and the later version without the embossed name and with different lenses and shutters was shown at Photokina the same year but was not released until 1952. According to the McKeowns' Guide, the earlier Gomag version has Emylar or Gomar lenses, and the later Riemerschmid has the Rictar lens. They also state that the last version has "Riemerschmid & Co. Munchen" around the shutter face. Still, my camera doesn't have that, so there must be different versions, or I didn't bother with this camera.

 I've looked at several websites about camera manufacturers but cannot find any information about them. If you're reading this and do have information, please write to me and let me know. I'd love to add that information as an update when I have it.

 The one thing that I enjoyed reading the article on the camera was that the camera they were writing about was red. Now, that excited me, as I'd love to have a red version of the camera. The thought of owning a rare and unique red Gomag Holly camera keeps me hunting for the odd and unusual cameras. There may be a red version somewhere that they won't appreciate and will let me purchase for a reasonable price. My fingers are crossed.

My Camera:

My Gomag Holly camera is a bakelite camera that measures 4.25" tall, including the viewfinder in the collapsed position, by 3.5" wide, including the winding knob, by 4" deep, and it weighs 11.3 oz. The Gomag Holly camera has an 80mm f3.5 Rictar lens; mine has serial number 1886T. The camera has three different shutter speeds: 1/200, 1/50, 1/25, and "B" for timed exposures. The shutter speeds are set by sliding a ring around until you get the black pointer pointing to the desired speed. There is a small knob on the shutter speed ring that makes moving the shutter speed dial easier. You'll need to cock the shutter t, which is above the shutter speed setting ring and is pulled in the counterclockwise motion to cock the shutter. The shutter release is in the upper right-hand corner as you hold the camera to fire. There is a flash PC outlet on the other side of the shutter release, which I find somewhat odd, especially for a box-style camera.

 When  I first picked up the camera for this blog post and started to fire the shutter, I noticed that the shutter was lagging. It would fire, but the speeds seemed very slow. One thing I learned early on was to "exercise" shutters, so I spent the next ten minutes cocking and firing the shutter, which seemed to work well. After just a few minutes, the 1/200 was working as it should, and all the shutter speeds seemed to spring back to life and were firing at what sounded like the correct speed.

 The aperture setting ranges from F3.5 to F16. It is set under the lens, indicated by a silver pointer indicating which aperture is being set. The focus on the lens ranges from 1 meter to Infinity. It is stated on the top of the camera by a black triangle, along with the depth of field scale on either side of the focus mark.

A dial on the side of the camera is turned counterclockwise to open the back to open the camera. A small red dot on the dial points forward when the camera is locked and to the rear of the camera when it is unlocked, and the camera body can pull away from the lens to load the film.

Since my camera was missing the two rollers that the film rolls across during transport, I didn't want the roll of film to drag across the shutter, causing scuffs and possible static on the film during transport from frame to frame. I wanted to add felt to the sides of the film opening to decrease the possibility of scratches. I didn't have felt in my bag of tools, etc., but I did have some very old and expired rolls of 35mm film, which I use as test rolls. I thought these canisters were made of felt material, so I took the canisters apart and peeled the felt from them. Unfortunately, the felt on the 35mm canisters is too short, so I needed a couple to cobble together.

Once I took the back off the camera and pulled the felt off the 35mm canisters, I did have some excellent double-sided tape, which I cut into strips and placed on the top and side of the film opening. After that, I cut the felt from the film canisters into lengths that would fit onto the back of the film area, and since I needed two to cover the area, I staggered them on different sides of the film chamber. I probably didn't need to stagger them, but in my mind, it was the right thing to do.

 Once the film was in place, I let them adhere for a few minutes. I took an Exakto knife and trimmed any excess from the film area so I didn't have straggler hairs from the felt hanging over the film chamber. I wanted a clean edge between frames. Once I had that done, I loaded the camera with a roll of 100 ISO/ASA film into the camera. I proceeded to advance the film until I saw the "start" on the film backing. I put the film back onto the camera body and locked the back in place, then proceeded to wind to my first frame, looking through the closable window on the back of the camera.

On top of the camera are the viewfinders. There are actually two on this camera. In the back of the collapsed viewfinder is a small ridge. You pull back, and the "sport" finder pops up. You can pull up a smaller glass finder within the more extensive sports finder. A round glass lens is on the bottom of the rear portion of the sports finder. When the glass finder is pulled up, you can view your subject through the rear glass lens, which looks clever for a simple box-style camera and does a fantastic job when viewing through. To collapse the glass finder, push it down, and a clip will hold it into place. Then, you can close the "sport" finder's back portion and the larger front folds to keep them in place. It is a straightforward but valuable addition to the camera.

My Results:

Now that I have the camera loaded with film, it's time to walk through the neighborhood and see what results I can get from it. Since the camera has a "B" setting, I wanted to see how it would do on some longer exposures, especially since, living in the Northwest, we don't get much sun between November and March.

 Here are some of the results I achieved with the Gomag Holly Camera.

Conclusion:

The camera did an outstanding job. The images were sharp, well-exposed, and very good for a relatively simple box-style camera. The camera was very fun to use, and I had a fun time getting the camera in the proper shooting condition. The felt on the back of the film chamber worked well, especially since the two film rollers were missing. I'll need to get a small swatch of felt to keep in my bag of tricks in case I need to do the same to another camera I come across. If I go to sell the camera, I can always take the tape off along with the felt and have the camera back in the condition in which I purchased it.

 Thank you for taking a few minutes from your busy schedule to read about a very unknown but fantastic camera.

 Until next week, please be safe.


Marchand Fischer Baby Camera

Whenever my wife and I visit a foreign city, I check to see if the town or a surrounding city has a Flea Market to check out the local market of used and collectible cameras. This spring, my wife and I returned to Paris, which has a robust and large Flea Market area that thrives on the weekends. 


The Flea Market, which comprises smallish stalls selling goods from carpets to antiques and almost anything imaginable, was a used camera store. It was not in the flea market but on one of the main roads surrounding the markets. Looking around the camera store, I noticed that the shop owner had many great cameras, but one that caught my eye was the Fischer Baby camera made by Marchand.


The Company:

I don't have much to say here, as I've searched the Internet and cannot find out much about this company. It's most likely because they were a small French company in Charbonnieres, France, after WWII. They produced a minimal amount of toyish cameras in the 1950s sold in toy stores. Due to their build quality, which I'll get into more when I explain the camera below, they were poorly received and, therefore, went out of business.

 If you or anyone who reads this post knows anything about Marchand Co., which produced these cameras, I'd love to know, and I will update the blog post with that information.

The Camera:

There are a few items that drew me to this camera. The faceplate is typical, but it does have a 6 on one side of the lens and 9 on the other. My first thought was that it was a fascinating film format. I'm a real enthusiast of anything panoramic, so this was the first light bulb in my head. Then, when I got closer to the camera and picked it up, the bulbous size and extremely light weight of the camera were pretty fascinating. It has almost a circular look and feel to the camera. Being someone who enjoys panoramic cameras and images, the 6x9 format made this very intriguing.


The camera is straightforward and similar to a Box-style camera but even simpler as there is no aperture setting and only two shutter speeds. The Fischer Baby has a very simple shutter with a bulb setting  "P" for time exposures and an "I" setting for instant. The camera's shutter, at least on my camera, "clicks" when you press the shutter button down, which exposes the film, but it does the same thing when you pull the shutter button up to what most people would think it to be the starting position. The shutter speed is about 1/80th sec, and possibly even slower.

Another fascinating point about the camera is how thin the plastic is. It doesn't have a lot of "heft" to it, and it's pretty light—the camera loads like any other simple point-and-shoot style camera from the late 1940s to mid-1950s. There's a red window on the back of the camera so you know when you're at the next frame to take a photo. The transport continues, but you can wind past the next frame if you're not careful.

 The Baby Fischer has no frills in its design. Two clips on the side of the camera keep the front of the camera attached to the back of the camera. There is no locking mechanism, and the clips could open easily, exposing the photos already taken. My camera is missing its strap because one of the eyelets has broken off, which I'd guess is pretty standard due to its build quality.

The Results:

My first impression was that this camera takes 120 film. When I went to load the film, the 120 roll was too big, so I thought this must be a 620 film camera. Its re-spooling capability allows you to re-spool 120 films onto a 620 reel. I found an empty 620 film spool and a 120 roll of T-Max film, put them into my dark bag, and re-spooled the film.

 I had never done this before, and when I took the film out of the dark bag, it looked OK. It was not professionally done, but it was my first time doing so. After loading the film into the camera, I took photos with my second spare 620 spool.

 The results showed that my re-spooling wasn't perfect. In fact, it was poor, as there was some light leakage coming from the end of the spool where the film wasn't tight enough. Other than the light leaks, the results were pretty good.

The Conclusion:

After walking around my backyard and in front, too, the camera could have been better to work with. The viewfinder was challenging to look through and not precisely in its proportions. The winding was OK; you can see the film advance and frame numbers in the red window on the back. Since there wasn't a strap on my camera, I had to carry it, which wasn't uncomfortable, but I was always thinking about not dropping it. I'm glad I did a post on this camera and have already picked the camera for my next post, which will be on the Exakta 66 camera.

 Thank you for reading this post. I appreciate your time. Until the next post, please be safe and well.


Konishiroku Snappy Camera

It's been a few weeks since I wrote my last camera collecting blog post because I've started a new position. Now that I feel comfortable in the new job, I think it's time to write about some of my cameras. I love the new responsibilities, the company I'm working for again. I also think I have my nose above water and can take on other enjoyable tasks such as writing about one of my passions: cameras within my collection

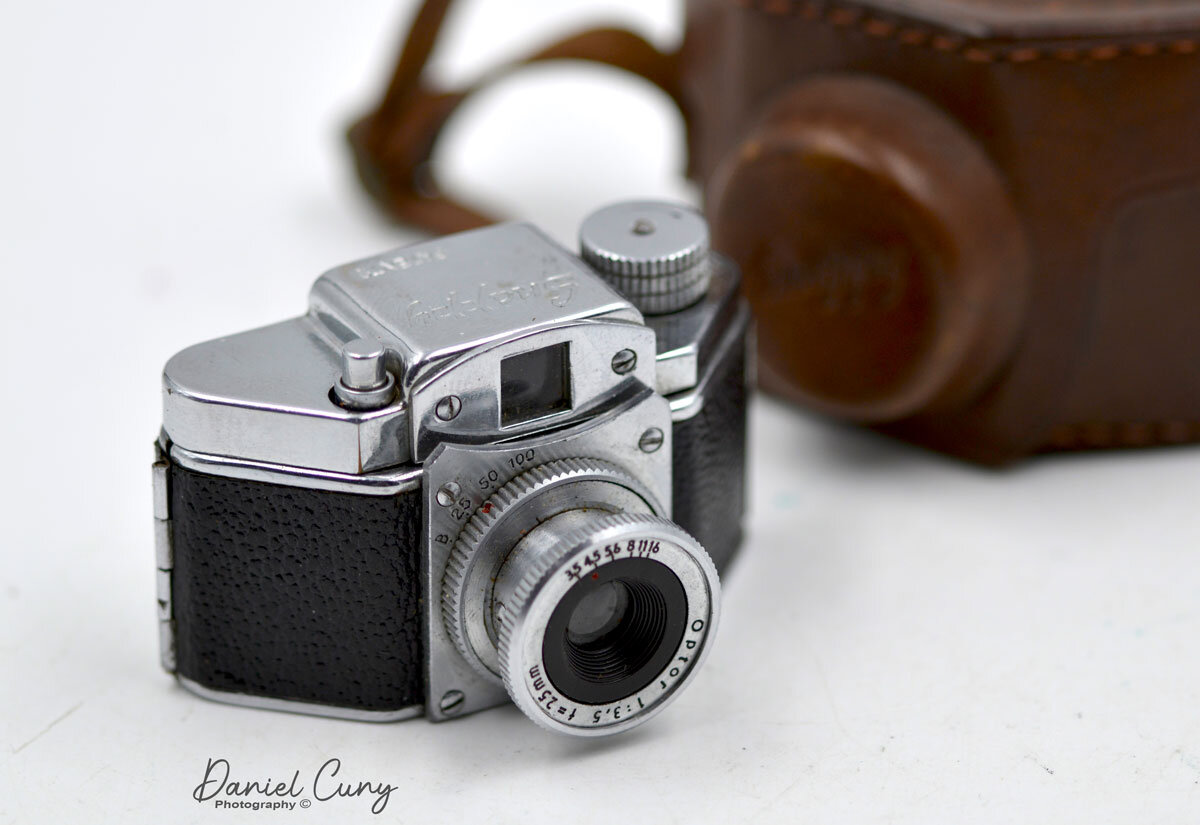
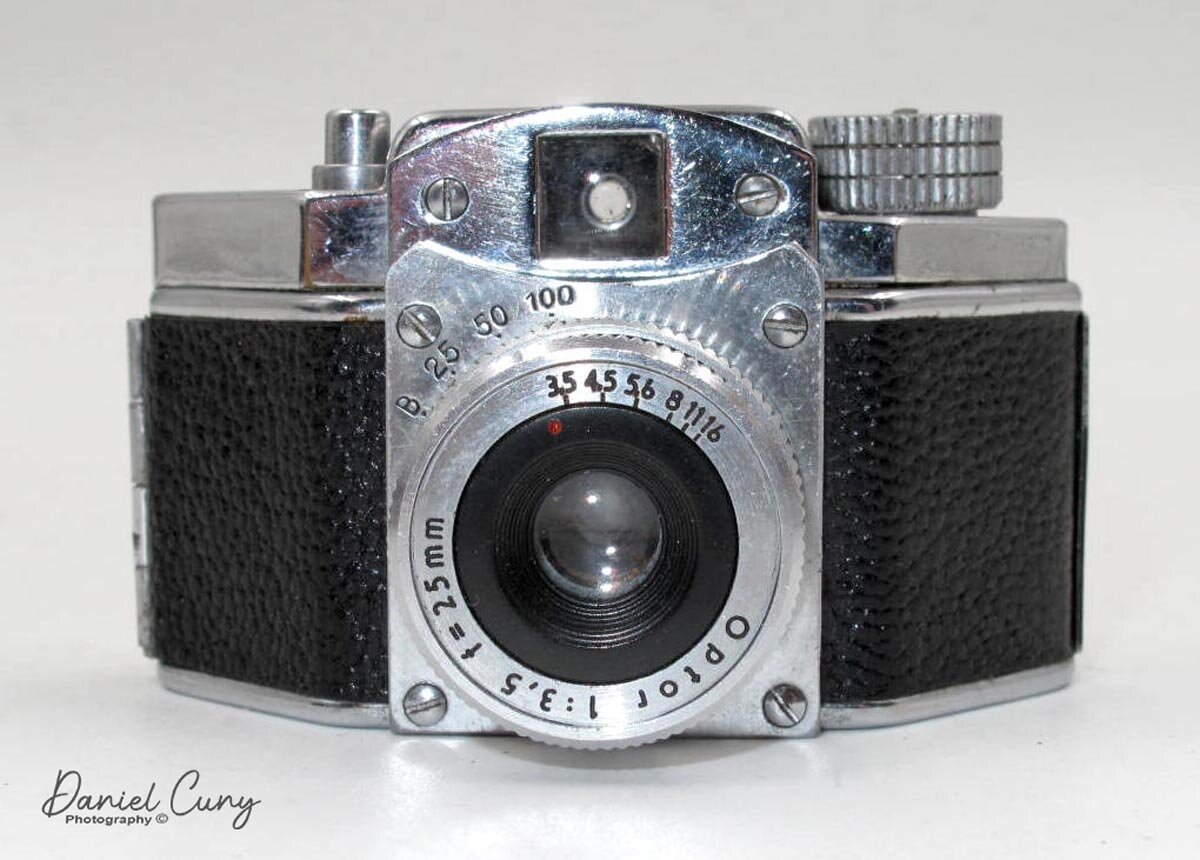
My Konishiroku Snappy Camera

My Konishiroku Snappy Camera

Looking over the cameras above my desk, I came across this small and what I believe is an underappreciated gem of a camera. So, in this week's blog post, I wanted to write about the Konishiroku Kogaku Snappy camera. A camera is exceptionally well built, especially for a subminiature-style camera coming out of Japan just after WWII.

Company History

Konishiroku is one of the oldest photographic companies coming out of Japan, even older than Kodak. The company traces back to 1873 when a pharmacist, Rokusaburo Sugiura, started selling photographic items out of the largest pharmacy in Toyoko that he owned. In 1878, Rokusaburo gave the original shop to his younger brother and launched a new shop, Konishi Honten, in Tokyo's Nihonbashi district.

In 1882, Konishi began to produce photography-related materials in Japan. In 1902, Konishi started to sell the Cherrimportedy Portable Camera, the first Japanese-built camera made for the public. In 1921, Konishi named his son Konishi Honten to succeed in the family business. The company turned into Konishiroku Honten, later Konishiroku, an abbreviation of their names Konishi Rokuemon.

 After WWII, Konishiroku was well known for its Konica brand of cameras, which they released the Konica I camera in 1948. Later in 1965, Konica produced the first auto-exposure SLR camera, the Konica Autoreflex. In 2003, they merged with Minolta and exited the photo market in 2006. they are now more recognized in the copier business.

The Camera

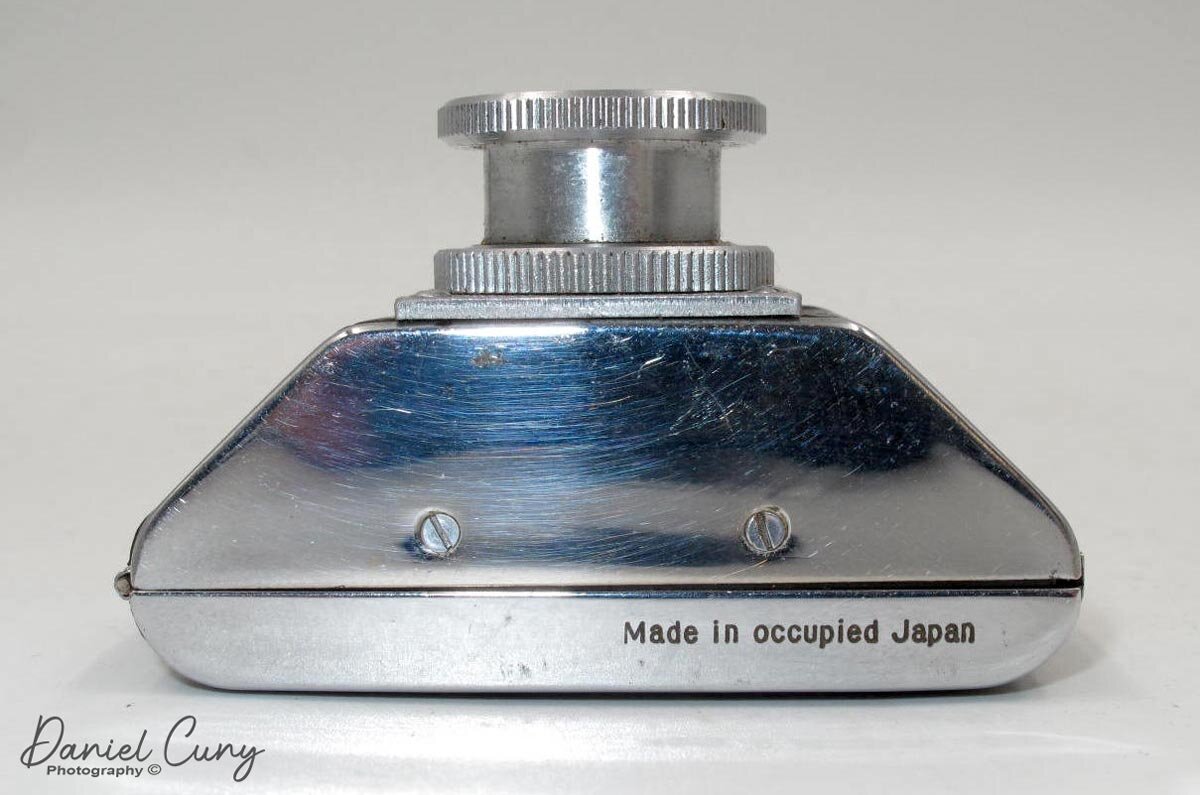
The Konishiroku Snappy was designed, developed, and sold in 1949. According to sources, the Snappy original design was in spring, with the first model released in August 1949. They were somewhat popular and sold approximately 40,000 units.

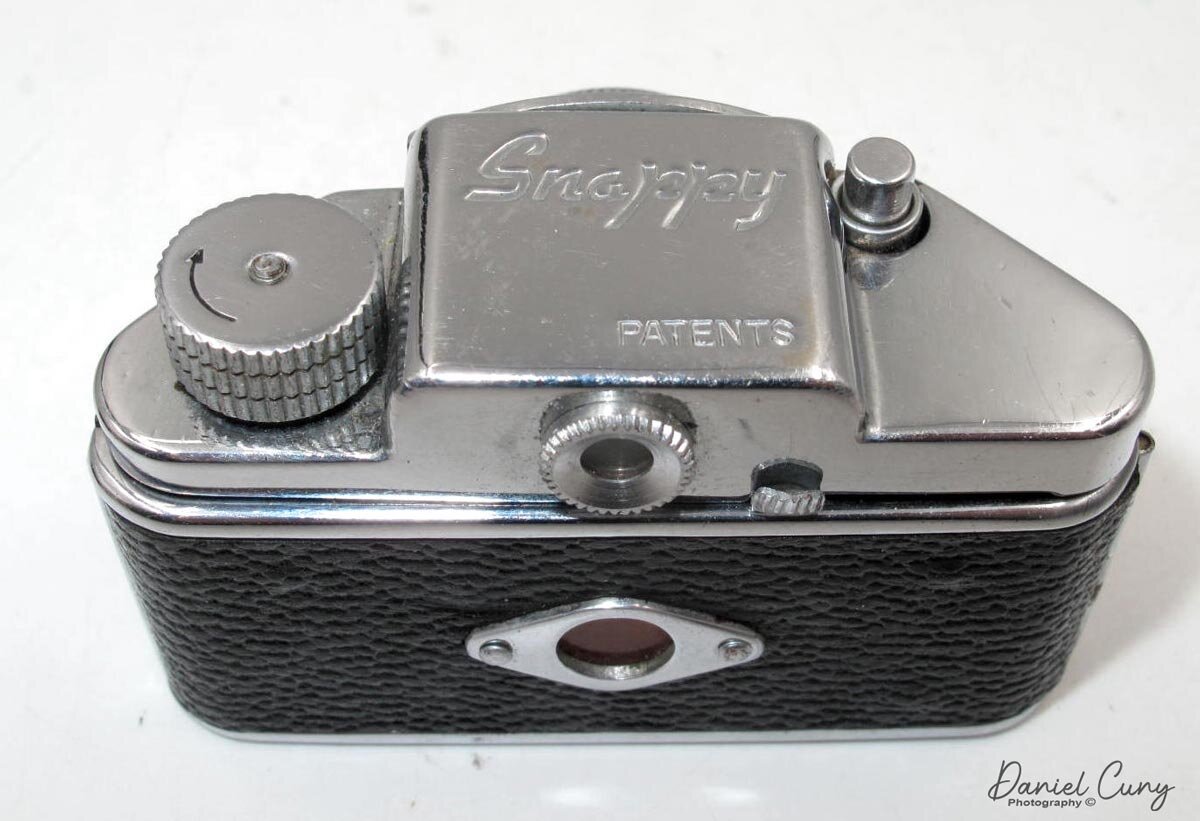
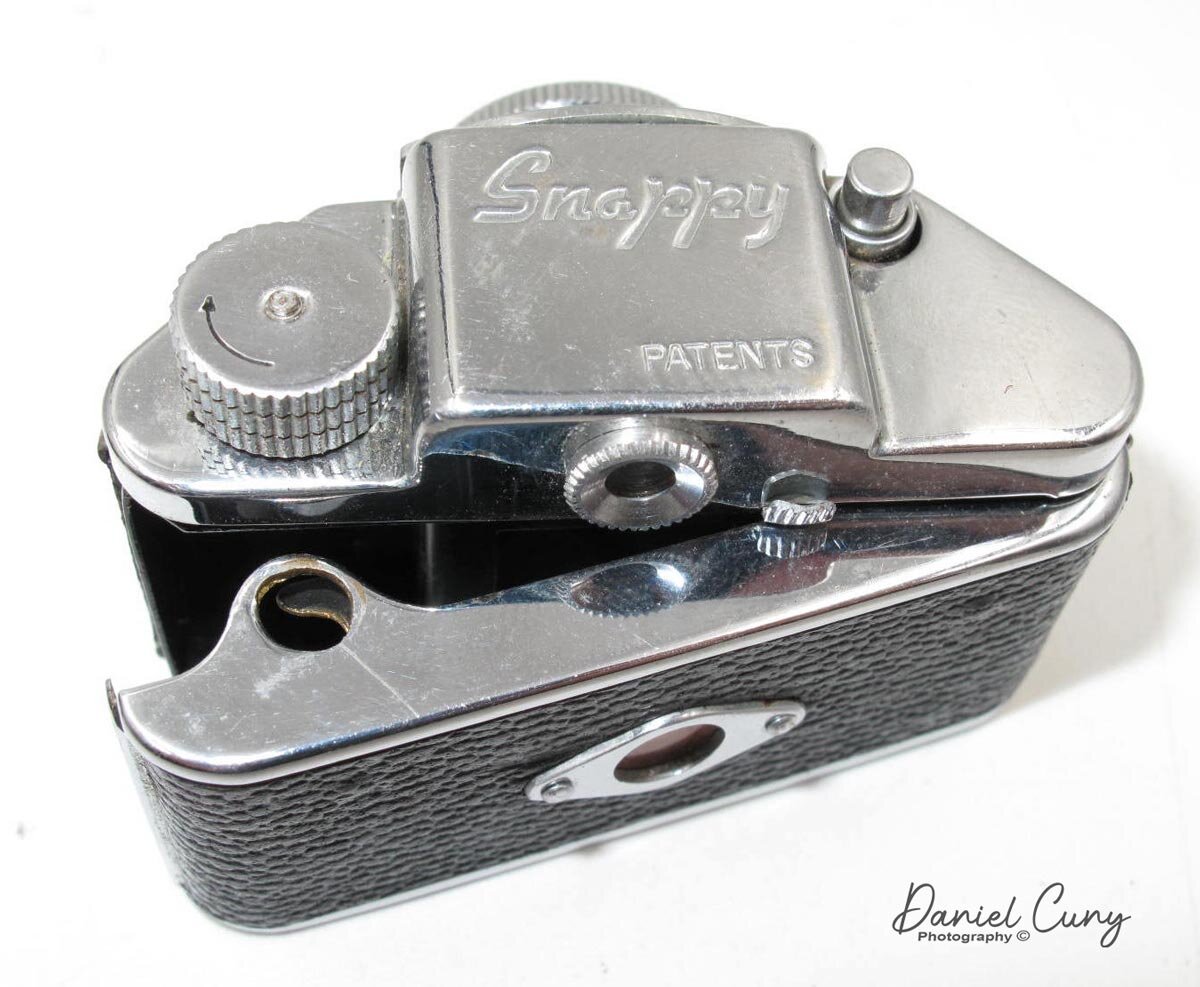
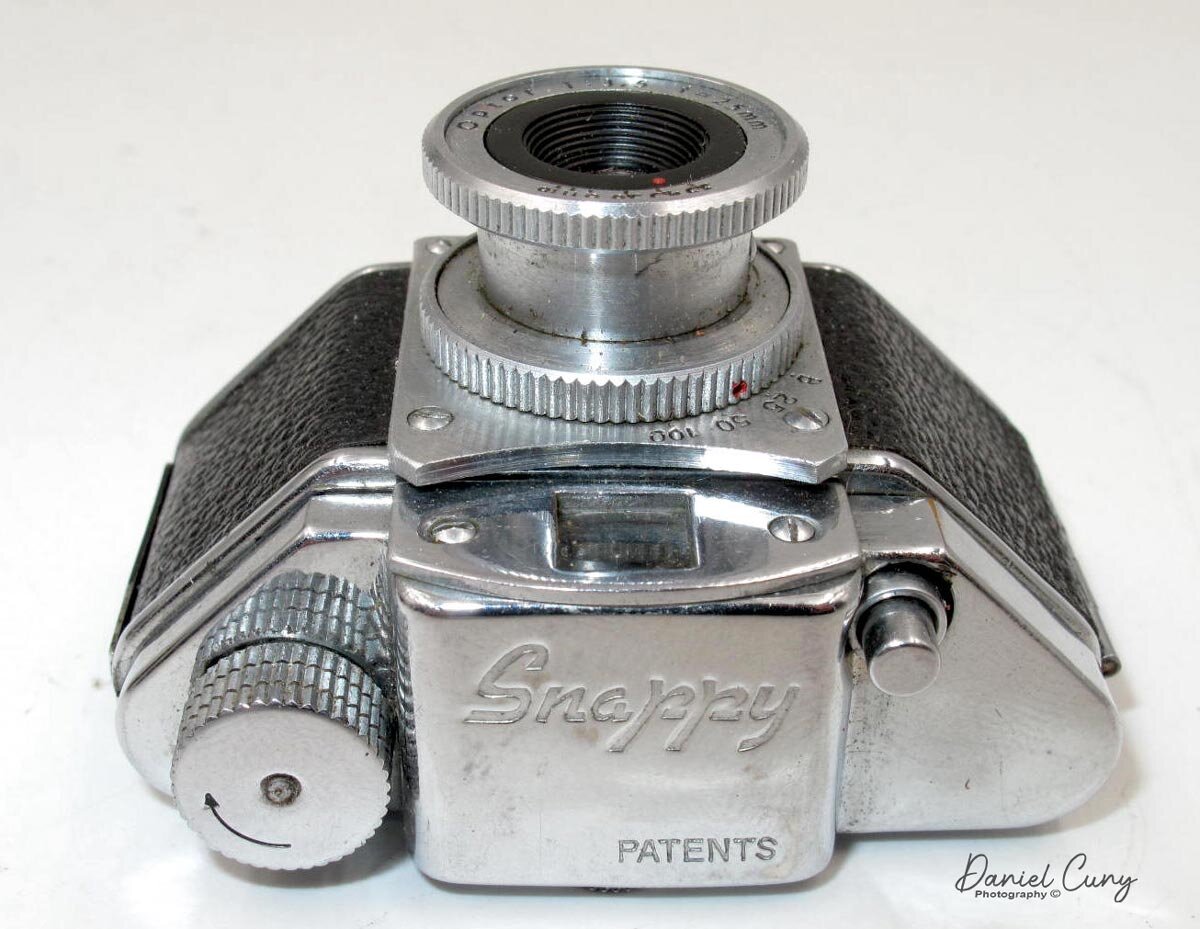
The camera has a trapezoidal-shaped camera that incorporates items seen in 35mm cameras of its time. The camera is a "system" with other lenses and accessories. In form, it reminds me of the VP Exakta, model B, which I wrote about in an earlier post, only considerably smaller. The camera measures 2.5" wide by 1 5/8" deep and 1.5" tall and weighs 5 oz. with a very sturdy and well-built leather case.

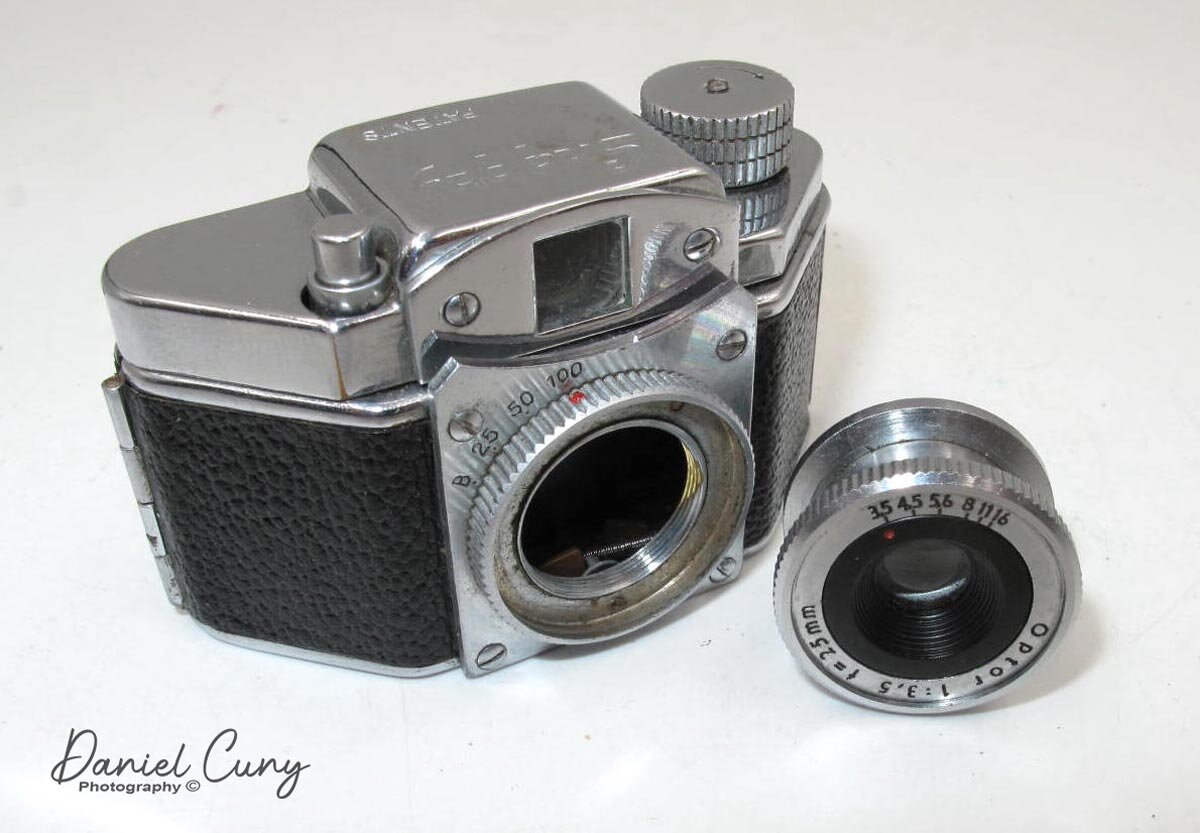
 Another item the camera has is a pull-up rewind knob that allows you to open the back. There are integrated shutter speeds of "B," 25, 50, 100. The lens is an Option 25mm f3.5 lens that allows the photographer to set aperture settings between f3.5-16 by turning the lens's outer ring. You would think this operation would focus the lens, but the lens is a fixed focus, and you're changing the aperture settings.

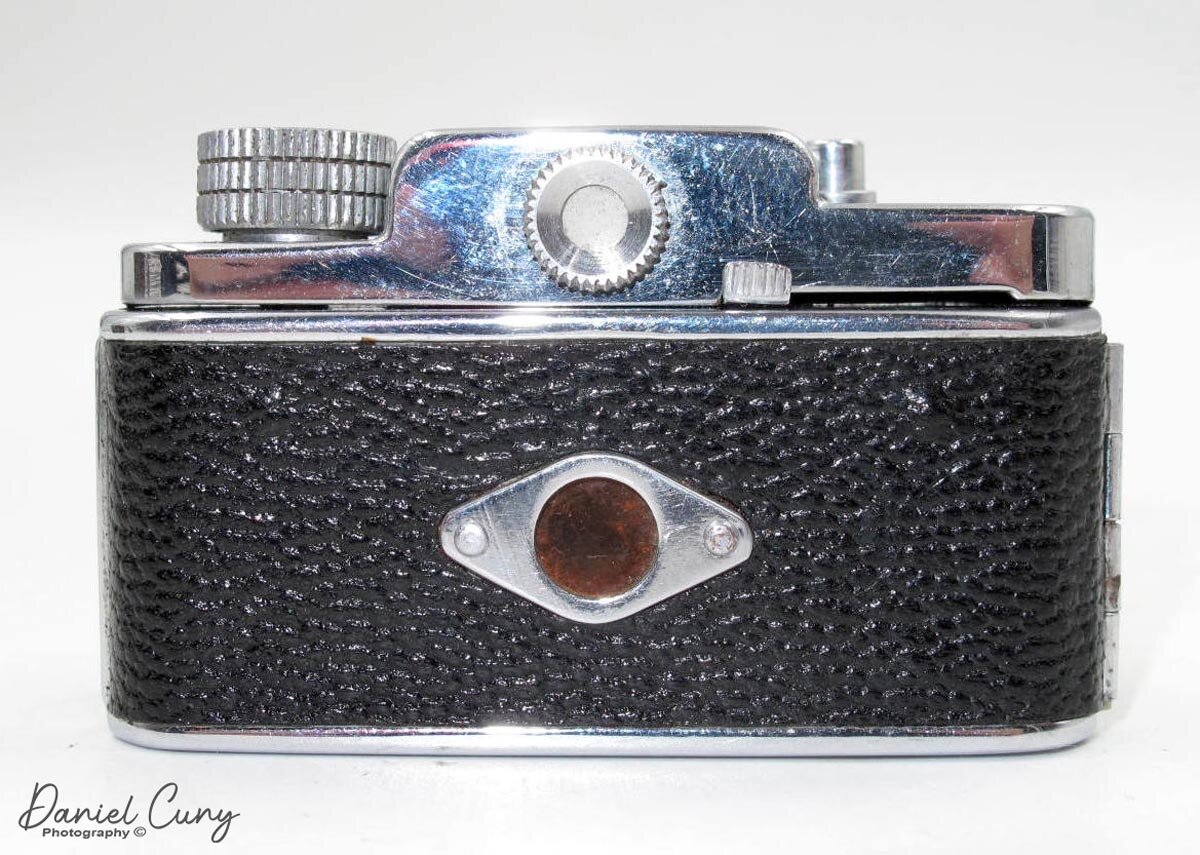
The camera has a horizontal running guillotine shutter tripped by the shutter release on the top of the camera. The winding leaver on the back of the camera advances the film and cocks the shutter.

 When you lift the rewind knob and swing the door open as you would a 35mm camera, you see there are rill film reels in the camera. The camera shoots 14x14mm square images on the 17.5 paper-backed roll film, which was popular in the "Hit" style cameras, but the Snappy film was much better quality.

The System

The lenses on the Snappy are also interchangeable, and they unscrew from the camera body. There is a Cherry 40mm f5.6 telephoto lens which also comes with an auxiliary frame that fits the front viewfinder window. Other accessories for the Snappy camera are Close up lens, which fits over the standard 25mm Optor lens, hoods and filters, tripod adapter, and the sturdy brown leather case with strap. The Snappy came in a kit with all the accessories in one red and black presentation box.

Conclusion

The Snappy is an excellent camera and a camera that I enjoy having in my collections. Having researched the camera, I'll need to hunt down the other accessories for the camera, especially the telephoto lens and filters. Maybe it's time to see if I can find the whole kit. Now that would be the crowning gem.

 Thank you for taking time from your busy schedule to read my blog post. I'll do my best to do this every other week, time permitting. Until next time, please be safe.

Petal Camera

In my early days of collecting, I was never a real huge fan of the smaller subminiature cameras, mainly since most of them were the lesser quality cameras, or as I called them, "carnival camera" like the Hit camera. Then there was the other end. The 007 spy style camera was coming from Minox. As I grew in my camera maturity, coming across cameras like the Minolta or Yashica 16mm camera gave me an appreciation of some of these cameras' quality and quality.

My Round Petal camera

My Round Petal camera

For this week's camera blog post, I wanted to go back to one of the subminiature cameras I have in my collection. The Petal camera has always intrigued me since it's the smallest of the small non-medical cameras made according to Guinness World Records. As far as cameras go, this one is tiny and just a little larger than a quarter in the US or a 2 Euro coin. The St. Peter Optical Company made the Petal camera, whose Japanese name was Sei-Petero Kōgaku, in 1948. According to some, I've seen some references where it stated its introduction in 1947. The first US advertising of the camera was in U. S. Camera in February 1949, which you can see here.

The Camera:

The Petal camera comes in two different styles, with an even rarer third version named the Evarax A. The two primary Petal camera are either a round-faced camera, which is what I own, or a second model with an octagonal shaped face. The Evarax A camera is an octagonal shaped face camera with a more elaborate etching on the faceplate. The Petal camera is only 1.25" across by 1.75" tall by 5/8" deep and weighs 2.2oz. The camera has a 12mm f5.6 lens, placed in the upper middle on the front of the camera. There are two shutter speeds, either "B" for time exposures or "I" for instant, which is 1/25th of a second, controlled by a wheel on the camera's front.

My Petal camera compared to a U.S. Quarter.

My Petal camera compared to a U.S. Quarter.

On the top of the camera is an optical viewfinder, and to the right of the viewfinder is the shutter trigger lever. Along the top of the optical viewfinder is a lever that can be mover over the trigger arm to lock it so you cannot take a photo when you don't want an accidental image taken. The shutter release lever pushes a plunger down into the camera, which trips the shutter. On the camera side is a knurled ring that you rotate to advance the film to the next exposures. To the side of the knurled ring, number 1 to 6 with indents stops the ring at the next photo.

Loading the Camera:

It took me some time to figure out how to get to the film chamber. After playing for about 15 minutes or so, I noticed that the back of the camera. The camera back can be unscrewed to get to the film cassette. Once the back is off, it exposes the film cassette. Once that's removed, you can see the shutter mechanism and the inside of the camera itself.

Unthreaded the back off the Petal camera. You can also see the exposure counter.

Unthreaded the back off the Petal camera. You can also see the exposure counter.

The film came in preloaded discs with 6-6mm images on each film cassette. The film cassette holds the film. To get to the film, the cassette needs to be unscrewed too. The original Petal film was a panchromatic film, which needed to be loaded in complete darkness. Many people used orthochromatic film like that can be loaded and unloaded under a red safelight, which doesn't affect the film. A film cutter allowed the Petal camera owners to cut 35mm film to use in the film cassettes.

Once the film is in the cassette and back into the camera, you thread the back onto the camera. You need to rotate the back portion of the camera one to two revolutions clockwise until the #1 is next to the exposure indicator. Doing this opens the film window on the film cassette and allows light to get to the film once the shutter is triggered.

Exposure counter on the Petal camera.

Exposure counter on the Petal camera.

After you took the six exposures, the exposure counter is at number six to unload the film. You need to turn the number counter clockwise two numbers to number 4, closing the film window and allowing the photographer to unscrew the back and take out the film cassette for processing.

Conclusion:

The Petal camera is a lot more sophisticated of a camera than I first thought when I purchased it many years ago. It's very well built and a prized camera to own for the "spy" photographers. Extremely small, very well made, and a beloved camera in my collection. The shutter on my camera is inoperable. It would be fun to cut some film and take it out for a spin.

 If you have questions or comments about this camera or any others in my collection, I'd love to hear from you. Thank you for taking a few minutes from your day to read about this fun camera. Until next week, please be safe.