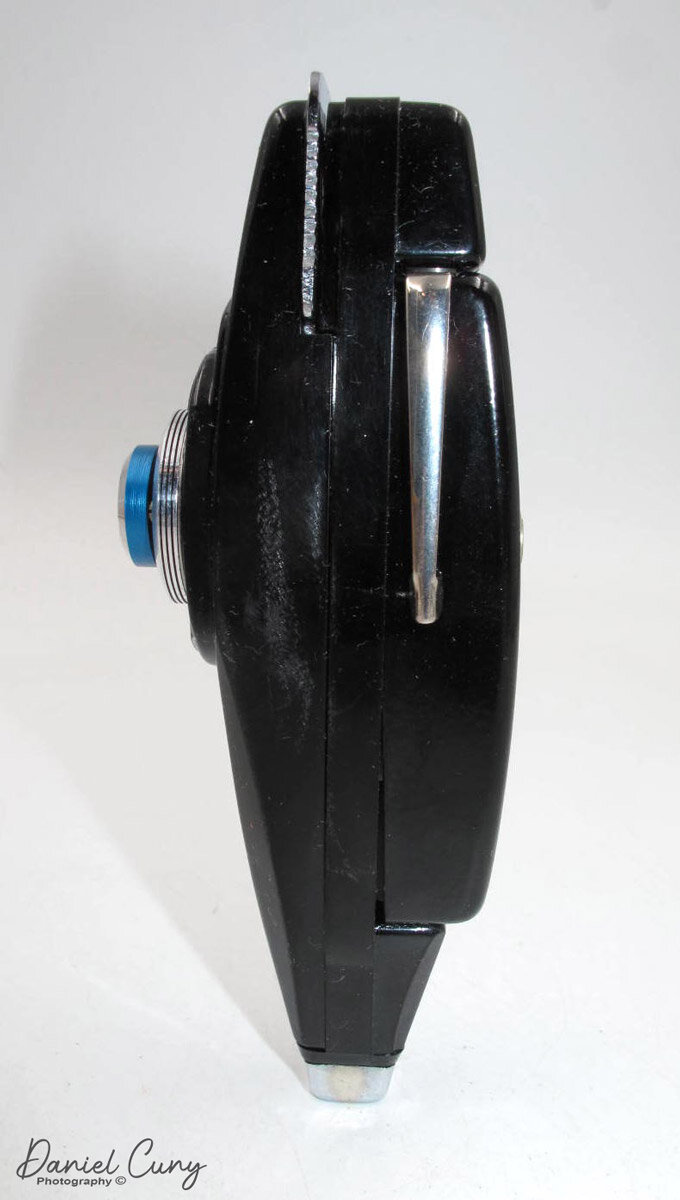
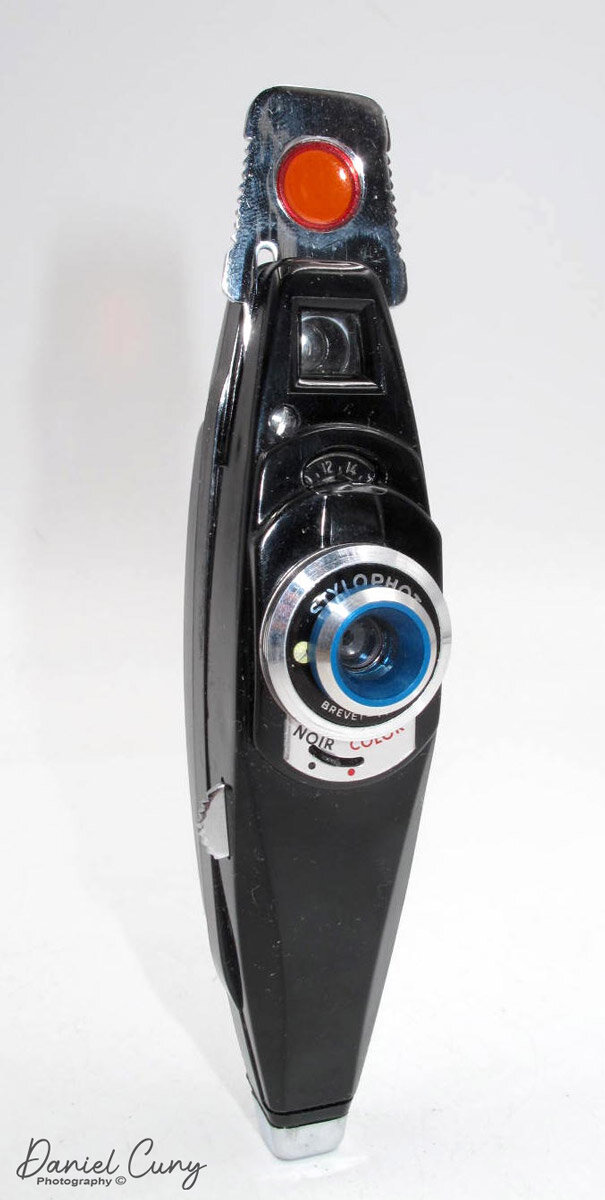
Gallus Derlux Camera

I can still remember when my wife and I visited Paris about 10-12 years ago and went to a small flea market in one of the arrondissements we were staying near and seeing for the first time the Gallus Derlux camera. My first impression was the camera needed the leather coverings that usually adorn cameras. Still, upon further inspection of the camera, it was made to have a silverish metal body as its covering. This was a camera I needed to have since its appearance was so different from any camera I had seen in the past.

My Gallus Derlux camera

 That was the first Gallus Derlux I've owned over the years. I sold that camera at the Paris flea market a couple of years after purchasing it, and I have bought and sold a couple of other Gallus Derlux cameras over the years. Recently, I had the bug to purchase it again to add to my collection. 

 I talked to a fellow camera collector, and he told me he had one and would sell it to me for a reasonable price, as I know he's downsizing his collection. I need to do the same thing but I purchased it from him. This camera has a working shutter and a nice pouch case. At this point, since I've had a few of these in my life, it's time to put some film in the camera, take it for a spin around the neighborhood, and write a post on it.

The Company:

To discuss the camera company, Gallus, we need to include the German company Foth in this discussion. After WWII, Gallus, which was in Paris, was either licensed by Foth or Foth moved their operation to Pari and renamed the company Gallus due to what was going on in Germany after the war. Let's start with a bit of information on Foth and work our way forward.

 The C.F. Foth Company, established in 1930 in Berlin, Germany, gained recognition for its innovative design and engineering of compact cameras. The Foth Derby series stands out as a celebrated line of cameras known for their portability, affordability, and reliability. The original models were a less expensive alternative to the more expensive Leica and Contax cameras of their time, but they utilized 127 film as opposed to 35mm from Leica and Contax. These cameras catered to the needs of amateur photographers and gained a reputation for their high-quality performance in a compact form.

 The Foth Derby cameras were introduced in the 1930s and remained in production through the late 1940s. They were designed with portability in mind, featuring a folding bellows system and compact dimensions that made them a popular choice for travelers and casual photographers. The cameras used 127 roll film, producing images in 4x6.5 cm format, a size well-suited for personal and artistic photography.

One of the defining features of the Foth Derby was its focal-plane shutter, which was uncommon in compact cameras of its time. This shutter system allowed for faster shutter speeds, up to 1/500th of a second, allowing photographers to capture motion and shoot in bright lighting conditions. The Derby series was also equipped with high-quality lenses, such as the Foth Anastigmat, or later upgraded models like the Foth Derby Anastigmat f/3.5, ensuring sharp and well-resolved images.


The Foth Derby evolved through several iterations, each offering incremental improvements and adaptations to meet changing photographic trends. Here are some general differences:

  1. Foth Derby I (1930): The original model featured a basic lens and a simple shutter mechanism. It utilized a 24x36mm format on 127 film and was praised for its ease of use and portability, making it accessible to novice photographers. 

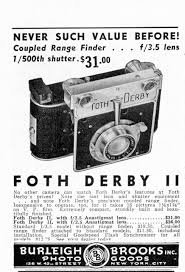
  2. Foth Derby II (1931-): This version introduced the 3x4 (30x40mm) film format. The camera's build quality was also refined for greater durability, and several different lens options were offered.

  3. Foth Derby III (1935-39): This model had several different viewfinder and lens options. Some models had interchangeable mounts that allowed the use of some Zeiss and Dallmeyer lenses.

  4. Foth Derby IV (1936-40): This model had an aluminum front standard that housed an integrated rangefinder for focus. It also offered a choice of different lens options.

 Somewhere around 1937, the combination of both Foth and Gallus became intertwined because in 1937, Foth came out with:

  1. Derby V: Made by C.F. Foth & Cie in Paris. It still has the 30x40 film format on 127 film, but the build quality was a bit rougher coming out of the French factory.

  2. Gallus Derby (1937-) was the start of the Gallus line of cameras, taken from the Foth Derby. The build quality was rougher than that of the German-made cameras and about 10% heavier.

 As a collector, you can see the progression of design and features from the Foth Derby and how it morphed into the Gallus Derlux, using part of the Derby and Delux naming and wanting to separate from the originating company.

My Camera:

My Gallus Derlux camera is 5" wide by 3" tall by 2" deep with the lens retracted and 3" with the lens extended in the usual picture-taking position. My camera weighs just under 15 oz, at 14.9 oz. and has a Gallus 50mm f3.5 lens built into the camera. The camera is a fundamental one without an integrated focusing system, but rather a simple viewfinder on top of the camera for general framing of the photo you desire. The Gallus Derlux has a vertical focal plane shutter and takes 16 30x40mm exposures on a roll of 127 film. 

To take a photo, you must pull the front lens section from the body. The lens plate has a small "hump: on the top and bottom to grip onto to pull the lens plate away from the camera body. The lens plate is on a strut on either side of the plate, which exposes the internal bellows built into the camera. After taking photos, you push the lens plate back into the body, where it stays for transportation. This makes the camera slimmer and more manageable to slip into the case or pocket for transportation.

 The lens and focus system are located on the lens plate. To focus the lens, hold onto the larger focus arm, which is very similar to what's used on the Leica system, and rotate the helicoid lens to the desired guessed distance to the subject. There is a stop arm, so you cannot unscrew the lens from the body. The minimum focus distance is 1 meter to infinity. The aperture settings are on the lens. The aperture goes from f3.5 to F18. To adjust the aperture, turn the lens to the desired aperture settings, which is the same indicator that tells the focus distance. This makes it easy to use because you can set aperture and focus in the same area.

The shutter speeds are set on the camera's top. The shutter speeds go from 1/500 down to 1/25, along with "B" for timed exposures. To set the different shutter speeds, you need to lift the shutter speed dial and rotate the dial to the desired speed, which is indicated by a small dot. You also need to wind the shutter to cock the shutter as it's not incorporated in the winding process, which is what most current cameras have. To cock the shutter, just turn the knob on top of the camera, which have the shutter speed on it in the clockwise direction until it stops. The shutter is now cocked and ready for the subsequent exposure. The shutter release is located on the front of the camera on the right side and just next to the film plate.

Shutter speed dial. Lift and turn to set speed..

The Gallus Derlux utilizes two red (and green) windows on the back of the camera. These two windows are inside an immense depth-of-field scale on the back of the camera. Two windows allow the photographer to get 16 images on 127-size film. 

Back of Gallus Derlux camera

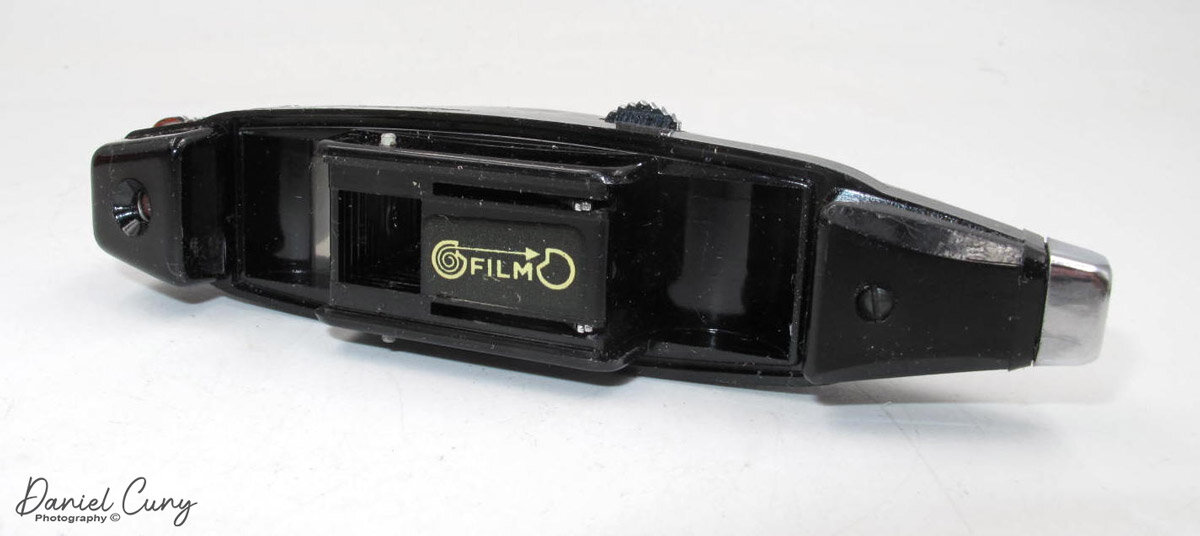
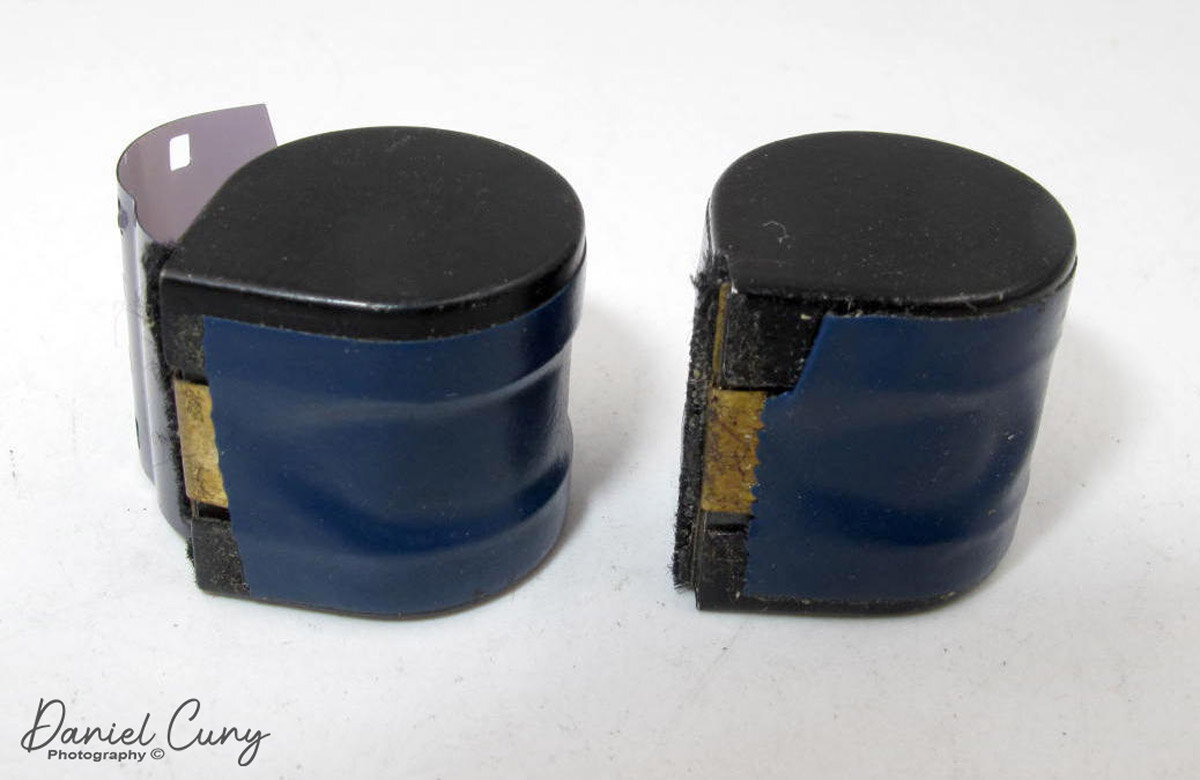
The film doors release is located on the right side of the camera to load the camera with film. Pull down the release button and swing the door open, which exposes the film chamber. Take the blank 127 reels from the right side of the film chamber by pulling up the knob above it and taking out the blank reel. Put the blank 127 film reel into the left side where the film transport knob is located. Lift the winding knob to insert the blank reel. Put your fresh and unexposed roll in the right chamber and press down the knob that holds it into place. Put the paper from the unexposed toll into the blank reel and wind it, ensuring the film moves. Stop when you see "start" and close the back of the camera.


To get 16 exposures on your roll of 127 film, wind the roll of film in the camera to frame number 1 to the first window, which on this camera is the window on the right-hand side of the backdoor. After you take that photo, wind the film until you see frame number 1 in the other window or the one on the left side of the backdoor. After you take that photo, frame number 2 will appear on the right side of the red window. Continue this process until frame number 8 is taken on the left side of the window. Wind until the film is all the way onto the take-up spool, open the back, and take the film out for processing.

My Results:

I put a roll of 400 ISO film in the camera and wandered around my backyard and the neighborhood streets. I used 400 ISO because the fall and winter in my neck of the woods are usually overcast. During my walk, the sun just so happened to come out, so I was forced to use the faster speeds on the camera.

After I took the photos and processed the film, I also noticed a gap between the two shutter curtains when winding the shutter to the next photo, causing a light leak on many of the images. I must have pointed the camera down or had the lens in a darker area several times because there were a few good images, but many were terrible. I also don't have a lens cap for this camera, so the next time I use the camera, I'll need to cover the lens when cocking the shutter so I don't expose the film to light before or after exposure.


If you have this or similar cameras and are mechanically inclined, I found a great article on someone overhauling the shutter on his Gallus Derby Lux camera.


Conclusion:

This was a fun camera to use. It's very simple, takes a nice larger image, and is small and compact. I'll need to find a lens cap for the one before I shoot again or just place my hand over the lens when cocking the shutter.

 Thank you for taking a few minutes from your day to look over this post.

 Until next week, please be safe.


KMZ FT-2 Panoramic Camera

Since I got into photography, I have been a fan of panoramic cameras and images. The ability to see wide views of subjects similar to what you see in person seems very natural, so it's not unrealistic for me to have a variety of cameras to use during trips and other photographic jaunts I take to make images.

My KMZ FT-2 Camera

I came across a Russian-made KMZ FT-2 camera many years ago when I was a sales representative for one of the companies I worked for. I remember visiting EP Levine in Waltham, MA, and seeing the FT-2 and a Spinshot they had. I asked about the Spinshot because, at the time, I knew the Spinshot was something out of my price range. One of the owners gave me a reasonable price on the camera and case because, like many of these cameras, they take a unique film cassette, which this camera didn't have. I knew at that time I was buying it more for my collection rather than using it, but always in the back of my mind, it was something I wanted to put a roll of film into and shoot with. 

The Company:

KMZ (Krasnogorsky Zavod), also known as the Krasnogorsk Mechanical Works, is a prominent camera and optical equipment manufacturer based in Russia. Founded in 1942 in the city of Krasnogorsk, near Moscow, KMZ played a significant role in the Soviet Union's photographic and optical industries. Initially established to support wartime needs, the company shifted its focus to producing civilian products, becoming a key player in developing photographic technology in the Soviet era.

FT-2 camera, leather case and 2 different 3D printed cassettes

 KMZ became widely known for producing cameras and optical devices for civilian and military use. One of its most famous products is the Zenit series of single-lens reflex cameras, which gained a strong reputation for their durability and affordability. First introduced in the late 1940s, the Zenit cameras became popular among amateur photographers and professionals worldwide, especially during the mid-20th century. These cameras were equipped with reliable optics, often branded under the Helios or Jupiter trademarks, known for their exceptional image quality.

Another well-known KMZ product is the Zorki rangefinder cameras, which were modeled after early Leica designs. The Zorki cameras, like the Zenit series, were affordable and accessible, making photography more attainable for the average user. These cameras are now considered collector's items, valued for their vintage appeal and craftsmanship.

 KMZ also contributed to advancements in optical engineering. The company developed lenses for photography, cinema, and scientific applications, as well as optical sights and instruments for military use. The Helios-44 lens, often paired with Zenit cameras, became legendary for its unique bokeh effect and remains highly sought after by enthusiasts.

 Following the dissolution of the Soviet Union in 1991, KMZ faced challenges adapting to a market economy. While the demand for traditional film cameras declined with the rise of digital photography, KMZ continued producing optical devices and exploring new markets. The Zenit brand was revived by introducing modern digital cameras like the Zenit M, which combines vintage aesthetics with contemporary technology.

KMZ's contributions to the photographic and optical fields testify to its innovation and resilience. Despite economic and technological shifts, the company remains a symbol of Soviet ingenuity, with its cameras and lenses appreciated by photographers and collectors worldwide.

The Camera:

The KMZ FT-2, one of the first 35mm panoramic cameras, is a model of simplicity in design. Its bare-bones appearance, resembling a small black brick, belies its robust mechanical construction. The camera measures 4.75" wide by 3.25" deep by 2.25" tall, including the winding knob, and weighs 1 lb. 7oz. The FT-5 boasts a 50mm fixed F5 lens that swings across the curved film plane to produce 110mm long images on your 35mm film. This unique design eliminates barrel distortion, ensuring your horizontal lines remain straight when holding the camera level. However, due to the extended negative size, 24mm x 110mm rather than the typical 24mm x 36mm, you only get 12 images on a roll of 36 exposures, a testament to the camera's straightforward and uncomplicated nature.

 The FT-2 only has 3 shutter speeds: 1/400, 1/200, and 1/100 second. The shutter speeds are set by changing two levers on top of the camera and located just below the shutter cocking lever. The shutter cocking lever is a larger finger and thumb knob, which you turn clockwise to cock the shutter, and it swings back to the starting position at approximately 11:00 when the exposure is finished. A mechanical braking system slows the shutter to these speeds when shooting at the two slower speeds. When shooting at the maximum speed, the camera jolts when the exposure ends and has a reasonably noisy snap when the shutter spins on its axis and comes to a vibrating finish of the exposure. The shutter release is to the right of the shutter cocking knob and just above the frame counter.

Since the camera produces such a long negative, the manual states that you need to turn the winding lever so that the frame counter does three full revolutions around, then add one number to get to the next frame. So, if you were on frame number 5, after taking the photo, you'd turn the winding lever, watch the frame counter go three revolutions around, and then stop at number 6 to be ready for that photo.

Top view of KMZ FT-2 camera where all the controls are located.

 There is no optical viewfinder, but rather a flip-up mask that you put your eye up to and guess that that's the approximate area that will be in your photo. There is a bubble level on top of the camera, so it's easy to level out the photos. This is not so helpful when looking through the viewfinder, but if you use the camera on a tripod or hold it more at waist level, then it makes sense.

 To open the back of the camera to load film, the front of the camera, in both corners, are silver clips holding the back close to the front. Snap these clips out, and holding the back with one hand and the body with the other, you slide the back off the camera. To put the back onto the camera, there are small channels on the body that the back fits into to slide back onto the camera. Make sure the back fits into the channel slide, then back onto the camera, and snap the clips into position.

Using the Camera:

Fast forward about 25 years, and I pulled the FT-2 out of my shelf and started to play with it. The camera is in excellent mechanical shape, so I wondered if there's a way to adapt a regular 35mm film cassette into the camera for shooting with it. Doing my usual looking on the internet to see what advancements have been made, I came across Roger Hyam's website discussing how he had the same camera and  1 set of cassettes. To make the camera more enjoyable, having multiple cassettes would make shooting with the camera more manageable. Since loading the cassettes is time-consuming, he made film cassettes for his FT-2 with a 3D printer. In that article, he has a CAD design and explains the process.

 At this point, seeing that there is a somewhat easy way to get cassettes made for the camera, I looked into buying a 3D printer for this and possibly other projects down the road. While I still may do that, I found a local company close to my house that does 3d printing, Rex Plastics in Vancouver, WA., and Harvey, one of the engineers who does the 3D printing for the company. I called on a Friday to see if they could do this and sent them the CAD file. While Harvey was off that day, I received a call from him early Monday to say that this could be done fairly easily, and they had produced a Minolta 16 cassette and a 126 film cassette someone else needed, so he was familiar with working with film. 

 On Thursday or Friday, I stopped by Rex Plastics to pick up the cassettes I had ordered, which looked tremendous. They fit into the camera and looked like the items I saw online. I took them home and started to load film into the cassettes, only to find that the design I sent had a minor flaw. Once there was film in the cassettes, the amount of film pushed the knob of the spool through the top of the cassette, making it impossible to fit back into the camera. 

 I told Harvey what the issue was and brought it back to him with film inside to show him the issue. Rex Plastics is such a good company that Harvey said it wasn't a big issue and went back and made the spool smaller to accommodate the film capacity and changed the cassette top to accommodate a different spool that fits into the cassette. This took just a few days, and now I had cassettes I could take home and shoot with the FT-2 camera. One thing I did to the 3D-printed cassettes was to add some felt to the inside cassette to avoid any scratches that may happen when transporting the film from one cassette to the other. I took some old 35mm canisters, pulled the felt off them, and taped them into the 3D-printed cassettes with double-sided tape.

Loading the Cassettes:

Here's the process I used to load the new 3D-printed cassettes with film to put into the FT-2 camera. Most of this process has to be done in complete darkness. I used my light-tight changing bag, which I use to load film onto reels for processing, but this time, here are the items I needed to keep in the changing bag.

 2-3D printed cassettes

1 roll of 35mm film (unexposed)

1 piece of tape taped to one of the spools

1-pencil used to wind film

1-FT-2 camera with the back partially off

 I'll break this down into the steps I used. You may find an easier way, but this process went much quicker than I thought and seemed manageable.


  1. Out in the daylight, I took the leader from the unexposed 35mm film and taped it onto the take-up spool. I then took up some of the slack and put it into one of the 3D-printed cassettes. This is what you can do in the light; all the other steps are done in the changing bag.

  2. Put all the items from the above list into the changing bag.

  3. At this point, I wound all the film from the unexposed film into the take-up spool until I reached the end of the roll. To make the winding easier, I put a pencil into the end of the spool and turned the pencil. Do this for step 7, too.

  4. Tear the end of the film of the unexposed film from its cartridge.

  5. Open the second cassette and tape the end of the unexposed film to the spool of the second 3D-printed cassette.

  6. Slide the spool into the second 3D-printed cassette and put it on the cover.

  7. Rewind the exposed film from the first cassette into the second cassette.

  8. Once you feel the leader, stop winding. Now, you have all your unexposed film into the second cassette.

  9. Put both cassettes into the back of the camera. 

  10. Make sure the winding knob is engaged into the first 3D printed cassette and starts to wind, making sure the film is moving across the film path.

  11. You don't need to wind much, just enough to ensure the film is transporting.

  12. Put the back of the camera on the loaded camera and snap closed.


Now, you can open the changing bag, remove the film-loaded camera, and wind it to the first frame, which should only take a few turns.

 PLEASE REMEMBER: When you're at the end of the roll, you don't rewind it back into the cassette like a standard 35mm camera. You take the camera and load it back into the changing bag so you can load it onto your developing tank for processing. If you wanted to wind hard enough to pull the tape off one spool onto the other, you could do that, but that risks exposing the film if you don't tape the cassettes closed.

My Results:

With the camera loaded into my newly made 3D printed film cassettes and the sun shining on a typically overcast November afternoon, there was a chill in the air and a panoramic camera in my hands. I walked through my neighborhood to see what the camera would produce. After taking the photos, I was excited to see the results, so I loaded the camera, developing tank, and reels into the changing bag. I took the film out of the camera, loaded it onto the developing reel, put it in my developing tank, and processed the negatives. 

The overexposed area on the left of the images must have caused a slight light leak. Here's what I produced.

Conclusion:

What a fun camera! I really enjoyed using it. Loading the cassettes wasn't as big of an issue as others I've read about make it out to be if you think about the process. If you have one and need technical or repair information, I found this very informative website, The FT-2 Panoramic Camera Guide.

If you have one and need cassettes, don't hesitate to get in touch with Harvey at Rex Plastics. I'm confident he can print some for you, and they can ship them to you.

Thank you for taking some time from your day to read about this fun panoramic camera that produces excellent images. 

Until next week, please be safe.

References:

The FT-2 Panoramic Camera Guide: https://lens-club.ru/public/files/pdfs/4e9b2081c1c77ede9e70d985d6bacc5d.pdf

FT-2 Camera Manual: https://cameramanuals.org/russian_pdf/russian_ft-2_panaromic.pdf

Roger Hyam’s Website: https://www.hyam.net/blog/archives/10727

Rex Plastics: https://rexplastics.com/3d-printing-and-plastic-product-design

Expo Watch Camera

This week's camera blog is about another unusual camera given to me many years ago by one of my sisters' in-laws who passed away. The family members knew I enjoyed cameras, so they gifted the camera to me and asked me to take care of it for the man who passed. 

My Expo Watch Camera

 When I first received the Expo Watch camera, I was utterly surprised and deeply touched by the generosity. Opening the small box to reveal the fantastic camera in good working condition was a moment I'll never forget. It was a revelation that the person who passed knew about my love for cameras. It could have been my wonderful sister who had shared my passion with the family.

 Needless to say, it's in a prominent place in my collection and something I look at almost daily and think about the generosity of the person who gifted it to me.

 To add to the story of this blog and the Expo Watch camera, about three to four years ago, I purchased a "lot" of camera items. Among the other items I bought were accessories from what I thought were for the Expo Watch camera. However, after researching the cameras, I found that they are actually for the slightly later British version made by Houghton, the Ticka camera. They fit and work on both the Expo and Ticka cameras.

The Company:

Patent for Expo Camera

The camera was designed and invented by a Swedish designer, Magnus Niéll, who lived in Sweden and New York. The patent for the Expo Watch camera was approved on September 6, 1904. This camera was a significant innovation in the history of photography, as it was one of the first to feature a daylight-loadable film cassette with 25, 16mm x 22mm, or 5/8" x 7/8" exposures in each cassette.

 The Expo Camera Company, located at 256 West 23rd Street, New York, manufactured the Expo Watch camera. It also produced the Expo Police Camera and developed and enlarged accessories for both cameras. The company offered film processing and printing to its customers. If interested, here's a copy of the full Expo Camera Pricelist and Manual.

In an ad I found published in 1917, the purchase price for the Expo Watch Camera was $2.50. According to the price list above, the processing fee was 10 cents to develop per roll of film. Contact prints (5/8"x7/8") were .10 cents per dozen, .07 cents per 2x3 enlargement, and .10 cents per 3x4 enlargement. I also enjoyed their statement that "Cash should accompany all orders for development, printing, and enlarging."

Ad for Expo Watch Camera

 The Expo Watch camera started in 1905, was taken over in the late 1920s by the dealer G Gennart, who produced several different names on the camera. In 1935, there were red, blue, and black enamel cameras, which were extremely rare. 

 In 1905, or shortly after, Magnus Niéll offered the camera's design to the British camera manufacturer Houghton, who produced the same camera under the Ticka name. The Ticka camera was available in the United Kingdom from 1905 to 1914. Some of the later Ticka models had a replica watch face on the front, with the hand indicating the angle of view the photographer would have when taking a photo.

Magnus Niéll designed other cameras for Houghton, such as the Ensign Midget, Ensignette, and the unusual design folding plate Lopa camera made by Kindermann. 

My Camera:

My Expo Watch camera measures 2 3/8" in diameter across the body of the camera, and if you measure from the front of the lens, including the fob ring, to the rear of the camera is 3" long and 1" deep, including the winding knob and the camera weighs 2.7oz. The camera is made from Nickel and has a highly polished chrome top and bottom.

The camera was designed like a pocket watch so it would be inconspicuous for the people the photographer wanted to photograph. This design feature allowed the user of the Expo Watch camera to easily keep it in one of his vest pockets, making it ideal for candid photography. The photographer could remove the camera from his pocket, take the cap off the lens, point it at his subject, and take a photo.

Beneath the fob ring is a lens cap resembling a pocket camera's winding stem. Under the lens cap is a fixed focus, 25mm lens. The camera has two settings for shutter speeds. There is "I" for an instant, approximately 1/125 speed, and the other setting is "T" for a time exposure. The shutter settings are done on the side of the camera with a lever you pull down. The shutter release butting is a small pin on the underside of the camera set at the one o'clock position. Once the camera's shutter is cocked, you press that pin in, and the shutter releases, making the photo.

The shutter release button on Expo Watch Camera

The shutter is not self-capping, meaning that when you cock the shutter, you're exposing the film to light, so it was recommended to keep the lens cap on until you're ready to make the exposure. 

Shutter cocking Mechanist and settings for Shutter speed.

 The lens cap served as the shutter time if you were doing time exposures. You set it to "T," click the shutter, take the lens cap off for exposure, put the lens cap on to end exposure, and the cock the shutter again for the following exposure. I can almost 100% guarantee that 99.9% of these images are blurry due to the person's hand holding the camera for any period of time, along with the movement of taking off and putting on the lens cap, and the negative being so small.

On the underside of the camera, or the opposite side of the removable plate with the beautifully etched "EXPO," is the winding lever you turn to advance the film. Just to the left of the winding knob is a small window that tells the photographer what frame number they're on. Above the winding knob is another logo for the camera company, which includes EXPO in the center of an oval. Around the oval is Pat throughout the world. On top and under is The Expo Camera New York USA

On the bottom of the camera is a lever you can turn to help pop off the etched plate, which comes off to load the film. I'm too afraid to turn this lever too hard, as I don't want the lever to snap off, so to remove the etched plate, I use my fingernails and pull the plate off to expose where the film goes. Once the plate is removed, the film cassette fits into the bottom portion of the camera.

The Expo Camera did have two different viewfinders available that would fit around the collar of the lens, under the winding stem. A simple model A ground glass viewfinder sold for .50 cents, and a model B brilliant finder sold for .75 cents.

 I also have an item made for the Ticka Camera in the group. There were a few accessories, such as the time exposure lens cap. This item fits over the lens and is held into place by a tension screw. Once in place, you can pull the lever up/down depending on how it is mounted to open the lens, exposing the film to light. Using the time exposure cap is considerably easier than taking the lens cap on and off for time exposures. Another item I have is a separate finder lens which is a larger glass item with a convex lens and attaches onto the camera like the other viewfinders. It has the exact attaching mechanism that fits around the lens collar. From what I'm seeing online, both the time exposure lens cap and the larger window finder were made for the TICKA camera.

Conclusion:

The Expo Watch Camera is a fun and exciting camera to have in my collection. I cherish the way I received it. The more I researched the camera and its different variations, the more I'd like to expand my collection to include the Ticka model with the watch face on it or even some of the colored models I'm always drawn to.


Reference:

Pacific Rim:  https://www.pacificrimcamera.com/rl/01266/01266.pdf

Historic Cameras:  http://www.historiccamera.com/cgi-bin/librarium2/pm.cgi?action=app_display&app=datasheet&app_id=919&

Submini.com:  http://www.submin.com/large/collection/expo/introduction.htm

Vintage photo:  http://www.vintagephoto.tv/expowatch.shtml

Corfield Periflex Camera

The Corfield Periflex is a relatively new camera to my collection. I've only had it for a few months, but I've desired to own one for many years. The opportunity arose to purchase one of the earlier models that was in good working condition and at a reasonable price for this camera in its condition, so I grabbed the opportunity and purchased it.

My Corfield Periflex Camera

 When the camera arrived, it was in good working condition and in the cosmetic condition described, so I was pleased with the purchase. I knew from purchasing the camera that my aim was to do a blog post on it, as the camera has many unique features that have not been seen in cameras before or since. 

 The Periflex is a 35mm camera with an appearance that resembles a Leica only because of the size and initial shape of the camera. Unlike the Leica cameras, the Periflex doesn't offer the photographer rangefinder focus, sprockets film advance, removable baseplate, or take-up spool, but it does offer the same lens thread mount and excellent optics in a small and compact camera made in the United Kingdom.

The Company:

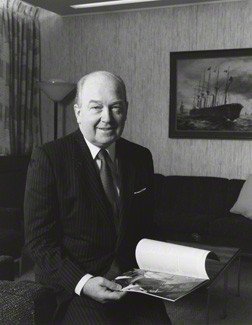
Sir Kenneth Corfield

Sir Kenneth Corfield (1924–2016) was a British engineer, entrepreneur, and photographer whose work significantly influenced the photographic industry in the UK, mainly through his company, Corfield Ltd. Known for his pioneering approach to camera design, Sir Kenneth's legacy is deeply intertwined with the Corfield Camera Company, which he founded in the mid-20th century. His innovative ideas, especially those focused on making quality, compact cameras, helped the brand gain a reputation in the photography community, although its operations ended in the 1970s.

 Kenneth Corfield was born in the UK in 1924 and trained as an engineer. He developed a passion for cameras and photography from an early age, and this interest led him to create camera equipment designed to fill the gaps he observed in the photographic tools available at the time. His mechanical expertise and curiosity about precision instruments motivated him to create Corfield Ltd., a company that produces cameras for professional and amateur photographers alike.

 Corfield founded his company in the post-war period when there was increasing demand for affordable, portable, high-quality photographic equipment. Starting in the 1940s, Corfield Ltd. initially operated as a small workshop but soon expanded to meet the needs of a growing photography market in the UK. Unlike the more prominent, established companies primarily located in Germany and Japan, Corfield's British roots gave his products a unique appeal in the domestic market. They also partnered with British Optical Lens Co. in Walsall, which designed and made the Lumar optics for Corfield.

Ad for the Corfield Camera

The company's first significant product was the Periflex, introduced in 1953. This camera became known for its innovative use of a periscope-type viewing system. This device made the Periflex one of the more unique 35mm cameras available at the time, as it allowed users to see the image through the lens without needing an expensive reflex mirror. The camera was compact, affordable, and relatively simple compared to other rangefinders, and it catered to a market that wanted quality at an accessible price.

The Periflex series became the backbone of Corfield Ltd.'s reputation. The first model, the Periflex I, was followed by several iterations, including the Periflex II, III, and Gold Star. Each version introduced new features and enhancements to meet photographers' increasing demands, such as improved shutter speeds, lens mounts, and more durable designs. 

The defining characteristic of the Periflex cameras was the periscope-like focusing mechanism. This mechanism, placed directly above the lens, allowed photographers to focus accurately without the bulk or complexity of a traditional single-lens reflex (SLR) system. This feature made the Periflex a unique hybrid of a rangefinder and SLR qualities, appealing to those who valued compact design but still wanted accurate focus control. Although some photographers found the system unorthodox, others appreciated the camera's compactness and precision, making it popular among professionals and amateurs.

Despite its successes, Corfield Ltd. faced stiff competition from German and Japanese camera manufacturers, producing high-quality cameras on a much larger scale. Companies like Leica, Nikon, and Canon dominated the market with advanced SLRs, and Corfield's unique designs needed to catch up with the rapid technological advancements. While the Periflex series had gained a loyal following, it required more sophistication and reliability than its competitors, ultimately limiting its market appeal.

In the 1970s, Corfield Ltd. ceased producing its cameras, and the Periflex series also ended production. Although the brand did not survive, the innovations introduced by Kenneth Corfield influenced camera design and highlighted the potential for high-quality British-made photographic equipment.

Kenneth Corfield's contributions to the photographic world extended beyond his camera company. Even after Corfield Ltd. ceased operations, he remained active in the photography industry. Later in his career, Corfield was involved with Gandolfi, a British large-format camera manufacturer, and his influence continued to be felt through his consulting and design work in the field.

Corfield's legacy is remembered by photography enthusiasts and collectors who admire his innovative approach to camera design. The Periflex cameras, in particular, are valued among collectors for their uniqueness and historical significance. Sir Kenneth's work reflects a time of British ingenuity in the photographic industry. It is a testament to a small, independent company's impact on a competitive global market.

Bev Parker has a wonderful website dedicated to The Corfield Company.

My Camera:

My Corfield Periflex camera isn't the first model, as the first 200 Periflex camera had a black top and bottom plate like mine. Still, they were covered in brownish pigskin on the body. I believe mine is the third version, as the engraving has been moved to the periscope but still has the black top and bottom plate, black leatherette covering, and chrome lens.

 My Periflex camera is 5.5" wide by 3.25" tall, including the periscope, and 3.25" deep from the back of the camera to the front of the lens focused to infinity. With the standard Lumar 50mm f3.5 lens, it weighs 1 lb 1.4 oz. The camera is made from aluminum, as opposed to brass, which was a more common construction material at the time. Aluminum was easy to work with for both the body and lenses and was less expensive.

This hybrid camera doesn't have a rangefinder to focus. Still, it has a very small mirror that drops down into the camera and points out through the lens, allowing the photographer to focus on the subject, which is very similar to a single-lens reflex camera. The periscope is achieved by the center tube over the lens, which has a small knob on the back that you pull down and look through the optics on the top to view your subject.

Periscope mirror when depredded in the film chamber

I was very skeptical at first, but it does work and focuses very crisply on the subject as it should. There are some things that could be improved in this system. First, you need to open the aperture to get the brightest image to focus on, so you don't do this quickly. Once the camera is focused, you stop the lens down to the desired aperture setting to get the proper exposure, move your eye to the mounted viewfinder on the top to frame your subject, and then take the photo. Once you do it a few times, it becomes manageable. But it would be best if you remembered to reset your aperture, which I didn't do on a few frames. That's just a matter of getting to know the camera and using it more often. I DID like looking through the lens in a small compact camera to focus on the subject.

 My Periflex has shutter speeds from 1/1000 to 1/30 sec exposure times along with "B" for timed exposures. Above the shutter speed indicator is a knob that needs to be turned to cock the shutter before making an exposure. Advancing the film DOES NOT cock the shutter. These are two separate operations and are not intertwined. You do, however, need to advance the film winding lever AND cock the shutter before the camera will fire. This makes it impossible to take a double exposure on this camera. At least, I am still looking for a way to do it. The shutter release button is on the front of the camera, similar to the Topcon cameras, so it's more of a squeezing motion than a pressing down motion. There is a removable collar around the shutter release to attach a Leica-style cable release for time exposures.

Top view of Corfield Periflex. from L-R, Rewind knob, Removable viewfinder, Periscope mirror, Shutter speed dial with Shutter cocking knob, Rewind button, Film advance knob

Another oddity about my camera is that I didn’t discover it until after I had shot all the photos for this post. I didn’t think there were aperture settings on the lens, but after I reread the instruction manual, there is a small black mark on the lens that goes along the depth of field scale which indicates what aperture you’re using. Looking at the Corfield Periflex instruction manual, they discuss apertures and depth of field, but there is where the aperture settings are. All my exposures were guesses of the size of the aperture needed. The focus on my lens is smooth, the aperture ring moves well, too, and the Lumar lens system has a Leica Thread mount, so the advantage is you can use any LTM lens with this camera.


Loading the film is very simple, and there is another camera oddity in the loading process on the camera. To open the back to load the film, you turn the chrome circle on the camera next to the tripod socket until the arrow points to the white dot. Once that is done, the camera's back will slide downward, exposing the film chamber. I first noticed that there was no drive gear to advance the film, and the take-up spool (drum) on the camera was much larger than the usual 35mm cameras on the market. The take-up spool is actually a drum that advances 180 degrees per wind of the film advance, so as the film is pulled and wrapped around the drum, the spacing of the film frames becomes more significant as you go from the first to the last frame.

Once the film is loaded, you slide the back into position on the camera and turn the chrome wheel on the bottom away from the white dot to lock the back onto the camera. When finished taking the roll of photos, rewind the film back into the film cassette. The drum/take-up spool release is a small chrome button between the shutter and film advance knobs. Press that button down, and you can rewind the film back into the cassette for processing.

My results:

I took the camera for a walk in the neighborhood on a sunny afternoon to see what I could do with the camera. It took some time to think about the metering process on the subject. Opening the aperture, setting the shutter speed, pressing down the periscope to focus (which was fun and easy), resetting the aperture to a size opening I thought might be the correct aperture size, putting the viewfinder to my eye to compose the photo, then taking the photo. Certainly not like cameras today with autofocus, automatic light meter settings, etc. You slow down, take your time and compose the shot, which I enjoy doing.

Here are a few of the images from the camera.

Conclusion:

I enjoyed shooting with the Corfield Periflex. It slows you down and makes you think about the process of creating an image rather than taking one. Not that the photos shown are any works of art, but I like the slower and more methodical process of taking the photo.

 The camera is small and compact, has the shutter speeds needed, and has good optical sharpness. After finding where the aperture settings are, it makes more sense on how to do the aperture settings. I only wish I knew that before using the camera for the first time.

 Thank you for taking a few minutes from your day to read my review of the Corfield Periflex, a gem of a camera. 

 Until next week, please be safe.

Purma Special Camera

As I was cleaning out a box of cameras, looking for the next camera to shoot with and use for my next camera blog, I grabbed a brown case that I had put in the box a long time ago. As I turned the case around, I saw the name Purma on the front of the case and thought to myself, This will be my next camera to discuss or talk about in my blog.

My Purma Special Camera

 The Purma Special is a camera I purchased well over 20 years ago. I remember it was early in my collecting and when I was buying and selling on eBay. I started on eBay as a seller and buyer back in early 1997. When you engaged with eBay then, you didn't have your name as an ID, but they assigned you a number you'd use to log in and for sales purposes. I remember my number was 1032 before changing it to my current name, "Clix."

 At that time on eBay, there were no photos on the site, and it was similar to a message board where people would describe what they had for sale, what you were asking for, etc., Very similar to what Craigslist was before photos. Having McKeown's guide for cameras and thumbing through it daily, I was intrigued by cameras from other countries, and the Purma Special was one that I desired at the time due to its odd diamond shape and the fact that it was made in England.

Because the Purma Special camera is, in my opinion, a camera oddity due to the design of the camera, the shutter used, and the somewhat popularity of the camera, it's been reviewed and discussed by several of my camera blog friends like Peggy of Go Camera Go and Mike Eckman. Still, I wanted to make sure people were aware of my odd and unusual take on cameras from yesteryear, so this is more like Peggy's post about my thoughts on using the camera and the overall take on what a camera gem this is.

My Purma Special with Case

The Company:

Purma Cameras Ltd. was founded in 1935 in London. The name Purma is a combination of the two owners of the company: Tom Purvis, a well-known artist and lithographer who worked for LNER (London and North East Railway) from 1923 to 43, producing beautiful and popular advertising posters. 

Diagram on how the shutter system works on Purma Camera

 The other partner in the company was inventor Alfred Croger Mayo, who, along with Joseph Terrett, invented the unusual and very simple gravity-controlled focal plane shutter used in the Purma cameras. I believe this is Purma's real claim to fame and set them apart from other camera companies of the time. They also had financial backing from David Brock of Brock Fireworks, a company that started in 1698 and is the oldest British fireworks manufacturer.

Purma introduced its first camera in 1936, the Purma Speed. It was an enameled metal and chrome camera with a pop-up viewfinder. The Purma Speed camera had six shutter speeds and looked like a more traditional rounded-corner, rectangular camera.

Ad for the Purma Special

 With the introduction of the Purma Special camera in 1937, the company turned to an all Bakelite camera, along with a flatted diamond shape design with an art deco appeal to the camera due to the thin ridges built into the camera, which extend all around the camera. The Purma Special only had three shutter speeds but has a classic sleek design, and one that was the camera that set them apart design-wise from other cameras. The unique diamond shape and the use of Bakelite, a revolutionary material at the time, gave the Purma Special a distinct look and feel, setting it apart from its contemporaries. 

 The Purma Special was imported to many different countries, including the United States. According to an ad I found from 1939, the camera sold in the US for $14.95. It's my understanding that this was their most popular camera, although I cannot find sales records to prove these claims, as it's just from what I see for sale and the quantity of Purma Special cameras available today. The Purma Special was a popular choice among amateur photographers and was widely available in the market, contributing to its popularity and the large number of units still in circulation today.

There are a couple of unique features of the Purma camera. One is the 'pop out' lens, which is concealed by a thread in the lens cap, a clever design that protects the lens when not in use. When you screw the lens cap back onto the camera, it also locks the shutter. Unfortunately, these lens caps get lost, and many of the used Purma cameras are sold without the lens cap. The second is the use of plastics in the viewfinder. Purma was the first to do this, a pioneering move that made the camera lighter and more durable. These innovative features were ahead of their time and contributed to the Purma Special's appeal among photographers.

Purma also introduced the Purma Plus in 1951, which had an aluminum body and sold for £12.00 at the time. Production for the Purma Plus lasted until 1959. I cannot find why the company stopped producing its camera, so I assume it closed around 1960.


The Camera:

My Purma Special camera measures 6 3/4" wide by 2 3/4" tall by 2 1/4" deep with the lens cap on the camera, and the camera weighs 12 oz without the fitted leather case.  The camera has a Beck 2 1/4"  F6.3  lens with a fixed focus from 12' to infinity. Purma did sell a series of close-up and portrait attachment lenses that allowed for focus from 3.5 to 5' but were sold separately. These are items I do not have.

The Purma cameras use 127-size roll film and produce 16-1 1/4" square images on the negative. The Purma special doesn't have a locking mechanism to keep the back attached to the front of the camera. They are held together just by friction, but the back of the camera fits tightly to the front. The friction held back doesn't prevent it from accidentally opening if something were to happen. To open the back of the camera, there is a tiny thumb notch where you put your fingernail in and pull the back from the front.

The camera utilizes two red windows on the back of the camera, so you get 16 frames on the film; the photographer winds the film to the #1 exposure on the left window, then after taking the photo, winds the film so the #1 exposure shows up on the right side window utilizing the same frame number for both the left and right red window on the back of the camera. Once you shoot frame #1 on the right red window, the photographer winds to frame #2 on the left side window, and so on.

The Purma Special has a curved film track that holds the film flat against the shutter with a two-sided pressure plate attached to the camera's back door. The shutter system only has three shutter speeds. The shutter uses a series of different size slits in the metal curtain along with a brass weight within the camera to determine what shutter speed is used. The camera also depends on how you hold it, which would set the shutter speeds used. Remember, the negative is square, so having the camera in either vertical position doesn't change the image in the frame. It will only change the orientation of how the image is captured on the negative.

When you hold the camera in the usual horizontal position, the shutter would shoot, and the medium shutter speed would be 1/150th second. Turning the camera so the advance lever was at the bottom, or the "slow" speed, the shutter, the camera shutter is set to 1/25th sec. When you turn the camera in the other direction, with the film advance lever at the top, which puts the shutter in the "fast" position, the shutter speed is set to 1/450 sec.

Top view of Purma Special camera with circular wheel to cock the shutter, and shutter release

To take a photo, the photographer needs to cock the shutter. To do this, you turn the circular wheel on the top of the camera in the direction of the arrow. There is a small piece of bakelite sticking out to turn the wheel fairly easily. Once you turn the wheel in the counterclockwise position, the wheel will stop, and you'll hear a click which means the shutter is cocked and ready to make the exposure. You can do this with the lens cap on, but the shutter won't release until the lens cap is off. 

 The shutter release is on the top and left side of the camera. Simply press the shutter release to trip the shutter. BUT REMEMBER. Turn the camera as needed to change the shutter speed, especially since the camera has a fixed aperture lens. Wind the film to the next frame, then repeat until. It was odd for me to use this camera as I'm not used to having the shutter release on the camera's left side.

For those interested, here’s the original instruction manual for the Purma Special Camera

My Results:

I did have some outdated Film for Classics 127 film in my drawer, so I loaded up the camera and went to a local waterfall to take photos on an overcast Sunday afternoon. Go figure a cloudy day when living near Portland, Oregon. That will be my life for the next four months or so. The results were OK, but I was mildly disappointed when I looked at what Peggy and Mike did with the camera.

 It may also have been the fact that the film I processed was processed in a different tank than I'm used to using for 127 film, and I messed up putting it on the developing reel, so that was my fault. I have noticed whenever I use the Film From Classics film, the imprint from the paper backing seems to bleed onto the negatives, and I'm unsure if that's due to the film's age and being out of date by a year or two or something else.

 Here's what I salvaged from the messed-up developing roll I put through the Purma Special camera. It's nowhere near as lovely as Peggy or Mike's photos, but overall, it yielded decent results.

My Conclusion:

It was a fun camera to shoot with. Turn the camera to set the speed, point at your subject, and shoot the camera (with your left hand). Wash, rinse, and repeat. I hoped for better results but tried a different reel to process the film.

 Thank you for reading the blog post on the Purma Special camera. I'll definitely use it in the future due to its simplicity and unique shutter system.

 Until next week, please be safe.


PIC Camera

The PIC camera was on my list of cameras to review just before I returned to work after the two years lost years of COVID-19. Recently, when I looked up from my desk and saw the odd and unusual camera, I wanted to put a film into the camera, run it through its paces, and do a blog post on it. The main thing that caught my eye was the shape and size of the camera. You don't come across many round cameras with a straightforward design.

 I am trying to remember where the PIC camera came from, as I've owned it for five to six years. Like many of the other cameras I write about, the PIC camera was included in a group or "lot" of cameras purchased. I do remember when I received it; my first thought was that it was a "toy" camera, which I own many of. 

The more I examined the camera, the more I realized it was not a serious camera. It does not have the ability to set shutter speeds, aperture settings, or even focus at a specific distance. It's just a simple point-and-shoot camera made for quick snapshots, a camera you can keep in your pocket for when you travel on holidays or visit friends and family. 

The Company:

From what I can see online, the PIC camera is another camera with very little information regarding the manufacturer. There's conflicting information about the camera and who and when it was made. Some of the information I found states the camera was made in England sometime in the early 1950s by a company named Pressure Sealed Plastics Ltd. and distributed by Pic Distributors Limited.

 When I looked up information about Pressure Sealed Plastics Ltd., it was initially a London-based company. It states that the company existed from 1955 to 1966 when it was purchased. It was transferred from Peckham to Chesterfield in May 1970. Some online information also states that the company was not in London but in Southend on Sea. I'll leave it someplace in England.

In 1986, the organization was divided into two trading operations: Consumer Products and Industrial Products. The former was responsible for waterbeds. The latter took over the remaining operations and manufactured Rompa products, waterbeds, etc.

 From the information I found and posted above, I have no idea where the idea or manufacturing of the PIC camera came from. If you have other information on the camera, who designed it, or the company that made it, please let me know, and I'll change the information in the post.

The Camera:

The PIC camera is a round camera that measures 3 3/4" in diameter, is 1 7/8" deep, and weighs 3.7 oz. with a fixed focus meniscus lens. The camera has a slight convex shape on the back along with the front, but halfway into the convex shape on the front, there are two tiers of flat surface where the shutter and lens are placed. The side view of the camera resembles a spaceship or UFO.

To open the camera to load the film, there is no latch or hinge to open the back of the camera, but you slide the front of the camera from the back of the camera and pull it off. My guess is this is where the "Pressure Sealed Plastic" comes from, as it's held together by a tightly fitting front that fits onto the rear of the camera.

 The rear of the camera has nothing other than two red windows that tell you the frame number you're on when advancing the film. On the outside of the back of the camera is written, Pats. Pend. Reg Dsgn No. 870468, Made in England. On the bottom right of the back of the camera is a slot where the film advance wheel fits.

In front of the camera, you load the film via an insert that fits into that area. The insert is a place to put the take-up spoon on the right and a new roll of film on the left. There's an opening for the negative, which measures 1 3/8" wide by 1 7/16", the exposed image size on the negative. A hinged wire acts as a pressure plate to keep the film flat when loaded into the camera. The insert is removable to make loading and unloading the film more accessible.

Underneath the film insert is a metal disc that covers the shutter assembly. When I received the camera, the shutter wasn't working, and I didn't notice that the metal disc covering the shutter assembly wasn't in its correct place. When I decided to write a post on this camera, I wanted to see if I could get the shutter working. This assembly is elementary and something even the non-mechanical person I am could get working again. I popped off the disc, and the shutter has two different levers corresponding to the levers on the front of the camera. My guess is that there is a shutter lever for "T" or timed exposures and another lever, "S," for snap. Generally the second shutter setting is "I" for instant, but this one is different.

 In the middle, there is a disc on the end of a piece of thin aluminum with a hinged rivet on the bottom that has the shape of an open safety pin, but the pin part is short, so it doesn't fit into the safety part. A spring holds the lens cover assembly in the closed position. Above the lens cover are your shutter levers, which also have hinged rivets, with a more extended metal arm that is bowed in the middle to fit over the lens covering disc, and on the bottom of the arm is a slight bend that allows the arm to interact with the shutter cover assembly. On the left of the shutter cover is a lever for the "T" shutter release for timed, and on the right is "S" for snap. A spring is between these two shutter assemblies to hold the arms away from the lens cover assembly.

Here's how the different shutter levers work. When you pull down the "T" lever, the shutter assembly arm slides over and pushes the lens cover away from the lens. Holding the shutter lever down keeps the lens open for the length of time you hold the lever down. When you pull the "S" lever down, it slides the shutter arm over the  "short pin" arm and grabs the shutter cover assembly. When you release the "S" arm, the shutter arm pulls the lens cover away from the lens, and due to the short pin arm, it slides off, and the lens cover closes, making a short exposure somewhere in the 1/50 sec timeframe.

The viewfinder on the PIC camera

There is a round viewfinder on the top of the camera, which doesn't correspond to the shape or the distance you get within your photos. 


The Results:

I had some expired 127 film from Film for Classics, which I purchased just for these cameras to test out. I fixed the very basic shutter, replaced the metal disc covering the shutter assembly, loaded a roll of film into the camera, walked around my house, and took photos, and here are the results.

My Conclusion:

You can tell from the photos that the lens isn't very sharp. It has a very "Lomo" look to it. I didn't get to photograph something close because I felt the plastic fixed focus lens wouldn't produce tack-sharp images, but it did take pictures. It was easy to use, but I'd take nothing on holiday unless the photos I wanted to create were similar to a Diana or Holga-style camera. Overall, the camera worked, and I discovered it's relatively rare due to the plastic construction and short camera run. People ask for around $500.00 on eBay when you can find them. I'll put it back in my collection and move on to a different camera next week.

 Please comment on your thoughts on this or other cameras I've discussed. I'd love to hear your thoughts on this camera.

 Please be safe until next week's camera post.

SportShot Senior Twenty Camera

One of the first memories I have of the SportShot Senior Twenty camera was looking through McKeown's camera (bible), collecting cameras, and noticing the odd shape of the camera as I thumbed through the pages. Then, upon doing a little more digging into what made this camera special to me, a company in Australia made it, and it only existed for a couple of years. These are the cameras I desire, and these it's these items separate cameras in my collection. 

My ACMA Sport Shot Senior Twenty camera.

 Whenever I travel alone for business or when my wife and I travel internationally, I always try to find the local flea market to see if I can find items that are rare in my part of the world. There are thousands of extremely popular Kodak box-style cameras, whether made from cardboard and leatherette covered or the bakelite cameras you see in every corner of the world. When I first started collecting, I would snatch up any camera because they were a "camera." But as time goes on and I see more of the odd and unusual items, I increasingly appreciate them.

I traded the SportShot Senior Twenty camera about a year ago for some items I had from a dealer who frequents the US occasionally from Australia. The trade happened at a camera show near to me. I got the SportShot Senior Twenty camera. I picked up a few other cameras from Australia, like the red Swiftshot and the Lexa box camera with an excellent metal faceplate. I believe he was happy getting tradeable items he could return to Australia, as it was hard to find items here in the United States.

The Company:

The SportShot Senior Twenty camera maker was the very short-lived ACMA, which stands for Australasian Camera Manufacturers Australia. They were based in Sydney, NSW, Australia, and existed from 1948 to 1950. I've looked at many different commerce sites in Australia and cannot find anything new about the ACMA company. They were one of Australia's only post-WWII camera manufacturers producing cameras. Inside the logo on the camera where the wording Australasian Camera Manufacturers Australia is located, the words British Make are there. There must have been British backing in the company to produce the cameras. 

My best guess is that while the camera is somewhat awkward to hold and use, it wasn't very popular, and sales never caught on, so the company folded, and what was made are the only examples available today.

 Since a large part of my collection is colored cameras or cameras other than black, I like the fact that this camera came in red and green as well and had a matching plastic strap to match the camera itself. These are now on my radar for future purchases. 

My Camera:

The SportShot Senior Twenty camera is triangular or trapezoidal in shape with what appear to be wings in the back to hold onto when taking a photo. The camera measures 5.5" wide in the back and 2.25" in the front. The camera is 4.5" deep, including the lens, and is 3.5" tall with the viewfinder closed but including the winding knob. The camera weighs 13.2 oz without the strap, which I don't have for this camera. The camera has a single red window on the back and shoots 6x9 format, producing eight exposures on either 120 or 620 film.

The camera is comprised of two separate parts. The top comes off with an effortless latch on the back that is somewhat spring tensioned with a hole that fits into a small knob holding the top to the bottom of the camera. On the top portion of the Sport Shot Twenty camera is also a pop-up viewfinder, along with a very odd winding knob. The winding portion of the film advance that fits into the film roll has a triangular shape; it will fit both 120 and 620 films. 

 Because the camera can shoot both 120 and 620 films, the useability is a bit more interesting as this opens the camera's film up to different types. The downside of having the winding portion shaped as it is is that the film advance is more difficult to use, which is what I experienced when I shot a roll of film through the camera. On the top of the camera adjacent to the film advance knob is stamped ACMA S20.

The camera loading is also not the easiest thing to do. Once you have the top off, you can take the empty roll from the right side and put t on the left side where the advance knob is. When loading the film, the tricky part was the channel it slid into to keep it flat for exposure. You can't just put in the roll, slide it over the shutter, and attach it to the empty spool like you do on the majority of cameras. The SportShot Senior Twenty has a thin slot the film needs to go into to keep the film flat, as you can see in the photos.

To load the film, I put the leader into the take-up spool and rolled out a bit of film to slide it into the thin channel. It took me a few times to get it in because the channel was so thin the film paper packing would crinkle and fold a bit, along with the curvature of the channel. It wasn't an easy load, but eventually, It slid in, and I got the camera loaded. How you load the camera was another factor against it when trying to sell to the masses. You don't want to make things more complicated than they need to be.

Note the thin slot film needs to be slid into to load film.

When I went to shoot the film, I loaded it into the camera, and I went to clean the lens. When cleaning it, one of the sides pressed in. I thought, "This wouldn't work with one side of the lens, not in the right position." I turned the lens, and it unscrewed from the camera body. I pressed the lens back into place, then re-screwed it back onto the camera.

 There are only two settings for the shutter. "T" for time, where the shutter stays open as long as you keep the shutter button depressed, and "I" for an instant for everyday shooting. The lens is a 13.5cm or 135mm lenticular lens f3.5 aperture. The lever above the lens is the shutter release, and you press it down towards the lens to take the photos. The viewfinder is a simple pop-up style and closes when not in use. There are no other settings to choose a different aperture, which makes this an extremely simple-to-operate camera.

My Results:

After struggling to load the camera, I had put a roll of Ilford FP-4 in the camera and walked out in front of my house to see how it did, and here's the results.

Conclusion:

Other than struggling to load the film into the camera, along with advancing the film. Due to the shape of the advanced knob that fits into the take-up spool, it didn't grab very well, and there were several times when the knob turned, and the film didn't move, but as long as I took my time, it did advance. Maybe it would do better with 620 film since the slot on the spool is thinner, and the advance knob would fit and hold into the spool better. I'm not going to say the camera was hard to use, but it wasn't the easiest, and I can understand why people would get frustrated using it. None of the images are sharp, but some are better than others. This may have been caused by removing the lens.

 Thank you for taking a few minutes from your day to look over this review. I realize it's not a sophisticated camera, but it definitely has an unusual shape.

 I have an odd camera set for next week's post and hope to hear your thoughts on it or other cameras I've written about.

 Until next week, please be safe.

Nova Subminiature Camera

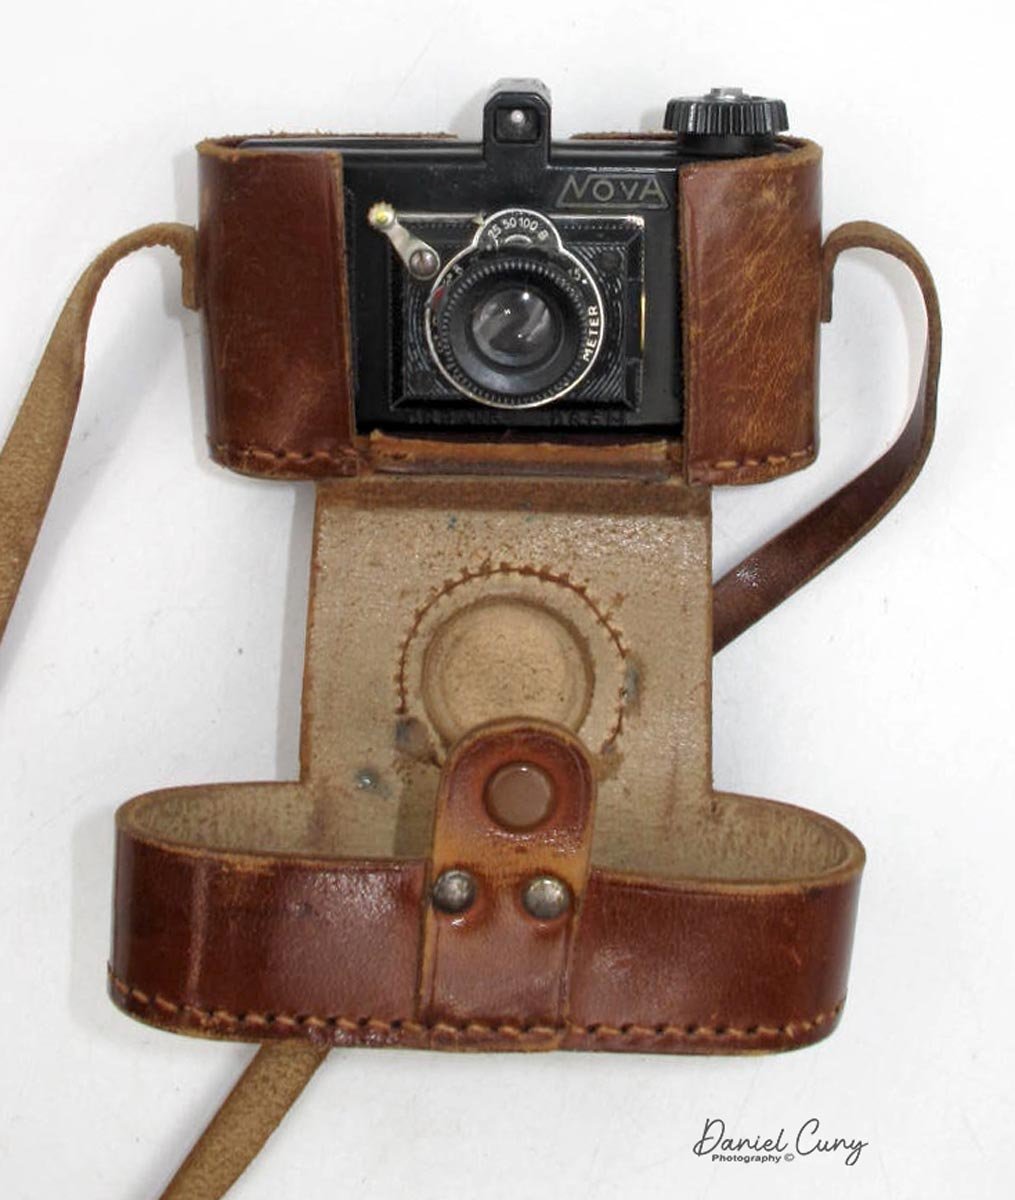
This is my Nova Camera

My camera collection is very eclectic, and I am drawn to odd and unusual cameras and photo items. I did a blog posting on the Minolta Six camera a couple of weeks ago. What drew me to that particular camera was that it didn't have the standard cloth bellows system but rather a series of metal cubes that pulled out and retracted back into the camera to form the bellows. These were very similar to a camping cup, where the larger rings pull away from the smaller ones on the bottom, creating a cone-shaped cup. 

 A year or so ago, there was a pretty major auction of cameras in the United States, with hundreds, if not thousands, of cameras and other photo items sold. There were many "lots" that had several cameras, maybe as many as 25-30 grouped into similar lots. I won one of these "lots" that had several smaller and subminiature cameras, many in their cases and several in the original box. The Nova Subminiature camera was in that particular lot.

I can still remember unwrapping the camera and opening the case to a camera I had seen in McKeown's Camera price guides many times. When I pulled the bellows out to find that they had a cubed bellows system, I immediately put the camera on my display shelf because I was drawn to its look.

The Company:

Here's where it gets odd. The only thing I can find about this camera or who made it was that it was created by Erwin Adloff Apparatebau, Berlin-Wilmersdorf, in 1938. Even that is suspect, according to McKeown's guide, as they have the Nova listed separately. There is a camera called the Adloff Tex camera, which has a body similar to the telescoping box bellows but with a more elaborate shutter. 

Nova Camera closed. It’s very compact.

Another oddity about this camera was that it was designed by Fritz Kaftanski, who was born in Essen, Germany, in 1899. According to the information found online, Kaftanski started designing Fotofex Kameras in Berlin in 1927. In 1932, Fotofex showed the Visorflex camera at the Leipzig fair and introduced other cameras a few months later.

 In 1934, the Sida and Extra Sida were tiny cameras produced in Germany, then later in Poland and Czechoslovakia under license in Italy. In 1937, Kaftanski moved to Czechoslovakia with the Sida patent, where production continued. Then, according to all I can find, Kaftanski moved to Paris in 1939, so sometime before moving to Czechoslovakia, he either designed the Nova for Erwin Adloff or someone else who remains unknown designed the camera.

Since little is written about this company, my best guess is that Erwin Adloff Apparatebau, Berlin-Wilmersdorf, was a small manufacturer producing one or two cameras just before World War II broke out. Many records either went missing or were possibly destroyed during the war. Fritz Kaftanski designed the Nova sometime before 1938, when it was produced. However, from what I can find online, I don't see any definitive proof or acknowledgment of Kaftanski designing the Nova, although he did create many other cameras during this timeframe.

 My Camera:

My camera is pretty small, measuring 3 5/8" wide by 2" tall by 1.5" deep with the lens retracted and 2 5/8" deep with the lens extended. The camera without the case weighs 7.1 oz, and with the case 9.9 oz. It uses paper-backed unperforated 35mm film, known as Bolta film, which was very popular during this timeframe and something I discussed in my last post.

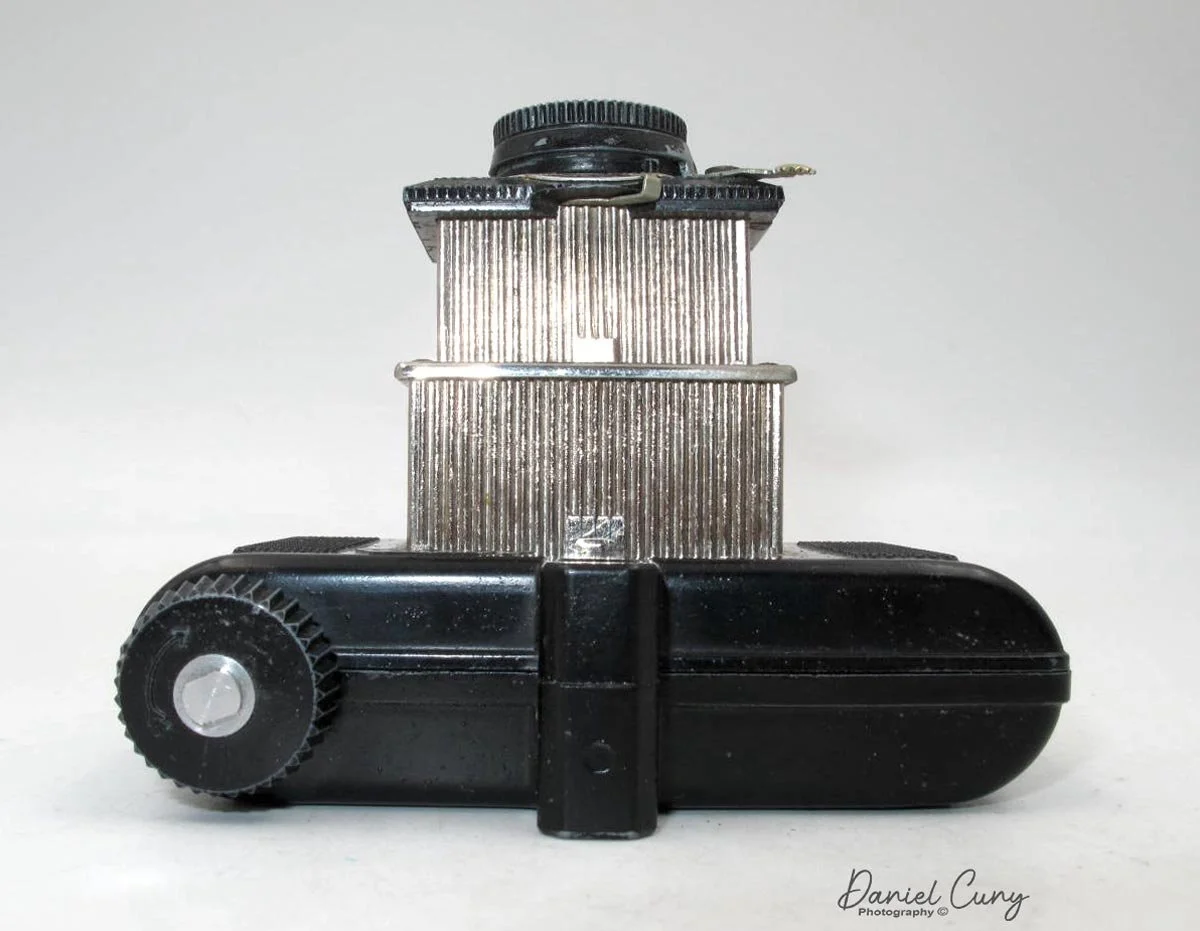
When you first look at the camera, it looks extremely plain, yet it has some Art Deco features, like the lines around the lens and the text used for the name. Pulling the lens away from the body reveals the double box bellows, which are very ribbed silver. When the camera is flat on its back with the bellows extended, they almost give the camera a wedding cake look.

On either side of the camera is a textured finish to the metal design to help with gripping. I don't know how much gripping is needed for such a small and lightweight camera. On the back of the camera are two more grips on the sides of an exposure table explaining the shutter speed depending on the distance to the subject, shutter speed, and aperture set on the camera. There is no mention of different film speeds. Just above the exposure table is a green window, and another green window is the camera's viewfinder. Just below the exposure table is the word "FOREIGN," and on the front, below the lens, is D.R.P. ANG D.R.G.M, meaning this was made for domestic or international sales.

 The camera has three shutter speeds: 1/25, 1/50, and 1/100 sec, along with "B" for timed exposures. On the side of the lens is a lever that can be pulled out to change the aperture from wide open at f4.5 to f6.8. This is very similar to what box camera employed to change the aperture. At the 10:00 o'clock position, around the lens is the shutter release, and around the lens is the focus adjustment in meters, with the closest focus being 2 meters.

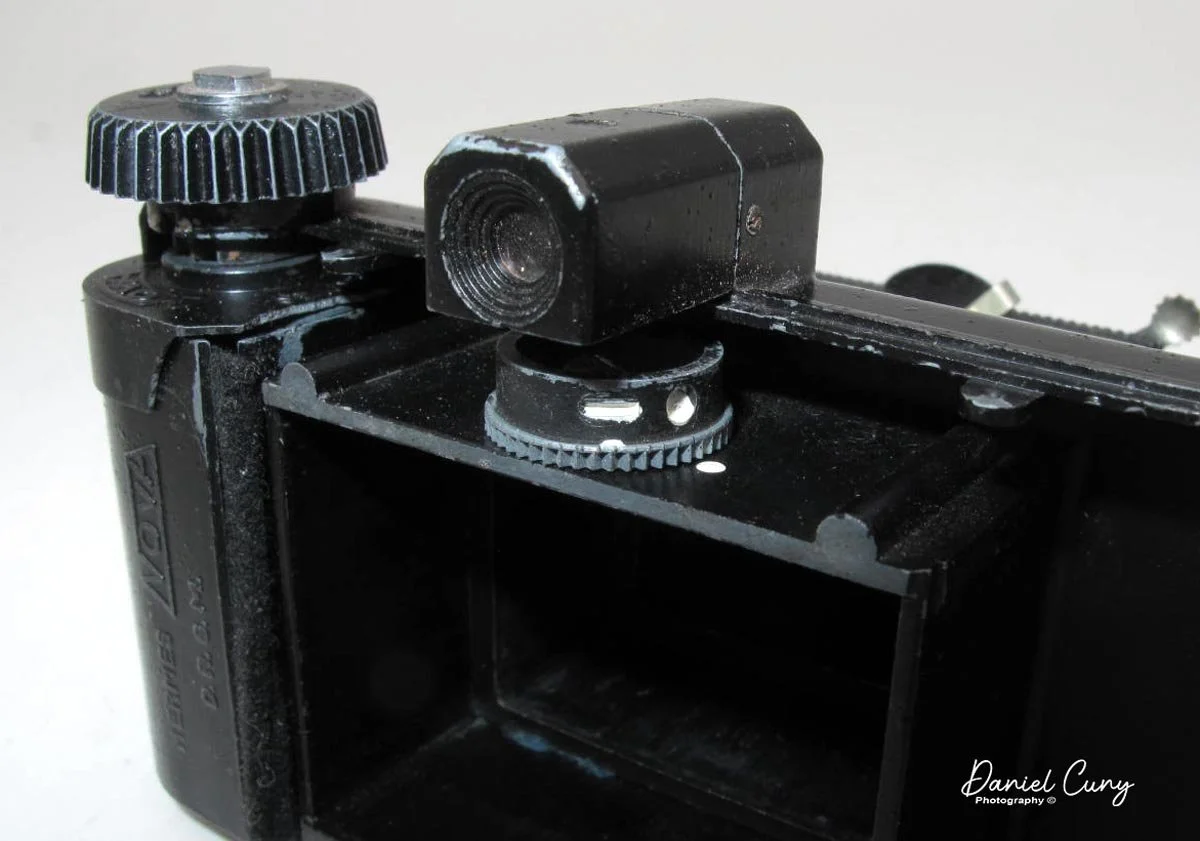
To take the back off the camera, there are two knobs you pull apart to get to loading and unloading the camera. Two films should be holding cassettes in the back of the camera, but mine only came with one. Interestingly, the film holding cassettes is Hermes Nova. Did the French company Hermes design the film holders, and how was a French company involved in this? This could be where the involvement of Fritz Kaftanski comes into play, as he did move to France in 1939, the year after the camera came out. Were there discussions between Kaftanski and Hermes during the mid-1930s?

Hermes Nova film cassette.

On the top of the film holder are four bumps or knobs that need to align with the slots on the camera film advance knob, otherwise, the film cassette won't fit in or out of the camera. Once the slots and the knobs are aligned, the film hold comes out quickly, and you can take it apart to load the film into the cassette. 

Once the film is in the camera, the film moves over a geared wheel above the film chamber, rotating a wheel with a white dot and white dash. As the film transports across this wheel, you can view this movement through the green window on the back of the camera, just above the exposure table, so you can tell when your following exposure will be as there is no frame counter on the camera, nor are there numbers on the Bolta film, so this was the only way to tell when you got to the next frame.

Conclusion:

I couldn't use this camera since I didn't have Bolta film to shoot with or a second film cassette, even if I did have the film. The Nova is a beautiful little camera, and I enjoy having it in my collection. Since the camera was only made for a year, how many cameras were made is unknown. Looking at the back door, there is 1114, which may be the serial number, but not 100% positive. Due to the lack of production and not seeing many for sale, I guess it's a reasonably rare camera.

My Nova camera in the fitted leather case

Thank you for taking time out of your busy day to review my film blog. I have another great camera picked for next week's blog, and I hope you'll look out for it.

 Until next week, please be safe.

Dan 35 I Camera

My Dan 35 Model I camera

I need to start this post back in time. I first started collecting cameras and other photo items in the late 1970s or early 1980s. I can remember purchasing one of McKeown's Camera Price Guides and spending hours combing through each camera manufacturer, looking at the cameras they had made in the past. There were so many odd and unusual like very rare original Leica; the very first bullet-shaped brass Voigtlander camera, the Compass camera or Photosphere that I could only dream of owning, and many were so far from the price budget that I knew there were only a pipedream.

 Many large companies, like Eastman Kodak, Polaroid, and Zeiss, made hundreds of different model cameras, which were abundant. Then, there were the smaller camera companies that produced unique cameras, like Univex, which was the first camera I owned. It was a Uniflex that was given to me by my uncle Bud, who, to this day, along with my brother Tim, I owe my love of photography.

 Then, I can remember thumbing through the price guide and finding a tiny company that produced a camera near and dear to me, the Dan camera. I immediately thought I needed to find one of these to put into my collection. My initial search was hopeless, as many of the local flea markets and antique stores I'd frequent only had the very common Kodak, Polaroid, Zeiss, and other companies like Herbert George and other American brands.

Online Auctions:

It would help to remember that this was before eBay, which didn't exist before the mid-1990s. I was an early adopter of buying and selling on eBay in 1997. At that time, there were no photos, and it was mainly just a buy/sell board with an auction element so you could post a camera or item for sale, but you only had the description from the seller to go by. When I first joined eBay, there was no name to have but a number. My original number was 1034; you had to do everything through DOS.

 EBay made a massive difference as it gained popularity. It changed how people bought and sold items. Adding photos gave the buyer more confidence in their purchase, and rarer items could hit higher pricing due to the inability to find them.

 For many years, the Dan Camera was very elusive, and since the camera was from a smaller company, the scarcity and pricing made the purchase of it next to impossible up until a couple of years ago when I was looking through a different online auction website, and I found a grouping of cameras which piqued my interest. As I zoomed in to look at this lot, there was a portion of a lens I could see.   I could barely read "Dan" on the ring around the lens as I looked closer. Here was my chance to finally own the elusive Dan 35 camera.

Name embossed on the back of the camera.

 The auction happened, and there was minimal interest in this group of cameras as many of them were very common items. However, these are the groups that I really enjoy because tucked away in the corner "could" have a gem hidden, and in this case, there was. I won the camera lot, got the items shipped to me, and there it was as I unwrapped it: the Dan 35 camera. To my amazement, it was the first model.

History:

The Dan 35 is a simple Bolta film camera made in Japan after WWII. Bolta film was invented by Johann Bolten, who founded Bolta-Werks in Nuremberg, Germany, in 1936. The film was to go into his smaller, more compact cameras named the Boltavit. Bolta Werk later produced the Photovit line of cameras from 1936 to the 1950s. Bolta film was incorporated into many different cameras during this period and was a nonperforated 35mm film with a paper backing loaded into special cassettes. Later models of film were spooled similar to films like 828 and 127.

Stetch of Dan 35 Camera by Hagimoto Danji.

 The Dan 35 camera was made by Hagimoto Danji. He built a small plant in Suwa to manufacture the Dan 35 camera, which he sold in his camera shop in Ginza after WWII in 1945. After the moderate success of the Dan 35, there were three different distributors for the camera between 1945 and 1950, when the camera company went bankrupt. The logo on the camera coincides with the company's name, which is H for Hagimoto above Dan for Danji on the far right of the camera.

 Here's where it gets a bit fuzzy. Yamato Koki Seisakusho was a camera company that started in Tokyo in 1943. It made shutters for Japanese camera companies like Gelto and Leotax. The first cameras produced by Yamato were the Minon 35, Minon Six, and Pax 35.

 Yamato, known to produce the Minon 35, a copy of the Dan 35 III and later the Pax 35, is a camera that is a copy of the Super Dan 35. Some sources say Yamato made the Dan 35 and Dan 35 II, but others say they took over producing the Dan 35 after Hagimoto went bankrupt in 1950. Yamato produced the Pax line in the 1960s.

My Camera:

The Dan 35 is a very simple camera with a torpedo-shaped viewfinder on top. It measures 3.25" wide by 2.25" tall from the base to the top of the finder and is 2" deep from the front of the lens to the back of the camera. The camera weighs a whopping 5.2oz and is considered a miniature camera. The Dan 35 has a Dan Anastigmat 40mm f4.5 lens with a Silver-B shutter.

Around the lens is the focus ring, a helicoid focus measuring from 1 meter to infinity. Just behind the aperture numbers on the lens is a knurled ring that sets the aperture. In front of the aperture numbers is another knurled ring that sets the shutter speeds on the camera. There are only shutter speeds, 1/25, 1/50, and 1/100 sec, along with B. On the left of the knurled ring is a cocking lever to cock the shutter, and the shutter release is on the right side to expose the film.

Logo and Torpedo viewfinder

 To load the film, on the top of the camera is a locking lever with "L" for lock and "O" for open. Switch the lever to "O," and the top comes off to load the film. The base comes off to load in later models like the Dan 35 Model II. My camera has no spools to load the film, and the shutter doesn't work. On the back of the camera is a red window with an open/close lever to see the numbers on the paper backing of the film so you know where to stop for your next exposure. Also, Dan 35 is embossed on the back of the camera.

Conclusion:

Unfortunately, I don't have film, and the camera's shutter doesn't work, so I couldn't take photos with this camera to share.

 I mainly have this camera for a couple of reasons. One is its rarity; the more important reason is that it has the same name as me, so I get a kick out of that. I have another miniature camera set aside for next week's blog post, which I also find fascinating.

 Thank you for taking a few minutes to review my blog post about the cameras in my collection. Please be safe until next week.


Petal Camera

In my early days of collecting, I was never a real huge fan of the smaller subminiature cameras, mainly since most of them were the lesser quality cameras, or as I called them, "carnival camera" like the Hit camera. Then there was the other end. The 007 spy style camera was coming from Minox. As I grew in my camera maturity, coming across cameras like the Minolta or Yashica 16mm camera gave me an appreciation of some of these cameras' quality and quality.

My Round Petal camera

My Round Petal camera

For this week's camera blog post, I wanted to go back to one of the subminiature cameras I have in my collection. The Petal camera has always intrigued me since it's the smallest of the small non-medical cameras made according to Guinness World Records. As far as cameras go, this one is tiny and just a little larger than a quarter in the US or a 2 Euro coin. The St. Peter Optical Company made the Petal camera, whose Japanese name was Sei-Petero Kōgaku, in 1948. According to some, I've seen some references where it stated its introduction in 1947. The first US advertising of the camera was in U. S. Camera in February 1949, which you can see here.

The Camera:

The Petal camera comes in two different styles, with an even rarer third version named the Evarax A. The two primary Petal camera are either a round-faced camera, which is what I own, or a second model with an octagonal shaped face. The Evarax A camera is an octagonal shaped face camera with a more elaborate etching on the faceplate. The Petal camera is only 1.25" across by 1.75" tall by 5/8" deep and weighs 2.2oz. The camera has a 12mm f5.6 lens, placed in the upper middle on the front of the camera. There are two shutter speeds, either "B" for time exposures or "I" for instant, which is 1/25th of a second, controlled by a wheel on the camera's front.

My Petal camera compared to a U.S. Quarter.

My Petal camera compared to a U.S. Quarter.

On the top of the camera is an optical viewfinder, and to the right of the viewfinder is the shutter trigger lever. Along the top of the optical viewfinder is a lever that can be mover over the trigger arm to lock it so you cannot take a photo when you don't want an accidental image taken. The shutter release lever pushes a plunger down into the camera, which trips the shutter. On the camera side is a knurled ring that you rotate to advance the film to the next exposures. To the side of the knurled ring, number 1 to 6 with indents stops the ring at the next photo.

Loading the Camera:

It took me some time to figure out how to get to the film chamber. After playing for about 15 minutes or so, I noticed that the back of the camera. The camera back can be unscrewed to get to the film cassette. Once the back is off, it exposes the film cassette. Once that's removed, you can see the shutter mechanism and the inside of the camera itself.

Unthreaded the back off the Petal camera. You can also see the exposure counter.

Unthreaded the back off the Petal camera. You can also see the exposure counter.

The film came in preloaded discs with 6-6mm images on each film cassette. The film cassette holds the film. To get to the film, the cassette needs to be unscrewed too. The original Petal film was a panchromatic film, which needed to be loaded in complete darkness. Many people used orthochromatic film like that can be loaded and unloaded under a red safelight, which doesn't affect the film. A film cutter allowed the Petal camera owners to cut 35mm film to use in the film cassettes.

Once the film is in the cassette and back into the camera, you thread the back onto the camera. You need to rotate the back portion of the camera one to two revolutions clockwise until the #1 is next to the exposure indicator. Doing this opens the film window on the film cassette and allows light to get to the film once the shutter is triggered.

Exposure counter on the Petal camera.

Exposure counter on the Petal camera.

After you took the six exposures, the exposure counter is at number six to unload the film. You need to turn the number counter clockwise two numbers to number 4, closing the film window and allowing the photographer to unscrew the back and take out the film cassette for processing.

Conclusion:

The Petal camera is a lot more sophisticated of a camera than I first thought when I purchased it many years ago. It's very well built and a prized camera to own for the "spy" photographers. Extremely small, very well made, and a beloved camera in my collection. The shutter on my camera is inoperable. It would be fun to cut some film and take it out for a spin.

 If you have questions or comments about this camera or any others in my collection, I'd love to hear from you. Thank you for taking a few minutes from your day to read about this fun camera. Until next week, please be safe.