Arsen Camera

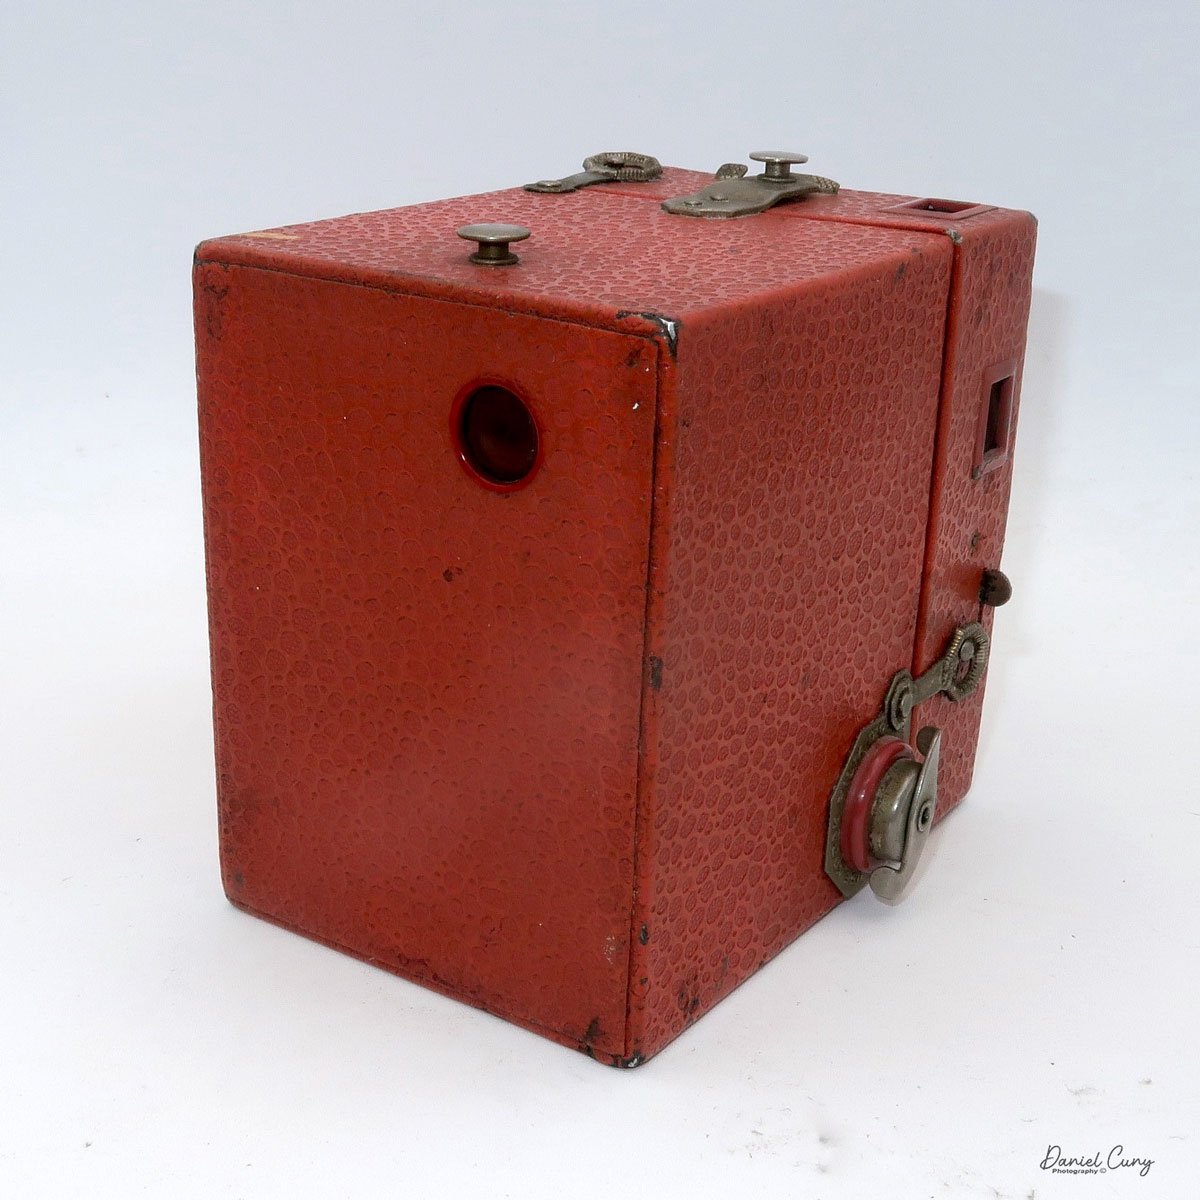
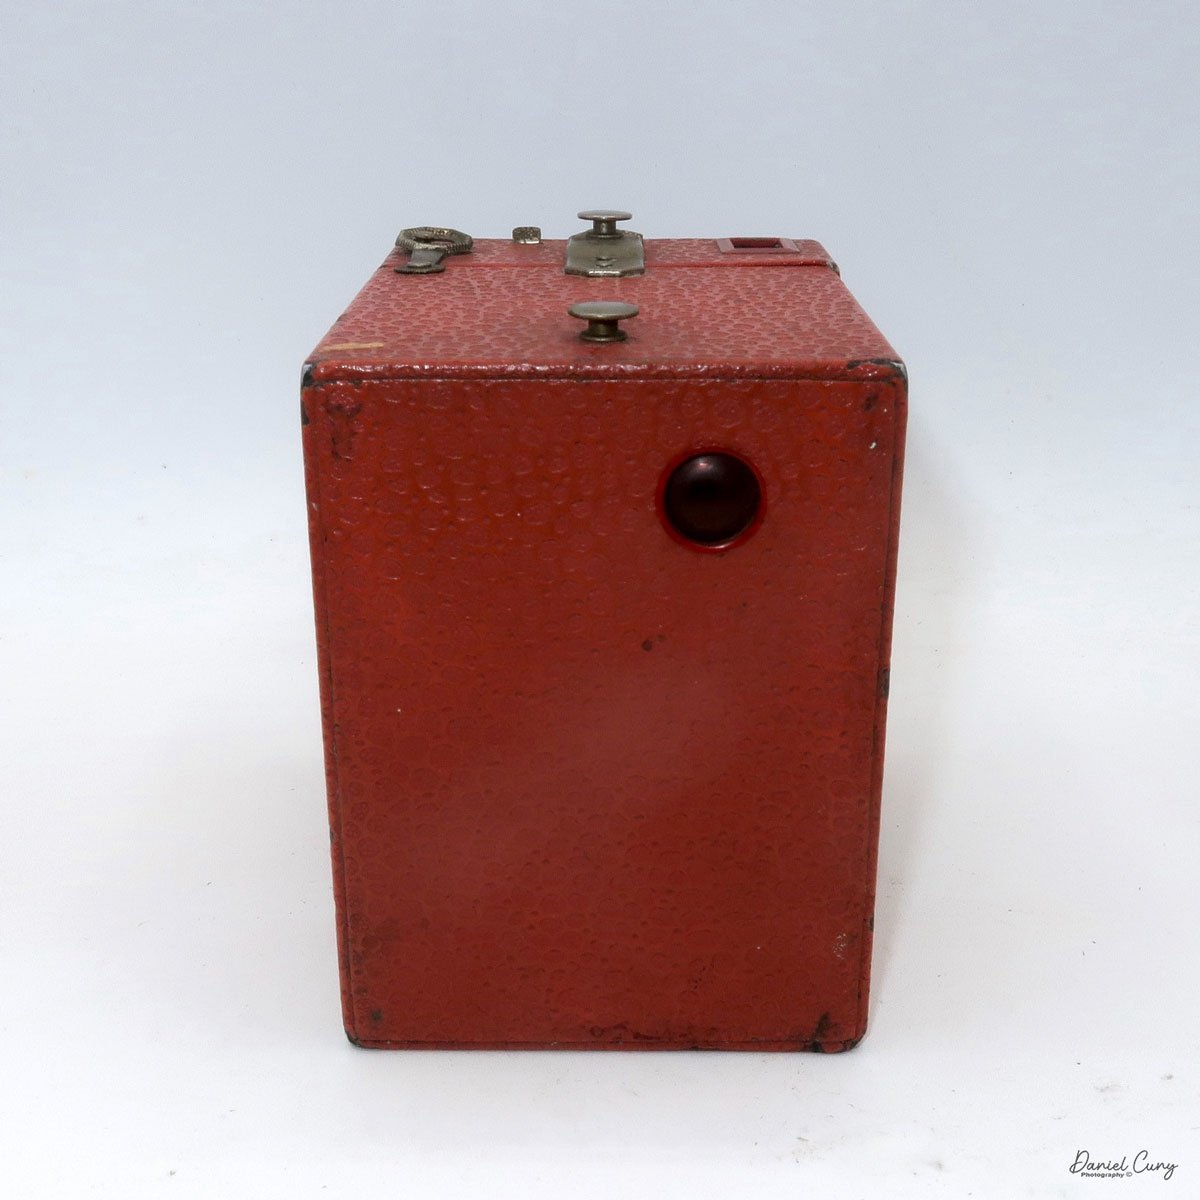
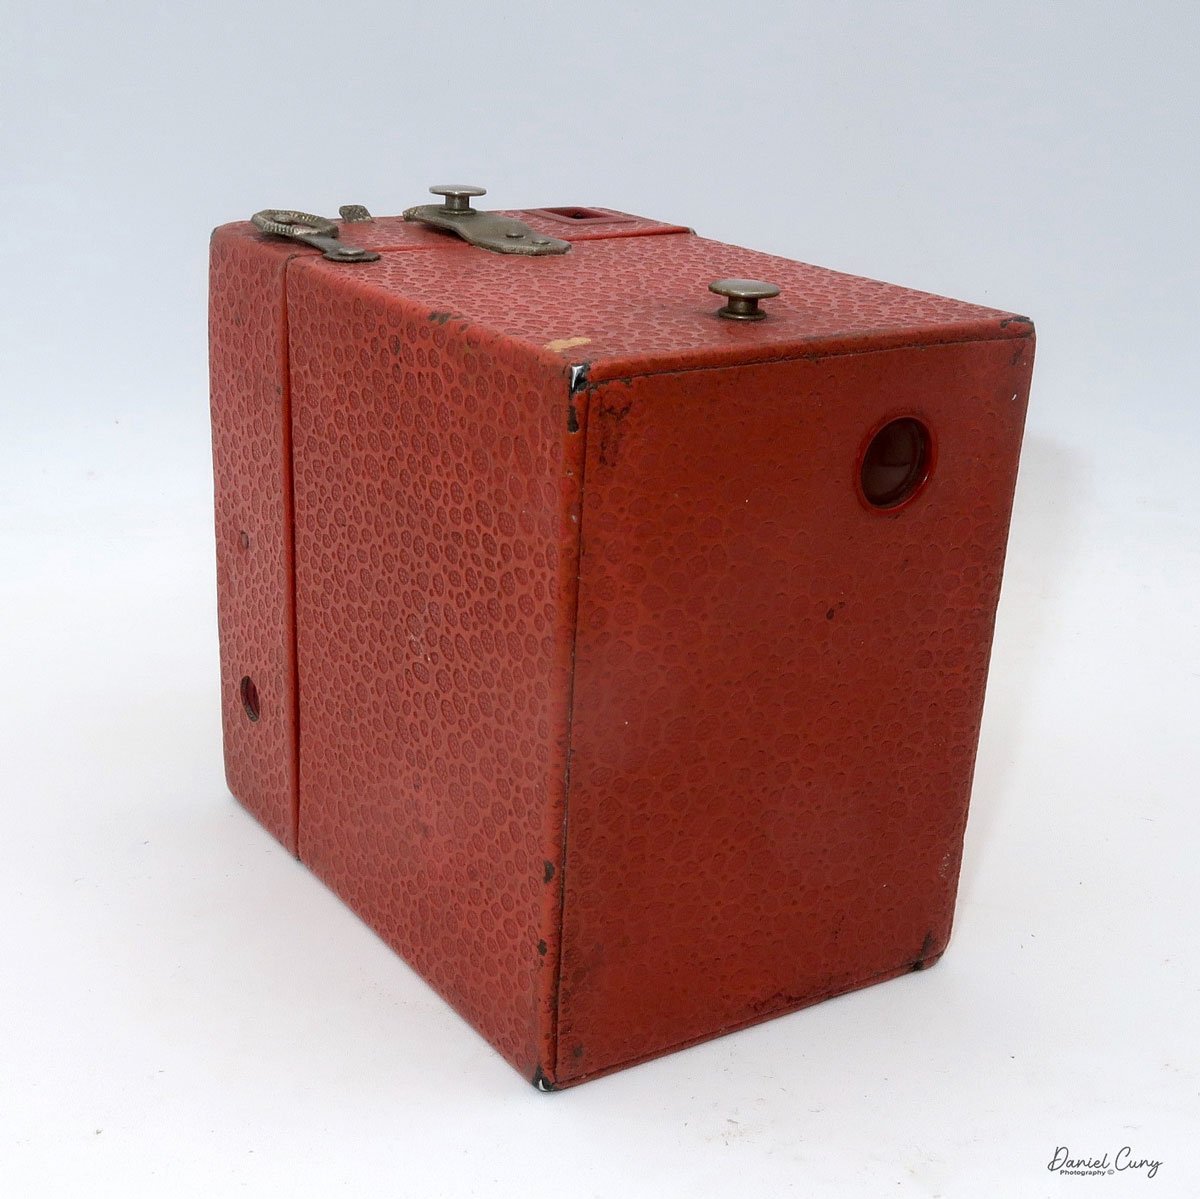
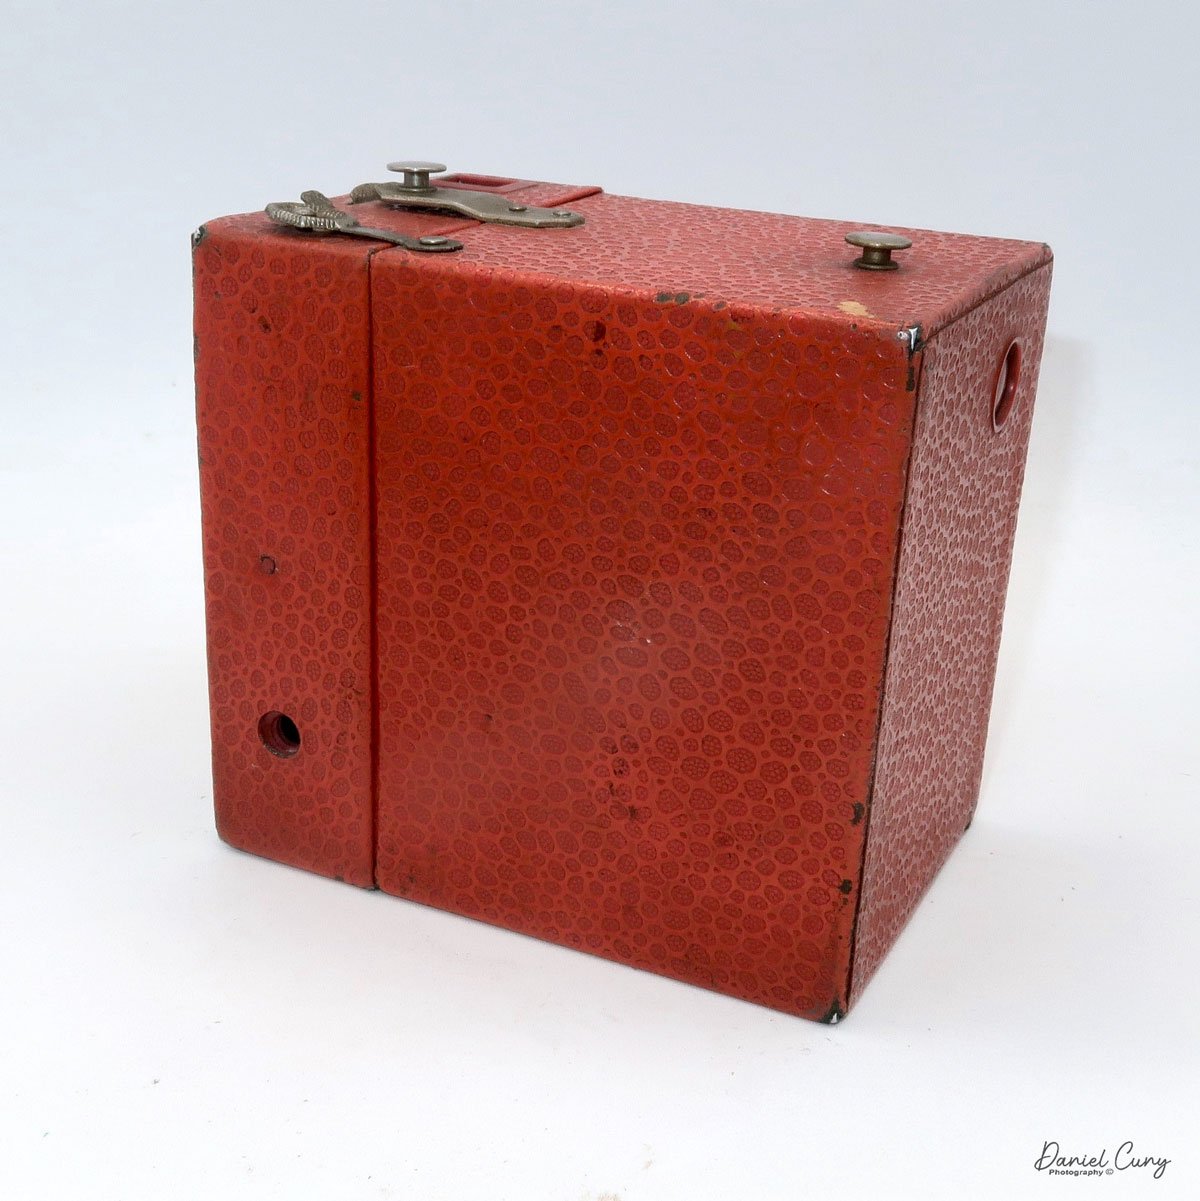
My Arsen Camera

When I first started collecting cameras, I was drawn to colored cameras, like the Kodak Beau brownies, the Rainbow Hawkeyes, Kodak Petites, and other brand colors or odd and unusual-looking cameras. I also like cameras with bold designs or odd or unusual faceplates on box cameras. I've always liked cameras with a bit of color or pazazz, as opposed to the more common black box or folding camera, which has black bellows. Heck, I still have many Kodaks and other brands with red bellows, which I prefer.

 I got a bug about purchasing another Gelto gold-finished camera a while back. I've owned a few in my camera-collecting life but sold them, and soon after doing so, I regretted that I did. I can remember looking on eBay and coming across a seller who was selling a couple of Gelto cameras, hoping that one of them was the gold version. However, the price for both was really low, so I pulled the trigger and purchased both what I thought were Gelto cameras.

 Upon the arrival of the package, I eagerly anticipated two distinct Gelto cameras. However, as I unveiled the contents and examined them closely, I was taken aback. One of the cameras was indeed a Gelto, but the other I had yet to anticipate, an Arsen camera. This unexpected discovery piqued my curiosity, prompting me to delve into the origins and features of the Arsen camera. To my surprise, I learned that the Arsen is a cousin of Gelto, which is produced by the same company.

The Company:

The Gelto, Arsen, and a few other cameras were made by camera maker Tōa Kōki, who might have been called Takahashi Kōgaku in the company's early years. The company was based in Tokyo. The earliest document with the Tōa Kōki name is from 1939, so it's unclear what the former name was. There were advertisements in 1937 and 1938 that have Gelto Camera Werke, but there's no record that was the actual name.

Ad for a Gelto Camera

 Before WWII, Tōa Kōki introduced the Gelto cameras in late 1936 or early 1937. They were a 3x4 format camera with 127 size film and a telescoping lens focused on a helicoid. Tōa Kōki survived WWII and was one of the 17 early members of the Optical and Precision Instruments Manufacturers' Association in Japan. Production of the Gelto cameras resumed in 1946.

From all my research, the Arsen camera was introduced in 1938 and was sold through Ars, which was Ars Seiki Kōgyō and the owner of the publication Ars Camera. It is the belief that's where the name of the Arsen camera originated from. Production of the camera ran through 1944. The Arsen camera had a different film format, 4x4, but still utilized 127 film. Another unique feature of the Arsen camera was that it used an "auto-stop" mechanism in the film's advance.

 By 1952, Gelto was now advertised by  Shinwa Seiki and was still based in Tokyo. It's not documented when the company ceased production, but it's assumed they closed soon after 1952.

My Camera:

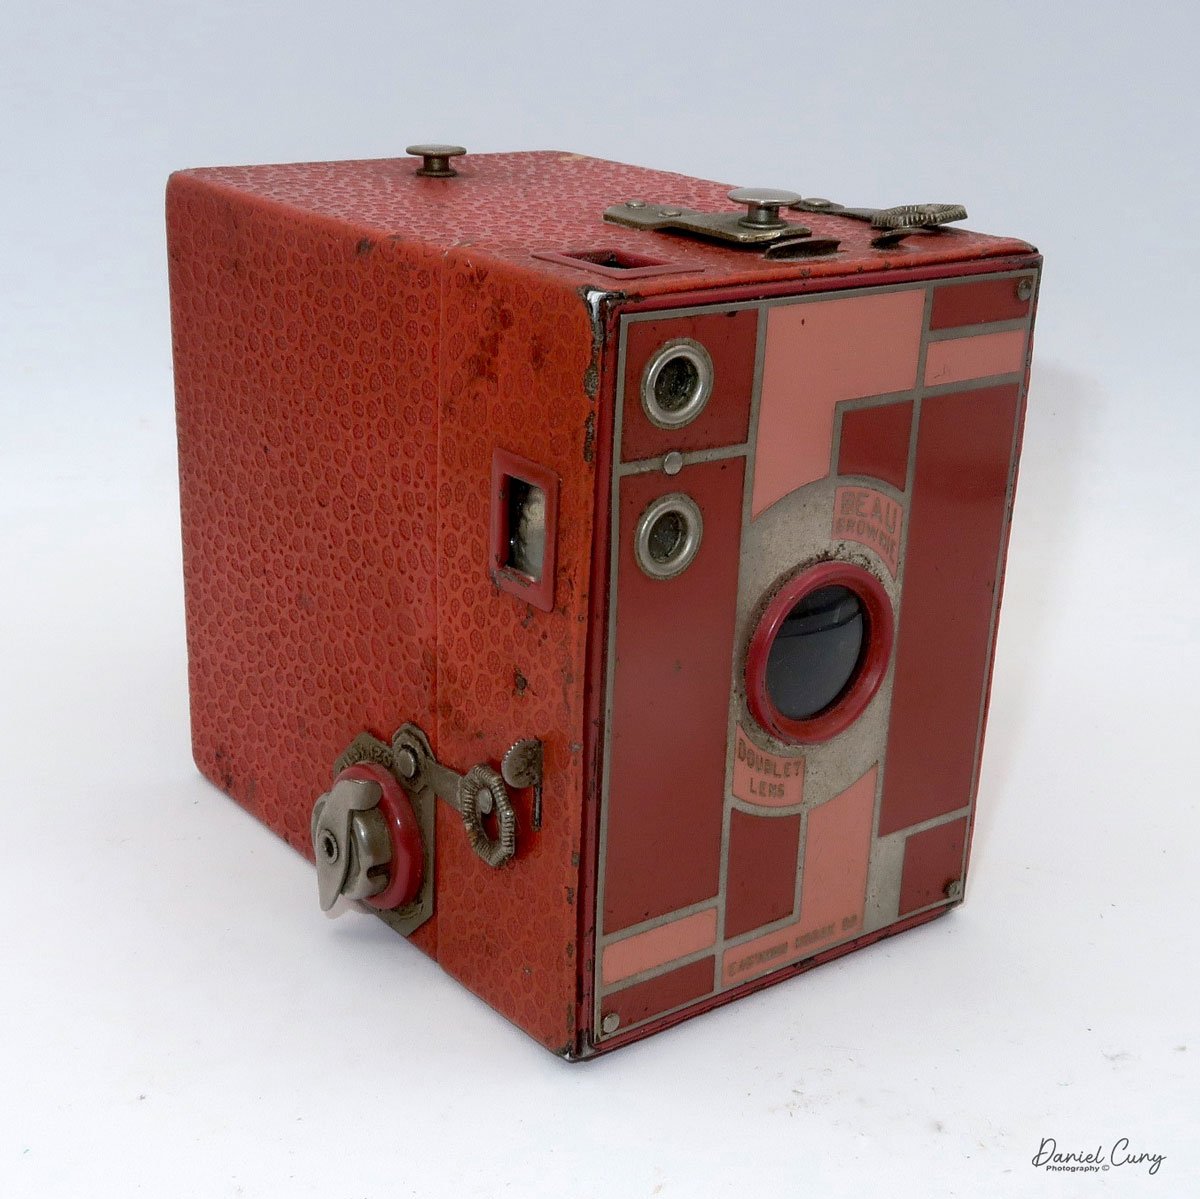
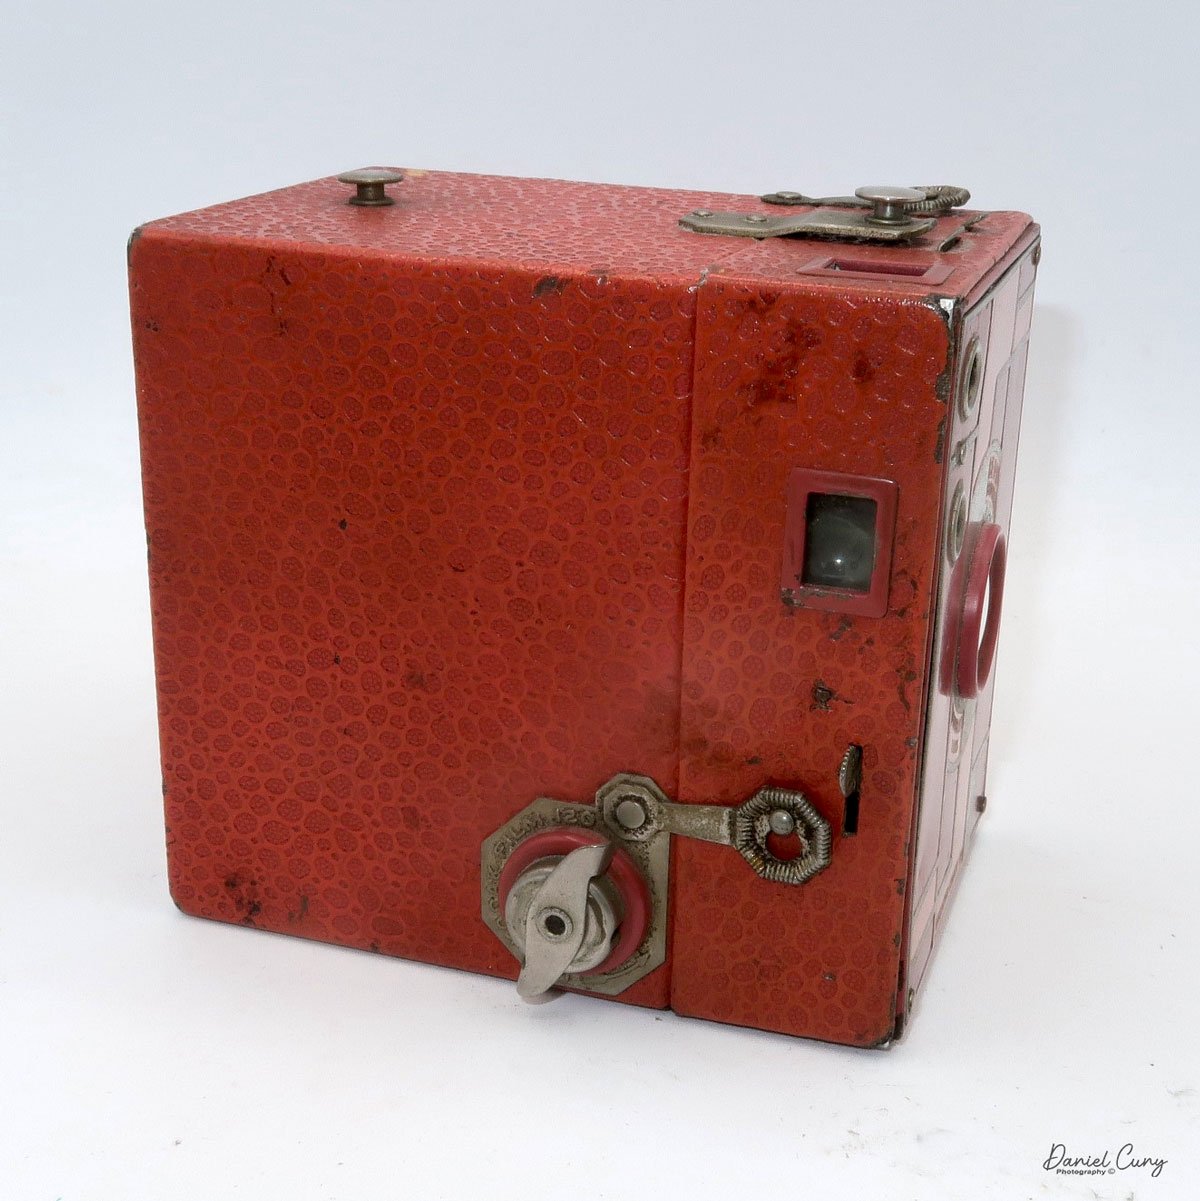
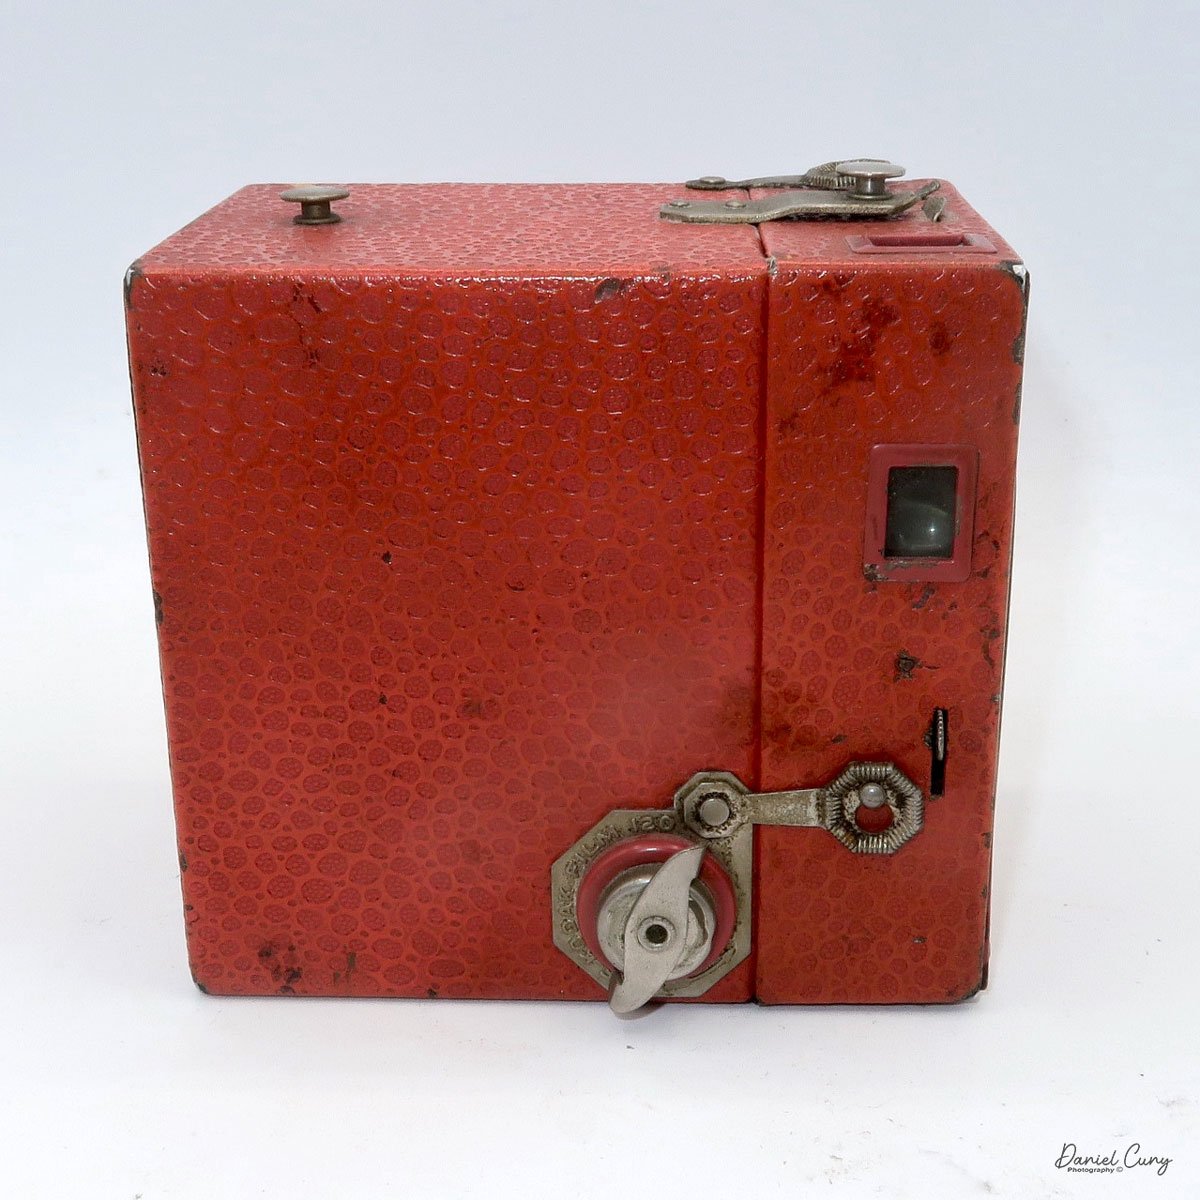
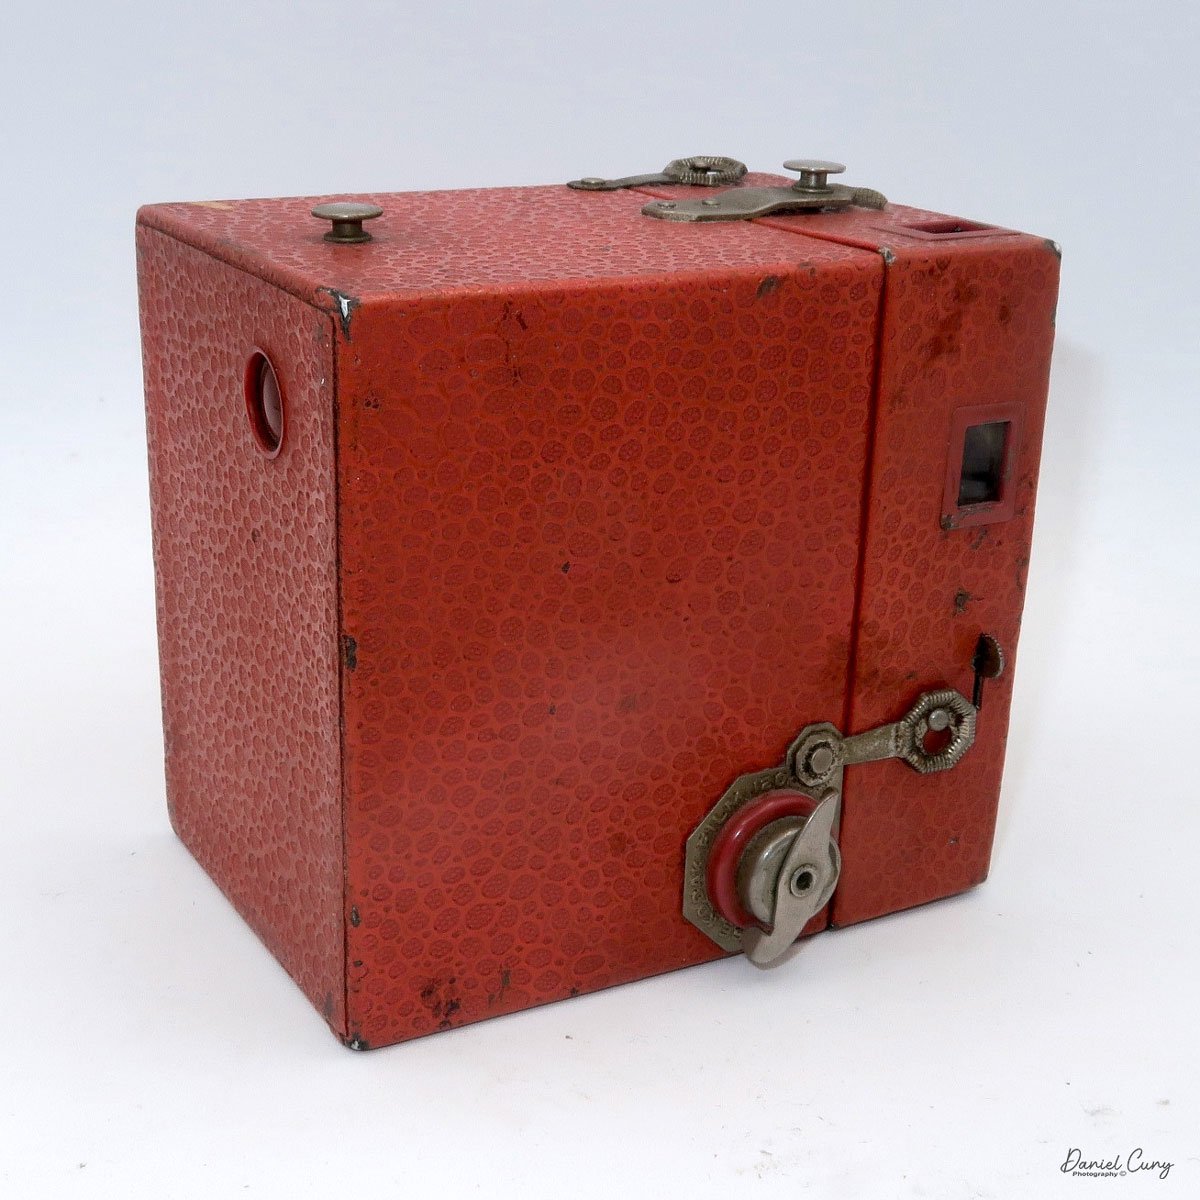
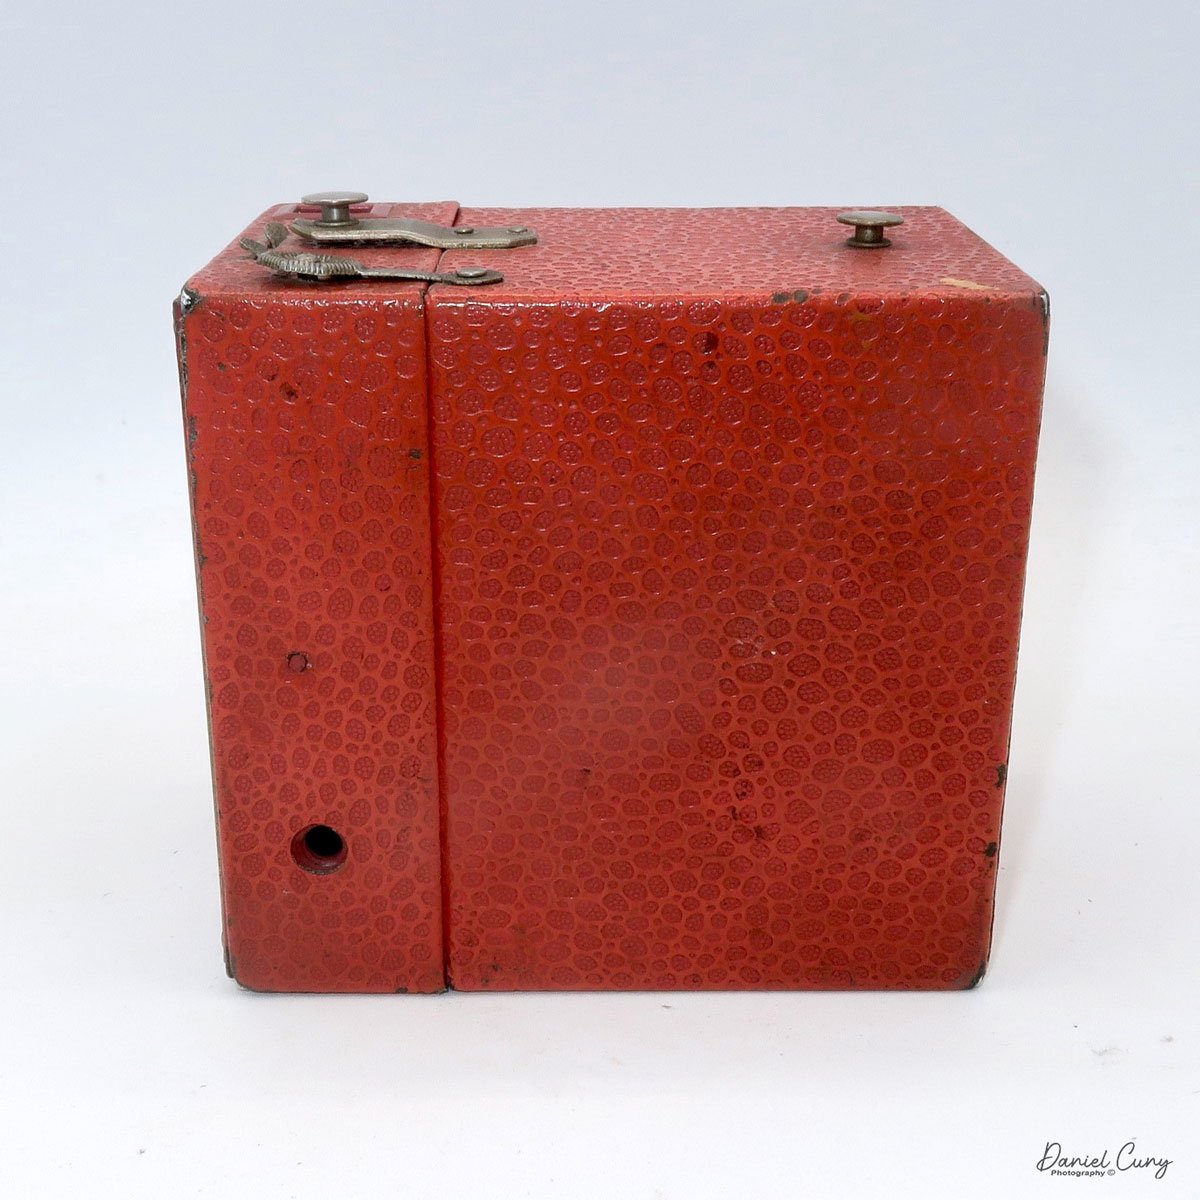
My Arsen camera is 3.75" wide by 3.25" tall by 2.25" deep with the lens retracted and 2.75" deep with the lens extended. My camera weighs 15.5 oz. so the camera is relatively small, compact, lightweight, and easy to carry around. ARSEN is embossed into the leather on the left side of the camera. My camera has a metal lens cap, which a previous owner painted black, and it is difficult to read "Arsen" through all the scratches screwed to the camera body with a small chain is how the camera was originally sold.

The camera has an Anastigmat Grimmel 50mm f4.5 lens mounted in a retractable tube that you extend to take photos and then push back for transport. The lens aperture ranges from f4.5 to f22. To set the aperture, you rotate a ring on the back side of the lens tube to the desired aperture. 

 The shutter speeds on the Arsen camera go from 1/250 down to 1/5 sec. along with "B" for bulb exposure and "T" for timed exposure. The shutter speed settings are located on a ring on the outside of the lens tube, which you rotate to set the desired speed. ARSEN is written along the bottom of the camera, under the lens, and on the same faceplate as the shutter speeds. Also on the film tube is the helicoid focus. An arm rotates to focus the lens from 0.5 meters to infinity. The focus marker is on the ring the lens pulls away from. There is also a "stop" on the focus ring, so you cannot move the focus ring past the minimum focus distance and infinity.

Like most cameras, you'd think the baseplate comes off to load film into it, but on the Arsen camera, the baseplate only contains the serial number (my serial number is 26725) and tripod socket. The camera is loaded by removing the top of the camera.

 A locking lever with a turning key is on the top of the Arsen camera. Lift up the turning lever and turn from "L" to "O" to unlock the top from the camera body. Lift the top off the camera to expose where you load the film. The film advance knob is on the right side of the camera, so you need to take the empty spool from the left out of the camera. The camera loads similarly to a Leica, where you need to start to load the film onto the take-up spool before you put both the take-up spool and roll of film into the camera. 

Sliding both the unexposed film on the left and the take-up spool with some of the film's rolled paper backing onto the take-up spool, sliding the paper backing into the small slot behind the lens. It's easy, but it is something that could be more intuitive. Holding both the roll of unexposed film, the take-up spool with some of the paper backings rolled onto it, and trying to slide both into their slots and the paper backing into a small slot behind the lens took me a few tries, but it happened.

 Once the film is in the camera, you open the door covering the back window and wind the film until you see the number 1 in the window. The camera does have a film auto stop built into the winding mechanism. Just to the right of the viewfinder on top of the camera is a small lever you must pull out to let the camera advance to the next frame. I needed to pull this lever several times until I got to frame number 1. This will need to be done to rotate the winding knob to advance the film to the next frame. There is also a frame counter on the top of the camera just to the left of the winding knob.

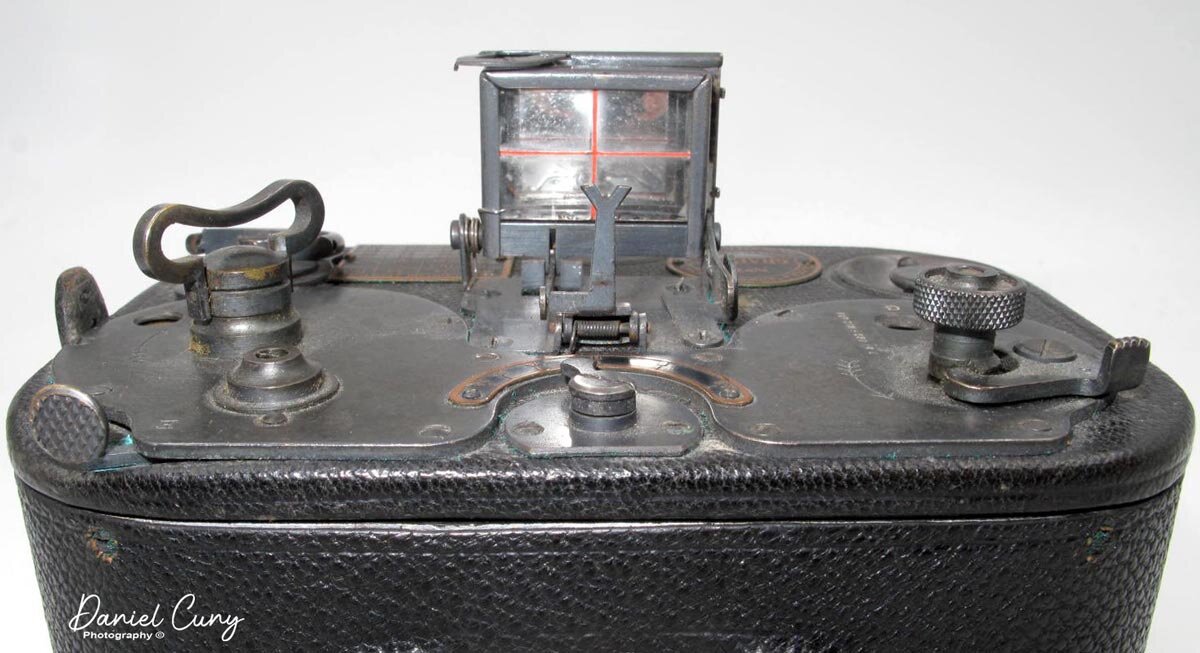
Top plate showing Winding knob, Frame counter, Locking mechanism, Lock release for auto-stop on film advance, Viewfinder and accessory shoe.

 Also on the top of the camera is the small viewfinder, which is easy to view through, and an accessory shoe. The shoe is for a flash attachment or accessory rangefinder if you want a more critical focus on the camera instead of using your best judgment on guessing distance.

My results:

I loaded the last roll of 127 film into my Arsen camera and took it with me when I took my dog for a walk around the block. As I pulled the lens away from the body, I started to turn the lens, and it came out of the lens mount. I was getting ready to take my first photo and I have the lens loose still on the camera. I got the lens back onto the camera but lost a few shots of the film. I was also still determining where the proper settings would be regarding the focus of the lens, but I guessed. After processing the film, there were images, but still determining if the focus or lack of focus could be attributed to the mounting of the lens in the field. Most likely, it's not where it should be, and the camera actually performs better than what these photos show.

Conclusion:

The Arsen camera isn't rare or unusual, but like many cameras in my collection, it's fun to use. That's something I enjoy about trying, and using so many different cameras is how they all work just a bit differently, so it's all about how you feel and how easy it is to use. This camera was very average. Other than the auto-stop with the film advance, there's nothing earth-shattering about the camera, but still fun to shoot.

 This is the last camera review before the holidays. For all my Christian friends, Merry Christmas; my Jewish friends, Happy Hanukkah; and my African American friends, Happy Kwanza; and for all others, Happy Holidays. May you be healthy and enjoy it with friends and family

 Until next week, please be safe.


Zeiss Kolibri-The Hummingbird

My Zeiss Kolibri Camera

The Zeiss Kolibri, which means "Hummingbird" in German, has always been a camera I wanted for my collection. I liked it mainly because it's very sleek and petite and resembles a 35mm camera, but its main attraction was its use of a larger 127 film size. The camera was built only for a few years, from 1930 through 1932, but I've seen ads for it through 1935.

 I had the opportunity to purchase one when I visited an antique store while on a trip to Minneapolis a couple of years ago. Still, I didn't pull the trigger to buy it, and ever since that trip, I've regretted it, so when I noticed an online auction for a few of the Zeiss Kolibri cameras come up for auction, I jumped on the opportunity and bid on two. At first, I thought these were different years of production, one being older than the other. One is more worn and used than the other. Both have the "cane," which keeps the camera upright, and both are in working condition.

 I won the cameras in the auction for a fair price, including the auction house commission and shipping fees. When the cameras arrived, I was pleased to see both in good working condition. One of the cameras seemed well used, and the other needed the aperture scale indicator, something I didn't notice when I bid on the items. Still, overall, I was pleased with the purchase and wanted to take one of the cameras out to see how it would perform.

History:

The story of Zeiss cameras is deeply intertwined with the evolution of optical technology and the art of photography. Founded in 1846 by Carl Zeiss in Jena, Germany, the company began as a precision mechanics and optics workshop. While its early focus was microscopes, the company's commitment to innovation soon extended to camera lenses and photographic equipment, establishing Zeiss as a pioneer in the optical and photographic industries.

The two Kolibri cameras purchased

 In the late 19th century, Zeiss gained prominence for its advancements in lens manufacturing. In collaboration with physicist Ernst Abbe, the company introduced revolutionary optical theories that improved lens quality and design. This partnership led to the creation of the Zeiss Anastigmat lens in 1889, which minimized distortions and chromatic aberrations, setting new standards for photographic lenses.

First Zeiss Logo

As photography gained popularity in the early 20th century, Zeiss partnered with other manufacturers to produce complete cameras. In 1926, Zeiss joined forces with several German camera companies to form Zeiss Ikon, consolidating its leadership in the industry. Zeiss Ikon cameras, like the Contessa-Nettel and the Ikonta, became renowned for their precision engineering and exceptional optics.

 One of Zeiss's most iconic contributions to photography was the Contax series, introduced in 1932 to compete with Leica. The Contax cameras were known for their innovative designs, including using a rangefinder system and superior Zeiss lenses like the Sonnar and Biotar. These cameras quickly became favorites among professionals and enthusiasts for their sharpness and reliability.

Ad for Zeiss Kolibri camera

During this period, Zeiss also developed a range of lenses that became benchmarks in the industry. The Tessar lens, introduced in 1902, remains one of the most widely used lens designs in photographic history, praised for its sharpness and compact size.

World War II disrupted Zeiss's operations, splitting the company into East and West divisions. The East German division, headquartered in Jena, retained the Zeiss Ikon name, while the West German division, based in Oberkochen, became Carl Zeiss AG. Despite the division, both branches continued producing high-quality photographic equipment.

In the 1950s, Zeiss partnered with Japanese camera manufacturers, most notably Yashica, to produce the Contax series. This collaboration introduced groundbreaking features like TTL metering, which became an industry standard.

 By the late 20th century, Zeiss shifted its focus from producing cameras to developing advanced lenses for various manufacturers. The company collaborated with brands like Sony, Hasselblad, and Nokia, bringing Zeiss optics to a broader audience. In 1996, the Contax G2, a rangefinder camera with autofocus and electronic control, became a cult favorite, blending modern technology with classic Zeiss craftsmanship.

In the digital era, Zeiss continues to push the boundaries of optical technology. Its lenses are widely used in professional photography, cinematography, and even smartphones. The company's commitment to precision, innovation, and excellence defines its legacy.

 From its beginnings in 19th-century Jena to its status as a global leader in optical technology, Zeiss has profoundly shaped the world of photography. Its cameras and lenses have captured countless iconic moments, leaving an indelible mark on history. Today, Zeiss is synonymous with unparalleled optical quality, a testament to over 175 years of innovation and craftsmanship.

My Camera:

My Kolibri camera is 4.5" tall without the viewfinder erected and 5.5" with it erected, by 3" wide and 2" deep without the lens in the taking position and 2.75" with the lens popped out and in the taking position. My camera weighs just over 1 lbs at 1 lbs .6oz. With the viewfinder down and the lens retracted, it's a very compact and sturdy camera that takes 16, 3x4cm images on 127-size film. The Zeiss Kolibri (523/18) has a couple of different lens and shutter combinations. The one I used to take the photos has a Novar Anastigmat 5cm F4.5 lens in a TELMA shutter. The other camera I received has a Carl Zeiss Jena Tessar 5cm F3.5 lens in a Compur shutter. A third model has a Zeiss Biotar 5cm F2 lens. All of the different lens/shutter combinations are in a chrome polished tube that pulls out to take the photos and to retract, grab the "wings" on either side of the lens, turn the lens slightly counter-clockwise, and press the lens back into the camera body. You also grab the "wings" to pull the lens out to take photos.

The Telma shutter has only three shutter speeds, 1/100, 1/50, and 1/25, along with "B" and "T" for timed exposures. The Compur shutter is more extensive, with shutter speeds starting at 1/300, 1/100, 1/50, etc., to 1 sec along with "B" & "T." The shutter release is on the left-hand side with the Telma shutter, and you do not need to cock the shutter; just press the shutter release and the shutter fires. On the Compur shutter, the cocking mechanism is on top of the shutter, and the shutter release is below, so there is a little difference between the two cameras in the shutter and shutter release function.

Telma shutter

On both cameras, the aperture settings are under the lens with a little slide that points to the aperture setting. Focus on both cameras is done by a slider knob on top of the camera, with the closest focus at 1 meter. On the bottom of the ring that has the "wings" on it is a hole that the "cane" or strut fits into to keep the camera upright, with either the lens out or retracted. Using the "cane" is excellent for timed exposures, connecting a cable release to take a timed exposure. There is a cable release socket on both cameras incorporated into the shutter.

The aperture ring is under the lens. The shutter release is on the left, and the self-timer is on the right with a red dot.

To load the film, you slide the knurled knob on the top of the camera in the direction of the arrow to open the back to load and unload the film. Once you open the back, you take the empty spool and put it on the left end, which has the winding knob, then put the fresh roll of film into the film chamber, pull the leader to the empty spool, put the leader into the slot on the reel and turn the winding knob until you see "start" on the film's paper backing. At this point, close the back of the camera and wind until you see the number 1 in the lower of the two windows. Now that you're ready to take your first photo, lift up the front and rear viewfinders so you can frame the image and take your photo.

 Since the camera has two red windows on the camera's back, the spacing between the top and bottom windows is the same as the negative size. You would take the photo once you wind the film so the number 1 appears on the bottom window. Once the photo is taken, wind until you see the number 1 in the top window, then take the picture. After you take the photo with the number 1 on the top window, roll until you see the number 2 on the bottom window and do this through the number 8.

Here's where I had some issues, and it's something I kept in mind when I was done taking the photos. In my small and simple mind, as I was holding the camera in a vertical position, it was in my mind that the camera would take a vertical photo. Unfortunately, that's not the case. If you're holding the camera in the vertical position, the camera is taking a horizontal image due to the orientation of the frame area in the camera. So, the photos I took that should have been horizontal were taken vertically and vice versa. I felt like an amateur when I finished taking the photos, only to realize I did it wrong.

 The viewfinder is tiny, and since I wear glasses, it's challenging to use. Its size also made it difficult to frame the photo accurately. Toward the end of the roll, I would just point the camera at the subject and "guess" on the framing, which seemed pretty good, with the exception of the vertical/horizontal format mishap.

Small viewfinder and glasses do not mix well.

 Once the photos were taken, I unloaded the film and processed them, and they turned out nicely.

 The serial numbers for my two Kolibri cameras are only 40 pieces off. The more well-used version is S.98995, and the Kolibri with the Compur shutter is S.98955, so they were built relatively close to each other. 

 My initial belief was that the camera with the Telma shutter was an older version. I believed that it was an older model because one camera was more used than the other. Now, I realize that the shutter and lens combination would be for a more or less expensive model that the consumer would purchase. If someone wanted the less expensive Telma shutter with a slower lens or the more expensive faster lens and Compur shutter, that made more sense to me.

My Results:

Here are some of the images taken with my more well-used Kolibri camera. I used it because the other camera didn't have the aperture settings, and I would have had to guess at the aperture. That would have been okay, and I'm a pretty good judge of that, as I could have marked on the camera what I thought the aperture setting should be.

Conclusion:

Except for my confusion about the vertical/horizontal format and the camera orientation, it's a fun camera. It is very well made, the photos are nice and sharp, and the camera fits nicely in my pocket when the lens is retracted and the viewfinder is down. As it is compact and sturdy, I can use it more often.

I look forward to shooting more photos with this in the future, but I must remember that when the camera is vertical, it's taking a horizontal photo.

 Thank you for taking a few minutes from your day to read about this gem of a camera. I hope to see you next week when I review another camera from my collection.

 Until next week, please be safe.


Kodak Chevron Camera

A week or so ago, when I was looking for another camera to write about in my weekly camera blog, I looked up on the shelf above my desk, and one camera stood above the rest. Maybe that's because I have it on a small tabletop tripod, and it literally was above many of the other cameras on my shelf. The camera is one of my favorite designs, the Kodak Chevron camera.

My Kodak Chevron camera

 I've owned the Kodak Chevron camera for many years. I remember buying it at a camera show early in my camera collecting years. It caught my eye because the design, along with the look and feel, is just wonderful. The camera is large, striking in design, and a medium-format camera with wonderful optics. 

 The Chevron, produced between 1953 and 1956, mirrors the post-war American era. Its design philosophy echoes the American auto industry of the time, reminiscent of the large, sturdy, and well-crafted automobiles by Chevrolet, Ford, and Cadillac. The Kodak Chevron is a testament to the classic cameras of this era.

The Company:

I don't believe I've ever written about one of my favorite companies. The Eastman Kodak Company, known to many as Kodak, was founded in 1888 by George Eastman, a visionary who revolutionized photography by making it accessible to the general public. Before Kodak, photography was an elaborate and expensive process that required significant expertise. Eastman's innovations in camera design and film processing transformed the photography industry.

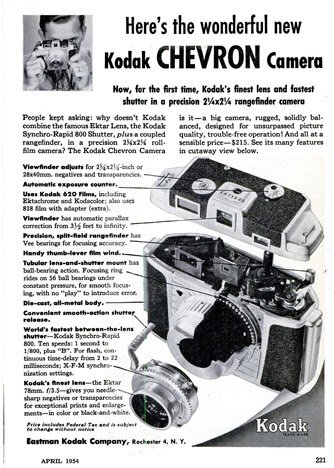
A wonderful ad showing the benefits of the Chevron camera

 George Eastman, a former bank clerk in Rochester, New York, initially became interested in photography as a hobby in the late 1870s. Frustrated by the cumbersome process of wet plate photography, which involved heavy equipment and complicated chemical preparations, Eastman sought to simplify the process. In 1880, he patented a dry-plate coating machine, which allowed for the mass production of photographic plates, and soon opened the Eastman Dry Plate Company.

Eastman's breakthrough came when he shifted focus from plates to roll film. In 1884, Eastman and businessman Henry A. Strong, who would later become the company's first president, formed a partnership to expand the business. They developed a flexible roll film, which replaced glass plates that had previously been used. This was a significant innovation because it created simpler, more portable cameras.


In 1888, the company launched its first Kodak camera, a compact box camera preloaded with enough film for 100 exposures. The marketing slogan, "You press the button, we do the rest," succinctly captured Kodak's appeal. After taking pictures, customers would send the entire camera back to Kodak for developing and reloading, eliminating the need for users to handle the film or chemicals themselves. This ease of use democratized photography and made it accessible to amateur photographers for the first time.

 Eastman chose "Kodak" because he wanted a distinctive and memorable trademark that was not associated with any existing words. He believed the letter "K" had a solid and unforgettable sound, so he experimented with various combinations of letters before arriving at Kodak.

 Kodak continued to innovate through the late 19th and early 20th centuries, producing increasingly sophisticated 35mm cameras like the Kodak Ektra and Retina lines, along with many medium—and larger-format cameras used during international conflicts. All the while refining its film development processes.

 Eastman built Kodak into a dominant force in the photography industry by introducing flexible film and creating simple, user-friendly cameras.

My Camera:

The Chevron camera is a rather large, heavy, and, some say, "bulky" camera that measures 6.25" wide, by 4.5" tall, by 4"deep, and weighs in at a whopping 2 lbs. 9.9 oz. without film loaded. I like how the camera feels. It's taller and wider than the Medalist, after which this camera was made. The Kodak Medalist is a marvel for its time, but when I hold the Medalist, the body feels too "fat" in my hands, although I do like the 6x9 format the Medalist has, whereas the Chevron is a proper 6x6 square format camera.

Some people discuss cameras in a much more technical manner, which I genuinely enjoy reading. There are times when I don't understand many of the technical "hows and whys," but that allows me to learn new things, which I enjoy. I prefer to talk about using the camera and my personal experiences.

To load the camera, you can open the back from the left or right side, which I like. You can take the whole back off if you want to. The empty spool will go onto the camera's left side, as the film advance lever is on the left. You put the fresh roll on the right, which is counterintuitive for many photographers, but it didn't bother me when using the camera. Before you load the film into the camera, the frame counter is on top of the camera, which you need to set to "N." The camera is supposed to have an automatic film advance stop when the film reaches the next frame. My auto-stop camera wasn't working, so I just used what was normal to me and looked at the red window on the back of the camera to get to the next frame. Here is the Chevron Camera Instruction manual. Thank you, M. Butkus, for your service in supplying manuals.

Now that I have film in the camera, it's time to take photos. To focus the camera on the subject, the rear viewfinder has two windows. The top window is used to frame your subject, and the bottom is to use the rangefinder, which uses a magnified split image to focus on the subject. Both windows are very close together, and for me, who wears glasses was a bit more challenging to use, but once I got used to it, it wasn't difficult. This is the same rangefinder system used in the Medalist and Ektra cameras.

One of the most delightful aspects of this camera is its exceptionally smooth focus ring. It's not so loose that it slips, like some lenses that feel very sloppy. Instead, it's a perfect balance of smoothness and precision, making the process of focusing a joy. It's a testament to the high-quality design and construction of the Kodak Chevron, and it's a feature that I find truly fabulous to use.

It's time to set the shutter speeds and aperture to create the proper exposure. The shutter speeds are located on the far outside ring around the lens. They go from a fantastic speed of 1/800 sec on the top end to "B", going down by half to get the "B" setting, so 1/400, 1/200, 1/100, etc.

The lens is a Kodak Ektar 78mm f3.5 lens. The aperture settings are set by a bar on the bottom of the lens. Sliding the bar over to the next setting is smooth and easy. The setting also has click stops, so there is no getting it if the aperture is set correctly. A visual setting is on the bottom by the bar and on top of the lens, which you can see with a red arrow. The aperture indication is just behind the arm you cock the shutter.

I've yet to make an image, the film advance was very smooth to move the film to the next frame. I would advance the lever four times to get to the next frame. The red window is on the back of the camera to check where you are advancing the film. The red window has a blackout bar, which you slide up to view the film inside. Being right-handed, it was easy to hold the camera, slide the bar up with my right hand, and advance the film to the next frame with my left hand.

One of the advantages Chevron offered was the ability to shoot 828-size films. The 828 film accessory kit consisted of a film mask for 828 film, 2- 828 film spool holders and an 828 spool. This would have been purchased as an accessory. To use the 828 adapter, the photographer needed to do a couple of things to adapt to the film format. First, a switch from the regular 620 to 828 film is on top of the camera. You take a coin and turn the "finder" settings to 828. Then, a switch at the back of the camera changes the viewfinder from the standard 620 film to the smaller 828 film. By using the 828 film, there is a magnification factor of 1.5x.


My results:

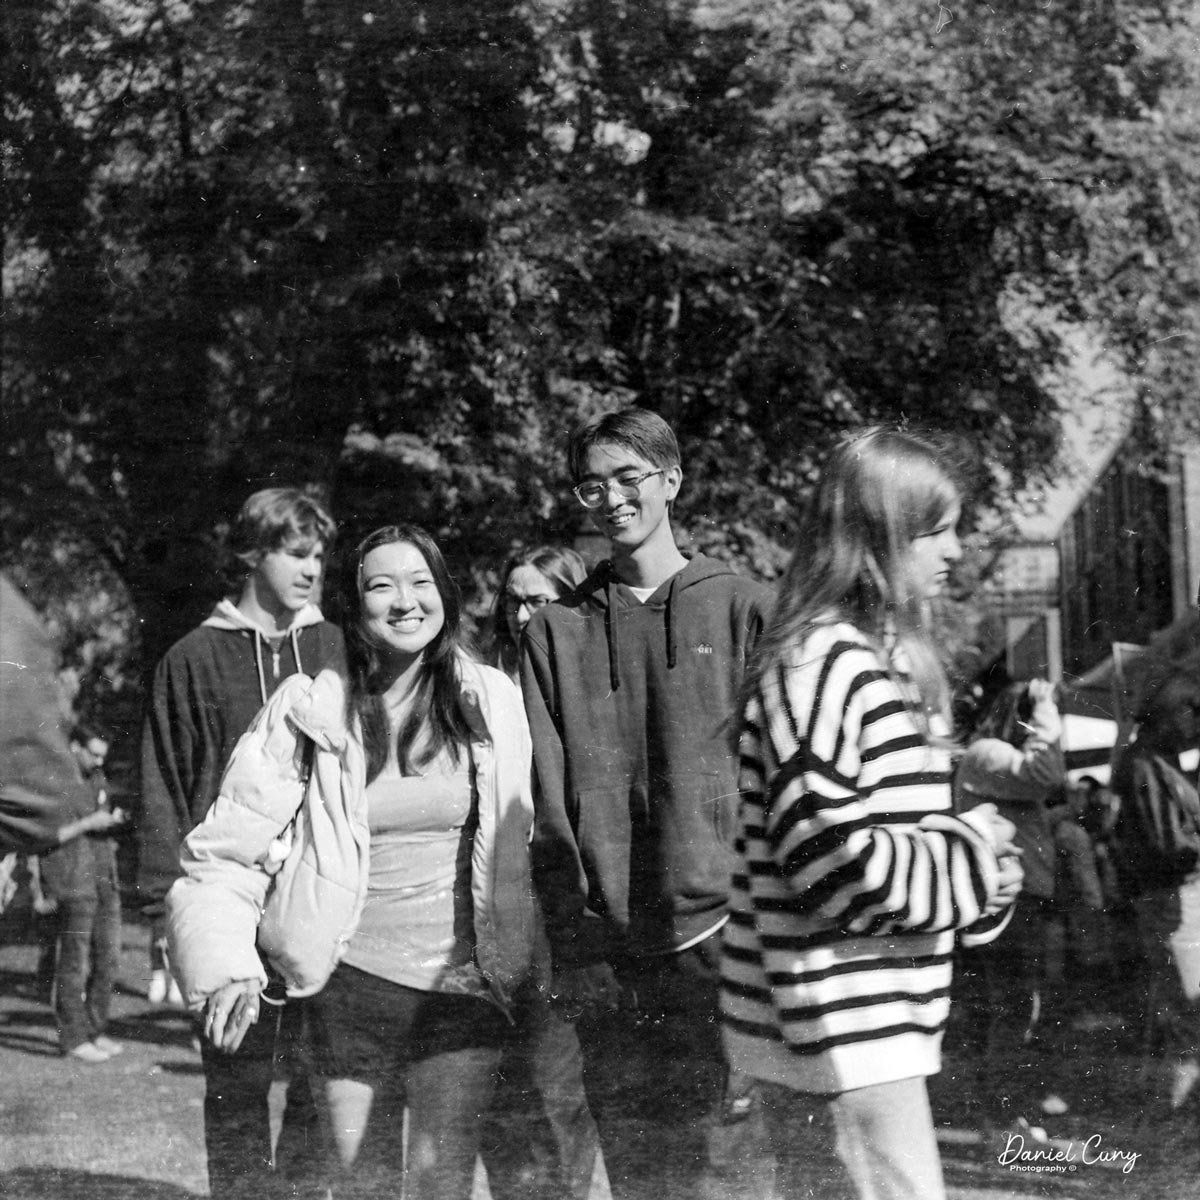
Recently, at a local camera show, I purchased about 50 rolls of Agfa ISS 620 film, which I have for sale on my eBay store. I wanted to test the film to see how usable it was, so I loaded it into the camera and went to the local farmers market to take photos. Here are some of the results from the camera, along with the film I have for sale.

My Conclusion:

WOW!!!! What a fun camera to use. The camera fits very nicely in my hand; the focus is smooth, and I prefer using it over many of the folders and TLR cameras I've used. The Chevron camera outperformed my expectations. It felt similar to what a Mamiya Seven feels like in your hand. While it didn't have the capabilities of interchangeable lenses or TTL viewing of the Mamiya Seven, the camera handled great. 

 The only downside to this camera is the small viewfinder and rangefinder window. There were times when I was walking around the market and just pre-focused, especially when I wanted to be somewhat inconspicuous when shooting. The light was fairly dim, too, so my shutter speed was generally 1/50, and my aperture was wide open.

 I also understand that due to the low number of cameras made, especially compared to the very popular Medalist and Medalist II cameras, they are selling at a premium price on the used market.

 Thank you for taking a few minutes from your day to read my post on this lovely camera. I plan on shooting with it more often, especially since I have many rolls to shoot with.

 Until next week, please be safe.


Bussox-Sport Luxe Camera

he Bussox-Sport Luxe camera is another beautiful camera purchased at the Paris flea market when my wife and I traveled there this past summer. While visiting one of the hundreds of stalls within many buildings comprising the Paris flea market, I found a wonderful gentleman with a case of cameras and other photographic items for sale. 

My Bussox-Sport Luxe Camera

As I mentioned in many of my previous blog posts, I love cameras that are colorful or unusual. Maybe they are toy cameras shaped like a soccer ball or a cartoon character. I own many colored box and folding cameras that are different from ordinary black box or folding cameras. That's what drew me to this wonderful, small, and odd camera.

 Within the stall, there was a case containing a group of glass negatives, the Zeiss Super Nettel that I previously wrote about, and this lovely exotic brown camera, which looked very familiar but had a name that I wasn't familiar with. I purchased all the items and went on my way to find other treasures.

 When I returned to the hotel, I took the brown bakelite camera from its case and did some more research. I found out the camera is called Bussox-Sport Luxe, made by Ruberg & Renner and explicitly exported to France from their factory in Germany. Also, looking at the back of the camera, it appeared to have a roll of film still in the camera, and the number on the frame was four, so with any luck, I could process the film and find other photos that might interest me.

The Company:

A few years ago, I wrote a blog post on a different Ruberg & Renner camera, and at that time, there needed to be more information regarding the company. In that post, I wrote: The Ruberg cameras were manufactured by the Ruberg & Renner company, located in the Delstern district of Hagen, Germany, during the 1930s.  The company was started in 1918 by Josef Ruberg, who originally started producing drive trains for bicycles, motorcycles, and automobiles. After 1930, the company began making simple cameras. In 1931, Josef obtained a patent for constructing a simple camera in Germany. He also received a patent in the United States in February 1932.

 The patent application states that the simple and very inexpensive production of all the camera parts from synthetic resin, which was done from a single pressing process, "makes it possible to place a cheap camera on the market that is affordable to all. " In the 1930s, Ruberg & Renner manufactured four models with 25 designs for export to the USA, Great Britain, and France. The cameras' construction ended in the mid-1930s when the company started producing products to help the German war effort.

 After doing some digging, I came up with the following: Along with cameras, chains remained the company's main business. From 1935 onwards, the series production of ammunition belts marked the end of camera production in Hagen, which shortly afterward followed. 

 Josef Ruberg had designed new metal cartridge belts for machine guns in 1917. The Treaty of Versailles banned the production of automatic weapons and accessories from 1919 to 1935. In February 1936, Ruberg & Renner applied for a patent for a metal cartridge belt for the MG 17 (caliber 7.92x57 mm). These specialized units are equipped with ammunition for machine guns and military equipment in the military air force. The sons also worked in the company. Felix (1909-1994) was born in 1937 in Delstern. It manufactured on-board gun carriages until the beginning of 1945. In 1941, his son Werner (1912-2005) took over the management of the Ruberg & Renner chain works.

 Ruberg & Renner continued producing drive and transport chains in 1947. The Felix Ruberg metal goods factory manufactured household appliances. From the early 1950s, Ruberg & Renner promoted cycling and motorcycle sports. Roller chains were used in particular here. Until 1967, the company, like the Schweinfurt Torpedo Works and Fichtel & Sachs, had its racing teams in the Federal Republic. In the following years, the firm of the US-American company Rexnord was taken over. Rexnord Kette GmbH relocated its production from Delstern to its current location in the Lennetal near Fley in 1982. Much of the historical information comes from the Westfalen Museum.

My Camera:

My Bussox-Sport Luxe camera is 3" tall, including the winding knobs, by 3 5/8" wide, by 1 5/8" deep with the lens retracted and 2.5" deep with the lens away from the body and focused to the closest focus distance, which is 1 meter. The camera weighs 6.1 oz, which is very small and compact, and takes 127 rolls of film, producing 1.25" by 1 5/8" sized negatives. On my camera, it's etched by the previous owner 4x6 1/2 in many different places.

To open the camera to load the film, a chrome button is on the left side of the camera if you're holding it to take a photo. Press the chrome button, moving a brass grip from holding the door closed on the camera. There are a couple of "thumb grips" on both the back door's top and bottom, which you hold onto to open the back. The back door doesn't come off the camera as it's hinged, and the door swings to the right to open.

On many cameras, to load the film into the camera, you pull up the tabs that hold the spool into place, which I tried, but the knobs didn't move. You need to turn the knobs which make you think you're unthreading them. By doing so, the knobs move away from the body of the camera, and you can load a roll of film or move the empty spool into the take-up position. The fresh roll of film goes into the camera's right side and you pull the leader to the left side where the take up spool is. This is backward to many cameras, or the many that I use, as the take-up spool is generally on the camera's right side.

Now that the film is loaded into the camera, it's time to take photos. The camera has a straightforward meniscus lens. There is a knurled collar around the lens that you need to turn in a clockwise motion to extend before taking a photo. The lens barrel is on a helicoid, which extends the lens when the knurled ring turns, much like on a bolt.

 For the shutter, two settings are located in the upper right of the lens and include settings "I" for instant or turn the wheel to "T" for time. Below the lens are the aperture settings. On this camera, since it's for the French market, there is Grand for the widest setting and Petit for a smaller aperture setting. One of the settings is Ferme, which means firm. When the aperture is set at Ferme, it does not open over the lens or block all light from reaching the film. 

Focus control on Bussox-Sport camera

Since there is no lock for the shutter, the shutter release in the 7 o'clock position on the lens can fire at any time when pressed. Whether the lens is out or in, the shutter will fire. This setting is similar to a lens cap, and by putting it in position, if the shutter fires, no frame will be exposed to light or wasting film. The photographer would need to consciously set the camera into and out of this setting every time they put it into the case or pocket, then change it when taking a photo.

To retract the lens to put it back into the camera case, you turn the knurled ring counterclockwise, and the lens retracts into the camera body. I can now understand the "Ferme" setting, as many of the negatives on the roll in the camera when purchased were exposed with the lens in the retracted position, as you can see in the results area on the post.

The results:

As mentioned, the camera had a roll of 127 Agfa film, so I walked in front of my house and took photos of a planter box and some trees in our neighborhood. There were only about four photos left. After taking the photos, I went home and processed the film. It didn't surprise me, but the images within the camera didn't turn out, and the ones I did around our hose turned out barely and were extremely thin in the exposure on the negatives.

 Here are the results from the film in the camera. As I mentioned earlier, I did note that it's easy to take a photo when the lens is retracted, making the image size smaller on the negative, which you can see on the negatives.

My Conclusion:

The shutter on my camera doesn't always work, so while I'd like to put a fresh roll in it and try it again, I don't think the shutter can take it as it's barely opening and closing as it is. I'll get brave and see if I can take the front off and fix it, but it's resting along with many other cameras in my collection. I love the color and the helicoid lens system.

Thank you for taking a few minutes to look over this week's blog post. I'd love to hear from you, so let me know your thoughts and if you have any of the Ruberg & Renner cameras in your collection.

Until next week, please be safe.


Dan 35 I Camera

My Dan 35 Model I camera

I need to start this post back in time. I first started collecting cameras and other photo items in the late 1970s or early 1980s. I can remember purchasing one of McKeown's Camera Price Guides and spending hours combing through each camera manufacturer, looking at the cameras they had made in the past. There were so many odd and unusual like very rare original Leica; the very first bullet-shaped brass Voigtlander camera, the Compass camera or Photosphere that I could only dream of owning, and many were so far from the price budget that I knew there were only a pipedream.

 Many large companies, like Eastman Kodak, Polaroid, and Zeiss, made hundreds of different model cameras, which were abundant. Then, there were the smaller camera companies that produced unique cameras, like Univex, which was the first camera I owned. It was a Uniflex that was given to me by my uncle Bud, who, to this day, along with my brother Tim, I owe my love of photography.

 Then, I can remember thumbing through the price guide and finding a tiny company that produced a camera near and dear to me, the Dan camera. I immediately thought I needed to find one of these to put into my collection. My initial search was hopeless, as many of the local flea markets and antique stores I'd frequent only had the very common Kodak, Polaroid, Zeiss, and other companies like Herbert George and other American brands.

Online Auctions:

It would help to remember that this was before eBay, which didn't exist before the mid-1990s. I was an early adopter of buying and selling on eBay in 1997. At that time, there were no photos, and it was mainly just a buy/sell board with an auction element so you could post a camera or item for sale, but you only had the description from the seller to go by. When I first joined eBay, there was no name to have but a number. My original number was 1034; you had to do everything through DOS.

 EBay made a massive difference as it gained popularity. It changed how people bought and sold items. Adding photos gave the buyer more confidence in their purchase, and rarer items could hit higher pricing due to the inability to find them.

 For many years, the Dan Camera was very elusive, and since the camera was from a smaller company, the scarcity and pricing made the purchase of it next to impossible up until a couple of years ago when I was looking through a different online auction website, and I found a grouping of cameras which piqued my interest. As I zoomed in to look at this lot, there was a portion of a lens I could see.   I could barely read "Dan" on the ring around the lens as I looked closer. Here was my chance to finally own the elusive Dan 35 camera.

Name embossed on the back of the camera.

 The auction happened, and there was minimal interest in this group of cameras as many of them were very common items. However, these are the groups that I really enjoy because tucked away in the corner "could" have a gem hidden, and in this case, there was. I won the camera lot, got the items shipped to me, and there it was as I unwrapped it: the Dan 35 camera. To my amazement, it was the first model.

History:

The Dan 35 is a simple Bolta film camera made in Japan after WWII. Bolta film was invented by Johann Bolten, who founded Bolta-Werks in Nuremberg, Germany, in 1936. The film was to go into his smaller, more compact cameras named the Boltavit. Bolta Werk later produced the Photovit line of cameras from 1936 to the 1950s. Bolta film was incorporated into many different cameras during this period and was a nonperforated 35mm film with a paper backing loaded into special cassettes. Later models of film were spooled similar to films like 828 and 127.

Stetch of Dan 35 Camera by Hagimoto Danji.

 The Dan 35 camera was made by Hagimoto Danji. He built a small plant in Suwa to manufacture the Dan 35 camera, which he sold in his camera shop in Ginza after WWII in 1945. After the moderate success of the Dan 35, there were three different distributors for the camera between 1945 and 1950, when the camera company went bankrupt. The logo on the camera coincides with the company's name, which is H for Hagimoto above Dan for Danji on the far right of the camera.

 Here's where it gets a bit fuzzy. Yamato Koki Seisakusho was a camera company that started in Tokyo in 1943. It made shutters for Japanese camera companies like Gelto and Leotax. The first cameras produced by Yamato were the Minon 35, Minon Six, and Pax 35.

 Yamato, known to produce the Minon 35, a copy of the Dan 35 III and later the Pax 35, is a camera that is a copy of the Super Dan 35. Some sources say Yamato made the Dan 35 and Dan 35 II, but others say they took over producing the Dan 35 after Hagimoto went bankrupt in 1950. Yamato produced the Pax line in the 1960s.

My Camera:

The Dan 35 is a very simple camera with a torpedo-shaped viewfinder on top. It measures 3.25" wide by 2.25" tall from the base to the top of the finder and is 2" deep from the front of the lens to the back of the camera. The camera weighs a whopping 5.2oz and is considered a miniature camera. The Dan 35 has a Dan Anastigmat 40mm f4.5 lens with a Silver-B shutter.

Around the lens is the focus ring, a helicoid focus measuring from 1 meter to infinity. Just behind the aperture numbers on the lens is a knurled ring that sets the aperture. In front of the aperture numbers is another knurled ring that sets the shutter speeds on the camera. There are only shutter speeds, 1/25, 1/50, and 1/100 sec, along with B. On the left of the knurled ring is a cocking lever to cock the shutter, and the shutter release is on the right side to expose the film.

Logo and Torpedo viewfinder

 To load the film, on the top of the camera is a locking lever with "L" for lock and "O" for open. Switch the lever to "O," and the top comes off to load the film. The base comes off to load in later models like the Dan 35 Model II. My camera has no spools to load the film, and the shutter doesn't work. On the back of the camera is a red window with an open/close lever to see the numbers on the paper backing of the film so you know where to stop for your next exposure. Also, Dan 35 is embossed on the back of the camera.

Conclusion:

Unfortunately, I don't have film, and the camera's shutter doesn't work, so I couldn't take photos with this camera to share.

 I mainly have this camera for a couple of reasons. One is its rarity; the more important reason is that it has the same name as me, so I get a kick out of that. I have another miniature camera set aside for next week's blog post, which I also find fascinating.

 Thank you for taking a few minutes to review my blog post about the cameras in my collection. Please be safe until next week.


No. 0 Graphic Camera

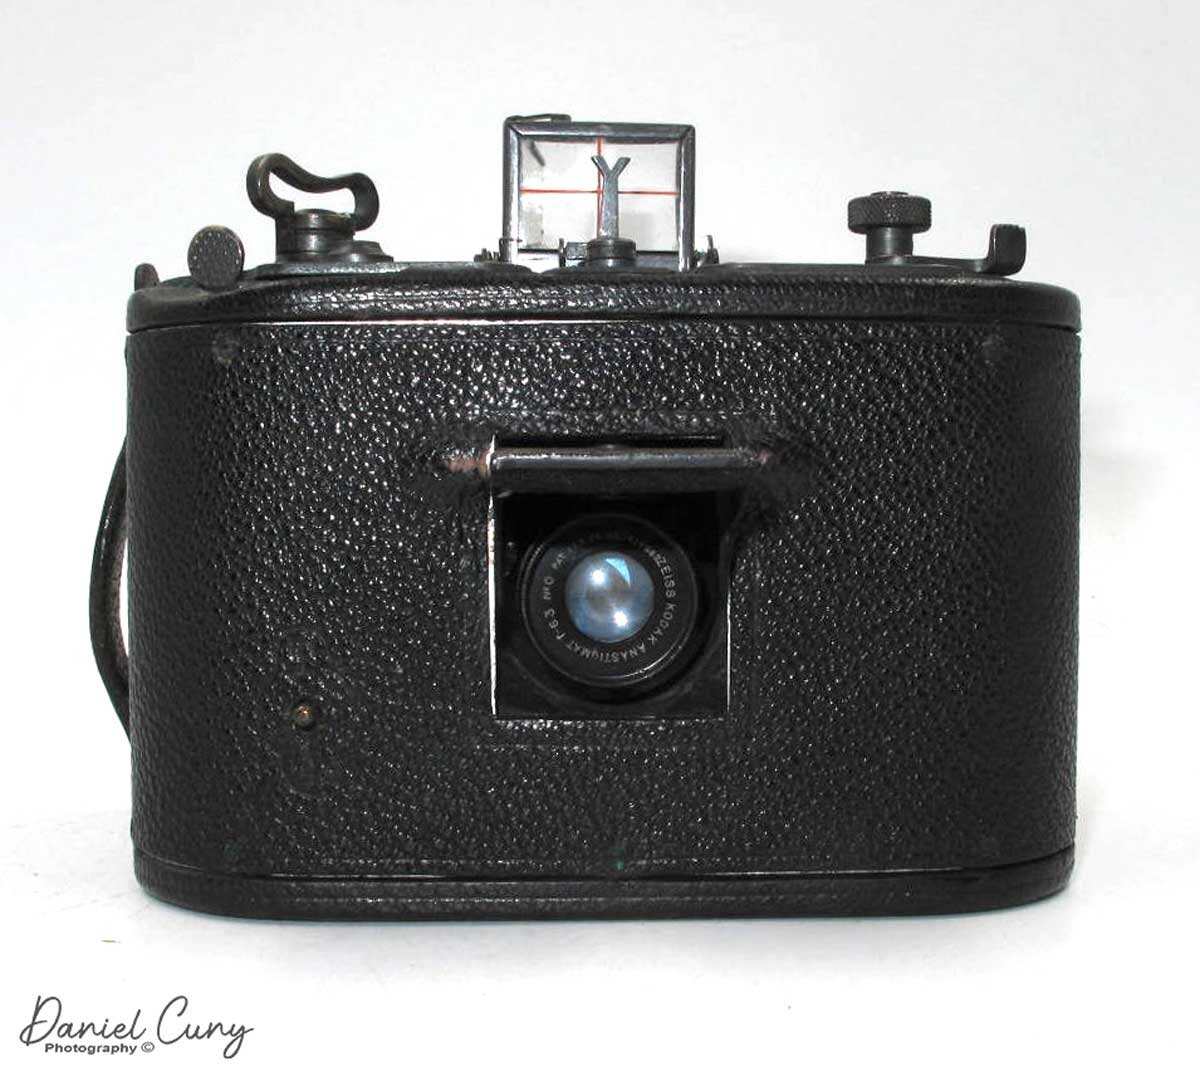
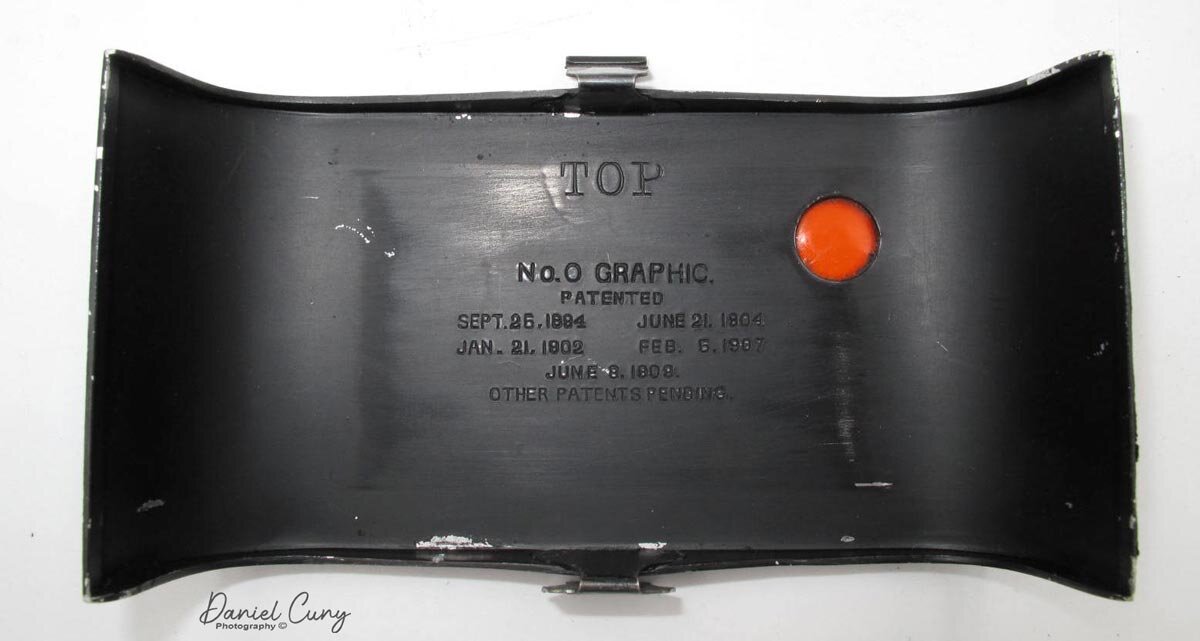
In my opinion, the No. 0 Graphic camera is one of the real sexy models made. It's a small yet sophisticated, high-quality design and somewhat technical that it advanced camera manufacturing forward. The camera is a fixed focus camera made by Folmer & Schwing, a division of Eastman Kodak at the time, manufactured between 1909 and 1926.

Graphic No.0 Camera & Case

Graphic No.0 Camera & Case

The Company

Folmer & Schwing, Mfg. Co. first started as a gas lamp manufacturing company. The company was started in 1887 by William F. Folmer and William E. Schwing. When the decline of gas lamp sales occurred in the 1890s, Folmer & Schwing moved into Bicycle and camera manufacturing. Their cameras first appeared in their 1896 catalog and their first Graphic camera in 1898, which you can see here. Mr. Folmer also introduced the photographic world to the very well-known Graflex cameras in 1898, known as the Graflex Reflex camera, a single lens and moving mirror (SLR). Looking at some of their later catalogs, it's interesting that there were so many bicycle-related cases, etc. You can see the No. 0 Graphic advertised here.

In 1905, Eastman Kodak purchased  Folmer & Schwing Mfg. Co., and up until 1926, they were a division of Eastman Kodak. In 1926 the U.S. government forced Kodak to divest its professional division due to the Sherman Anti Trust Act. With no one buying Folmer & Schwing, they became Graflex Inc., which was an independently owned company up until 1958. After 1958, the company had a few other owners and was officially closed in 1973.

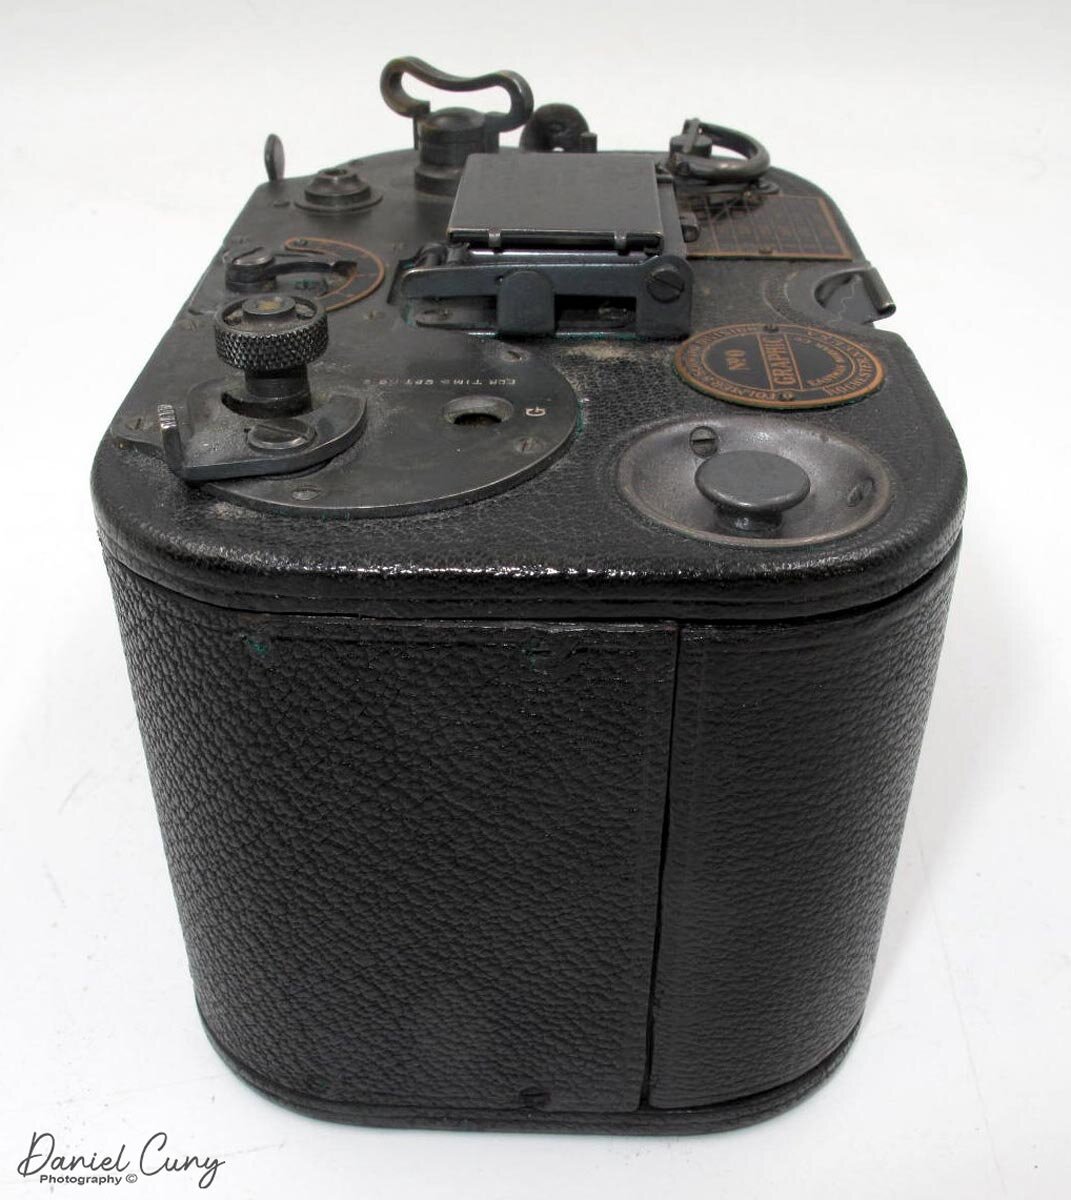
Top view of No. 0 Graphic camera

The Camera

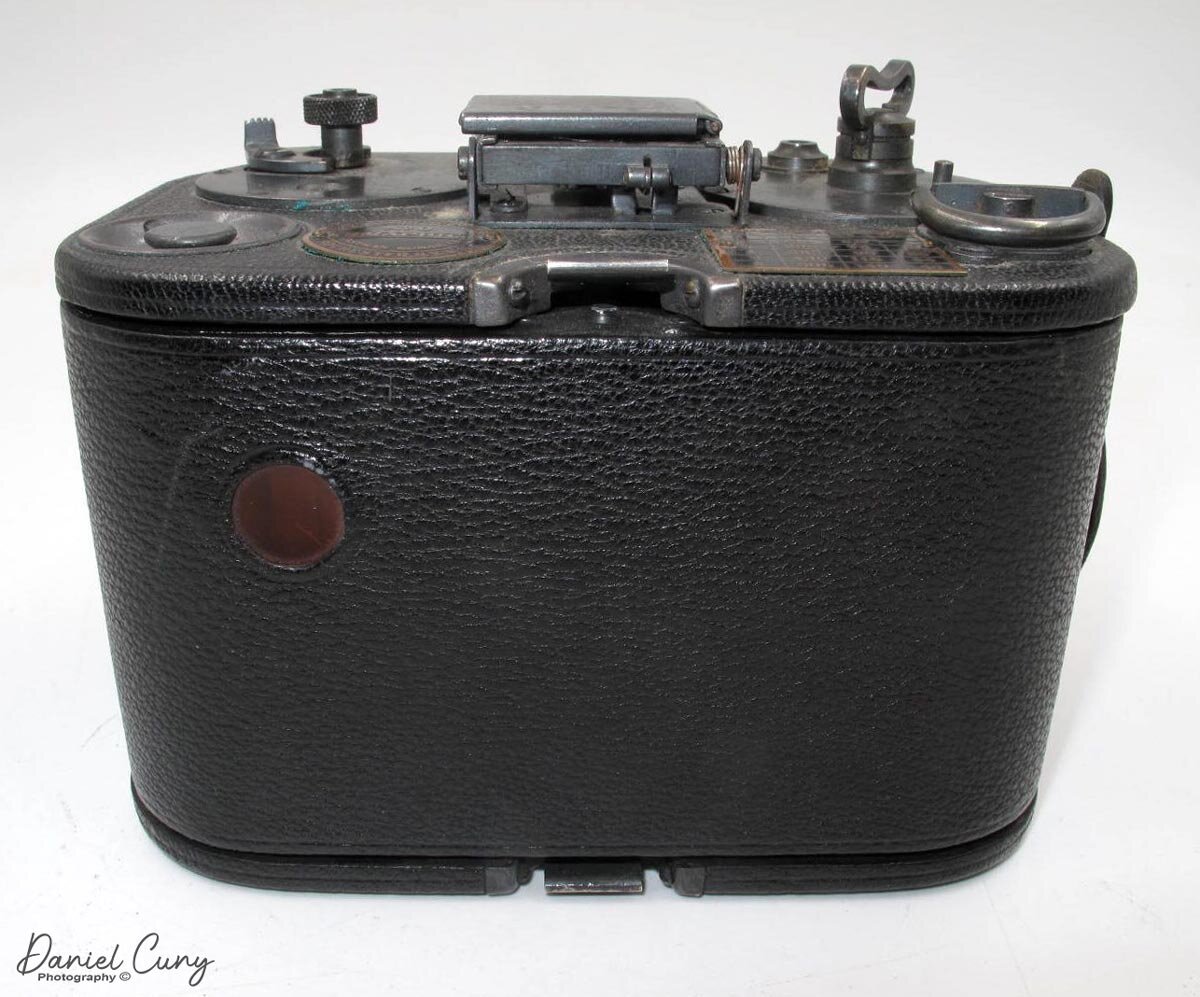
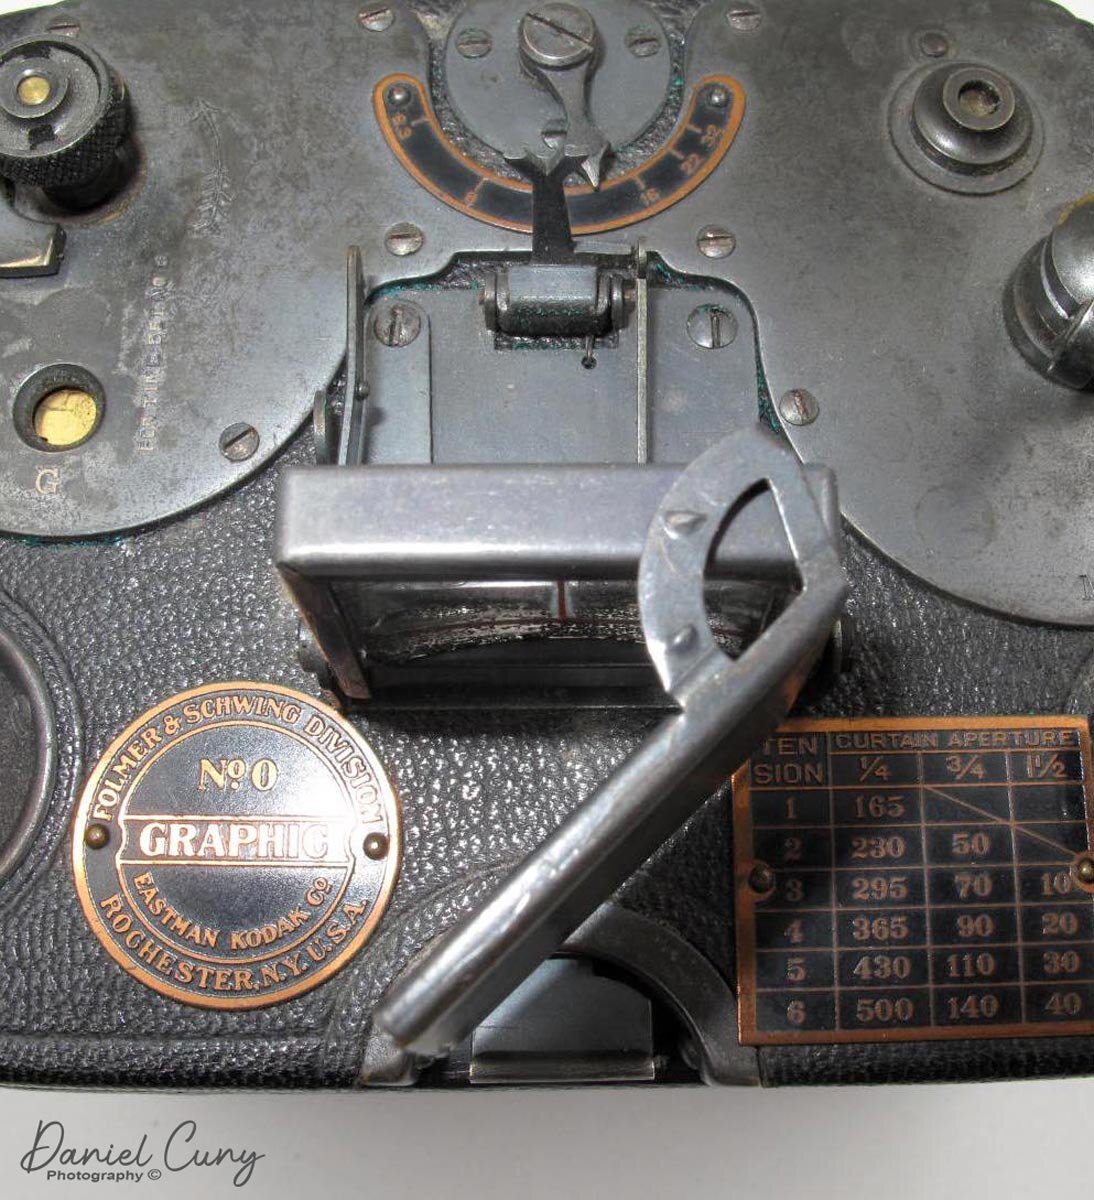
Looking at the No. 0 Graphic, I like the intricacy of the top of the camera and the rest of the camera's simplicity. Looking at photos of the camera, I thought the camera would be larger than it is. The camera measures 5 1/4" wide by 3 3/4" tall, including the viewfinder, by 3 1/2" deep, and weighs 1 lb. 10.6 oz. without film. To open the lens, or I guess I should say to open the door to expose the lens as the lens is fixed focus, you press the thumb knob on the camera body's upper left as you face the lens. By pressing the knob back, the door to the lens opens. To close it. Press the button to the left of the lens, and the door closes. The camera has a Zeiss Kodak anastigmat lens, f6.3.

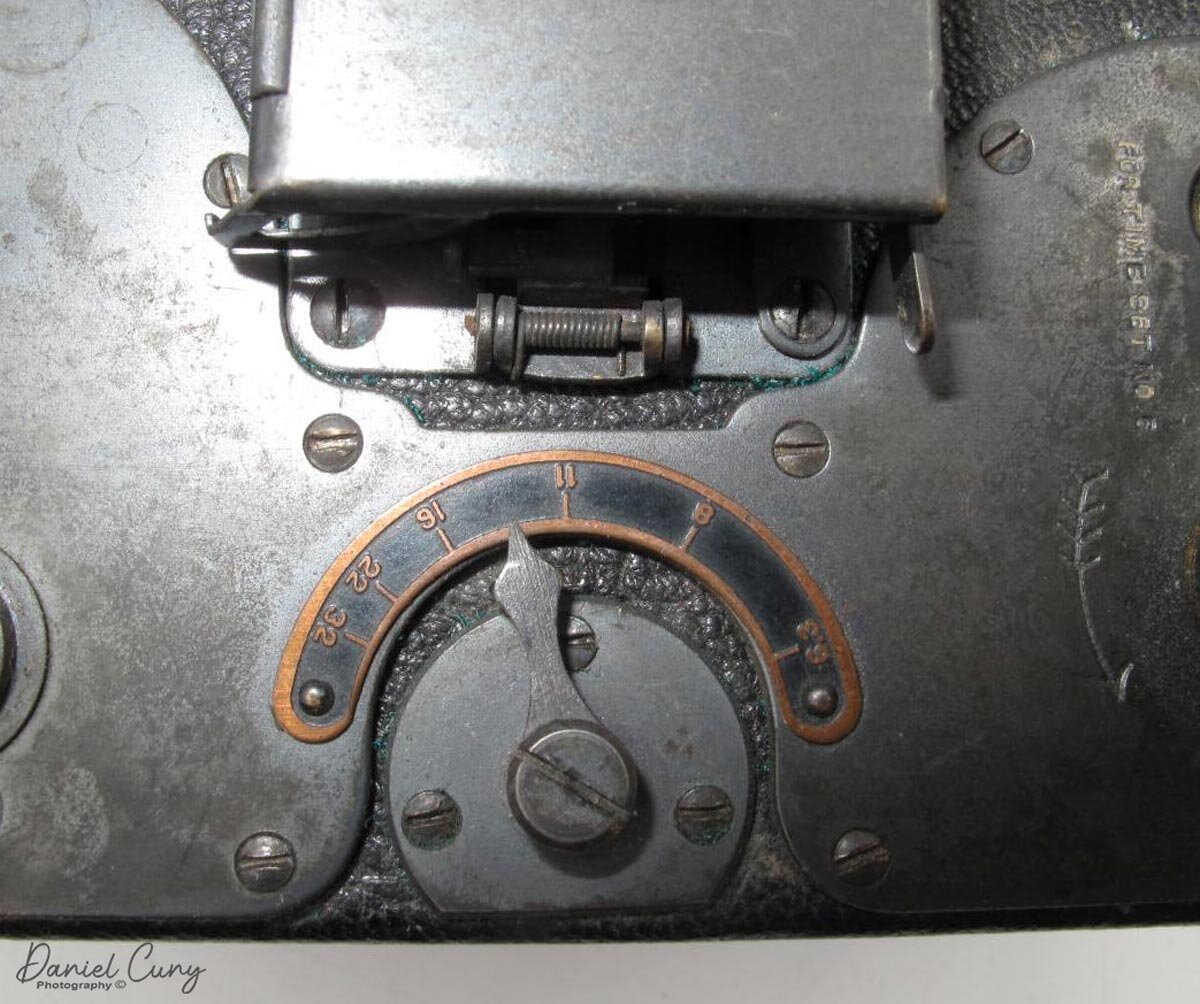
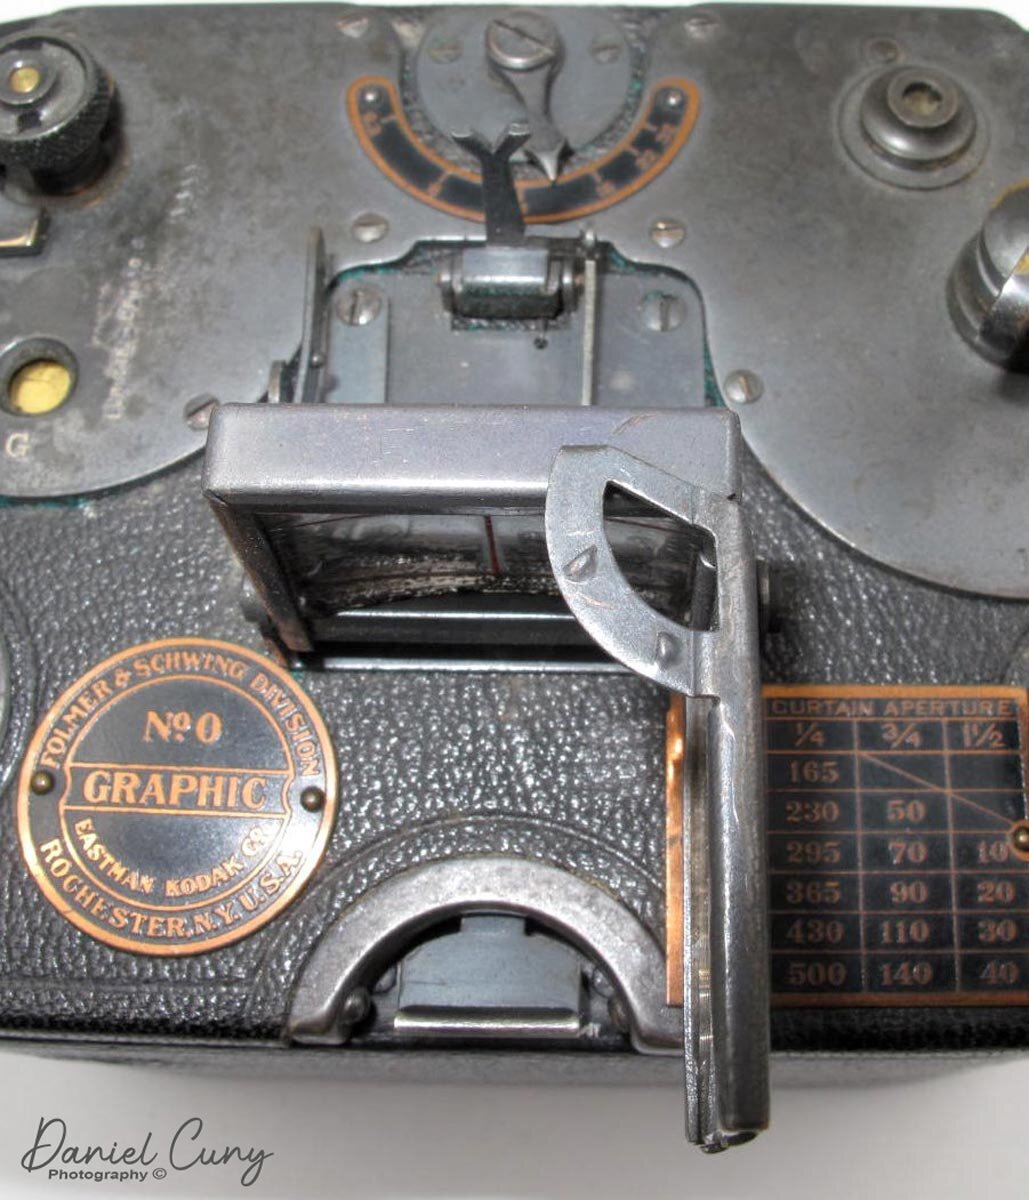
The camera uses a cloth focal-plane shutter system with shutter apertures (distances between shutter curtains) of 1/4, 3/4, and 1 1/2 inches. There is a tension regulator on the top of the camera that regulates the shutter speed and the shutter aperture used. There is a graph on the top of the camera showing what shutter speed the camera will fire at depending on the tension and shutter aperture used. Looking at the chart on the top of the No. 0 Graphic, the shutter speeds range from 1/10 to 1/500. Also on the top of the camera is the aperture setting, which varies from f6.3-f32. You move the pointer wheel to the desired setting.

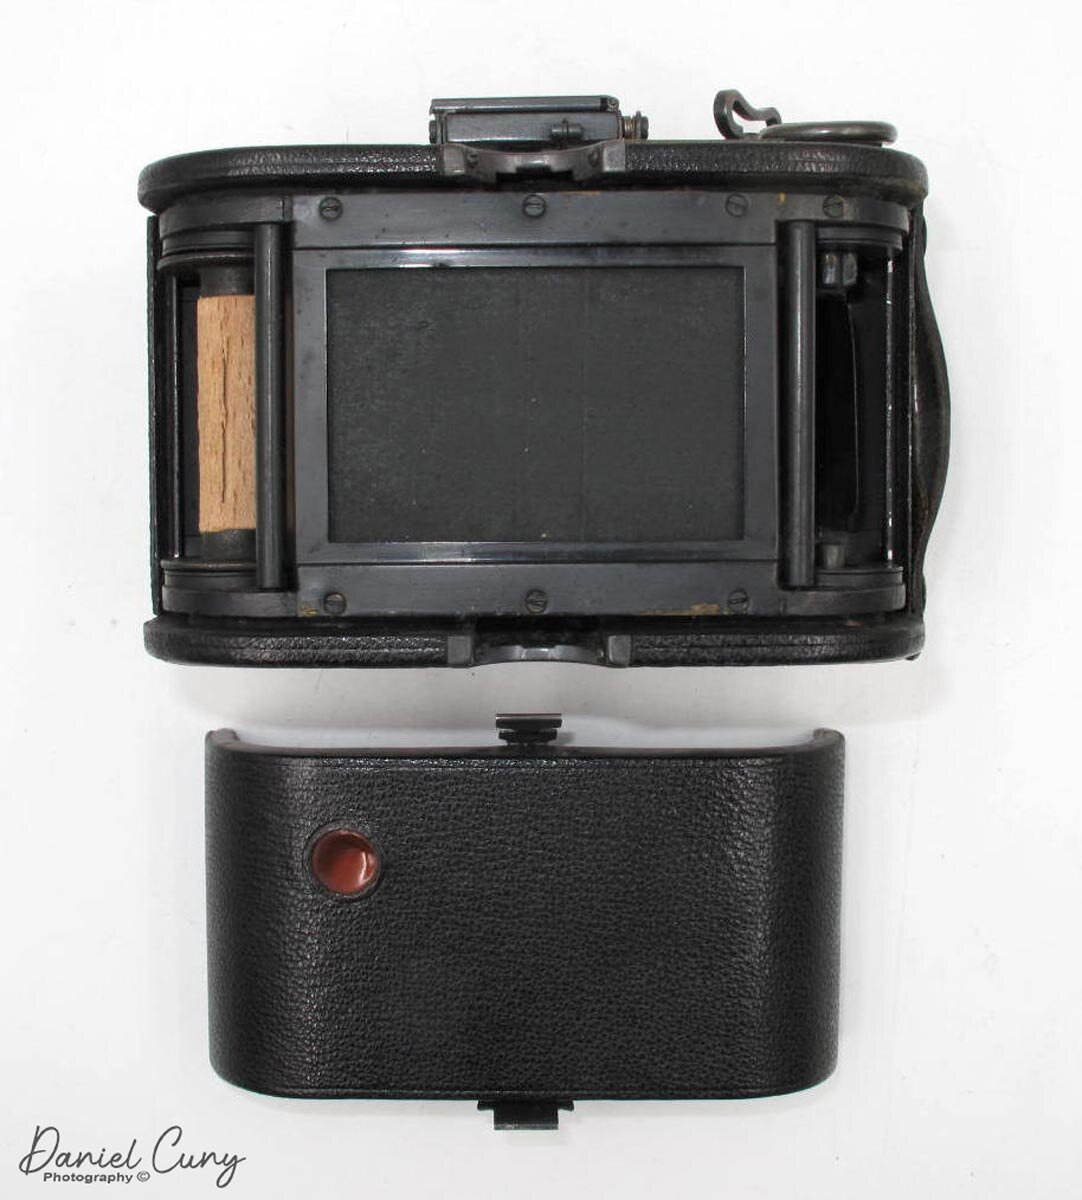
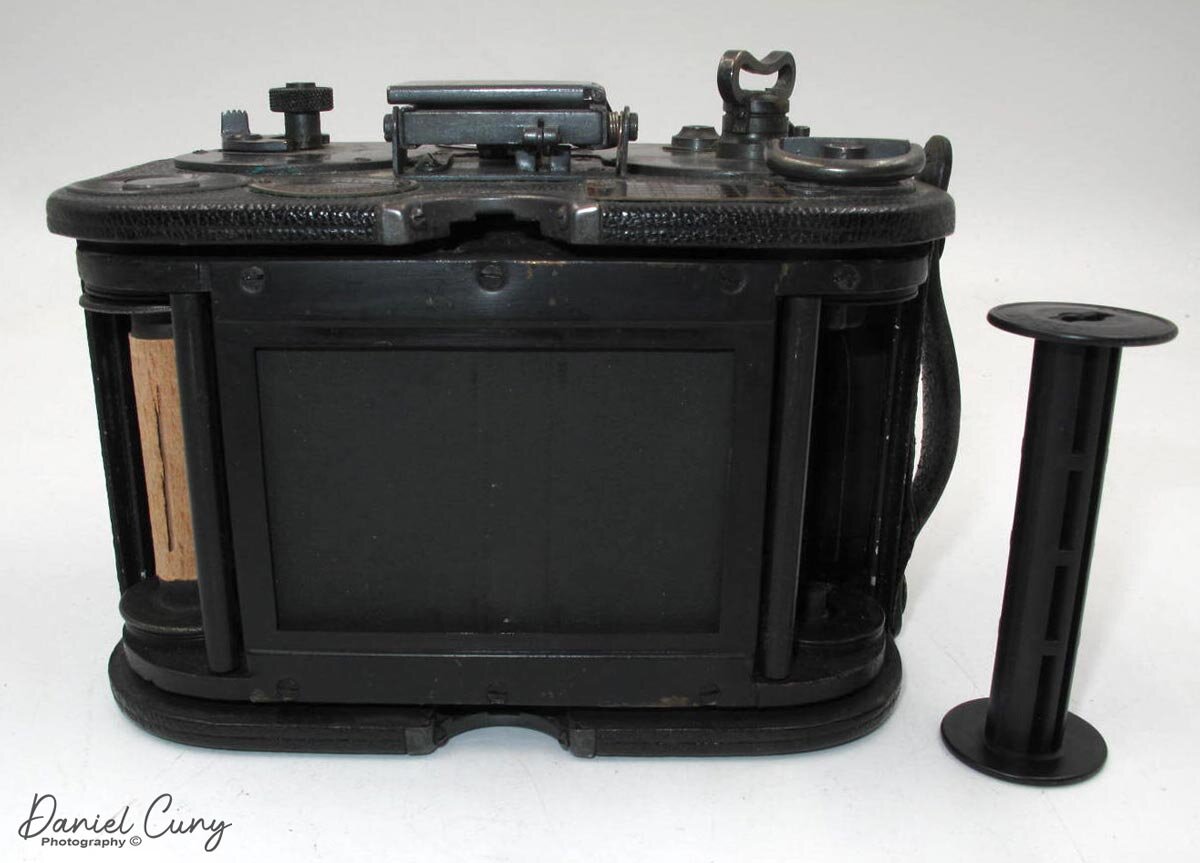
The No. 0 Graphic takes six 1 5/8 x 2 1/2 inches on No. 0 F.P. Kodak roll film. Later the film was called Kodak 121 film, which you would load just like any roll film camera with the take-up spool on the right-hand side. To open the camera's back is simple, pinch the top and bottom springs and pull the camera back off. This method is similar to many of the Kodak Autographic cameras of this era.

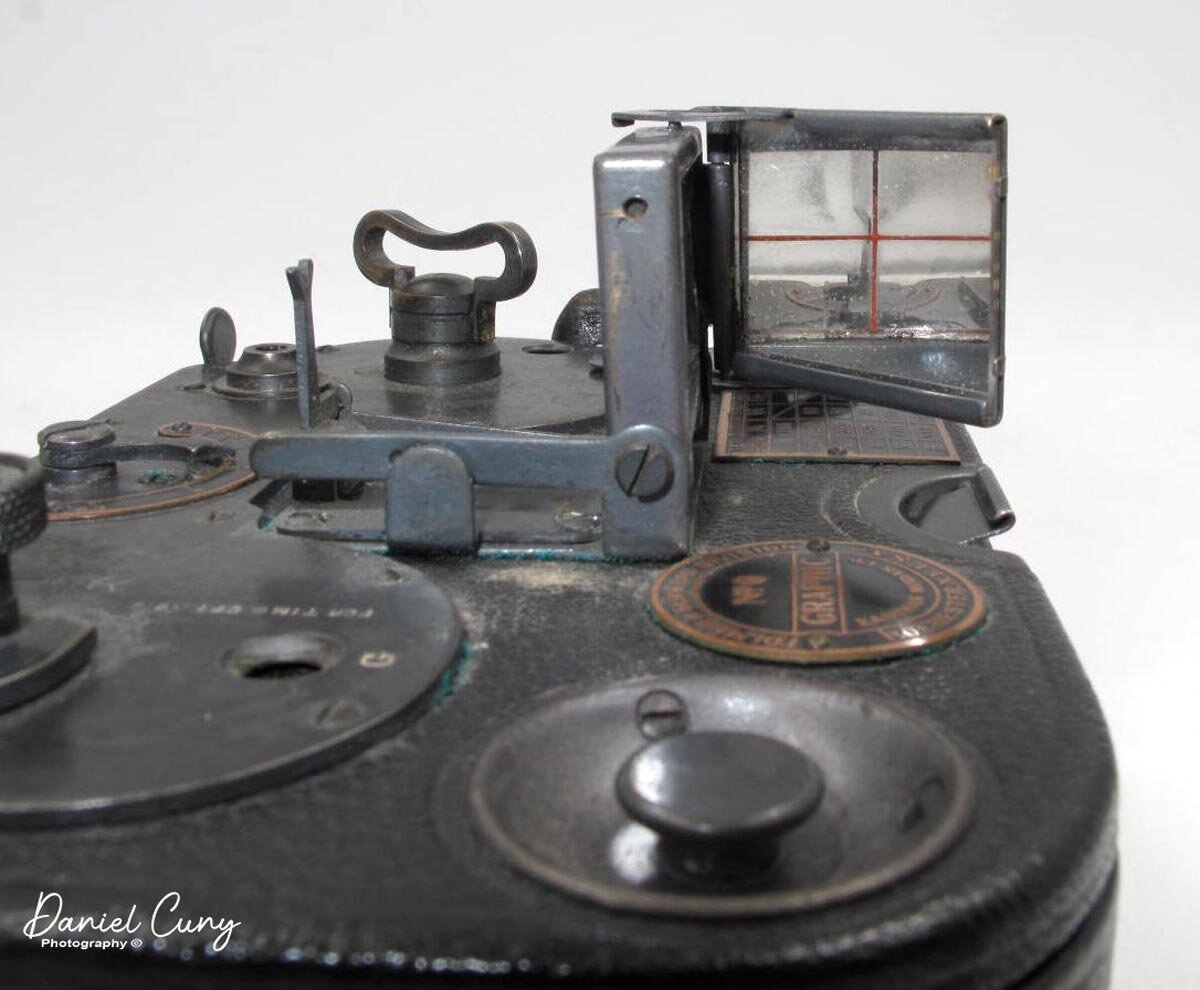
 The camera also incorporates an exciting viewfinder system, which allows for discreet photo taking. There is a mirror in the viewfinder which can be placed in either a 45-degree or 90-degree position. The 45-degree position enables the photographer to view from a 90-degree position from your subject. What they call it deceptive angles camera. You can also open the mirror to 90 degrees making the mirror even with the viewing plane to point it forward towards the subject. In the manual, which you can see here.

The camera I own still has the camera strap on the side and the fitted camera case. While the No.0 Graphic I have is missing the leather on the lens door, it's something I overlook as I generally display it with the door open. My camera is serial number 26602, embossed on the camera's bottom, just behind the tripod socket.

No. 0 Graphic camera in the fitted case.

No. 0 Graphic camera in the fitted case.

Conclusion

The No. 0 Graphic is a prized camera in my collection, especially with how complete the camera is. The shutter is a bit slow, and since 121 film is no longer available, I might want to see if possibly something like 127 size film might work. The camera is small, and I love the quality they put into the design and display on the camera's top.

 Thank you for taking some time from your busy schedules to look over this post, and I always love to hear from you. If you have any questions, comments, or concerns about this or any of the other cameras I've written about, please drop me a line.

 Until next week, please be safe.