Kodak Chevron Camera

A week or so ago, when I was looking for another camera to write about in my weekly camera blog, I looked up on the shelf above my desk, and one camera stood above the rest. Maybe that's because I have it on a small tabletop tripod, and it literally was above many of the other cameras on my shelf. The camera is one of my favorite designs, the Kodak Chevron camera.

My Kodak Chevron camera

 I've owned the Kodak Chevron camera for many years. I remember buying it at a camera show early in my camera collecting years. It caught my eye because the design, along with the look and feel, is just wonderful. The camera is large, striking in design, and a medium-format camera with wonderful optics. 

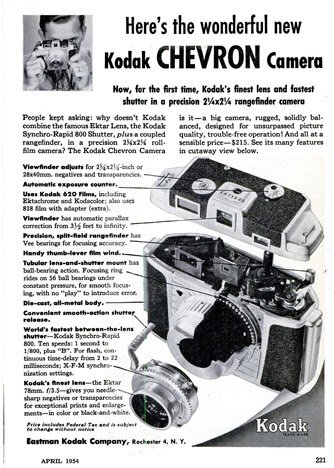
 The Chevron, produced between 1953 and 1956, mirrors the post-war American era. Its design philosophy echoes the American auto industry of the time, reminiscent of the large, sturdy, and well-crafted automobiles by Chevrolet, Ford, and Cadillac. The Kodak Chevron is a testament to the classic cameras of this era.

The Company:

I don't believe I've ever written about one of my favorite companies. The Eastman Kodak Company, known to many as Kodak, was founded in 1888 by George Eastman, a visionary who revolutionized photography by making it accessible to the general public. Before Kodak, photography was an elaborate and expensive process that required significant expertise. Eastman's innovations in camera design and film processing transformed the photography industry.

A wonderful ad showing the benefits of the Chevron camera

 George Eastman, a former bank clerk in Rochester, New York, initially became interested in photography as a hobby in the late 1870s. Frustrated by the cumbersome process of wet plate photography, which involved heavy equipment and complicated chemical preparations, Eastman sought to simplify the process. In 1880, he patented a dry-plate coating machine, which allowed for the mass production of photographic plates, and soon opened the Eastman Dry Plate Company.

Eastman's breakthrough came when he shifted focus from plates to roll film. In 1884, Eastman and businessman Henry A. Strong, who would later become the company's first president, formed a partnership to expand the business. They developed a flexible roll film, which replaced glass plates that had previously been used. This was a significant innovation because it created simpler, more portable cameras.


In 1888, the company launched its first Kodak camera, a compact box camera preloaded with enough film for 100 exposures. The marketing slogan, "You press the button, we do the rest," succinctly captured Kodak's appeal. After taking pictures, customers would send the entire camera back to Kodak for developing and reloading, eliminating the need for users to handle the film or chemicals themselves. This ease of use democratized photography and made it accessible to amateur photographers for the first time.

 Eastman chose "Kodak" because he wanted a distinctive and memorable trademark that was not associated with any existing words. He believed the letter "K" had a solid and unforgettable sound, so he experimented with various combinations of letters before arriving at Kodak.

 Kodak continued to innovate through the late 19th and early 20th centuries, producing increasingly sophisticated 35mm cameras like the Kodak Ektra and Retina lines, along with many medium—and larger-format cameras used during international conflicts. All the while refining its film development processes.

 Eastman built Kodak into a dominant force in the photography industry by introducing flexible film and creating simple, user-friendly cameras.

My Camera:

The Chevron camera is a rather large, heavy, and, some say, "bulky" camera that measures 6.25" wide, by 4.5" tall, by 4"deep, and weighs in at a whopping 2 lbs. 9.9 oz. without film loaded. I like how the camera feels. It's taller and wider than the Medalist, after which this camera was made. The Kodak Medalist is a marvel for its time, but when I hold the Medalist, the body feels too "fat" in my hands, although I do like the 6x9 format the Medalist has, whereas the Chevron is a proper 6x6 square format camera.

Some people discuss cameras in a much more technical manner, which I genuinely enjoy reading. There are times when I don't understand many of the technical "hows and whys," but that allows me to learn new things, which I enjoy. I prefer to talk about using the camera and my personal experiences.

To load the camera, you can open the back from the left or right side, which I like. You can take the whole back off if you want to. The empty spool will go onto the camera's left side, as the film advance lever is on the left. You put the fresh roll on the right, which is counterintuitive for many photographers, but it didn't bother me when using the camera. Before you load the film into the camera, the frame counter is on top of the camera, which you need to set to "N." The camera is supposed to have an automatic film advance stop when the film reaches the next frame. My auto-stop camera wasn't working, so I just used what was normal to me and looked at the red window on the back of the camera to get to the next frame. Here is the Chevron Camera Instruction manual. Thank you, M. Butkus, for your service in supplying manuals.

Now that I have film in the camera, it's time to take photos. To focus the camera on the subject, the rear viewfinder has two windows. The top window is used to frame your subject, and the bottom is to use the rangefinder, which uses a magnified split image to focus on the subject. Both windows are very close together, and for me, who wears glasses was a bit more challenging to use, but once I got used to it, it wasn't difficult. This is the same rangefinder system used in the Medalist and Ektra cameras.

One of the most delightful aspects of this camera is its exceptionally smooth focus ring. It's not so loose that it slips, like some lenses that feel very sloppy. Instead, it's a perfect balance of smoothness and precision, making the process of focusing a joy. It's a testament to the high-quality design and construction of the Kodak Chevron, and it's a feature that I find truly fabulous to use.

It's time to set the shutter speeds and aperture to create the proper exposure. The shutter speeds are located on the far outside ring around the lens. They go from a fantastic speed of 1/800 sec on the top end to "B", going down by half to get the "B" setting, so 1/400, 1/200, 1/100, etc.

The lens is a Kodak Ektar 78mm f3.5 lens. The aperture settings are set by a bar on the bottom of the lens. Sliding the bar over to the next setting is smooth and easy. The setting also has click stops, so there is no getting it if the aperture is set correctly. A visual setting is on the bottom by the bar and on top of the lens, which you can see with a red arrow. The aperture indication is just behind the arm you cock the shutter.

I've yet to make an image, the film advance was very smooth to move the film to the next frame. I would advance the lever four times to get to the next frame. The red window is on the back of the camera to check where you are advancing the film. The red window has a blackout bar, which you slide up to view the film inside. Being right-handed, it was easy to hold the camera, slide the bar up with my right hand, and advance the film to the next frame with my left hand.

One of the advantages Chevron offered was the ability to shoot 828-size films. The 828 film accessory kit consisted of a film mask for 828 film, 2- 828 film spool holders and an 828 spool. This would have been purchased as an accessory. To use the 828 adapter, the photographer needed to do a couple of things to adapt to the film format. First, a switch from the regular 620 to 828 film is on top of the camera. You take a coin and turn the "finder" settings to 828. Then, a switch at the back of the camera changes the viewfinder from the standard 620 film to the smaller 828 film. By using the 828 film, there is a magnification factor of 1.5x.


My results:

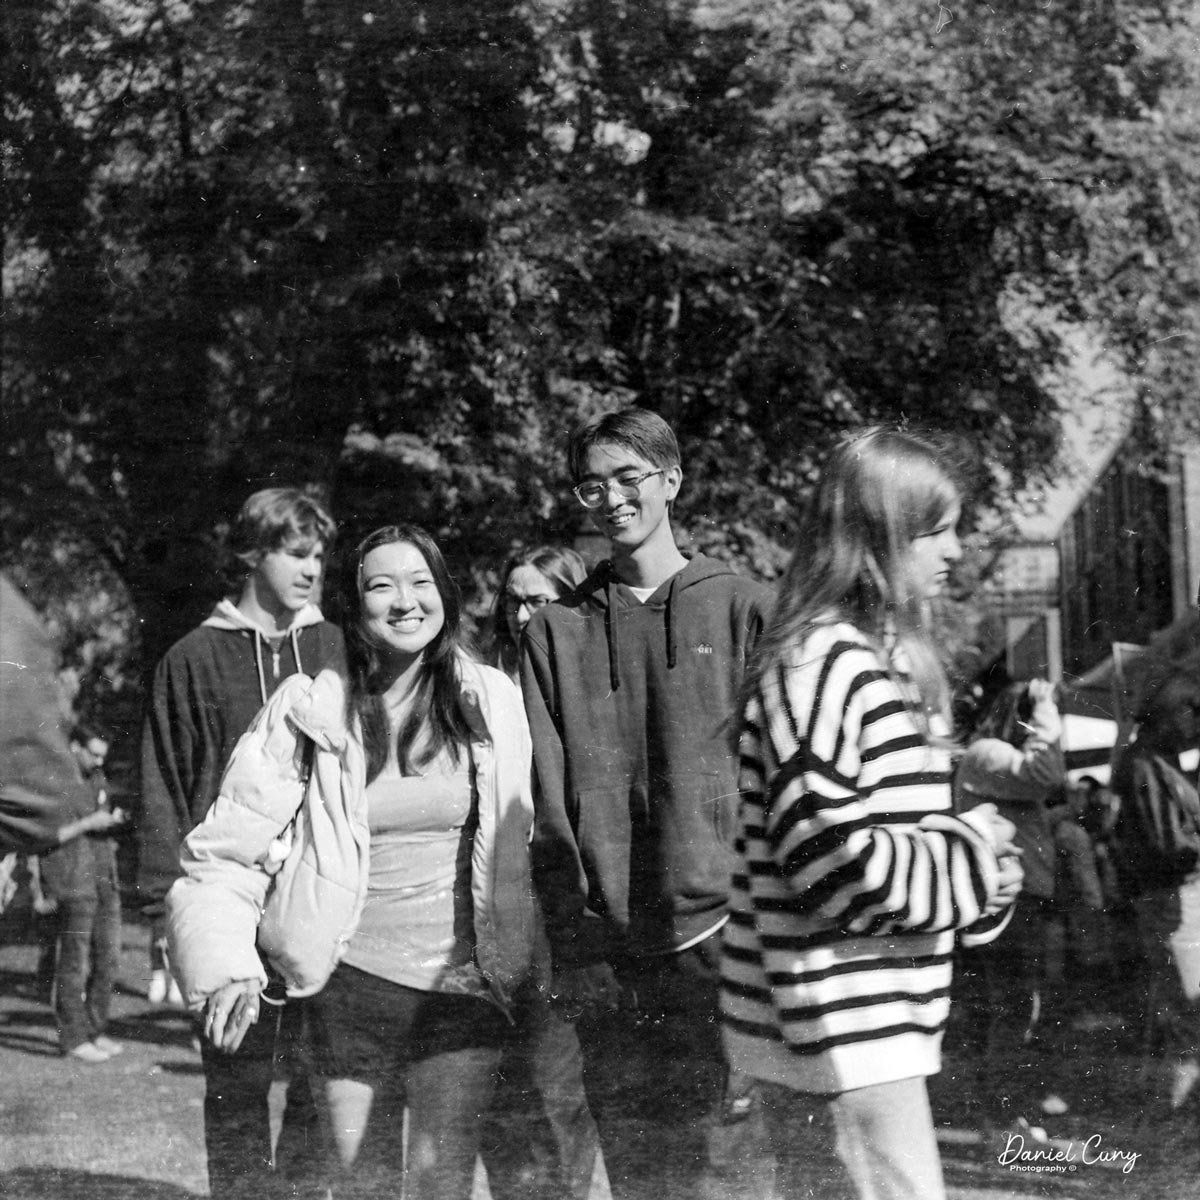
Recently, at a local camera show, I purchased about 50 rolls of Agfa ISS 620 film, which I have for sale on my eBay store. I wanted to test the film to see how usable it was, so I loaded it into the camera and went to the local farmers market to take photos. Here are some of the results from the camera, along with the film I have for sale.

My Conclusion:

WOW!!!! What a fun camera to use. The camera fits very nicely in my hand; the focus is smooth, and I prefer using it over many of the folders and TLR cameras I've used. The Chevron camera outperformed my expectations. It felt similar to what a Mamiya Seven feels like in your hand. While it didn't have the capabilities of interchangeable lenses or TTL viewing of the Mamiya Seven, the camera handled great. 

 The only downside to this camera is the small viewfinder and rangefinder window. There were times when I was walking around the market and just pre-focused, especially when I wanted to be somewhat inconspicuous when shooting. The light was fairly dim, too, so my shutter speed was generally 1/50, and my aperture was wide open.

 I also understand that due to the low number of cameras made, especially compared to the very popular Medalist and Medalist II cameras, they are selling at a premium price on the used market.

 Thank you for taking a few minutes from your day to read my post on this lovely camera. I plan on shooting with it more often, especially since I have many rolls to shoot with.

 Until next week, please be safe.


Kalimar Six Sixty Camera

My posts start in a very similar way. I purchased this camera from an auction site that had a grouping of very common and not-so-interesting items. In the corner of the grouping was the Kalimar Six Sixty camera in its case, along with an eye-level prism finder, which really caught my eye. Looking at the other photos, the camera looked very clean, but there was no information on whether it was working or not. I put in a low price for the lot and actually won. 

My Kalimar Six Sixty w/ case & lens cap

 When the camera items were shipped to me, the camera was in great working condition and cosmetically in great shape, too. The item I was most thrilled to see was the pentaprism for the camera in its original fitted case, which was very clean and in fantastic condition. Being a collector of cameras in different colors, one of the things that drew me to this particular camera was the blue-grey color of the camera and its cases.

 Having been a collector of cameras and photo items for over 50 years, I remember when I first started collecting, and all the different cameras fascinated me. I buy almost any camera initially, then I become more selective as time passes. It's now where I'm very selective about the cameras I purchase. I sold off some of the items in the lot, got my money back, and donated the other items to Goodwill Industries, which is something I do when the items aren't appealing or too familiar for my collection.

Here's where it starts to get fun as well as very incestuous. From all the information I've read, Fujita introduced the Fujita 66ST camera in 1956. The original Fujita had script lettering as a nameplate. Fujita also manufactured the same camera as the Kalimar Reflex, Soligor 66, Haco 66, and the Dutch Fodor 66 camera. Over the years, Fujita has done minor upgrades on different cameras and for other distributors. Most of the enhancements were additions of slower shutter speeds. For example, the Fujita 66SL was released in 1958, and the 1/5 shutter speed was added. The original Fujita shutter speed stopped at 1/25. 

 My camera, the Kalimar Six Sixty, was released in 1963. It is an upgrade to the original Kalimar Reflex, which is an upgraded version of the Fujita 66SL due to the Kalimar having an auto-returning mirror. Fujita added a split-image focusing screen and an interchangeable viewfinder to the Kalimar Six Sixty.

My Kalimar Six Sixty w/Prism finder & cases

The Company:

There are two Fujita companies in Japan with very similar names. Fujita Kōgaku Kikai and Fujita Kōgaku Kōgyō were both photo companies in Japan after WWII. My friend Mike Eckman did a review of the Fujita 66SL ( https://mikeeckman.com/2024/02/fujita-66sl-1958/) and in his article, he wrote about the camera history, which I believe sums it up very well. He said, "Camera-wiki suggests that Fujita Kōgaku Kikai was listed in an 1943 listing of Japanese lens makers, which seems plausible to me as there were a great deal of small companies in Japan making lenses at the time.  We also know that at some time between 1953 and 1954, Fujita Kōgaku Kōgyō began work on a prototype medium format 6×6 SLR.  The difference in the two names Fujita Kōgaku Kikai and Fujita Kōgaku Kōgyō is "Fujita Optical Machinery" versus "Fujita Optical Industry".  I am going to go on a limb here and suggest that either the two companies are exactly the same, and just changed their name, or the original Fujita Kōgaku Kikai was reorganized into a new entity called Fujita Kōgaku Kōgyō.  I think that is going to be the most plausible explanation anyone will be able to find with the resources we have today.

One of the best things about the Fujita/Kalimar/Soligor/Haco/Fodor relation was the lenses used. Fujita must have had a relationship with Heinz Kilfitt, the designer of the Behring Robot Camera and a fantastic lens designer for Alpa and other companies. There are photos of a prototype Kilfitt camera, which is similar to the Fujita cameras back in 1952, so there must have been some relationship, but that's unknown. I know that Kilfitt made lenses with a 42mm thread, which is the mount on these cameras. Kalimar made three lenses for this camera. The standard 80mm f3.5 was later upgraded to an 80mm f2.8, which I have, a wide-angle 52mm f3.5, and short telephoto 150mm f4.


My Camera:

My Kalimar Six Sixty is 5.5" tall by 4.5" wide, including the film advance knob, and 6" deep, including the 80mm f2.8 lens. The camera weighs 2lbs 10.1 oz without the fitted case. The accessory viewfinder is 3.25" tall x 4" wide x2.75" deep and weighs 11.4 oz. The Kalimar Six Sixty camera was great fun to use, and as other people have mentioned in their reviews of the camera that you can see online, it's somewhat advanced for its time. I like the auto returning mirror, which you get used to shooting with a 35mm SLR but are not accustomed to when shooting a medium format camera from this era or even on a Hasselblad. Some people call this the poor man Hasselblad. 

You open the back of the camera similarly to how you'd change the film on a TLR camera like Rolleiflex. On the bottom of the camera is a lever you slide over, and the back of the camera lifts up to reveal a large focal plane shutter system and the film loading and take-up areas. Once you load the camera, on the back of the camera, just below the film advance lever, which also has the shutter speed dial inside, is a lever with the word "SET." This resets the frame counter to "0", then you close up the back and wind the film advance knob until it stops and you're at the first frame.

To set the camera's shutter speeds, on the outside of the film advance lever is a black ring that you pull out, and the dial turns to set the shutter speed desired. The shutter speeds go from 1/500, 1/200, 1/100,m1/50, and 1/25 on the main settings. Next to 1/25 is a red dot, similar to cameras like Leica and Nikon rangefinders; you can set the lower shutter speed on a separate dial just under the film advance lever. There, you'll find the shutter speeds of 1/25, which are in red, so both 1/25th speeds need to be set there if you want to use the 1/25 speed. Also on the dial are 1/10 and 1/5. A "B" setting is on the larger shutter speed dial. To the right of the slow shutter speed settings is a tiny window that has the frame number you are on and advances when you wind to the next frame.

Shutter speed setting inside the winding knob. Secondary shutter speeds below and small window for frame counter.

The viewfinder lifts from the sides, exposing the nice split image focusing screen on my camera. To pop up the magnifying glass for critical focusing, slide the chrome switch on the back, which pops it into place and is spring-loaded. Pressing it down and clicking it into position when not in use allows the photographer to view the entire screen for composition.  There is also the ability to use the light hood as a sports finder by sliding the front panel to the right, swinging it up, and flicking the chrome switch to bring up the magnifying glass, which allows the photographer to frame their images similar to a sports finder on other TLR cameras. To take the light hood off and change it to the pentaprism finder, you open the light hood, and it slides off towards the front to remove it. To put on the prism finder, slide the rails on the side of the hood and prism finder into the slot on the camera body and slide it on. Straightforward.

The lenses do not have an automatic aperture, so you need to manually open and close the aperture to focus, then stop the lens down to take the photos. To do so, there is a secondary ring just behind the aperture settings with a big red square. You set your aperture, then slide the rig to the left to open the aperture for focus, then slide the ring back to the right to take the photos. This doesn't bother me, as one of the advantages of this method is that the photographer sees the depth of the field before taking the photo. This, to me, is an advantage when taking my time and setting up shots. Some people may think of it as a hindrance, as the majority of people like taking snapshots and are not too worried about the depth of field or seeing what's actually in or out of focus in their photos.

Now that I have the camera loaded with 125 iso film, I walked through my backyard, taking photos of our plants, animals, and scenes to see how the camera performed. It was a sunny afternoon, and I took out my trusty light meter to get the readings, so I didn't use any speed slower than 1/100, but here are my thoughts as I did so. The camera functioned very well. I liked that the mirror instantly returned, and the shutter was quiet. Sometimes, I questioned if the camera shot as all I felt was the mirror, and I didn't hear the shutter, but it worked on all shots. The focus was difficult and not the brightest to focus. I spent too much time on the split image instead of just looking at the frame and concentrating as usual.

I didn't use the prism finder when shooting the film; instead, I put it on afterward to see how it looked and performed. I have always preferred to shoot from the waist using a medium format, but it worked well, especially in the sunlight. The open/close aperture was fine, as I used to do it with many other older cameras. At least I remembered to open/close it. I remember when I first tried cameras with manual aperture, I'd get frustrated because I'd forget to open to focus and get upset thinking, "Why is it so dark?" Then, remember to open/close the aperture manually.

 My results.

Here are a few of the wonderful results from my Kalimar Six Sixty camera as I walked my backyard. There are some excellent images.

Conclusion.

I liked using this camera. It was easy to handle, and the camera was smaller than a Hasselblad or other medium-format cameras. The optics are excellent, and other than the manual aperture or very bright viewfinder, the camera handled well and produced nice images. I also like the look of the camera and its styling. I did have some familiarity with this as I've owned a few in the past, mostly the Kalimar Reflex, and I also have a Soligor on my eBay site for sale if you're interested.

 Thank you for taking a few minutes to read my blog post. It means a lot to me, and I hope you'll do so again next week when I pull out another oddity from my collection to write about. 

 Until next week, please be safe.

Minolta Six Camera

It seems like I purchase items from camera auctions in "lots," and there is always a treasure hidden in the background that you either didn't notice at first, is hidden within all the photos of the items, or, in this case, the camera wasn't taken out of the case, and the case was obscured, so there was no visual evidence that the camera was.

 As I unwrapped the cameras won from the auction, one brown case caught my eye. It bore a striking resemblance to the Mamiya Six in my collection. But upon closer inspection, the name 'Minolta Six' was revealed. I initially thought it might be similar to the Mamiya Six, but the truth was far more exciting, as I'll reveal when I introduce the camera.

History:

In an earlier post, I did on the Minoltaflex CDS, I did a brief history of the company, which read, 

Kazuo Tashima founded Minolta in Osaka, Japan, in 1928 as Nichi-Doku Shashinki Shōten, which means Japanese-German Camera Shop. In 1931, the company updated its name to Minolta, which stands for Mechanism, Instruments, Optics, and Lenses by Tashima. In 1937, the company was reorganized as Chiyoda Kogaku Seikō, K.K. They are now introducing their first Twin Lens Reflex (TLR) camera, the MinoltaFlex, based on the German Rolleiflex cameras. The MinoltaFlex was only the second TLR introduced from Japan after the Prince Flex by Neumann & Heilemann. In 1947, Minolta introduced rangefinder cameras like the Minolta-35, and in 1959, the Single Lens Reflex (SLR) SR-1 camera. In later years, they signed agreements with Leica and came out with the first autofocus SLR, The Minolta Maxxum 7000, which carried on to several in their autofocus system.

 To expand slightly from the above text, in the early years, there was a big German influence on the Minolta company, which was known as Nichidoku Shashinki Shōten, which means Japanese, German camera shop. In the early years, the company received help from camera technicians Billy Neumann and Willy Heilemann, and the shutters and lenses were supplied from Germany. Their first camera was the Nicarette, which was released in 1929.

In 1931, the company was transformed into a stock corporation named Molta Gōshi-gaisha. Molta is an abbreviation of Mechanism, Optics, and Lenses by Tashima. Neumann and Heilemann left the company in 1932, returning to Germany to start their own company, and the German influence left with them. In 1933, the name Minolta was adopted. In 1937, the company became Chiyoda Kōgaku Seikō K.K anexpanded the production of cameras into TLR and press cameras similar to the Plaubel Makina. 

Minolta Six in the July 1938 catalogue and price list by Asanuma Shōkai. Scan by A. Apra. (Image rights)

 In 1940, the famous Minolta Rokkor lens was produced, but it was only used for the military. Consumer camera production ended in 1943 to concentrate on the war effort. Three of its four plants were destroyed by Allied forces during WWII. Soon after the war, Minolta released the Semi Minolta III, and throughout the 1950s, Minolta expanded its line of cameras to include folding cameras, TLRs, SLRs, and rangefinder cameras.

 In 1958, the SR-2 was released, and it was Minolta's first system camera. This reign of SLR system cameras included partnerships with Leitz in the 1970s, which helped produce CLE cameras. Minolta had a full line of autofocus cameras, the Maxxum line of bodies and lenses, and Minoltas final SLR camera ended in 1995 with their X-370.

 Minolta produced many different 35mm, APS, and DISC cameras and partnered with Konica in 2003, but by 2006, the camera company had discontinued camera production and relied heavily on the copier business.

My Camera:

Opening the case and looking at the camera for the first time, I was surprised by the Minolta logo and text on top. Since it was made in 1936, it has a genuine Art Deco design in the look and feel of the camera. My biggest surprise was when I initially pulled the lens out from the body and found the camera didn't have a cloth bellows. Instead, it has a series of stacking cubes that pull away from the camera body, AND these boxes are reinforced with another Art Deco element, metal brackets that resemble an "M" when the camera is laid on its back with the lens pointing up. WOW, Just a fantastic design.

The Minolta Six camera measures 6 inches in width, 4.75 inches in height with the finder up, 3.75 inches with the finder closed, and 4 inches in depth with the lens out, or 2.25 inches with the lens closed. It weighs 1 lb. 5.7oz. without the case or loaded with film. The camera's body is made from a bakelite or plastic material, covered in a high-quality leatherette.

 To pull the lens out to take photos, there are two grips, one on either side of the lens, that you grab onto to pull the lens out and away from the body. You need to expose three stacking cubes before the camera is ready to take the photos. Under the lens are two curved chrome bars you can slide down to prop the camera up so that when the lens is out, it doesn't tip forward and keeps the lens level.

Around the top of the lens is Patents-Nippon, and below is Crown, which is the shutter on the camera. The actual lens is an 80mm f5.6 Coronar Anastigmat Nippon lens. Around the lens is a manual focus ring that focuses from under 1 meter to infinity. The focus line to judge distance is a protruding tab with a line at approximately 10 O'Clock on the lens face. The lens also has a stopping screw that prevents the lens from rotating past the infinity mark on the tab.


My camera has only four shutter speeds: 1/150, 1/100, 1/50, and 1/25, along with "b" and "T" for timed exposures. On the top of the camera is a pop-up viewfinder with etched or lined crosshairs to line up horizontal or vertical subjects as needed. The back of my camera sports three red windows with different numbers, which are used to line up with the number on the paper backing to get to the proper frame number. In later cameras, they went to a single window system, which is more common with current 6x6 format cameras using 120 film.


To open the back of the camera, there is a latch behind the strap on the left side with an arrow pointing down. Slide the button down, and the camera's back opens. The chrome winding lever was used on the older models. Later they went to a plastic or bakelite knob in the later models. My first thought when I looked at the back of the camera was that it was not a full-frame 6x6 camera, but that was because I was looking at the retracted plastic cubes from the bellows. It is indeed a full 6x6 format camera. Load the film on the right side and bring the leader to the left to take up the spool. The knobs on the bottom of the camera pull out so you can put in the film and take up the reel easily.

 The case for my camera is in great condition. There's a pretty cool instruction tab on the inside of the case, which was made for the three window cameras.

 The crown shutter doesn't have a cocking mechanism. There's just the shutter release to take the photos. I loaded the film. I pulled out the cube below and started to take pictures of the neighborhood with my trusty light meter. Once I reached the end, I unloaded the film and processed the negatives.

My Results:

Here are some of the photos taken with the Minolta Six camera. The photos were a bit flat in exposure and contrast.

Conclusion:

I enjoyed shooting with the camera, but I am still primarily impressed with the innovative and beautiful bellows system in the camera. Not only is it functional, but it is very light and tight and only wears out slowly compared to the style bellows. The flip side is, if something happens to this bellows, the replacement is hard to replace due to the material. I wished there were faster shutter speeds, but I was using 125 iso film, and with the aperture range of the lens, I didn't have an issue.

 I have a great and fun camera for next week's blog post, so I hope you'll stick around to read that one, too. Thank you for your time, and please be safe until then.

Update:

According to Andrea Apra, who corrected and let me know initially, a small cardstock table was provided with this camera. This table was used to calculate the Depth of Field. The card I have in the case with the wrong translation is just instructions for using this table provided with the camera, which I don’t have.

The table has a horizontal scale at the top with the various distances on the focus ring: 7, 5, 3, 2, 1.5, 1 Mtr.

Then, on the vertical column, the diaphragm has various apertures: F 5.6, 6.3, 9, 12.5, 18, 25.

Two pairs of values, the minimum and maximum distance of the DoF, are intersecting at the table's intersection.

This explains how to read the table.

This is the text translated in its original graphic structure of the text.