I have been excited to do a blog post on this camera since I acquired it a couple of years ago as part of a group of cameras from an auction. The camera came as a kit with the case, extension tubes, lens hood, and film holders. When it arrived in excellent condition with a working shutter and clean lens, I was anxious to put some film in it and take a walk around my yard snapping photos.

History:
Bentzin has always been known as an innovator and a company that excelled in quality cameras like Primar, Primarette, and Primarflex. Carl Bentzin was born in Görlitz on February 8, 1862, died on May 23, 1932, and is buried in grave number 260, Old Görlitz Cemetery. He opened his first factory in 1989, located at Rauschwalder Strasse 28 in Görlitz, Saxony. He changed it in 1893.

In 1899, Bentzin entered into negotiations with Carl Zeiss regarding a collaboration with Dr. Paul Rudolph, who had developed their anastigmats: Planar, Protar, and Ulnar lenses. Zeiss was looking to build cameras so they could put these lenses on them, and Bentzin had the expertise of the time to do so.
The "Aktiengesellschaft Camerawerk Palmos" was founded in 1900. They produced cameras at the Zeiss factory in Jena and the Bentzin factory in Görlitz. In late 1900, the "Film-Palmos 6x9" camera was produced at the factory. In 1901, the bank ran into financial difficulties, and Zeiss took over production in Jena. Bentzin ran their own company, run by Carl Bentzin, in Görlitz.
In the following years, the Carl Bentzin Company produced many high-caliber SLR cameras and even cameras for companies like Voigtlander, Emil Busch, and other German camera companies.
Soon after WWI, Carl started having his son Ludwig take over more of the day-to-day operations of the company, where he honed his manufacturing and business skills. In 1928, Carl turned the company over to his son Ludwig, his daughter Helene, and Helene's husband.
Carl Bentzin died in 1932 at the age of 70. From 1928, Helene and Ludwig ran the company together until Ludwig's death in 1945. After Ludwig's death, the company went through several different reorganizations as part of the state-owned system, ending as VEB Feinoptisches Werk Görlitz.
The Camera:
Upon my first encounter with the camera, I was immediately drawn to its unique layout. All the controls and settings are conveniently located on the right side, including the film advance, shutter speed control, shutter release, frame counter, self-timer, and flash sync terminals. This thoughtful design, detailed in the manual, makes it easy to navigate the camera's functions.


The camera exudes a sense of robustness and reliability. It's more compact than a Hasselblad and larger than a Twin Lens reflex, striking a perfect balance. As an SLR camera, it offers the unique experience of focusing and observing the depth of field through the lens, a feature I particularly appreciate.
To open the back, just behind the viewfinder is a knob that has duo functions. To open the finder, you slide the knob back towards the rear of the camera. Then, open the back to load the film. While the knob is back, you press it down, and the back door opens, revealing the film cassette, which is removable to load the film. To remove the film cassette, you'll need to pull out the winding lever just a bit like you would any film advancing knob to release the gear from the body and the film cassette is easily removable by holding the center handle and pulling it away from the body of the camera.


Loading the film onto the cassette is straightforward for any medium-format camera. Put the empty spool onto the top area where the gear for the film advance is located. Load the new film onto the other area and bring the leader over the pressure plate so the black paper backing is facing out or towards the shutter when you put the film cassette back into the camera body. Put the end tab into the spool slot and wind it a bit until you know the film won't pop off the spool and is starting to take up on the take-up spool. I like to advance the film until I see the arrows of the paper backing, and then I put the film cassette back into the camera. The manual says to reset the frame counter, turn the counterclockwise until it stops, and lift it. DO NOT FORCE IT. A red "zero" appears in the window, then advance the film until the number one appears, then you're ready to go. Unfortunately, my camera reset on the frame counter didn't work, so I advanced until I thought I was at number 1 and started shooting.
Now that I have the film loaded, the viewfinder or light hood, as they call it in the manuals, has a couple of different variations. You can remove it for cleaning. It does have a magnifying glass folded down on the rear of the hood if needed for fine focus. Just lift the magnifying lens into position and focus. It also has a "sports" type finder, which many medium format cameras have, where you can lift a portion on the hood and look through the rear opening through the front opening to get a general sense of composition for quick action photos. If you're going to use this, be sure to pre-focus the camera and use a smaller aperture to allow the depth of focus to compensate for any missed focus.


Focusing the lens and setting the aperture is straightforward. The lens doesn't have an automatic aperture, so you need to open the lens to focus and then manually stop the lens down to the desired and needed setting for proper exposure. A "locking" mechanism for the aperture is used to help with this. You pull back the collar with the red dot and turn it to the desired aperture setting. Releasing the collar "locks" the lens into that setting, which means you cannot go past that setting when you turn the collar back and forth. This lock allows the photographer to open the aperture for brighter focusing, then quickly turn the dial back to the "locked" aperture setting to take your photo. It's easy, and the benefit is that when the lens stops down, you'll see the actual depth of field you'll get in your photograph. When I turned the advance lever, the mirror returned as it should, and to cock the shutter; there was a little extra turn needed to get the shutter cocked again. Having the additional amount to turn is standard, as It did the same function every time I advanced to the next frame.

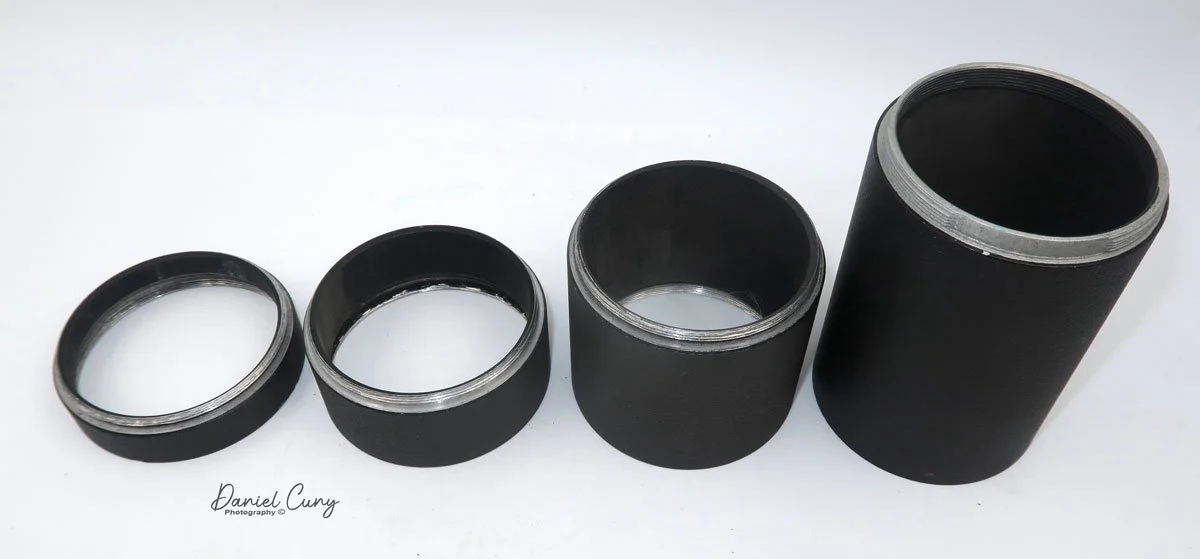
When I received the "camera lot," it included a set of 4 extension tubes for the camera and three separate cut film holders. I'm very familiar with extension tubes and love shooting with them, but what would you ever use 6x6 film holders for when using this camera? I've never heard of a 6x6 cut film ever produced, so I'm curious how you'd even use them. Doing a bit of fussing around with the camera, the only mention I found was the availability of the cut film holders, but nowhere in the manual does it say how to load them.


You'll need to open the back of the camera to use the film holders and take out the cassette. A silver clip is at the back of the light hood (Viewfinder). When you slide that clip back towards the back of the camera, you can slide up an insert with a couple of tabs on the top and a couple of small rollers within the insert. At that point, you can slide the film holders into that slot and take out the dark slide, exposing the film to the shutter and, eventually, the light when the shutter opens/closes. After using the film holders, you can put the roller insert back and slide the silver tab towards the lens, locking the insert into place so the film cassette works as it should within the camera.


The lens is a Carl Zeiss Jena 105mm T f3.5 lens, and it has threads on the back, which you use when using the extension tubes, but to put the lens onto the body, there is a red dot on the front of the camera at the 10 o'clock position. All you need to do is line up the red dot on the lens and turn it to the right or clockwise, and the lens locks into place by pressure. To remove, grab the lens and turn counterclockwise; the lens comes off after about a quarter of a turn.


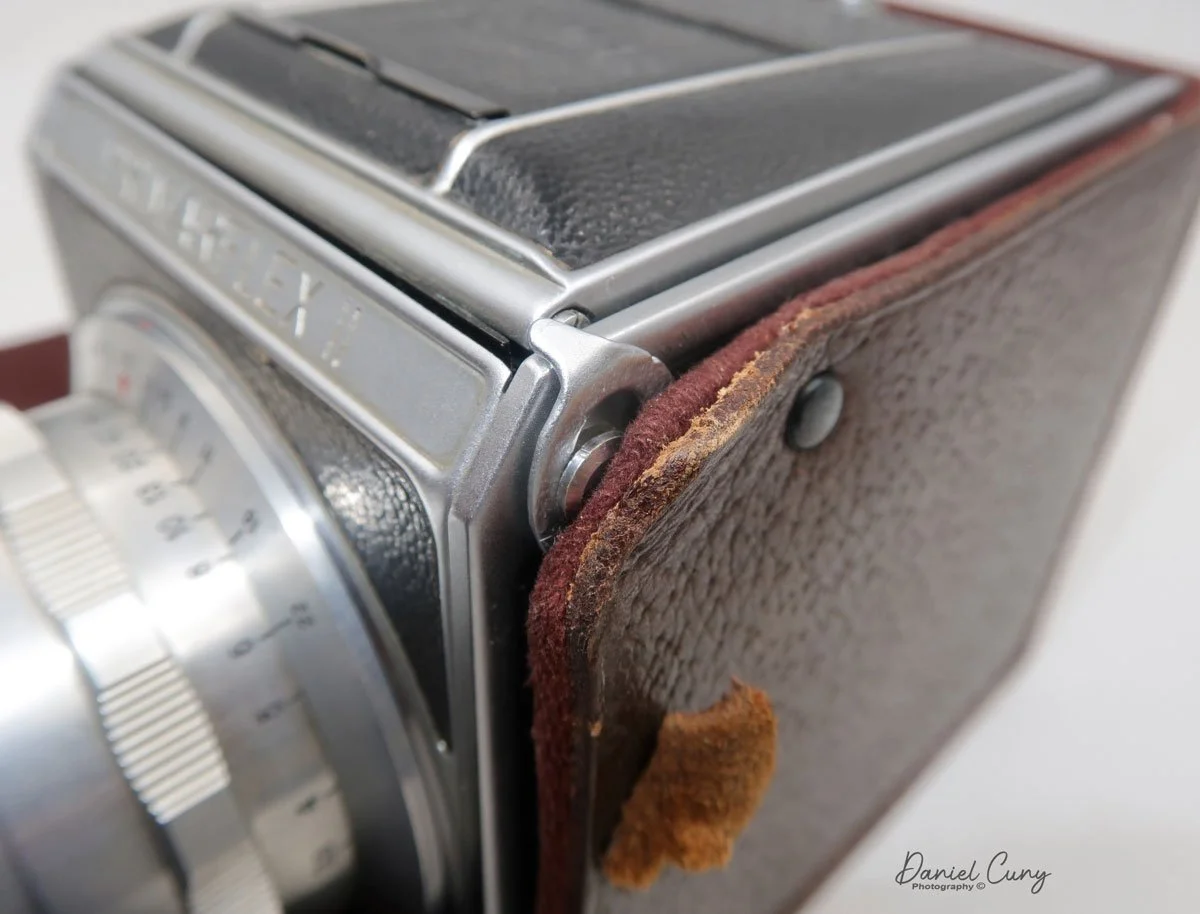
The fitted case is exceptionally well-built. When you open it, the right side of the case folds down so you can access the different operation dials, which is very handy. While my strap is broken, I do see where it's attachable in several places to hold and distribute the weight evenly. The case can be held tightly in the case by a hook on the front and looping into the rear of the case.


Results:
I walked around my front and back yards using my light meter to get the proper exposure for each shot. The shutter works great, and as mentioned above, the aperture and focus move smoothly, so taking the photos was relatively easy.
Here are the results from the camera.


Overview:
WOW, what a fun camera to shoot with. When I looked through the finder, the images were bright and clear. The focus was sharp, and using the "locking" mechanism on the lens was intuitive and straightforward. I didn't use the extension tubes on this shoot, but I plan on trying them out on an upcoming post for my blog, so keep tuned for that experience.
Thank you for taking a few minutes to review this posting on a wonderful, well-built camera that should rival any medium-format SLR camera.
Until next time, please be safe and well.