Konishiroku Snappy Camera

It's been a few weeks since I wrote my last camera collecting blog post because I've started a new position. Now that I feel comfortable in the new job, I think it's time to write about some of my cameras. I love the new responsibilities, the company I'm working for again. I also think I have my nose above water and can take on other enjoyable tasks such as writing about one of my passions: cameras within my collection

My Konishiroku Snappy Camera

My Konishiroku Snappy Camera

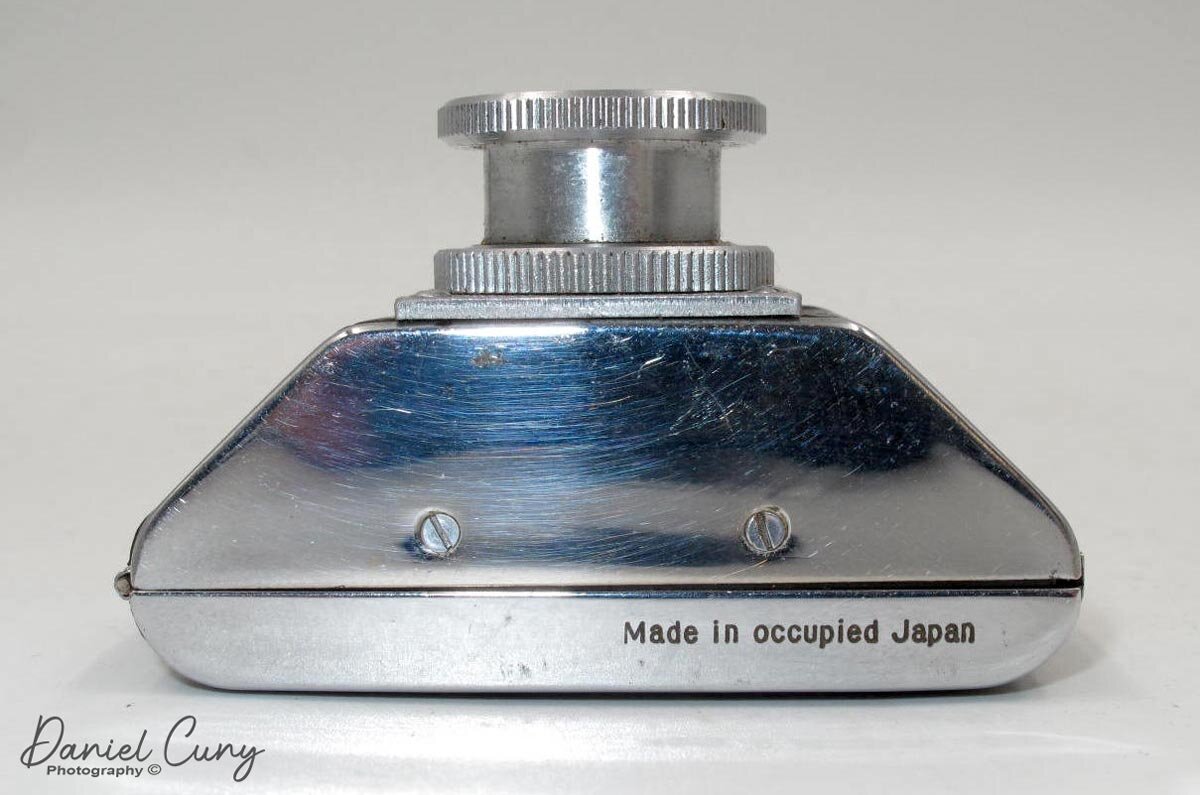
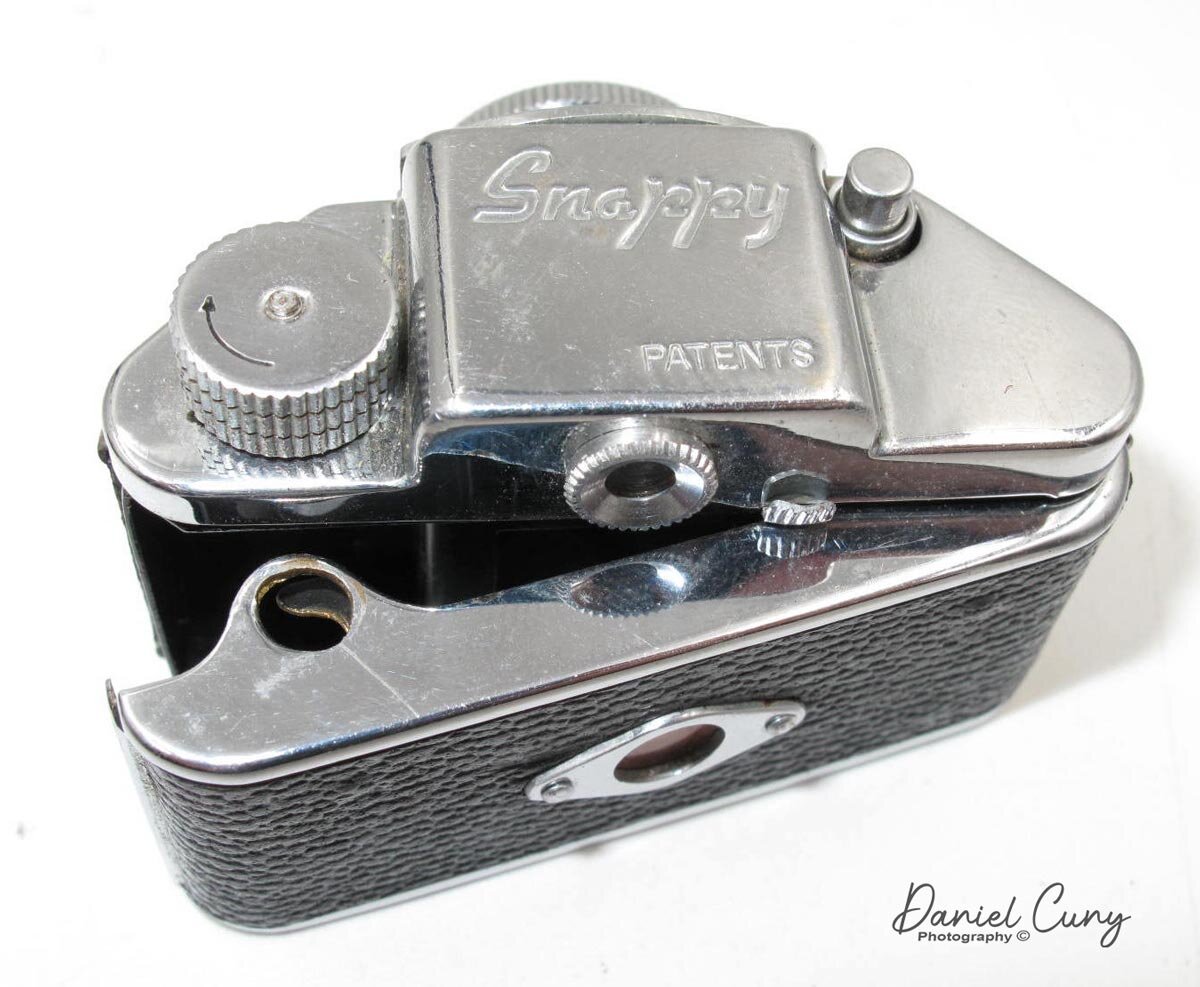
Looking over the cameras above my desk, I came across this small and what I believe is an underappreciated gem of a camera. So, in this week's blog post, I wanted to write about the Konishiroku Kogaku Snappy camera. A camera is exceptionally well built, especially for a subminiature-style camera coming out of Japan just after WWII.

Company History

Konishiroku is one of the oldest photographic companies coming out of Japan, even older than Kodak. The company traces back to 1873 when a pharmacist, Rokusaburo Sugiura, started selling photographic items out of the largest pharmacy in Toyoko that he owned. In 1878, Rokusaburo gave the original shop to his younger brother and launched a new shop, Konishi Honten, in Tokyo's Nihonbashi district.

In 1882, Konishi began to produce photography-related materials in Japan. In 1902, Konishi started to sell the Cherrimportedy Portable Camera, the first Japanese-built camera made for the public. In 1921, Konishi named his son Konishi Honten to succeed in the family business. The company turned into Konishiroku Honten, later Konishiroku, an abbreviation of their names Konishi Rokuemon.

 After WWII, Konishiroku was well known for its Konica brand of cameras, which they released the Konica I camera in 1948. Later in 1965, Konica produced the first auto-exposure SLR camera, the Konica Autoreflex. In 2003, they merged with Minolta and exited the photo market in 2006. they are now more recognized in the copier business.

The Camera

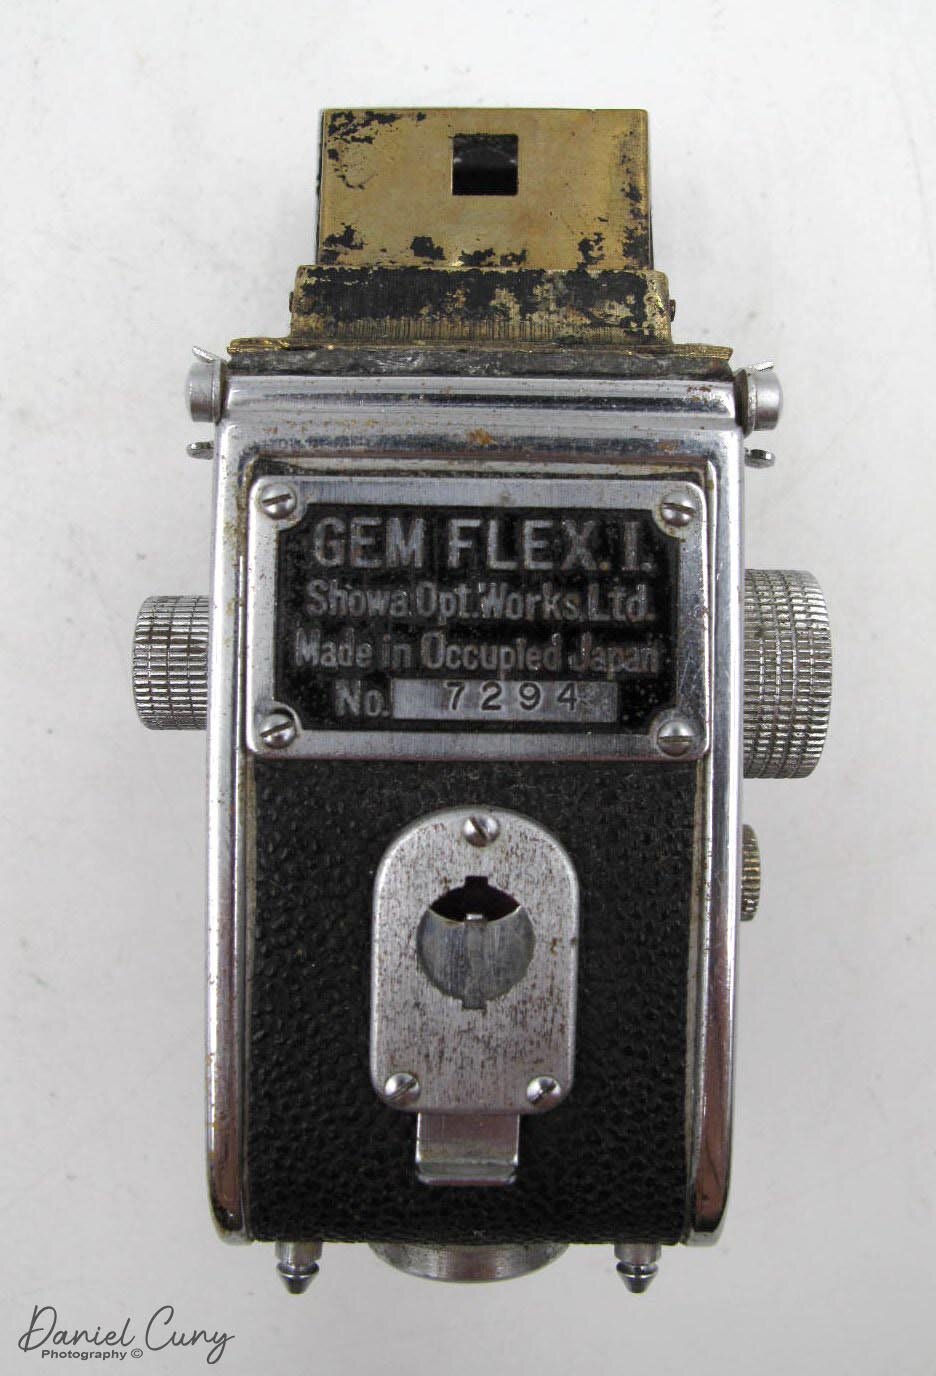
The Konishiroku Snappy was designed, developed, and sold in 1949. According to sources, the Snappy original design was in spring, with the first model released in August 1949. They were somewhat popular and sold approximately 40,000 units.

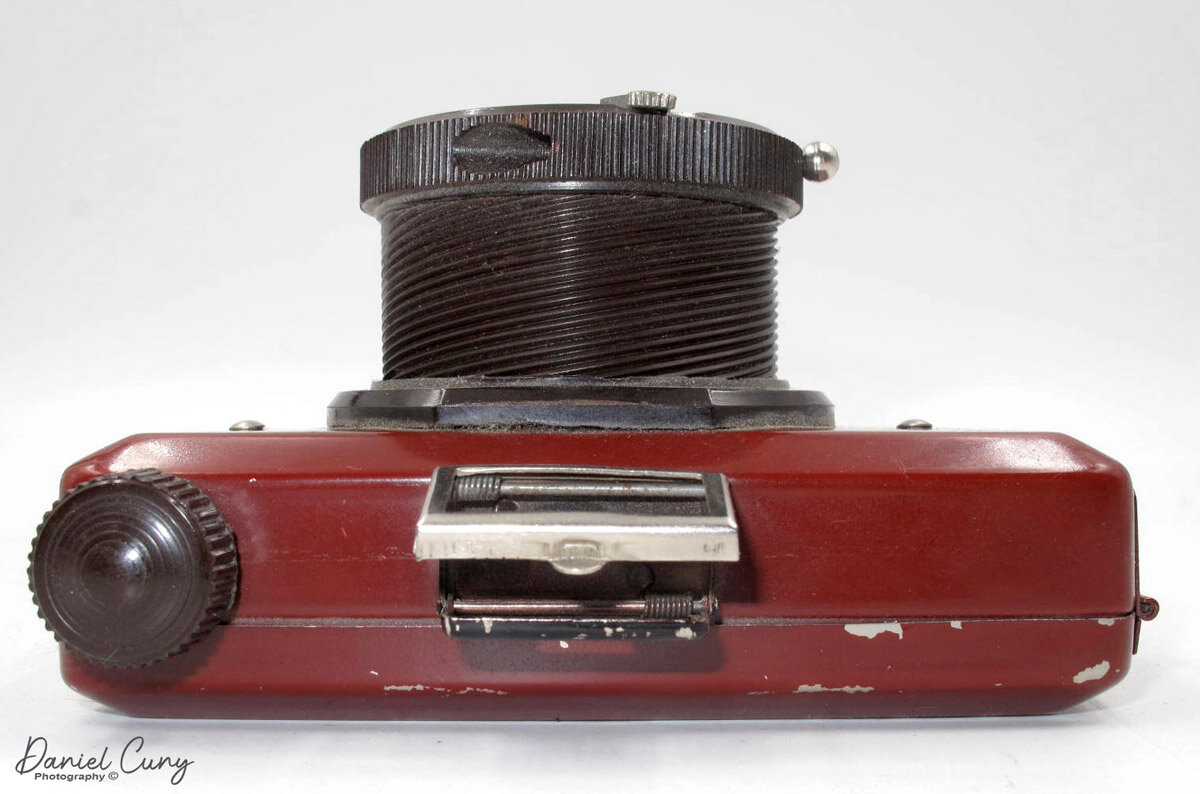
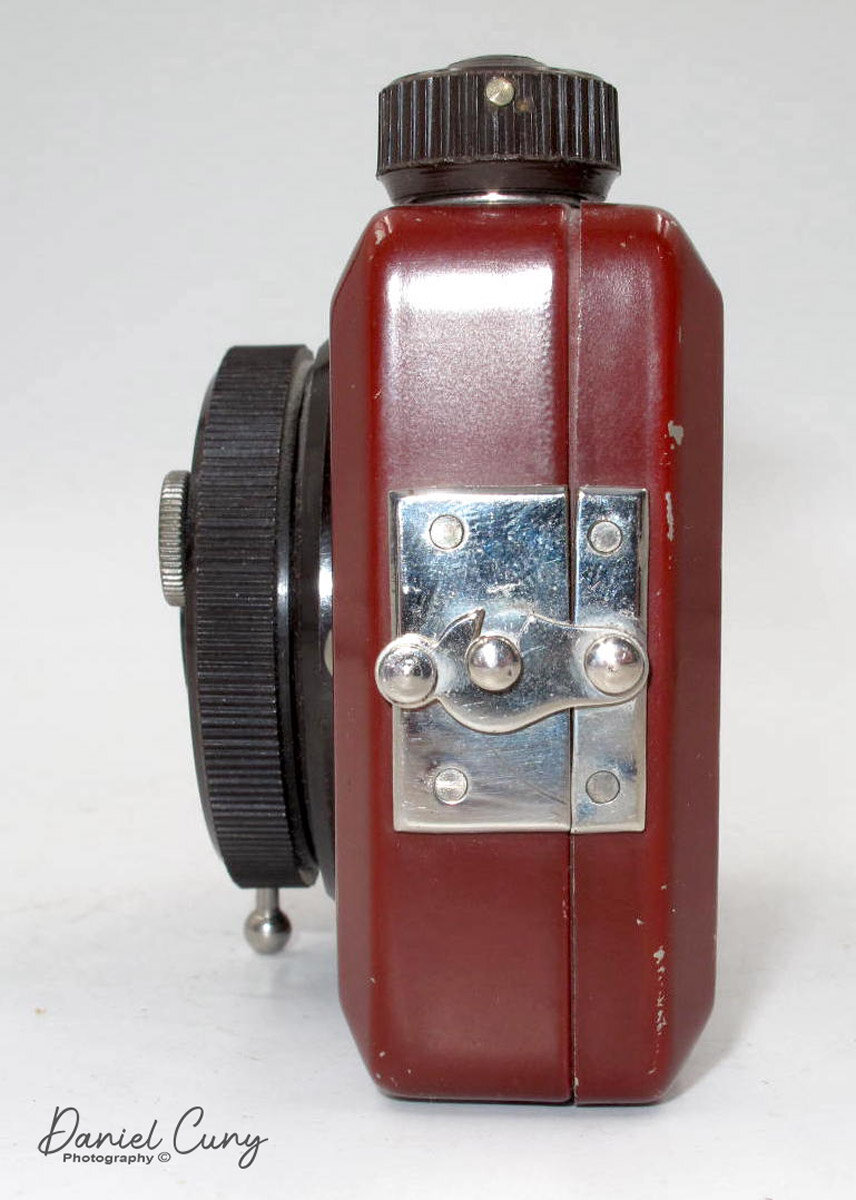
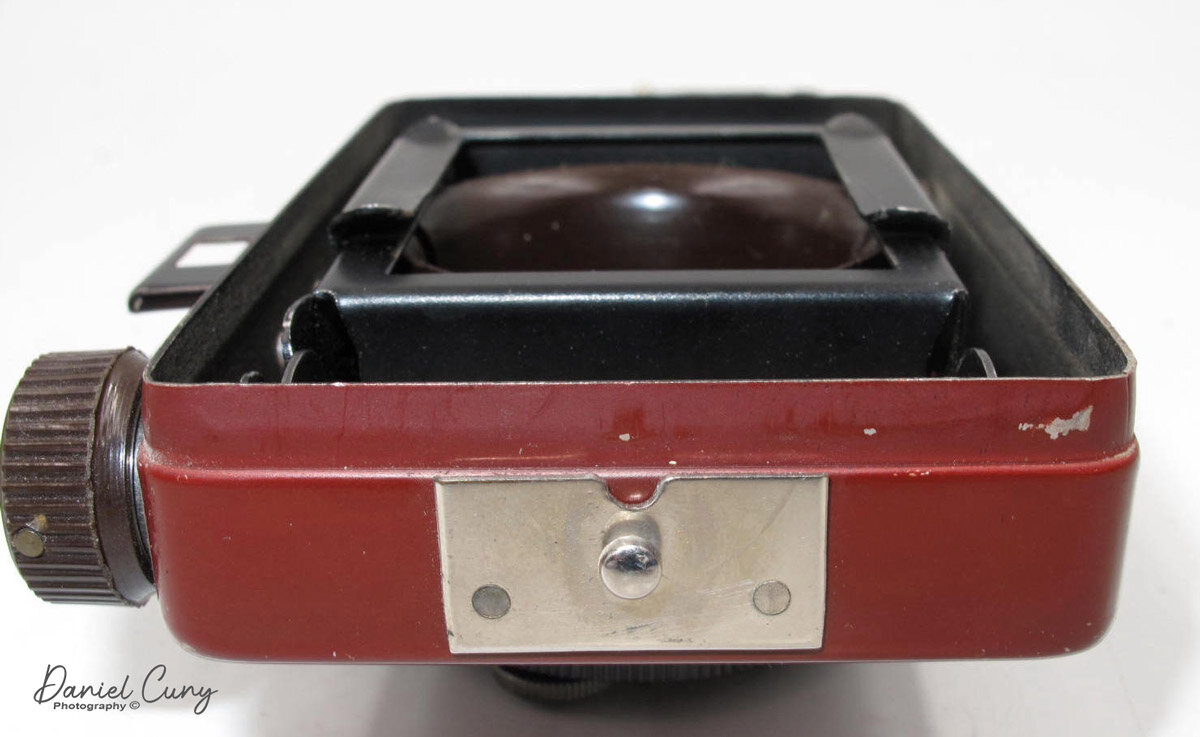
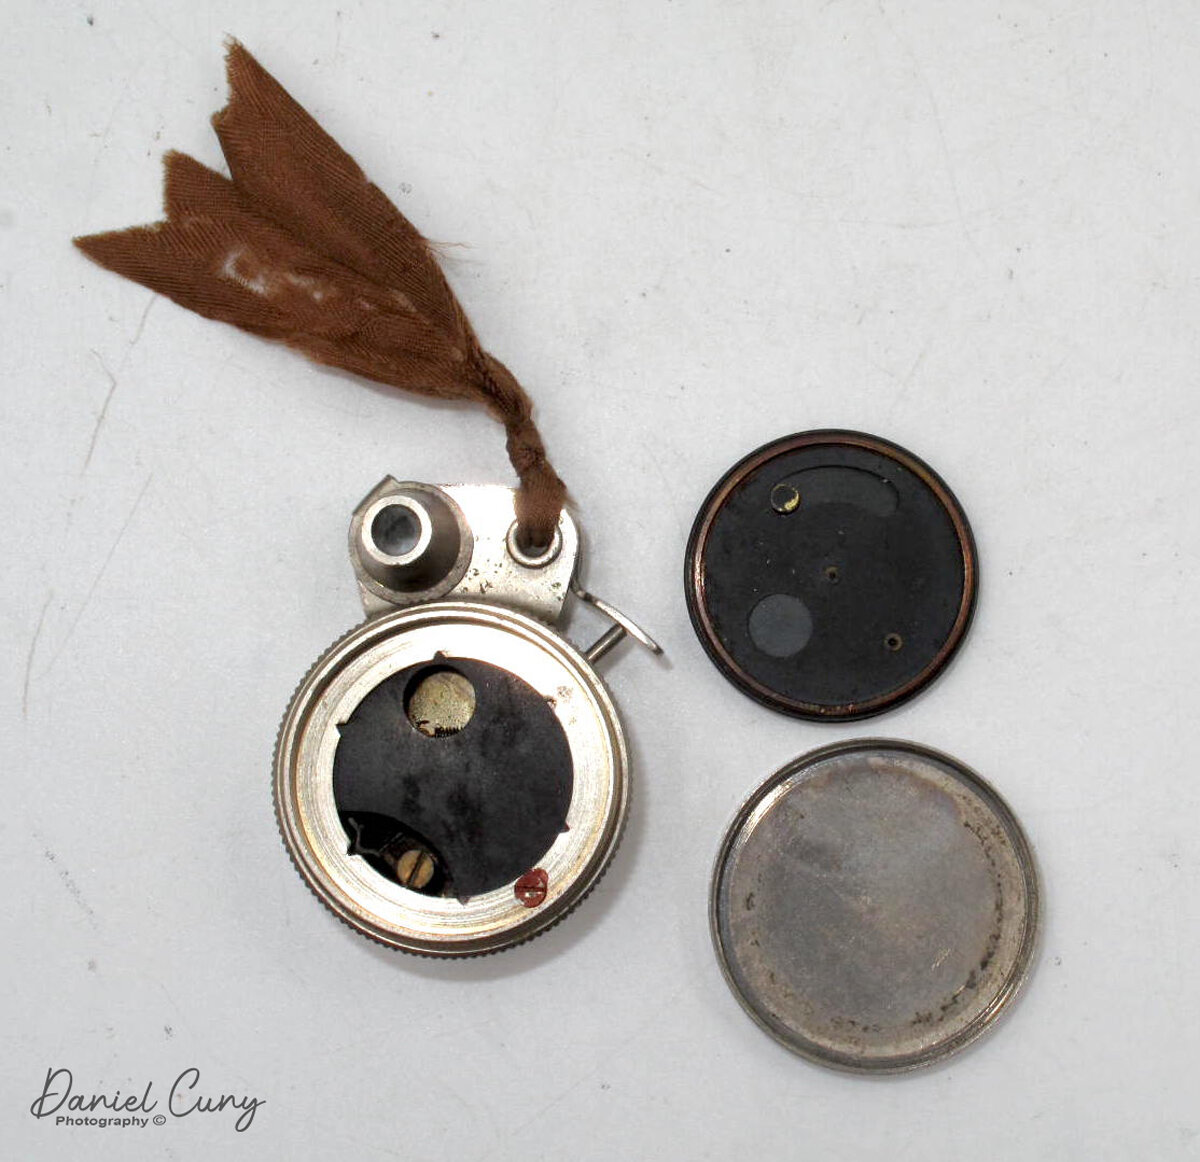
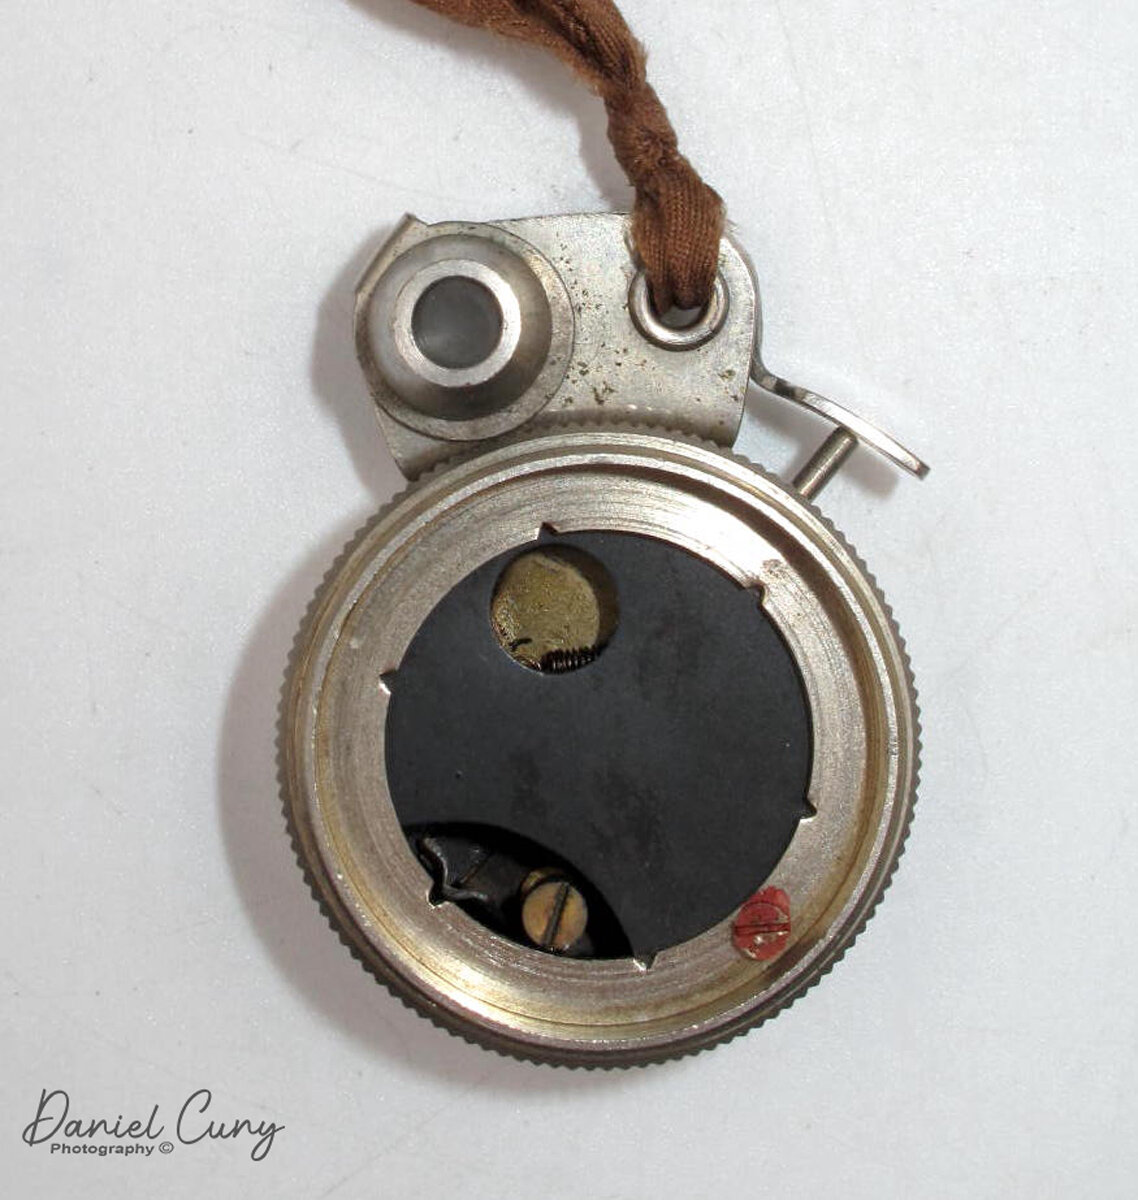
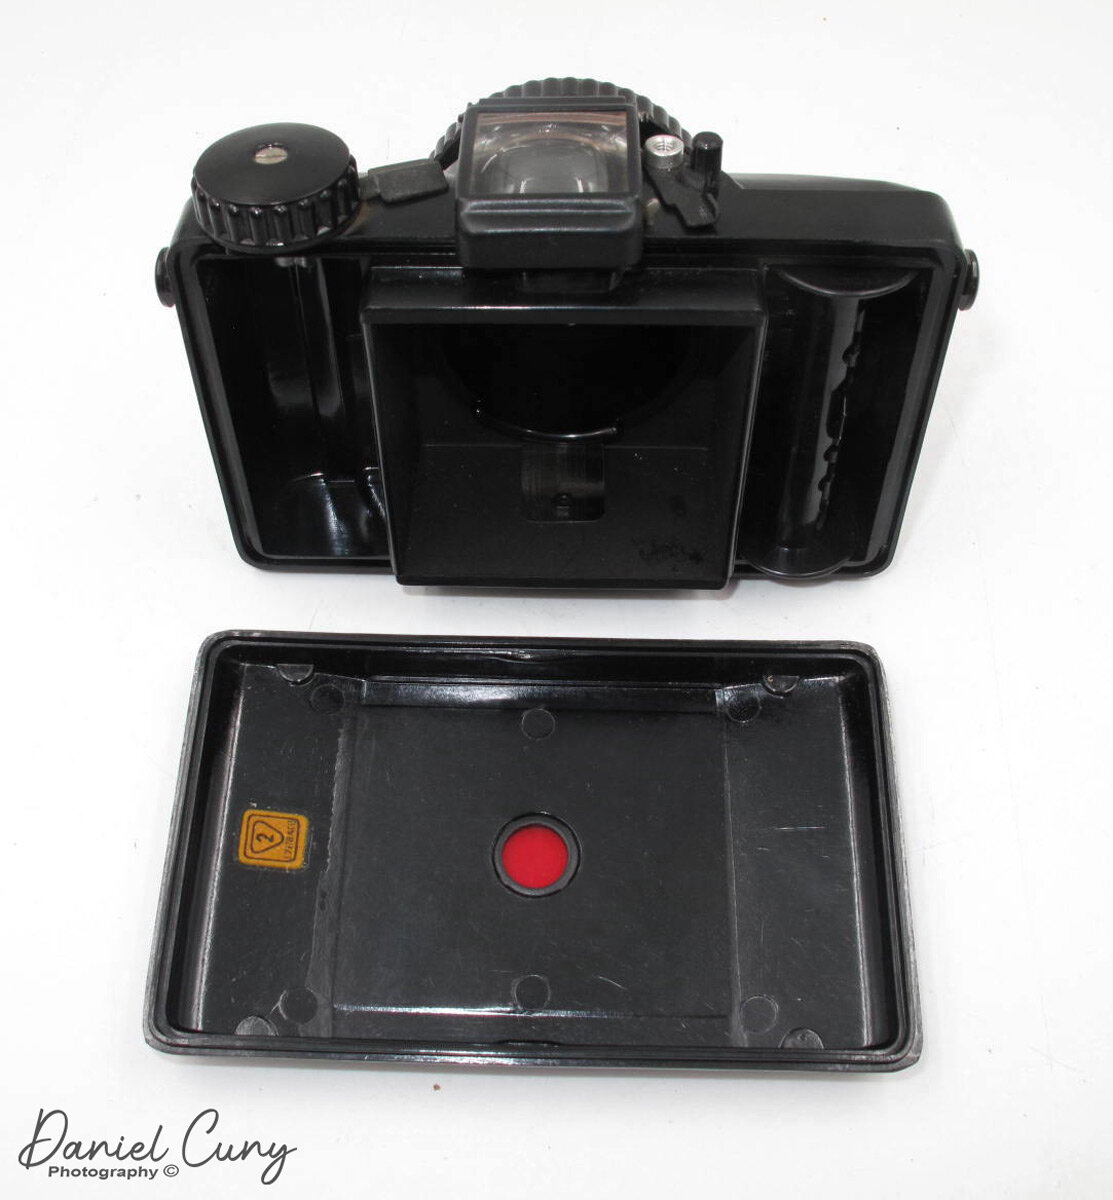
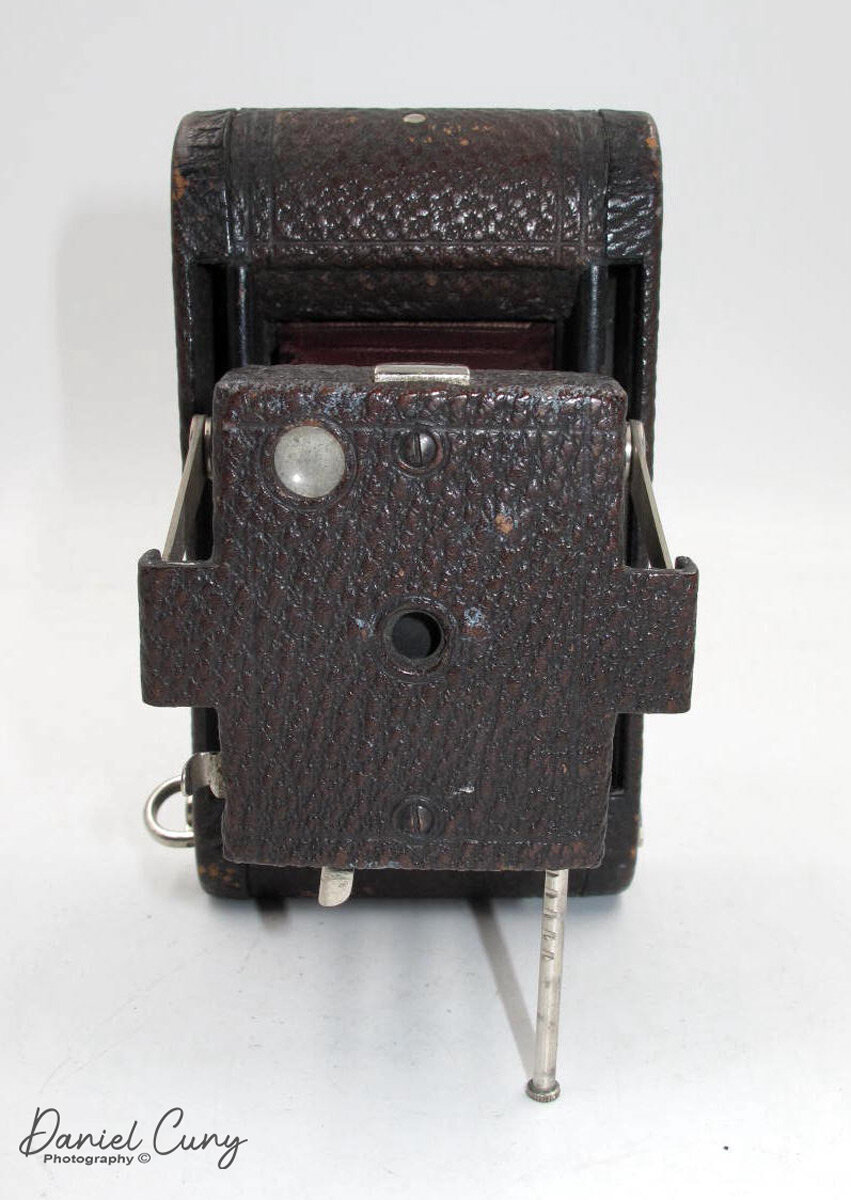
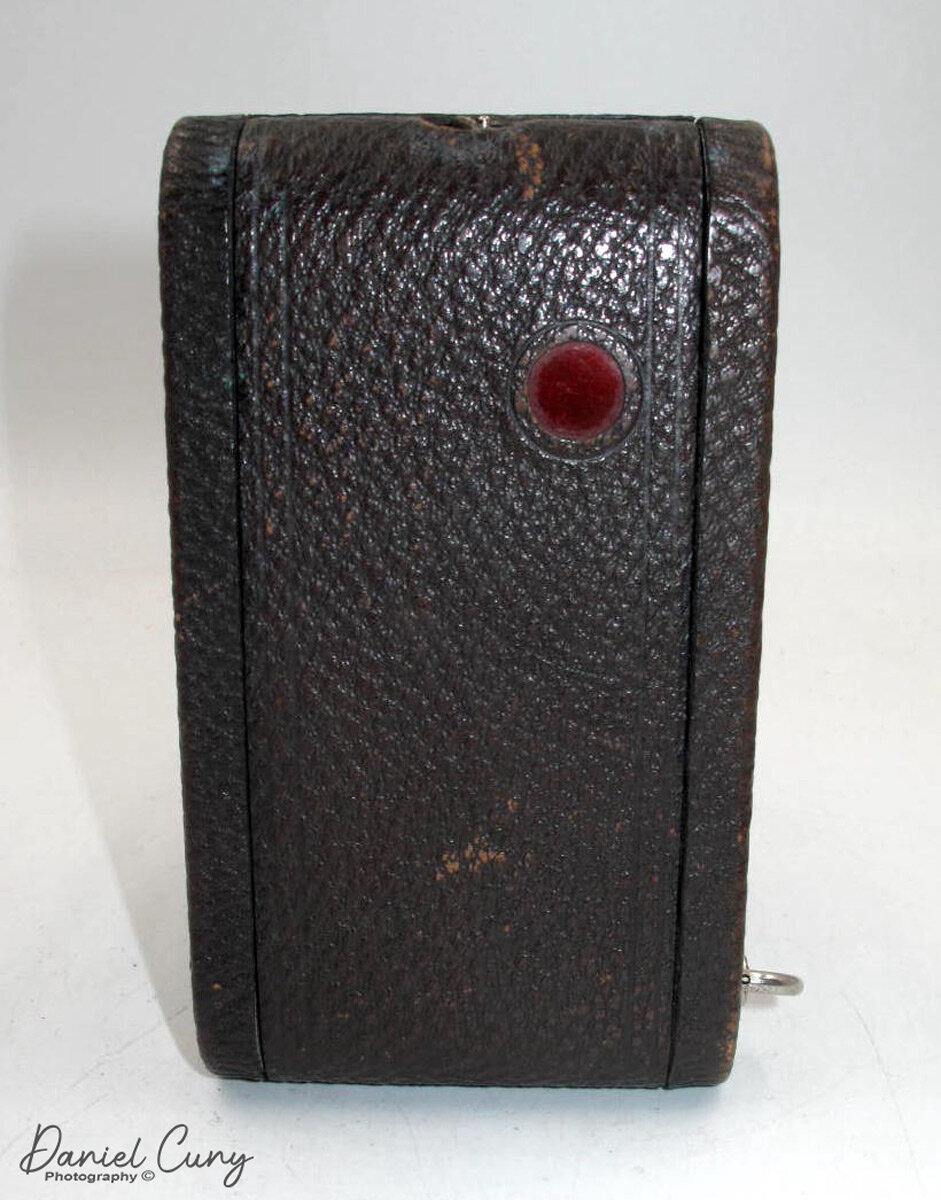
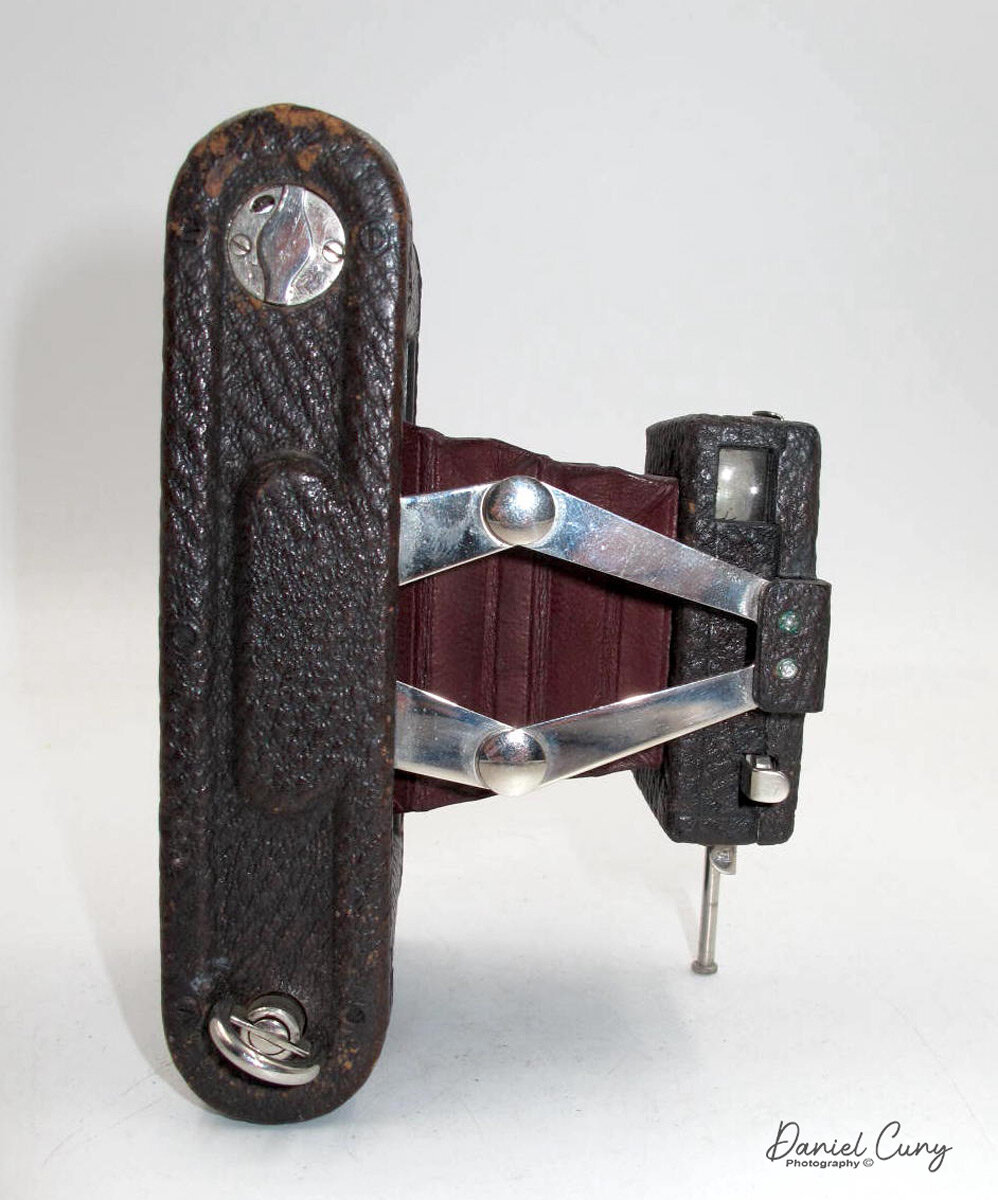
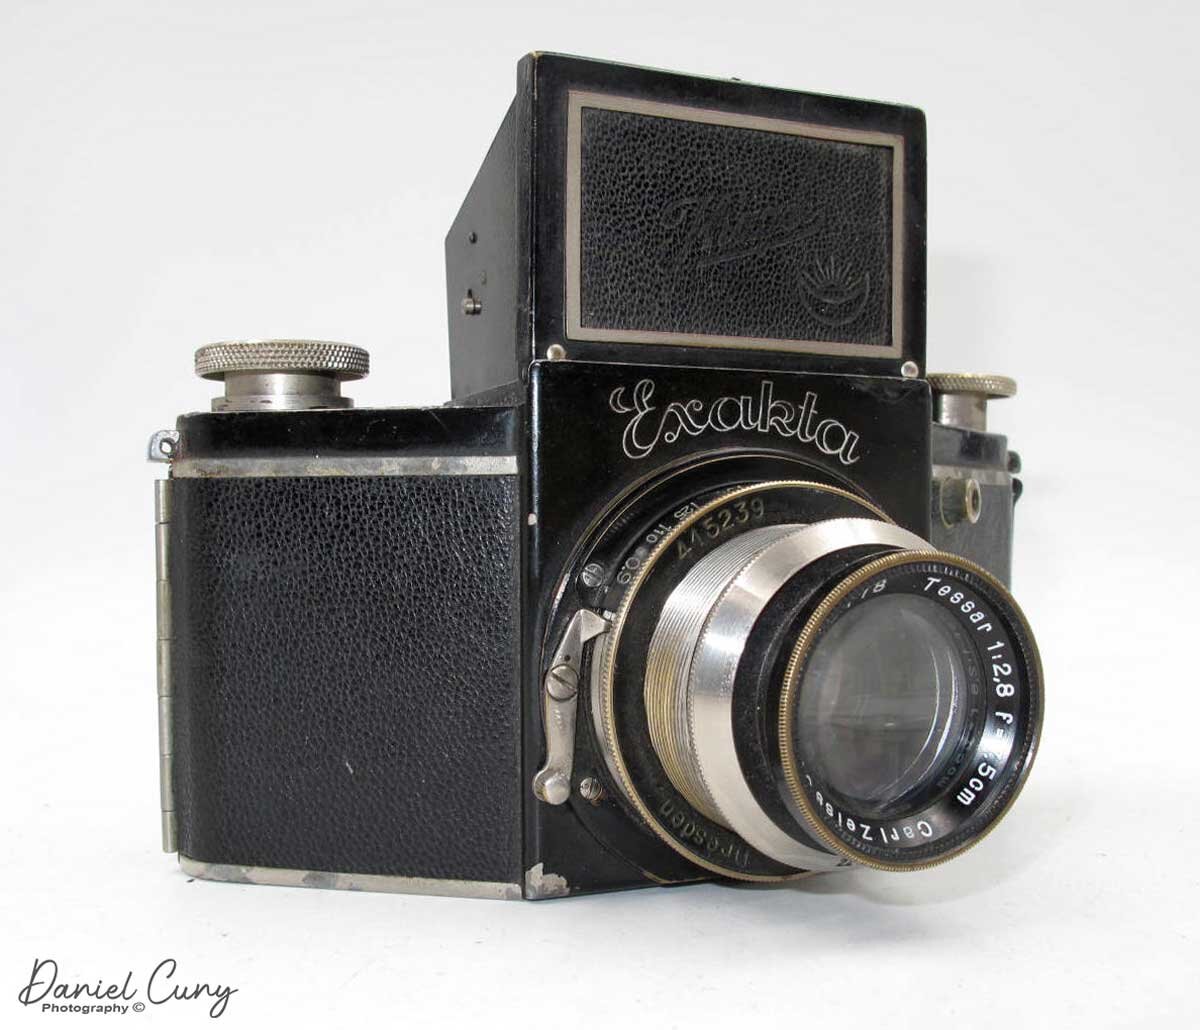
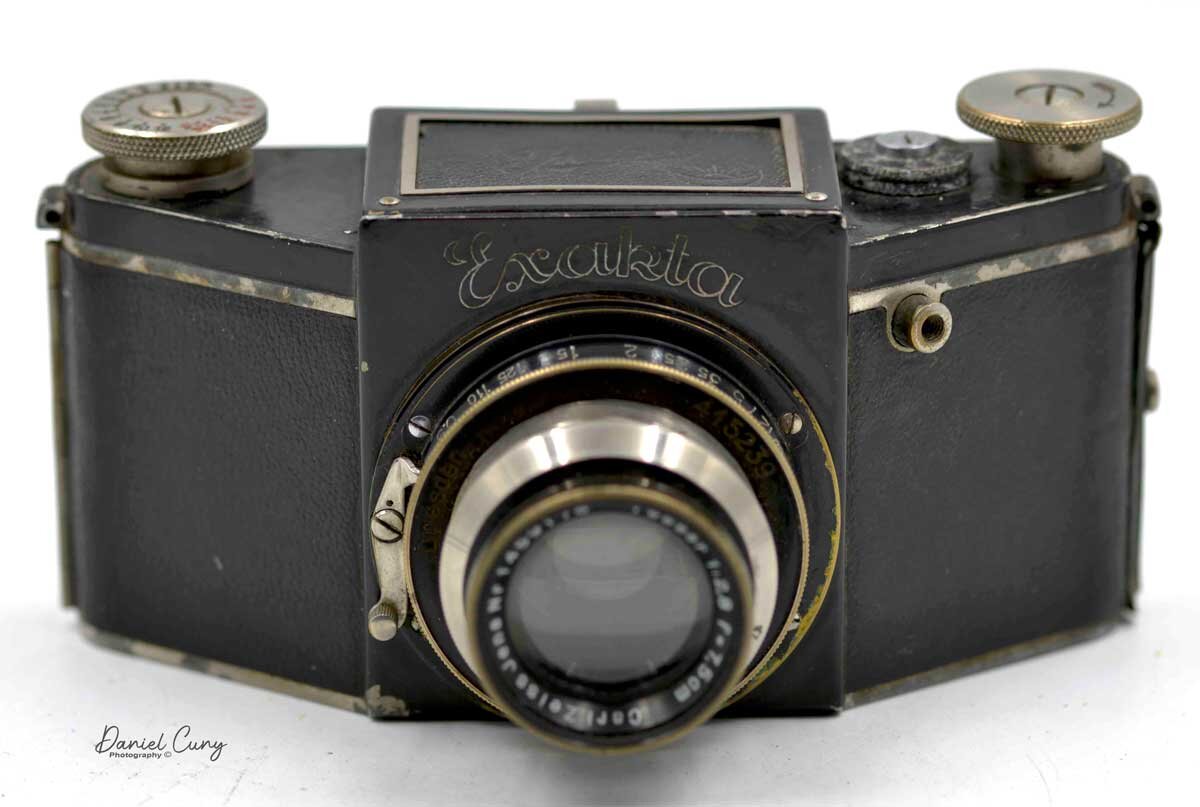
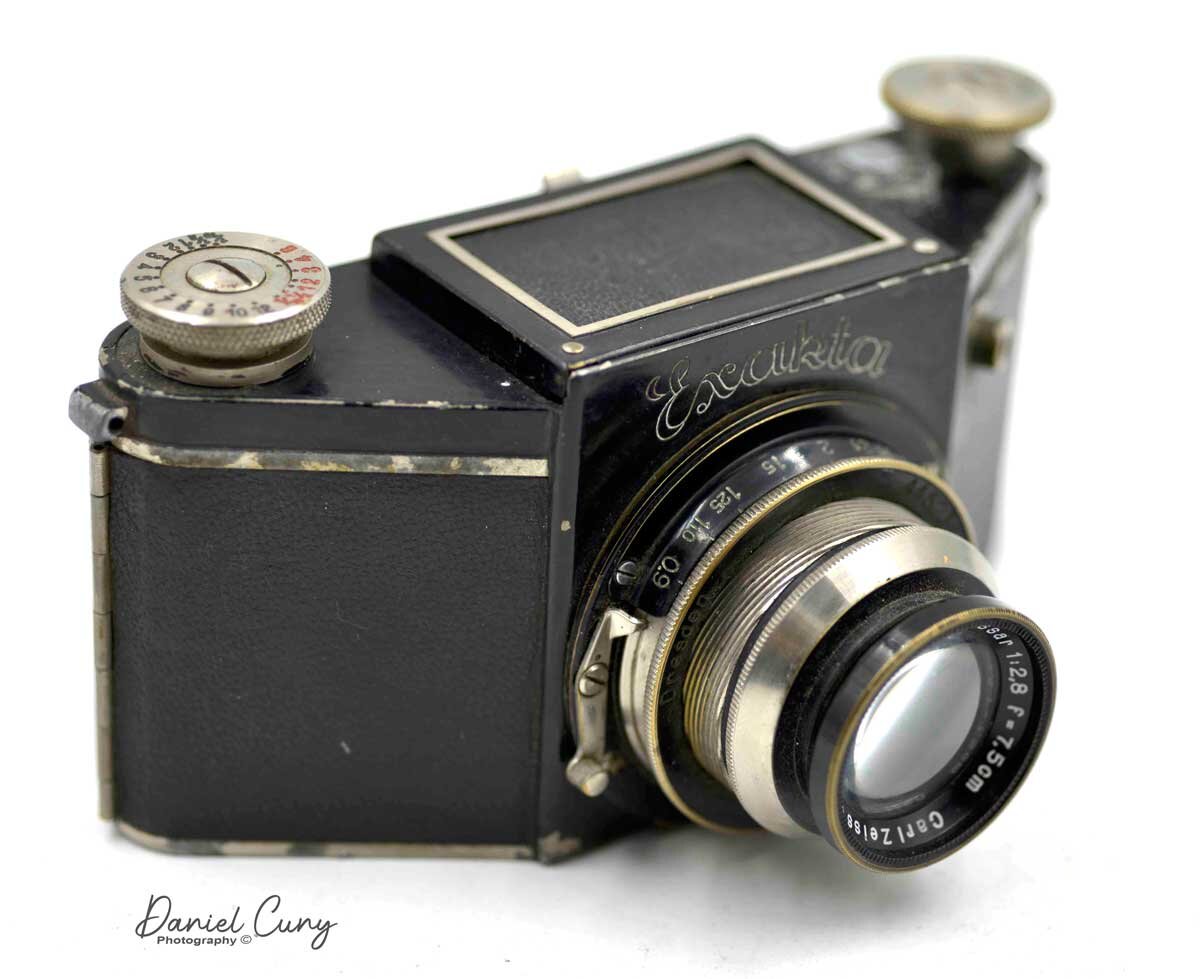
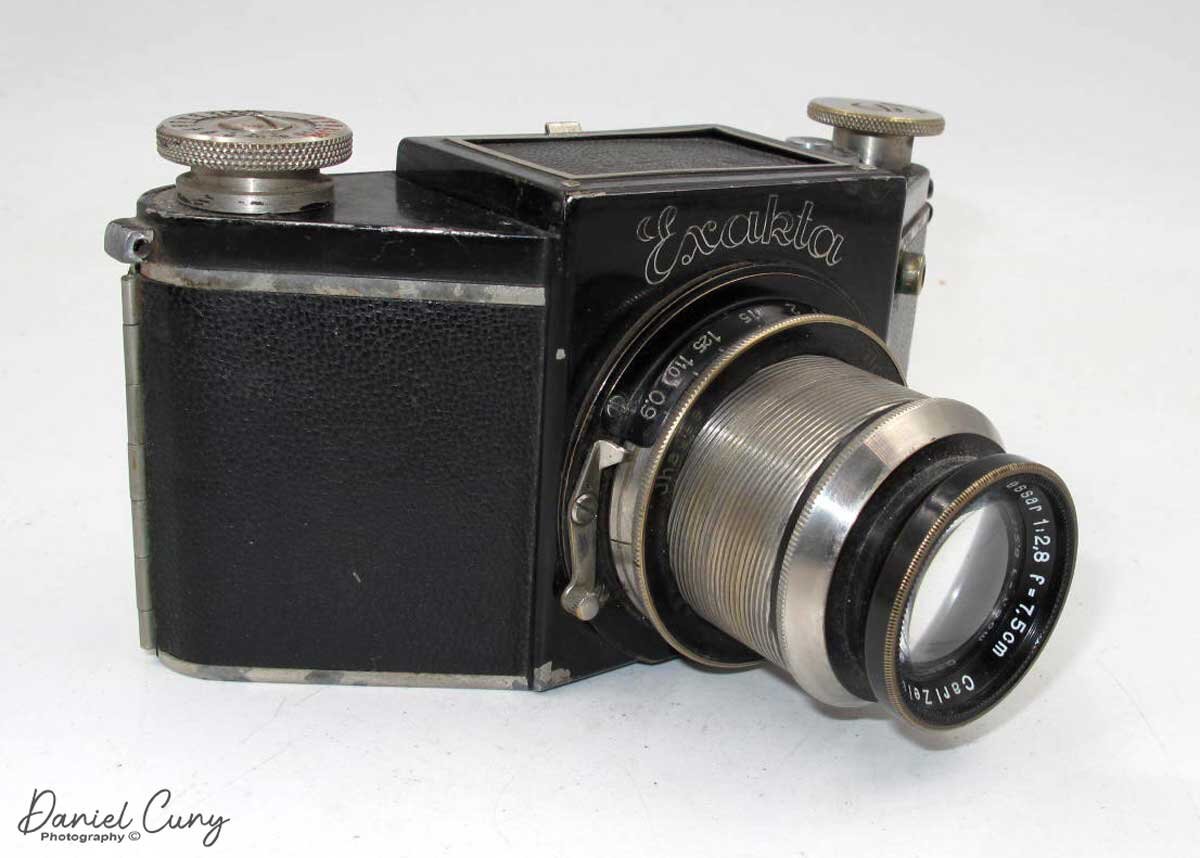
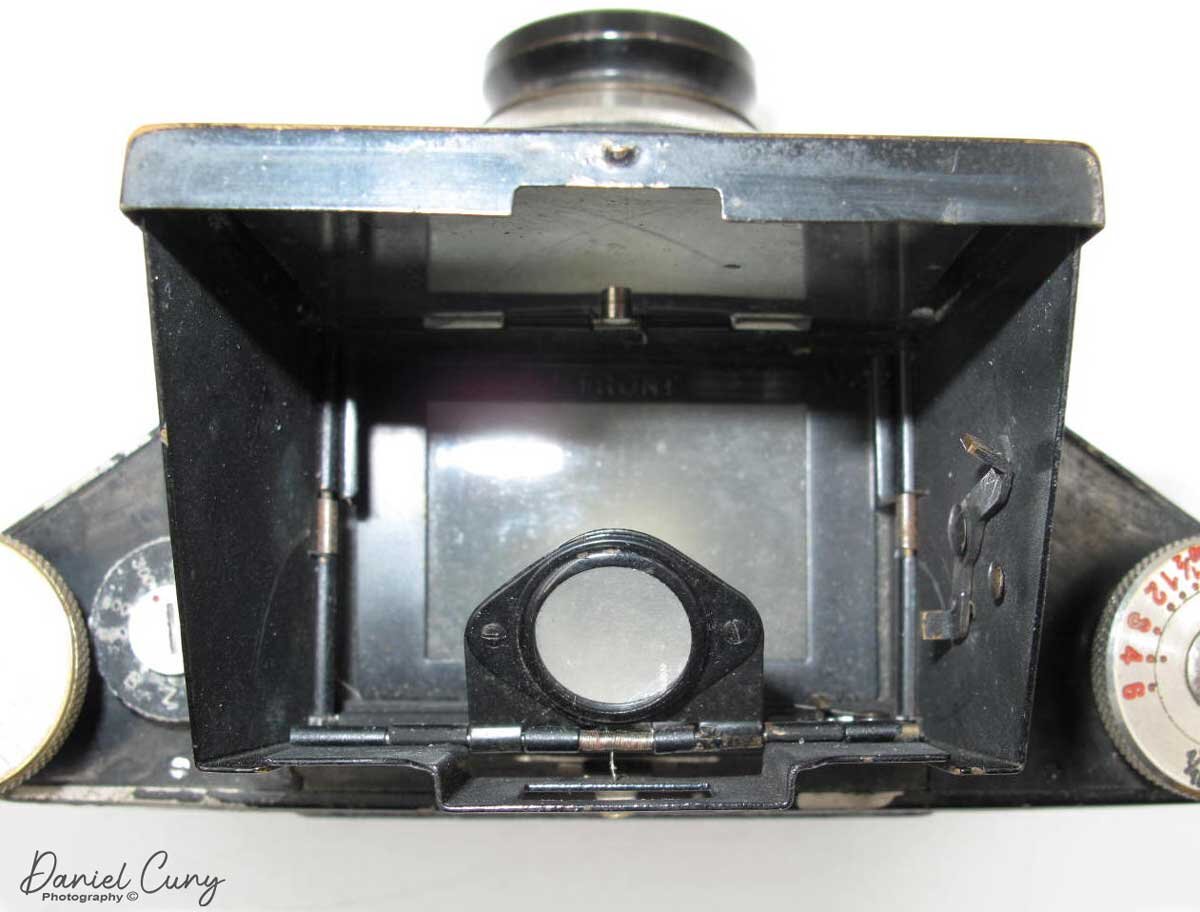
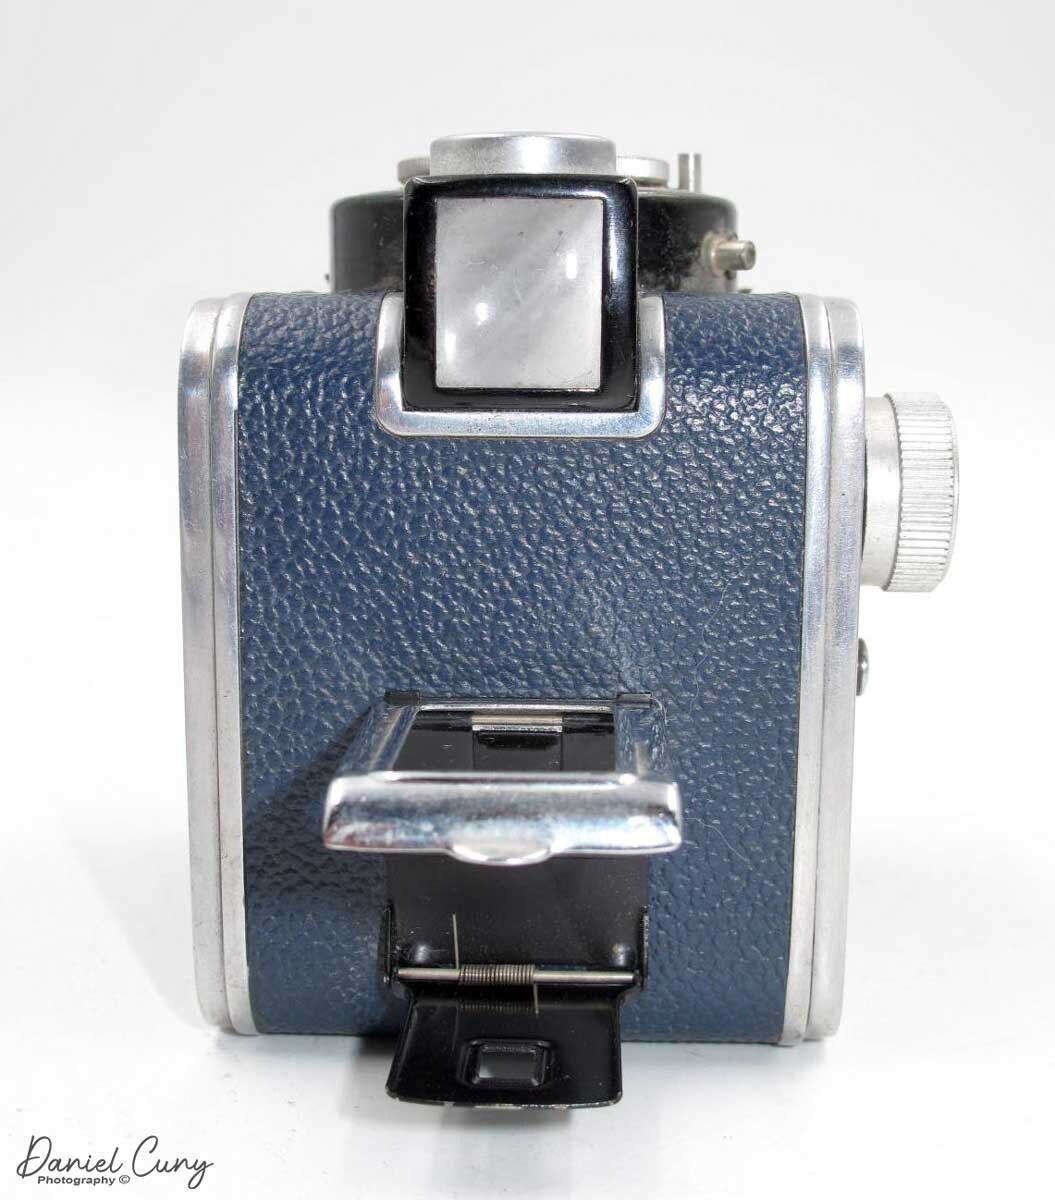
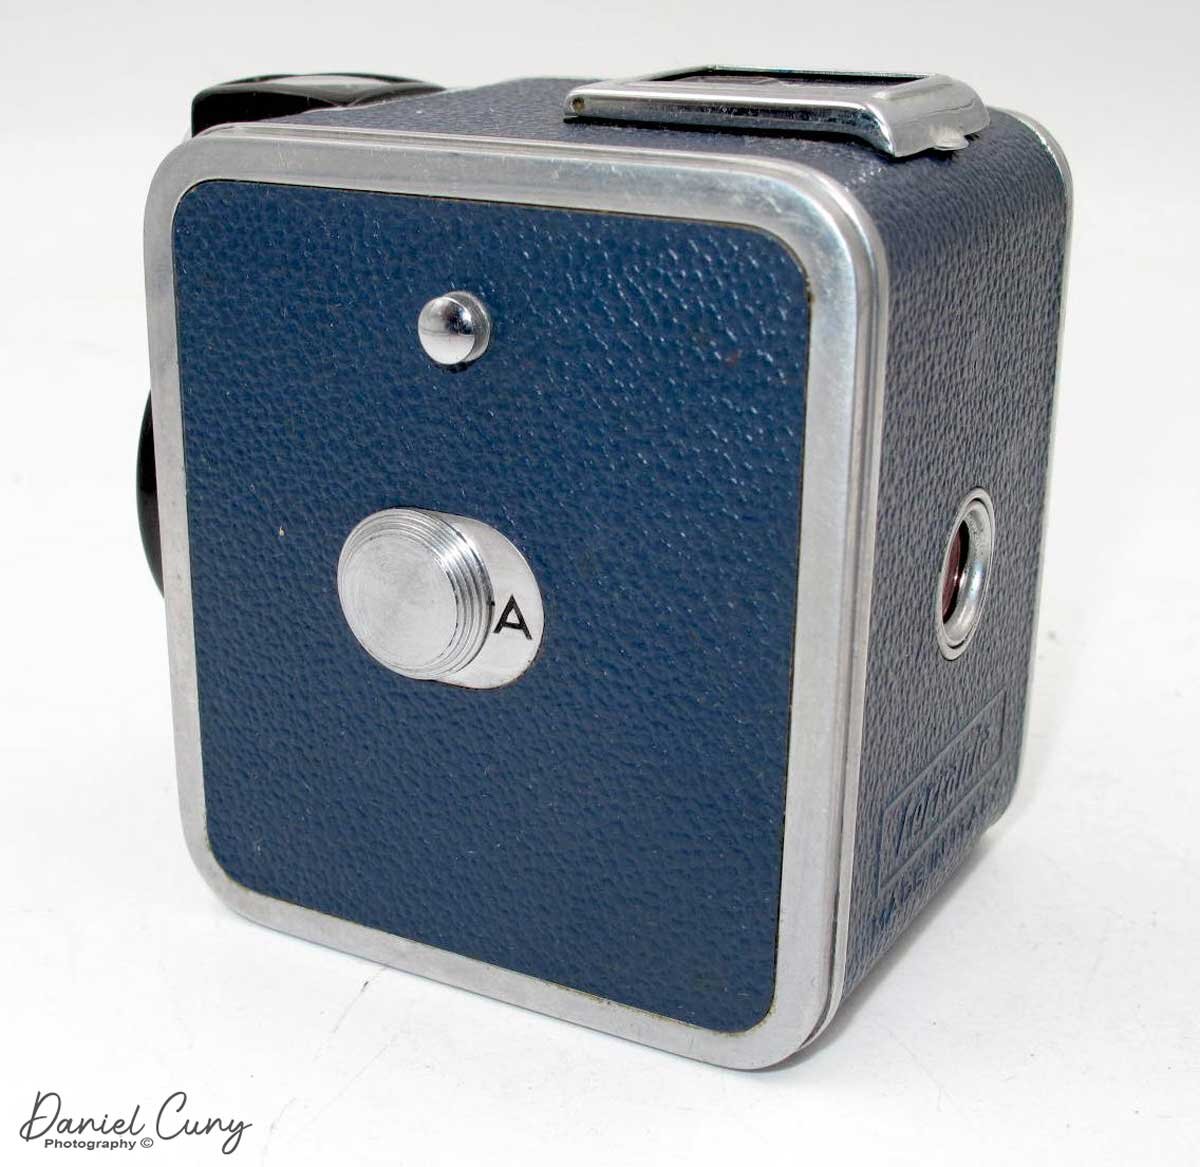
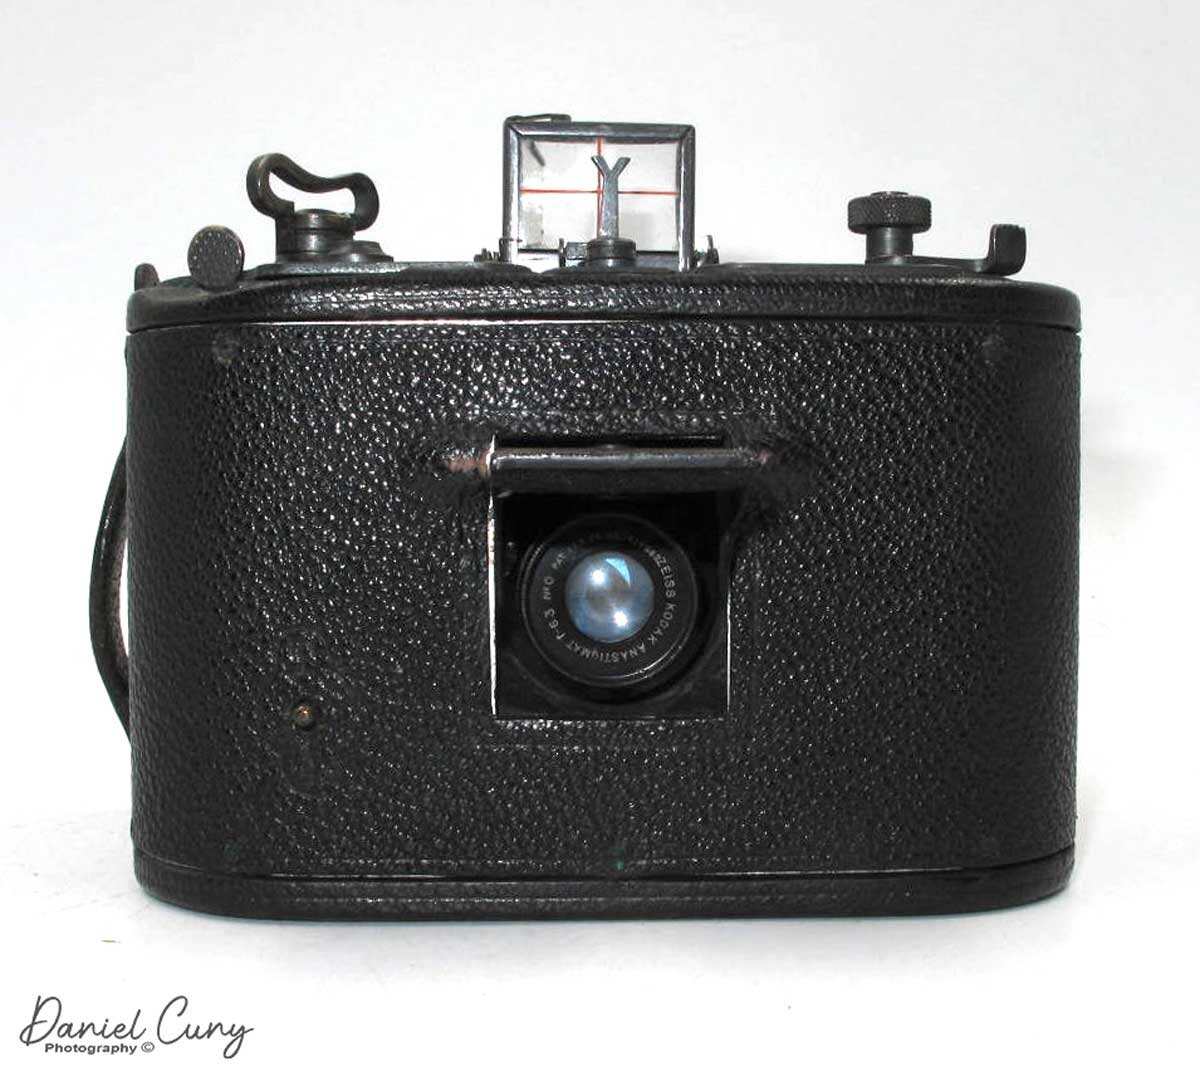
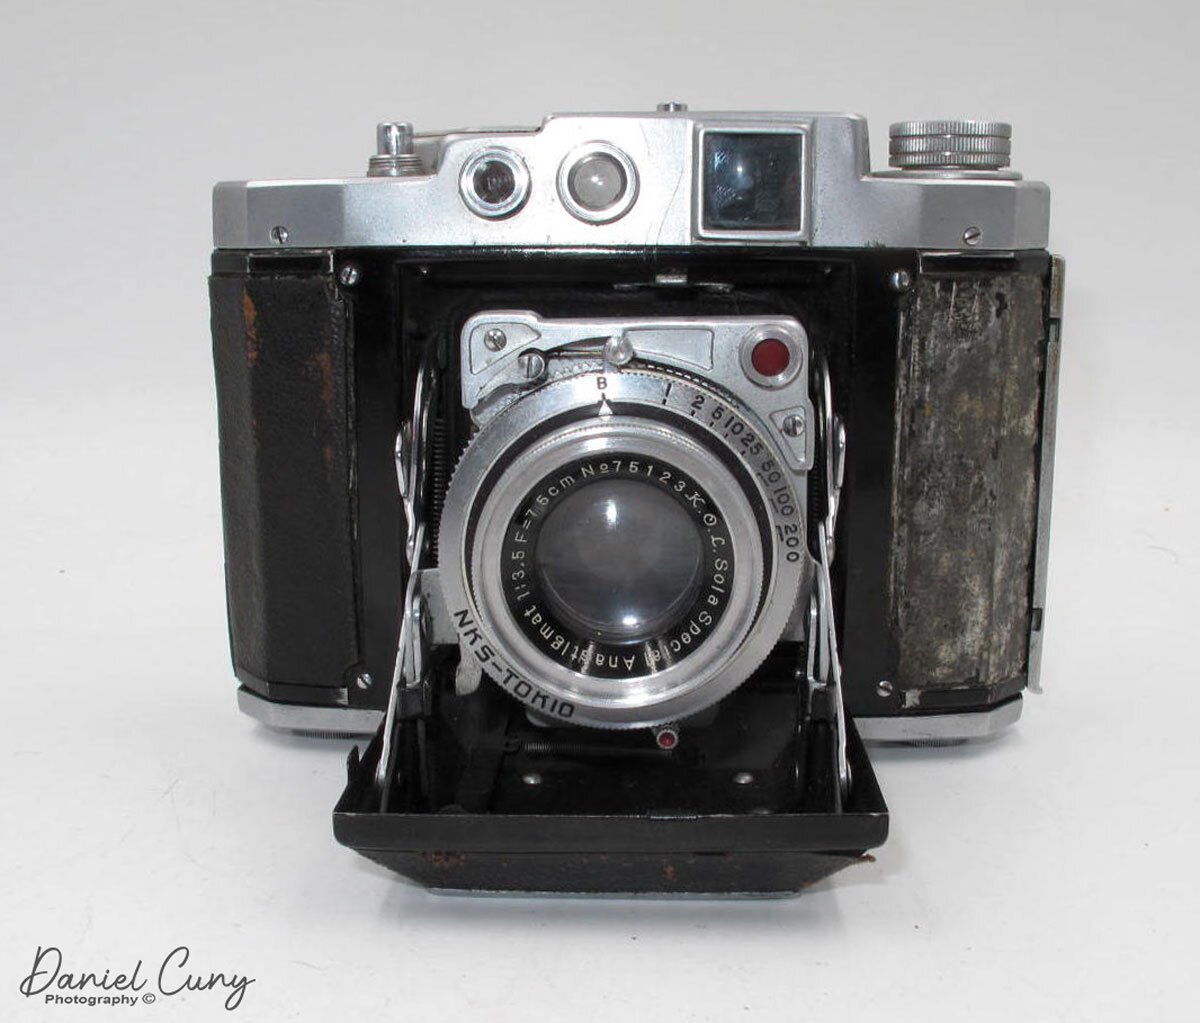
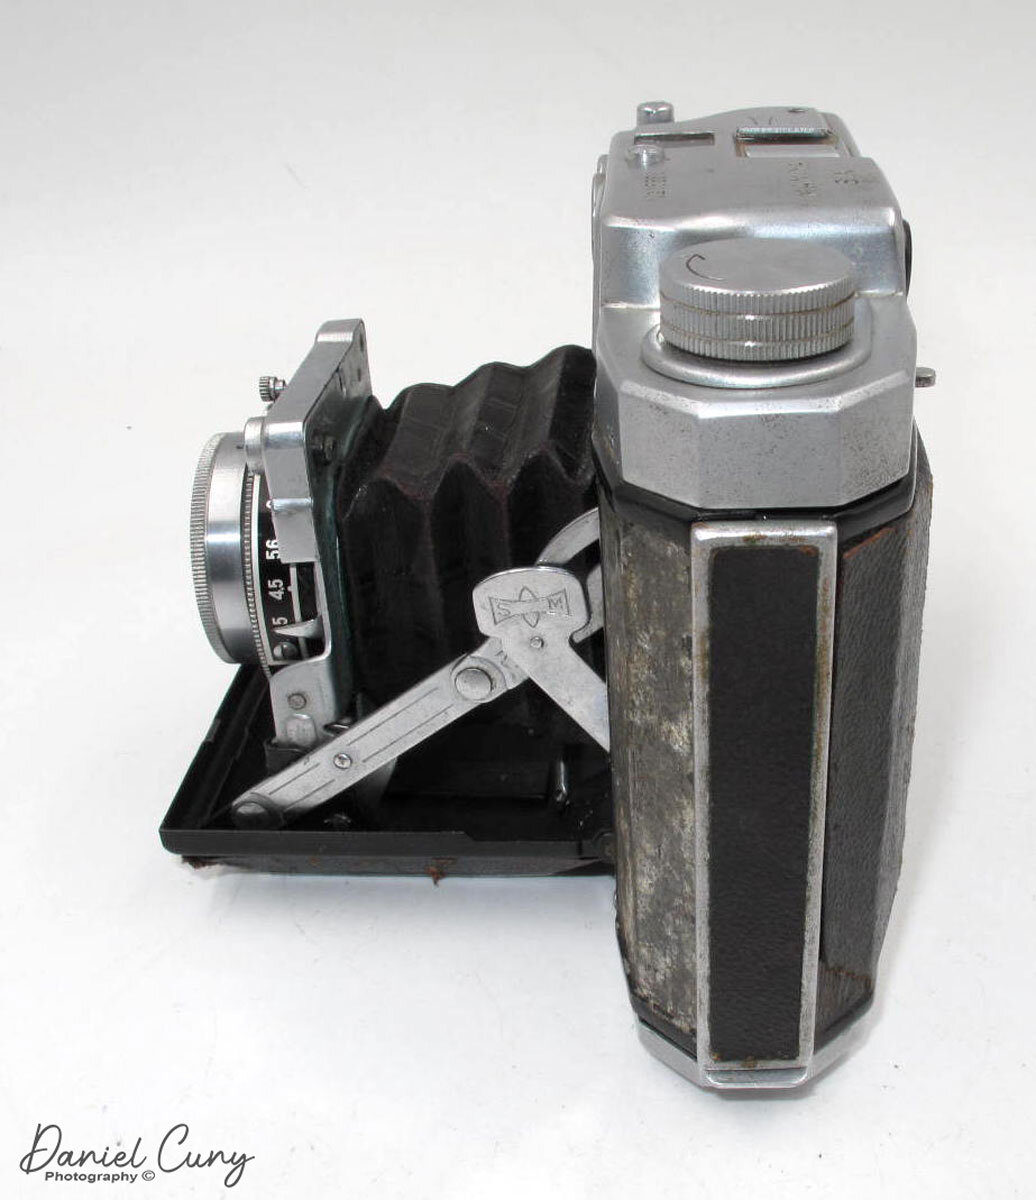
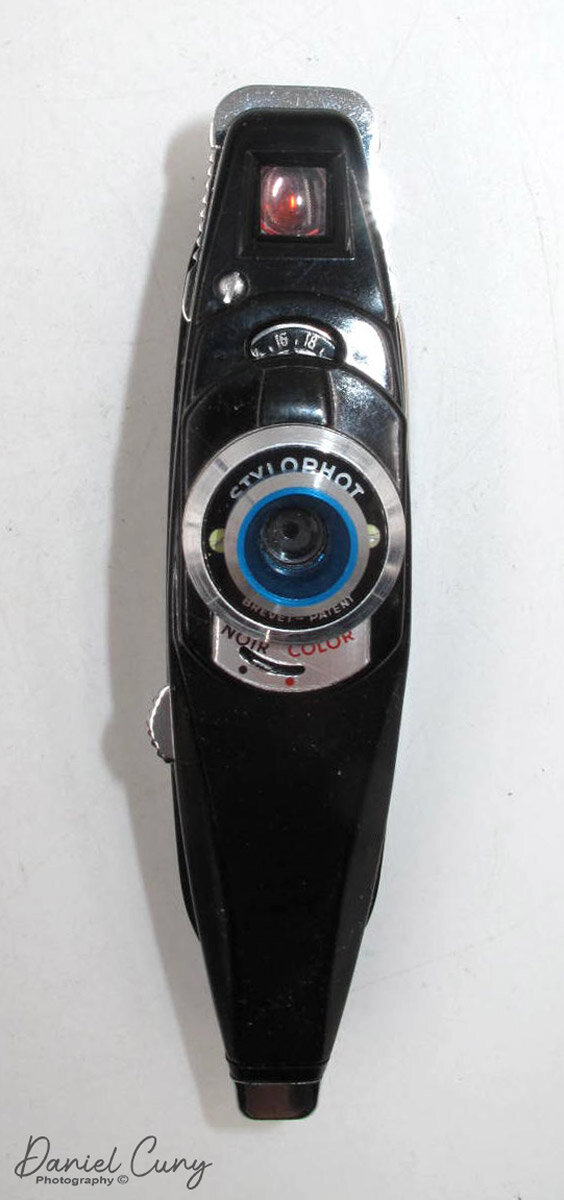
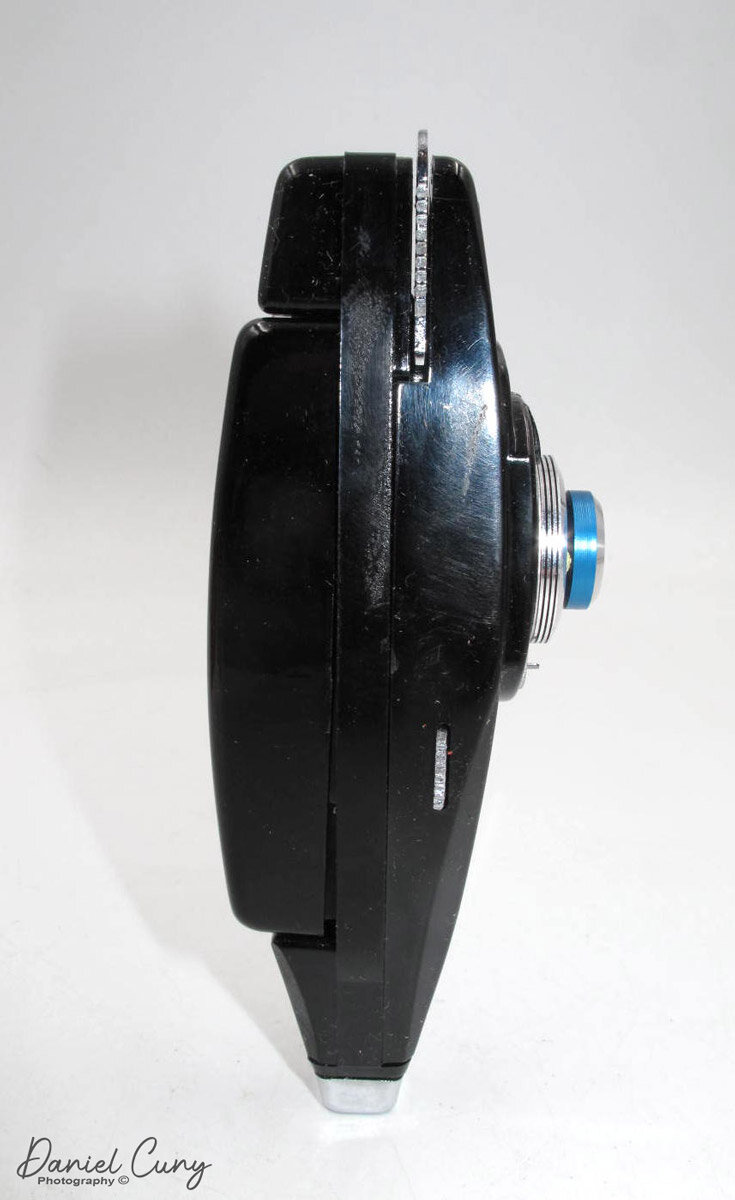
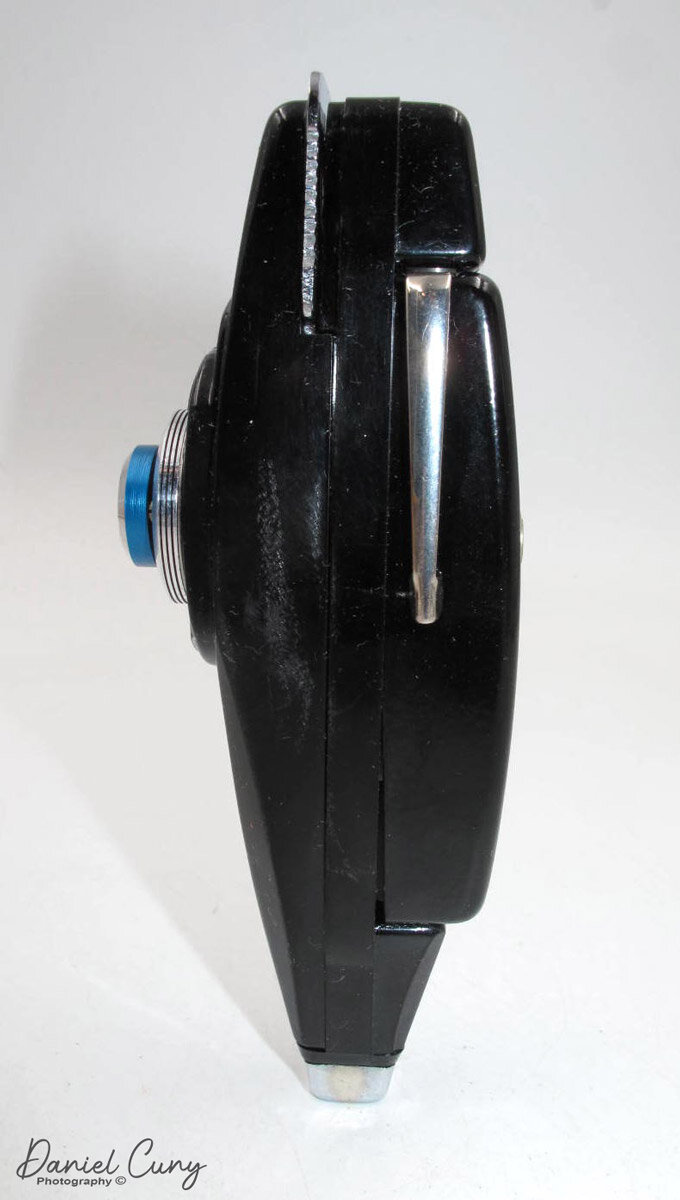
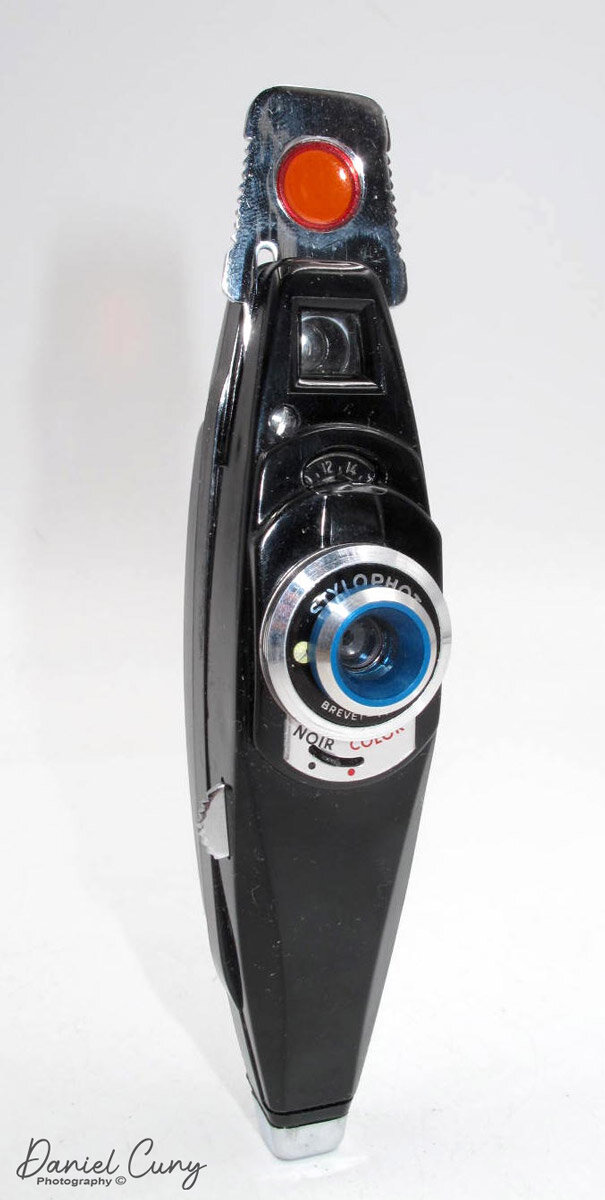
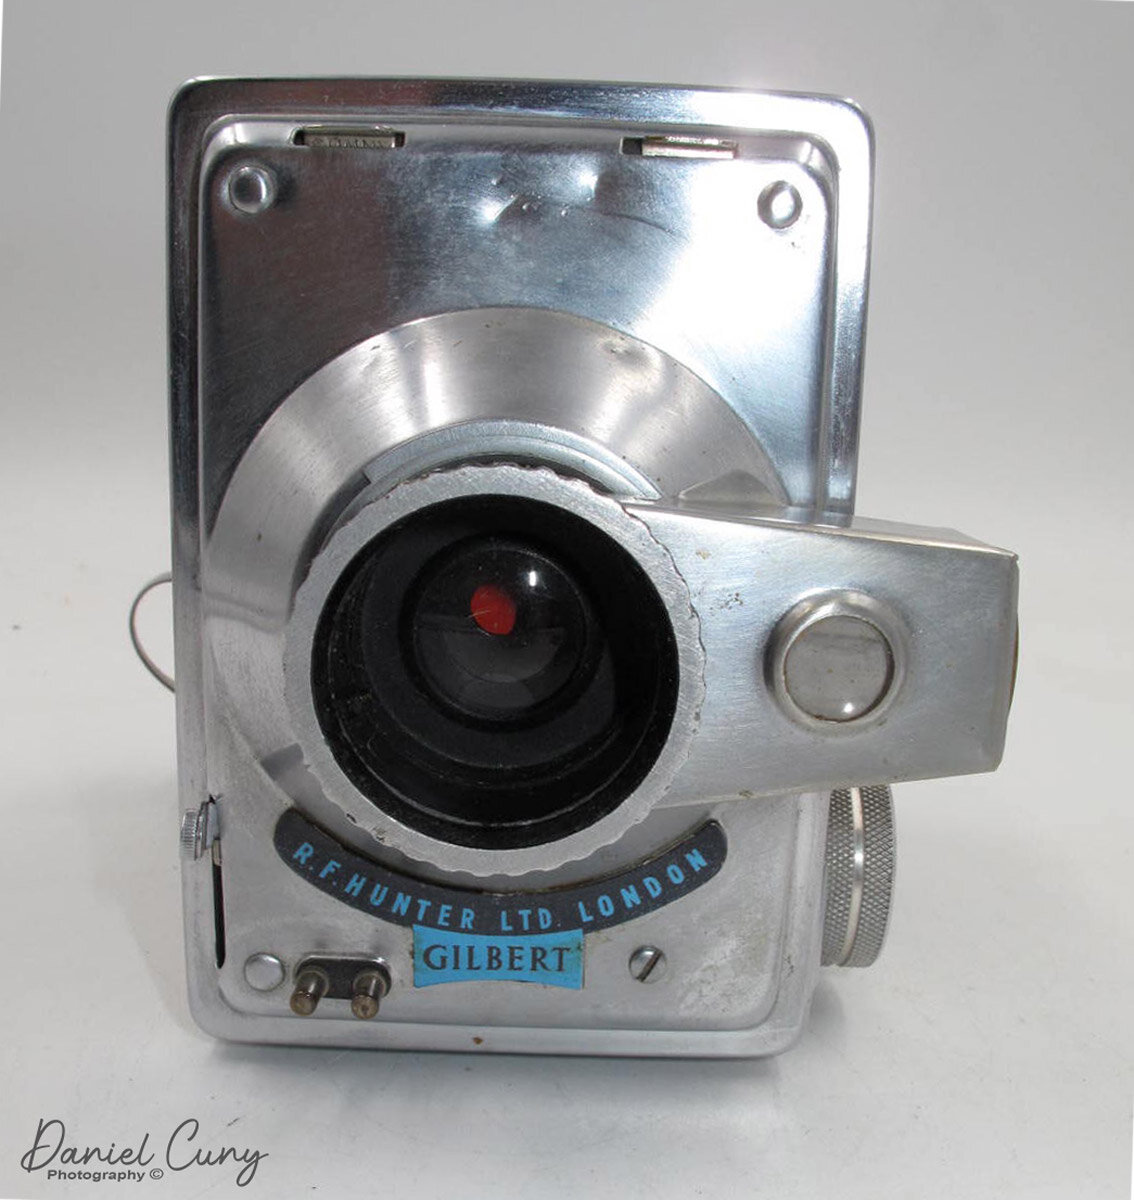
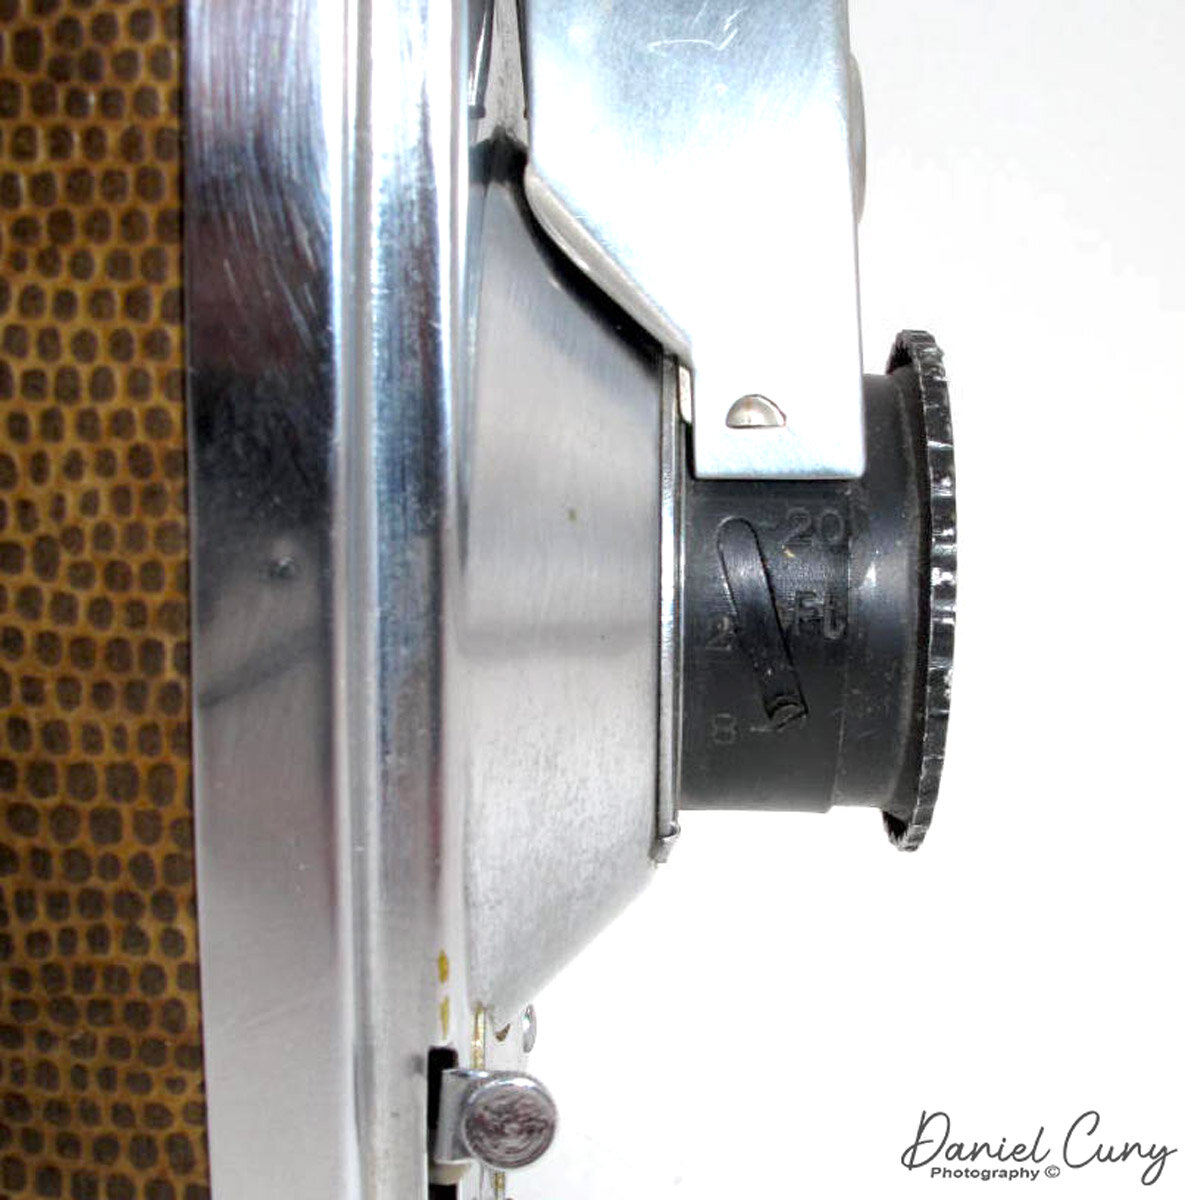
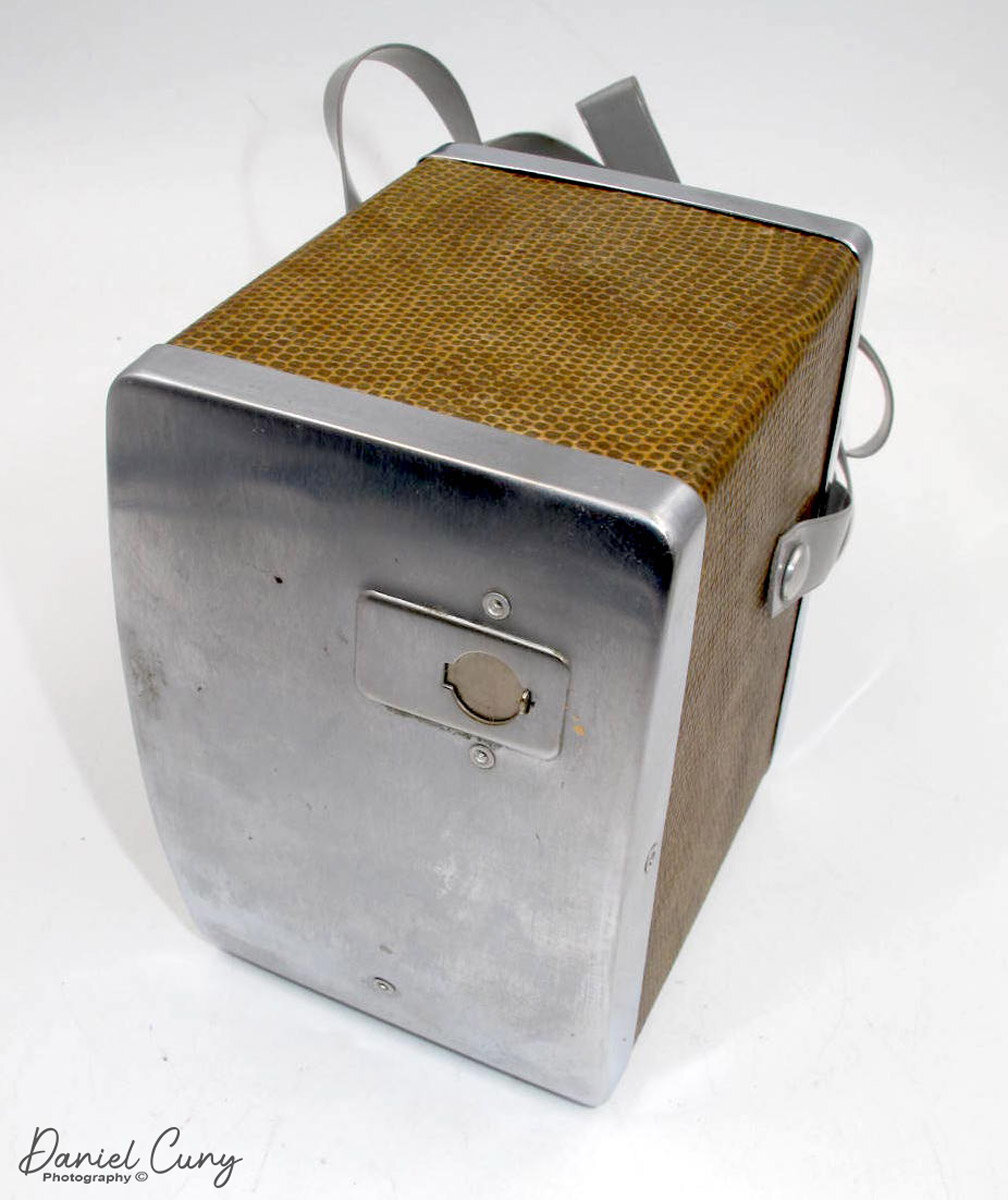
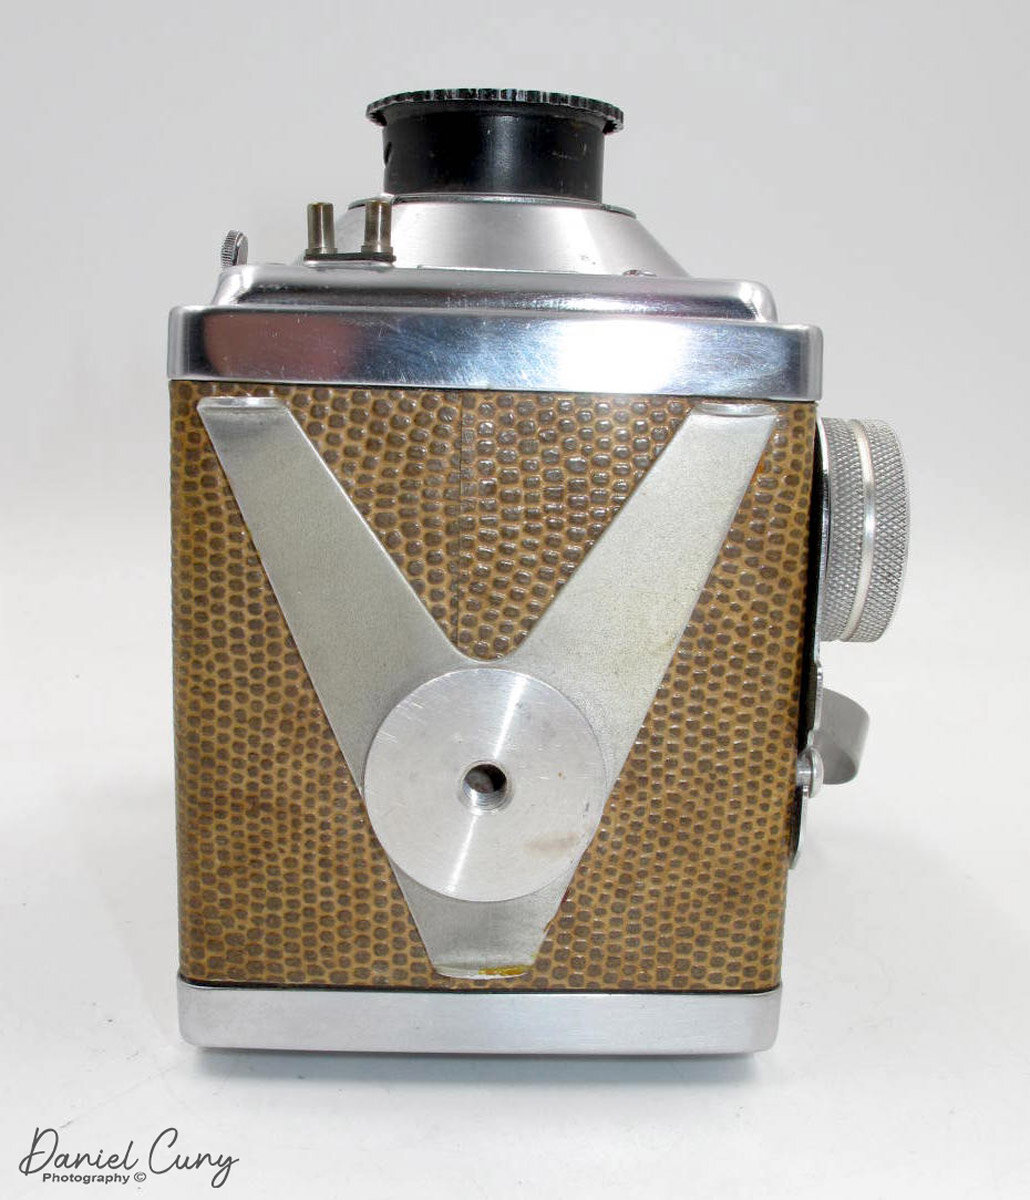
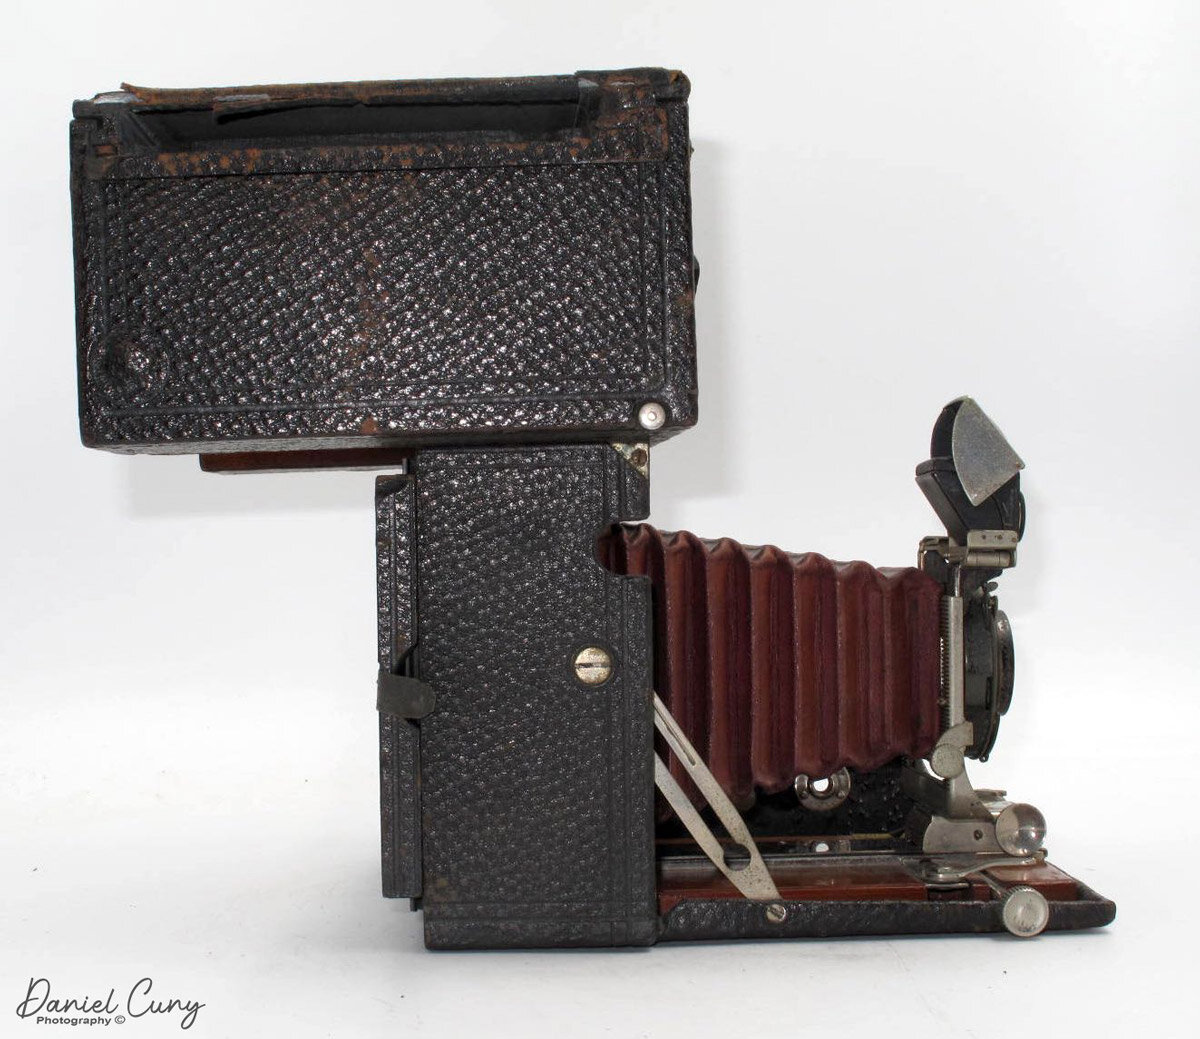
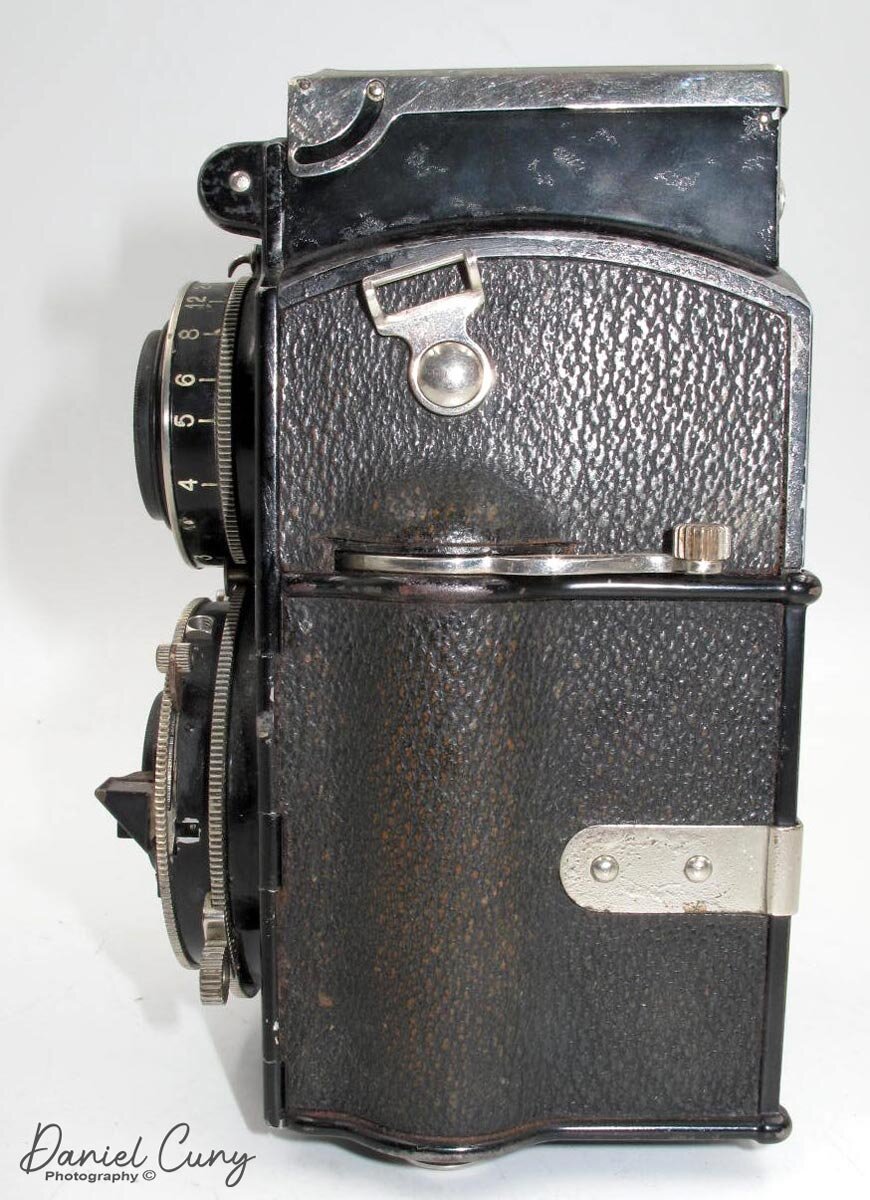
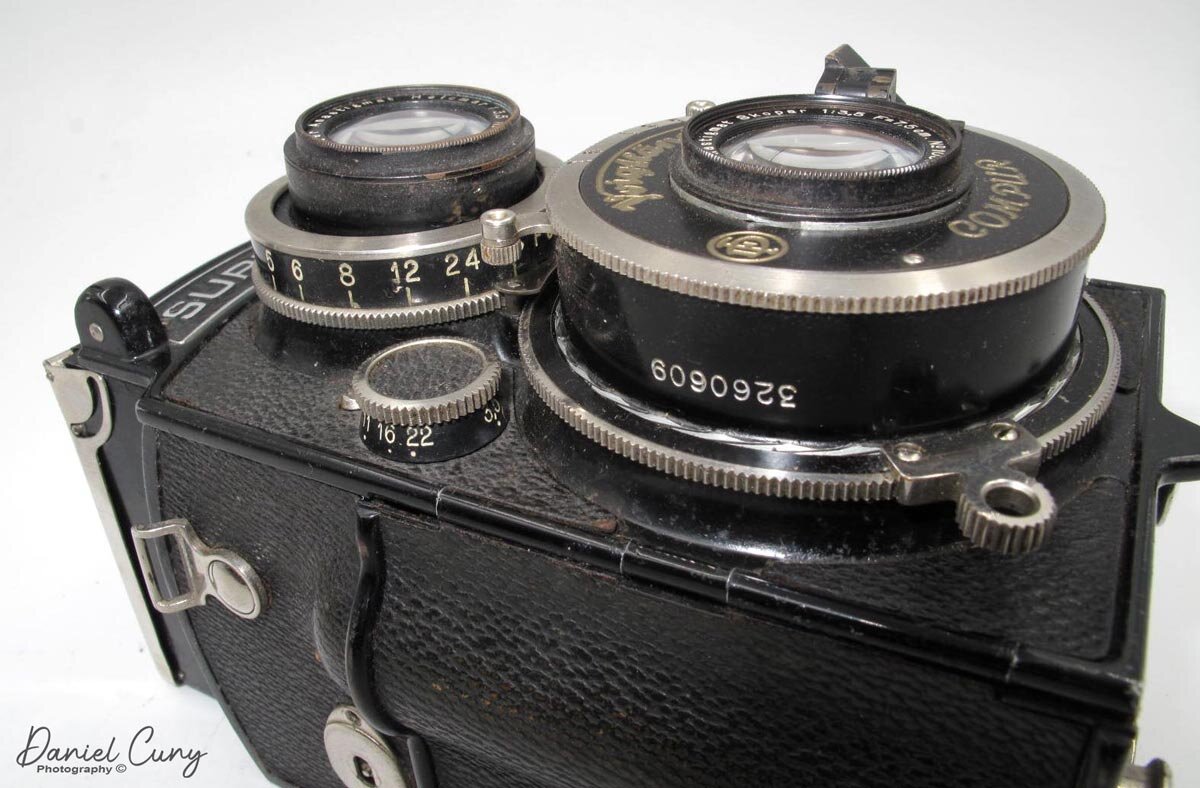
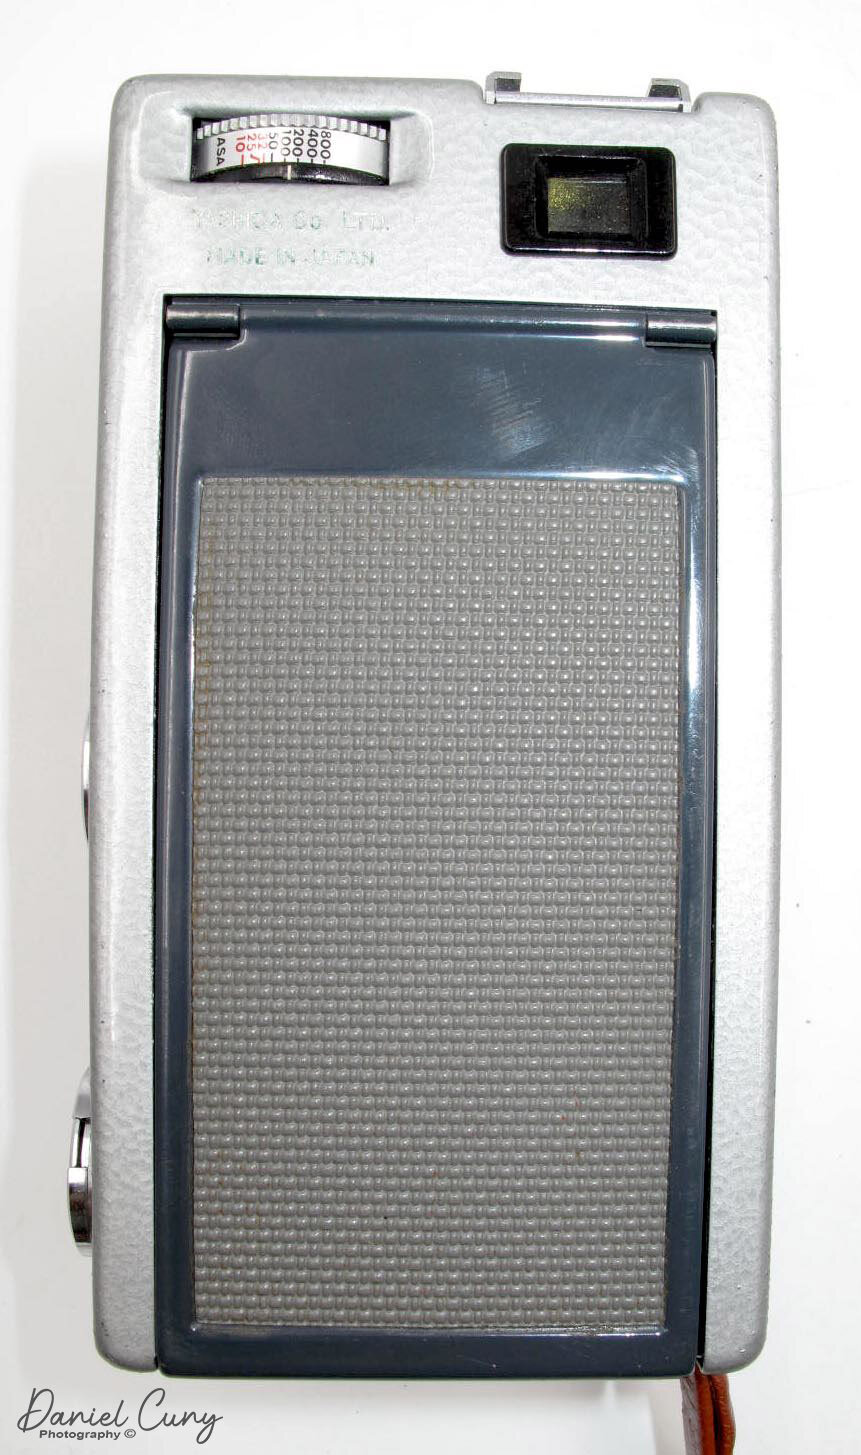
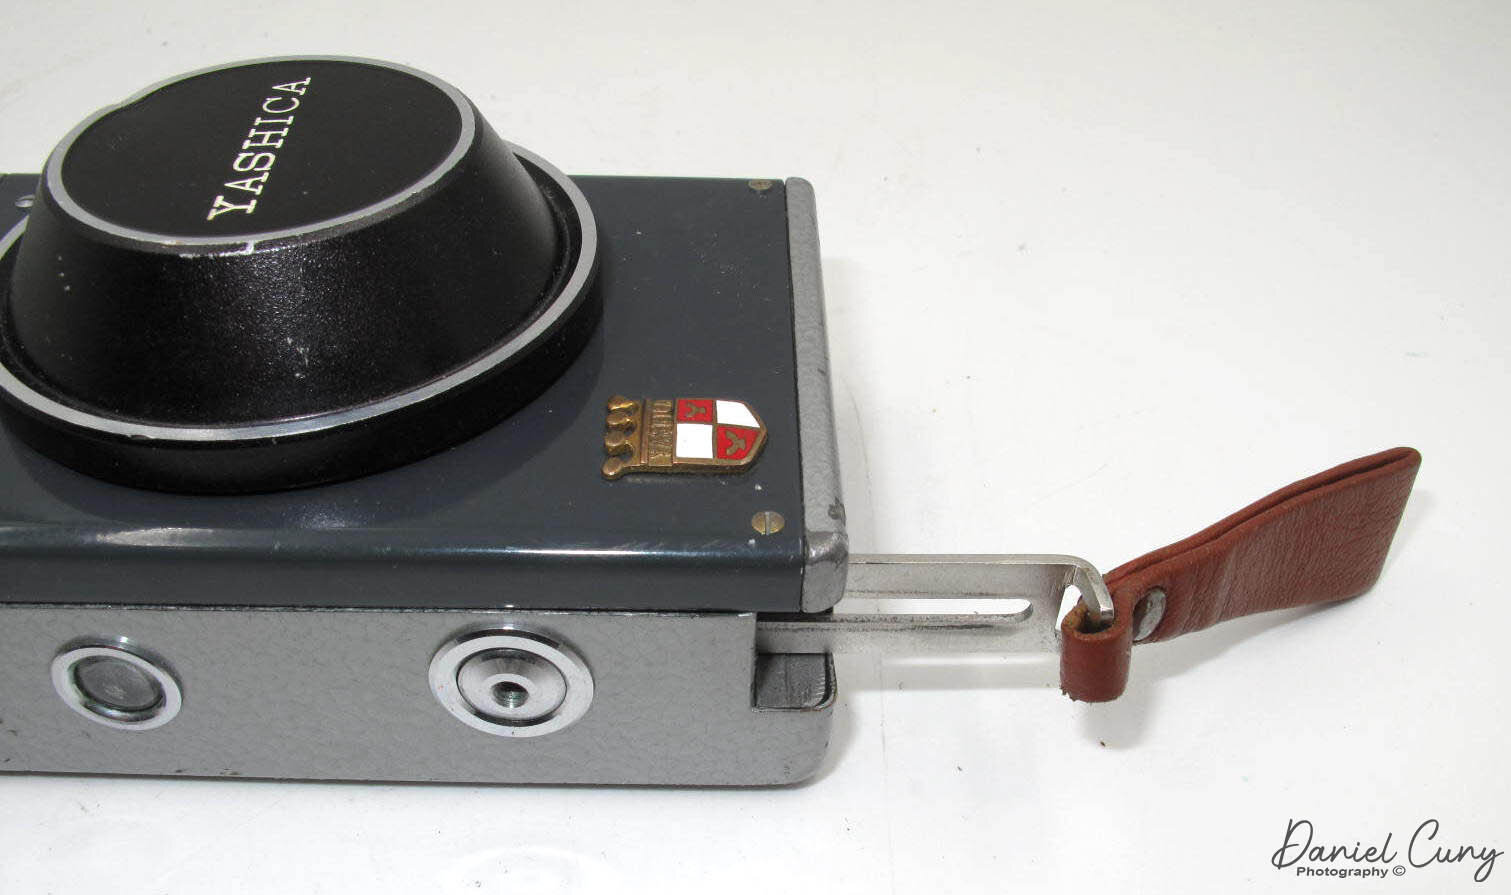
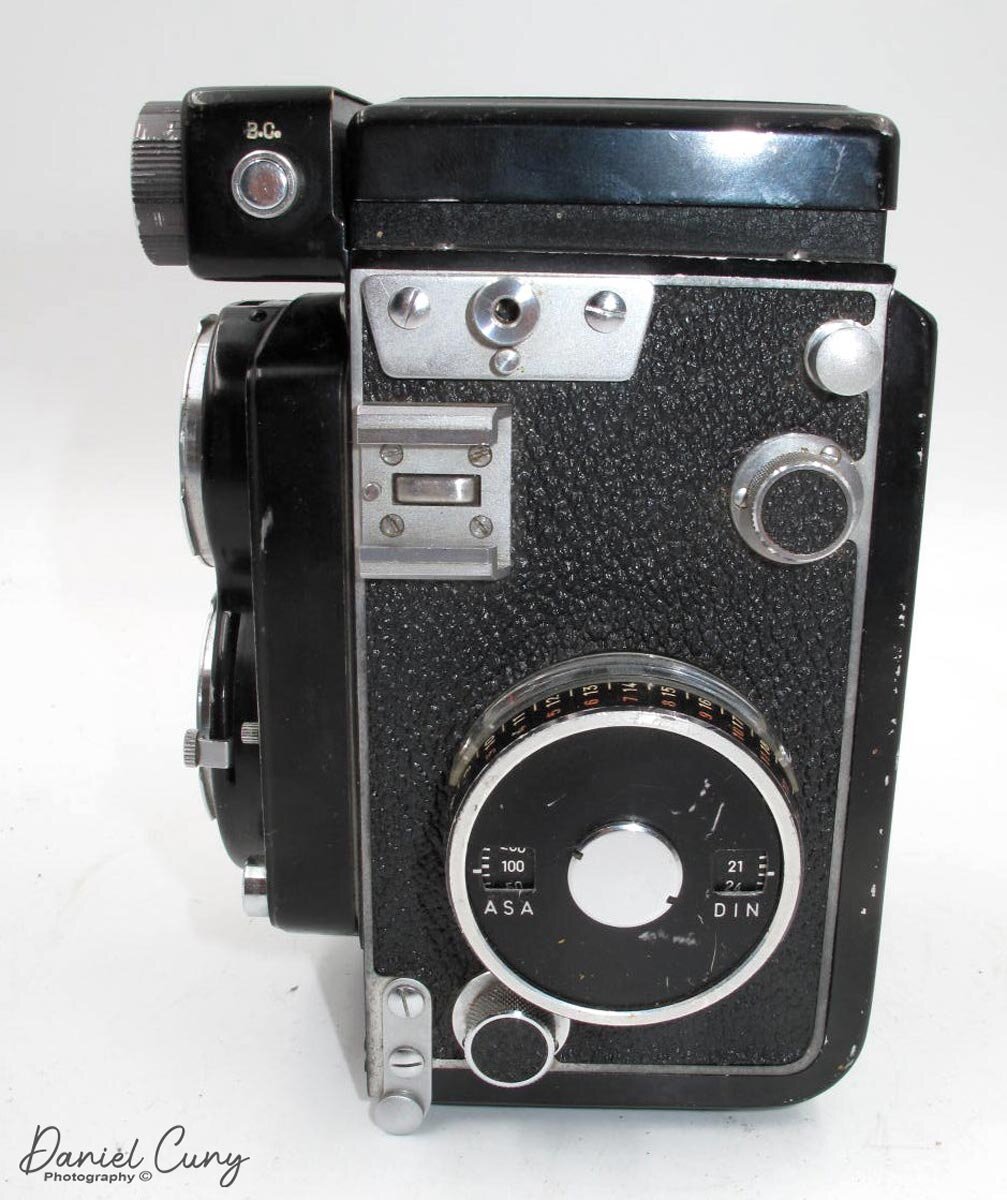
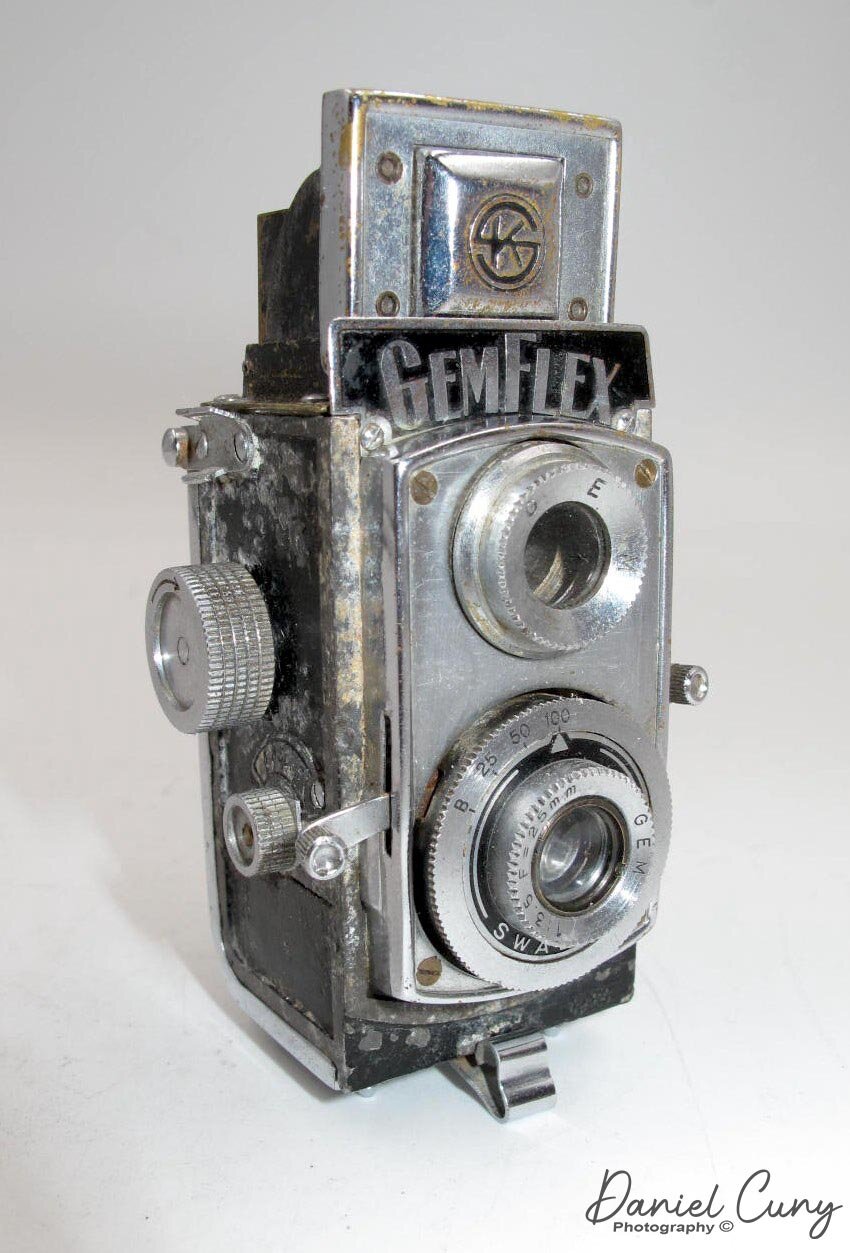
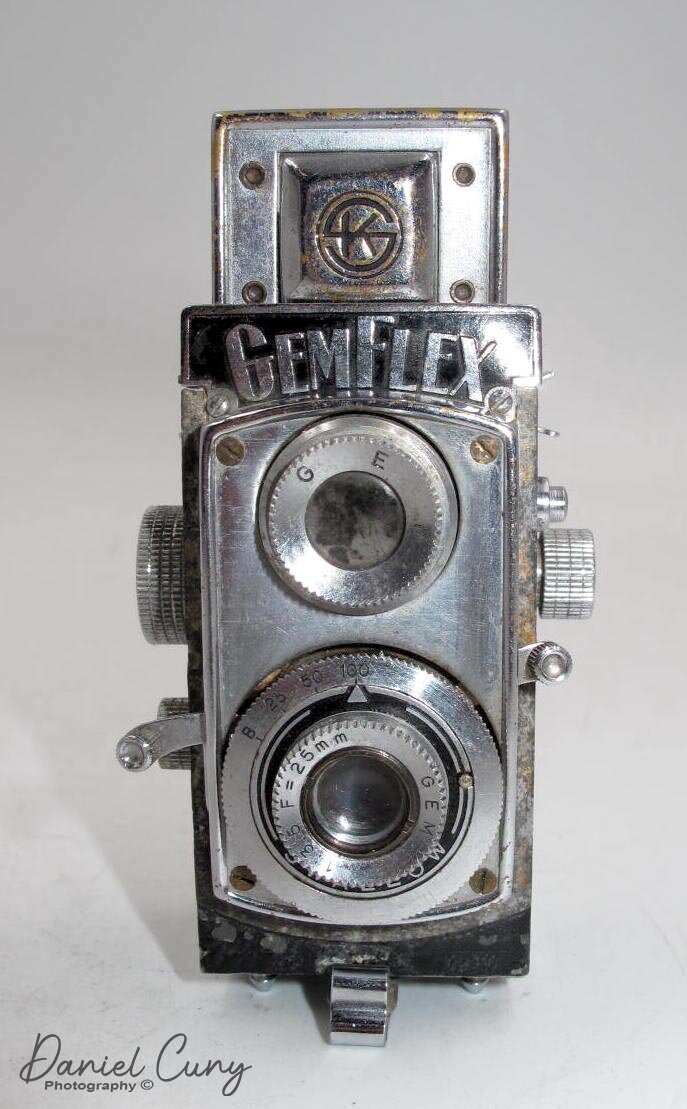
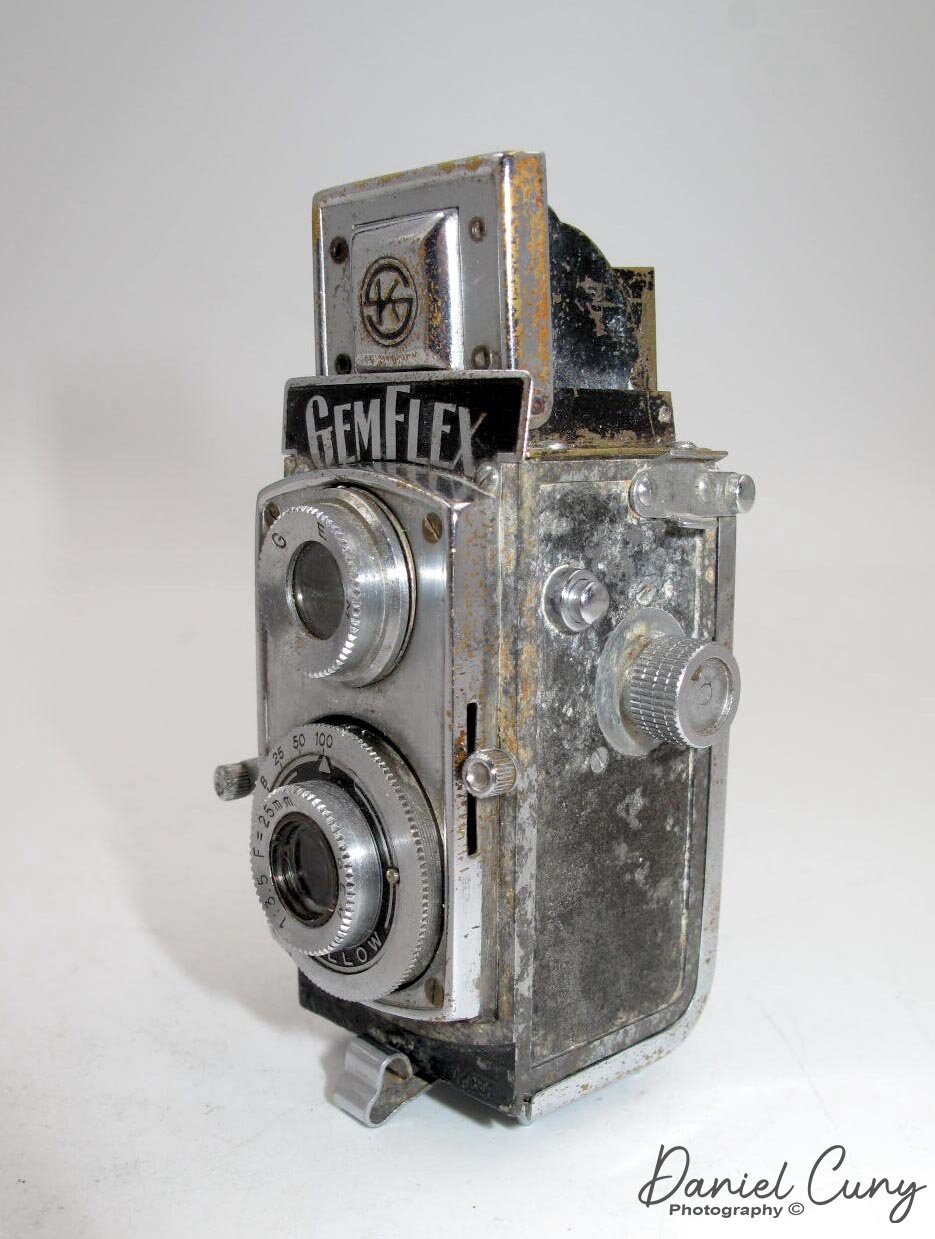
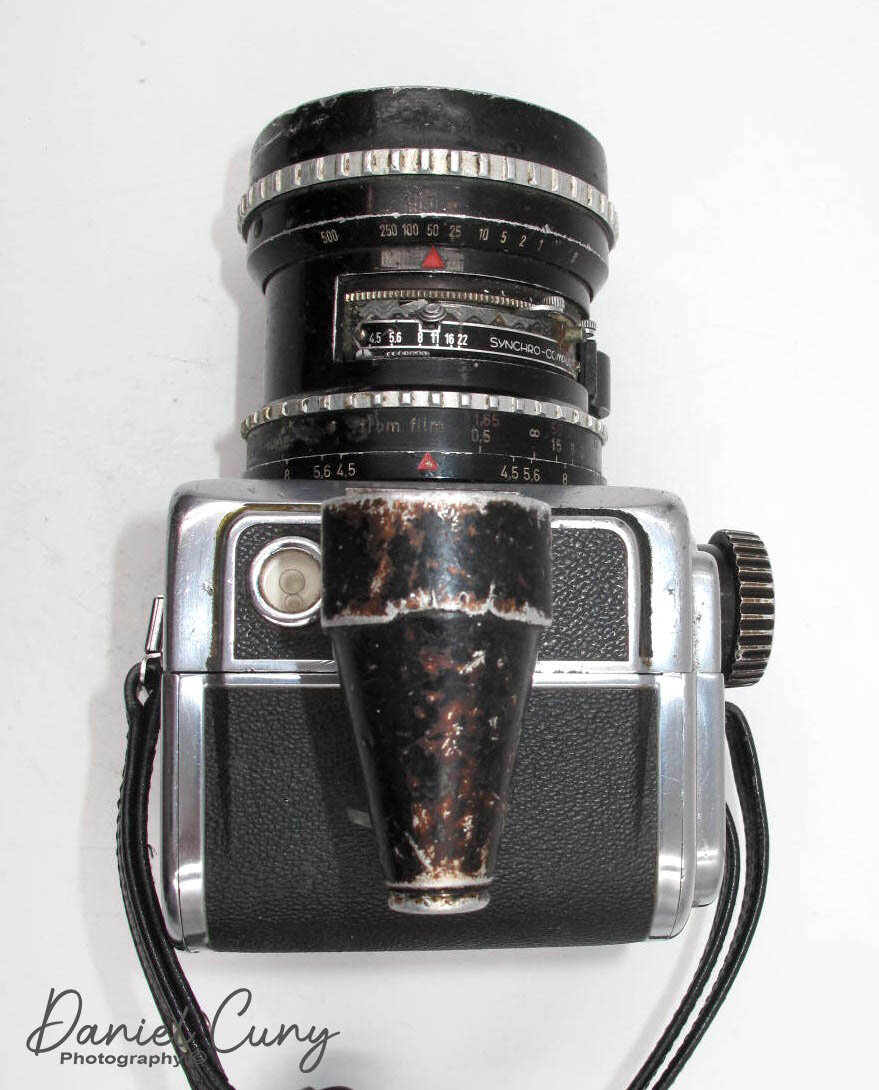
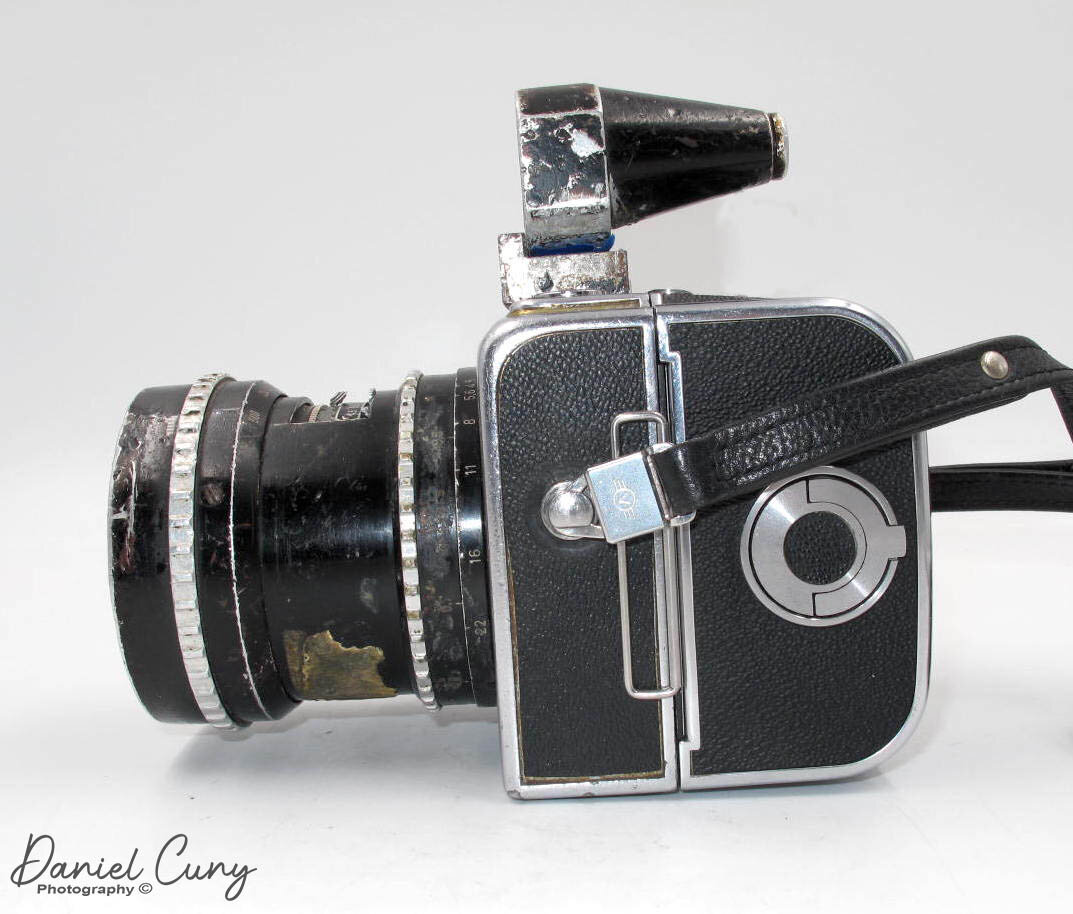
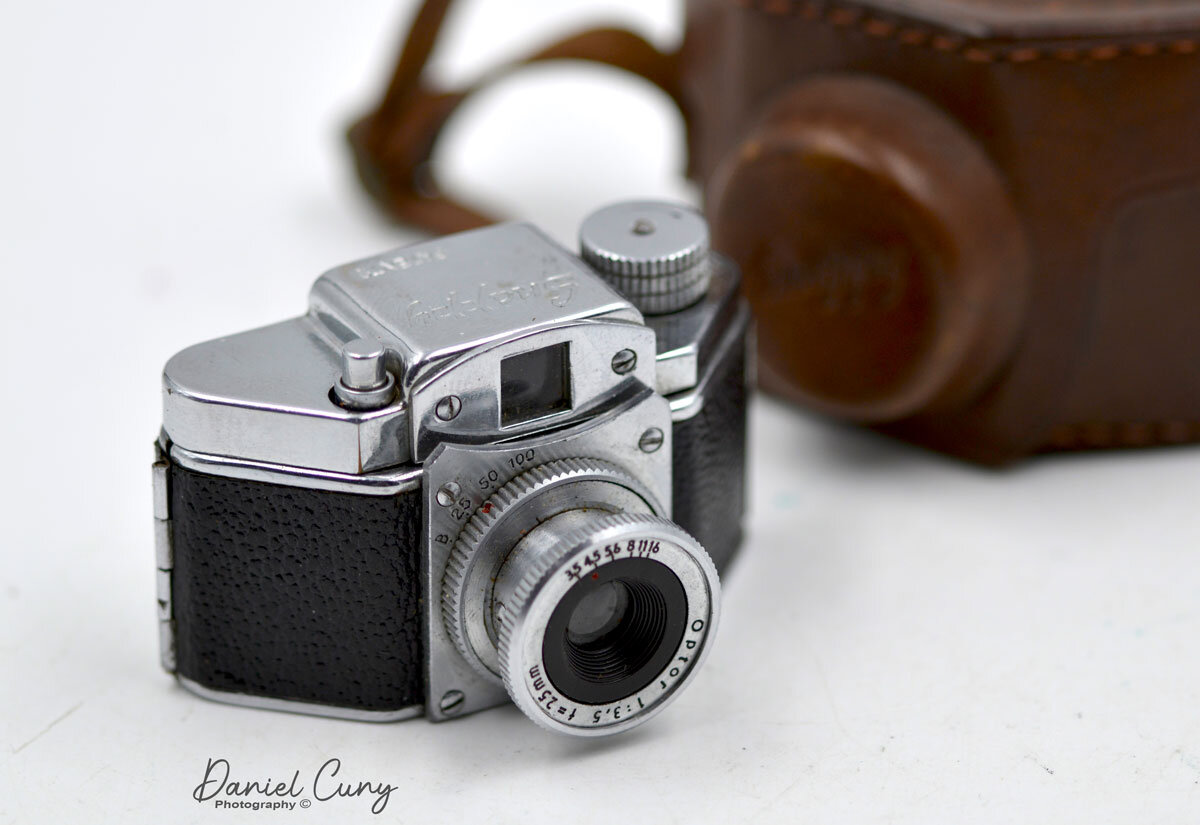
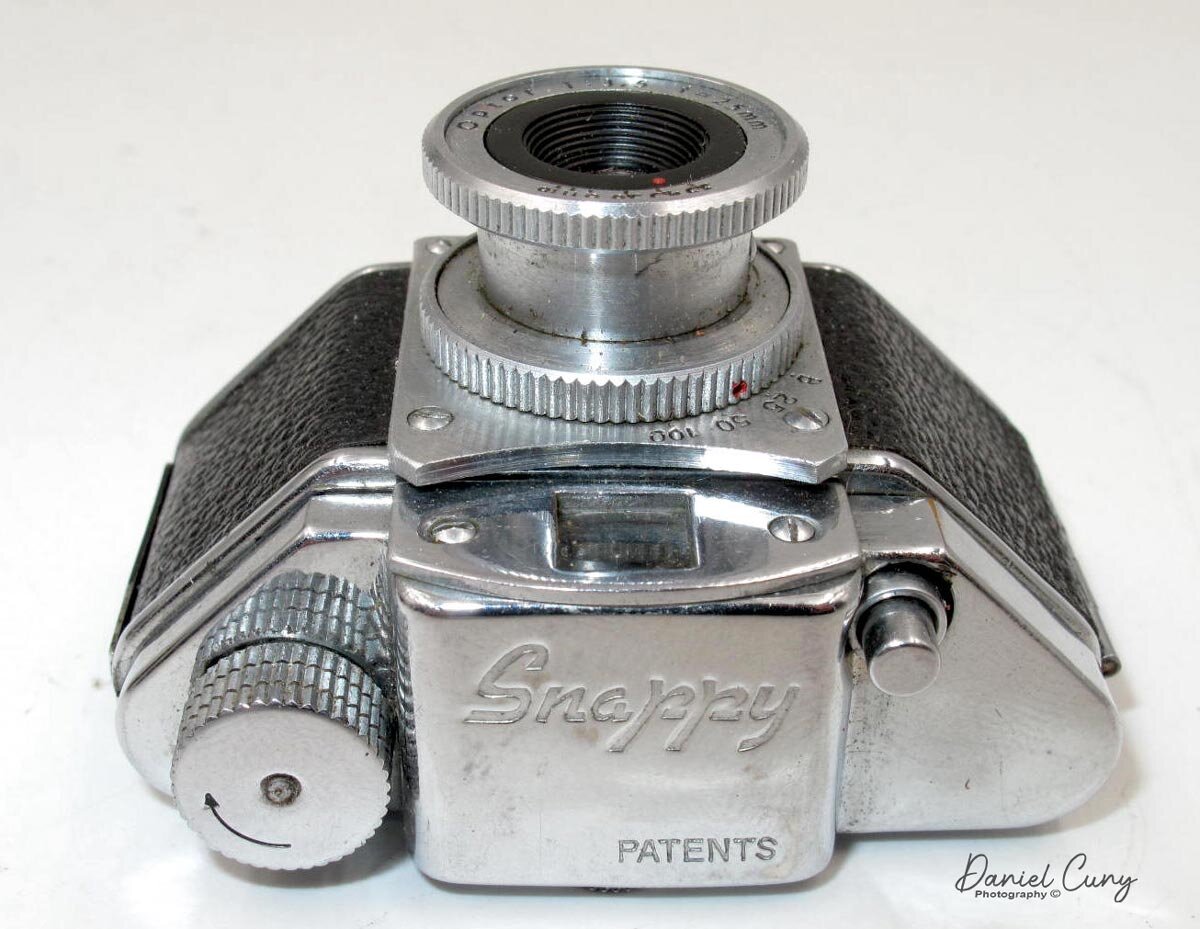
The camera has a trapezoidal-shaped camera that incorporates items seen in 35mm cameras of its time. The camera is a "system" with other lenses and accessories. In form, it reminds me of the VP Exakta, model B, which I wrote about in an earlier post, only considerably smaller. The camera measures 2.5" wide by 1 5/8" deep and 1.5" tall and weighs 5 oz. with a very sturdy and well-built leather case.

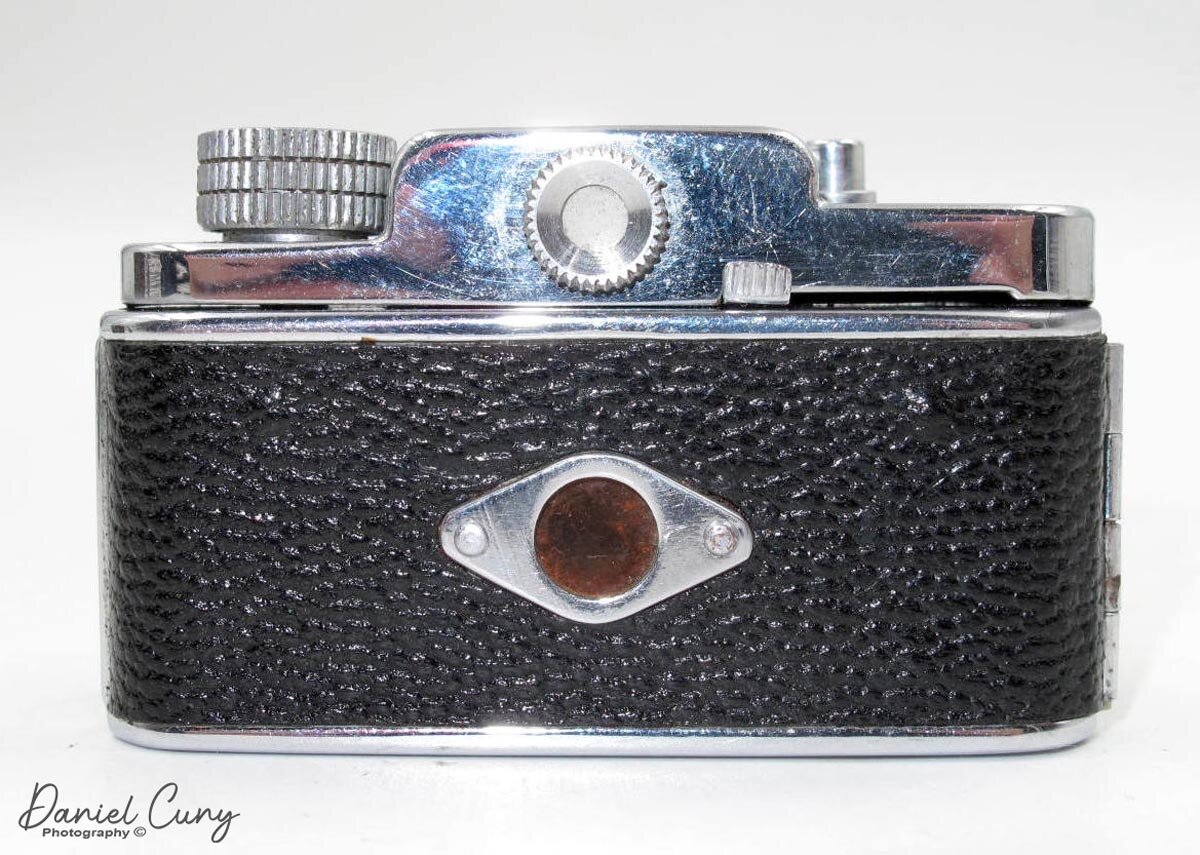
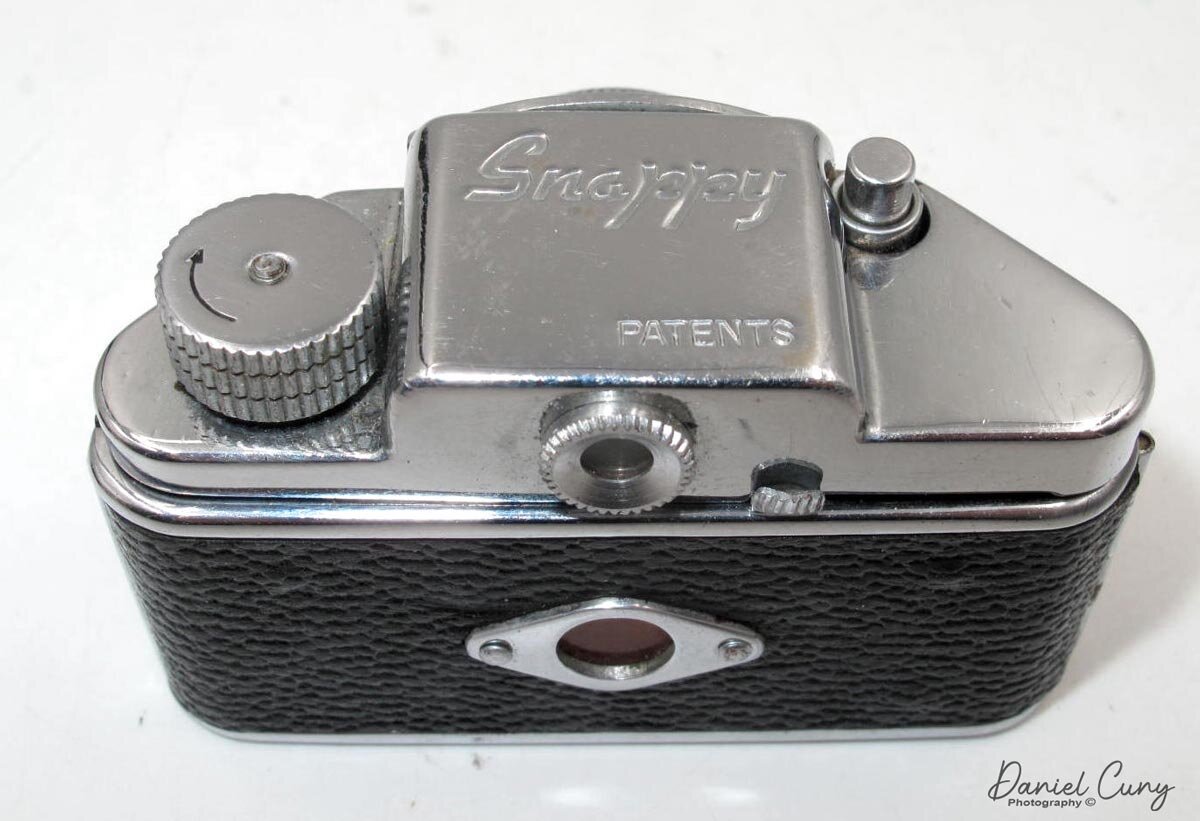
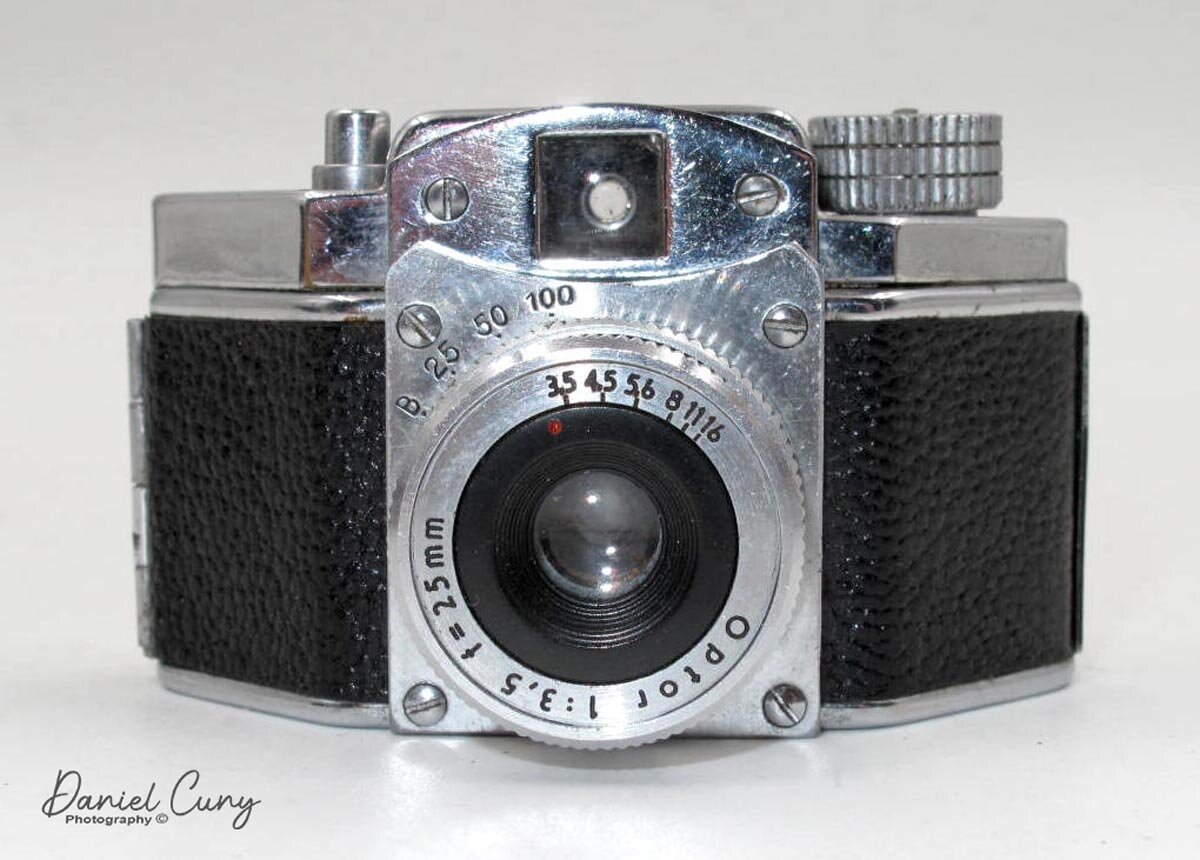
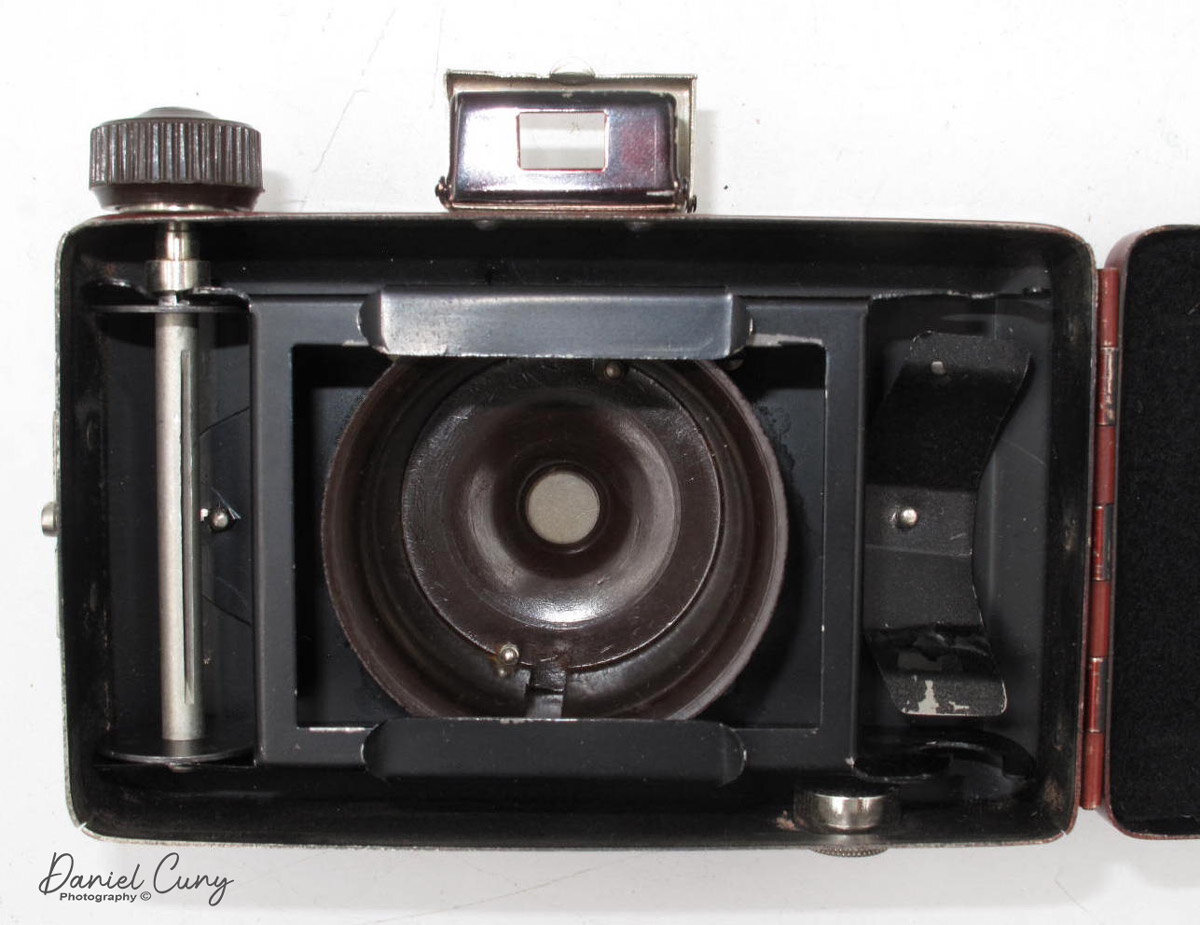
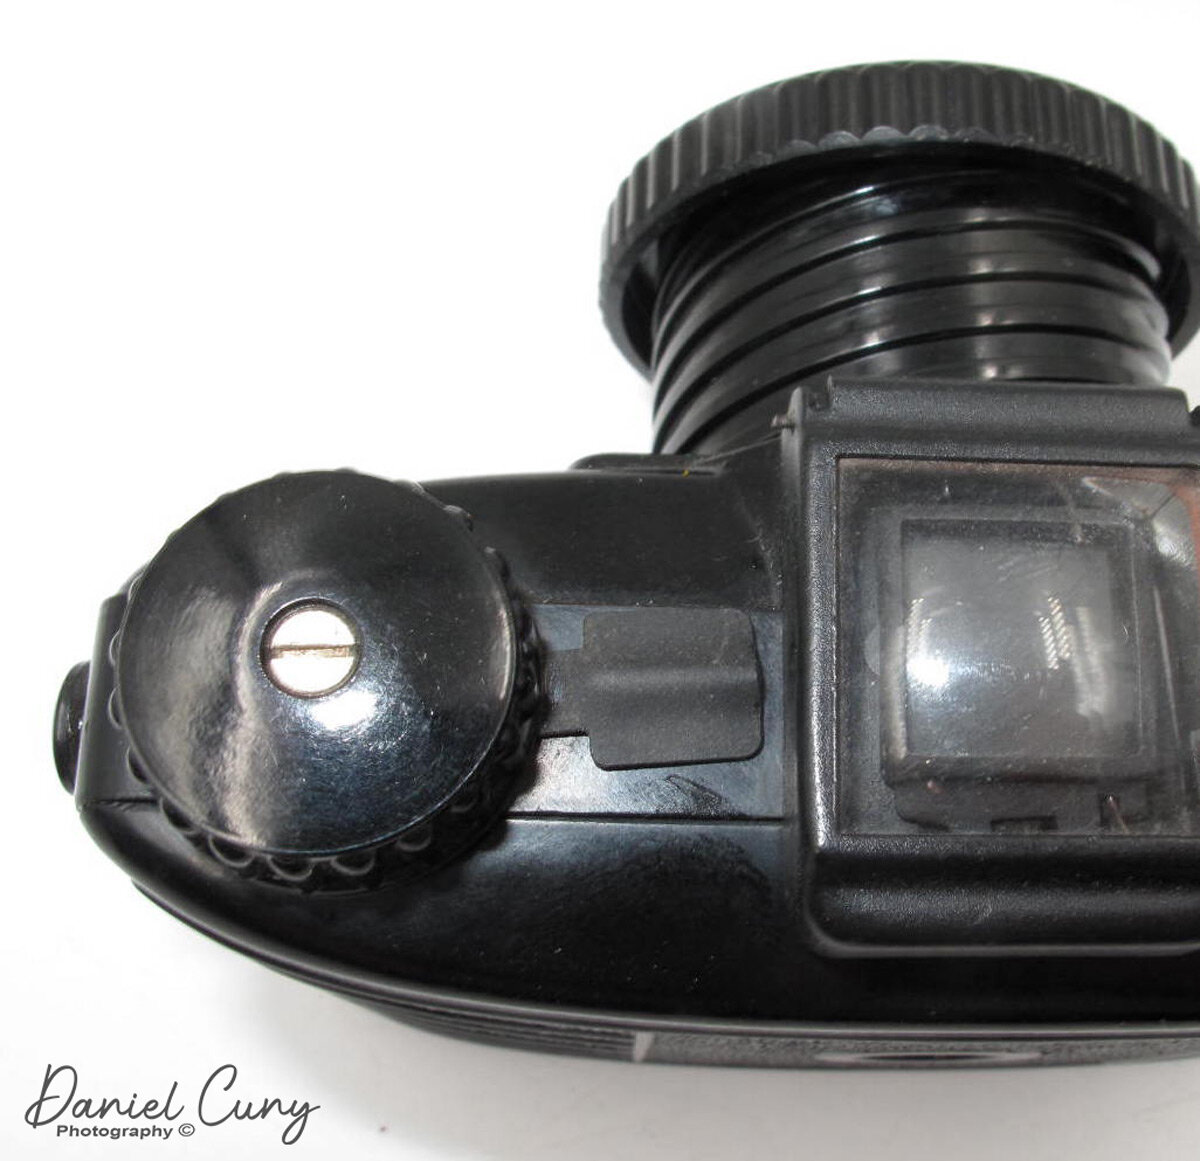
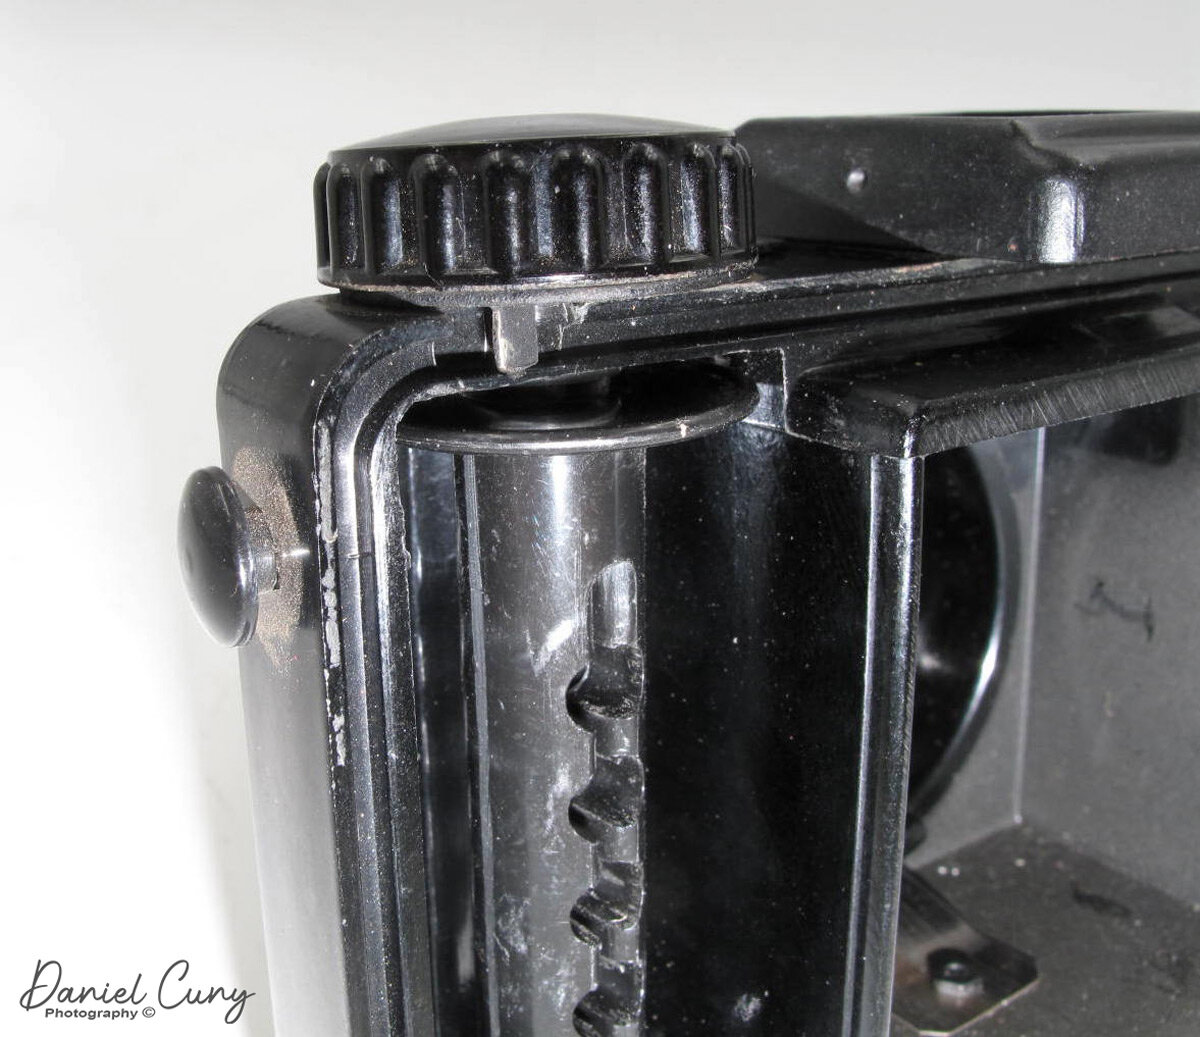
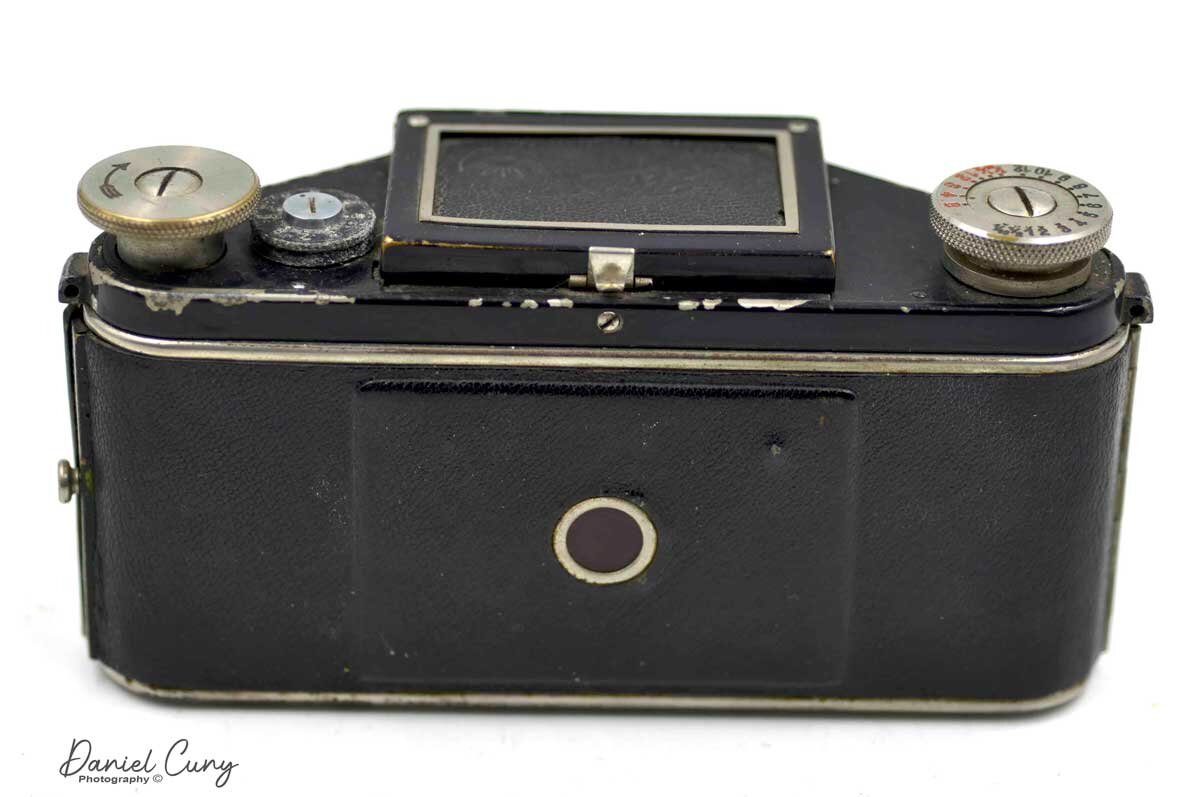
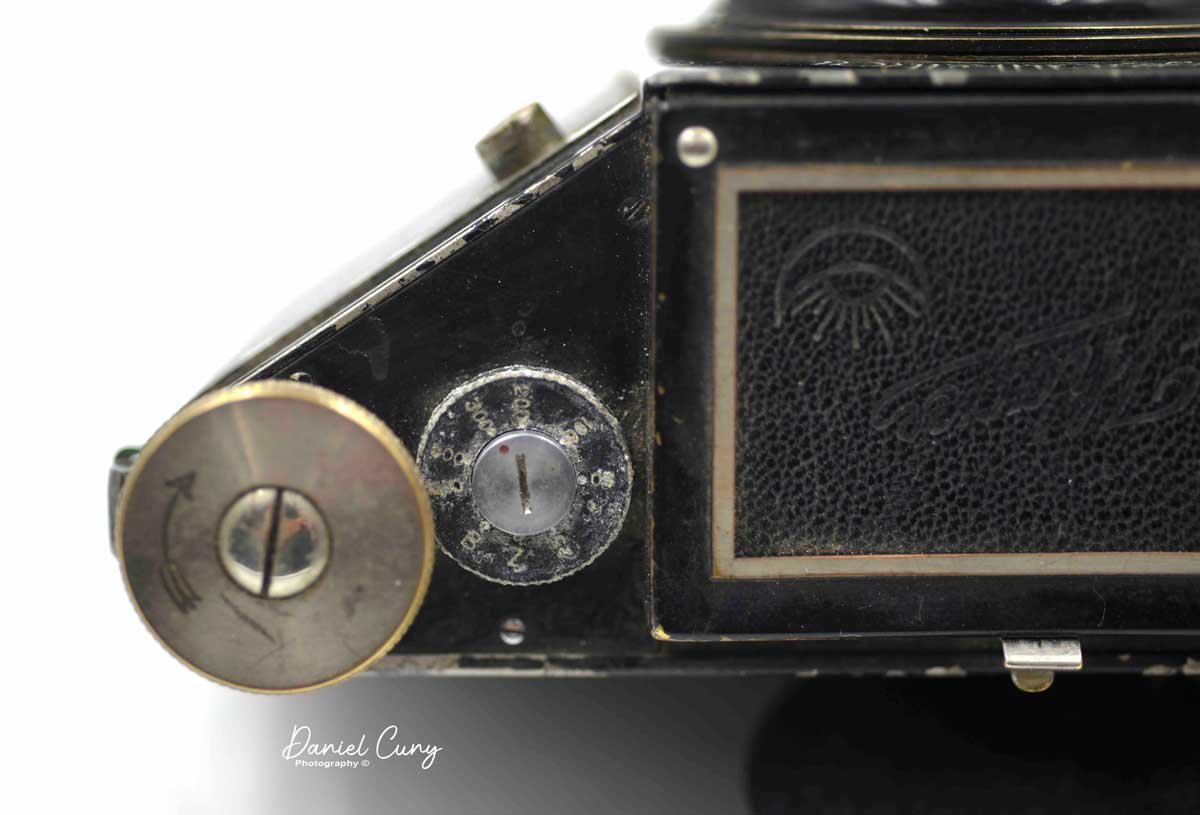
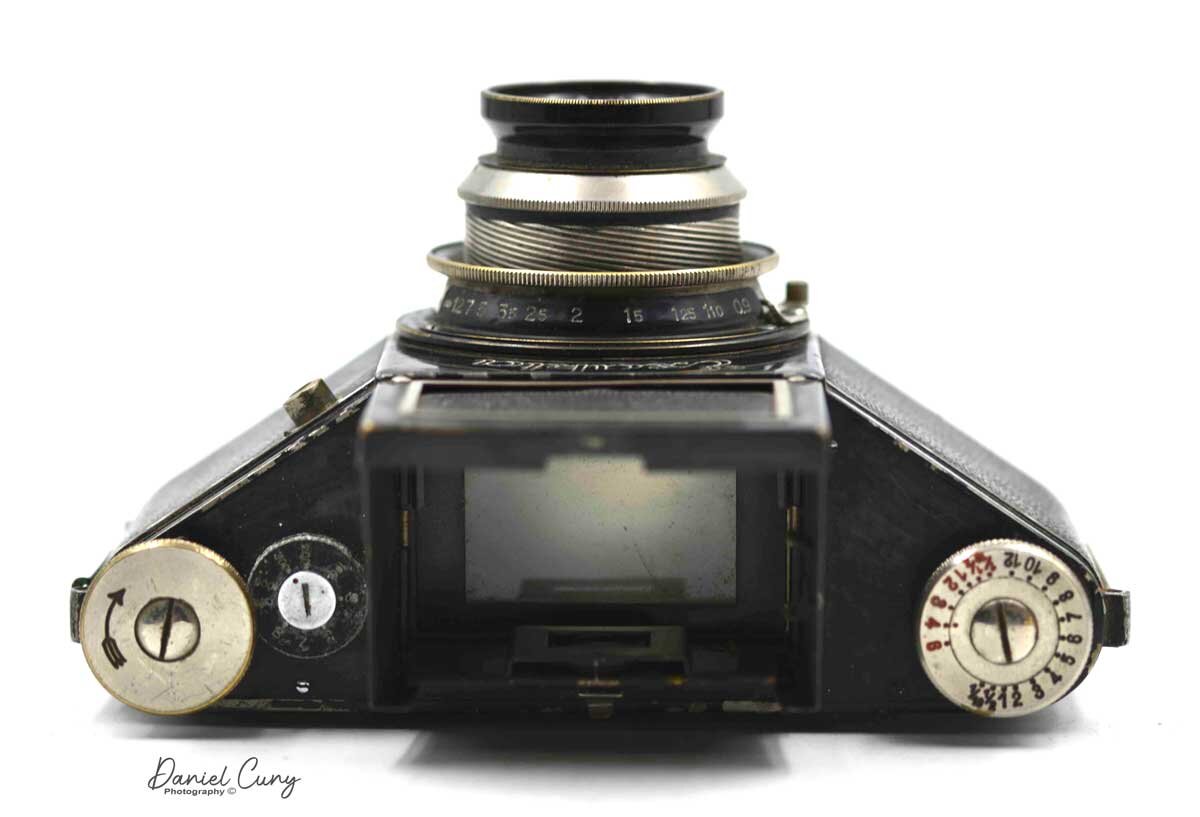
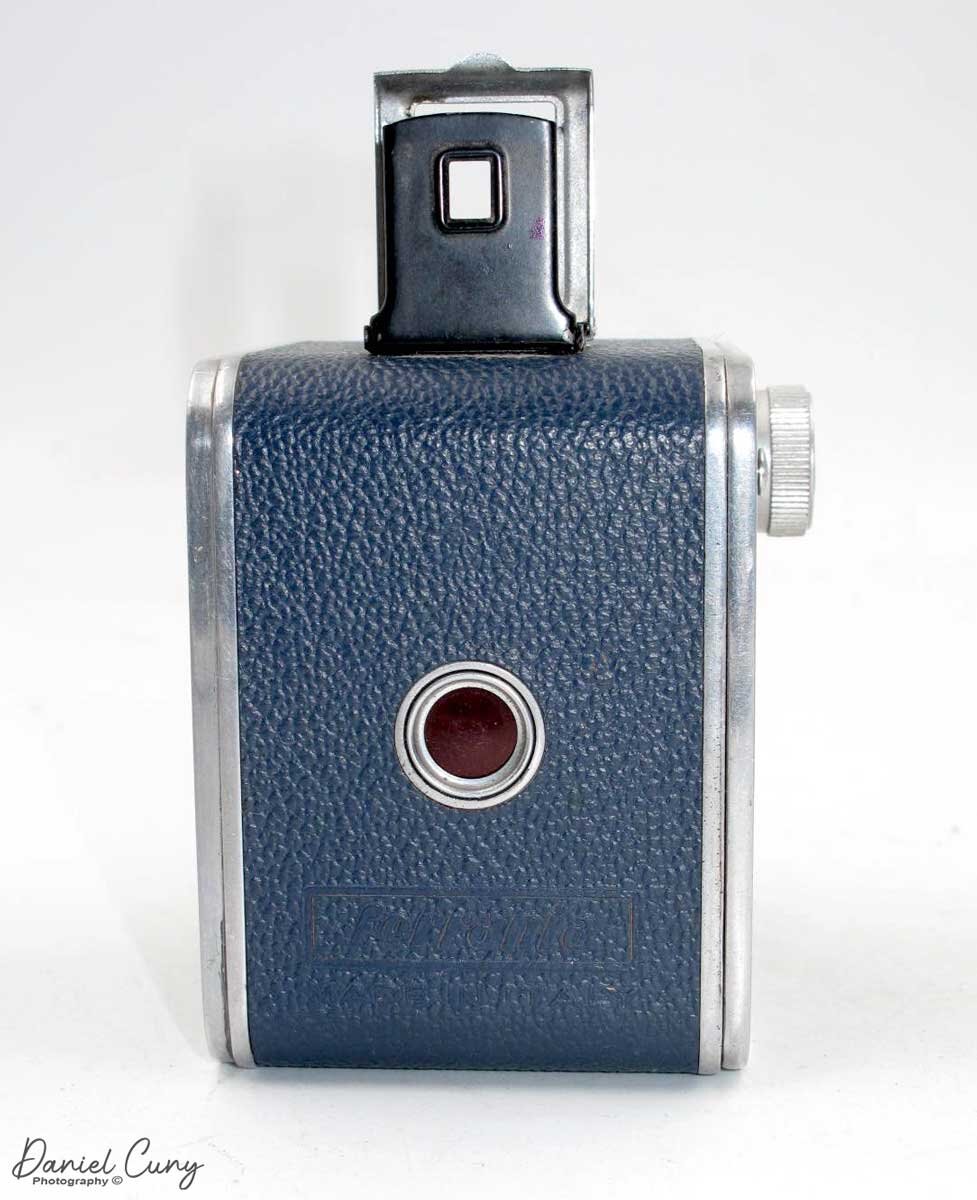
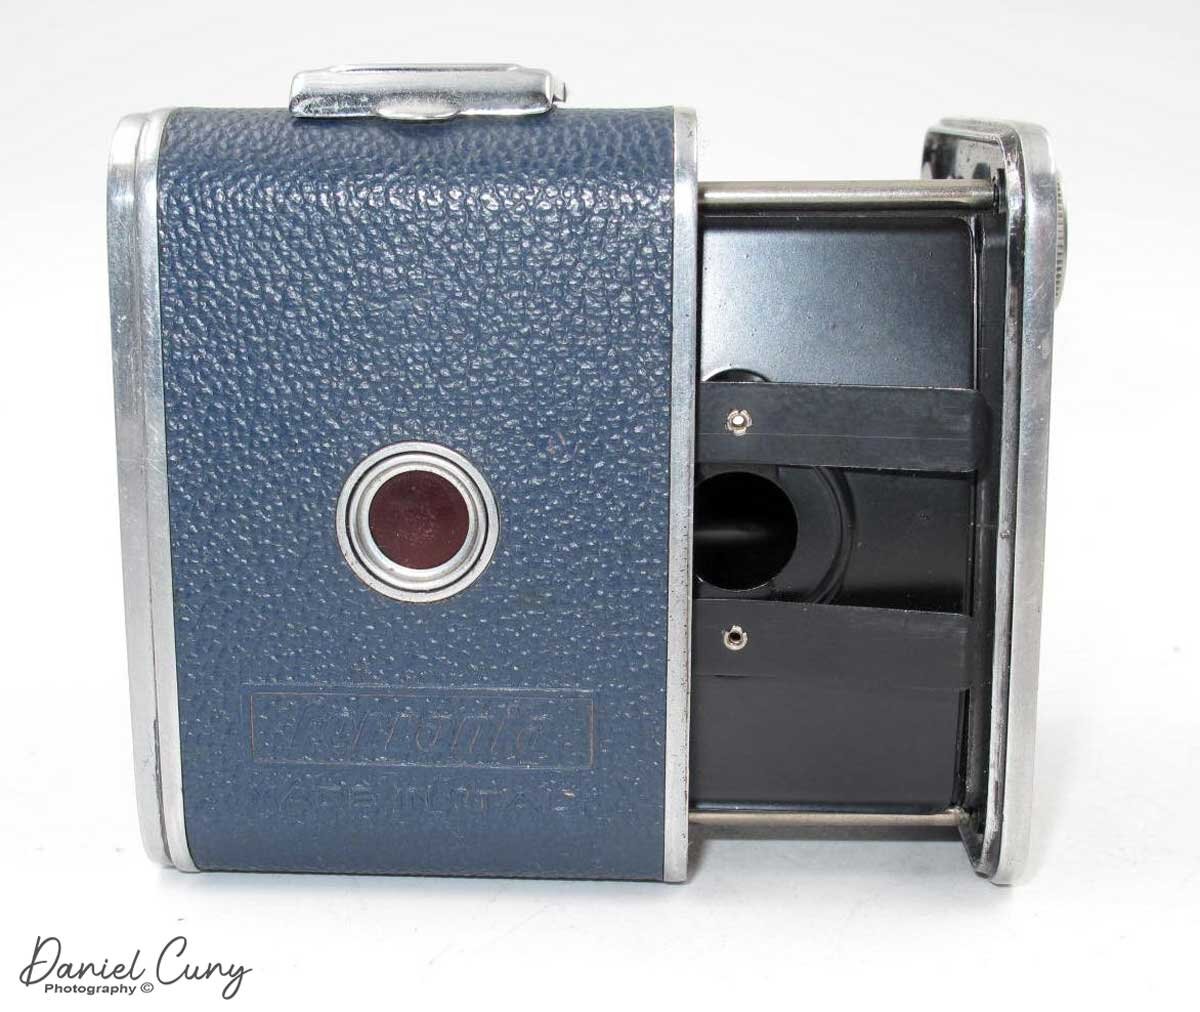
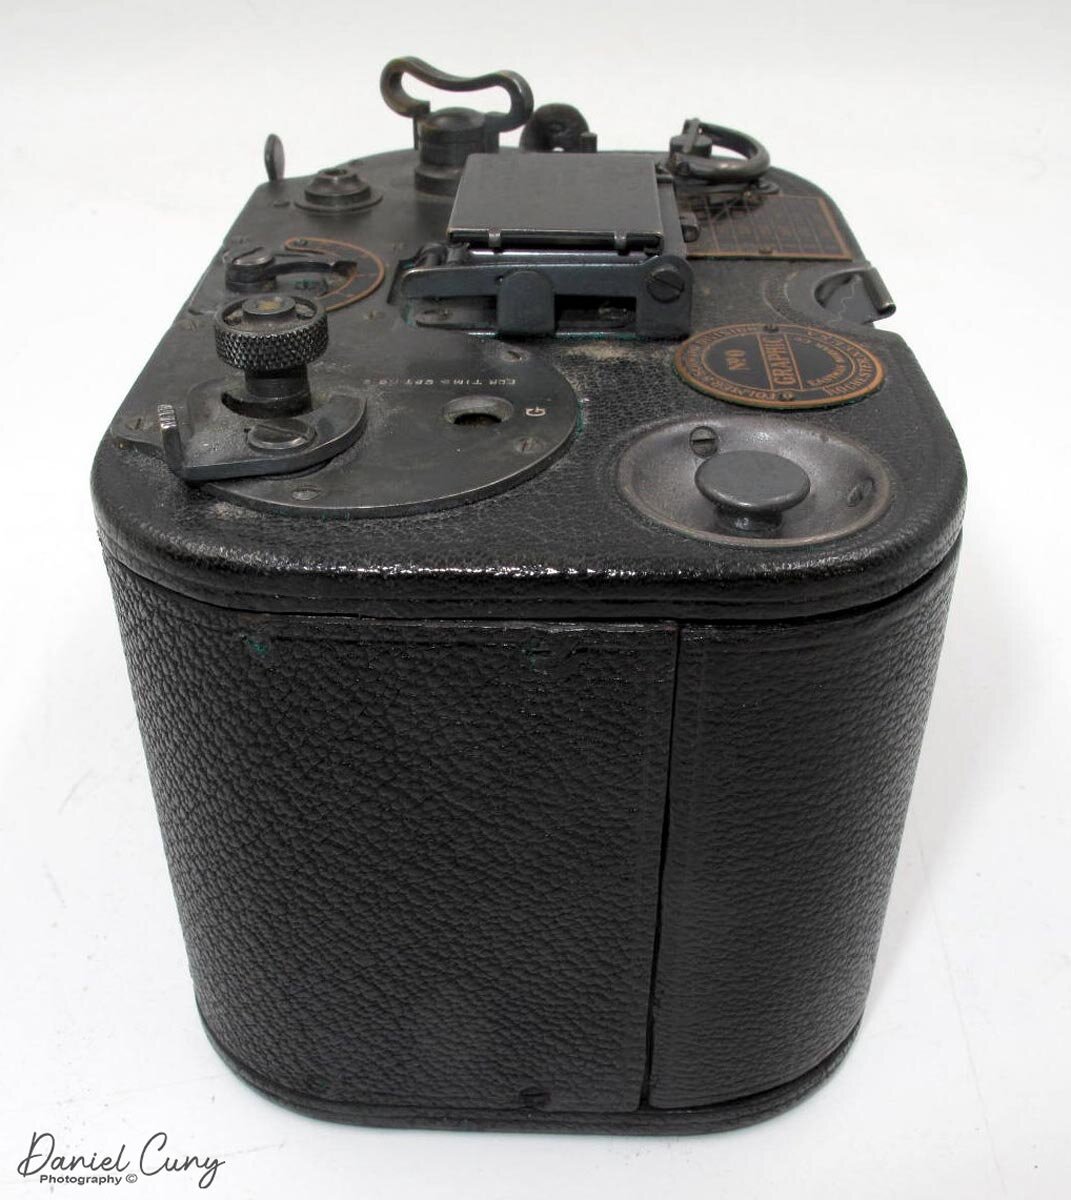
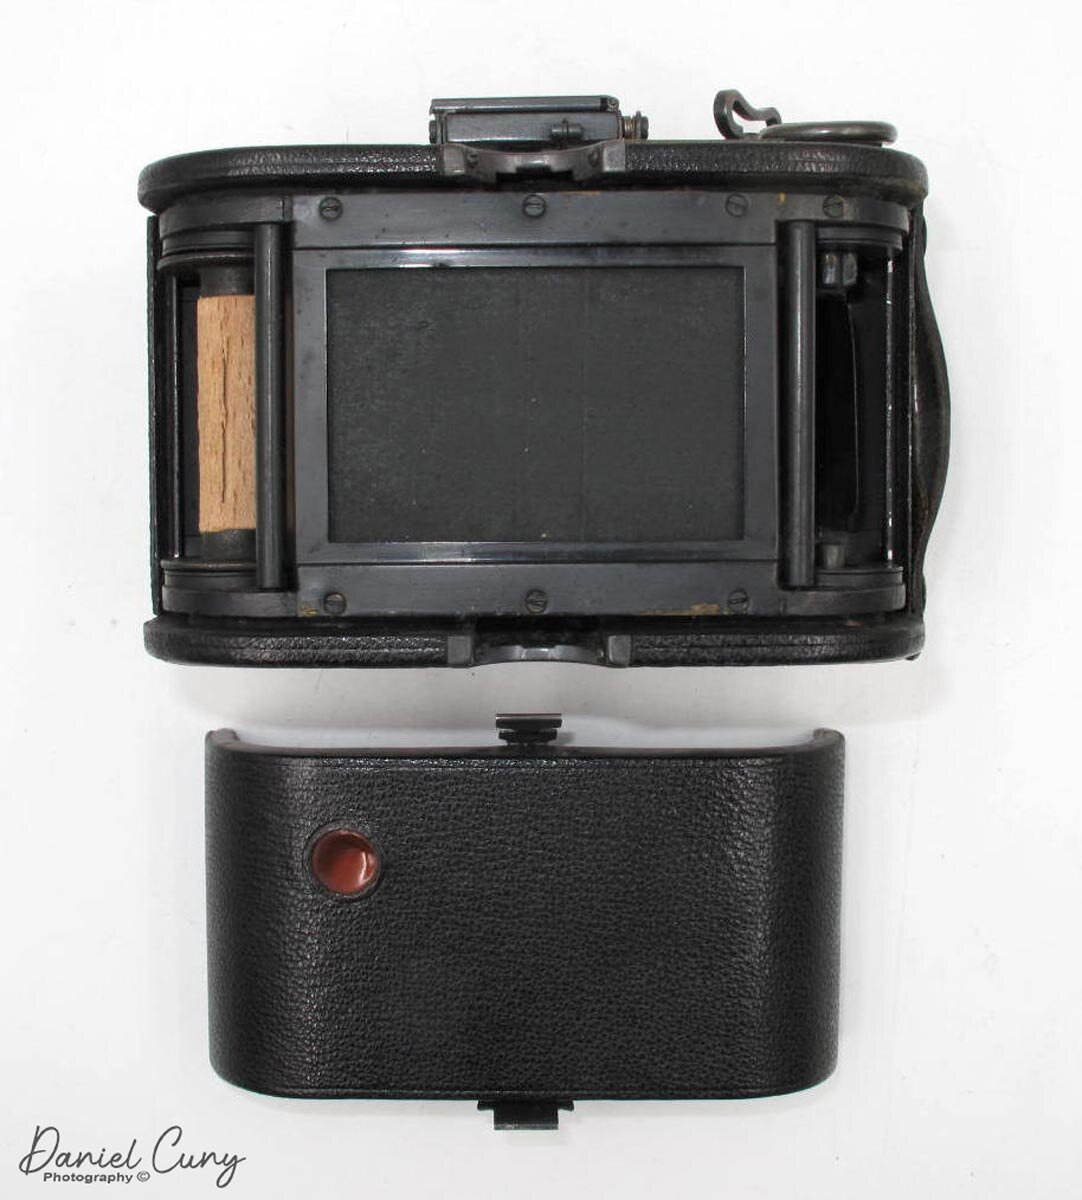
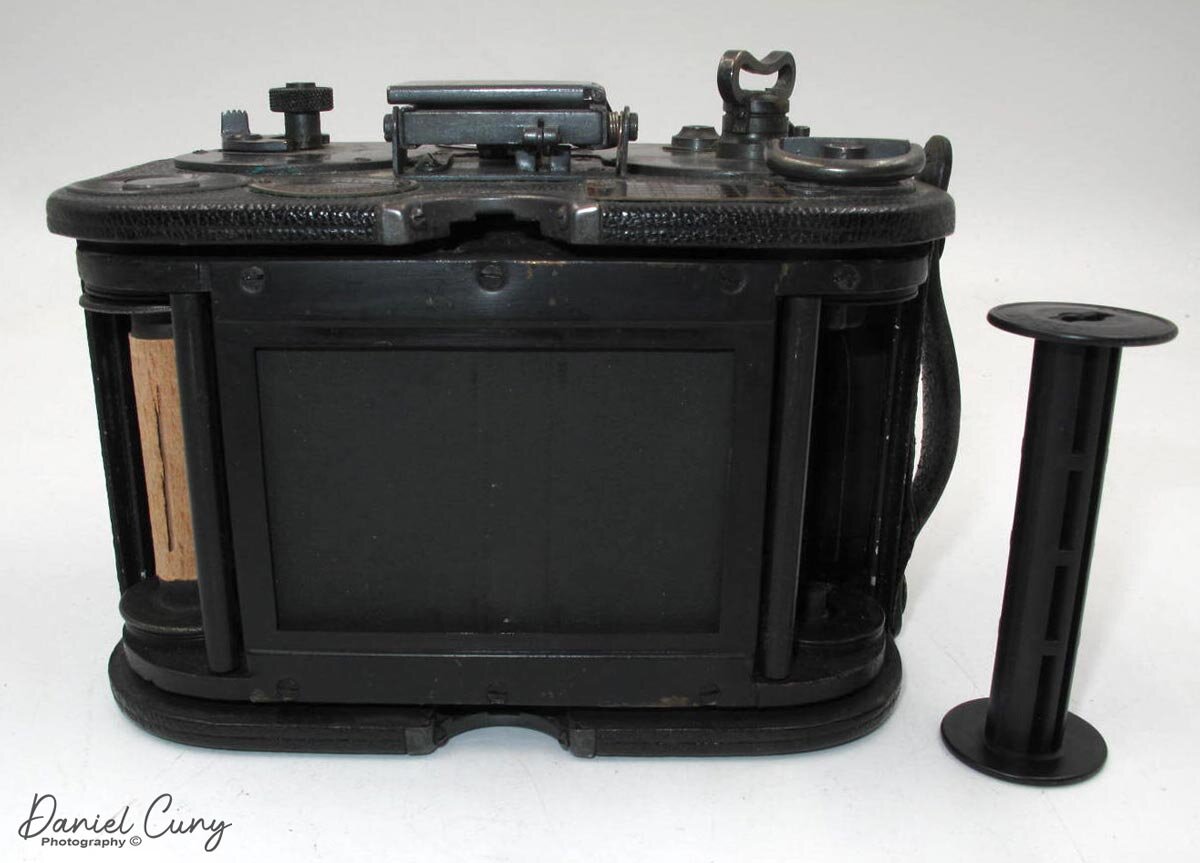
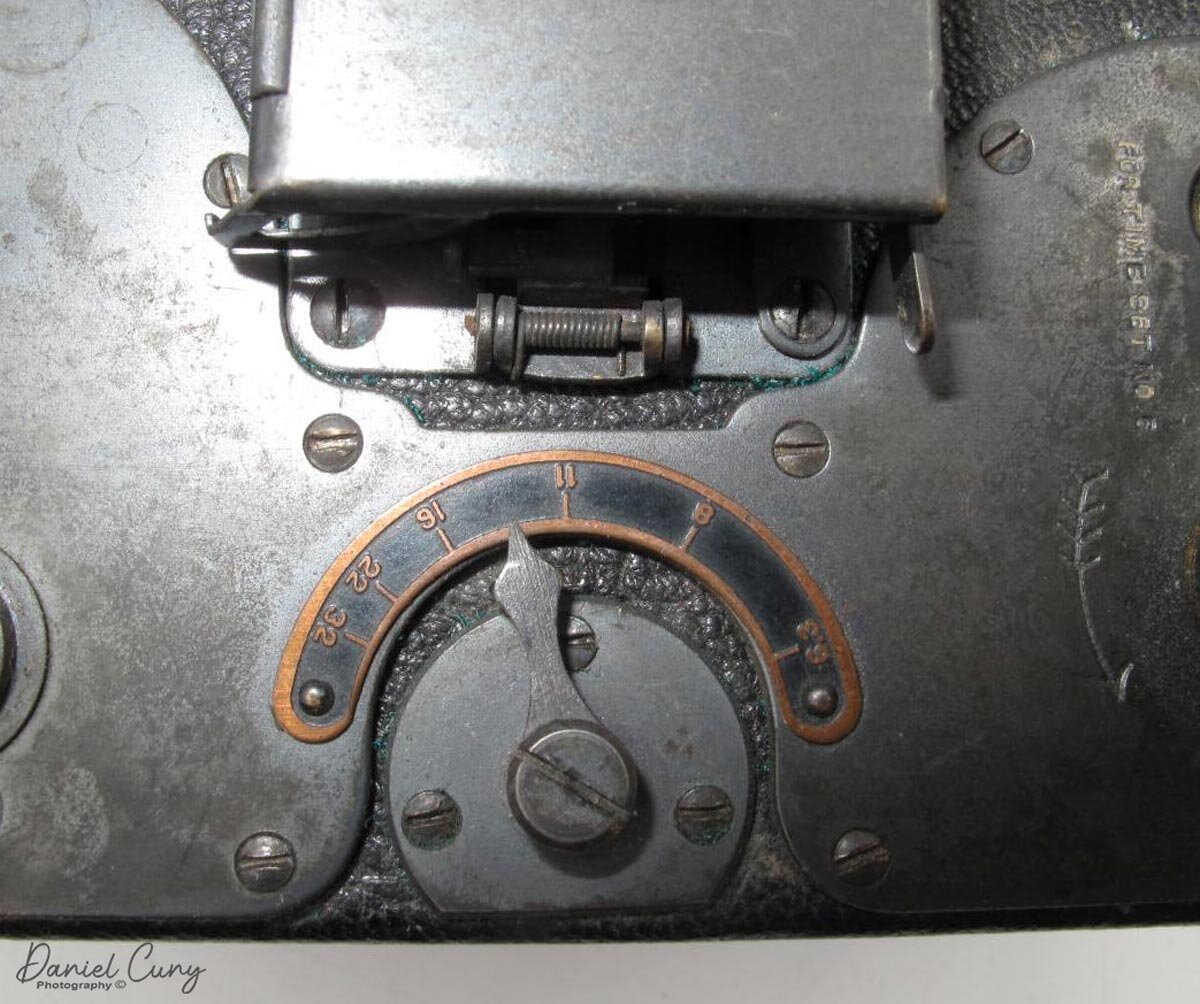
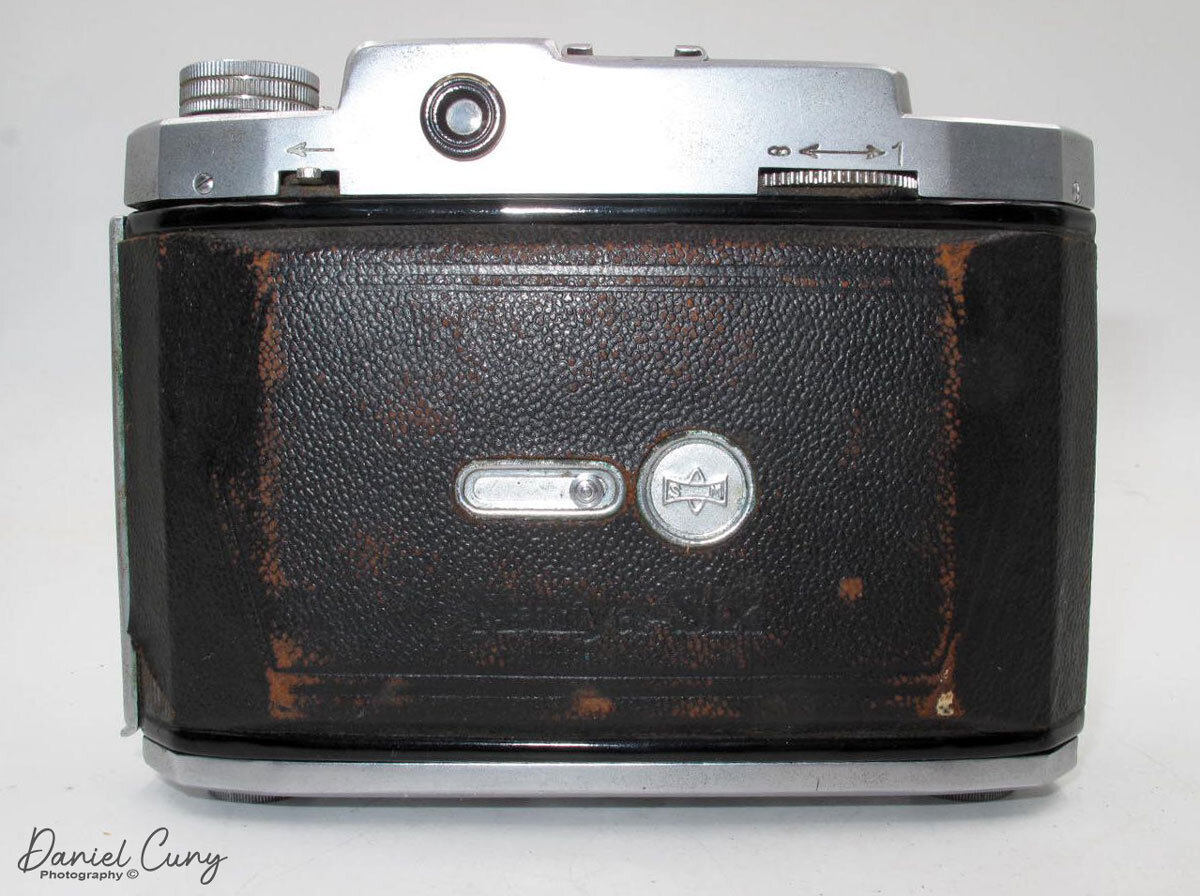
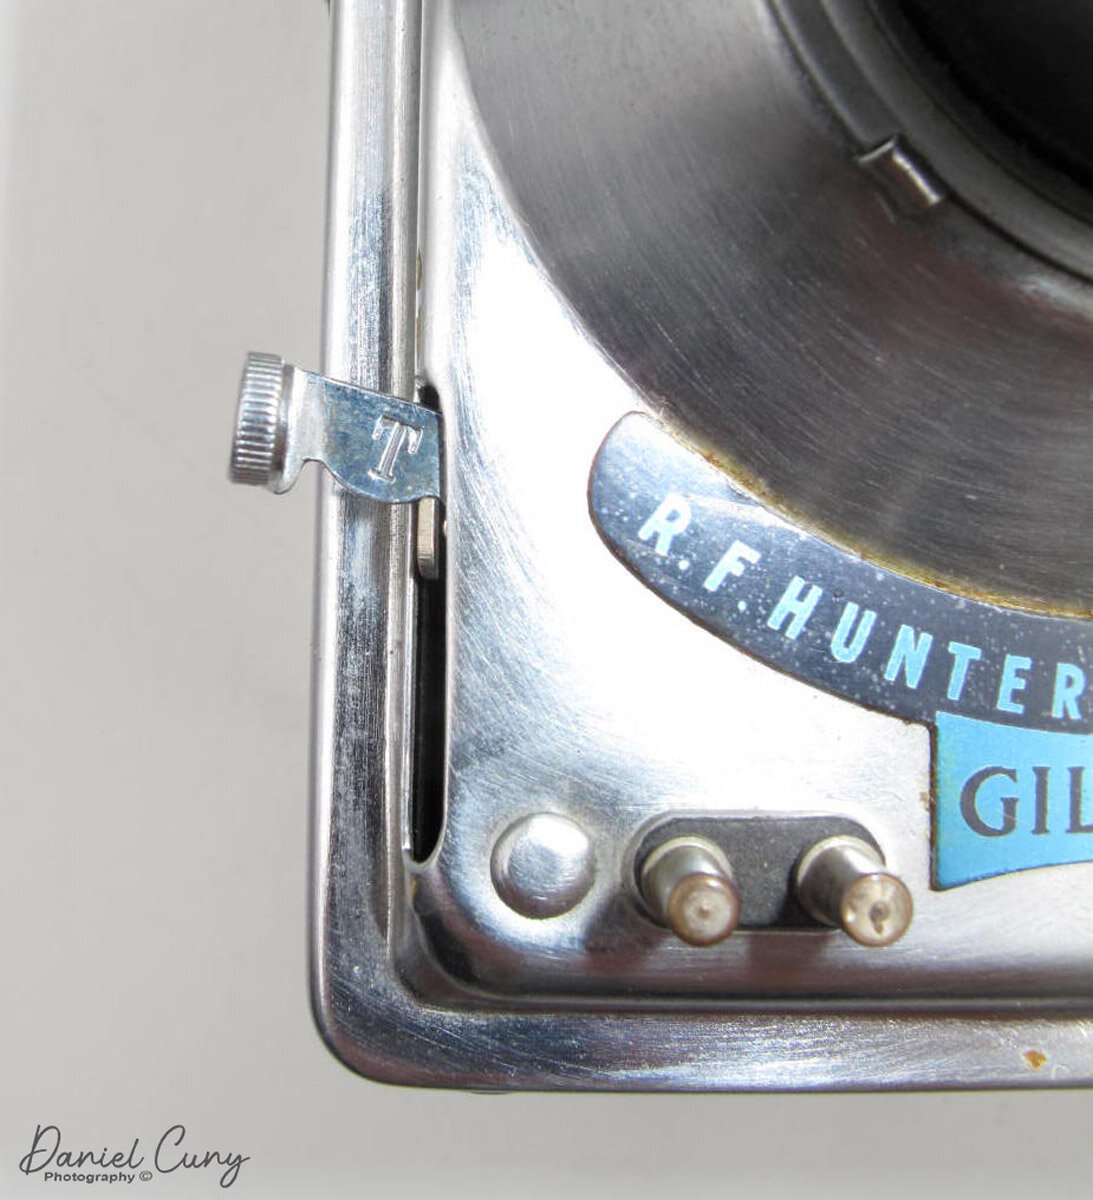
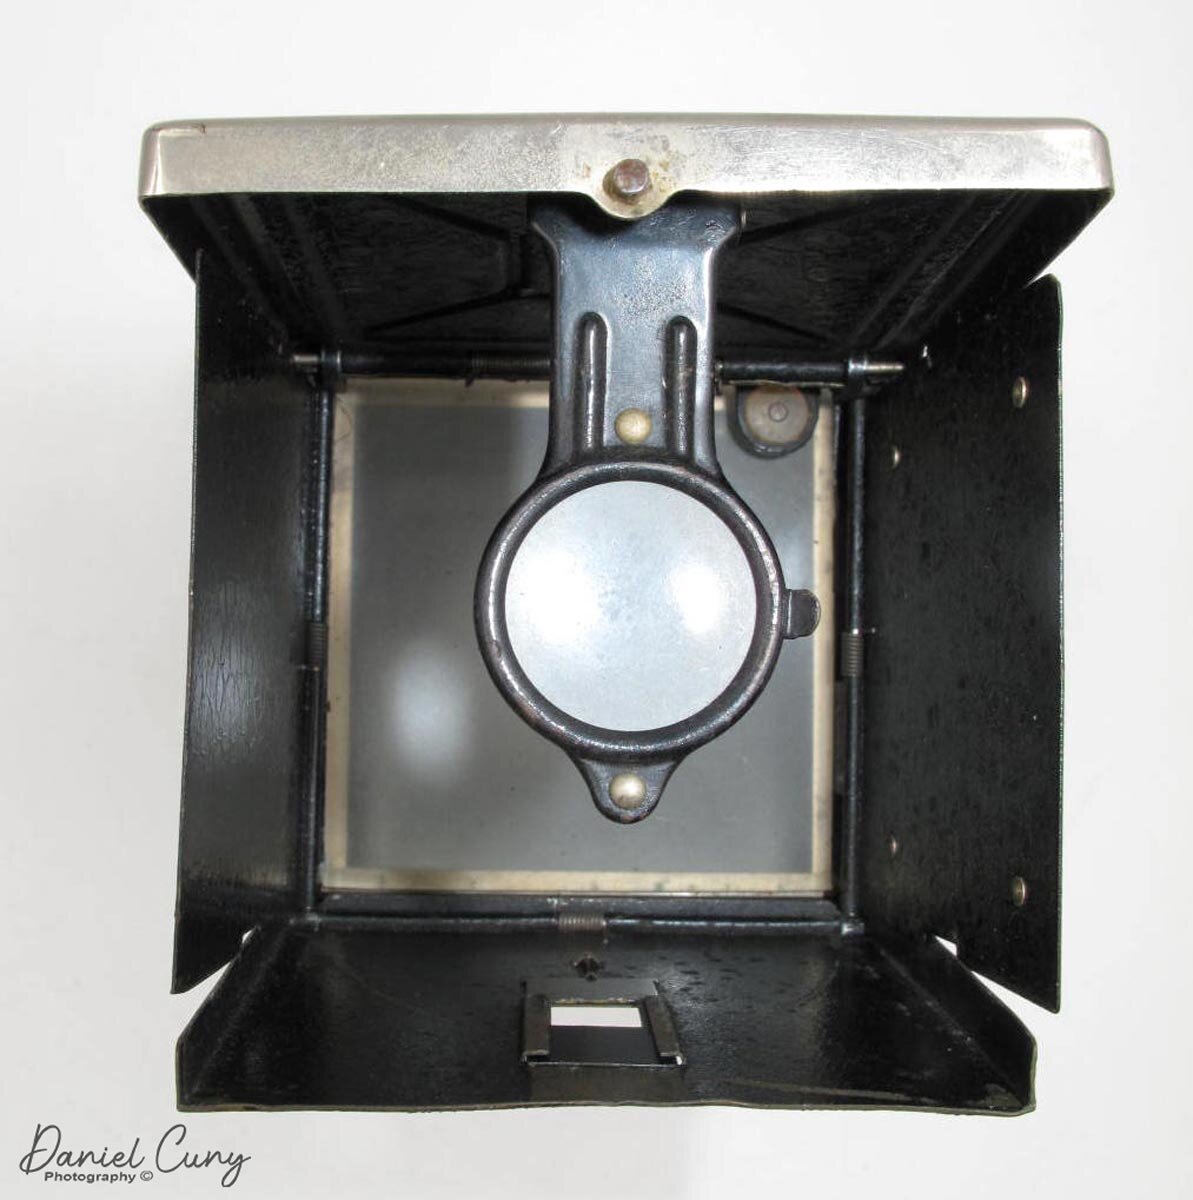
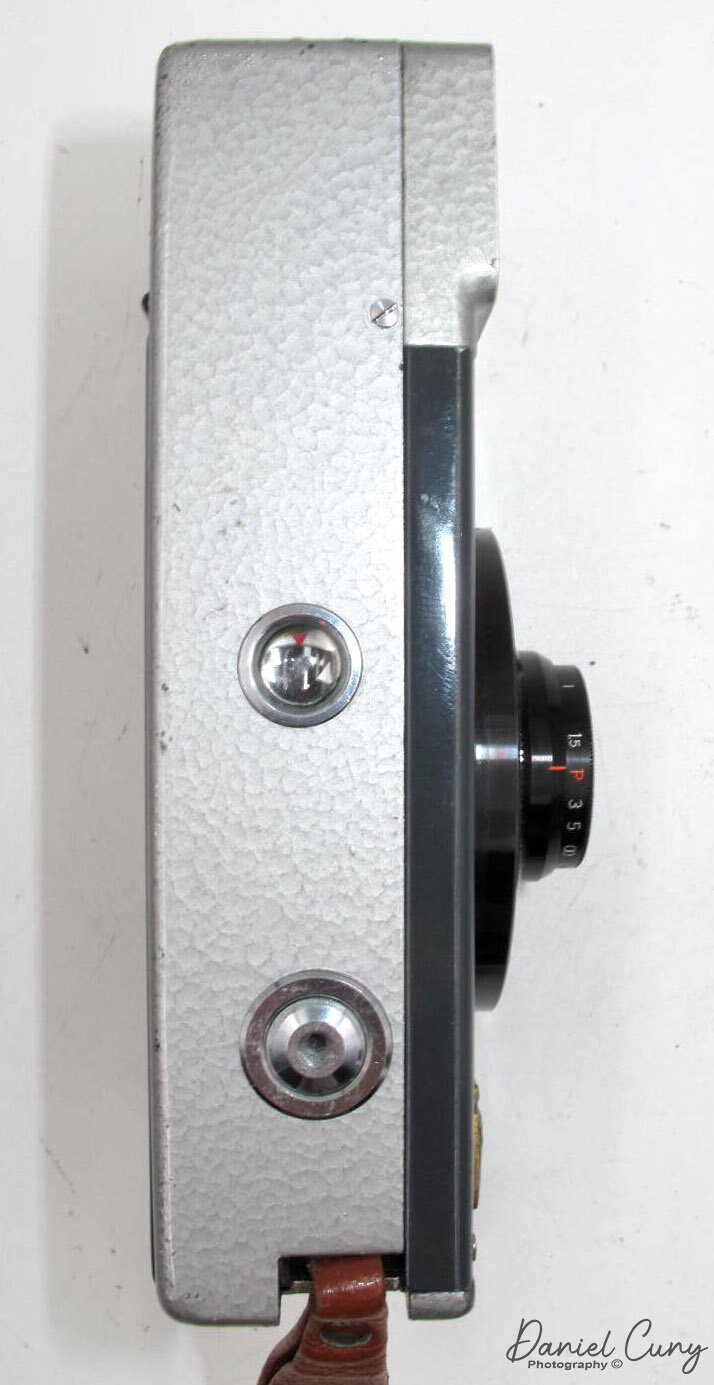
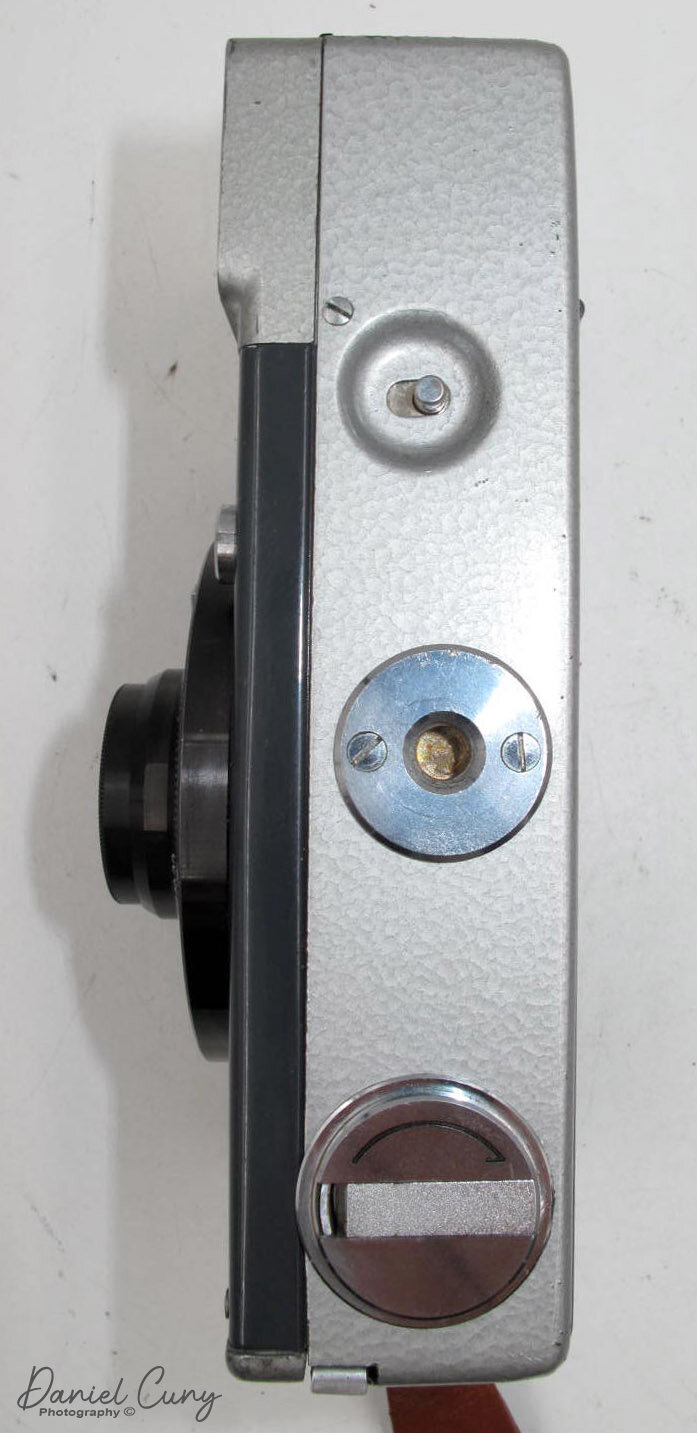
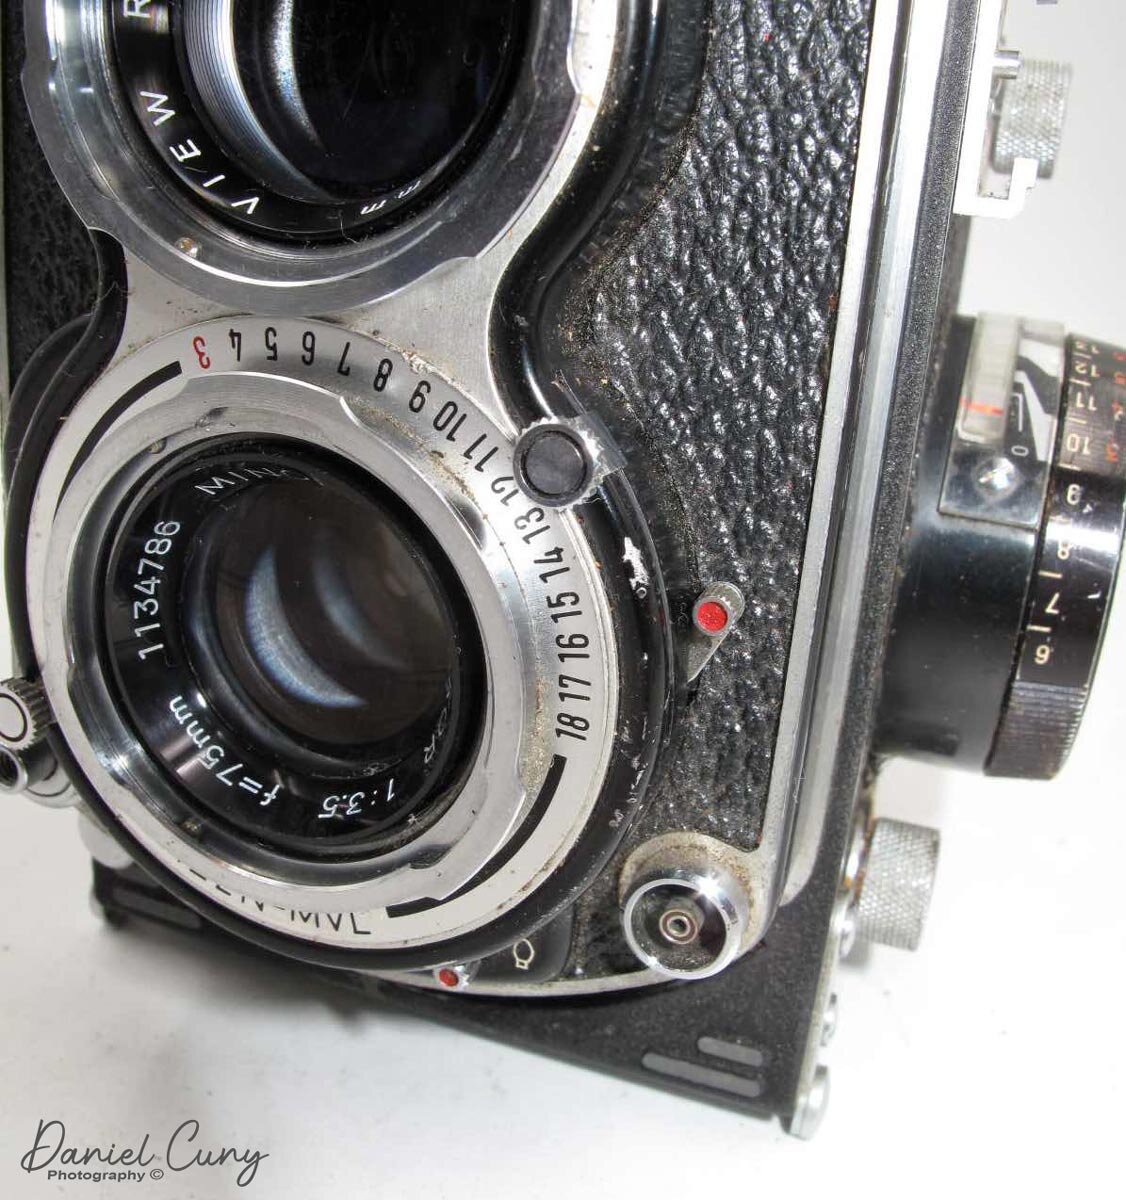
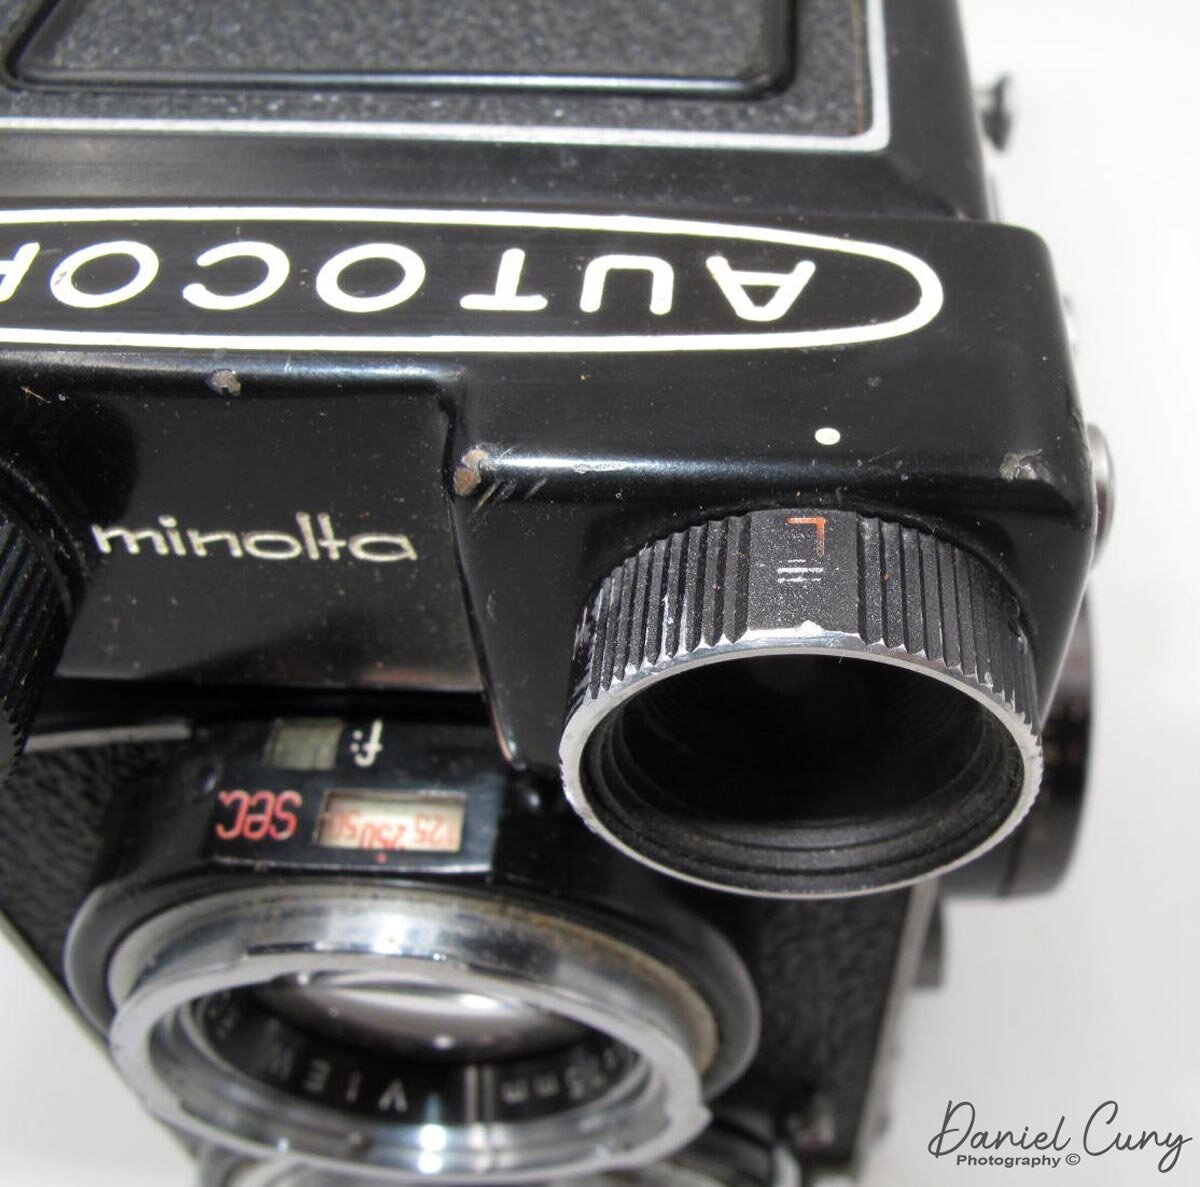
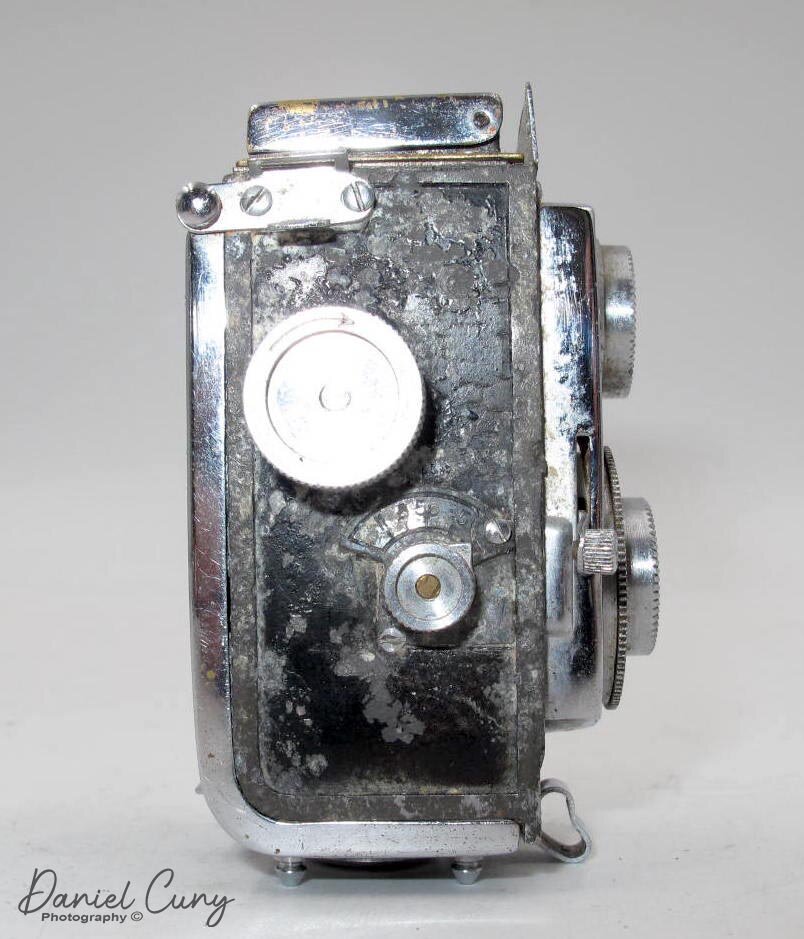
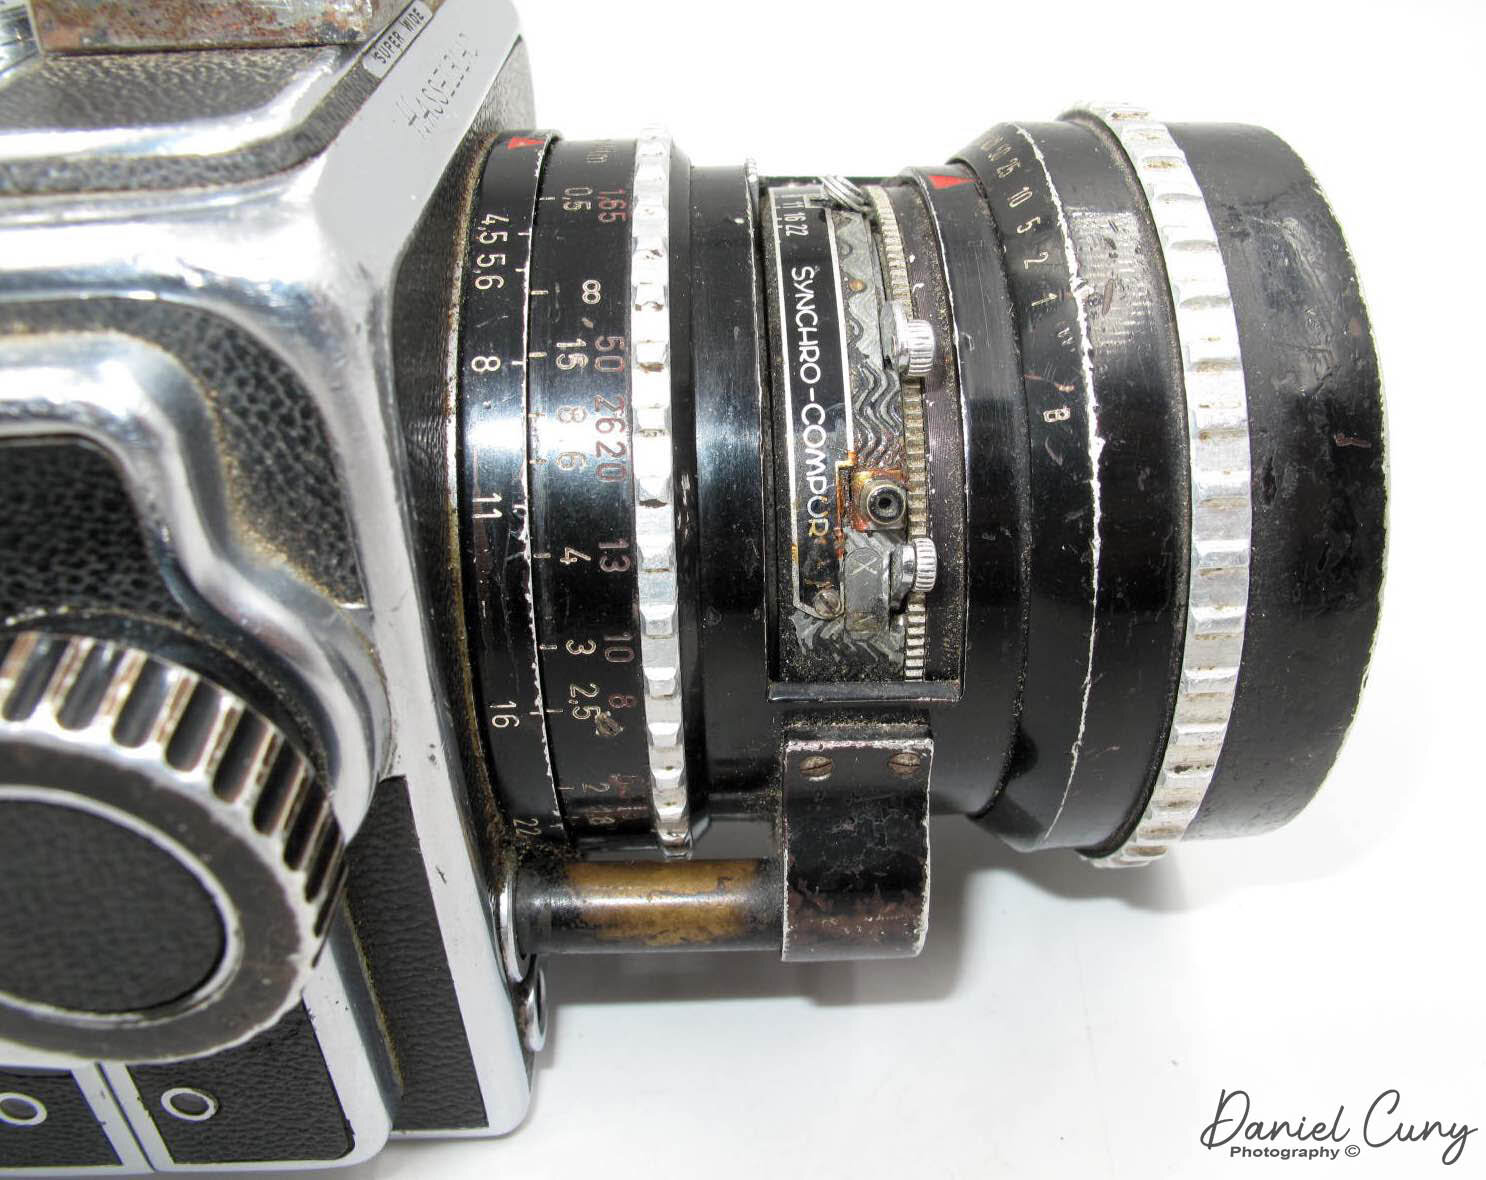
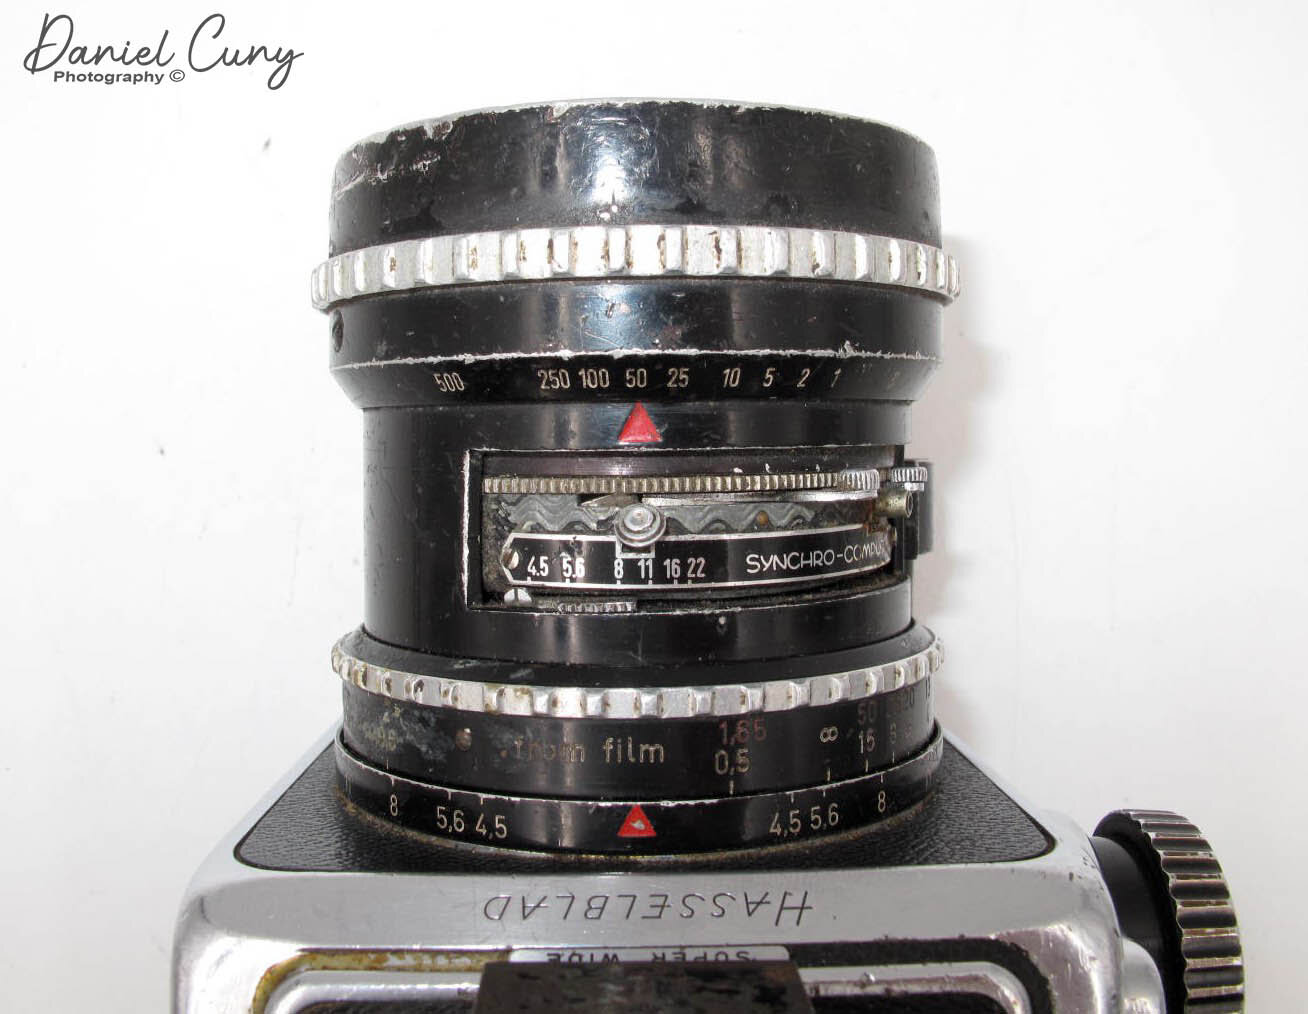
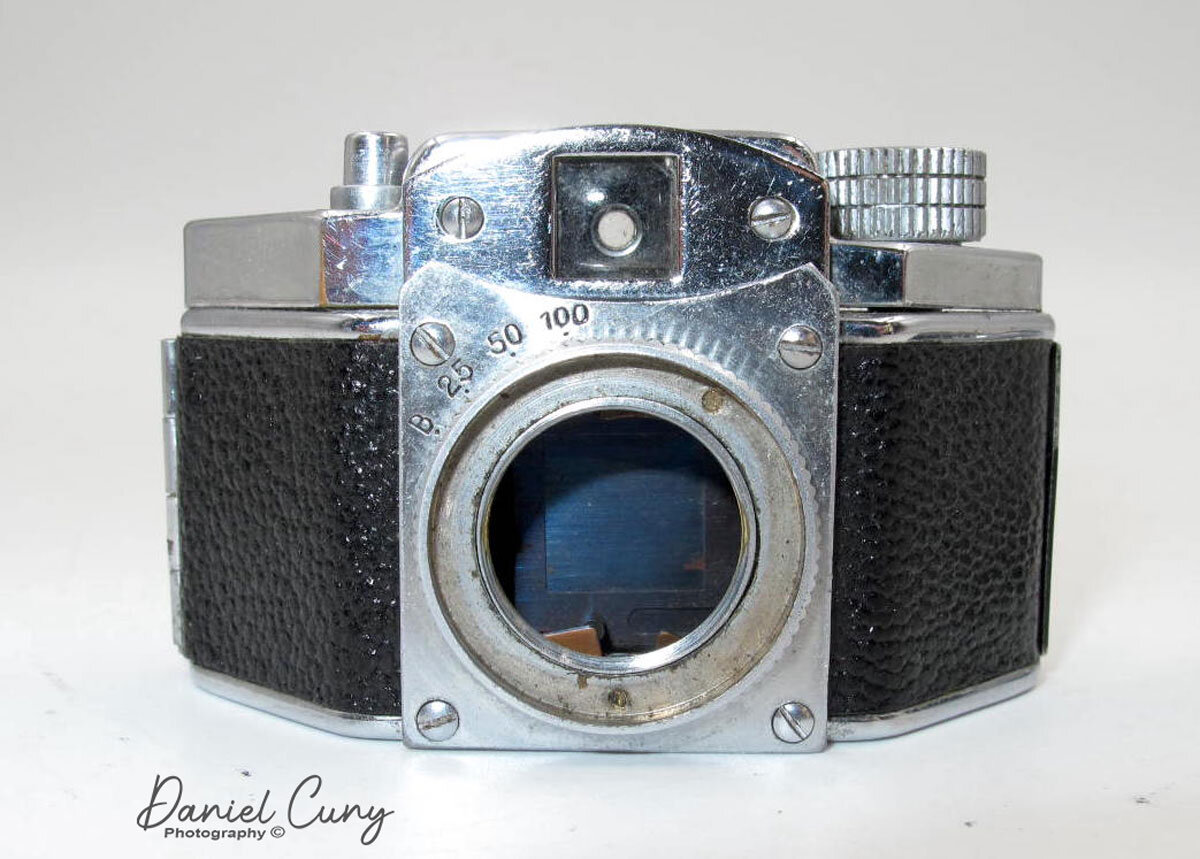
 Another item the camera has is a pull-up rewind knob that allows you to open the back. There are integrated shutter speeds of "B," 25, 50, 100. The lens is an Option 25mm f3.5 lens that allows the photographer to set aperture settings between f3.5-16 by turning the lens's outer ring. You would think this operation would focus the lens, but the lens is a fixed focus, and you're changing the aperture settings.

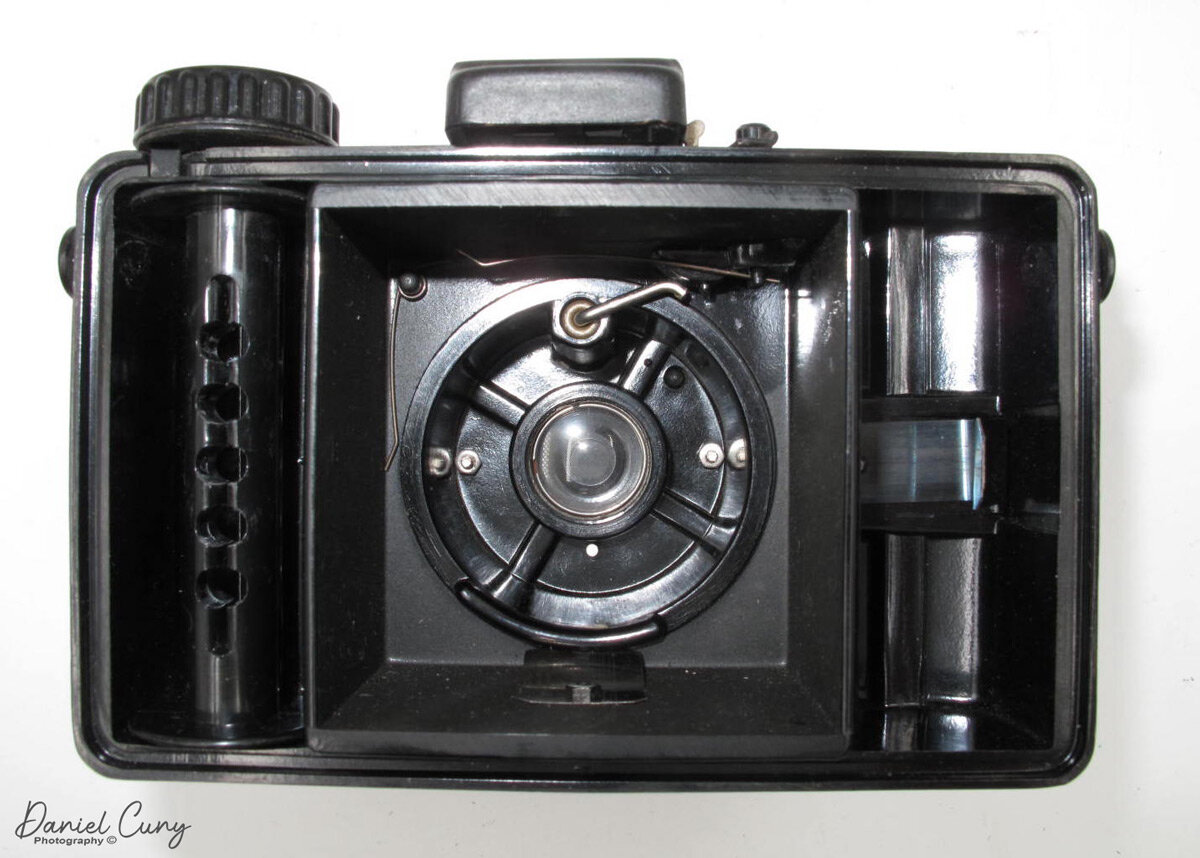
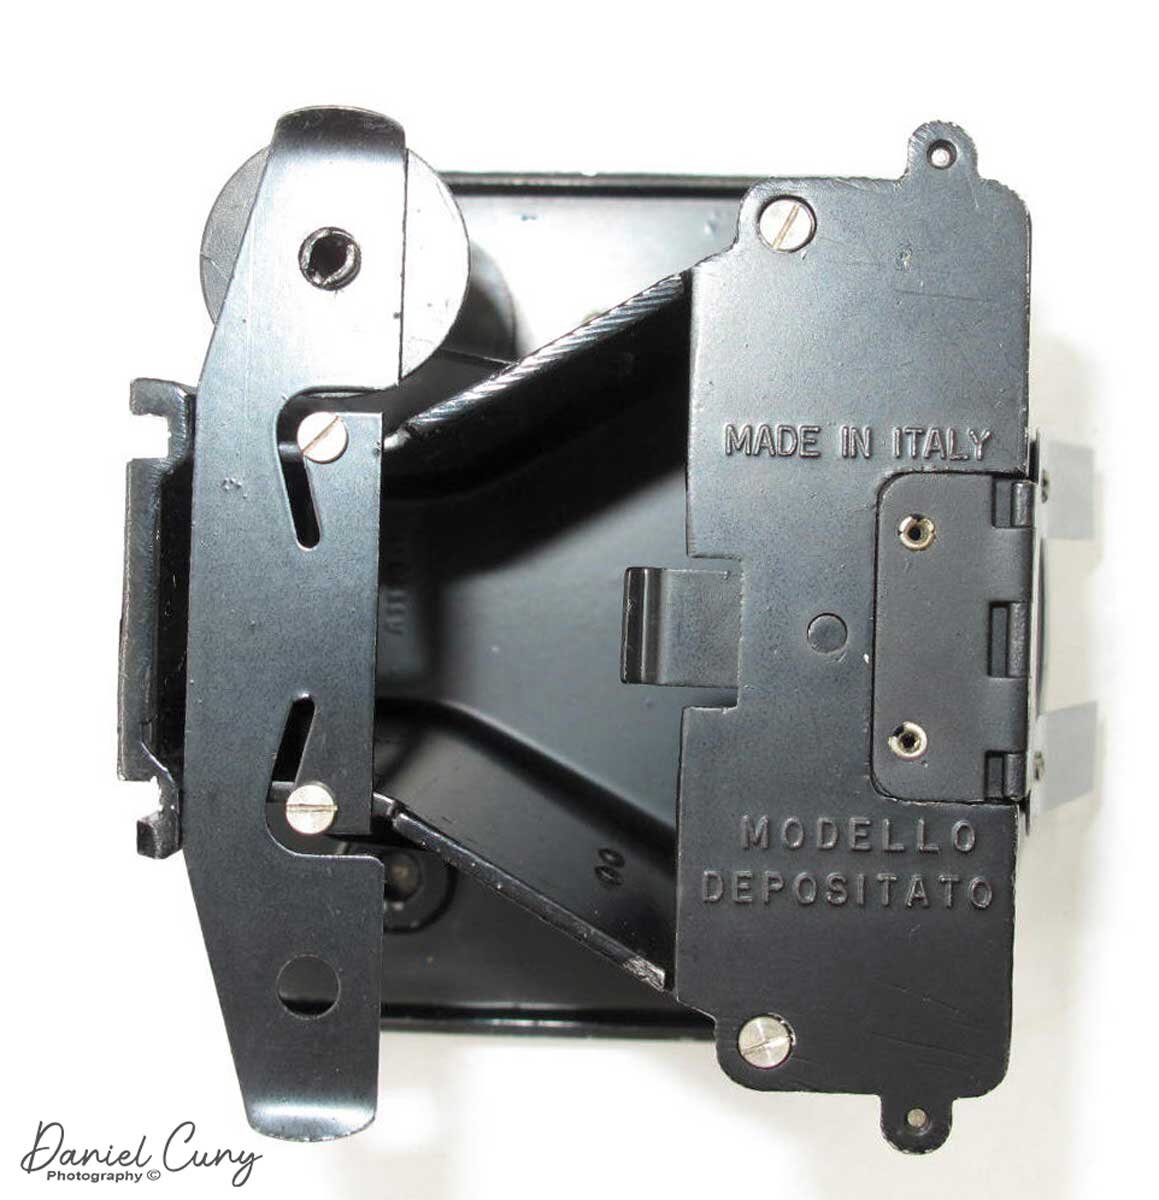
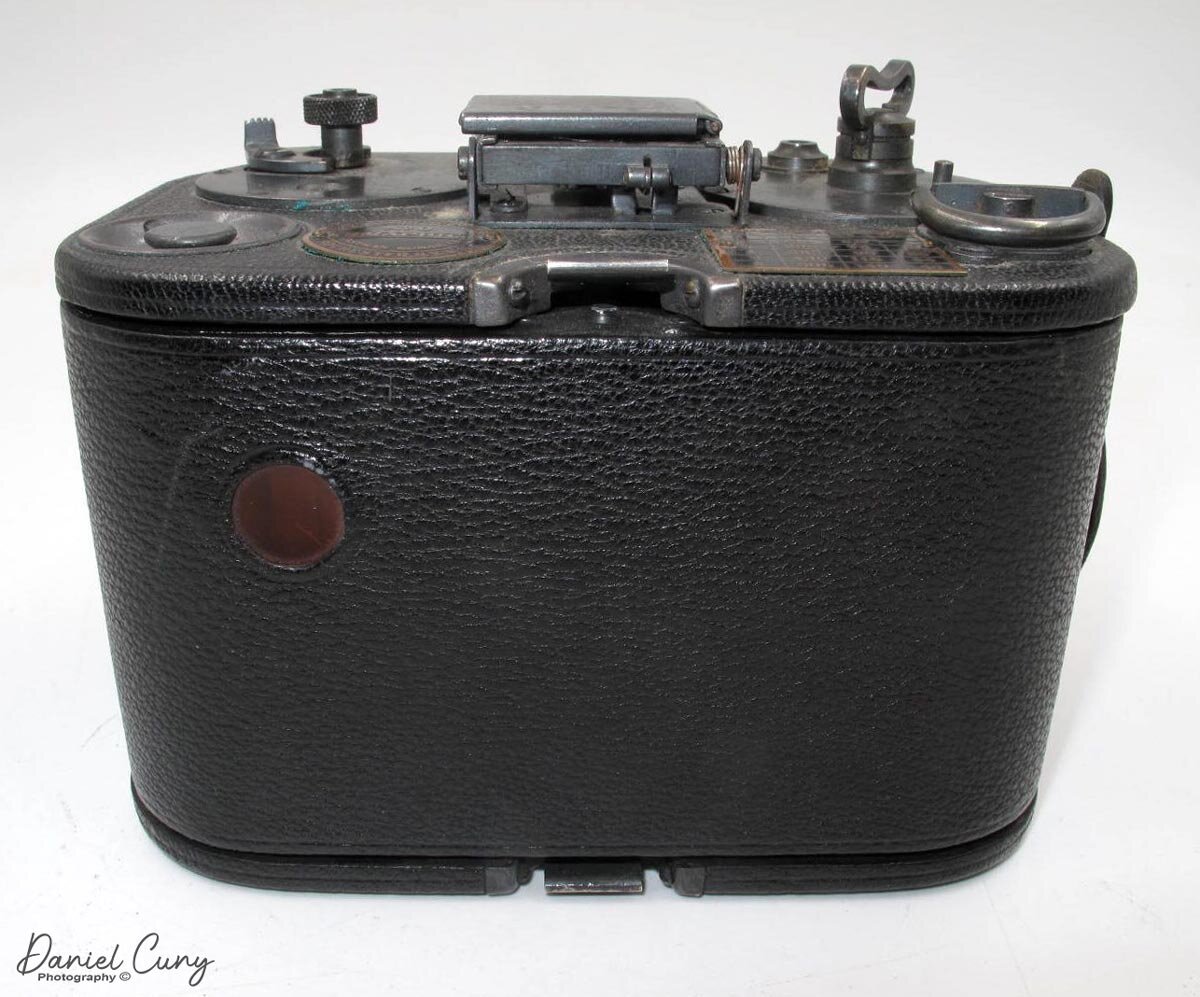
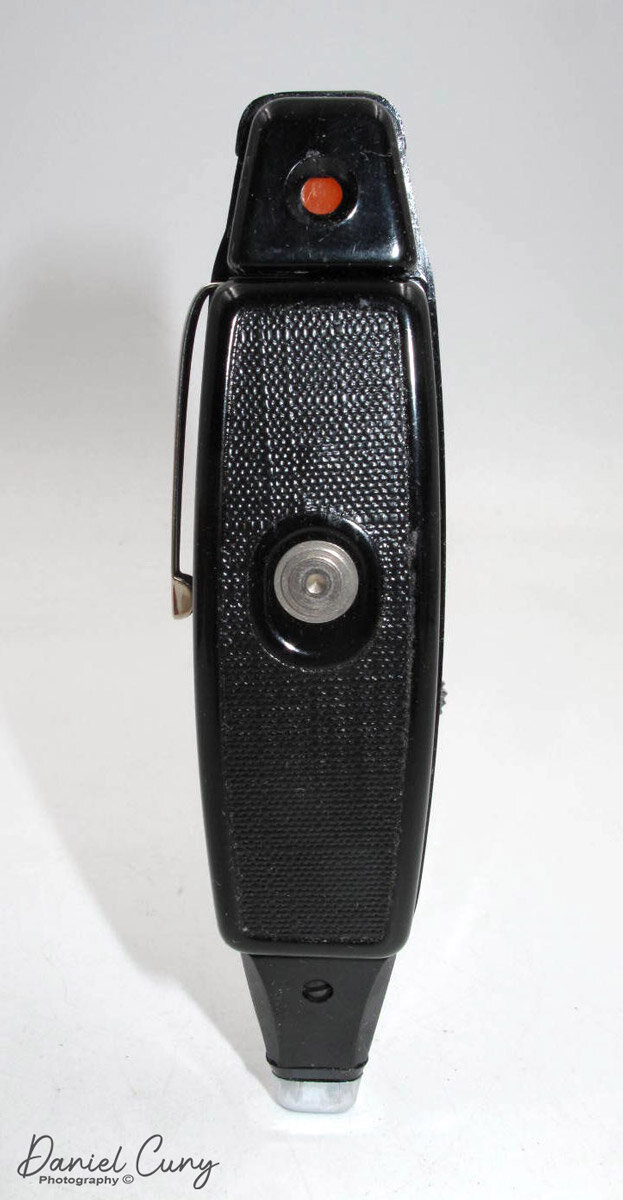
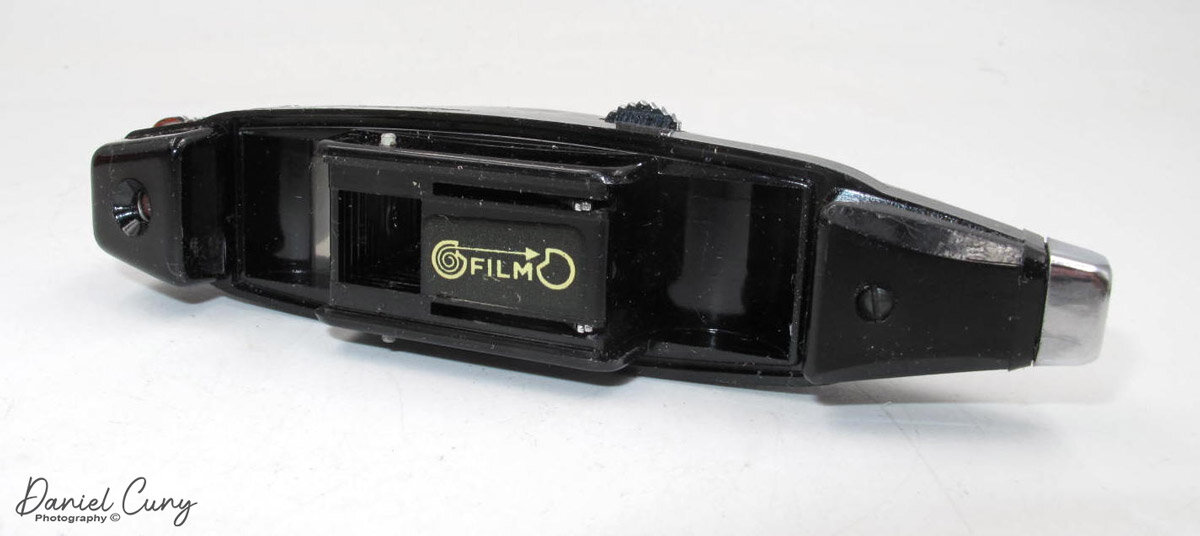
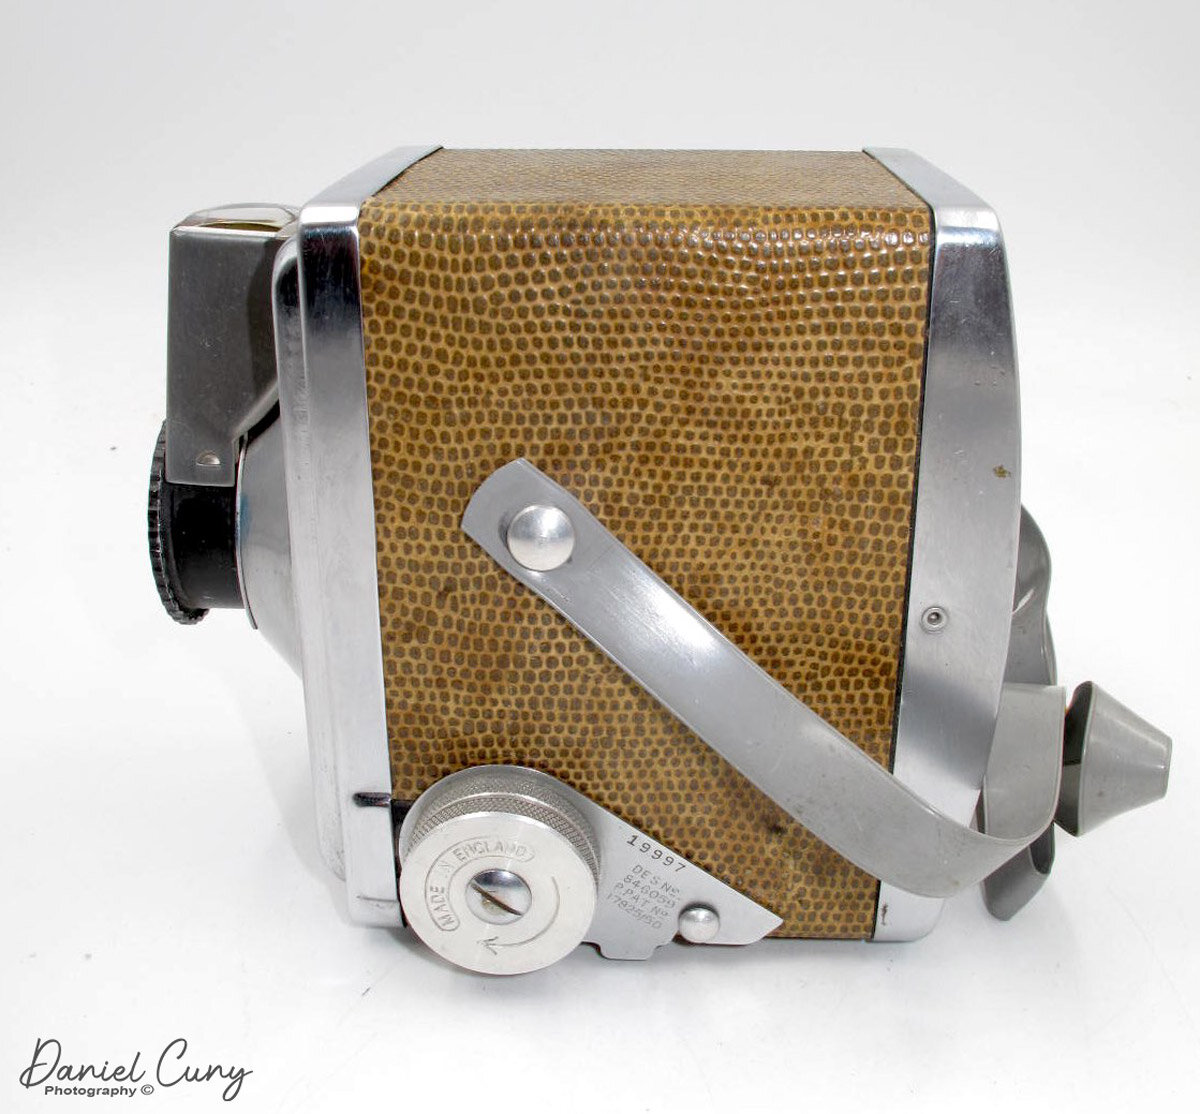
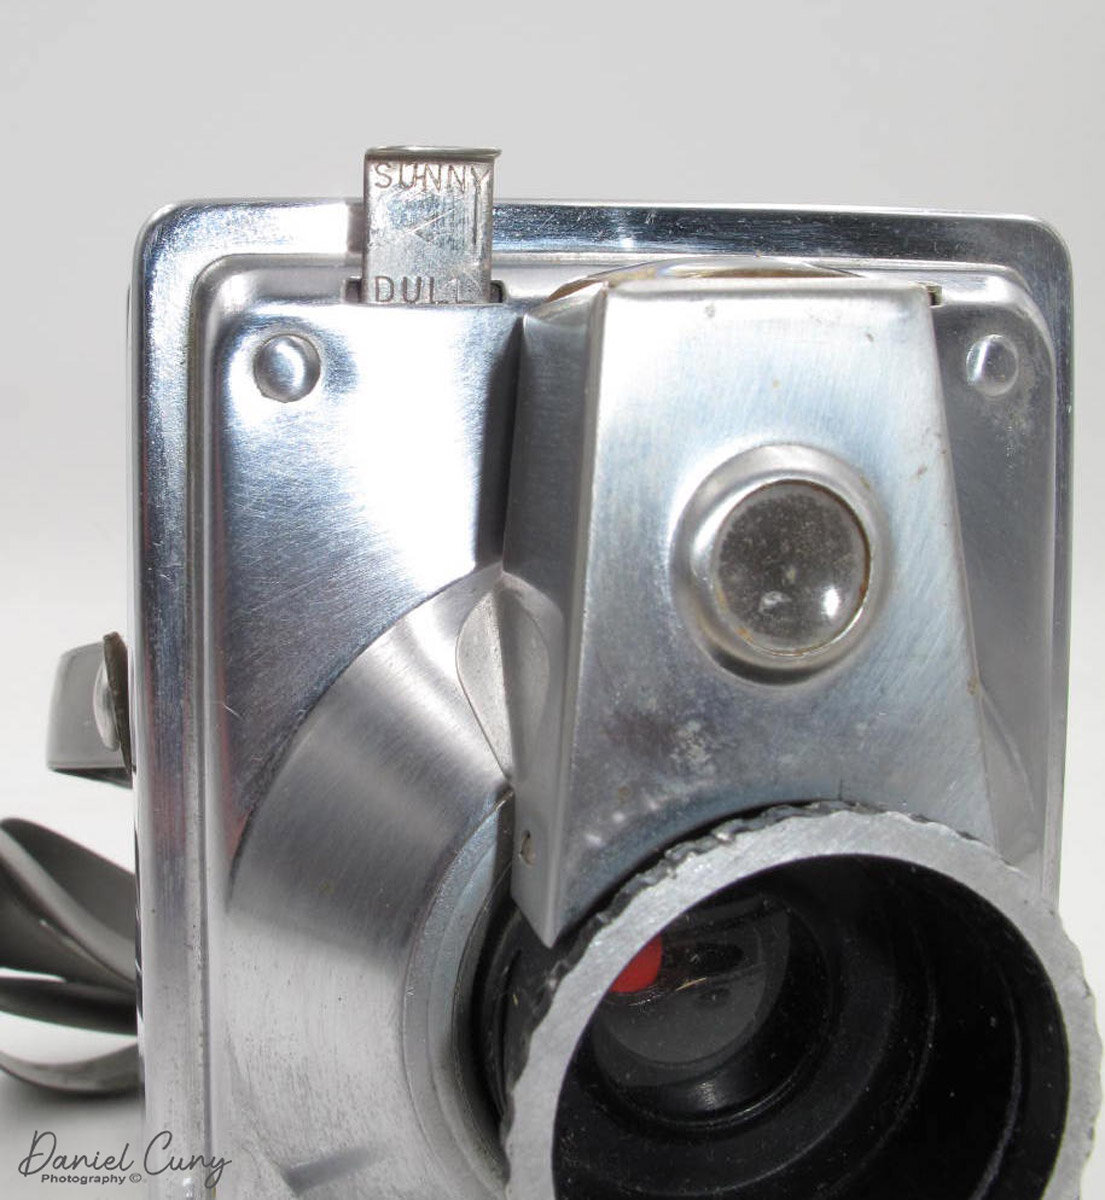
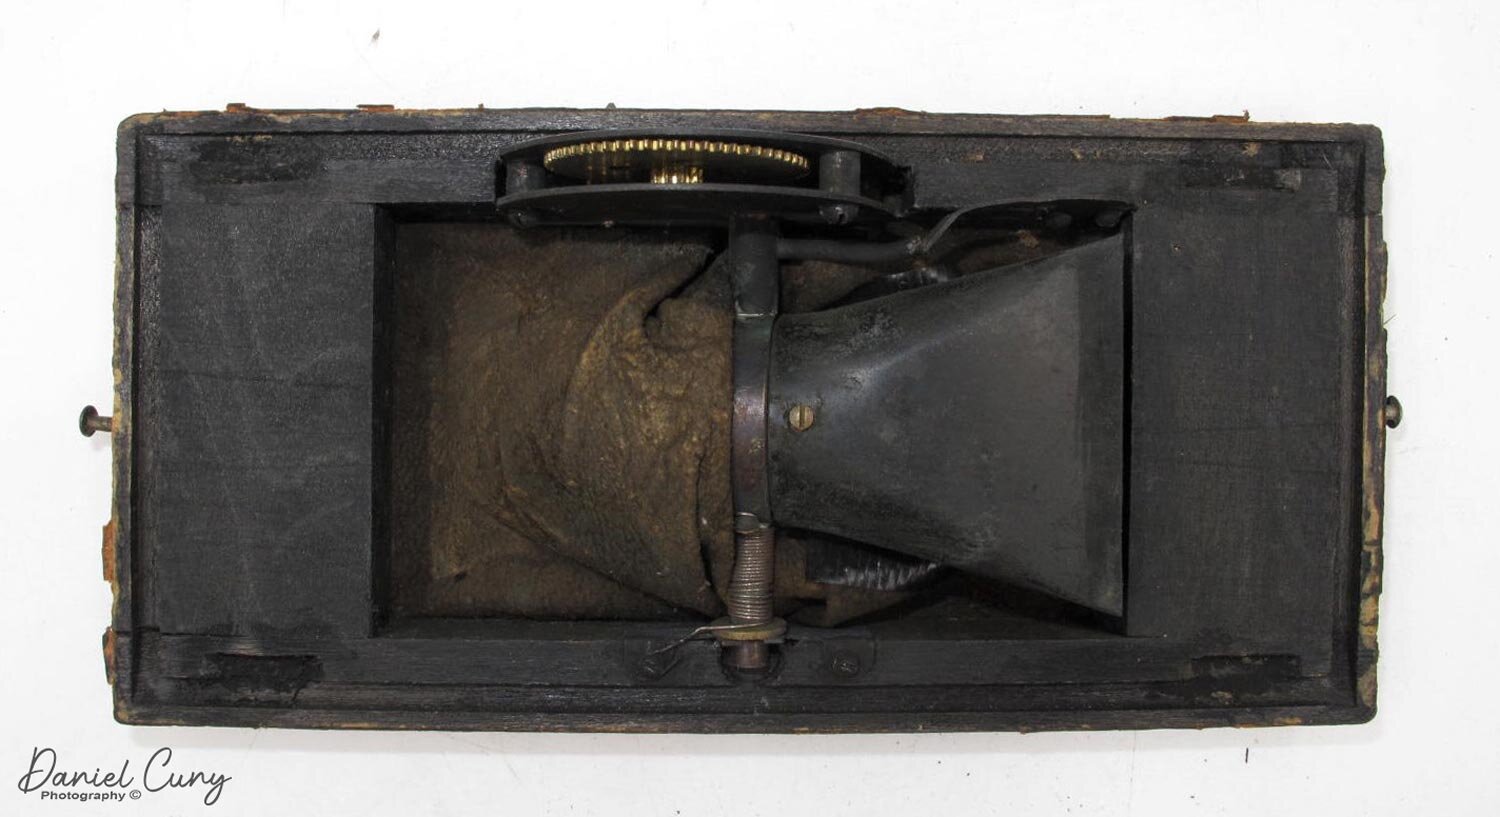
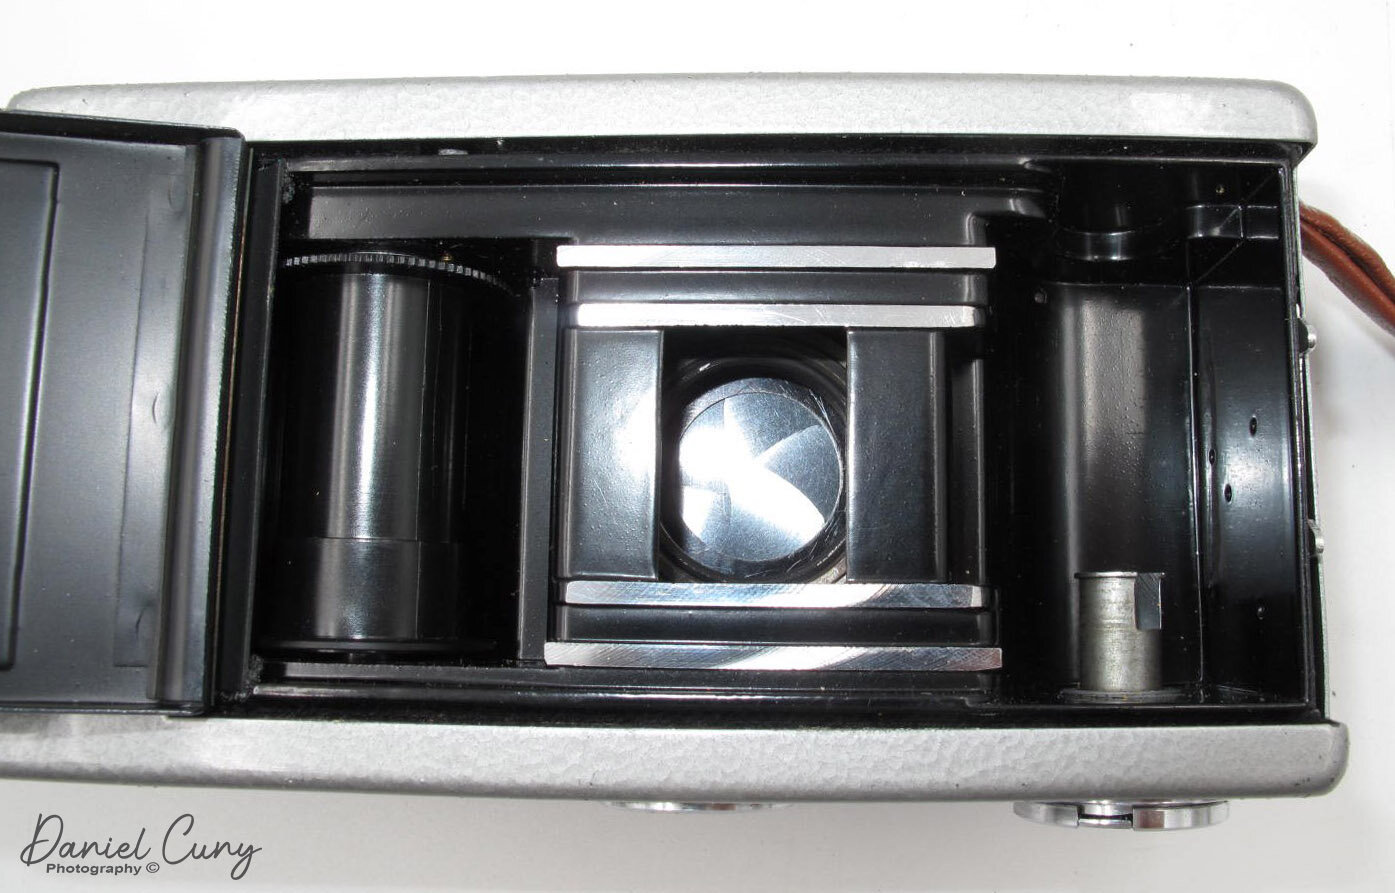
The camera has a horizontal running guillotine shutter tripped by the shutter release on the top of the camera. The winding leaver on the back of the camera advances the film and cocks the shutter.

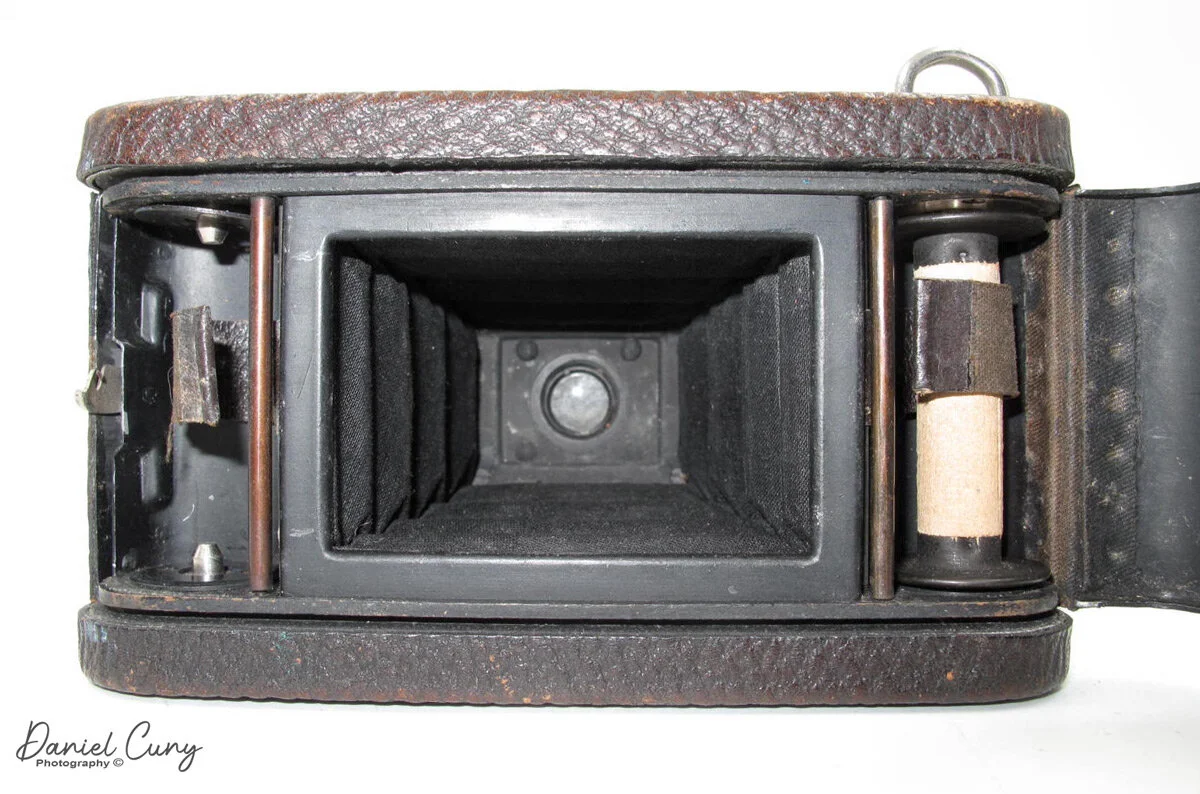
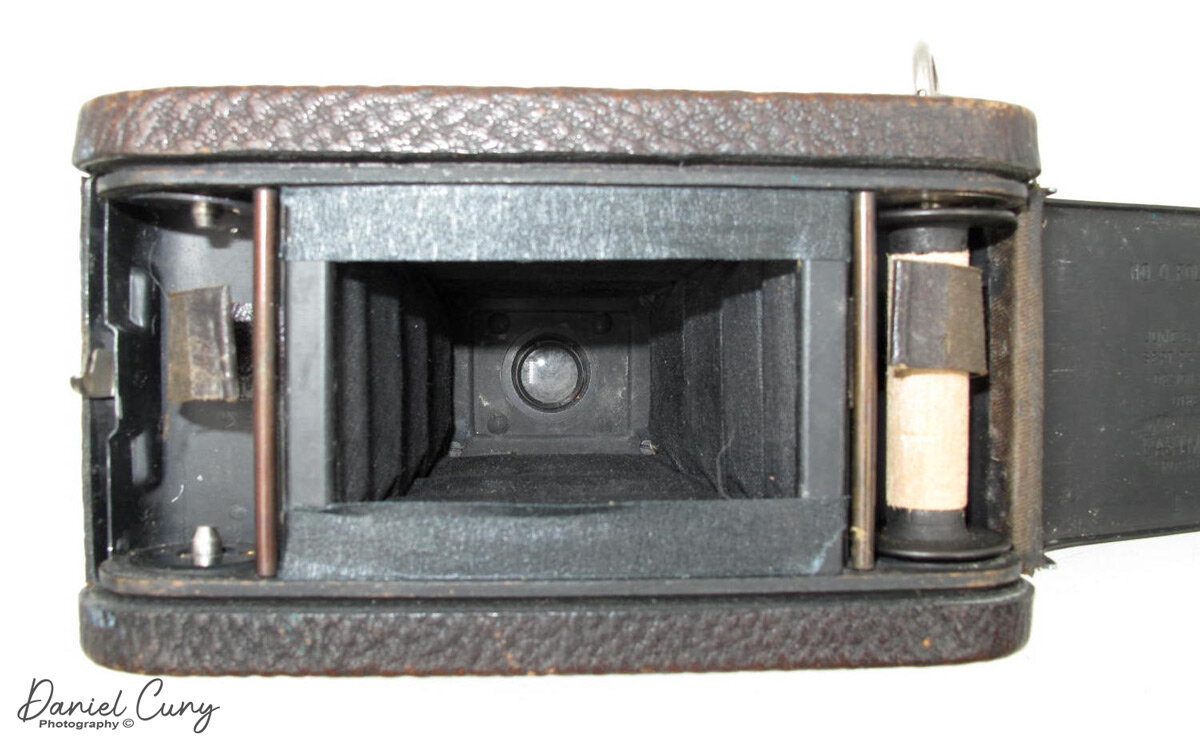
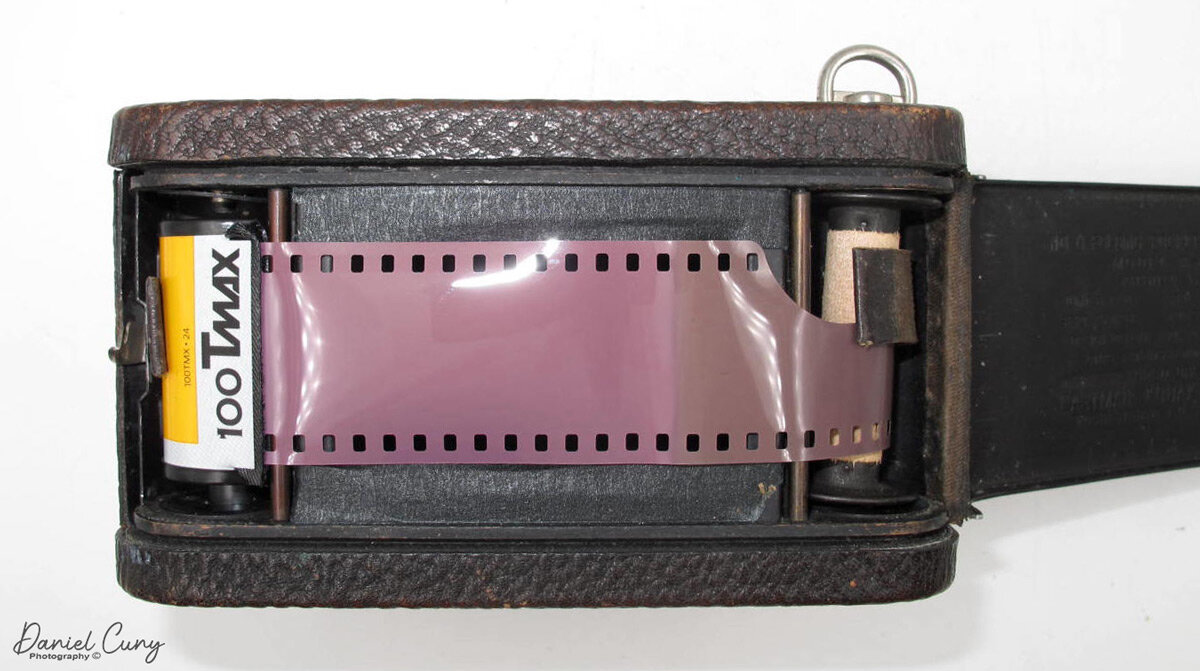
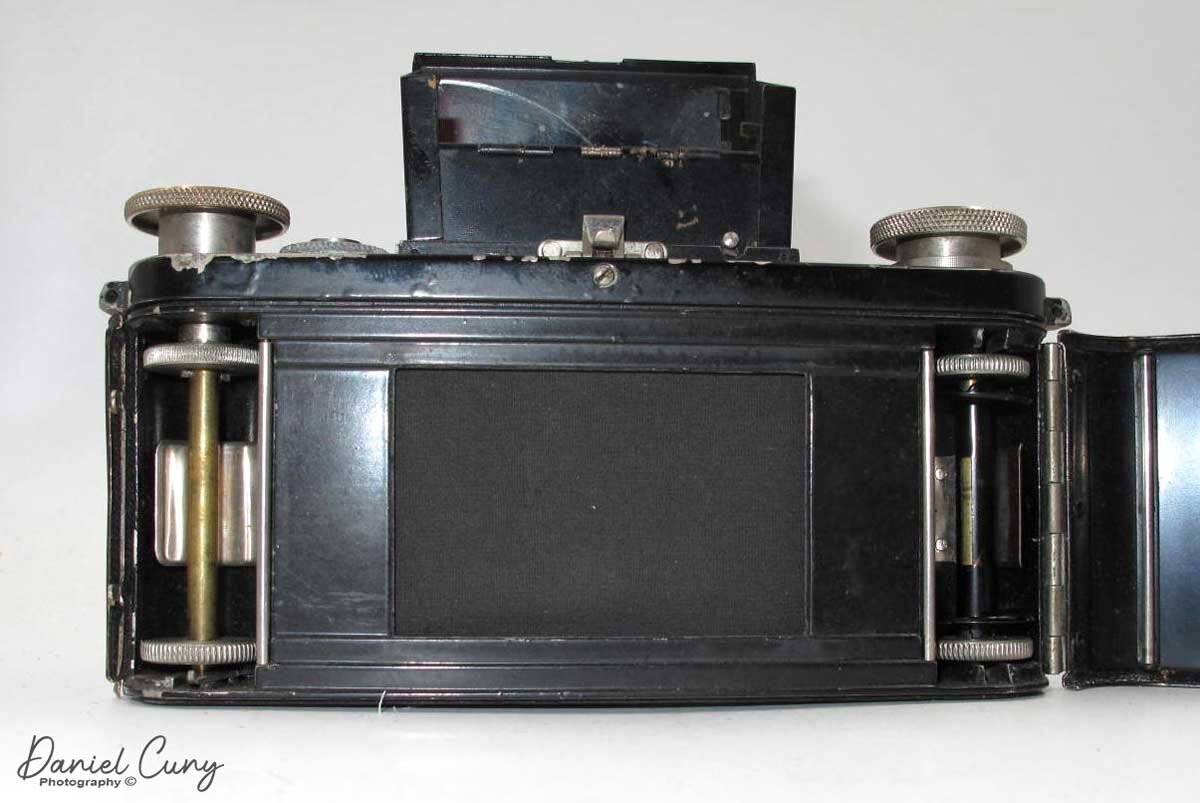
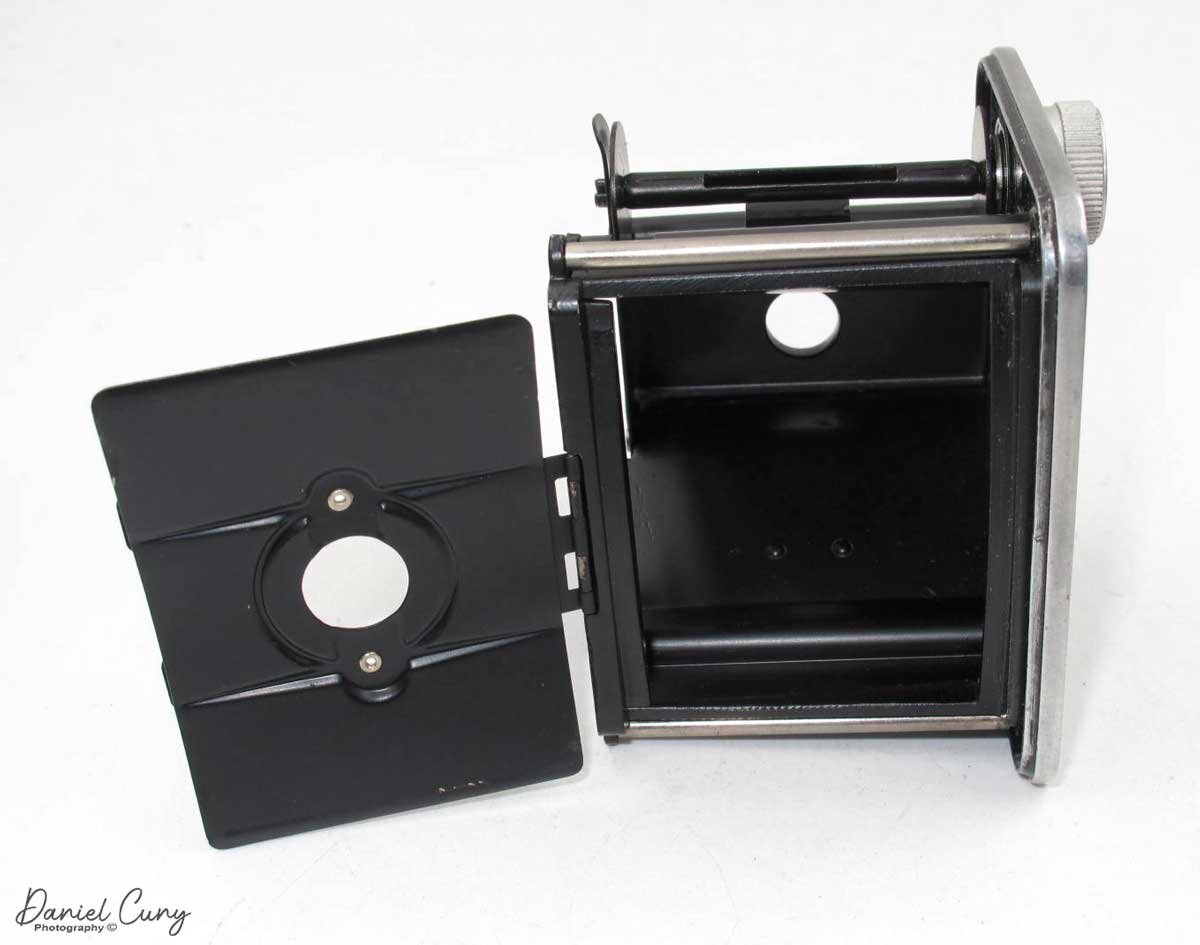
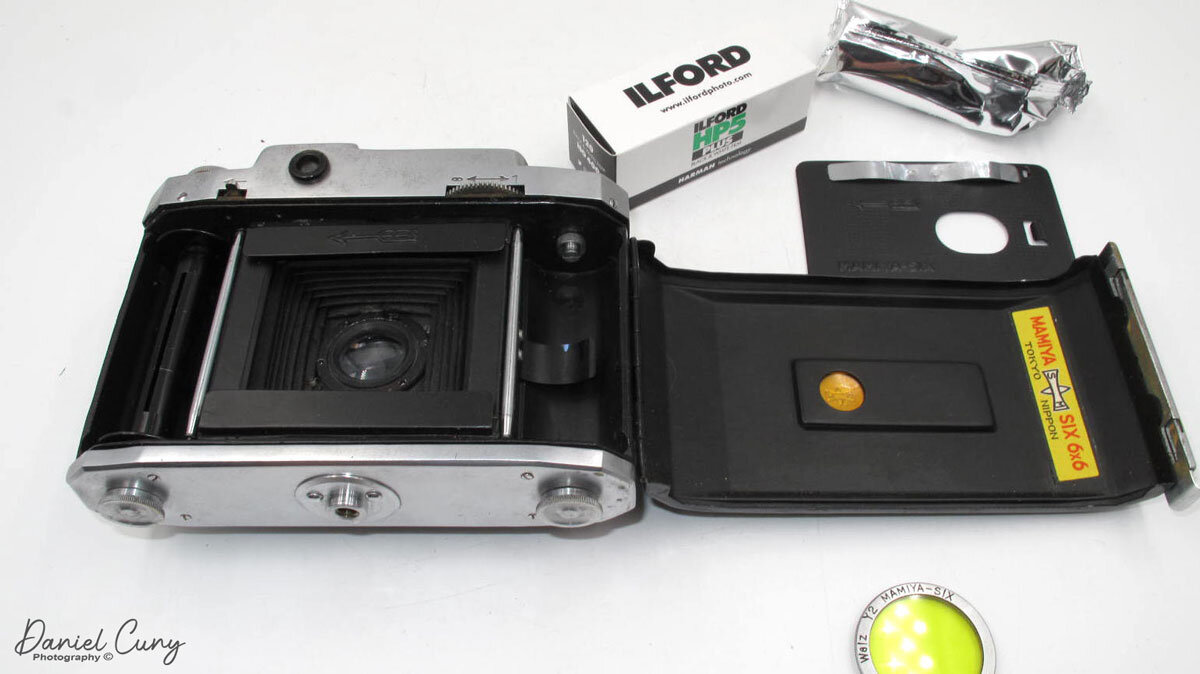
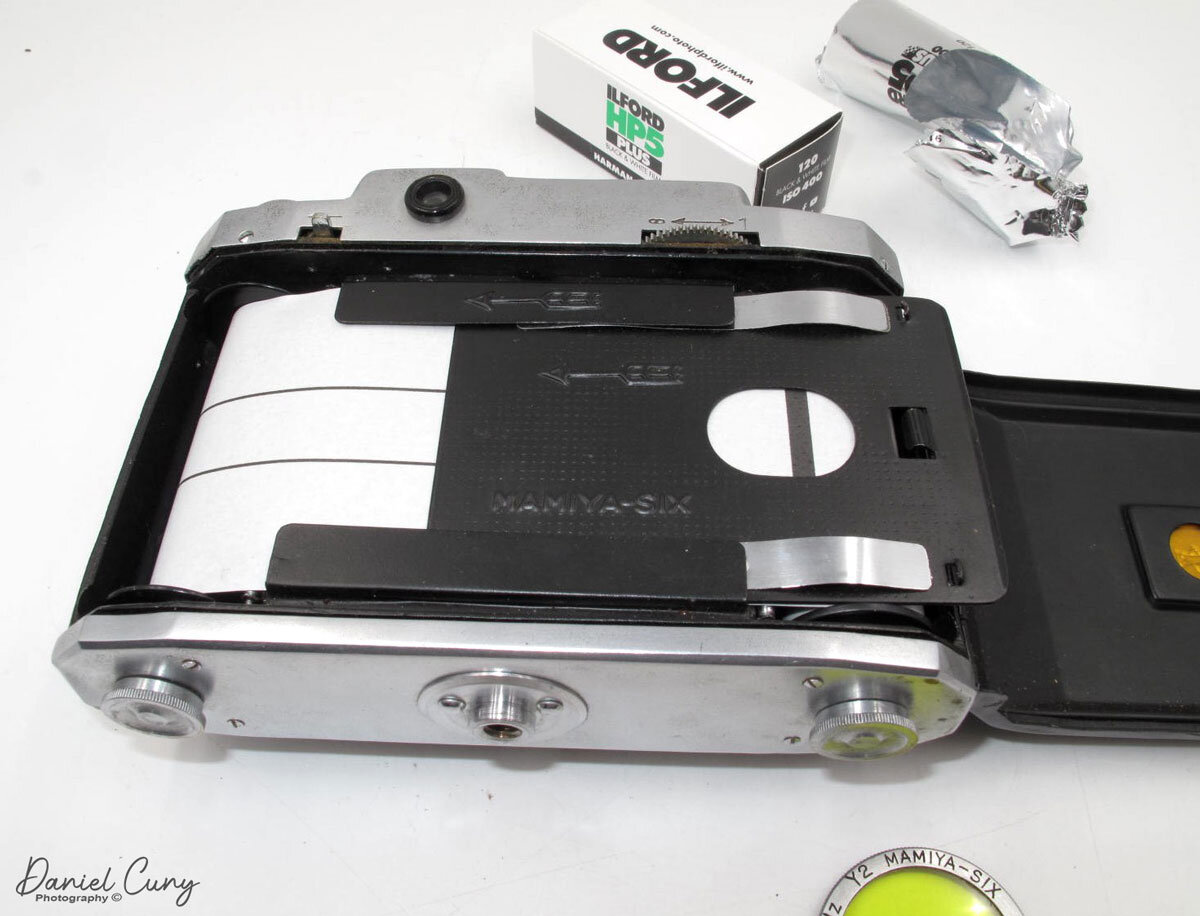
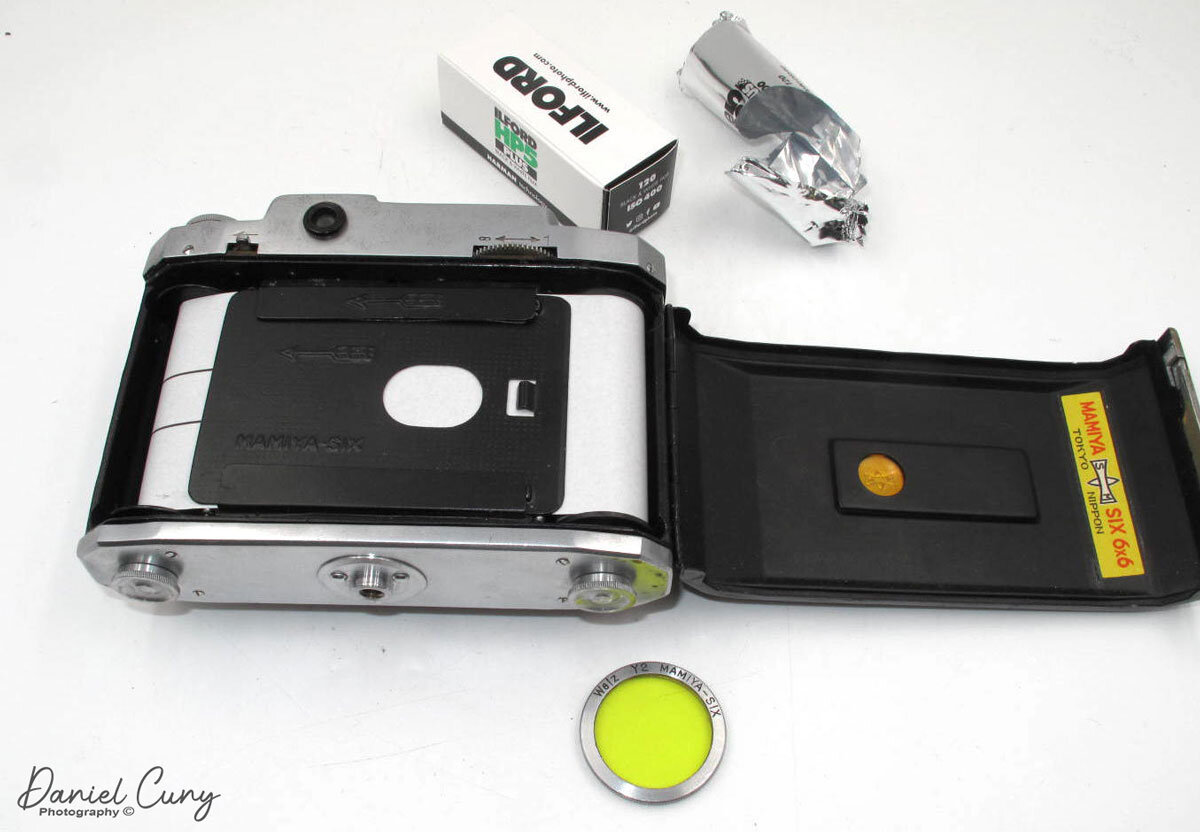
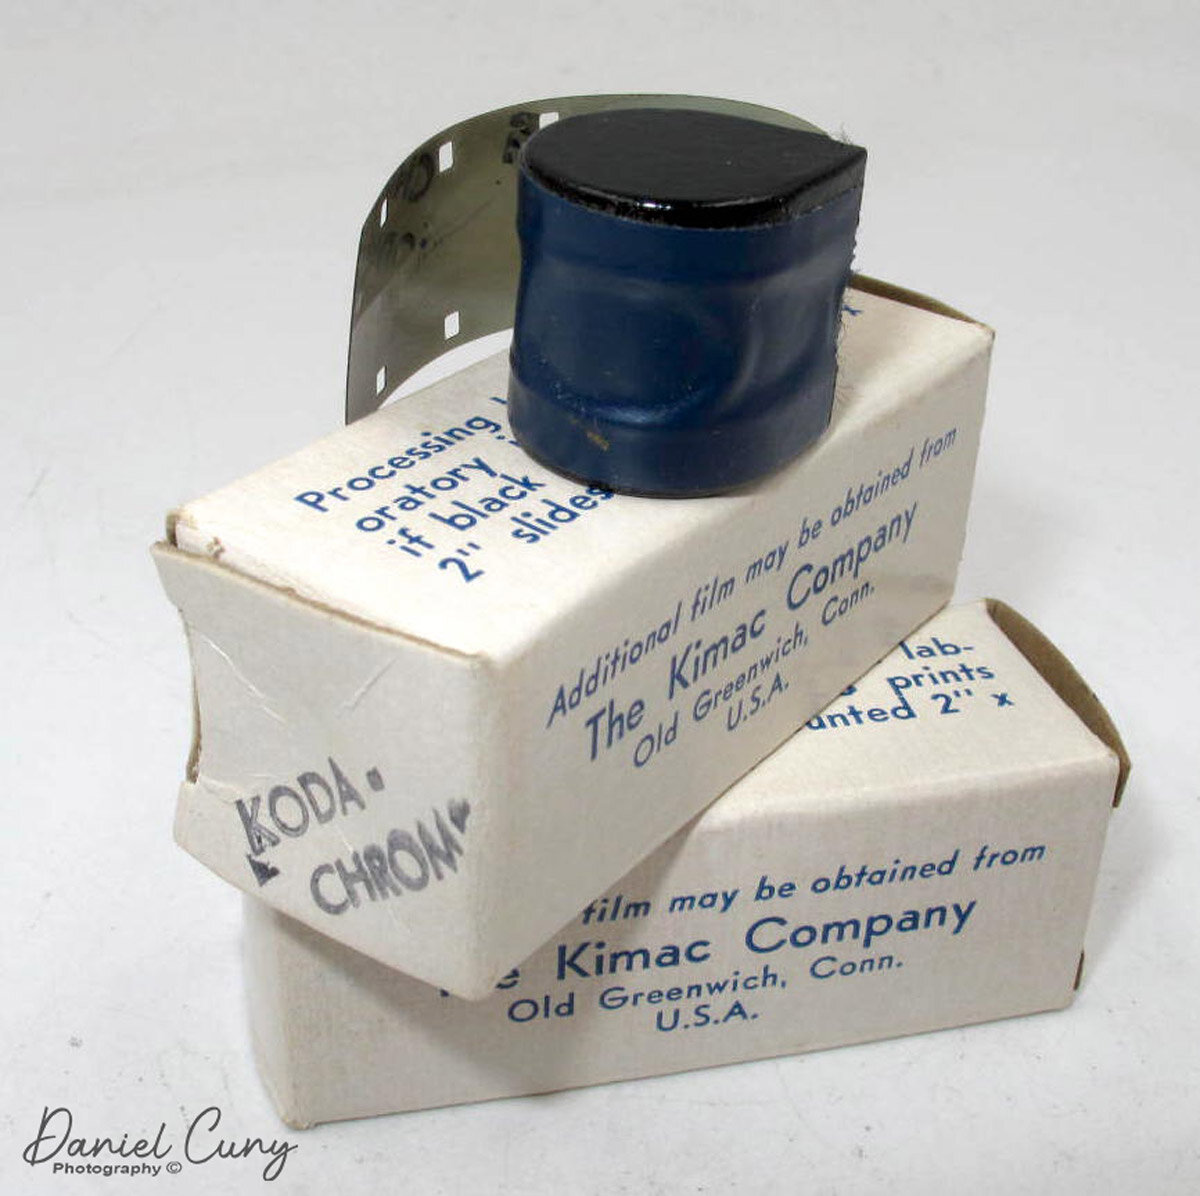
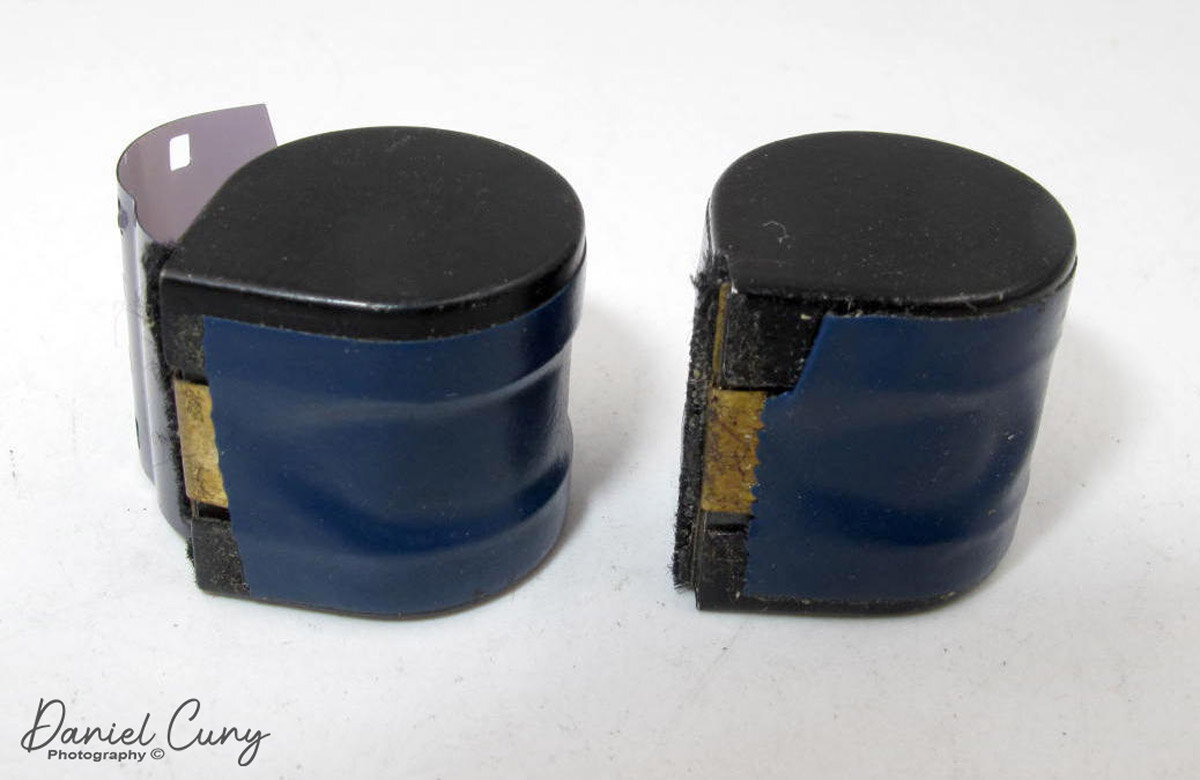
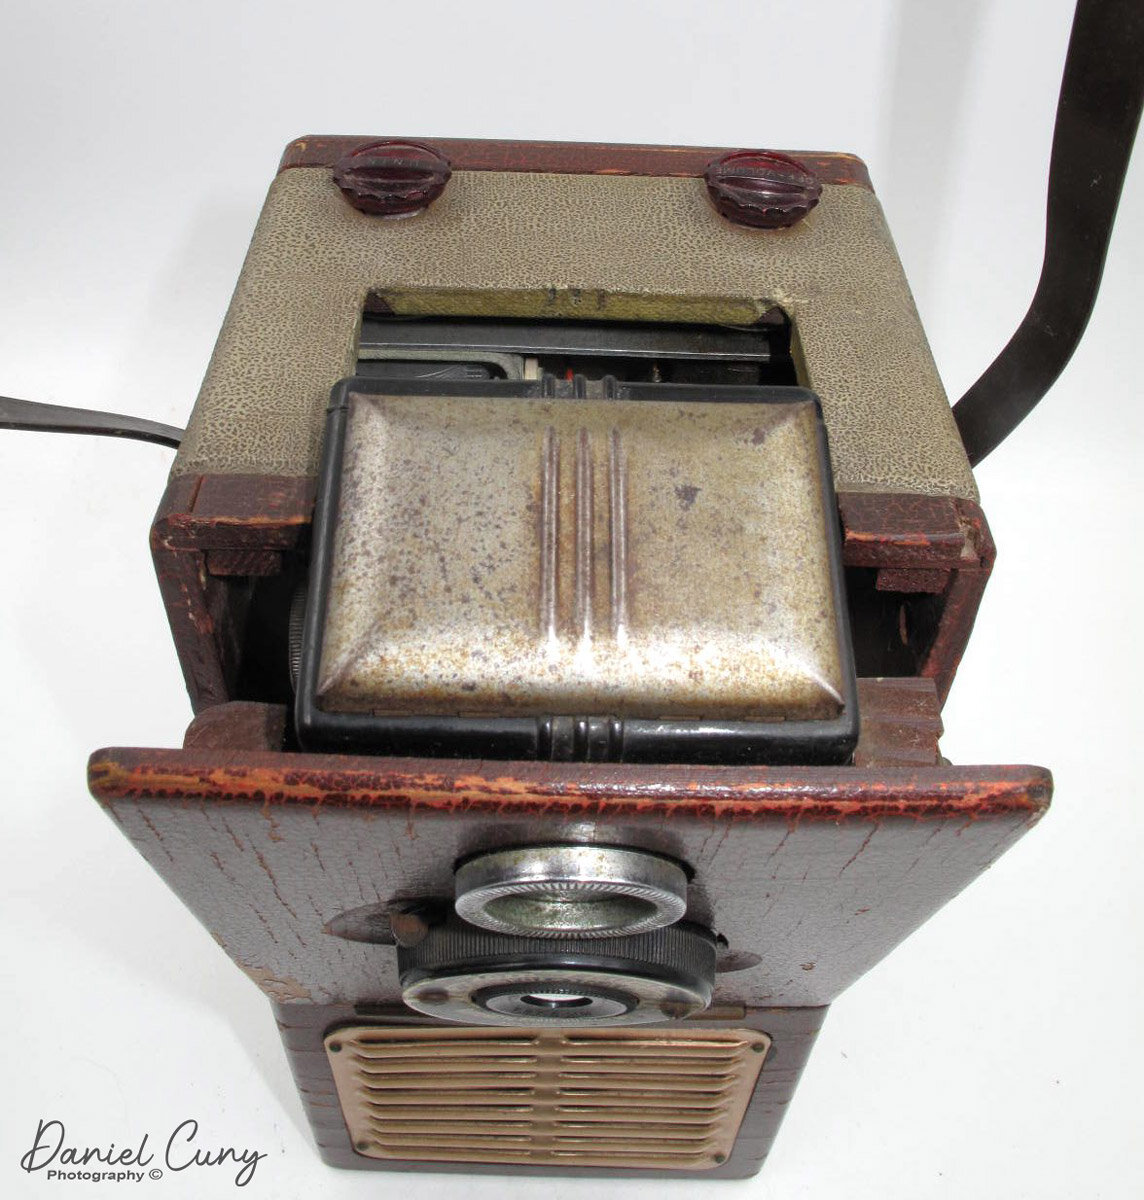
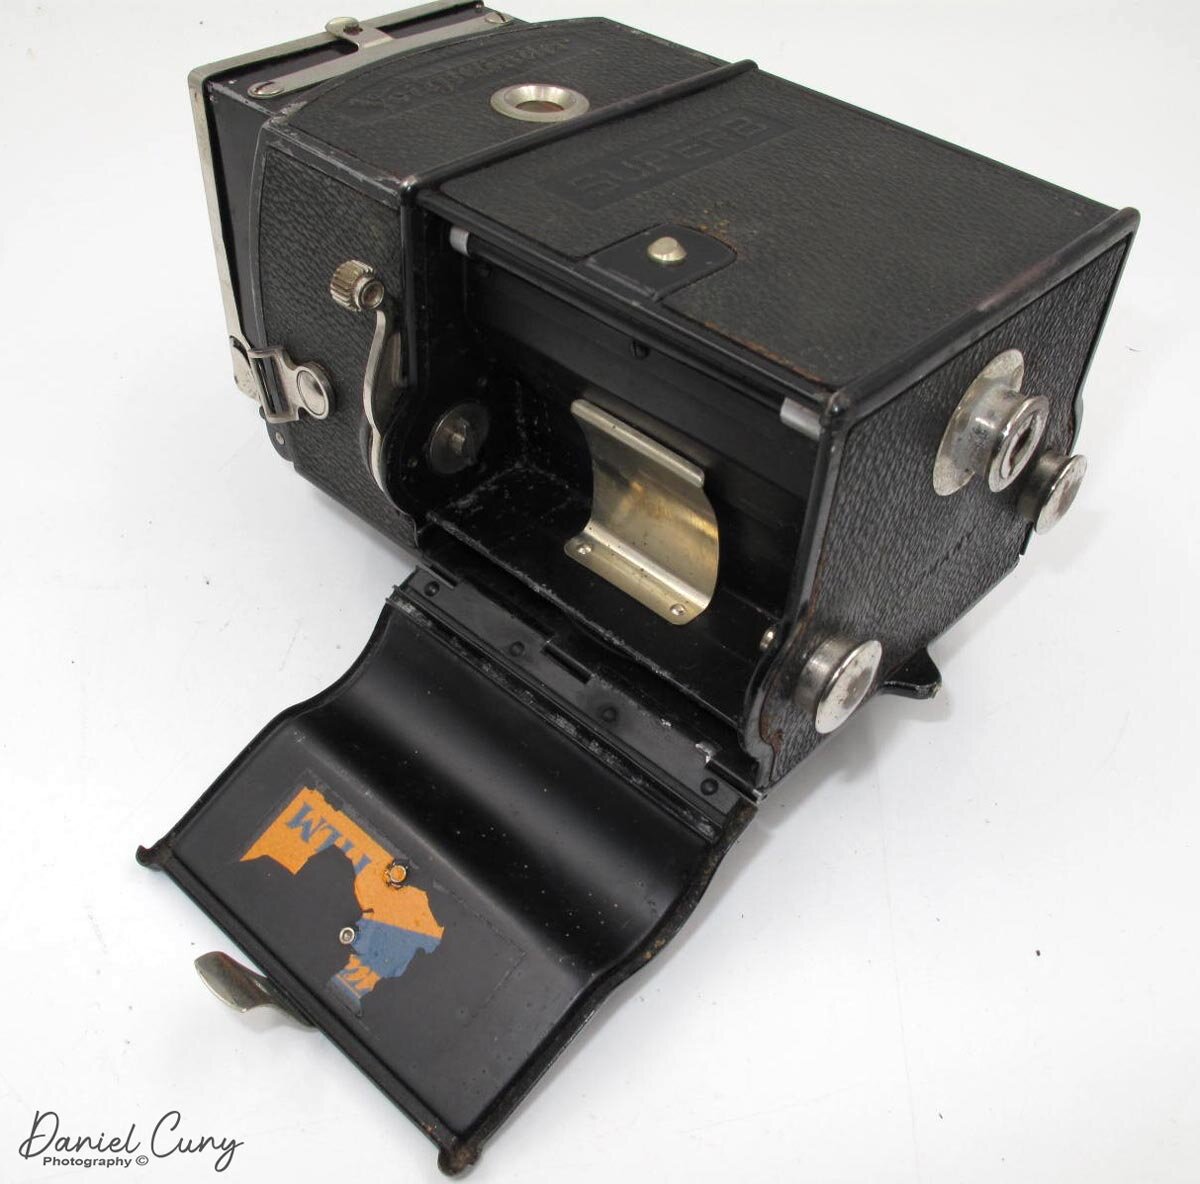
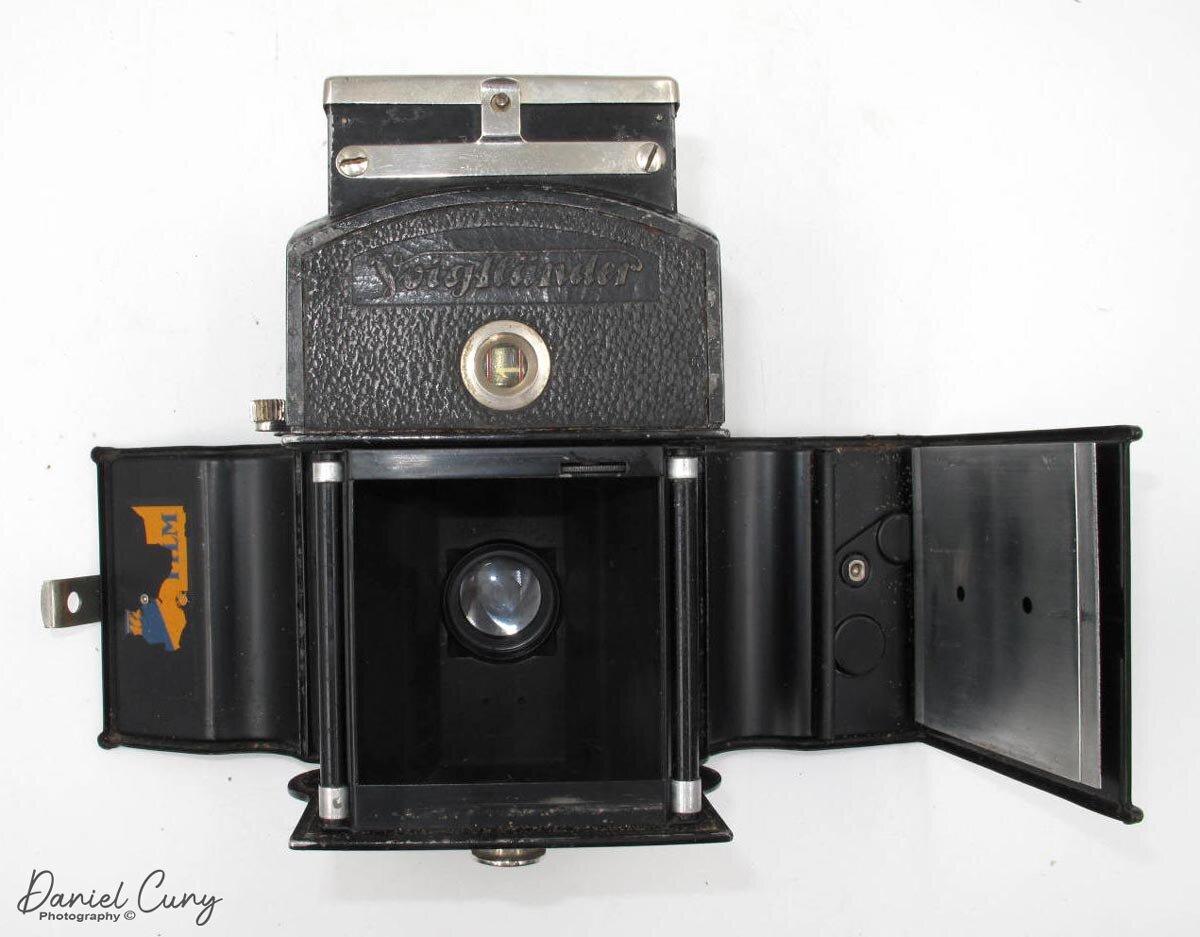
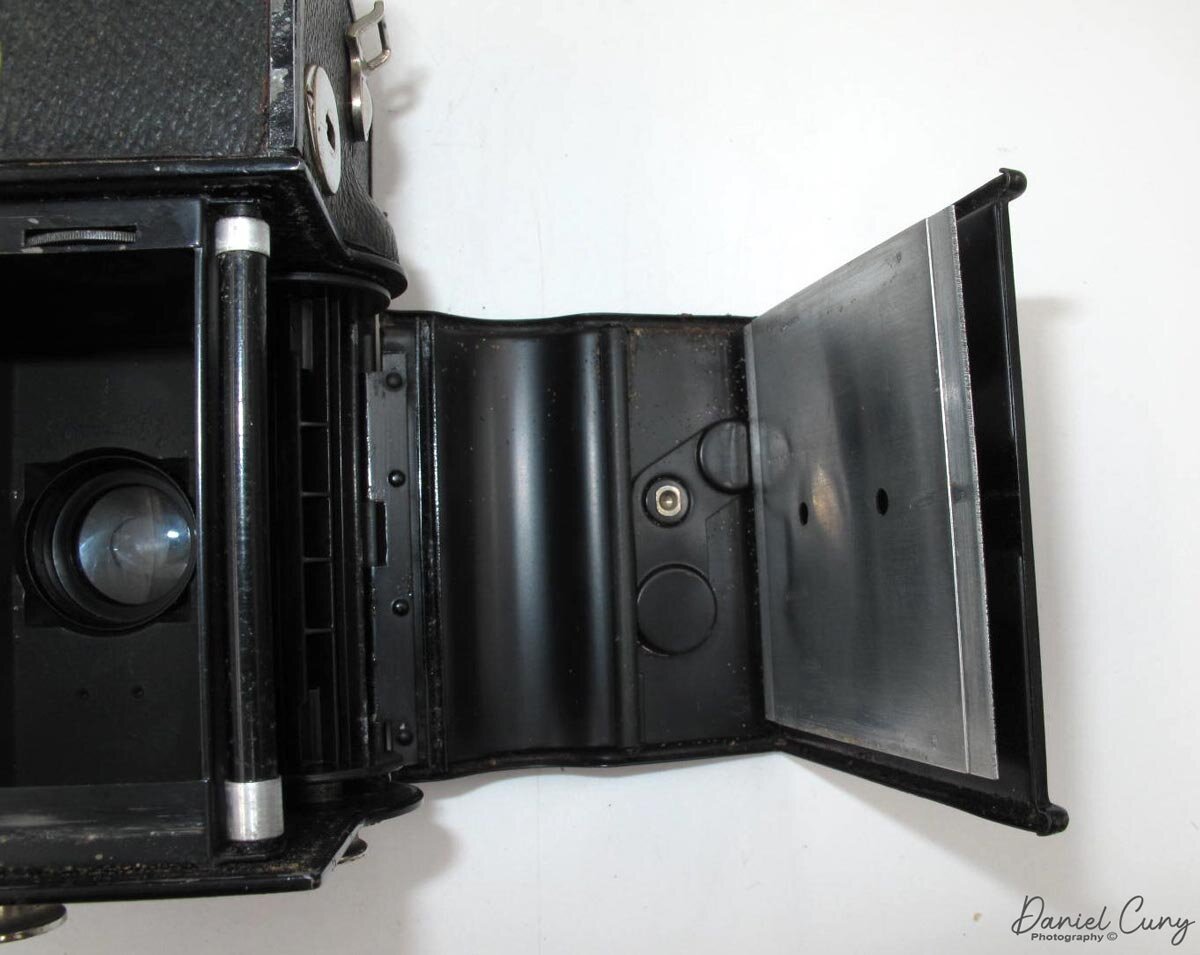
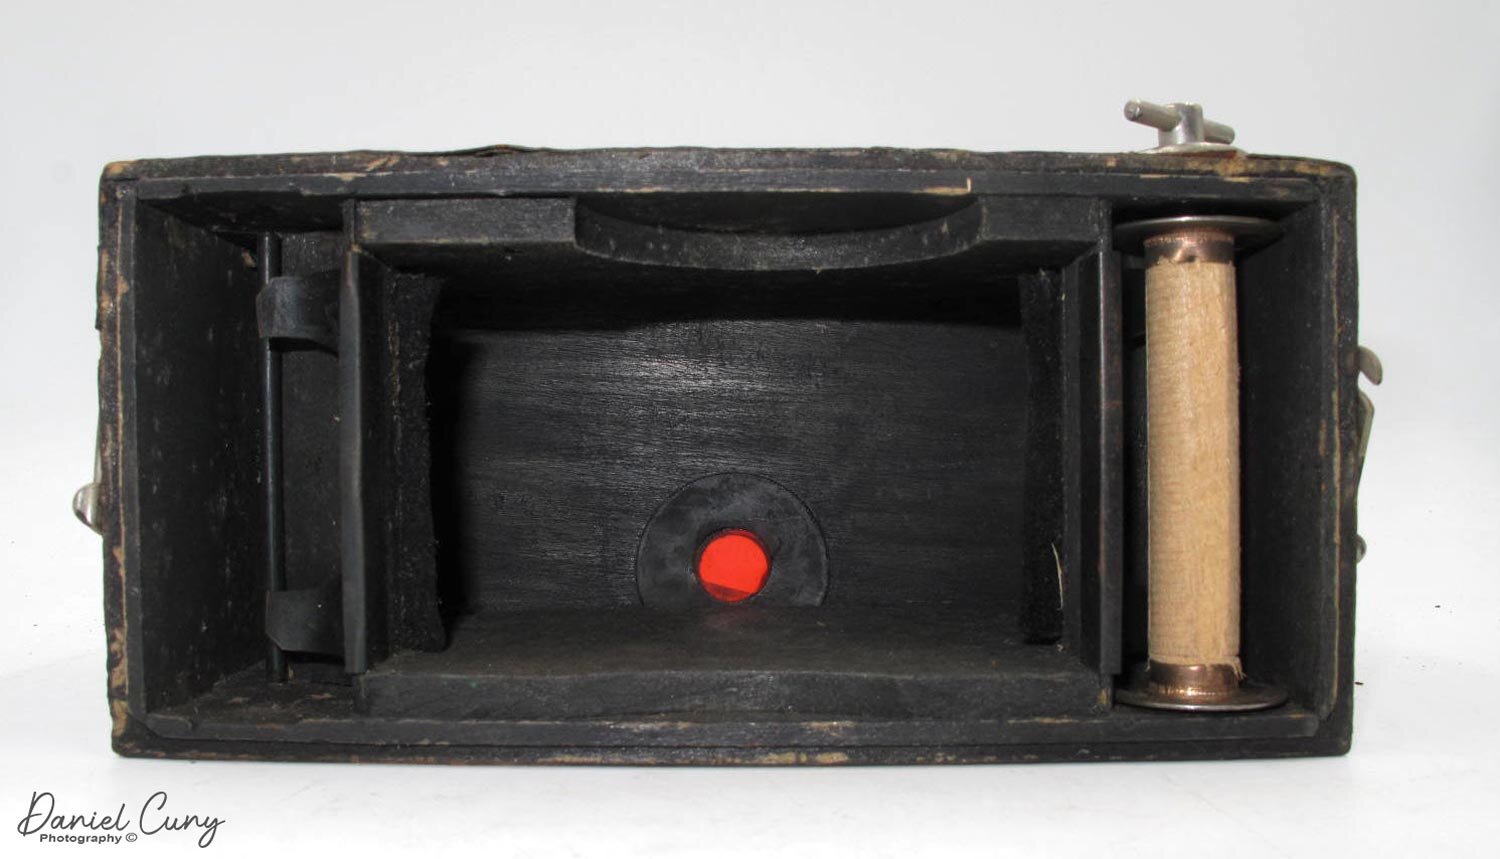
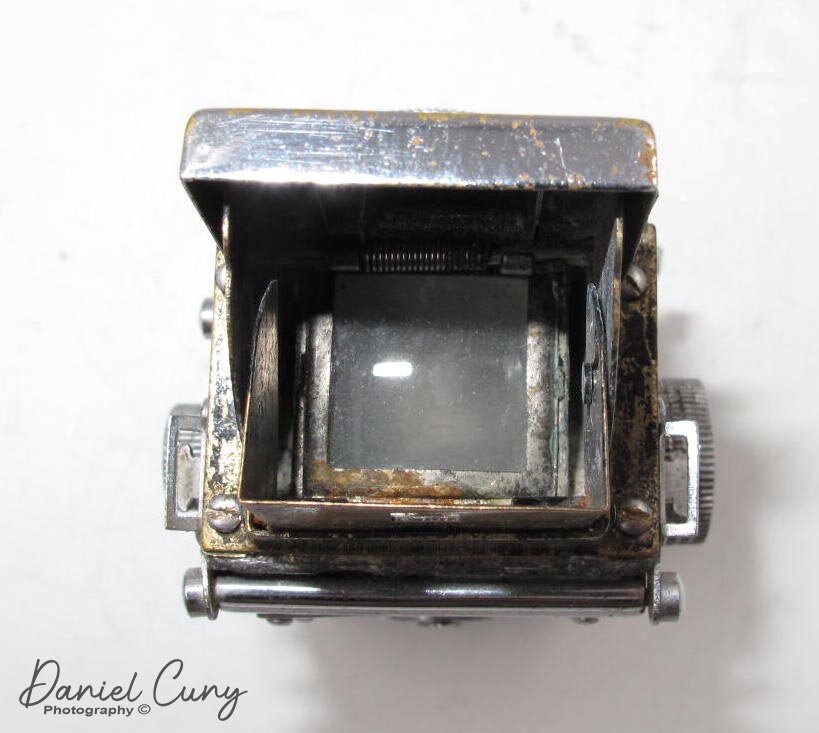
 When you lift the rewind knob and swing the door open as you would a 35mm camera, you see there are rill film reels in the camera. The camera shoots 14x14mm square images on the 17.5 paper-backed roll film, which was popular in the "Hit" style cameras, but the Snappy film was much better quality.

The System

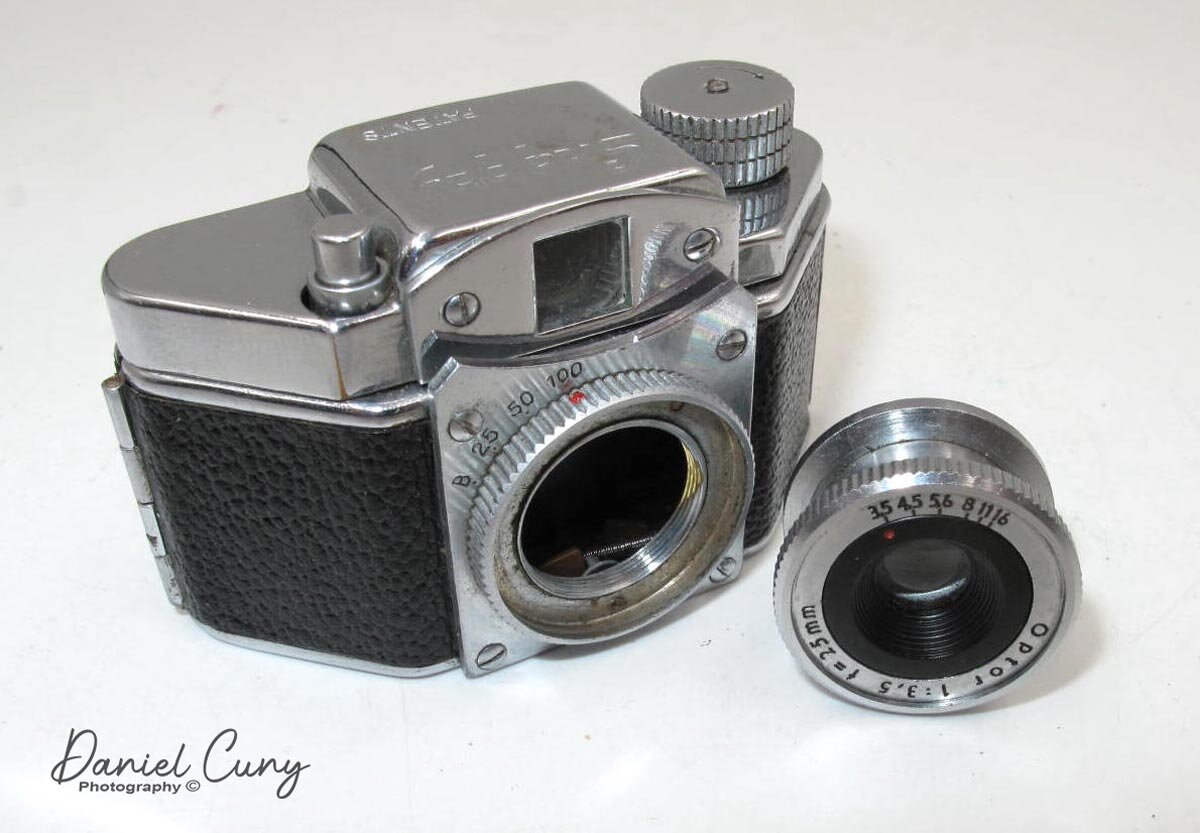
The lenses on the Snappy are also interchangeable, and they unscrew from the camera body. There is a Cherry 40mm f5.6 telephoto lens which also comes with an auxiliary frame that fits the front viewfinder window. Other accessories for the Snappy camera are Close up lens, which fits over the standard 25mm Optor lens, hoods and filters, tripod adapter, and the sturdy brown leather case with strap. The Snappy came in a kit with all the accessories in one red and black presentation box.

Conclusion

The Snappy is an excellent camera and a camera that I enjoy having in my collections. Having researched the camera, I'll need to hunt down the other accessories for the camera, especially the telephoto lens and filters. Maybe it's time to see if I can find the whole kit. Now that would be the crowning gem.

 Thank you for taking time from your busy schedule to read my blog post. I'll do my best to do this every other week, time permitting. Until next time, please be safe.

Rare Univex Model AF Cameras

I started writing my blog posts to let the world know about the cameras in my collection, the fondness I have for cameras, and anything photographic. I had a LOT of time on my hands since losing my position a year ago due to the Covid 19 pandemic. The company I worked for restructured the sales position, and I was the odd man out.

My collection of Univex AF Cameras

My collection of Univex AF Cameras

 I love the companies that hired me. It's been gratifying to get back to work, and it feels lovely to contribute to the workforce and the photo community I feel so passionately about. I've been lax in my camera blog posts lately because I took a new job that has consumed most of my time and energy for the past few weeks.

Blogging

I'm hoping to get back to writing this post every other week now instead of weekly as I was doing. Time willing, I'll do it every other week, or maybe weekly should time allow.

 I wanted to take a few hours to photograph the cameras I'm presenting this week. It's not a single camera like the past blog postings, but a whole collection of cameras that I've built over many years of collecting.


The Company

The Universal Camera Corporation started in 1932 at 521 Fifth Ave., then moved the following year to 32-46 West 23rd St. New York, NY. They stayed in that location until they ran out of office and manufacturing space in 1938. Starting in the depression era, they made reasonably inexpensive cameras made that also used their film, the successful Universal six exposure #OO film for their cameras.

Until 1938, The Universal Camera Corp. was making primarily smaller cameras like the Original Univex Model A camera, which sold for $0.39 and was wildly successful. In 1938, to revise the sales of #00 film, Universal Camera Corp came out with a line of Candid Cameras, which became increasingly popular during this time.

The Story

This story is about the small "A" model cameras and their specialized models in the AF line. As mentioned in many of my previous posts, my love for colored cameras and the odd, unusual models camera manufacturers made. I started collecting the Univex AF line well over 20 years ago when I came across their colored cameras.

 I believe the first camera purchased the standard and graphic-faced AF-2 model with the black face and graphic red lines running from top to bottom of the camera. Then I started buying the colored models, green, blue, brown, grey, and found their Girl Scout model when I searched out "Scout" cameras. At this time is when I came across the elusive Hollywood, GE Topper, and very rare Aristocrat model.

 I found the Hollywood camera (brown model) first on eBay and was excited to have it in my collection. I've been looking for the GE Topper and even more elusive Aristocrat camera for years. I did see GE Topper models on eBay, but they were always more expensive than I could afford.

My collection of Univex AF cameras

My collection of Univex AF cameras

The Elusive Camera(s)

In my camera searches, I received an email about someone back east selling a "lot" of cameras, and looking at the photos, I saw it…..The elusive Aristocrat camera. It was an online auction, and I just HAD to have it. On the day of the sale, I went online, and when the camera lot came up for sale, I was ready. The pricing started slow and started to build. It got close to my limit, and low and behold. I had won the auction along with a box of items I wasn't sure I wanted.

 When I talked to the shipper about the items in the box, I told them I only wanted this one item, but they already had the items packed and ready to ship. I bit the bullet and had the whole lot shipped to me. From the time I paid for the shipping to get to me to the day it arrived, I knew the one camera to complete my collection was the GE Topper. For days, all I could think about was finding the GE Topper camera.

 When the box arrived, I was giddy with excitement to open it and put the Aristocrat model on my shelf and the other models in the collection. All the cameras were bubble-wrapped. Pulling items out, I kept looking for the Aristocrat. I pulled this one bubble-wrapped item and, turning it over, I faintly saw….could it be what I believe it is, the GE Topper camera? I gently unwrapped the camera, and as I was peeling off the wrap, the front face became more visible. It was the GE Topper model. My heart was pounding, and my eyes teared up a bit. Not only did I get the Aristocrat camera BUT the GE Topper too in the same sale.

Later, I added the odd difficult to find, green Hollywood camera, so along with the AF-3, AF-5, and AF-5 models, I can call this collection complete unless something else pops up that I'm not aware of.

 Thank you for taking some time from your schedule to read my blog on cameras in my collection. Until my next posting, please be safe.


Ruberg Art Deco Camera

As I've stated several times in my blog posts, that the flashy, colorful odd, unusual, or bazar cameras are items I'm attracted to. That's been the same my entire life. I believe that's probably true for the majority of individuals. People are always looking for something out of the ordinary, not the usual mundane, usual products or items. Maybe I'm wrong, but that's how my brain operates. With that in mind, this week's camera and maker of the camera fits right into this category, the Ruberg Art Deco camera.

My Ruberg “Art Deco” Camera

My Ruberg “Art Deco” Camera

The company.

The Ruberg cameras were manufactured by the Ruberg & Renner company, which was located in the Delstern district of Hagen, Germany, during the 1930s.  The company was started in 1918 by Josef Ruberg, who originally started producing drive trains for bicycles, motorcycles, and automobiles. After 1930, the company started making simple cameras. In 1931, Josef obtained a patent for the construction of a simple camera in Germany. He also received a patent in the United States in February 1932.

"Due to the simple and very inexpensive production of all the parts of the camera from synthetic resin which was done from a single pressing process makes it possible to place a cheap camera on the market which is affordable to all", it says on the patent application. In the 1930s, Ruberg & Renner manufactured four models with 25 designs for export to the USA, Great Britain, and France. The cameras' construction ended in the mid-1930s where the company started producing products to help the German war effort.

The Camera

As noted before, the Ruberg cameras are straightforward cameras with several different variations of the same build. The Art Deco version I have has the standard helical telescoping lens tube found on all of their cameras. On the back of my Art Deco camera are chrome patterns on two corners, giving it a modern look. The cameras take 127 size film and have a straightforward shutter system. Some later models even enjoyed the lens's focus, even though it was a fundamental zone focus. My Art Deco version is a metal body camera with a dark brown resin lens tube. My camera has either B for time exposures or I instantly, which is 1/25th second exposures. There is primary aperture control. Pulling on the chrome arm with the ball on end seems to change the aperture settings inside the camera's lens. Looking at the aperture settings, I can't see much difference. I'm guessing they are in the F8 to f11 or f16 settings.

The camera sports a straightforward pop-up sports finder. Mine is pretty wonky and doesn't stay erect and kind of flops down a bit.  The film advance is just a bare knob to advance the film. Loading the film is basic. There is a latch on the side of the camera to open the back. The film slides through a channel to hold it flat. There is no pressure plate to keep it flat. There is a black piece of felt glued onto the backdoor on my camera, so I'm not sure if that's normal or just the previous owner did it to the camera I have. The red window cut out for the felt is professionally done, so it may be something they did in the factory.

The Ruberg Art Deco Camera with lens extended

The Ruberg Art Deco Camera with lens extended

Conclusion.

I enjoy this camera and am now looking for other Ruberg & Renner versions to add to the collection. I like the twisting lens, but most of all, I like the different colors the cameras come in. The shutter in my camera isn't working so I haven't taken photos with it. At some point, I'll be purchasing some 127 size film to run through the many cameras I have that take that film size.

 Thank you for taking a few minutes out of your day to read this blog post. As always, I enjoy your replies and comments, so please keep them coming. Until next week, please be safe.

Petal Camera

In my early days of collecting, I was never a real huge fan of the smaller subminiature cameras, mainly since most of them were the lesser quality cameras, or as I called them, "carnival camera" like the Hit camera. Then there was the other end. The 007 spy style camera was coming from Minox. As I grew in my camera maturity, coming across cameras like the Minolta or Yashica 16mm camera gave me an appreciation of some of these cameras' quality and quality.

My Round Petal camera

My Round Petal camera

For this week's camera blog post, I wanted to go back to one of the subminiature cameras I have in my collection. The Petal camera has always intrigued me since it's the smallest of the small non-medical cameras made according to Guinness World Records. As far as cameras go, this one is tiny and just a little larger than a quarter in the US or a 2 Euro coin. The St. Peter Optical Company made the Petal camera, whose Japanese name was Sei-Petero Kōgaku, in 1948. According to some, I've seen some references where it stated its introduction in 1947. The first US advertising of the camera was in U. S. Camera in February 1949, which you can see here.

The Camera:

The Petal camera comes in two different styles, with an even rarer third version named the Evarax A. The two primary Petal camera are either a round-faced camera, which is what I own, or a second model with an octagonal shaped face. The Evarax A camera is an octagonal shaped face camera with a more elaborate etching on the faceplate. The Petal camera is only 1.25" across by 1.75" tall by 5/8" deep and weighs 2.2oz. The camera has a 12mm f5.6 lens, placed in the upper middle on the front of the camera. There are two shutter speeds, either "B" for time exposures or "I" for instant, which is 1/25th of a second, controlled by a wheel on the camera's front.

My Petal camera compared to a U.S. Quarter.

My Petal camera compared to a U.S. Quarter.

On the top of the camera is an optical viewfinder, and to the right of the viewfinder is the shutter trigger lever. Along the top of the optical viewfinder is a lever that can be mover over the trigger arm to lock it so you cannot take a photo when you don't want an accidental image taken. The shutter release lever pushes a plunger down into the camera, which trips the shutter. On the camera side is a knurled ring that you rotate to advance the film to the next exposures. To the side of the knurled ring, number 1 to 6 with indents stops the ring at the next photo.

Loading the Camera:

It took me some time to figure out how to get to the film chamber. After playing for about 15 minutes or so, I noticed that the back of the camera. The camera back can be unscrewed to get to the film cassette. Once the back is off, it exposes the film cassette. Once that's removed, you can see the shutter mechanism and the inside of the camera itself.

Unthreaded the back off the Petal camera. You can also see the exposure counter.

Unthreaded the back off the Petal camera. You can also see the exposure counter.

The film came in preloaded discs with 6-6mm images on each film cassette. The film cassette holds the film. To get to the film, the cassette needs to be unscrewed too. The original Petal film was a panchromatic film, which needed to be loaded in complete darkness. Many people used orthochromatic film like that can be loaded and unloaded under a red safelight, which doesn't affect the film. A film cutter allowed the Petal camera owners to cut 35mm film to use in the film cassettes.

Once the film is in the cassette and back into the camera, you thread the back onto the camera. You need to rotate the back portion of the camera one to two revolutions clockwise until the #1 is next to the exposure indicator. Doing this opens the film window on the film cassette and allows light to get to the film once the shutter is triggered.

Exposure counter on the Petal camera.

Exposure counter on the Petal camera.

After you took the six exposures, the exposure counter is at number six to unload the film. You need to turn the number counter clockwise two numbers to number 4, closing the film window and allowing the photographer to unscrew the back and take out the film cassette for processing.

Conclusion:

The Petal camera is a lot more sophisticated of a camera than I first thought when I purchased it many years ago. It's very well built and a prized camera to own for the "spy" photographers. Extremely small, very well made, and a beloved camera in my collection. The shutter on my camera is inoperable. It would be fun to cut some film and take it out for a spin.

 If you have questions or comments about this camera or any others in my collection, I'd love to hear from you. Thank you for taking a few minutes from your day to read about this fun camera. Until next week, please be safe.

Pouva Start

Whenever my wife and I travel, I'm always looking to see if the country we're going to has a flea market or someplace where there might be a possibility to find cameras. It might be in a run-down antique store in Vietnam where I found a few cameras. One of my all-time favorite places was a flea market outside of Prague, Czechoslovakia.

My Pouva Start original model with sport finder opened and lens out.

My Pouva Start original model with sport finder opened and lens out.

The flea market itself was a wild experience. The people-watching and the different items at the vendor's tables was pretty fantastic in itself. I didn't know how many cameras I would find but figured there'd be a good mix of Russian and European cameras. I was correct on both counts, and one of my favorite cameras found there was the Pouva Start. In my opinion, this is a classic 6x6 format Lomography camera. Something compact, well built, and extremely simple to use. Let me tell you a bit about the camera and the company that made it.

Karl Pouva

The Pouva Start camera was built by Karl Pouva AG, who first started his company making simple Bakelite slide projectors in Freitel, a city near Dresden, Germany, in 1939. After the war, that area of Germany was a part of East Germany. In 1951, with his experience with Bakelite, he decided to build a simple camera. Something easy to use, low cost, and a camera to get the youth started to take photos. At the time, the camera cost 16.50 Deutsche Mark (east), which was very affordable for young people.

There have been several different changes in the Pouva Start camera over the years. I am starting with the camera I have, with the pop-up sports finder. Later, in 1956, they updated the design to incorporate an optical viewfinder into the camera and symbols for aperture settings. A sun symbol for smaller aperture settings, and clouds for larger aperture settings. The one thing that stayed constant on the cameras was the screw out lens, which acts as a locking mechanism for the camera.

The Camera

This camera has a very classic design, with a spiral threaded lens system, which is very similar to the Kodak Bullet cameras built in the early 1930s. When the lens is threaded back into the camera body, the shutter mechanism is locked so you cannot take unwanted photos. Once you wind the lens into the taking position, the shutter firing system engages with the shutter button, and the shutter now fires.

On the lens are just four settings, two for the shutter and two for the aperture settings. There is a toggle switch on the shutter side that goes from "Zeit" for timed exposures and "Moment" for a regular shutter speed of 1/30 second. On the aperture side, there is another toggle between "Sonne" Sunny or F16 and "Trub" Cloudy F8. In the later versions, as stated, they used symbols for sunny/cloudy. The camera incorporates a Duplar F8 lens, which has two elements in two groups for simplicity.

On top of the camera is the pop-up sports finder, the shutter release button, a cable release button to thread a cable release into and trigger the shutter: the film transport winding knob, and two metal levers. One of the levers is next to the shutter release button, which you can slide over to lock the shutter for time exposures. The second is by the film winding knob. This lever opens the back of the camera for film loading.

That lever is the one that stumped me for the longest time. I kept wondering how to open the back to load the film. I pulled and twisted several different areas without success. Then I pressed the lever forward, and the back started to come off. The back is held into place by friction and seats tightly onto the camera very well. The lever is attached to a small piece of Bakelite that, when pressed forward, separates the back from the camera, allowing you to take the back off. Ingenious!!!! I love this. So simple.

Photos from the camera:

Lake-Quinault-9-2020_047.jpg
Lake-Quinault-9-2020_001-copy.jpg
Lake-Quinault-9-2020_045.jpg

Conclusion:

The camera is enjoyable to use and doesn't take a horrible photo. I was surprised at how the pictures turned out. They're not the sharpest photos I've taken, but for a simple lens, they're not bad. If you like the Lomography style of cameras, I search out this camera and try it out, as I think you'll enjoy using it and the photos that come from it too.

 Thank you for taking a few minutes out of your day to read this post. I always enjoy it when I hear from you, so please feel free to email me any questions or comments about this or any other camera I've written about. Until next week, please be safe.

No. 0 Folding Pocket Kodak

Due to the holiday season, I thought I'd do something a bit different for the blog this week. I did pick out a camera to write about, but as you can imagine, I didn't have a lot of time to do the research, but I did have an opportunity to take the camera out and use it. The camera I picked for this week's post is a camera that's well over 110 years old, and I received some pretty peculiar looks when I took it out to shoot.

No. 0 Folding Pocket Kodak

No. 0 Folding Pocket Kodak

The Camera

This week's camera is the No.0 Folding Pocket Kodak camera built between 1902 and 1906. It's a very compact folding camera that takes  121 size film that produced 1 5/8" x 2 1/2 size film negatives. The No.0 folding pocket Kodak is one of the earliest Kodak folding cameras and measures 5 5/8" long by 3 1/4" wide by 1 1/4" deep when closed, and 3 1/2" deep with the lens extended and weighs in at 11.5 oz.

The No.0 folding pocket Kodak is a fundamental camera that was marketed for horizontal shooting. When you pull the lens away from the body, it has a scissor-style hinge system to keep the lens erect, along with a pull-down leg on the front, right side of the camera so the camera can stand on its own. I'm a big fan of the red bellows style cameras produced during this period, and the bellows on my camera are light tight and a vibrant dark red color. The No.0 folding pocket Kodak has a Meniscus lens along with an Eastman Automatic shutter. To open the back of the camera is just a simple latch on the left side of the camera, and it opens on a hinge to load the film.

When you're holding the No.0 folding pocket Kodak with the lens extended and ready to take a photo, there is only one viewfinder, and it's for horizontal images. Most cameras have two viewfinders, one for horizontal and one for vertical photos. On the other side of the viewfinder is the shutter release button for normal instant style photos, which I'm guessing is approximately 1/60 sec. On the right side of the extended lens area is a protruding shutter release for time exposures. You click once to open the shutter and a second time to close it. On the left side of the extended lens area is the sliding mechanism, which changes the aperture setting. There are three different aperture settings set by moving the slider out to get to the desired aperture.

I am preparing the camera to shoot.

When I played with the camera, I had a roll of 35mm film on my desk. When I opened the back, the camera, it still had the wooden take-up spool in it. I picked up the 35mm film and laid it in the film chamber, and noticed how well it fit there. Pulling the film leader over to the take-up spool, I figured I'd be able to shoot 35mm through this camera.

The 35mm film's width was too small, so I needed to put something across the film area to keep the film flat when shooting. I had some black masking tape in my office, which I use to mask my light table when shooting glass negatives. I measured the width of 35mm film in the camera and cut some masking tape to fit across the film chamber so the film would lay flat.

Now I needed to figure out how many turns of the winding lever would take to advance the film to the next frame without overlapping frames. I did this with a dummy roll I had in my office. It takes two full turns of the winding lever to advance to the next frame. It probably is 1 3/4 turns, but I like to keep it simple. There is a red window on the back of the camera, which I needed to block out the light since 35mm film isn't a paper-backed film like other roll films. I put a couple of black tape layers over the red window to block that light as well.

 I loaded up the film into the camera and took my dogs to the local dog park to try out the No.0 folding pocket Kodak. Once I took the roll of film, I brought it home to unload the film. There is no rewind on the No.0 folding pocket Kodak, so I put the camera into my trusty dark bag for film processing and unloaded the film.

Photos from the camera.

My local dog park, from No. 0 Folding Pocket Kodak camera

My local dog park, from No. 0 Folding Pocket Kodak camera

Lulu from the dog park. She was sitting so nicely, then got too close. Photos from No. 0 Folding Pocket Kodak

Lulu from the dog park. She was sitting so nicely, then got too close. Photos from No. 0 Folding Pocket Kodak

Vertical photo from the No. 0 Folding Pocket Kodak

Vertical photo from the No. 0 Folding Pocket Kodak

Conclusion.

It was enjoyable to put a film through this 110 plus-year-old camera. There were a couple of hiccups as I hit the time exposure shutter button a couple of times to take the photo as I'm used to having the trigger on the side of the camera instead of on top, but other than that, the results are pretty good.

 Thank you for taking a few minutes to read my camera collecting blog. I enjoy hearing from you about this or any of the other posts I've made so far. I hope everyone has a very happy and safe new year and until next week, please be safe.

VP Exakta Model B

Knowing me, the more odd and unusual the item is, the more I enjoy it. The VP Exakta, also known as the "standard" Exakta, is just one of these cameras. The VP Exakta camera has such a classic design. They are sleek, angular, somewhat small but fits well into your hands when holding them. The VP stands for Vest Pocket, which refers to the 127 size film used in this camera and was introduced to fit into the folding Vest Pocket cameras from Kodak started in 1912. This camera isn't small by any stretch of the imagination, but interesting. They call this the VP model due to the size of the film used.

My VP Exakta Model B camera

My VP Exakta Model B camera

The VP Exakta started being produced in 1933 and is an SLR or Single Lens Reflex camera utilizing the 127 size film made by Ihagee in Dresden, Germany. The Ihagee company has a very long history and well known in the photographic community for its cameras and accessories. Here is one of the best websites about the company and cameras. Let me tell you a little about the company before I get more into the camera.

The Company

The company started as Industrie- und Handelsgesellschaft in Dresden, Germany. Johan Steenbergen, a Dutchman, started it in 1912. The name changed to Ihagee due to the German pronunciation of IHG or "ee-hah-get." In the early years, the company was making wooden plate style cameras. You can see their 1914 German language catalog here. In 1918 they changed their name to Ihagee Kamerawerk Steenbergen & Co and six woodworking employees producing products.

After WWI, they had some horrible financial problems, much as other German companies did. After the war, the company dissolves but reappears in the early 1920s, whereby in 1925, they are producing 1000 roll film cameras a day. In 1933 they introduced the first in this line of cameras known as the Exakta A. The camera has a cloth focal-plane shutter that had shutter speeds up to 1/1000 sec, which was extremely fast for its time. Even the Leica's of the same era only had shutter speeds to 1/500 sec.

During WWII, production ceased, and Steenbergen, a Dutch national, transferred ownership of the company to an excellent friend and the company employees due to the tensions between the Netherlands and Nazi Germany. After WWII, Dresden was part of the Soviet-occupied part of Germany. Because Ihagee was Dutch-owned, the East Germans didn't want to damage international relationships, so they produced their popular 35mm Kine Exakta. These were the first 35mm SLR cameras made, and the VP Exaktas paved the way for this prevalent model. It's the camera most people are familiar with or associate what Exakas are today.

 In 1950, Pentacon took over Ihagee and was producing cameras under their name. In 1959, Steenbergen returned to Frankfurt, Germany, and started Ihagee West, making some unsuccessful camera. Steenbergen died in 1967, and the company dissolved in 1976.

The Camera.

The VP Exakta or Standard Exakta took eight 6x4.5cm exposures on 127 size film. They have shutter speeds from 1/25, 1/50, 1/100, 1/200, 1/300, 1/600, and 1/1000 plus "B." The newer "B" model came out later the same year. They started calling the original model "A." The more recent "B" model incorporated extended shutter speeds and a self-timer. The extended shutter speeds were 1/10, 1/2, and seconds of exposure up to 12 seconds, giving the "B" model a shutter speed range from 12 sec. to 1/1000. There are also settings for B and Z. The Z setting is for "time" exposures on the shutter speed dial. I own this model of Exaktas. The later model "C" incorporated interchangeable backs for ground glass focus and film plates. It also had a film advance lever, and they also made the camera with a chrome finish.

The camera's size is 6" wide by 2" tall by 2.5" deep, including the lens, and it weighs 28 oz. I enjoy the camera's trapezoid shape, which, to me, is one of the finer points. The cameras came with several different lenses. The camera I have has the more expensive Tessar f2,8 lens, similar in price to the Zeiss Xenar 2.9 lens. You can look through the 1933 German catalog here. The aperture range on my camera goes from f2.8-22 and is set by the knurled ring outside the lens. I also enjoy seeing the exposed helicoid when you focus the lens. It gives the camera a more industrial look. The helicoid on my camera freezes up and is next to impossible to move unless I put some lighter fluid on the helicoid to loosen it up, but that only lasts a few hours, then it freezes up again.

The focal plane shutter on my camera sometimes works, but it is mainly in the closed position. I can get it to fire at times, but winding the camera to advance the shutters is exceptionally challenging, so I mostly use the camera for display purposes. The film fits into a holder, which then fits into the camera body. To put the film spool on the holders, you unscrew the film holder's bottom and slide the film reel over the holder's center and screw the base back onto the holder before putting it back into the camera.

Conclusion:

I enjoy this camera and am looking into getting the camera repaired to shoot film through it. If any of you out there have had one repaired or know of a reputable repair facility in the US that can handle the repair, please let me know. I'd enjoy running through some 127 films through it to see how it operates, especially if I can get it to shoot for 12 seconds.

 Thank you for taking a few minutes from your schedule to read my post. If you have questions or concerns regarding this post or any of the others I've written, please email me. I'd love to hear from you.

 Until next week, please be safe and hope you have a joyous holiday.

Ferrania Rondine

As I've mentioned in some of the other blog posts, I have a real fondness for the odd, unusual, or colored cameras. When I first started collecting, I was fascinated with all the different colors camera manufacturers would make their cameras. Walking through an antique store or flea market, I thought it was boring to see the regular black box or folding camera unless the folding camera had red bellows. Some had exciting faces on them, but the blue, green, brown, tan, burgundy, and rose-colored cameras were the cameras that stood out. Even better if they came with the matching or, at times, contrasting color bellows.

Ferrenia Ronnie with Sport finder open.

Ferrenia Ronnie with Sport finder open.

This week's post is on one of the cameras in my collection that does come in different colors, blue, green, black, burgundy, and red, the beautifully designed Ferrania Rondine camera. I purchased my first Rondine at least 30 years ago, and while I don't have all the different colors (yet), I'm sure I will shortly.

The Company.

The story of Ferrania, an Italian company, is a fascinating one. Film Ferrania is making film today, but it different from when the original company started in 1882 as SIPE (Società Italiana Prodotti Esplodenti, "Italian Society of Explosive Products," an explosive manufacturer. During WWI, the company grew and built a new facility in Cairo, Montenotte, an area in Farrinia, Italy. At the time, the chemical properties of explosives and film were very similar. And in 1917, SIPE founded a new subsidiary, FILM (Fabbrica Italiana Lamine Milano) in Milano, which was a partnership with Pathe' Brothers of France, which effectively became the film manufacturer Farrania in 1923.

Farina purchased other companies in the 1930s like Cappelli and Tensi, and for a while, they were known as Farrania-Cappelli producing film plates but went back to Farrania in 1938. After WWII brought Farrania to the height of their business, and by 1964, 3M purchased the company. By 2008, Farania ceased to make a color film, and in 2012, they had laid off the majority of their workers. In 2013, FILM Farrinia s.r.l. purchased the manufacturing lines and brought back many of the laid-off workers. Much of the capital to start production came by crowdfunding, kickstart, and in 2017 started to produce black & white film, P30 Alpha. In 2019, the Farrania P30 film began selling into the North American market.

My three Farrinia Ronnie cameras, Green, Blue and Tan

My three Farrinia Ronnie cameras, Green, Blue and Tan

The Camera

The Rondine, which means "Swallow" in Italian, has been soaring in my collection for many years. The Rondine started in 1948, at the height of Farrinia's success. These cameras are very well made box camera that produces 8-1 5/8" x 2 1/2" or 4cm x 6.5cm images onto 127 size film. They are a full metal construction body with some areas showing brushed metal and come with both a waist-level finder and a sports finder built in the camera. There were three different models made, Model A was focus-free, Model B had focus control, and Model BF had focus control and flash sync capability. The camera measures 3.25" tall without the sports finder extended and 4.5" tall with it opened, by 2.75" wide and 3.5" deep. The camera weighs 13.2 oz.

On top of the camera are the waist level finder and the pop-up sports finder. On the front of the camera is the Farrinia Linear 75 meniscus lens, 7.5cm or 75mm f8.8 lens. You can focus from 6' to infinity by rotating the lens to the desired distance noted outside the lens. The Rondine is designed for portrait mode shooting as there is no viewfinder to use in landscape mode. Under the lens is a switch set for "I" or 1/75th second exposure or "P" for a time exposure. Under the switch and the very bottom of the lens is the shutter release, which moves left-right.

The three that I own are all the Model BF with focus and flash capability. The colors I have are blue, green, and tan are all in good condition, with the green camera having a small piece of the leatherette missing under the lens. I see this missing piece on many Rondine cameras. I recently noticed that 127 film is being sold again, and need to run some film through this camera and bring them back to life.

Farrinia Rondine

Farrinia Rondine

Conclusion

The Farrania Rondine is a solidly built camera with some sleek Italian design. It seems like it classy camera, especially with all the different colors available. It's somewhat more advanced than the average non-focusing box camera and something you can quickly put in your pocket, although bulky, a nifty handheld camera.

 Thank you for taking a few minutes out of your day to read my camera collecting blog. If you have questions, concerns, or want to leave a comment, please do so. I enjoy hearing from you.

 Until next week, please be safe.

No. 0 Graphic Camera

In my opinion, the No. 0 Graphic camera is one of the real sexy models made. It's a small yet sophisticated, high-quality design and somewhat technical that it advanced camera manufacturing forward. The camera is a fixed focus camera made by Folmer & Schwing, a division of Eastman Kodak at the time, manufactured between 1909 and 1926.

Graphic No.0 Camera & Case

Graphic No.0 Camera & Case

The Company

Folmer & Schwing, Mfg. Co. first started as a gas lamp manufacturing company. The company was started in 1887 by William F. Folmer and William E. Schwing. When the decline of gas lamp sales occurred in the 1890s, Folmer & Schwing moved into Bicycle and camera manufacturing. Their cameras first appeared in their 1896 catalog and their first Graphic camera in 1898, which you can see here. Mr. Folmer also introduced the photographic world to the very well-known Graflex cameras in 1898, known as the Graflex Reflex camera, a single lens and moving mirror (SLR). Looking at some of their later catalogs, it's interesting that there were so many bicycle-related cases, etc. You can see the No. 0 Graphic advertised here.

In 1905, Eastman Kodak purchased  Folmer & Schwing Mfg. Co., and up until 1926, they were a division of Eastman Kodak. In 1926 the U.S. government forced Kodak to divest its professional division due to the Sherman Anti Trust Act. With no one buying Folmer & Schwing, they became Graflex Inc., which was an independently owned company up until 1958. After 1958, the company had a few other owners and was officially closed in 1973.

Top view of No. 0 Graphic camera

The Camera

Looking at the No. 0 Graphic, I like the intricacy of the top of the camera and the rest of the camera's simplicity. Looking at photos of the camera, I thought the camera would be larger than it is. The camera measures 5 1/4" wide by 3 3/4" tall, including the viewfinder, by 3 1/2" deep, and weighs 1 lb. 10.6 oz. without film. To open the lens, or I guess I should say to open the door to expose the lens as the lens is fixed focus, you press the thumb knob on the camera body's upper left as you face the lens. By pressing the knob back, the door to the lens opens. To close it. Press the button to the left of the lens, and the door closes. The camera has a Zeiss Kodak anastigmat lens, f6.3.

The camera uses a cloth focal-plane shutter system with shutter apertures (distances between shutter curtains) of 1/4, 3/4, and 1 1/2 inches. There is a tension regulator on the top of the camera that regulates the shutter speed and the shutter aperture used. There is a graph on the top of the camera showing what shutter speed the camera will fire at depending on the tension and shutter aperture used. Looking at the chart on the top of the No. 0 Graphic, the shutter speeds range from 1/10 to 1/500. Also on the top of the camera is the aperture setting, which varies from f6.3-f32. You move the pointer wheel to the desired setting.

The No. 0 Graphic takes six 1 5/8 x 2 1/2 inches on No. 0 F.P. Kodak roll film. Later the film was called Kodak 121 film, which you would load just like any roll film camera with the take-up spool on the right-hand side. To open the camera's back is simple, pinch the top and bottom springs and pull the camera back off. This method is similar to many of the Kodak Autographic cameras of this era.

 The camera also incorporates an exciting viewfinder system, which allows for discreet photo taking. There is a mirror in the viewfinder which can be placed in either a 45-degree or 90-degree position. The 45-degree position enables the photographer to view from a 90-degree position from your subject. What they call it deceptive angles camera. You can also open the mirror to 90 degrees making the mirror even with the viewing plane to point it forward towards the subject. In the manual, which you can see here.

The camera I own still has the camera strap on the side and the fitted camera case. While the No.0 Graphic I have is missing the leather on the lens door, it's something I overlook as I generally display it with the door open. My camera is serial number 26602, embossed on the camera's bottom, just behind the tripod socket.

No. 0 Graphic camera in the fitted case.

No. 0 Graphic camera in the fitted case.

Conclusion

The No. 0 Graphic is a prized camera in my collection, especially with how complete the camera is. The shutter is a bit slow, and since 121 film is no longer available, I might want to see if possibly something like 127 size film might work. The camera is small, and I love the quality they put into the design and display on the camera's top.

 Thank you for taking some time from your busy schedules to look over this post, and I always love to hear from you. If you have any questions, comments, or concerns about this or any of the other cameras I've written about, please drop me a line.

 Until next week, please be safe.

Mamiya Six II, Early Version

For the past few years, I've enjoyed shooting with older folding medium format cameras. These cameras are generally smaller and something I can fit into my pocket for easy transportation. They also use larger than 35mm film, so the ability to enlarge or crop the image gives more flexibility. Their lenses are somewhat flat in contrast, but I can change that after processing and digitizing the images. The Mamiya Six camera I have is one of the cameras I like to use often. There are some exciting features built into this camera that make the camera fun to use. The Mamiya Six was the first camera manufactured by Mamiya, and the camera I have, I believe, is the second version.

My opened Mamiya Six camera.

The Company

Mamiya was started in May of 1940 by Mamiya Seiichi and Sugawara Tsunejirō in Toyko, Japan. The first and only camera they produced for eight years was the Mamiya Six, which incorporates a coupled rangefinder on a 6x6 camera that moves the film plane for focusing instead of the lens. Even though they only made one camera, Mamiya managed to grow and gain success throughout the wartime. By February 1944, Mamiya had up to 150 employees and had moved their manufacturing to a new facility. In March 1944, they also opened a second manufacturing facility that made and assembled their lenses. In October 1945, just a month after Japan's surrender, Mamiya was the first company to receive a substantial order, bringing them back to full production.

In 1947, Mamiya started to produce Stamina shutters and Neocon lenses. In 1950, the Setagaya plant became the company Setagaya Kōki K.K. making their shutters and lenses. The name Sekor that appears on most Mamiya lenses comes from Setagaya ki, with the r most likely for Renzu meaning lens. 

I should mention one item I have a real fondness for Mamiya cameras as I was an employee for Mamiya America for about six years during the early 2000s. Some of my fondest memories are working with the wonderful people at MAC Group (Mamiya America Corp.). Phase One purchased a 45% stake of Mamiya in 2009 that changed its dynamic, but they still make cameras and lenses under the Phase One name.

The Camera

Over the years the Mamiya Six was manufactured there have been many changes and modifications. To see some of the changes, you can look here. This is also not to be confused with the Mamiya 6 which was introduced in 1989. I believe the version I have is the Mamiya Six II because the strap eyelets are no longer on the camera as they were on the original models.  Looking at the camera, the first thing I noticed when I bought it was the camera has both a waist-level finder and an incorporated rangefinder, which you can see from the window on top of the camera. Just to the left of the waist level finder window is a small button to open the camera. Depress the button, and the lens extends downward. To me, it resembles the Zeiss Ikon Super Ikonta 530/16 in size and weight. The Mamiya Six I have is 4" tall by 5.5" wide and 2" deep unopened or 4.5" deep opened, and weighs 1lb 12.5 oz without the case or film.

The Mamiya Six I have has a 7.5cm (75mm) f3.5 K.O.L. Sola Special Anastigmat lens in an NKS-TOKIO shutter with speed from 1-200 & "B." The aperture setting range from f3.5-32. To change shutter speeds, you move the knurled ring on the outside of the lens to the desired shutter speed. There is also a knurled ring on the back of the lens are on the right side that allows you to change aperture settings. It's somewhat hidden and took me a minute to find it, but it's easy to change once found. The pin on the top of the shutter cocks the shutter. There is a self-timer on the bottom of the shutter, which has a red dot. On the top of the camera at the far right are the focus distance and a depth of field scale. My scale only goes to F8, which is standard on the early cameras. The Mamiya Six I have also arrived with a Mamiya Six Y-2 filter.

On the back of the Mamiya Six is the viewfinder window. To the right of that is a thumbwheel that focuses the camera. Looking through the viewfinder is the typical rangefinder for focusing the camera. Once the shutter is cocked and you depress the shutter button on top of the camera, a red window appears in the viewfinder letting the photographer they have taken a photo. Under the viewfinder and to the left is a switch with an arrow pointing to the left. Moving that switch to the left allows you to wind the film to the next frame and also takes the red warning out of the viewfinder. The frame counter is at the top of the camera. It's a small round window next to the film advance knob. On the back of the Mamiya Six is also a red window and cover, which you can see the film advance and stop at the next frame, which is automatic. 


Close-up of lens & shutter on Mamiya Six camera.

Loading the film is a bit tricky. I always make sure my film counter is at number 1 before loading. Since the film plane moves for focusing, the pressure plate is a removable plate that slides into the film plane. You slide out the pressure plate. Load the film on the right side of the camera. Drag the leader through the slots where the pressure plate goes and wind onto the take-up spool. Slide back the pressure plate into place, and turn the advance knob until you see the starting arrow on the film leader. Close the back and with the rear window open, advance the film to number 1. Now the frame counter and the film frame number coincided with each other. Once you take a photo, slide the switch to remove the red warning label, unlocks the film advance, and wind to the next frame.

Photos

Here are a few quick shots I took walking around my neighborhood.

Conclusion

I enjoy using the Mamiya Six I have. I like the waist level finder, especially when I want to get the camera low to the ground. It's small for a medium format camera, the optics are good, and the aperture goes to F32, which I utilize when in the day time. The Mamiya Six is, in my opinion, a real keeper, especially when I want to put something in my pocket and shoot medium format.

 I appreciate you taking a few minutes to read this week's blog post. I enjoy hearing from you about your experiences with this or any other camera you have in your collection. Feel free to comment if you have a question or concerns regarding this or any other posts I've done.

 Until next week, be safe.

R. F. Hunter, Gilbert Box Camera

The cameras that caught my eye early in my collecting years were mainly colored cameras. Red, blue, green, brown tan cameras were the cameras I enjoy. If they had the original color bellows, it was that much better, or If the cameras had some design, even better still. Then I started to add red bellows cameras, as well as the odd and unusual cameras. When I first got a look at the Gilbert Box camera, which had the name R. F. Hunter LTD. London, under the lens, I knew I needed to own one. I thought it was not only a great camera but close to a work of art and a mid-century masterpiece.

R.F. Hunter, Gilbert Box Camera with filter

R.F. Hunter, Gilbert Box Camera with filter

Company Background

R. F. Hunter, LTD. London was an importing and distribution company which was initially located at 40 Doughty St., in central London, England. In their later days before going out of business, they were located at 51 Gray's Inn Road, London. They started in the early 1930s, mainly distributing cine projectors and cameras.

Their main claim to fame was Franke & Heidecke Rollei products in the UK in the 1930s. This was the first distribution of their products outside of Germany, mainly due to Cyril Hunter, the Managing Director of R. F. Hunter's close relationship with Herr Franke. The story goes that Herr Franke brought his son to the UK just before WWII and asked Cyril Hunter to watch him in the UK during the wartime. He did so but needed to report to the authorities frequently with his son.

After the war, Franke & Heidecke went back into full production, but licensing the UK's distribution was limited. It wasn't until 1950 that the country changed the licenses, and robust distribution could of the product started to flow freely. According to advertising for the Gilbert camera, R.F. Hunter introduced it in 1953.

The Camera

The brushed stainless steel body with lizard skin sides are what drew me to this camera. When I first saw it, I needed to have it for my collection, just for the camera's refined look, the shine, the color, and Lizard skin sides. It had everything someone like me coveted. It had it all. Once I bought it and received it and started to play with it, I knew I had a superb camera. The whole viewfinder rotates for vertical or horizontal photos. The camera has a double exposure lock, so you can't take multiple images on the same frame. It takes 8-6x9 negatives on 120 film.

The camera measures 4.5" tall by 3.5" wide by 5" deep, including the lens. The lens is an approximate 105mm lens with two aperture setting (Dull) F5.6 or (Sunny) F11. The aperture settings are controlled by lifting or depressing a tab on the camera's upper right, next to the viewfinder. There are two shutter speeds for taking photos (fast) 1/50 and (slow) 1/30, a tab on the camera's left side. My camera doesn't allow me to pull up the tab to get the "slow" settings, so mine is 1/50. There is another setting located on the shutter release of the camera. If you pull the shutter release away from the body, there s an option for "T" or time exposure if needed. Another oddity about this camera is on the side where you focus the lens. As you rotate the lens, there are settings for 8,12, or 20 feet. I wonder why this was in feet as opposed to meters? Was this made for the US market?

On the left side of the camera is the film advance knob, which also cock the shutter, preventing double exposure. Behind the film advance wheel is a liftable latch that holds the camera's body portion to the lens/shutter area. Lifting the latch and pulling the body away from the lens, opens the camera for film loading. The camera's back has a slight curve outwards to replicate the film plane's arc, and there's a window that opens/closes so the photographer can see the frame numbers pass by when advancing the film.

Looking at the top's rotating viewfinder, you can see the etched line for registering your image for vertical or horizontal photos. I prefer the etched lines instead of the cropped corners many other box cameras have. My camera also came with the yellow filter, which fits snuggly into the lens. Next to the shutter release is a couple of flash sync posts. The camera's bottom has a tripod socket in the middle of 3 legs that prevent the camera from sitting directly on a table or ledge, which keeps the bottom from getting scuffed up.

Images

I loaded the camera up with Ilford Delta 125, black and white film. I only wished I had a faster film to shoot as the day I went to shoot was very overcast, so the photos are a bit dark, but not too bad. These images are also unretouched and quickly scanned for the post.

Conclusion

I've enjoyed this camera for many years from afar as it was sitting with my other cameras, but I am happy that I took it off the shelf and took photos with it. To me, it's a beautiful camera. I love the design, the look, and the lizard skin coverings. It is a mid-century beauty that I intend to cherish for many more years for an almost seventy-year-old camera.

 Thank you for taking a few minutes out of your day to look this over. I'd love to hear from you about your experience with the camera and if you've taken it out to use. If you have questions or comments about this or any of the other cameras I've written about, drop me a line. Until next week, please be safe.

Tom Thumb Camera Radio

As I looked at some of the cameras on my shelf, I wonder what I wanted to write about in this week's blog. The Tom Thumb Camera Radio caught my eye and felt this would be a fun camera to tell you about. Like the Kowa Ramra, which I wrote about previously, this camera, radio combination, is an earlier version using tubes instead of transistors.

Front view, Tom Thumb Camera Radio

Front view, Tom Thumb Camera Radio

Company Background

Automatic Radio Manufacturing Company of Boston, MA. manufactured the Tom Thumb Camera Radio in 1948. They started in 1920 and continued making radios until 1957. The company made radios of wood, Bakelite, and two models of Catalin. They are well known for their line for Tom Thumb Radios, which in the 1930s were some of the smallest made during the time. Another funny thing about this particular camera radio combination is an almost identical item named the Cameradio produced by Universal Radio Manufacturing Company of Elmira, NY. The only difference I can see is the name of the camera and the company around the lens. I found an image of Cameradio on the Collectiblend website, which you can see here.

My Camera/Radio

My Tom Thumb Radio Camera measures 9.5" tall, including the radio knobs and camera finder on top by 4.5" wide, by 4.75" deep, including the front lens. It's relatively heavy, weighing 3 lb. 6 oz without the 2-"D" cells and Eveready 467 batteries needed to power the AM frequency radio. Suppose you factor in 10 oz for the "D" cell batteries and 12 oz for the 467 battery, that just under 5 pounds for the radio and camera.

The radio portion of the camera radio is a four-tube radio with a speaker on the unit's bottom front, hidden by the gold-colored grill. On top of the camera-radio is the on/off and volume knob on the left. The tuner knob is on the right. A 7" panel of the back comes off the camera radio by a screw on the bottom. Removing the back panel allows you to install the two "D" batteries along with the 67.5v 467 battery. The 467 battery attaches by a clip similar to a 9v battery, but just more massive, and fits in between the two "D" batteries, which you can see in the photos. Above the removable panel on the back of the camera is the AM tuner. The Camera Radio comes in a wooden box, covered with red crackle finish on the front and rear and tan coverings on the sides. There is also a thin plastic strap for carrying.

Built into the camera radio is a plastic, pseudo twin lens camera that takes 127 film. On the lens itself, it states f.57.5mm on the bottom and Maestar Lens on top. I'm guessing the camera has a fixed 75mm f5 Maestar lens. The camera radio also has an extremely simple spring shutter with two settings, "Inst." and "Time." Inst. is for regular shooting while "Time" is for long or time exposed photos. On top of the camera radio is the pull-up viewfinder. This nothing more than a couple of pieces of bent shiny metal that forms a waist-level finder. On the back of the one I own, it's stamped, "Pat Pend."

The camera portion and film loading is another oddity. Just above the front speaker is a hinge. If you pull the viewfinder portion forward, the camera's front pulls down and exposes its back. A screw holds on the back in the center, top area of the camera. You unscrew the screw and take the camera back off to load the 127 size film. Once loaded, push the top back into the radio portion, and it snaps back into place. There is no way to see the back of the camera until you pull the camera down. You'll need to do this to advance the film after each photo. Not the most convenient, but it works. The camera seems like a very "Novelty" style camera that I've seen with so many different names. I guess the camera manufactured by Utility Mfg Co. or a similar company.

If you're interested in the schematic and instructions, you can find them here.

Conclusion

I can imagine the people that bought this were families that wanted to listen to their favorite music while at the beach, camping, or at a family get together and had the convenience of a camera in the same place. The Tom Thumb Camera Radio appears to have been a very modern and futuristic product for the after World War II families.


Thank you for taking a few minutes to read this post about a product of the future that didn't catch on. I'd love to hear from you about this or any of the other posts I have written. Until next week, please be safe.

Tom Thumb Camera Radio with Viewfinder up.

Tom Thumb Camera Radio with Viewfinder up.

No. 4 Screen Focus Kodak Camera

When I started to put this week's post together, it was on a different camera. I had the first 6x7cm camera picked, National Graflex. It was in excellent working condition, but when I went to load the camera with film, the shutter failed and needed to jump to a different camera. I had the No. 4 Screen Focus Kodak picked for next week, but all the best plans need a backup, and this is mine.

Front view with film chamber up for focusing

Company Background

I find it fascinating that one of the largest companies in the history of photography, if not the largest at its height, didn't adapt to photography's future. I'm sure many of you know the story of Kodak and George Eastman, but researching the post, I found some pretty fascinating facts about the man and the company. Especially in the early part of the Kodak story.

George Eastman was born on July 12, 1854, in the small town of Waterville, NY. When he was four years old, the family moved to Rochester, NY, where his father started Eastman Commercial College. Tragically his father died, and the college failed. He had dropped out of high school to support the family and got his first job at 14.

When George was 24, he had planned on taking a trip to Santo Domingo when a friend told him he should document the journey. At the time (1878), the photographers would coat the wet plates themselves. He realized the amount of equipment needed to take on the trip was enormous, but this is where he fell in love with photography. He wanted to make the process more simplified and had read in the British Journal about people experimenting with gelatin emulsion. After working for almost three years trying to perfect this, by 1880, he invented a dry plate formula and the machine to produce them in quantities.

In 1883, Kodak shocked the industry when he introduces the first film on a roll. In 1888, the company introduced the first camera with a roll of film with enough exposures for 100 photos. The camera sold for $25.00 and would be returned to the company to have the film processed, prints made, and re-loaded with another roll for $10.00. If you want to read more about the man and the company, you can do so here.

Film chamber down.

The Camera

The No. 4 Screen Focus Kodak is a very odd and unusual camera and produced between 1904-1910. According to records, there were only 4000 made. It's like having a roll film and 4x5 view camera in one camera. Well, that's pretty much what this camera is. It allows the photographer to load a roll of No. 123 film in the camera. Putting in the dark slide, swing the roll film up. You'd attach a focusing screen for focus, then swing the film back into place to take the photo. Another great thing about this camera is you'd get twelve 4x5 images on the roll of film. I believe it was competition for the Blair Focusing Weno Hawk-Eye introduced in 1902.

Here's a look at my camera. It measures 10.25" wide x 5.75" tall x 3.5" deep and weighs just under 4 lbs, 3 lb. 13.8oz to be exact, without film. My camera still has the handle attached, which is a nice feature. To open the front door, you press a concealed button on the top towards the camera's right side. Pinching the two locking grips just below the lens and sliding the beautiful red bellows onto the rosewood focus track is smooth. My camera has a rapid rectilinear lens in a Kodak automatic shutter. Just above the lens is a brilliant two-way finder with a bubble level next to it. There is also a knob that allows the rise or fall of the lens. On the side of the lens-bed is a critical focusing knob if you're using the ground glass.

A small button on the top towards the rear and the right allows the back to slide off, allowing the photographer to load the film. This is where the photographer would also attach the optional glass plate adapter. Mine doesn't have this, but I'm still looking to find one. Also, on the back of the film back is the red window to see the film numbers when you advance the film and the holder for the ground glass used for focusing.

Once you have the film loaded and the lens pulled out, you're ready to make the exposures. On top of the camera is a dark slide. Make sure it's in the camera. There is a little "L" bracket that holds it into place. On the right side of the camera, the bottom front corner is another concealed button that, when pressed, allows the film area to swing up over the camera. Pull out the ground glass, and attach it to the back of the camera via two small clips that allow you to slip it into place. Open the lens for focus. You could check the depth of field too by stopping down the lens. Close the lens. Now it's time to lower the film chamber. On the left side is a release that allows the film chamber to be lowered back into place. Set shutter speed, and aperture, pull the dark slide out, and expose the film. Then wind the film to the next frame via a knob on the top left. See, It's simple.

I wish I had images from this tremendous camera, but I don't have the glass plate holder, which I might be able to use film in or have the ability to find a roll of No. 123 film, which ended production in 1949.  

Front view

I appreciate you taking a few minutes out of your day to look this post over. Please let me know if you have any questions or concerns about this or any other I've posted. Until next week, please be safe.

Voigtlander Superb

The Voigtlander Superb is a camera I owned for a short time, almost thirty years ago. At that time, I was buying and selling cameras rapidly and not using them. To me, at the time, it was more of a commodity. The Superb I owned also had a more rare lens, and someone was willing to pay me handsomely for it. At the time, with growing children, It's something I needed to do. Things have changed, and I've evolved in my appreciation for cameras.

My Voigtlander Superb.

My Voigtlander Superb.

Company Background

In my post about the Voigtlander Vitessa, I made a brief history of the camera company that you can see here. The thing that amazes me about Voigtlander is how early they got into the photography industry and the names and products associated with them.

 In 1839, publications introduced photography to the public; Voigtlander's optics were the first mathematically calculated optics made by mathematics professor Josef Petzval. Peter Voigtlander gave technical advice regarding these lenses, which cut down exposure times to about one minute. That was revolutionary. By 1840, they were not only producing cameras, the all-metal Voigtlander Daguerreotype camera, they also introduced the first Petzval photographic portrait lens, with a maximum F stop of F3.6, know as the fastest lens of the time.

 
Camera and case

Camera and case

In 1923, Schering AG's photo division purchased Voigtlander, and by 1925, they started mass production of cameras and photo equipment. Voigtlander introduced such everyday items as the zoom lens, the 36–82/2.8 Zoomar in 1959, and the first 35mm compact camera with a built-in flash, the Vitrona in 1965. Voigtlander introduced the Superb model from 1933 until 1939. There weren't many modifications during that time. The early cameras had "bunny ears" as camera strap holders and the later years had a winged slot for the strap. You can see a version here, and there is an instruction manual here.

My Camera

Recently, a Voigtlander Superb became available to me, and the price was fantastic, so I immediately jumped on the offer. The seller stated it was in excellent working condition and also had the original case. Voigtlander made the Superb with two different lenses. The rarer and challenging to find 7.5cm (75mm) f3.5 Heliar, the one I owned previously. The more common lens is the 7.5cm (75mm) f3.5 Skopar, which this camera had. When I received the camera, there was no mold, mildew, or fungus on the lens, and indeed the camera was in fine working condition. Now it was time to take the camera out for a spin.

Using the Camera

It was time to get myself familiar with the camera again. Holding the camera is very comfortable. Popping up the viewfinder, I immediately noticed there's a bubble level in the upper right-hand corner. I liked that. The magnifier is held in place by a small clip, so it doesn't pop up when you press on the front of the hood like the Rolleiflex's do. At least mine didn't. You focus the camera by sliding a bar on the bottom of the taking lens. The focusing is very similar to the Minolta Autocord. I prefer this method as opposed to the focus knob on the side of the camera. It allows me to keep my hands under the camera when focusing. The viewing lens points down when you focus closer, which corrects for parallax. That's fantastic.

Looking at the shutter speeds around the Compur shutter, I noticed they are reverse. Then I noticed a small prism/mirror right next to the lens. Holding the camera and looking down allows you to see the shutter speed set in the window of the prism/window. That's genius. The shutter speeds go from 1/250 to 1 sec, along with 'T' and 'B.' The aperture settings are f3.5-22 and on a small dial to the right of the viewing and taking lens. When you're looking down from the top of the camera, you can see the shutter speeds and aperture settings without tilting the camera up to view them. You can easily see the focus distance, which you can see on the top of the viewing lens.

Here's where the camera gets fun, loading the film. The Voigtlander Superb has a horizontal loading and transport system. If not all other Twin Lens Reflex cameras, the majority use a vertical loading and transport system. On the left side of the camera is an angled bar that attaches to a metal nub on the back. Lifting the bar from the nub and opening it to the left exposes the take-up spool on the camera. Opening the back to the right reveals where you load the film in the camera. Put the fresh roll of film on the right, and pull the leader across the shutter area to the take-up spool on the left.

Viewing the shutter speeds.

Viewing the shutter speeds.

Just above the film chamber is an advance lever. Wind the lever to advance the film. Close the back. On the right side of the camera is the red window. There is an inside cover for the window. It's opened/closed by the square knob above the red window. I watch until the frame number reaches #1. Then I close the window. Above the square knob is a switch. This switch resets the frame counter, which you can see on the back of the camera. The film advance lever doesn't automatically stop at the next frame, so you need to advance it until you see the frame number which is five cranks.

Images

I took the camera out a couple of times this week. Here are some of the images from the camera.

Conclusion.

The Voigtlander Superb is an 80-year-old gem of a camera. It's easy to load and unload. The ability to see the shutter speed and aperture settings when looking down on the camera is excellent. I enjoy the bubble level in the viewfinder, so I know my camera is level. It fits nicely in my hand and isn't too heavy. The viewfinder is just a bit dark, but nothing to deter me from using it in the future. Another oddity is when I processed the film, and the images are across the film sideways instead of running top to bottom. It just kind of surprised me, but putting the negatives in my sleeves, they work better that way. If you run across one for a reasonable price, buy it, and I don't think you'll be disappointed. A great camera.

 I truly appreciate you taking the time to read my post. It does mean a lot to me. If you have comments or concerns about the article or the camera, please drop me a line. I'd love to hear from you. Until next week, please be safe.

You can subscribe to my Camera Collecting Blog below.

Baby Al-Vista Panoramic Camera

I'm a big fan of panoramic images and cameras. In my collection, I own many panoramic photos, most likely in the neighborhood of 100 or so. There's just something magical about seeing a vast and sweeping image. It reminds me of what I see with our eyes when we look over a canyon or cityscape instead of a narrower vision in many photo images. One of my favorite panoramic cameras in my collection is the Baby Al-Vista camera made by The Multiscope & Film Company.

Baby Al-Vista compared to Al-Vista 5B and 35mm film.

Baby Al-Vista compared to Al-Vista 5B and 35mm film.

Company History

The Multiscope & Film Company started in 1896 in Burlington, Wisconsin, by William Selig. Mr. Selig was an entrepreneur with interests in motion picture cameras as well as being a magician. The reason he formed the company was he purchased the patent for the Al-Vista camera from two gentlemen, Peter N. Angsten and Charles H. Gesbeck, in 1896, and 1897, they introduced their first camera. The Al-Vista camera uses a swinging lens, which produced an image on a 180-degree arc as the camera has a curved film plane. This concept was revolutionary for that time. This design and camera was the first successfully produced commercial camera of the time. At the end of 1908, they sold all patents, equipment, and rights to the panoramic cameras to Conley Camera Co. of Rochester, NY.

In 1900,  the company had 25 employees making panoramic cameras. The Al-Vista camera model number signifies the height of the film in inches, and they had five different format models depending on the length of the photo taken. The sizes are 4,6,8,10 or 12. With this said, an Al-Vista 4B would have film 4 inches high, by either 4,6,8,10 or 12 inches long, depending on the mask used. On many of the cameras, there was an adjustable spring tension knob on top. Turning the knob controlled the swinging lens, which gave you four different shutter speeds depending on the spring tension.

My Baby Al-Vista Camera

The Baby Al-Vista was produced between 1906-1908 and used 120 size film and produces a 2 1/4" x 6 3/4" negatives. They came in two models. Model 1 had the adjustable spring tension control on the top of the camera to regulate shutter speed. Model 2, which I own, has something even better. You control the shutter speed by adding flags or fans that you put in a slot on top of the camera. The bigger the fan, the more air resistance you have and the slower shutter speed you have. Typically there are five different sizes of fans, but my model only has four. When sold initially, there were three different apertures you could put in between the camera and lens, but I only have one.

To use the camera is very basic. You cock the lens or move it to the taking position. The starting position is the lens pointing toward the left as you're holding it to take a photo. Remove the lens cap. Release the shutter by depressing the shutter release on top of the camera. Then put the lens cap back on before moving the lens back to the starting position. The fans are number one through five, with one being the smallest and five the largest. I'm missing fan number four. I believe the most challenging part is not knowing what the shutter speeds are for the fans used.

The camera's size is excellent for taking on trips as it's 6.5" wide x 3" tall and 4" deep. On top of the camera is the film advance knob on the far left, the slot for the fans, the shutter release, and a ball bearing level behind the handle. On the sides are just the locks to keep the front of the camera held to the camera body. Taking the front portion off is also where you load the film. The back also comes off to help in the process of loading film.

Baby-AlVista_9.jpg

Results

Here is the good and bad news. I start to write my post early in the week, generally on Tuesday or Wednesday. I like to take photos with the camera, process the negatives, and digitize them in the article. As you can see in the images, the original bellows, leather material, have a few holes. I tried to patch them, first with a cloth tape. That didn't hold. Then I tried to glue a small piece of cloth, which wasn't pliable enough and made the hole worse. I tried three different kinds of leather and materials that didn't work except for one very dense negative.

I have since purchased a couple of other materials that I know will work, but for the sake of publishing this post, I only have one decent image to show, so my apologies. I will update this post with new pictures in a week or so when I've fixed the camera.

Conclusion

I owned a Baby Al-Vista about 30 years ago and sold it many years ago. Since then, I've been on the lookout for another Baby Al-Vista and found this one, a great and fun camera to use.  I'm excited to put the final pieces back together and take the camera out for a good spin. The camera is light, easy to carry, and produces some fun images.

 Thank you for taking the time to read this week's post. Please ask questions, or leave comments, and I'll reply as soon as possible. Until next week, Be safe.

 Next week's posting will be on the Voigtlander Superb camera.

You can subscribe to my Camera Collecting Blog below.

GemFlex I Camera

GemFlex I Camera

Front view of camera with the finder up.

Front view of camera with the finder up.

When I started collecting cameras many years ago, I never really liked the smaller cameras. Looking through my collection recently, I noticed I have quite a few smaller subminiature cameras, so I'm guessing they've come to grow on me. On many of the more intricate ones like the one I writing about this week, I enjoy these little wonders' quality and workability.

 I picked this camera for my blog post this week because of this subminiature camera's oddity and uniqueness, The GemFlex camera. It resembles a twin-lens reflex style of camera as opposed to other subminiature cameras.  This camera's workability is excellent from the standpoint that it has aperture and shutter speed settings as well as a pop-up finder for top-down viewing.

 
Size of the camera with finder down.

Size of the camera with finder down.

The GemFlex camera was manufactured in the 1950s by Shōwa Kōgaku Seiki in Nippon Toyko, Japan. Shōwa Kōgaku was started in 1938 by Nakagawa Kenzō, an engineer at Konishiroku, and obtained financing to create a new company. After WWII, the company changed the name of the company to Shōwa Kōgaku Seiki K.K. Their main claim to fame was a charming Leica copy named Leotax, which had several different models. Leotax line of Leica copies is still a very collectible camera today.

My version of GemFlex is a bit worn and a non-working version. This camera has higher quality than other "HIT" style cameras coming out of Japan during this timeframe. I purchased this camera in Honolulu, Hawaii, about ten years ago in a great antique store with several cameras. The owners are fun to talk with about antiques. Every time I go there, I make it a point to stop in and see what they have. If interested, the name of the shop is Antique Alley.

 
Gemflex_18 copy.jpg

Let me tell you more about the camera itself. The camera is about 3" tall and 1.5" wide and deep. The top of the camera pops up like a regular TLR camera. If you slide the emblem on the top back, it even has a "speed" finder to use instead of looking down. On the top is the camera company logo, which is a stylized S and smaller K. Below the S.K. when opened, is the "GemFlex" name, which are chrome letters on a black field. There is a bump-out the portion of the camera where the two lenses are. The top viewing lens has GEM printed around it. The bottom lens is a 25mm f3.5 GEM lens. The lens is inside a Swallow shutter with shutter speeds of "B", 1/125, 1/150, 1/100, which are on a rotating collar. There is also a shutter cocking lever on the right as you face the camera. The shutter release is on the left of the shutter dial.

On the right side of the camera, there are two dials. The larger dial is the film advance knob, which has an arrow on the side with a clockwise direction to wind the film. Generally, on TLR cameras, this would be the focusing knob, but this camera is a fixed focus lens. The smaller dial is to set the aperture settings from f3.5-11. The aperture numbers on my camera are worn, I needed to get a magnifier to confirm.

On the left side of the camera is a button to release the top for viewing and another small knob to pull out to load the film. On both sides are places to put on a camera strap. On the bottom of the camera is the door release, which is more of a spring release, and a tripod socket. On the back of the camera is the camera nameplate with the company name and serial number. Also, "Made in Occupied Japan." The film counting window with a slide to open/close this window is on the rear too.

Like other TLR cameras, the GemFlex used a paperback roll film, 17.5mm, and took ten exposures per roll. Each frame was 14x14mm in size. Initially, when the camera was purchased new, it came with a leather case, lens hood, yellow filter, four rolls of film, and an instruction booklet. Initially, the camera had leather on the outside, but all of that is gone on my camera.

I hope you enjoyed reading a bit about this camera and would love to hear your comments. Next week's camera will be on the Minolta Autocord CDS. Until next week, please be safe.

You can subscribe to my Camera Collecting Blog below.

Gemflex_16 copy.jpg

Hasselblad Super Wide (Early Version)

 
My early version of Hasselblad Super Wide.

My early version of Hasselblad Super Wide.

Last week I mentioned that this week's post would be on the Hasselblad Supreme Wide Angle (SWA) camera. I intended this week's post to be about until I took the camera out, shot with it. I quickly noticed that this is indeed a Hasselblad Super Wide (SW) version of the camera instead of the Supreme Wide Angle, which is what I believe I owned. Let me explain the difference.

 The Supreme Wide Angle camera was introduced in 1954 by Victor Hasselblad during his first visit to Photokina in Cologne, Germany. The purpose of his trip there was to introduce two new cameras. The original Hasselblad 1000F and their unique design, The Supreme Wide Angle, highlight Zeiss's spectacular optic with their Biogon 38mm f4.5 lens.

 
Hassy SW_17.jpg

Because of the new lens design and the short distance between the rear element and the film plane, it wasn't possible to add this to their 1000F camera line. Hasselblad needed a more streamlined design utilizing the same film backs and other accessories and an optical viewfinder. This new camera design with the spectacular optics was called Hasselblad Supreme Wide Angle.

 They made Supreme Wide Angle for two years from 1954-1955 when they made some modifications to the lens barrel and changed the camera's name to Super Wide starting in 1956-1957. Many people like to think of these cameras as the same with just some modifications made, which is generally done by manufacturers. Others feel these are two separate camera models because of the name change. I understand both views and am more inclined to go with the first thought that these are the same camera, just different modifications.

The main changes in the later Super Wide camera was an additional metal cylinder to the lens design. The lens barrel, which had a cut out in the barrel for the shutter control, also connected the lens's front to the rear. Another change was the focusing helicoid went from turning approximately 180 degrees in the Supreme Wide Angle to moving just under 360 degrees on the Super Wide versions.

Like I mentioned earlier, I thought my camera was the SWA, as I like to have the original models in my collection. Unfortunately, my budget doesn't allow this to happen all the time. I purchased the camera many years ago. When I bought it, it had a very crude viewfinder mounted to the camera. All the shutter speeds worked, and mechanically and optically, the camera was in excellent condition. The viewfinder worked, and for the price, I was happy.

 I figured I'd be able to take the crude viewfinder off and find an accessory shoe and original viewfinder to replace them. I did get the viewfinder and mount off, but finding the replacement has been somewhat challenging.

 I do enjoy shooting with this camera. It's small, compact, and optics have excellent quality. The lens produces great contrast, low distortion, and crisp, sharp images. I also like the fact I can utilize the same backs I have for my 1000F and 1600F cameras on this body. The photos included in this article are shot with my A16 back, which produced 6cm x 4.5cm sized images on 120 film. This back also gives me an 8x10 format and 16 images per roll instead of 12 with the A12 back.

 
Crude Viewfinder and mount

Crude Viewfinder and mount

Using the camera is relatively easy and straight forward. When using the Hasselblad cameras, you always need to remove the dark slide from the back to fire the camera. There is no light meter built into this camera, or many of the Hasselblad camera unless you purchase a different finder. An external light meter is needed to get proper exposure. The shutter cocking lever is also on the top of the lens barrel.

 The top of this camera lens barrel is both the shutter speed control on the farthest ring away from the camera body. The shutter speeds go from 1-1/500, and B. Coming closer to the camera body is the shutter cocking lever, which is separated by a toggle switch. When the lever is away from the camera body, the camera is in normal shooting mode. If the control is inward towards the camera body, the cocking lever can be moved to the farthest position putting into "self-timer" mode. This allows the photographer approximately 10 seconds before the shutter fires. Closer to the camera body is the aperture setting. Closest to the body is the Focus ring.

On the right side of the camera body is the film transport knob. You turn this knob forward until it stops, which advances the film. On the top of the camera is (typically) the viewfinder accessory shoe, and the left of that is a spirit level. The original viewfinders had a small prism in the finder so you could see the level in the viewfinder to make sure the camera was level when handholding it. Another excellent feature mine doesn't have.

 To take the film back off, you need to have the dark slide inserted into the film holder. You slide the button on top of the holder to the right. You can then remove the film holder, and you replace it with another.

 Images from my camera

As you see, my camera is "well used." It works, it's mine, and I enjoy using it. If you have any of the parts I discussed in this post and want to sell them, please contact me with reasonable offers. Thank you for taking the time to read this week's post. Please ask questions, or leave comments, and I'll reply as soon as possible. Until next week, Be safe. Next week's posting will be on the Sub-compact GemFlex camera.

You can subscribe to my Camera Collecting Blog below.